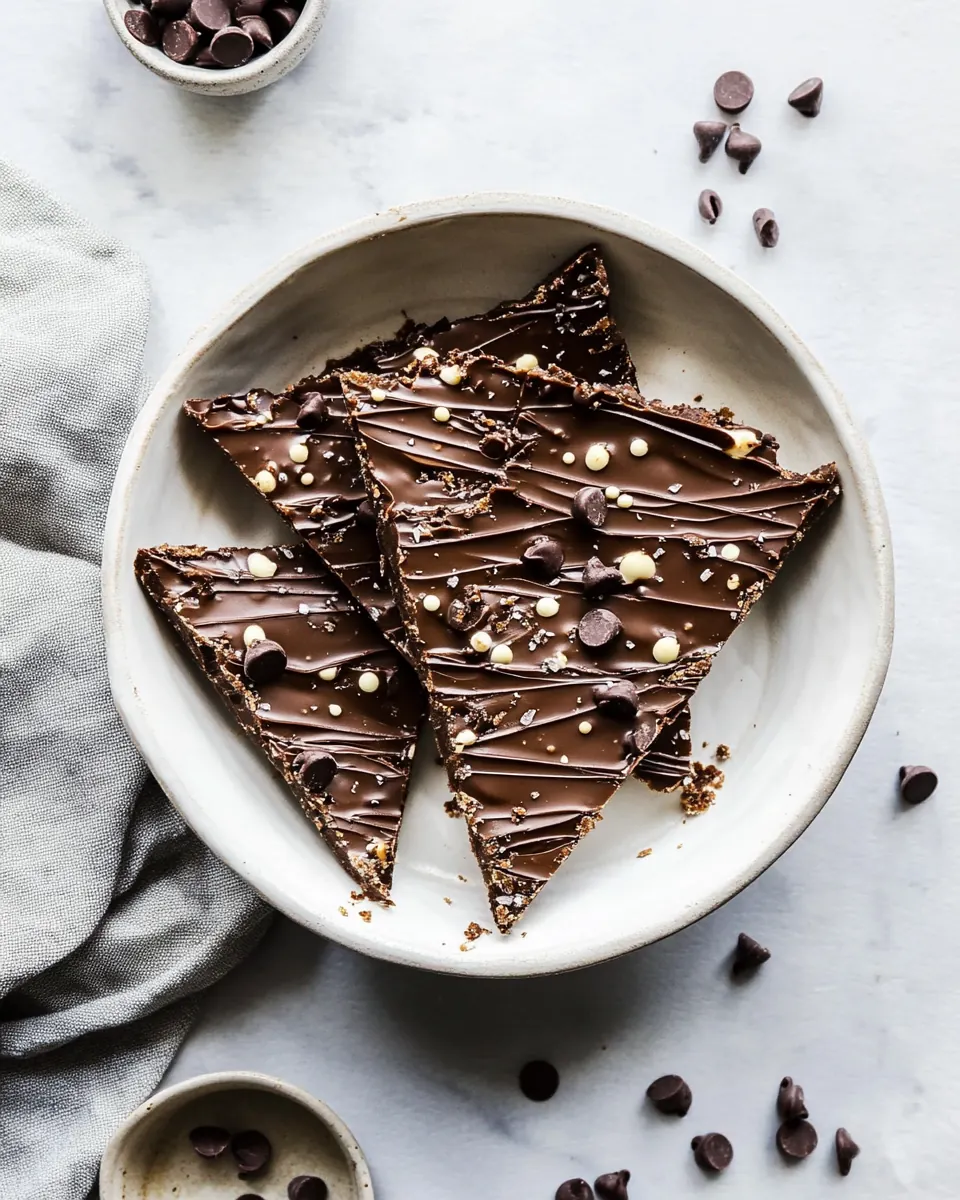
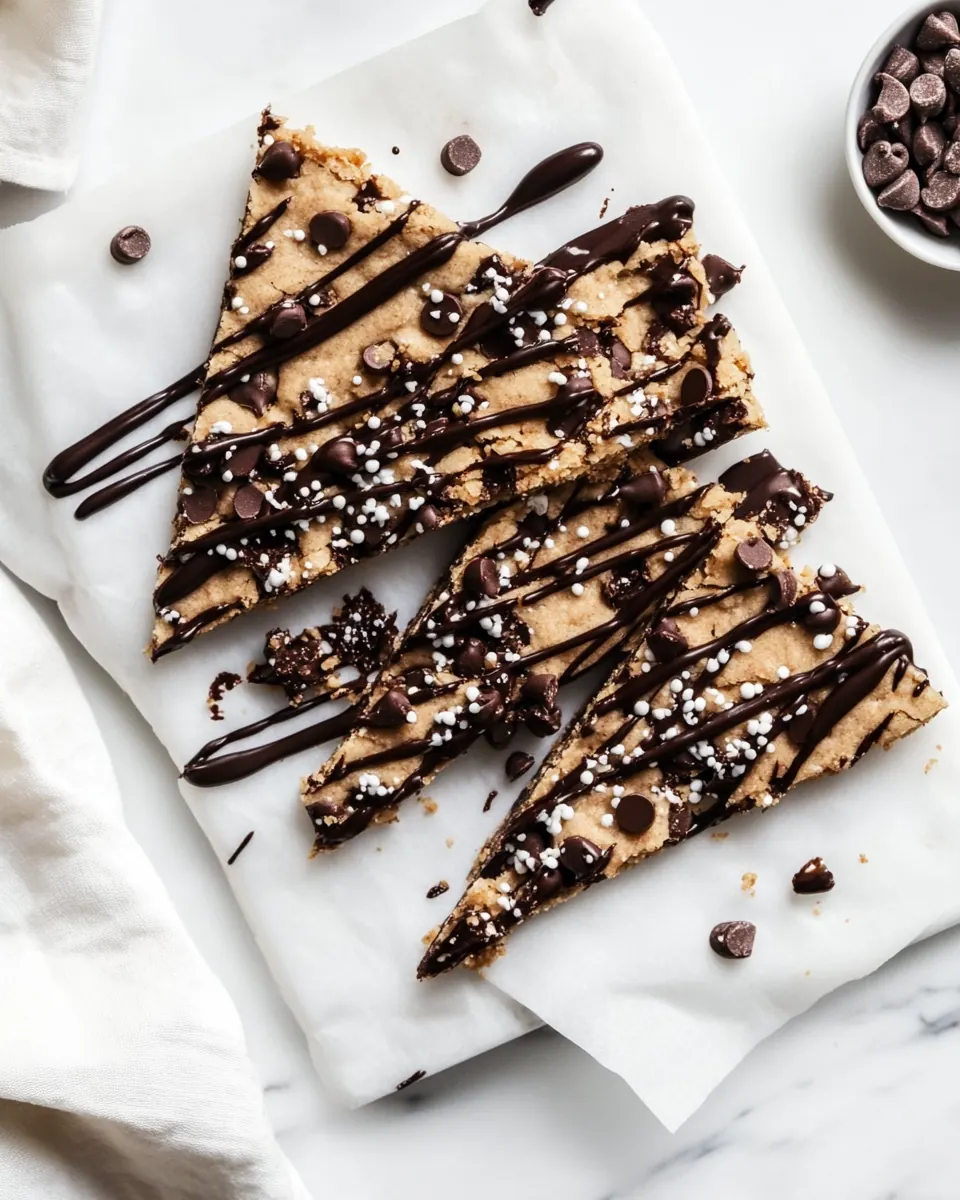
Cookie Dough Bark
Cookie Dough Bark is the kind of sweet I reach for when I need a quick, satisfying treat that feels a little indulgent and a little clever at the same time. The first bite takes me right back to afternoons when I would sneak spoonfuls of cookie dough while stirring the batter, only this time it is more textured, chilled, and perfectly snackable. I love how the soft, oat based dough pairs with a glossy layer of melted chocolate, creating a contrast that always makes me pause and savor the moment.
When I developed this Cookie Dough Bark, I was chasing a snack that was portable, freezer friendly, and loved by everyone from my picky teenagers to my dessert-obsessed friends. Over time I learned small tricks, like using finely blended oats to mimic flour and adding just enough coconut oil so the mixture holds together yet remains tender. There is something comforting about pressing the dough into a sheet pan, smoothing it with my fingers, and then drizzling warm chocolate over top while the kitchen fills with the smell of cocoa and toasted oats.
Recipe Snapshot
45 mins
15 mins
30 mins
Medium
150 kcal
American
Gluten-Free, Low FODMAP
Desserts
Medium bowl
Why This Cookie Dough Bark Is a Winner
It is delightfully simple
I adore how few ingredients create a big payoff. With just oats, coconut oil, maple syrup, vanilla extract, and chocolate, you get a treat that tastes like a hybrid of cookie and candy. The simplicity makes it approachable for busy days, and I often make a batch when I want a fast homemade dessert that still feels special.
Texture contrast is everything
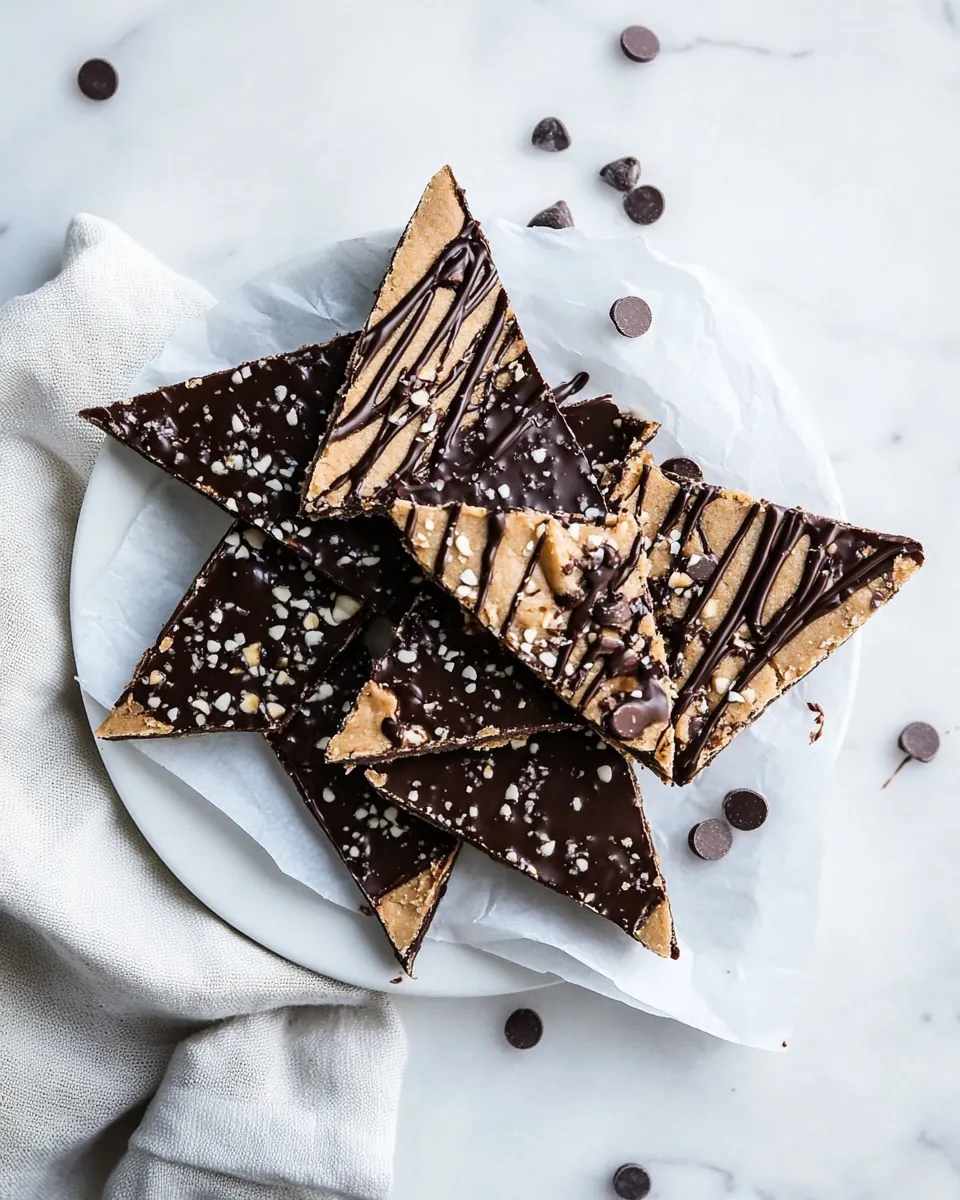
The interplay between the tender, slightly chewy oat cookie dough layer and the firm, snapable chocolate chips top is what keeps me coming back. I love that each bite gives a soft interior and a crisp exterior, which feels intentional even though it is easy to achieve. That contrast is why folks call it bark; it behaves like a candy and a cookie in one.
Freezer friendly and flexible
I value recipes that fit into real life, and Cookie Dough Bark stores beautifully in the freezer. You can make a double batch for gatherings or portion it for weekday snacks. In my kitchen, this recipe becomes a grab and go dessert that stays firm and satisfying, perfect for packing into lunches or serving as a chilled treat after dinner.
Kid friendly and crowd pleasing
I keep this recipe in rotation because kids and adults alike love the flavor. The mini chocolate chips folded into the dough add little pops of chocolate throughout, and the melted top layer makes it feel celebratory. I’ve taken it to potlucks and seen it disappear in minutes, which tells me it’s a real crowd pleaser.
Health conscious without sacrificing taste
Using blended old fashioned oats brings fiber and a hearty base, while maple syrup provides natural sweetness instead of refined sugar. It is not a diet food, but it’s a smarter, satisfying treat when you want something that feels homemade and not overly processed. I often reach for this when I want a balance of wholesome texture and dessert level satisfaction.
Cookie Dough Bark Ingredients
These ingredients are chosen to balance taste, texture, and ease. The base relies on finely blended oats to mimic flour and provide body, while coconut oil and maple syrup bring richness and binding power. Vanilla extract and a pinch of salt lift the flavors, and both the mini and regular chocolate chips play essential roles in the final texture and appearance.
- 2 cups old-fashioned oats blended: Ground and textured to form the base and provide hearty structure, blended old-fashioned oats create a chewy, wholesome foundation that mimics cookie dough while keeping the bark gluten-flexible. Imparting nutty flavor and absorbency, they help bind wet ingredients and give the finished bark satisfying bite.
- 1/4 cup + 1 teaspoon melted coconut oil divided: Melted to distribute fat evenly, coconut oil adds richness and helps solidify the bark when chilled, contributing a smooth mouthfeel and slight tropical aroma. Dividing the oil allows some to incorporate into the dough layer and some to help set the chocolate, ensuring proper texture and sheen.
- 1/4 cup maple syrup see note 2: Sweetening naturally and adding depth, maple syrup provides moistness and caramel-like flavor that complements the oat base and chocolate layers. Acting as a liquid sweetener, it helps bind dry components while avoiding crystallization that can occur with granulated sugars.
- 1 teaspoon vanilla extract: Imparting warm, aromatic flavor, vanilla extract rounds out the sweetness and enhances the overall dessert profile without adding moisture. Using vanilla elevates the perception of other flavors and ties the oat and chocolate notes together.
- 1/8 teaspoons salt: Balancing and enhancing flavors, a small amount of salt brightens sweetness and deepens chocolate and maple notes without making the bark taste salty. Salt also subtly strengthens the perception of other ingredients and improves overall taste harmony.
- 1/3 cup mini chocolate chips: Dispersed as tiny pockets of chocolate, mini chocolate chips provide bursts of concentrated sweetness and a pleasant contrast to the oat texture. Adding these chips to the dough mimics traditional cookie dough elements and creates little melty pockets when bitten.
- 3/4 cup chocolate chips milk, semi-sweet, or dark: Melted and layered to form a glossy, solid chocolate coating, chocolate chips supply rich cocoa flavor and structural integrity once cooled. Choosing milk, semi–sweet, or dark allows control over sweetness and intensity, and the melted chips create a smooth surface that crisps slightly when set.
Directions for Cookie Dough Bark
I like to think of these directions as a relaxed assembly rather than a complex bake, so take your time with each step and enjoy the process. Keep your workspace tidy, and prepare your sheet pan and tools before mixing so you can move smoothly. Below you will find step by step guidance with sensory cues, why each action matters, and troubleshooting tips to keep you on track.
- Measure oats to get 2 cups then blend them in a high-powered blender until they resemble a fine flour. Transfer to a medium bowl.: When you blend the oats , listen for a consistent higher pitched whir as the blades work, and watch for the powder to become uniformly fine without visible flakes. A fine oat flour gives the dough a smooth mouthfeel and helps it bind; if it is left coarse you will end up with a gritty texture and a less cohesive dough. A common error is overfilling the blender, which causes uneven milling, so work in batches if needed. If you notice larger bits after pulsing, return them to the blender and pulse again in short bursts, scraping down the sides between pulses to ensure an even grind.
- Add 1/4 cup melted coconut oil, maple syrup, vanilla, and salt to the bowl. Stir until combined. Gently fold in mini chocolate chips.: As you stir, you should see the mixture transform into a glossy, slightly sticky mass that holds together when pressed between your fingers; the aroma will shift to a sweet, toasty scent with coconut notes. This binding step is essential because the coconut oil and maple syrup provide the moisture and fat that let the dough compress into a cohesive layer. If it seems too dry, add a teaspoon of maple syrup at a time, but avoid over wetting, which makes the dough soggy. A common mistake is stirring too vigorously, which can break up the mini chocolate chips and make the dough uneven; fold gently so the chips remain intact.
- Line a sheet pan with parchment paper. Press the cookie dough into an even 1/4-inch layer. Freeze for 5–10 minutes.: Pressing the dough firmly and evenly is critical for a uniform final bark thickness; run your fingers or a spatula across the surface to remove air pockets and create a smooth top. When chilled, the dough firms slightly and develops a compact texture that makes slicing clean later. You should feel the dough cool and slightly firm to the touch after chilling. A typical issue is uneven pressing which leads to pieces of varying thickness, so take a moment to smooth edges and corners for consistent slices.
- While the bark chills, add 3/4 cup chocolate chips and 1 tsp coconut oil to a microwave-safe bowl. Microwave in 20-second bursts, stirring between each, until melted and smooth.: Heat gently and stir frequently; you will notice the chocolate start to soften around the edges before it fully liquefies, and stirring will create a shiny, velvety texture. The teaspoon of coconut oil helps the chocolate loosen and results in a glossier finish that sets with a nicer snap. Overheating is the most common pitfall, which causes graininess or burning; remove the bowl when mostly melted and stir until fully smooth, letting residual heat finish the job.
- Pour melted chocolate over chilled cookie dough layer and spread evenly with the back of a spoon.: As you spread the warm chocolate, it should glide and create a glossy surface that contrasts with the matte cookie dough below. Work quickly but carefully so the melted chocolate does not begin to set too soon; the visual cue you want is a uniformly coated sheet with tiny ripples from the spreading motion. If the chocolate sets before you finish, warm it briefly for a few seconds and continue, but avoid overheating. An uneven pour or patchy spreading will create thin spots that may break more easily when cutting.
- Return to freezer for at least 30 minutes, or until firm.: The freezing step is about setting and contrast, and the chocolate should become firm to the touch with a satisfying snap, while the dough remains slightly tender inside. You will notice the chocolate lose its gloss just a touch as it fully solidifies. Leaving it in the freezer longer improves slicing and storage stability. A common mistake is removing it too soon, which results in smearing when you try to cut it, so confirm that the center is fully firm before moving on.
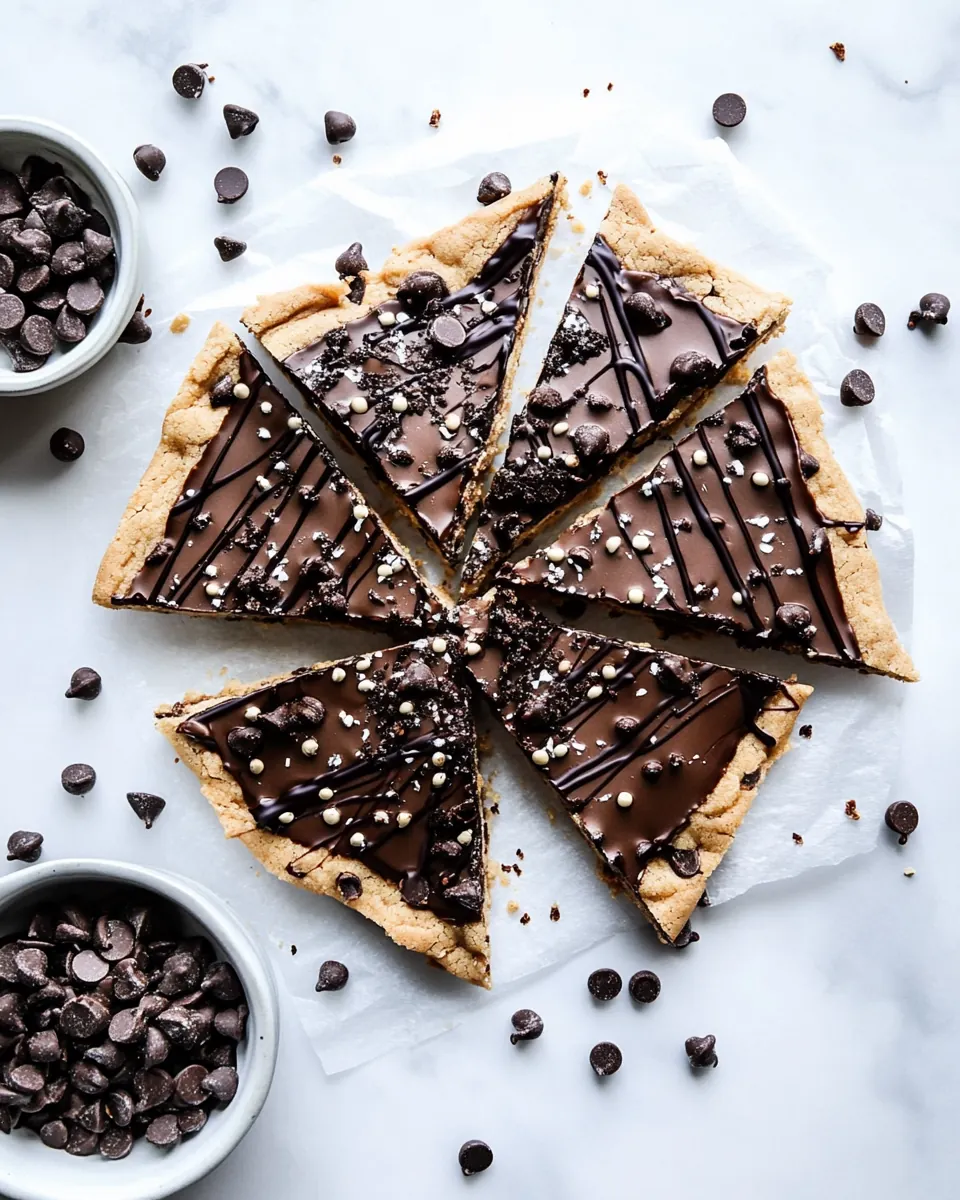
- Remove from the freezer and cut into pieces. For clean cuts, run a sharp knife under hot water, dry it, slice, and repeat as needed.: The clean cut technique uses heat to glide through the chocolate, giving you smooth, polished edges. After dipping the knife, wipe it dry to avoid water dripping onto the bark, which can create streaks. You should hear a crisp sound as the knife slices through the set chocolate, and you will see neat, uniform squares or shards depending on your cut. If pieces crumble, warm the knife slightly more and apply gentle, steady pressure rather than sawing motions.
Pro Tips and Tweaks
I like to think of these tips as little chef secrets that make the final product look and taste more polished. Below are practical tweaks I use in my kitchen to ensure consistent results, especially when making multiple batches or gifting the bark.
- Use quality chocolate, choose a chocolate you enjoy eating on its own; better chocolate yields a smoother melt and a tastier finished bark.
- Control the texture, blend the oats until they are very fine for a cake like bite, or leave a few tiny grains for rustic chewiness.
- Adjust sweetness, if you prefer less sweetness, opt for semi sweet or dark chocolate chips for the topping and you will balance the natural maple sweetness.
- Make ahead friendly, store in the freezer in a zip top bag and pull out a few pieces as needed for a quick treat that stays firm.
- Clean cuts, dip a sharp knife in hot water and dry before each cut for tidy squares and minimal crumbs.
What to Pair With Cookie Dough Bark
This sweet treat pairs well with simple companions and fits many occasions from casual snacking to party platters. Think about contrast and temperature when pairing the bark with other items, and choose vessels and presentations that highlight its snap and texture.
- Serve with coffee or tea, a hot beverage offers a warm contrast to the chilled bark, which makes for a cozy pairing during afternoon snack time.
- Make a dessert board, include dried fruit and nuts on a board so the bark serves as the indulgent chocolate element alongside more savory and chewy bites.
- Party friendly, cut into bite sized pieces and display in a bowl or on parchment for easy grabbing at gatherings, ideal for casual get togethers or potlucks.
- Seasonal gifting, package pieces in a clear bag with ribbon and keep them frozen until gifting; they travel well and stay firm during short trips.
- Storage suggestions, refrigerate for up to one week or freeze for two to three months, and thaw a few minutes at room temperature before serving for best flavor release.
- Occasion ideas, perfect for lunchbox treats, Ramadan dessert spreads when you need a no bake option, or as an easy offering after a weeknight dinner.
FAQ
Conclusion
Cookie Dough Bark stands out because it combines simple pantry ingredients into a treat that is both nostalgic and refined. The blend of finely processed oats, natural maple sweetness, and a glossy chocolate top creates a balance of textures and flavors that feels homemade yet polished. Give it a try when you want a fuss free dessert that travels well, keeps for weeks in the freezer, and disappears fast at gatherings. I hope this recipe becomes one of your go to snacks for busy weeks and special moments alike.
Cookie Dough Bark
Equipment
- Medium Bowl
Ingredients
- 2 cups old-fashioned oats blended Ground and textured to form the base and provide hearty structure, blended old-fashioned oats create a chewy, wholesome foundation that mimics cookie dough while keeping the bark gluten-flexible. Imparting nutty flavor and absorbency, they help bind wet ingredients and give the finished bark satisfying bite.
- 1/4 cup + 1 teaspoon melted coconut oil divided Melted to distribute fat evenly, coconut oil adds richness and helps solidify the bark when chilled, contributing a smooth mouthfeel and slight tropical aroma. Dividing the oil allows some to incorporate into the dough layer and some to help set the chocolate, ensuring proper texture and sheen.
- 1/4 cup maple syrup see note 2 Sweetening naturally and adding depth, maple syrup provides moistness and caramel-like flavor that complements the oat base and chocolate layers. Acting as a liquid sweetener, it helps bind dry components while avoiding crystallization that can occur with granulated sugars.
- 1 teaspoon vanilla extract Imparting warm, aromatic flavor, vanilla extract rounds out the sweetness and enhances the overall dessert profile without adding moisture. Using vanilla elevates the perception of other flavors and ties the oat and chocolate notes together.
- 1/8 teaspoons salt Balancing and enhancing flavors, a small amount of salt brightens sweetness and deepens chocolate and maple notes without making the bark taste salty. Salt also subtly strengthens the perception of other ingredients and improves overall taste harmony.
- 1/3 cup mini chocolate chips Dispersed as tiny pockets of chocolate, mini chocolate chips provide bursts of concentrated sweetness and a pleasant contrast to the oat texture. Adding these chips to the dough mimics traditional cookie dough elements and creates little melty pockets when bitten.
- 3/4 cup chocolate chips milk, semi-sweet, or dark Melted and layered to form a glossy, solid chocolate coating, chocolate chips supply rich cocoa flavor and structural integrity once cooled. Choosing milk, semi-sweet, or dark allows control over sweetness and intensity, and the melted chips create a smooth surface that crisps slightly when set.
Instructions
- Measure oats to get 2 cups then blend them in a high-powered blender until they resemble a fine flour. Transfer to a medium bowl.: When you blend the oats , listen for a consistent higher pitched whir as the blades work, and watch for the powder to become uniformly fine without visible flakes. A fine oat flour gives the dough a smooth mouthfeel and helps it bind; if it is left coarse you will end up with a gritty texture and a less cohesive dough. A common error is overfilling the blender, which causes uneven milling, so work in batches if needed. If you notice larger bits after pulsing, return them to the blender and pulse again in short bursts, scraping down the sides between pulses to ensure an even grind.
- Add 1/4 cup melted coconut oil, maple syrup, vanilla, and salt to the bowl. Stir until combined. Gently fold in mini chocolate chips.: As you stir, you should see the mixture transform into a glossy, slightly sticky mass that holds together when pressed between your fingers; the aroma will shift to a sweet, toasty scent with coconut notes. This binding step is essential because the coconut oil and maple syrup provide the moisture and fat that let the dough compress into a cohesive layer. If it seems too dry, add a teaspoon of maple syrup at a time, but avoid over wetting, which makes the dough soggy. A common mistake is stirring too vigorously, which can break up the mini chocolate chips and make the dough uneven; fold gently so the chips remain intact.
- Line a sheet pan with parchment paper. Press the cookie dough into an even 1/4-inch layer. Freeze for 5–10 minutes.: Pressing the dough firmly and evenly is critical for a uniform final bark thickness; run your fingers or a spatula across the surface to remove air pockets and create a smooth top. When chilled, the dough firms slightly and develops a compact texture that makes slicing clean later. You should feel the dough cool and slightly firm to the touch after chilling. A typical issue is uneven pressing which leads to pieces of varying thickness, so take a moment to smooth edges and corners for consistent slices.
- While the bark chills, add 3/4 cup chocolate chips and 1 tsp coconut oil to a microwave-safe bowl. Microwave in 20-second bursts, stirring between each, until melted and smooth.: Heat gently and stir frequently; you will notice the chocolate start to soften around the edges before it fully liquefies, and stirring will create a shiny, velvety texture. The teaspoon of coconut oil helps the chocolate loosen and results in a glossier finish that sets with a nicer snap. Overheating is the most common pitfall, which causes graininess or burning; remove the bowl when mostly melted and stir until fully smooth, letting residual heat finish the job.
- Pour melted chocolate over chilled cookie dough layer and spread evenly with the back of a spoon.: As you spread the warm chocolate, it should glide and create a glossy surface that contrasts with the matte cookie dough below. Work quickly but carefully so the melted chocolate does not begin to set too soon; the visual cue you want is a uniformly coated sheet with tiny ripples from the spreading motion. If the chocolate sets before you finish, warm it briefly for a few seconds and continue, but avoid overheating. An uneven pour or patchy spreading will create thin spots that may break more easily when cutting.
- Return to freezer for at least 30 minutes, or until firm.: The freezing step is about setting and contrast, and the chocolate should become firm to the touch with a satisfying snap, while the dough remains slightly tender inside. You will notice the chocolate lose its gloss just a touch as it fully solidifies. Leaving it in the freezer longer improves slicing and storage stability. A common mistake is removing it too soon, which results in smearing when you try to cut it, so confirm that the center is fully firm before moving on.
- Remove from the freezer and cut into pieces. For clean cuts, run a sharp knife under hot water, dry it, slice, and repeat as needed.: The clean cut technique uses heat to glide through the chocolate, giving you smooth, polished edges. After dipping the knife, wipe it dry to avoid water dripping onto the bark, which can create streaks. You should hear a crisp sound as the knife slices through the set chocolate, and you will see neat, uniform squares or shards depending on your cut. If pieces crumble, warm the knife slightly more and apply gentle, steady pressure rather than sawing motions.
Notes
- Use quality chocolate, choose a chocolate you enjoy eating on its own; better chocolate yields a smoother melt and a tastier finished bark.
- Control the texture, blend the oats until they are very fine for a cake like bite, or leave a few tiny grains for rustic chewiness.
- Adjust sweetness, if you prefer less sweetness, opt for semi sweet or dark chocolate chips for the topping and you will balance the natural maple sweetness.
- Make ahead friendly, store in the freezer in a zip top bag and pull out a few pieces as needed for a quick treat that stays firm.
- Clean cuts, dip a sharp knife in hot water and dry before each cut for tidy squares and minimal crumbs.