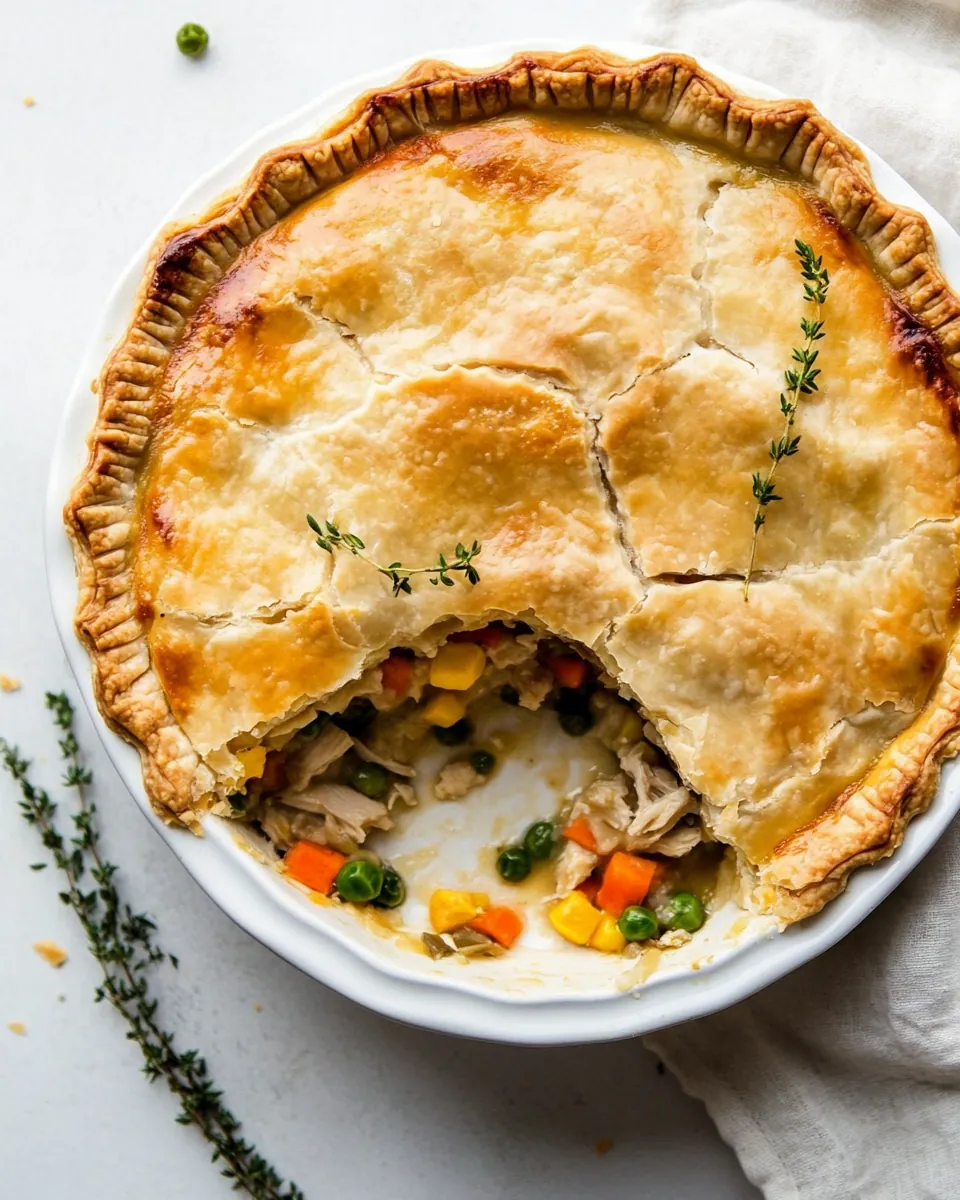
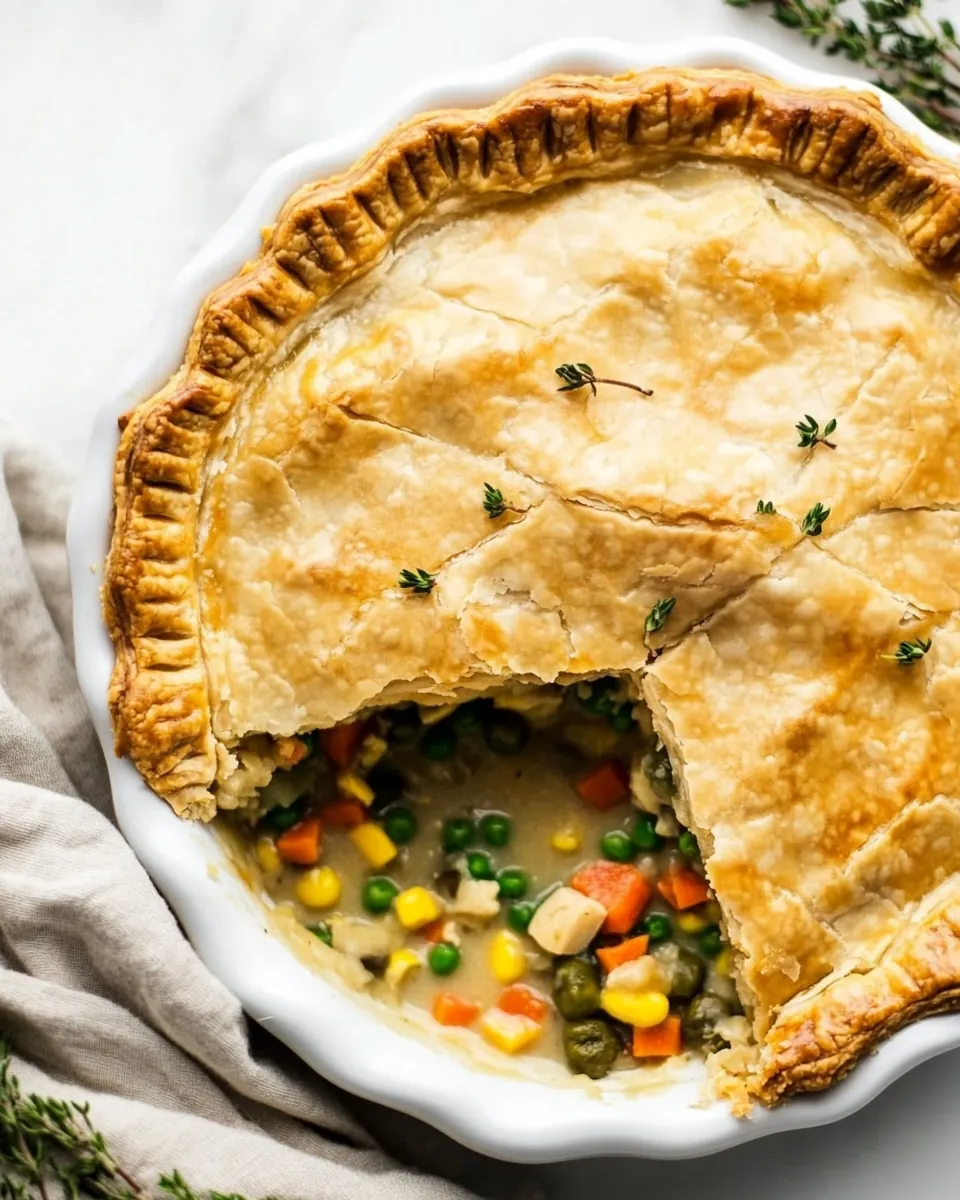
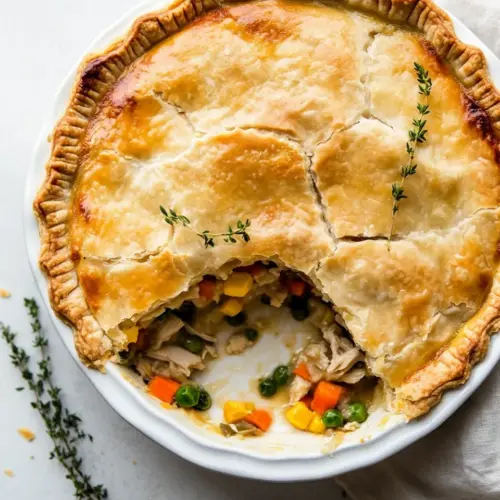
Turkey Pot Pie
Turkey Pot Pie is the kind of dish that feels like a warm invitation when the days turn crisp and I want something comforting on the table. The first time I made it after a busy holiday, I remember standing at my counter with a mug of tea, listening to the oven click as it preheated, and realizing how small rituals like folding a crust can feel almost ceremonial. I loved how the scent of herbs rising from the skillet filled the kitchen, and how the savory filling promised creamy bites wrapped in a flaky top. That memory keeps me returning to this recipe on chilly nights and Sunday dinners.
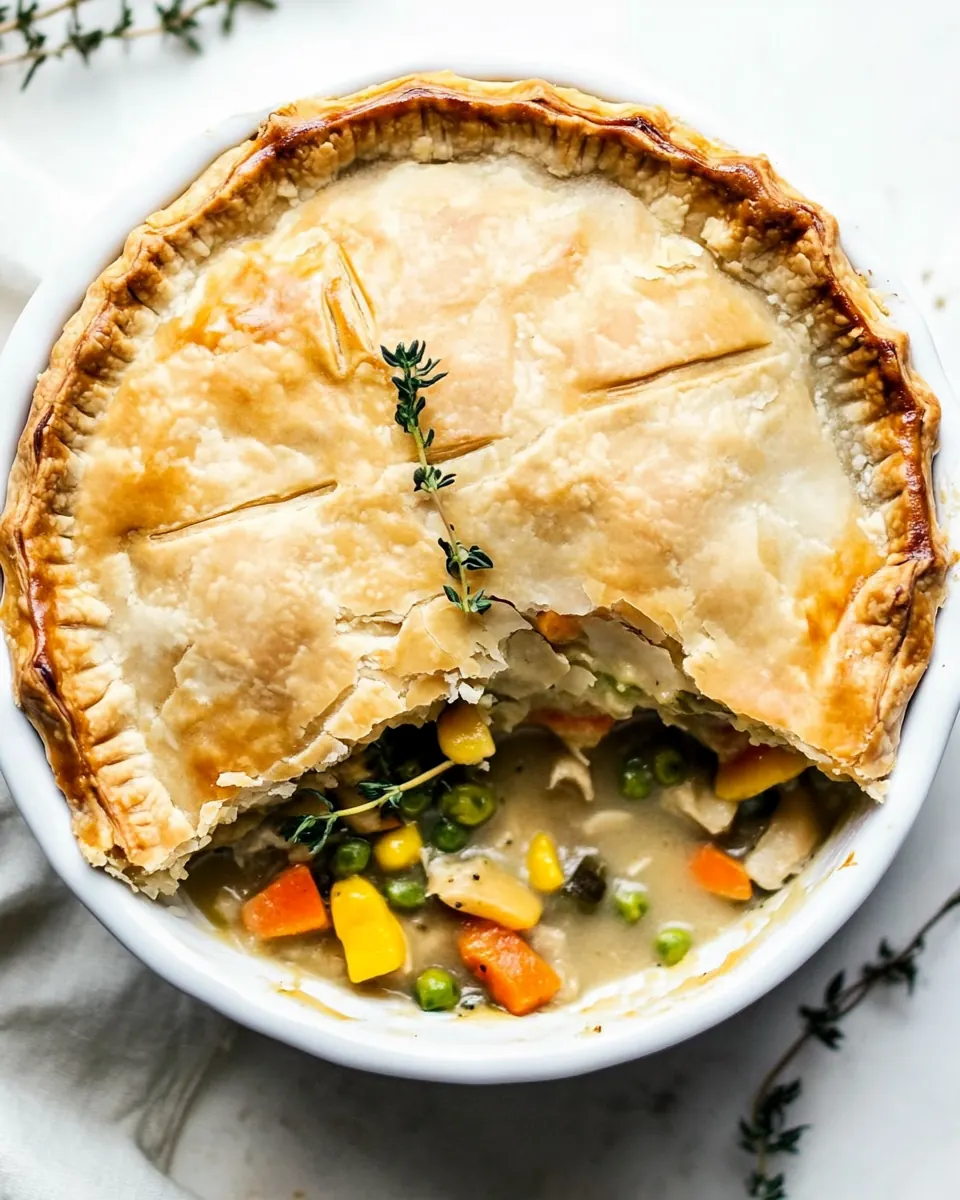
I also have a soft spot for recipes that rescue leftovers and turn them into something better than the original meal. With Turkey Pot Pie, leftover roast becomes the star, and the filling thickens into a silky, herb studded sauce that tastes more complex than the sum of its parts. Over the years I learned little tricks, like using a mix of fresh parsley, thyme, and sage to lift the flavors, and cutting the turkey into small, uniform pieces so every forkful is balanced. These details make a noticeable difference when friends come over and ask for seconds.
There is something gratifying about the contrast between a bubbling hot filling and a golden crust that crackles when you slice into it. I often make mini pies because they are perfect for portion control and fun to serve, though a single 9 inch pie works just as well for family dinners. Whether I am feeding four or saving extras for lunches, this Turkey Pot Pie has become a reliable comfort dish that travels well from oven to plate. I enjoy the quiet satisfaction of brushing an egg wash across the crust and knowing a crispy, glossy finish is moments away.
Recipe Snapshot
1 hr 5 mins
10 mins
55 mins
Medium
350 kcal
American
Gluten-Free, Paleo
Dinner
Nonstick skillet, Sheet pan, Pie dish, Mixing bowl
What Makes This Turkey Pot Pie Special
Hearty comfort that rescues leftovers
I adore how Turkey Pot Pie turns yesterday’s roast into a fresh, comforting meal. The leftover turkey soaks up the herb and broth flavors, making each bite feel intentional rather than second best. I often cook extra breast for this reason, because the texture of diced turkey mixed with a velvety sauce is more satisfying than plain slices.
Layered savory flavors from simple herbs
The trio of parsley, thyme, and sage adds bright and savory notes that cut through the richness. I like how those herbs release aroma when gently cooked with shallot, creating a fragrant base that hints at autumn spices without being heavy. When I stir them in the skillet, the kitchen fills with a comforting bouquet that builds anticipation for the finished pie.
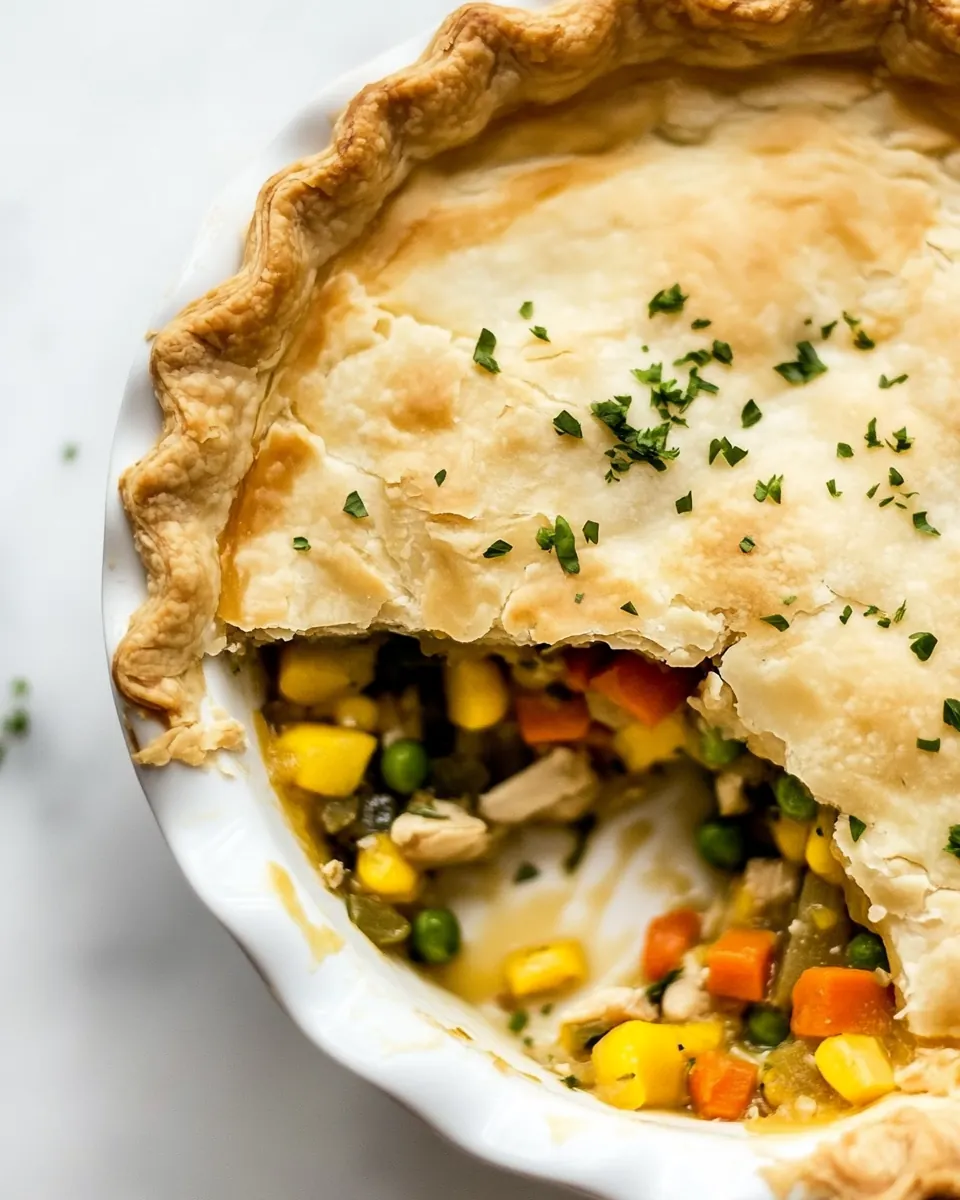
Texture contrast that matters
A good pot pie depends on contrast: a smooth, glossy filling and a crisp, golden crust. I love that the cornstarch thickens the sauce to a silky consistency, while the egg wash gives the crust a glossy finish and delightful crunch. Serving it straight from the oven when the crust is crackling gives the best mouthfeel, and I try to resist cutting into it too soon so the filling sets just right.
Flexible for gatherings or solo meals
I appreciate that Turkey Pot Pie works as mini pies for a buffet or a single pie for family style. The recipe scales easily, and the make ahead and freeze options mean you can have one on hand for last minute dinners. I often prepare several mini pies, freeze them, and then bake from frozen when I need a quick, satisfying meal.
Reasonably quick, but feels special
Despite tasting indulgent, this recipe comes together without fuss. From chopping the vegetables to rolling the crust, the steps are straightforward, and the oven does the heavy lifting. I love serving it on a weeknight because it feels like an occasion without requiring an all day commitment.
What’s In This Turkey Pot Pie
These ingredients are chosen to create a balanced, comforting filling with a crisp top. The key players are the aromatic shallot and fresh herbs, which build savory depth, the diced turkey for meaty body, and the broth plus cornstarch which form a silky sauce. The prepared pie crust and egg finish the dish with a golden, inviting crust that contrasts with the creamy center.
- 1/2 tablespoon extra-virgin olive oil: Heat lightly to provide a subtle, fruity fat for sautéing aromatics and helping ingredients brown without overpowering the pie filling.
- 1 large shallot chopped: Chop finely to add a mild, sweet onion flavor and tender texture that softens quickly when cooked, forming the aromatic base of the filling.
- 3 tablespoons fresh parsley chopped: Chop coarsely or finely to introduce bright, herbaceous notes and a fresh finish that balances savory richness in the pot pie.
- 1 tablespoon fresh thyme chopped: Chop finely to deliver earthy, slightly minty flavor and fragrant warmth that complements poultry and binds other herbs together.
- 1 tablespoon fresh sage chopped: Chop finely to contribute a savory, slightly peppery aroma with hints of mint that enhances the overall poultry filling complexity.
- 2 small celery stalks chopped: Chop into small pieces to add a crisp, vegetal backbone and subtle aromatic bitterness that helps build savory depth in the filling.
- 5 ounces frozen mixed vegetables: Keep frozen until use to provide a mix of tender vegetables for color, texture, and nutritional balance, boosting the classic pot pie profile.
- 2 1/4 cups turkey or chicken broth: Simmer or heat to create a flavorful liquid base that dissolves starches and concentrates savory taste, ensuring a cohesive gravy for the filling.
- 1/2 teaspoon chicken or turkey bouillon: Dissolve into the broth as a concentrated seasoning to intensify savory poultry notes and round out the stock’s umami character.
- 1/2 teaspoon kosher salt: Measure precisely to season the filling, enhancing and balancing flavors while helping to control the overall sodium level of the dish.
- 1/4 teaspoon freshly ground black pepper: Grind fresh to season and add bright, slightly spicy heat that lifts the savory components without dominating the herb blend.
- 3 cups leftover cooked turkey breast diced small and skin removed: Dice into small, uniform pieces to provide the primary protein and classic turkey flavor, contributing texture and heartiness to each slice.
- 2 1/2 tablespoons cornstarch: Whisk with a little liquid to act as a thickening slurry that creates a glossy, stable gravy when cooked, ensuring the filling sets properly.
- 1 prepared pie crust – dairy free if needed (I used my favorite whole wheat pie crust): Unroll or fit into a pie dish to form the flaky, structural shell that holds the filling and bakes into a golden, crisp crust suitable for dairy–free needs.
- 1 large egg beaten: Beat lightly and brush over the crust to promote even browning and help any edges seal, giving the pie an attractive, glossy finish.
How to Make Turkey Pot Pie
I like to walk through the assembly with calm focus, because small details make a big difference in the final texture and flavor. The steps are straightforward, but I take time to notice aromas and consistency as the filling comes together. Keep your tools nearby and your oven preheated so the assembly flows smoothly when the filling is ready.
- Preheat the oven to 400°F. Lightly coat 4 mini pie dishes (for mini pies) or 1, 9-inch regular pie dish with nonstick spray.: The warm, dry air of a fully preheated oven ensures the crust starts crisping immediately, producing that desirable flaky top. You should hear a faint hum from the oven and feel consistent heat when you open the door briefly to place the pies on a sheet pan. This matters because an oven that is not hot enough will cause the crust to absorb moisture from the filling and become soggy rather than golden. A common mistake here is rushing and putting pies into an oven that has not reached temperature, resulting in uneven browning and a limp crust. To avoid this, check the oven light and wait until it fully cycles to temperature before baking.
- In a large, deep nonstick skillet, heat the oil over medium heat. When the pan is hot, add the shallot, parsley, thyme, and sage and cook until almost soft and fragrant, 2 to 3 minutes.: The moment the extra virgin olive oil begins to shimmer, it releases a soft fruity aroma that welcomes the shallot and herbs. As they cook, you will notice their scent bloom into something savory and herbaceous, and the shallot will soften to a translucent sheen. This step builds the flavor foundation, allowing the herb oils to infuse the fat, which then carries flavor throughout the filling. A common pitfall is cooking at too high a temperature, which can brown and bitter the shallot; keep the heat moderate and stir frequently so everything warms evenly.
- Add the celery and cook until the vegetables are soft, 3 to 5 minutes.: As the celery softens, it releases a subtle vegetal scent and loses its raw crunch, integrating into the aromatic base. You'll hear a gentle sizzle and see the pieces become glossy and slightly translucent, which tells you they have released moisture and flavor. This gentle cooking helps the filling meld into a cohesive texture later, rather than having distinct raw vegetable bites. Avoid undercooking which leaves fibrous texture, or overcooking which can make them mushy and indistinguishable.
- Add the frozen mixed vegetables, 2 cups broth, the bouillon, salt, and black pepper, and bring to a boil. Simmer for about 5 minutes, stirring frequently, until the flavors meld.: When the frozen vegetables hit the pan, they will lower the temperature briefly, then begin to steam and release perfumed starches into the liquid. The broth combined with bouillon creates a savory pool that will smell rich and inviting as it comes to a boil. Simmering concentrates flavors and softens the vegetables so they integrate into the filling. A typical error is letting the mixture boil too hard which can evaporate too much liquid and overconcentrate saltiness, so keep a gentle boil and stir to prevent sticking.
- Add the leftover turkey.: At this stage, the aroma will shift as the warm sauce envelopes the diced turkey . The meat should be added so it can heat through and absorb surrounding flavors rather than cooking further. You will feel a reassuring steam and see the turkey pieces become glossy as they mingle with the simmered vegetables. A common mistake is adding cold, large chunks which cools the sauce and prevents even reheating; make sure the turkey is diced small and warmed gently for even texture.
- Meanwhile, combine the remaining 1/4 cup broth with the cornstarch in a bowl and mix well to dissolve. Add to the skillet and cook over medium-low heat, stirring until thickened, 4 to 6 minutes.: The cornstarch slurry will transform the mixture from soupy to velvety, and you will notice the sauce become shiny and coat the back of a spoon. The gentle medium low heat activates thickening while preventing the starch from breaking down, which keeps the texture smooth. Stir constantly to distribute heat and avoid localized lumps forming. If you add cornstarch directly to hot liquid without dissolving, you risk clumps and an uneven texture, so always make a well mixed slurry first.
- Remove from the heat and transfer to the prepared pie plate(s). Place the plate(s) on a sheet pan to catch any drips.: The filling will hiss softly as it is transferred and the steam will carry herb and broth aromas. Moving the pie dish to a sheet pan is practical because bubbling filling can overflow, and the sheet pan protects your oven and makes it easy to slide the pies in and out. Transfer while the filling is hot so the pie crust seals to warm filling correctly. A common oversight is skipping the sheet pan which leads to oven spills and harder cleanup.
- Roll out the pie crust to be slightly larger than your dish (if cooking mini pies, cut out 4 rounds slightly larger than the pie plates). Place the crust over the turkey filling. Crimp the edges or fold over the edge of the pie plate. Cut slits in the top of the crust with a thin, sharp knife. These small cuts will function as vents to allow steam to escape while the pie bakes.: As you drape the crust over the warm filling you will feel its pliability, and after crimping the edges it should form a neat seal. Cutting vents lets steam escape so the filling does not make the crust soggy from the inside. You will hear a subtle tearing sound if the crust is too dry, so if it resists, allow it to rest a few minutes at room temperature. A common mistake is sealing the crust without vents which traps steam and soggifies the top rather than letting it crisp.
- Brush the crust with the egg and immediately transfer to the preheated oven to bake on the sheet pan for 25 to 35 minutes, or until the crust is golden and the filling is hot and bubbly.: The beaten egg will give the crust a rich, glossy sheen as it bakes and helps develop an even golden color. In the oven you should see the edges take on a warm tan quickly and then deepen to a rich golden brown while the filling bubbles at the vents. Baking on a sheet pan promotes even heat circulation and prevents drips. A frequent error is removing the pie too soon; the filling should be visibly bubbling and the crust uniformly colored to ensure it is fully heated and the texture is correct.
Ways to Adapt This Recipe
I like offering adaptable directions so cooks can tailor Turkey Pot Pie to pantry supplies and dietary needs. Below are practical adjustments and make ahead ideas that keep the core flavors intact while providing flexibility. Each tip starts with a short bold phrase to highlight the main change.
- Make it dairy free Use a dairy free or whole wheat prepared pie crust as noted, and confirm your pie crust ingredients if avoiding dairy. This preserves texture while meeting dietary needs, and the egg wash is optional if you need a fully egg free finish.
- Freeze for quick dinners Assemble pies without egg wash, freeze until solid, then wrap tightly for long term storage. When ready to bake, brush with egg and bake from frozen at the recommended temperature until golden and heated through, adjusting time for size.
- Scale to serve more people Multiply the filling ingredients proportionally and use a larger pie dish or multiple mini pans. Baking time will vary, so watch for a bubbling filling and golden crust rather than strictly following minutes.
- Use chicken if preferred The recipe works interchangeably with cooked shredded or diced chicken for similar flavor and texture, making this a flexible leftover friendly option when turkey is not available.
- Boost vegetable content Increase the frozen mixed vegetables slightly if you want a more vegetable forward pie, being mindful to adjust broth and thickener so the filling is not too loose.
- Prep ahead for ease Cook and cool the filling, then refrigerate up to a day before assembling and baking. This streamlines dinner night and lets the flavors meld, often improving the overall taste.
What to Pair With Turkey Pot Pie
This pie pairs beautifully with simple, bright sides that contrast its richness. Think crisp salads, lightly dressed slaws, or roasted seasonal vegetables that add texture and freshness. Serving suggestions below include ideas for occasions, storage, and seasonal touches to round out the meal.
- Light green salad A simple mixed leaf salad dressed with a light vinaigrette cuts through the pie’s richness and refreshes the palate between bites.
- Steamed green vegetables Steamed broccoli or green beans add a tender snap and vivid color that complements the warm, creamy filling.
- Roasted root vegetables Carrots, parsnips, or sweet potatoes roasted with a touch of olive oil and herbs provide a sweet counterpoint and hearty side for fall dinners.
- Casual dinner occasion Serve mini pies at a casual gathering or make a single pie for a cozy family dinner; they work well for both relaxed and slightly festive tables.
- Meal prep and storage Refrigerate leftovers in an airtight container for up to four days, or freeze assembled pies for longer storage, then reheat in the oven for best texture retention.
- Seasonal pairing In fall and winter I like to pair the pie with apple slices or a crisp slaw to introduce a bright, slightly acidic contrast to the savory pie.
FAQ
Conclusion
This Turkey Pot Pie stands out because it combines comforting, herb forward flavors with a silky, well thickened filling and a golden, crisp crust. It is forgiving, adaptable, and perfect for turning leftover roast into a special meal that feels both homey and a little celebratory. Give it a try on a chilly evening or make a batch to freeze for easy dinners; I think you will love how simple steps and thoughtful seasoning come together to make a satisfying dish that lands on the table with warmth and flavor.
Turkey Pot Pie
Equipment
- nonstick skillet
- Sheet Pan
- Pie Dish
- Mixing Bowl
Ingredients
- 1/2 tablespoon extra-virgin olive oil Heat lightly to provide a subtle, fruity fat for sautéing aromatics and helping ingredients brown without overpowering the pie filling.
- 1 large shallot chopped Chop finely to add a mild, sweet onion flavor and tender texture that softens quickly when cooked, forming the aromatic base of the filling.
- 3 tablespoons fresh parsley chopped Chop coarsely or finely to introduce bright, herbaceous notes and a fresh finish that balances savory richness in the pot pie.
- 1 tablespoon fresh thyme chopped Chop finely to deliver earthy, slightly minty flavor and fragrant warmth that complements poultry and binds other herbs together.
- 1 tablespoon fresh sage chopped Chop finely to contribute a savory, slightly peppery aroma with hints of mint that enhances the overall poultry filling complexity.
- 2 small celery stalks chopped Chop into small pieces to add a crisp, vegetal backbone and subtle aromatic bitterness that helps build savory depth in the filling.
- 5 ounces frozen mixed vegetables Keep frozen until use to provide a mix of tender vegetables for color, texture, and nutritional balance, boosting the classic pot pie profile.
- 2 1/4 cups turkey or chicken broth Simmer or heat to create a flavorful liquid base that dissolves starches and concentrates savory taste, ensuring a cohesive gravy for the filling.
- 1/2 teaspoon chicken or turkey bouillon Dissolve into the broth as a concentrated seasoning to intensify savory poultry notes and round out the stock’s umami character.
- 1/2 teaspoon kosher salt Measure precisely to season the filling, enhancing and balancing flavors while helping to control the overall sodium level of the dish.
- 1/4 teaspoon freshly ground black pepper Grind fresh to season and add bright, slightly spicy heat that lifts the savory components without dominating the herb blend.
- 3 cups leftover cooked turkey breast diced small and skin removed Dice into small, uniform pieces to provide the primary protein and classic turkey flavor, contributing texture and heartiness to each slice.
- 2 1/2 tablespoons cornstarch Whisk with a little liquid to act as a thickening slurry that creates a glossy, stable gravy when cooked, ensuring the filling sets properly.
- 1 prepared pie crust – dairy free if needed (I used my favorite whole wheat pie crust) Unroll or fit into a pie dish to form the flaky, structural shell that holds the filling and bakes into a golden, crisp crust suitable for dairy-free needs.
- 1 large egg beaten Beat lightly and brush over the crust to promote even browning and help any edges seal, giving the pie an attractive, glossy finish.
Instructions
- Preheat the oven to 400°F. Lightly coat 4 mini pie dishes (for mini pies) or 1, 9-inch regular pie dish with nonstick spray.: The warm, dry air of a fully preheated oven ensures the crust starts crisping immediately, producing that desirable flaky top. You should hear a faint hum from the oven and feel consistent heat when you open the door briefly to place the pies on a sheet pan. This matters because an oven that is not hot enough will cause the crust to absorb moisture from the filling and become soggy rather than golden. A common mistake here is rushing and putting pies into an oven that has not reached temperature, resulting in uneven browning and a limp crust. To avoid this, check the oven light and wait until it fully cycles to temperature before baking.
- In a large, deep nonstick skillet, heat the oil over medium heat. When the pan is hot, add the shallot, parsley, thyme, and sage and cook until almost soft and fragrant, 2 to 3 minutes.: The moment the extra virgin olive oil begins to shimmer, it releases a soft fruity aroma that welcomes the shallot and herbs. As they cook, you will notice their scent bloom into something savory and herbaceous, and the shallot will soften to a translucent sheen. This step builds the flavor foundation, allowing the herb oils to infuse the fat, which then carries flavor throughout the filling. A common pitfall is cooking at too high a temperature, which can brown and bitter the shallot; keep the heat moderate and stir frequently so everything warms evenly.
- Add the celery and cook until the vegetables are soft, 3 to 5 minutes.: As the celery softens, it releases a subtle vegetal scent and loses its raw crunch, integrating into the aromatic base. You'll hear a gentle sizzle and see the pieces become glossy and slightly translucent, which tells you they have released moisture and flavor. This gentle cooking helps the filling meld into a cohesive texture later, rather than having distinct raw vegetable bites. Avoid undercooking which leaves fibrous texture, or overcooking which can make them mushy and indistinguishable.
- Add the frozen mixed vegetables, 2 cups broth, the bouillon, salt, and black pepper, and bring to a boil. Simmer for about 5 minutes, stirring frequently, until the flavors meld.: When the frozen vegetables hit the pan, they will lower the temperature briefly, then begin to steam and release perfumed starches into the liquid. The broth combined with bouillon creates a savory pool that will smell rich and inviting as it comes to a boil. Simmering concentrates flavors and softens the vegetables so they integrate into the filling. A typical error is letting the mixture boil too hard which can evaporate too much liquid and overconcentrate saltiness, so keep a gentle boil and stir to prevent sticking.
- Add the leftover turkey.: At this stage, the aroma will shift as the warm sauce envelopes the diced turkey . The meat should be added so it can heat through and absorb surrounding flavors rather than cooking further. You will feel a reassuring steam and see the turkey pieces become glossy as they mingle with the simmered vegetables. A common mistake is adding cold, large chunks which cools the sauce and prevents even reheating; make sure the turkey is diced small and warmed gently for even texture.
- Meanwhile, combine the remaining 1/4 cup broth with the cornstarch in a bowl and mix well to dissolve. Add to the skillet and cook over medium-low heat, stirring until thickened, 4 to 6 minutes.: The cornstarch slurry will transform the mixture from soupy to velvety, and you will notice the sauce become shiny and coat the back of a spoon. The gentle medium low heat activates thickening while preventing the starch from breaking down, which keeps the texture smooth. Stir constantly to distribute heat and avoid localized lumps forming. If you add cornstarch directly to hot liquid without dissolving, you risk clumps and an uneven texture, so always make a well mixed slurry first.
- Remove from the heat and transfer to the prepared pie plate(s). Place the plate(s) on a sheet pan to catch any drips.: The filling will hiss softly as it is transferred and the steam will carry herb and broth aromas. Moving the pie dish to a sheet pan is practical because bubbling filling can overflow, and the sheet pan protects your oven and makes it easy to slide the pies in and out. Transfer while the filling is hot so the pie crust seals to warm filling correctly. A common oversight is skipping the sheet pan which leads to oven spills and harder cleanup.
- Roll out the pie crust to be slightly larger than your dish (if cooking mini pies, cut out 4 rounds slightly larger than the pie plates). Place the crust over the turkey filling. Crimp the edges or fold over the edge of the pie plate. Cut slits in the top of the crust with a thin, sharp knife. These small cuts will function as vents to allow steam to escape while the pie bakes.: As you drape the crust over the warm filling you will feel its pliability, and after crimping the edges it should form a neat seal. Cutting vents lets steam escape so the filling does not make the crust soggy from the inside. You will hear a subtle tearing sound if the crust is too dry, so if it resists, allow it to rest a few minutes at room temperature. A common mistake is sealing the crust without vents which traps steam and soggifies the top rather than letting it crisp.
- Brush the crust with the egg and immediately transfer to the preheated oven to bake on the sheet pan for 25 to 35 minutes, or until the crust is golden and the filling is hot and bubbly.: The beaten egg will give the crust a rich, glossy sheen as it bakes and helps develop an even golden color. In the oven you should see the edges take on a warm tan quickly and then deepen to a rich golden brown while the filling bubbles at the vents. Baking on a sheet pan promotes even heat circulation and prevents drips. A frequent error is removing the pie too soon; the filling should be visibly bubbling and the crust uniformly colored to ensure it is fully heated and the texture is correct.
Notes
- Make it dairy free Use a dairy free or whole wheat prepared pie crust as noted, and confirm your pie crust ingredients if avoiding dairy. This preserves texture while meeting dietary needs, and the egg wash is optional if you need a fully egg free finish.
- Freeze for quick dinners Assemble pies without egg wash, freeze until solid, then wrap tightly for long term storage. When ready to bake, brush with egg and bake from frozen at the recommended temperature until golden and heated through, adjusting time for size.
- Scale to serve more people Multiply the filling ingredients proportionally and use a larger pie dish or multiple mini pans. Baking time will vary, so watch for a bubbling filling and golden crust rather than strictly following minutes.
- Use chicken if preferred The recipe works interchangeably with cooked shredded or diced chicken for similar flavor and texture, making this a flexible leftover friendly option when turkey is not available.
- Boost vegetable content Increase the frozen mixed vegetables slightly if you want a more vegetable forward pie, being mindful to adjust broth and thickener so the filling is not too loose.
- Prep ahead for ease Cook and cool the filling, then refrigerate up to a day before assembling and baking. This streamlines dinner night and lets the flavors meld, often improving the overall taste.