Easter Cake Mix Cookies
Easter Cake Mix Cookies bring a burst of childhood joy to my kitchen, and the first time I made them I remember the shrill giggles from my niece as she spotted the colorful candies on top. I was racing the afternoon sun to finish a batch before guests arrived, and these cookies saved the day with their quick batter and festive look. The memory of warm, tender centers dotted with candy still makes me smile every spring.
These cookies have become my go to when I need something cheerful and fast, a recipe I can pull together while sipping coffee and answering messages. I love how simple the ingredient list is, yet the results feel celebratory. If you want a treat that feels homemade without a lot of fuss, these are the cookies to reach for.
Recipe Snapshot
15 mins
5 mins
10 mins
Medium
150 kcal
American
Keto, Gluten-Free
Desserts
Mixing bowl, Measuring cups, Baking sheet, Parchment paper, Microwave safe bowl, Cooling rack
Why This Easter Cake Mix Cookies Is So Good
They Are Ridiculously Easy
I can throw together the batter in minutes, and that hands off chilling time lets me get other things ready. Because I use a boxed cake mix, this feels like a tiny kitchen shortcut that doesn’t sacrifice texture or flavor.
Perfect for Last Minute Celebrations
When friends pop by or I need something for a school event, these Easter Cake Mix Cookies are quick to scale. I often double the batch without worrying about complicated technique, and they still bake up with soft centers and slightly crisp edges.
Customizable and Playful
I love swapping the M&M’s or sprinkles to match a theme. The melted candy coating gives a polished, bakery style finish, and changing colors makes them feel seasonal without changing the base recipe.
Kid Friendly and Hands On
Kids enjoy forming the dough into balls and decorating the tops, so these cookies double as a fun activity. That hands on element makes them great for family afternoons when I want everyone involved in the kitchen.
Reliable Texture Every Time
Because the recipe relies on a standardized cake mix, results are consistent. The dough chills to firm up so the cookies keep their shape, and the quick bake time leaves centers tender, which I always appreciate.
What’s In This Easter Cake Mix Cookies
These ingredients are a study in simplicity. The boxed cake mix provides structure and sweetness, while the vegetable oil and eggs bring richness and tenderness. The vanilla extract adds aromatic depth, and the candy melts plus M&M’s or sprinkles supply color and texture for a festive finish. Together they create an easy cookie that still feels celebratory.
- 15.25 ounces white cake mix: Provides the base structure and sweetness for the cookies, supplying flour, sugar, and leavening in one convenient package; use the full 15.25 ounces to ensure correct dough consistency and cookie spread. Enhances texture and uniformity so the cookies bake evenly with a tender crumb.
- 1/3 cup vegetable oil: Adds moisture and fat to the dry mix, yielding a soft, slightly chewy cookie texture while helping ingredients bind together. Measure 1/3 cup precisely to maintain the intended balance between cakey and chewy.
- 2 eggs room temperature: Contributes richness, additional moisture, and helps emulsify the batter for a smooth dough; room temperature eggs incorporate more easily and trap air for a lighter finished cookie. Beat in fully to ensure even distribution and proper structure during baking.
- 1 teaspoon vanilla extract: Provides aromatic flavor depth and balances sweetness with warm vanilla notes, enhancing overall cookie taste; use 1 teaspoon for a subtle but noticeable flavor boost. Stir in with the eggs and oil so the flavor disperses evenly throughout the dough.
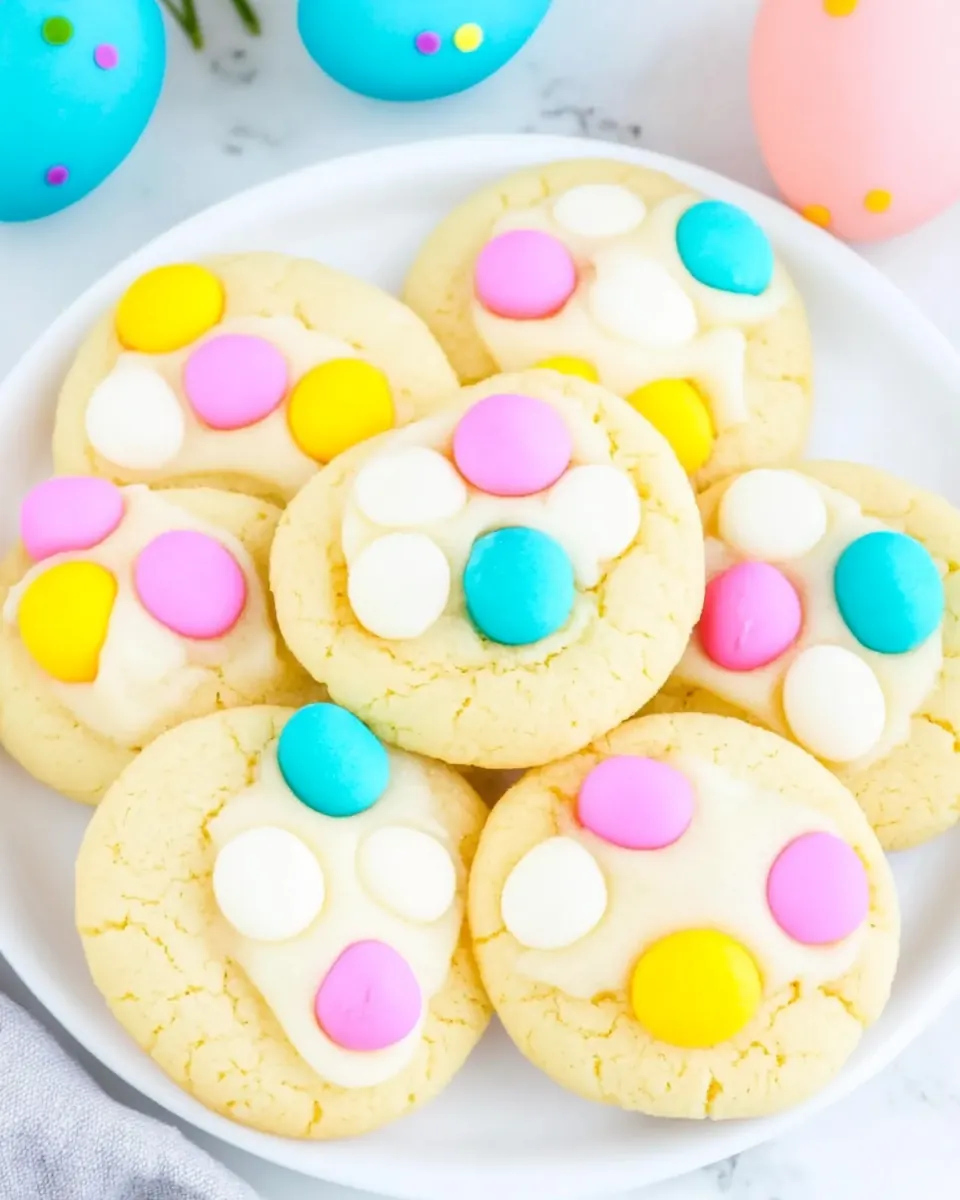
- 12 ounces candy melts I used white Ghirardelli melting wafers but you can buy candy melts in assorted colors if you prefer: Supplies a coating and decorative color when melted, allowing dipped or drizzled finishing touches; 12 ounces yields enough to coat a batch of cookies or create festive patterns. Choose white or colored candy melts for contrast and to help M&M's adhere when decorating.
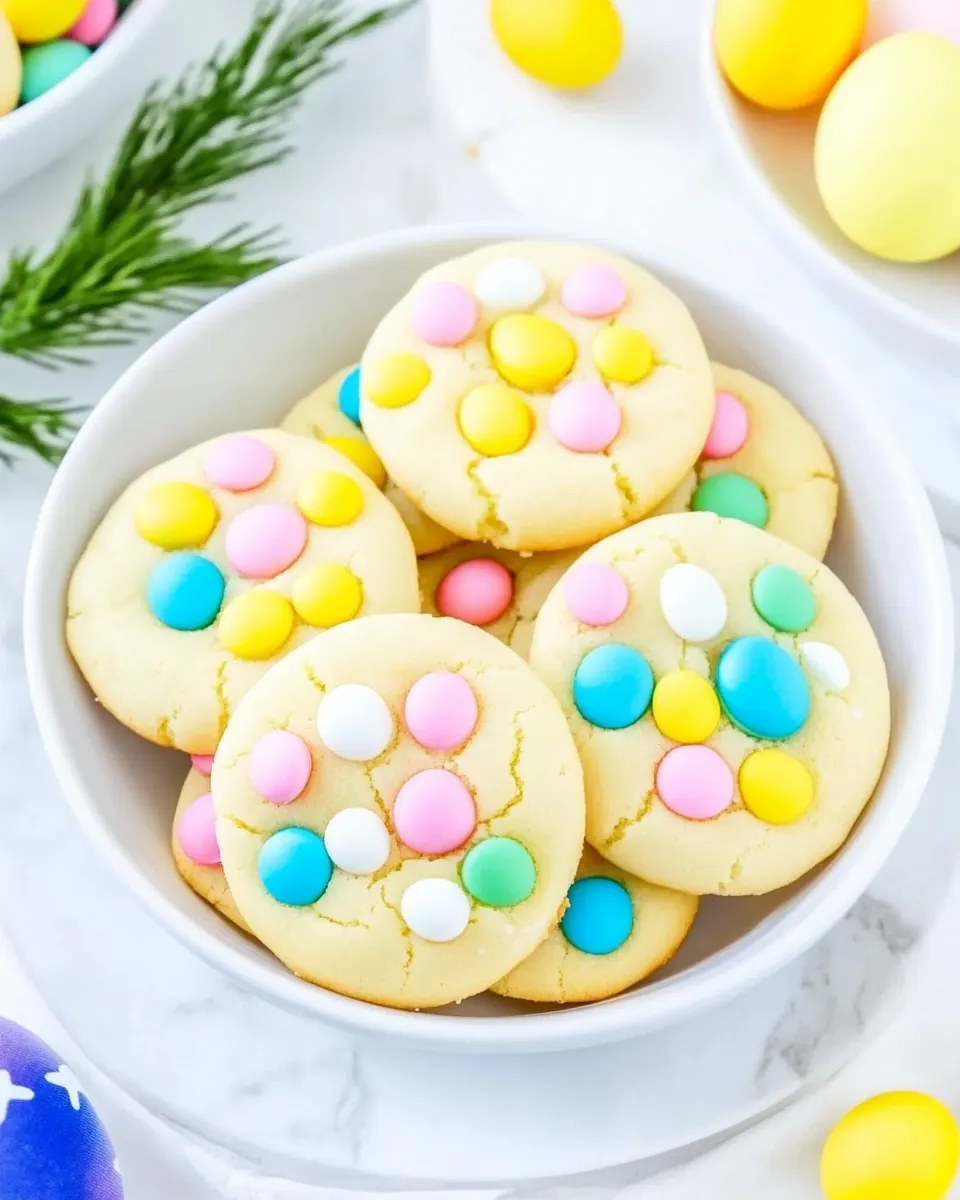
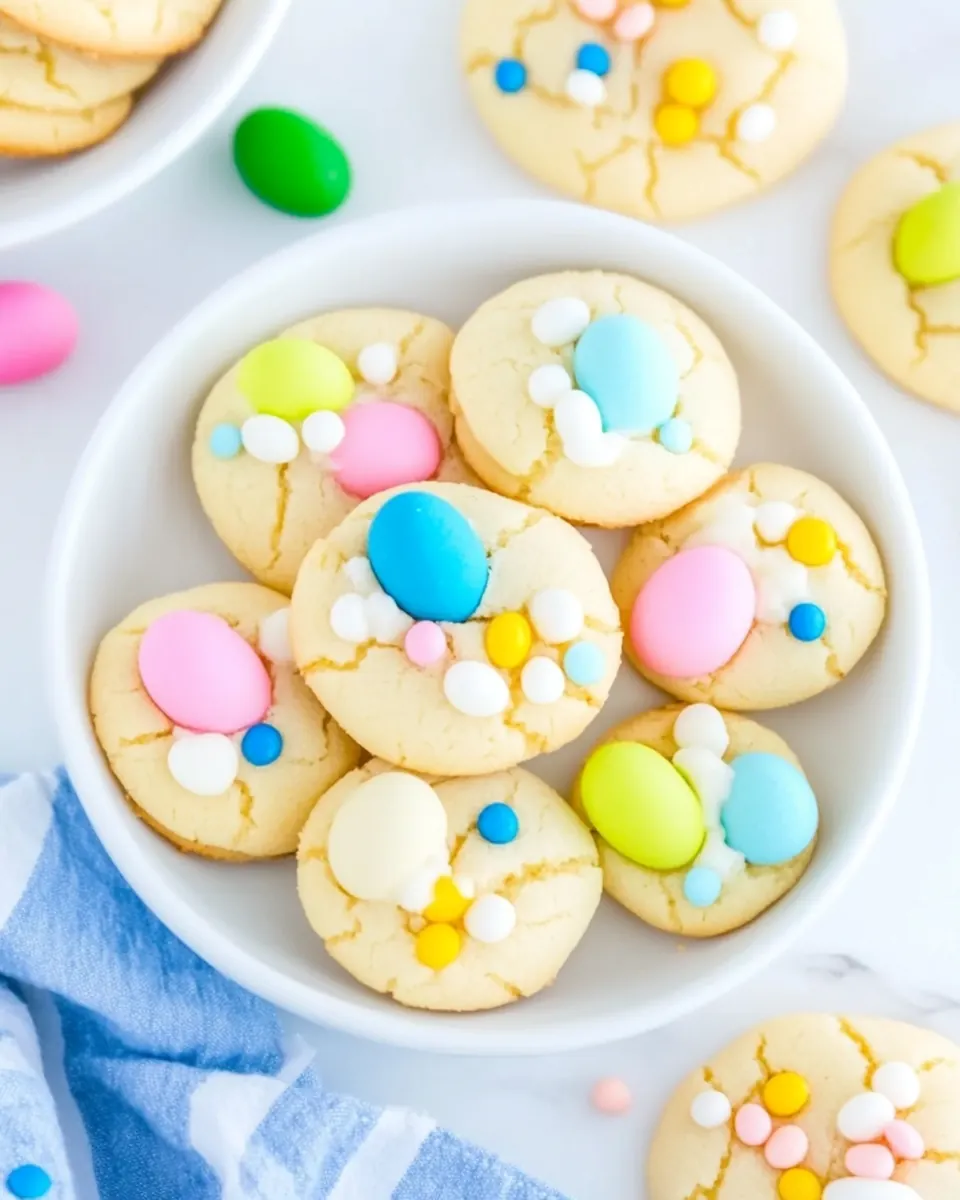
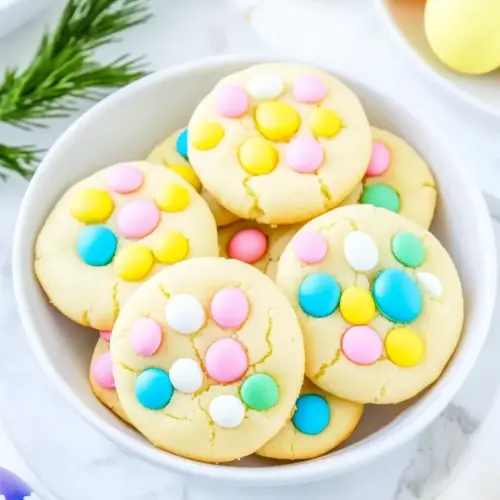
- M&M's or sprinkles of your choice: Adds crunchy texture, bursts of chocolate and color, or bright sprinkles for visual appeal and festive flavor; press onto cookies before the coating sets to secure them. Select M&M's or sprinkles based on desired sweetness, crunch, and holiday aesthetic.
Step by Step Guide for Easter Cake Mix Cookies

These instructions turn the simple ingredients into irresistibly festive cookies. I walk you through every sensory cue, so you know when the dough is ready, how the bake should look, and how to finish with glossy candy coating and colorful toppings.
- Stir together the cake mix, vegetable oil, eggs and vanilla extract in a large bowl.: You will notice a crumbly, slightly sticky dough forming as the dry cake mix absorbs the vegetable oil and eggs . The aroma of vanilla extract will become noticeable as you mix, and the dough should come together without large pockets of dry mix. This step matters because uniform hydration ensures even baking and consistent texture. If you see dry streaks, scrape the bowl and fold until smooth, but avoid over mixing which can make cookies tough. A common mistake is adding extra oil when dough seems dry, which leads to spread; instead let it rest a moment so ingredients hydrate.
- Cover the dough and chill for 30 minutes in the refrigerator.: Chilling firms the dough, making it easier to scoop and helping the cookies keep their shape while baking. You will feel the dough become denser and cooler, and this rest also allows flavors to meld. The cold dough produces a chewier interior because fats solidify and melt more slowly in the oven. Avoid skipping this step, as warm dough tends to spread and flatten, giving you thin, crispy cookies instead of soft centers.
- Preheat oven to 350°F. Line a large baking sheet with parchment paper or a silicone baking mat and set aside.: As the oven warms, you may hear its quiet hum and feel the kitchen temperature shift. Proper preheating ensures immediate reaction from the leavening agents in the cake mix , creating the right rise and edge set. Lining the sheet prevents sticking and promotes even browning. A mistake is placing cold dough in an oven that is not fully preheated, which leads to uneven texture and underbaked centers.
- Scoop the cookie dough and form into 1-inch balls. Place balls on the prepared baking sheet making sure to leave about 2 inches in between each dough ball.: As you roll the dough into 1 inch balls, you will feel a soft, slightly tacky surface that holds together well. Spacing them about 2 inches apart gives the cookies room to expand and develop lightly crisp edges. Rolling consistently sized balls produces uniform baking and visual appeal. One common error is making uneven sizes, which results in some cookies burning while others remain underdone.
- Bake cookies for 8 to 10 minutes. Be careful not to over bake!: As the cookies bake, watch for pale golden edges and set tops while centers remain slightly soft and puffy. You might smell a warm sweet aroma as the sugars caramelize at the edges. This exact timing preserves soft interiors, so remove them when the surface no longer looks raw but is not deeply browned. Over baking dries them out, so err on the side of underbaking by a minute if unsure. A typical mistake is leaving them in until golden brown across the top, which yields a firmer, less tender cookie.
- Let cookies cool for 2 to 3 minutes on the baking sheet before transferring to a cooling rack to cool completely.: Cooling briefly on the sheet allows the cookies to firm up and makes them easier to move without breaking. You will notice the bottoms finish setting as the internal steam escapes, and transferring too soon can deform them. Cooling completely before dipping prevents the melted candy melts from seeping into warm cookies. Rushing this step often causes toppings to sink or spread into the cookie surface.
- Melt the Ghirardelli wafers or almond bark in the microwave following the package instructions.: Melt the candy melts in short bursts, stirring between intervals until smooth and glossy. The sound is a soft bubbling as trapped moisture dissipates, and the shine indicates a properly tempered mixture for dipping. Why this matters: a smooth melt sets with a clean snap and keeps toppings adhered. Avoid overheating, which causes grainy texture or burning; if it becomes too thick, stir in a tiny amount of neutral oil to smooth it.
- Dip the cooled cookies about one third to half way into the melted chocolate and tap off the excess. Place on the parchment lined baking sheet or back on the cooling rack. Top with three M&Ms or add some sprinkles and allow to set up before serving.: When you dip, the final look depends on how much coating you allow to remain, and tapping off excess creates a neat, even layer. You will feel the weight of the candy coating and see it glisten before it begins to set. This technique gives a professional finish and ensures the centers stay tender by not overcoating. A frequent mistake is dipping warm cookies, which melts the cookie surface and causes the coating to slide off once set. After dipping, press three M&M's or sprinkles into the coating and let them set before serving.
Recipe Tips about Easter Cake Mix Cookies
These tips will help you achieve consistent, festive cookies without fuss. I include practical notes from real experience so you avoid common pitfalls and get bakery style results at home.
- Measure the cake mix properly, fluff the mix before scooping to avoid compacting, which can lead to dense dough and heavier cookies.
- Chill time is important, even if you are in a hurry, because cold dough spreads less and yields a chewier center with better shape.
- Use parchment or silicone mats to ensure even baking and easy cleanup, they also help prevent bottoms from overbrowning.
- Melt candy melts gently, stir often and use short microwave bursts to keep the coating glossy and smooth for a neat finish.
- Decorate immediately after dipping, press candies or sprinkles into the wet coating so they set in place and look polished.
How to Enjoy Easter Cake Mix Cookies
These cookies are incredibly versatile for entertaining and everyday treats. Serve them warm or at room temperature depending on the occasion, and they pair well with simple beverages or as part of a dessert spread.
- For brunch or dessert tables, arrange the Easter Cake Mix Cookies on a wide platter with varying colors to create an eye catching centerpiece for spring gatherings.
- Kid friendly celebrations, set out a decorating station with extra sprinkles and M&M’s so children can personalize their cookies before the coating sets.
- Gift packs, layer cookies between parchment in a box for a homemade edible gift that holds up well for short transport.
- Storage tips, store in an airtight container at room temperature for up to three days, or freeze uncoated cookies for up to one month and dip after thawing for freshest finish.
- Seasonal pairings, serve these at springtime gatherings, holiday brunches, or school parties where the colorful toppings match the festive mood.
FAQ
Conclusion
These cookies stand out for their joyful presentation and effortless preparation, making them a reliable choice for spring gatherings and last minute celebrations. Give them a try the next time you want a colorful, crowd pleasing treat that comes together with minimal effort. I hope these Easter Cake Mix Cookies become one of your go to recipes when you need something quick, fun, and shareable.
Easter Cake Mix Cookies
Equipment
- Mixing Bowl
- Measuring Cups
- Baking Sheet
- Parchment Paper
- Microwave-safe Bowl
- Cooling rack
Ingredients
- 15.25 ounces white cake mix Provides the base structure and sweetness for the cookies, supplying flour, sugar, and leavening in one convenient package; use the full 15.25 ounces to ensure correct dough consistency and cookie spread. Enhances texture and uniformity so the cookies bake evenly with a tender crumb.
- 1/3 cup vegetable oil Adds moisture and fat to the dry mix, yielding a soft, slightly chewy cookie texture while helping ingredients bind together. Measure 1/3 cup precisely to maintain the intended balance between cakey and chewy.
- 2 eggs room temperature Contributes richness, additional moisture, and helps emulsify the batter for a smooth dough; room temperature eggs incorporate more easily and trap air for a lighter finished cookie. Beat in fully to ensure even distribution and proper structure during baking.
- 1 teaspoon vanilla extract Provides aromatic flavor depth and balances sweetness with warm vanilla notes, enhancing overall cookie taste; use 1 teaspoon for a subtle but noticeable flavor boost. Stir in with the eggs and oil so the flavor disperses evenly throughout the dough.
- 12 ounces candy melts I used white Ghirardelli melting wafers but you can buy candy melts in assorted colors if you prefer Supplies a coating and decorative color when melted, allowing dipped or drizzled finishing touches; 12 ounces yields enough to coat a batch of cookies or create festive patterns. Choose white or colored candy melts for contrast and to help M&M's adhere when decorating.
- M&M's or sprinkles of your choice Adds crunchy texture, bursts of chocolate and color, or bright sprinkles for visual appeal and festive flavor; press onto cookies before the coating sets to secure them. Select M&M's or sprinkles based on desired sweetness, crunch, and holiday aesthetic.
Instructions
- Stir together the cake mix, vegetable oil, eggs and vanilla extract in a large bowl.: You will notice a crumbly, slightly sticky dough forming as the dry cake mix absorbs the vegetable oil and eggs . The aroma of vanilla extract will become noticeable as you mix, and the dough should come together without large pockets of dry mix. This step matters because uniform hydration ensures even baking and consistent texture. If you see dry streaks, scrape the bowl and fold until smooth, but avoid over mixing which can make cookies tough. A common mistake is adding extra oil when dough seems dry, which leads to spread; instead let it rest a moment so ingredients hydrate.
- Cover the dough and chill for 30 minutes in the refrigerator.: Chilling firms the dough, making it easier to scoop and helping the cookies keep their shape while baking. You will feel the dough become denser and cooler, and this rest also allows flavors to meld. The cold dough produces a chewier interior because fats solidify and melt more slowly in the oven. Avoid skipping this step, as warm dough tends to spread and flatten, giving you thin, crispy cookies instead of soft centers.
- Preheat oven to 350°F. Line a large baking sheet with parchment paper or a silicone baking mat and set aside.: As the oven warms, you may hear its quiet hum and feel the kitchen temperature shift. Proper preheating ensures immediate reaction from the leavening agents in the cake mix , creating the right rise and edge set. Lining the sheet prevents sticking and promotes even browning. A mistake is placing cold dough in an oven that is not fully preheated, which leads to uneven texture and underbaked centers.
- Scoop the cookie dough and form into 1-inch balls. Place balls on the prepared baking sheet making sure to leave about 2 inches in between each dough ball.: As you roll the dough into 1 inch balls, you will feel a soft, slightly tacky surface that holds together well. Spacing them about 2 inches apart gives the cookies room to expand and develop lightly crisp edges. Rolling consistently sized balls produces uniform baking and visual appeal. One common error is making uneven sizes, which results in some cookies burning while others remain underdone.
- Bake cookies for 8 to 10 minutes. Be careful not to over bake!: As the cookies bake, watch for pale golden edges and set tops while centers remain slightly soft and puffy. You might smell a warm sweet aroma as the sugars caramelize at the edges. This exact timing preserves soft interiors, so remove them when the surface no longer looks raw but is not deeply browned. Over baking dries them out, so err on the side of underbaking by a minute if unsure. A typical mistake is leaving them in until golden brown across the top, which yields a firmer, less tender cookie.
- Let cookies cool for 2 to 3 minutes on the baking sheet before transferring to a cooling rack to cool completely.: Cooling briefly on the sheet allows the cookies to firm up and makes them easier to move without breaking. You will notice the bottoms finish setting as the internal steam escapes, and transferring too soon can deform them. Cooling completely before dipping prevents the melted candy melts from seeping into warm cookies. Rushing this step often causes toppings to sink or spread into the cookie surface.
- Melt the Ghirardelli wafers or almond bark in the microwave following the package instructions.: Melt the candy melts in short bursts, stirring between intervals until smooth and glossy. The sound is a soft bubbling as trapped moisture dissipates, and the shine indicates a properly tempered mixture for dipping. Why this matters: a smooth melt sets with a clean snap and keeps toppings adhered. Avoid overheating, which causes grainy texture or burning; if it becomes too thick, stir in a tiny amount of neutral oil to smooth it.
- Dip the cooled cookies about one third to half way into the melted chocolate and tap off the excess. Place on the parchment lined baking sheet or back on the cooling rack. Top with three M&Ms or add some sprinkles and allow to set up before serving.: When you dip, the final look depends on how much coating you allow to remain, and tapping off excess creates a neat, even layer. You will feel the weight of the candy coating and see it glisten before it begins to set. This technique gives a professional finish and ensures the centers stay tender by not overcoating. A frequent mistake is dipping warm cookies, which melts the cookie surface and causes the coating to slide off once set. After dipping, press three M&M's or sprinkles into the coating and let them set before serving.
Notes
- Measure the cake mix properly, fluff the mix before scooping to avoid compacting, which can lead to dense dough and heavier cookies.
- Chill time is important, even if you are in a hurry, because cold dough spreads less and yields a chewier center with better shape.
- Use parchment or silicone mats to ensure even baking and easy cleanup, they also help prevent bottoms from overbrowning.
- Melt candy melts gently, stir often and use short microwave bursts to keep the coating glossy and smooth for a neat finish.
- Decorate immediately after dipping, press candies or sprinkles into the wet coating so they set in place and look polished.