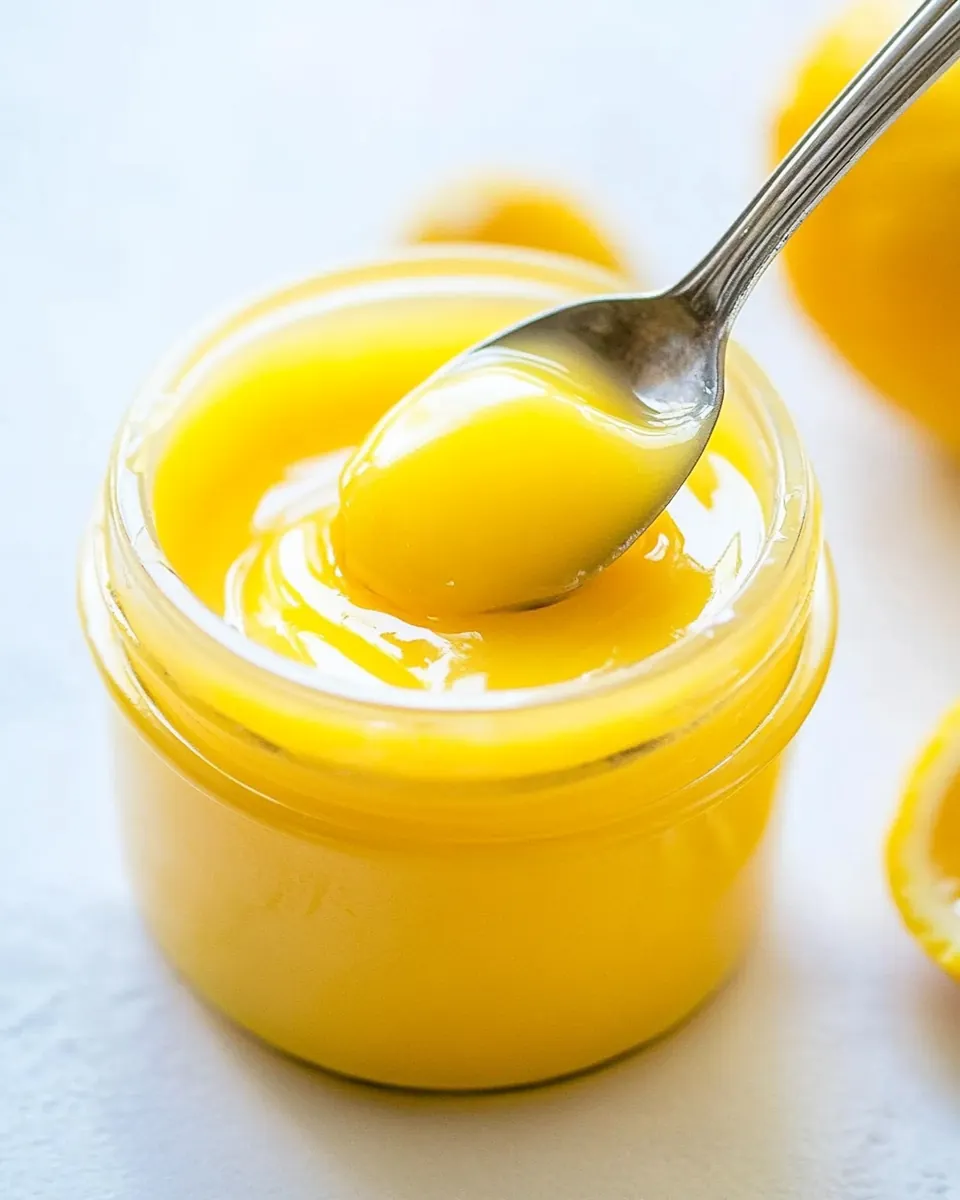
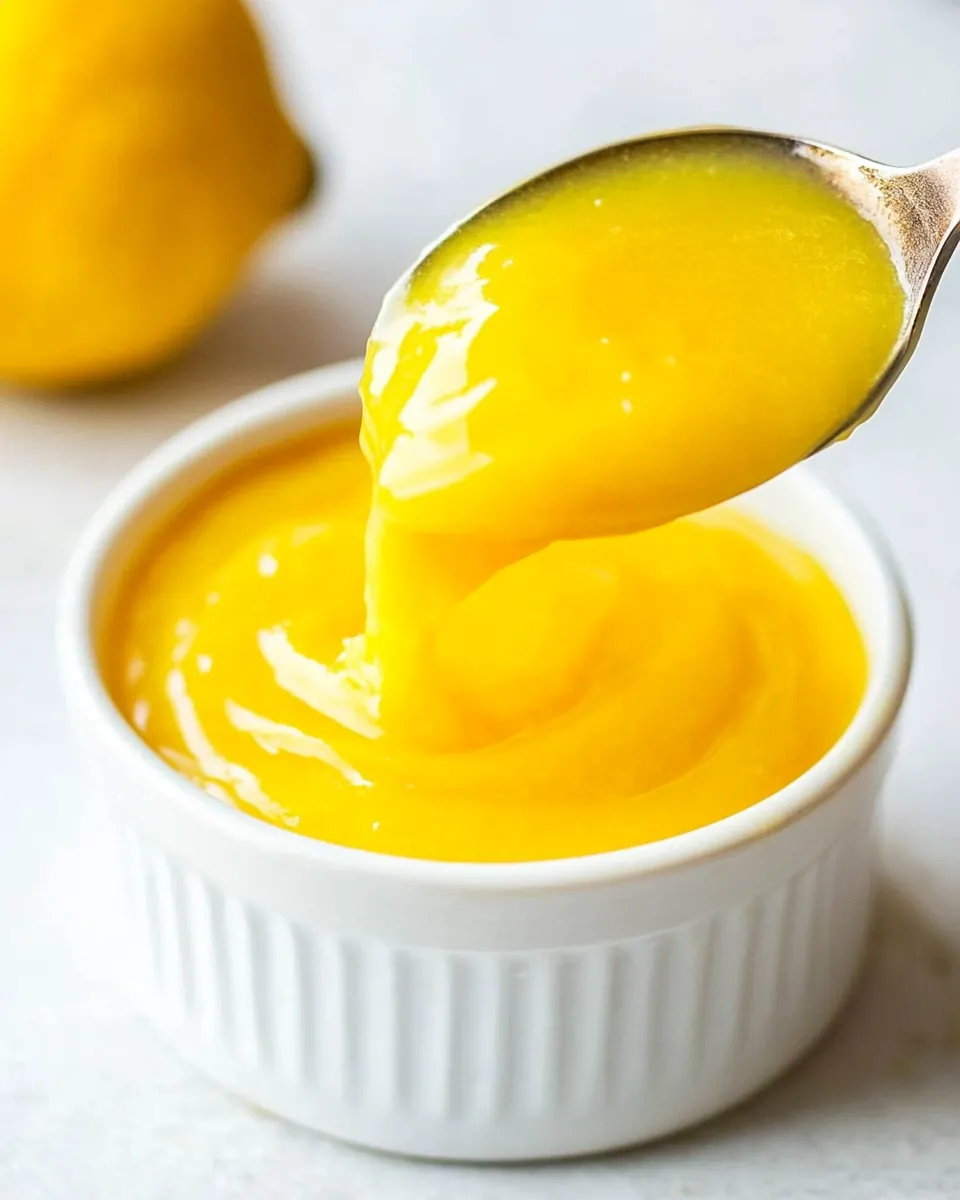
Perfect Lemon Curd
Perfect Lemon Curd is the kind of recipe that brightens a morning and lifts a dull afternoon, and I still remember the first time I whisked it on my tiny stovetop while sunlight pooled across the counter. I had a bushel of lemons and a stubborn sweet tooth, so I decided to try making curd from scratch. Right away I noticed how the whole kitchen transformed as the scent of fresh lemon filled the air and the glossy mix turned from translucent to silky, coaxing me to taste a spoonful before it was cooled.
That day I learned a few small lessons that changed how I make Perfect Lemon Curd forever. I discovered that patience while whisking is everything, and that using room temperature eggs and slicing the butter helps the mixture come together smoothly. Over time I began using it on morning toast, folded into whipped cream, spooned over cakes, and jarred for gifts. Each time someone bites into a tart spoonful, they ask if it is homemade, and I get to smile because it really is simple, if you follow a few mindful steps.
When I make this curd now, I like to treat it as a small celebration of citrus, savoring the bright zip from the lemon juice and the rich silk that comes from butter and eggs. It is kitchen alchemy that rewards careful stirring and a little patience. You will notice the texture shift and the aroma deepen, and that is when you know the work paid off. This recipe has become my go to when I want something that feels fancy but is utterly straightforward, and I hope you will enjoy making Perfect Lemon Curd as much as I do.
Recipe Snapshot
15 mins
5 mins
10 mins
Easy
120 kcal
American
Keto, Gluten-Free
Desserts
saucepan, Whisk, Strain, Bowl
The Magic of This Perfect Lemon Curd
Bright citrus flavor that wakes up everything
I love how Perfect Lemon Curd lends instantaneous brightness to so many dishes. The concentrated lemon flavor is tart yet balanced by sugar, so a spoonful can lift breakfast toast or bring a burst of freshness to a dense dessert. I reach for it when I want a lively contrast to buttery bakes.
Silky texture from simple ingredients
There is something deeply satisfying about turning a few pantry staples into a luxuriously smooth curd. The combination of room temperature eggs, warm butter, and fresh lemon juice produces a custardy texture that feels indulgent without fuss. I always pause to admire that glossy sheen before bottling it.
Versatile and easy to customize
I often use Perfect Lemon Curd across meals, from swirled yogurts to sandwiching layers of a sponge cake. Because the base is straightforward, you can adapt how sweet or tart it is, and I sometimes adjust the zest quantity to amplify the aromatic oils. I enjoy that it plays well with so many preparations.
Quick to make, great to store
This curd comes together in a short time on the stove and keeps well in the fridge, so I can make a batch to stash for busy mornings. I like having jars ready because they make last minute desserts feel intentional and homemade. Freezing portions for longer storage also saves trips to the store.
Feels special but is accessible
One reason I reach for this recipe is that it looks and tastes like something from a bakery, yet it requires everyday items most cooks have on hand. That makes it a delightful little treat to prepare for friends, and I always recommend it to anyone who wants a high impact, low complexity recipe.
What to Buy for Perfect Lemon Curd
The beauty of Perfect Lemon Curd is its simplicity. These ingredients work together because each plays a clear role: eggs provide richness and structure, sugar balances the tartness, lemon juice and zest give brightness and aromatic oils, butter adds silk and mouthfeel, and a pinch of salt rounds the flavor. Together they transform into a luscious, spreadable curd that is greater than the sum of its parts.
- 5 large eggs: Whisk vigorously to incorporate air and create structure; eggs provide the custard base that thickens when gently cooked, giving lemon curd its smooth, silky texture. Maintain a low, steady heat and stir constantly to prevent curdling and achieve a glossy finish.
- 1 1/2 cups sugar: Sweeten evenly to balance lemon's acidity; sugar not only adds sweetness but helps stabilize the curd and contributes to the glossy texture when dissolved. Gradually combine with eggs and juice to ensure even cooking and a smooth final product.
- 1 1/4 cup freshly squeezed lemon juice about 3-4 lemons: Squeeze freshly to provide bright, natural lemon flavor and acidity that sets the curd while cutting richness; fresh juice yields cleaner, more vibrant citrus notes than bottled alternatives. Measure carefully and strain if needed to remove pulp for an ultra-smooth curd.
- 1/4 cup lemon zest: Grate finely to release concentrated citrus oils and intense lemon aroma that elevates flavor complexity; zest enhances fragrance without adding extra acidity. Use only the colored outer peel to avoid bitterness from the pith, and distribute evenly through the mixture.
- pinch of salt: Season lightly to enhance sweetness and brighten flavors; a pinch of salt rounds out the taste profile and makes the citrus notes pop. Add sparingly to avoid altering the curd's balance while improving overall flavor depth.
- 10 tablespoons butter sliced: Melt smoothly to add rich, velvety fat that enriches texture and helps the curd set with a luxurious mouthfeel; butter also contributes a subtle creaminess and sheen. Integrate gradually off heat or over very low heat to emulsify into the custard without separation.
Recipe Directions for Perfect Lemon Curd
These directions are straightforward, but they reward attention and rhythm. A steady whisk and mindful heat control are what make Perfect Lemon Curd reach that perfect glossy thickness. Keep your tools ready and focus on sensory cues rather than the clock alone.
- In a medium size saucepan over medium heat whisk the eggs and sugar until combined. Add in lemon juice, zest, and salt. Whisk for 2-3 minutes.: You will feel the mixture change as the sugar dissolves into the eggs , and you should notice the texture go from grainy to satin as you whisk, with a faint sweet aroma rising. This step sets the foundation for smoothness, so whisk briskly but calmly to avoid aerating too much. A common issue here is overheating the mix and curdling the eggs , so keep the heat moderate and stir constantly to distribute warmth evenly. If you see small coagulated bits forming, immediately reduce the heat and whisk vigorously to bring them back into the mixture, then strain later to ensure a silky finish.
- Add in the butter and continue to whisk until melted. Continue to whisk until the mixture thickens and coats the back of a spoon.: As you incorporate fresh lemon juice , the scent becomes markedly brighter and more floral thanks to the volatile oils, and the mixture will smell citrusy and clean. The zest brings an aromatic lift that you can almost taste on the inhale. Whisking here helps emulsify the acids with the egg base, which controls how the curd will thicken. A typical mistake is adding the juice too quickly on high heat, which can scramble the eggs , so keep the heat steady and fold the juice in gradually while whisking to maintain a silky texture.
- Remove from heat and strain into a bowl and let cool. Store the curd in an airtight container for up to 2 weeks. Can also freeze up to 3 months.: When sliced butter hits the warm mixture, you will hear small gentle bubbles and see glossy ribbons as it melts, contributing to a richer mouthfeel. The fat coats the proteins, lending a velvet finish and helping the curd set without becoming rubbery. Add the butter a few slices at a time so it emulsifies rather than separates; if you dump it all at once, the liquid can look greasy and may not incorporate, so patience is key. If you notice separation, keep whisking off the heat and allow the temperature to stabilize, then whisk until unified.
- Continue to whisk until the mixture thickens and coats the back of a spoon.: You will observe the curd transition from runny to noticeably thicker, leaving a clean line on the spoon when you run your finger through it. Aromas deepen, and steam becomes gentle rather than vigorous. This tactile test is more reliable than timing alone because stovetops vary; trust the coating test to know when it is done. Overcooking causes an overly firm curd with a cooked egg flavor, so stop as soon as it reaches that spoon coating stage. If you accidentally overheat and the texture becomes grainy, straining and gently rewarming with a little extra butter may help rescue it.
- Remove from heat and strain into a bowl and let cool.: Straining is where the curd becomes impeccably smooth, catching any tiny bits of cooked egg or zest fibers, and the aroma will be clean and bright as it cools. Transfer into a clean bowl and press it through a fine mesh strain to ensure a velvety finish. Cooling allows the curd to set to the right spreadable consistency; rapid cooling can cause condensation so cover lightly after it reaches room temperature. A frequent pitfall is skipping the strain, which leaves a less refined texture, so take the extra minute for a flawless result.
- Store the curd in an airtight container for up to 2 weeks.: Once cooled, the curd will feel firm yet creamy, and sealing it in a clean jar preserves flavor and prevents aroma transfer in the fridge. Label with the date, and tuck it into the back of the refrigerator where temperatures are most stable. For longer keeping, portion and freeze up to 3 months, thawing overnight in the fridge before using. A common storage mistake is leaving it uncovered, which can allow odors in and dry the surface, so always use airtight containers.
Pro Tips and Tweaks
I like to keep a few pro tips in mind when making Perfect Lemon Curd. These help with consistency and deepen flavor without adding complexity. With a little care, you can reliably produce a glossy, balanced curd every time.
- Room temperature ingredients: Allow your eggs and butter to come to room temperature so they incorporate smoothly and reduce the risk of curdling.
- Gradual heat: Cook over medium to medium low heat and whisk constantly to promote even thickening and prevent the eggs from scrambling.
- Fine zesting: Use a microplane for the lemon zest so the oils disperse evenly without bitter pith.
- Taste as you go: Sample the curd as it cools and adjust the balance by slightly increasing sugar or zest to suit your preference.
- Proper storage: Cool to room temperature before sealing in an airtight container to avoid condensation and maintain texture.
What to Serve Alongside Perfect Lemon Curd
Perfect Lemon Curd pairs effortlessly with a variety of items, and the right accompaniments can turn a jar into an elegant spreadable dessert. Below are serving ideas, occasions, and storage pointers laid out so you can pick and choose how to enjoy your curd.
- On bread and pastries: Spread on toast, croissants, or scones for a bright breakfast or brunch option that contrasts buttery pastries with citrus tang.
- As a dessert filling: Use the curd between cake layers or folded into whipped cream for a quick but elevated dessert suitable for gatherings and celebrations.
- With yogurt or ricotta: Swirl into plain yogurt or spoon over fresh ricotta for a simple, creamy treat that works well for afternoon snacks or light desserts.
- For gifting and entertaining: Jar small portions in attractive jars with labels for hostess gifts, holiday treats, or to include on dessert boards at parties.
- Storage and make ahead: Keep sealed jars in the back of the fridge for up to 2 weeks for best quality, or freeze individual portions for up to 3 months for future use.
FAQ
Conclusion
Perfect Lemon Curd shines because of its bright citrus flavor and silky texture from simple, honest ingredients. Give it a try the next time you want a quick but impressive spread or filling, and let the fresh lemon essence be the star. Once you taste the glossy, tangy curd on toast or folded into cream, I think you will understand why it becomes a pantry staple. Enjoy the process, and don’t forget to label your jars for sharing.
Perfect Lemon Curd
Equipment
- Saucepan
- Whisk
- Strain
- Bowl
Ingredients
- 5 large eggs Whisk vigorously to incorporate air and create structure; eggs provide the custard base that thickens when gently cooked, giving lemon curd its smooth, silky texture. Maintain a low, steady heat and stir constantly to prevent curdling and achieve a glossy finish.
- 1 1/2 cups sugar Sweeten evenly to balance lemon's acidity; sugar not only adds sweetness but helps stabilize the curd and contributes to the glossy texture when dissolved. Gradually combine with eggs and juice to ensure even cooking and a smooth final product.
- 1 1/4 cup freshly squeezed lemon juice about 3-4 lemons Squeeze freshly to provide bright, natural lemon flavor and acidity that sets the curd while cutting richness; fresh juice yields cleaner, more vibrant citrus notes than bottled alternatives. Measure carefully and strain if needed to remove pulp for an ultra-smooth curd.
- 1/4 cup lemon zest Grate finely to release concentrated citrus oils and intense lemon aroma that elevates flavor complexity; zest enhances fragrance without adding extra acidity. Use only the colored outer peel to avoid bitterness from the pith, and distribute evenly through the mixture.
- pinch of salt Season lightly to enhance sweetness and brighten flavors; a pinch of salt rounds out the taste profile and makes the citrus notes pop. Add sparingly to avoid altering the curd's balance while improving overall flavor depth.
- 10 tablespoons butter sliced Melt smoothly to add rich, velvety fat that enriches texture and helps the curd set with a luxurious mouthfeel; butter also contributes a subtle creaminess and sheen. Integrate gradually off heat or over very low heat to emulsify into the custard without separation.
Instructions
- In a medium size saucepan over medium heat whisk the eggs and sugar until combined. Add in lemon juice, zest, and salt. Whisk for 2-3 minutes.: You will feel the mixture change as the sugar dissolves into the eggs , and you should notice the texture go from grainy to satin as you whisk, with a faint sweet aroma rising. This step sets the foundation for smoothness, so whisk briskly but calmly to avoid aerating too much. A common issue here is overheating the mix and curdling the eggs , so keep the heat moderate and stir constantly to distribute warmth evenly. If you see small coagulated bits forming, immediately reduce the heat and whisk vigorously to bring them back into the mixture, then strain later to ensure a silky finish.
- Add in the butter and continue to whisk until melted. Continue to whisk until the mixture thickens and coats the back of a spoon.: As you incorporate fresh lemon juice , the scent becomes markedly brighter and more floral thanks to the volatile oils, and the mixture will smell citrusy and clean. The zest brings an aromatic lift that you can almost taste on the inhale. Whisking here helps emulsify the acids with the egg base, which controls how the curd will thicken. A typical mistake is adding the juice too quickly on high heat, which can scramble the eggs , so keep the heat steady and fold the juice in gradually while whisking to maintain a silky texture.
- Remove from heat and strain into a bowl and let cool. Store the curd in an airtight container for up to 2 weeks. Can also freeze up to 3 months.: When sliced butter hits the warm mixture, you will hear small gentle bubbles and see glossy ribbons as it melts, contributing to a richer mouthfeel. The fat coats the proteins, lending a velvet finish and helping the curd set without becoming rubbery. Add the butter a few slices at a time so it emulsifies rather than separates; if you dump it all at once, the liquid can look greasy and may not incorporate, so patience is key. If you notice separation, keep whisking off the heat and allow the temperature to stabilize, then whisk until unified.
- Continue to whisk until the mixture thickens and coats the back of a spoon.: You will observe the curd transition from runny to noticeably thicker, leaving a clean line on the spoon when you run your finger through it. Aromas deepen, and steam becomes gentle rather than vigorous. This tactile test is more reliable than timing alone because stovetops vary; trust the coating test to know when it is done. Overcooking causes an overly firm curd with a cooked egg flavor, so stop as soon as it reaches that spoon coating stage. If you accidentally overheat and the texture becomes grainy, straining and gently rewarming with a little extra butter may help rescue it.
- Remove from heat and strain into a bowl and let cool.: Straining is where the curd becomes impeccably smooth, catching any tiny bits of cooked egg or zest fibers, and the aroma will be clean and bright as it cools. Transfer into a clean bowl and press it through a fine mesh strain to ensure a velvety finish. Cooling allows the curd to set to the right spreadable consistency; rapid cooling can cause condensation so cover lightly after it reaches room temperature. A frequent pitfall is skipping the strain, which leaves a less refined texture, so take the extra minute for a flawless result.
- Store the curd in an airtight container for up to 2 weeks.: Once cooled, the curd will feel firm yet creamy, and sealing it in a clean jar preserves flavor and prevents aroma transfer in the fridge. Label with the date, and tuck it into the back of the refrigerator where temperatures are most stable. For longer keeping, portion and freeze up to 3 months, thawing overnight in the fridge before using. A common storage mistake is leaving it uncovered, which can allow odors in and dry the surface, so always use airtight containers.
Notes
- Room temperature ingredients: Allow your eggs and butter to come to room temperature so they incorporate smoothly and reduce the risk of curdling.
- Gradual heat: Cook over medium to medium low heat and whisk constantly to promote even thickening and prevent the eggs from scrambling.
- Fine zesting: Use a microplane for the lemon zest so the oils disperse evenly without bitter pith.
- Taste as you go: Sample the curd as it cools and adjust the balance by slightly increasing sugar or zest to suit your preference.
- Proper storage: Cool to room temperature before sealing in an airtight container to avoid condensation and maintain texture.