
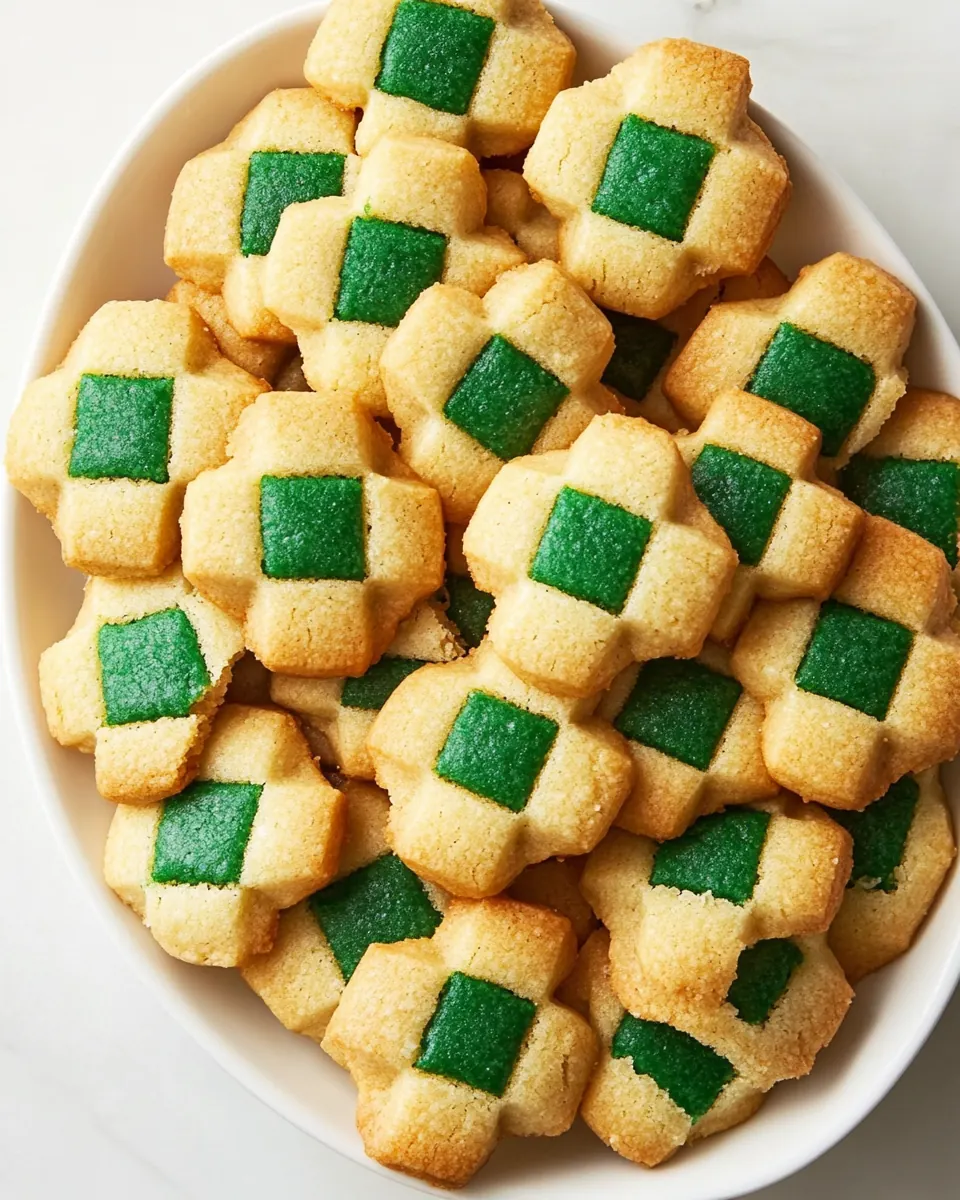
Vanilla Almond Checkerboard Cookies
Vanilla Almond Checkerboard Cookies have been a holiday staple in my kitchen for years, starting as a messy experiment that somehow turned into a family tradition. The first time I attempted these, I was juggling brightly colored dough, a sticky countertop, and a very curious toddler who insisted the black gel was “chocolate.” I remember laughing as the kitchen filled with the warm, buttery scent of butter and the sweet, nutty perfume of almond extract, convinced I had ruined the pattern but thrilled by how the flavors were coming together.
On another afternoon, I decided to push the idea further and made a batch for a neighborhood cookie swap. I packed the checkerboard logs with care, the stacked strips barely contained by plastic wrap, and when the package was opened at the event people were genuinely impressed by the playful squares. That moment taught me something I still tell friends, that a thoughtful method turns simple ingredients like all purpose flour and granulated sugar into something both visually striking and deeply comforting.
Recipe Snapshot
40 mins
30 mins
10 mins
Medium
150 kcal
American
Gluten-Free, Low FODMAP
Desserts
Stand mixer, Paddle attachment, Mixing bowl, Sharp knife, Plastic wrap, Parchment paper, Rimmed baking sheet, Wire rack, Bench scraper
Why This Vanilla Almond Checkerboard Cookies Works
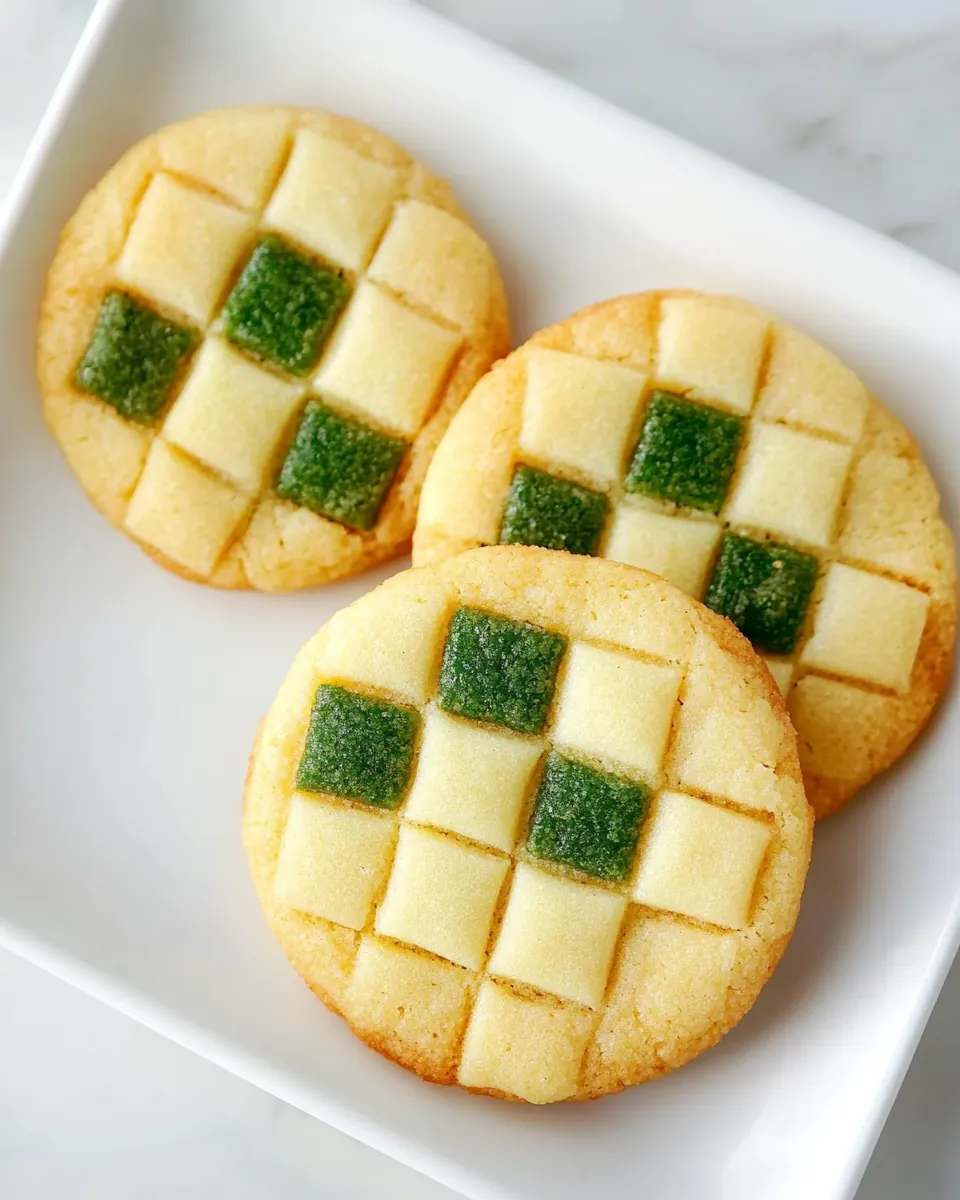
Playful visual appeal that wows
I love how Vanilla Almond Checkerboard Cookies look on a plate, they practically demand attention. The crisp squares and alternating colors feel festive, and I find the design sparks conversation every time I bring them to a gathering. Making the pattern is surprisingly meditative, and the payoff is worth the few extra minutes of assembly.
A classic buttery cookie base
The backbone of these cookies is a rich dough made from butter, granulated sugar, and all purpose flour. That simple trio gives you a tender, slightly crumbly texture that holds up when sliced, while still offering a melt in the mouth bite. I always appreciate recipes where a dependable base supports decorative techniques.
Delicate almond and vanilla flavor
Adding a touch of almond extract alongside vanilla extract elevates the flavor profile without overpowering it. I find the almond note adds a cozy warmth, while the vanilla keeps it familiar. Together they create a balanced taste that pairs beautifully with the buttery cookie texture.
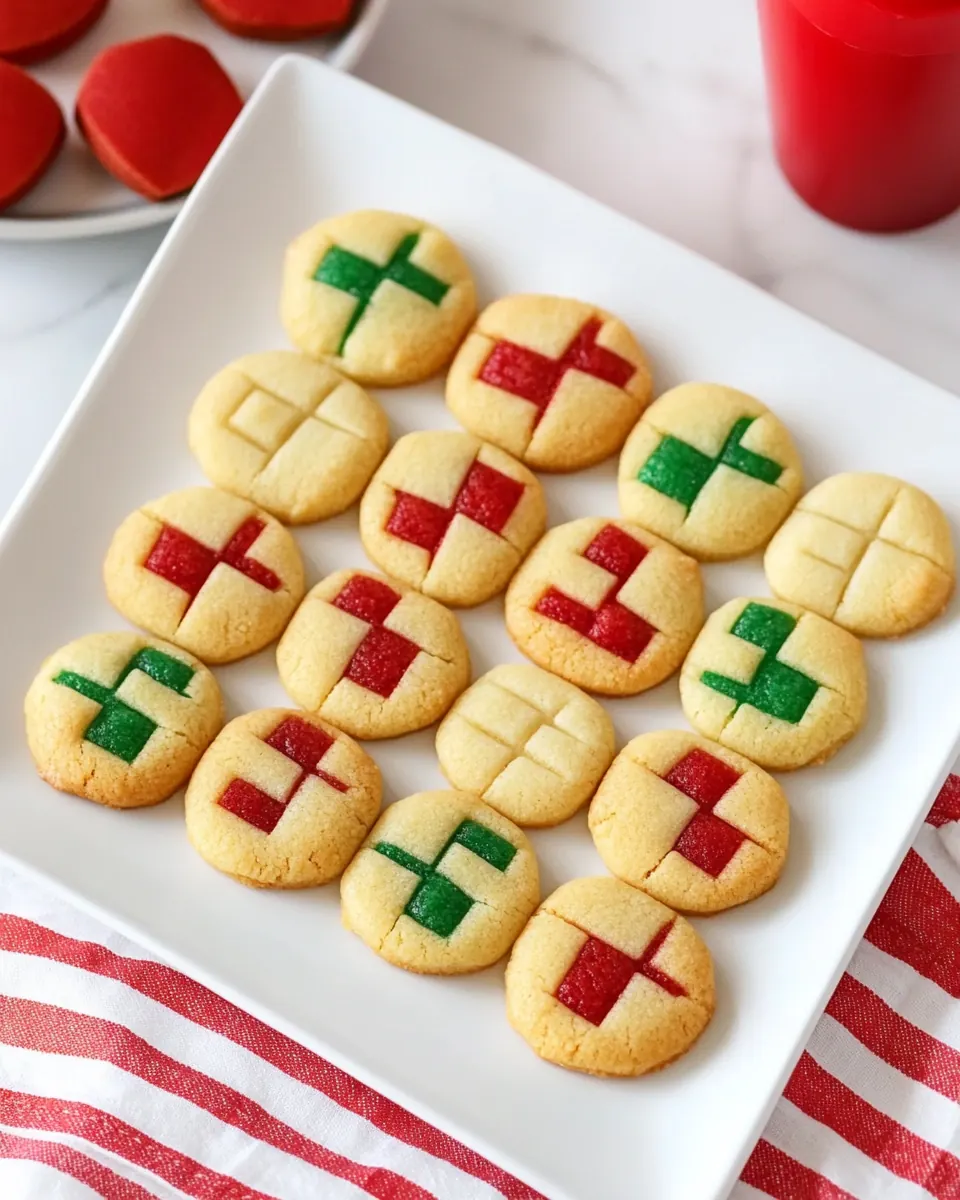
Flexible for color and creativity
These cookies are an excellent canvas. You can deepen hues with gel color, and I love how experimenting with red and green makes them holiday ready, while alternative palettes work for other celebrations. The technique rewards precision, but it also forgives imperfections, which is why I keep coming back to this recipe.
Make ahead friendly and shareable
I often prepare dough logs in advance and chill or freeze them, which makes last minute baking simple. The logs slice neatly when cold, and the cookies bake quickly, so you can produce uniform batches without late night stress. For me, that convenience is a huge part of the recipe’s appeal.
Ingredients Overview for Vanilla Almond Checkerboard Cookies
These ingredients form a straightforward, dependable dough that supports color and structure. The key players are the rich butter and the sturdy all purpose flour, while granulated sugar sweetens and helps create delicate edges. The extracts provide aroma and depth, and the gel colors let you make the striking checkerboard pattern that defines the cookie.
- 1 cup (227 grams) unsalted butter, softened: Creamed and softened to provide a rich, tender base that contributes moisture, flavor, and structure to the dough; helps create light, melt-in-your-mouth texture when properly incorporated with sugar and eggs.
- 1 cup (200 grams) granulated sugar: Granulated sugar beaten with butter to aerate the batter, contributing sweetness, tenderness, and slight crispness at the cookie edges; helps with browning through caramelization during baking.
- 2 large eggs (100 grams), room temperature: Beaten and added at room temperature to emulsify the dough, provide lift, richness, and structure; contributes moisture and helps bind dry ingredients for a cohesive cookie.
- 2 teaspoons (8 grams) vanilla extract: Added for a warm, familiar flavor note and aromatic depth; enhances the overall vanilla profile and balances the nutty almond extract.
- 1 teaspoon (4 grams) almond extract: Included to deliver a concentrated nutty aroma that complements vanilla, creating the classic almond–vanilla pairing; used sparingly to avoid overpowering the cookie.
- 3 1/3 cups (416 grams) all-purpose flour: Incorporated to provide bulk, structure, and tender crumb through gluten formation; sifted or mixed just until combined to prevent tough cookies.
- 1 1/2 teaspoons (7.5 grams) baking powder: Used as a leavening agent to create gentle rise and lightness in the cookies; balanced amount ensures subtle lift without altering the checkerboard shape.
- 1 teaspoon (3 grams) kosher salt: Added in measured quantity to enhance and balance flavors while controlling dough strength; helps manage the overall seasoning and sweetness perception.
- Red gel food coloring: Used sparingly to tint portions of the dough a vibrant red without altering texture; gel coloring provides concentrated hue with minimal liquid impact.
- Black gel food coloring: Applied sparingly to create deep black accents in the checkerboard pattern; gel format ensures intense color without thinning the dough.
- Green gel food coloring: Used to color sections of the dough green for decorative contrast; gel coloring maintains dough consistency while delivering bright, even color.
Step by Step Guide for Vanilla Almond Checkerboard Cookies
I like to walk through these steps slowly so the pattern comes out clean and the flavors stay balanced. The assembly requires patience, but the sensory rewards are immediate: buttery aroma, firm chilled dough, and the satisfying click of a sharp knife. Follow the sequence and you will end up with neat squares that bake into tender, slightly golden cookies.
- In the bowl of a stand mixer fitted with the paddle attachment, beat butter and sugar at medium speed until creamy, 2 to 3 minutes, stopping to scrape sides of bowl. Add eggs, one at a time, beating until combined after each addition. Beat in extracts.: You will notice the mixture turn pale and fluffy, releasing a rich, sweet butter scent that signals proper aeration. The creaming incorporates air essential for texture, and scraping the bowl periodically prevents pockets of unincorporated butter or sugar . If you skip scraping, the mixture may be uneven, leading to inconsistent dough. Aim for a smooth, homogeneous cream before moving on, and if the butter looks greasy you likely overbeaten it and should chill briefly.
- In a medium bowl, whisk together flour, baking powder, and salt. With mixer on low speed, gradually add flour mixture to butter mixture, beating just until a dough forms and stopping to scrape sides of bowl.: As you add each egg , the batter will become silkier and slightly glossy, the sound changing to a softer, more cohesive mixing. Adding eggs one at a time ensures they emulsify properly with the creamed butter and sugar , preventing separation. If you dump in all eggs at once, the mixture can curdle or appear lumpy; pause and scrape if you see streaks. Use room temperature eggs for smooth integration, and stop mixing as soon as each egg disappears into the batter.
- Turn out dough onto a large piece of parchment paper. Divide dough into 4 portions (about 230 grams each). Return 1 portion to bowl. Add red and black food coloring, and beat at low speed; repeat just until desired color is reached.: When the vanilla extract and almond extract are added, the aroma becomes immediately more complex and inviting, a sweet floral note from the vanilla extract and a nutty hint from the almond extract . These concentrated essences elevate the dough, but because they are potent you only need the stated amounts. Avoid over mixing at this point, and if your extracts taste especially strong, you can slightly reduce the almond extract to keep the flavor balanced.
- Clean bowl of stand mixer and paddle attachment. Place 1 portion plain dough in bowl. Add green and black food coloring, and beat at low speed; repeat just until desired color is reached. Leave remaining 2 dough portions plain.: The dry ingredients should smell faintly of grain and have a fine, even texture after whisking. This step ensures the baking powder and salt are evenly distributed, preventing pockets of leavening or salt in the cookies. If you skip whisking, some slices may puff differently or taste uneven. Take a moment to measure accurately, and if the flour seems clumpy, break it up with the whisk for a uniform mix.
- Place 1 dough portion on a sheet of plastic wrap. Shape into a 4 1/2-inch-long, 1 5/8- to 13/4-inch-wide square log. (A plastic bench scraper is a great tool for squaring sides.) Wrap dough log in plastic wrap. Repeat with remaining 3 dough portions. (It is OK if logs are not perfectly square at this point.) Refrigerate for 2 hours.: Gradual addition prevents flour clouds and overdevelopment of gluten, which would make cookies tough. The dough will transition from glossy to a soft, moldable mass, and you should stop as soon as it holds together. Over mixing after the flour goes in can yield dense cookies, so be conservative; a few streaks are better than overworked dough. If the dough appears too dry, briefly beat on low while monitoring texture, but resist the urge to rescue with extra liquid.
- Preheat oven to 400°F (200°C). Line 2 to 3 rimmed baking sheets with parchment paper.: The dough will feel cool and supple to the touch, slightly tacky but firm enough to handle. Working on parchment makes cleanup easier and prevents sticking. If the dough clings to your hands, chill it for 10 to 20 minutes so it is easier to divide and shape. Avoid adding extra flour while handling, as too much will alter the delicate texture.
- Using a sharp knife, trim sides of 1 plain dough log to create a 4 1/2-inch-long, 1 1/2-inch-wide square log. (See PRO TIP.) Slice dough log lengthwise into 3 equal strips. Stack strips; cut stacked strips in thirds lengthwise to create 9 equal strips. Wipe knife clean, and repeat procedure with red dough log.: Even portions help ensure consistent log sizes so the checkerboard pattern aligns. I weigh portions for accuracy, and you will notice the dough portion surface becomes smoother as you shape them. If portions vary greatly, the final cookie sizes will differ and slicing strategy becomes trickier. Use a bench scraper to lift dough cleanly and keep the workspace tidy.
- Arrange a red strip, a plain strip, and a red strip side by side lengthwise. Stack a plain strip, a red strip, and a plain strip side by side on top of first layer of strips. Stack a red strip, a plain strip, and a red strip side by side on top of second layer of strips to create a checkerboard-patterned rectangular log. Repeat with remaining plain and red dough strips to create another checkerboard-patterned rectangular log, but begin pattern with a plain strip, a red strip, and a plain strip. Gently press together strips of each checkerboard dough log; wrap each log in plastic wrap, and place on a small baking sheet. (Aim for sides to be as flush and flat as possible, but it is fine if some sides are uneven. You will trim them further later.) Freeze for 15 minutes. Repeat procedure with remaining plain and green dough logs.: Placing a portion back in the mixer bowl prepares it for coloring without contaminating the remaining dough. The bowl will show residual traces of dough, so a clean container helps when you switch colors. If the dough warms too much while handling, pop it in the fridge for a few minutes to firm up before coloring, otherwise the gel color might distribute unevenly.
- Using a sharp knife, trim ends of 1 dough log. Slice log crosswise into 1/4-inch-thick square cookies. Trim and square edges of sliced cookies as needed. (See PRO TIP.) Place 1 to 2 inches apart on prepared pans. Repeat with remaining logs.: As you mix in the gels, the dough will take on a glossy, saturated color. The black should be added sparingly to deepen tone without turning the red muddy. Mixing at low speed prevents splatters and allows you to watch color development. If you overadd black, the hue may become less vibrant; correct by incorporating a bit more plain dough, or start again with a fresh portion if necessary.
- Bake, one batch at a time, until bottoms are lightly golden, 6 to 8 minutes, rotating pan halfway through baking. Remove from pan, and let cool completely on wire racks. Store in an airtight container for up to 5 days.: A clean bowl prevents color contamination when making the next shade, ensuring each log remains pure. Wiping and drying the bowl also removes any warmed butter residue that could affect the next portion. Skipping this step risks dulling colors or creating unintended marbling.
- Place 1 portion plain dough in bowl: Returning a plain portion to the cleaned bowl readies it for the next color, and you will feel the dough's cool density as you press it in. Keep remaining portions wrapped to maintain chill. If the plain dough becomes too soft, refrigerate it briefly to make coloring easier and cleaner.
- Add green and black food coloring, and beat at low speed; repeat just until desired color is reached: The green will spread and deepen with each pass, and small additions of black will help reach a richer shade without dulling the vibrancy. Work slowly to avoid overworking the dough, which can warm it. If the green looks uneven, stop and fold gently with a spatula to finish mixing by hand.
- Leave remaining 2 dough portions plain: Keeping two portions uncolored gives you the contrasting neutral strips needed for the checkerboard. The plain dough will showcase the extracts and buttery notes, and its pale tone helps the colored strips pop. Keep these portions chilled until you're ready to shape them.
- Place 1 dough portion on a sheet of plastic wrap: Laying dough onto plastic wrap makes it easier to roll and shape into a log without sticking. The dough will feel pliable and slightly tacky, and the wrap lets you compress and square the sides neatly. If the dough resists shaping, chill it briefly so it firms up and becomes easier to square.
- Shape into a 4 1/2-inch-long, 1 5/8- to 13/4-inch-wide square log: Using your hands or a bench scraper, you will form a rough square. The edges do not need to be perfect, but aim for uniform thickness for even slices. A slightly warm dough will slump, so keep it cool and work quickly. If the edges gape, press gently and rewrap to rest in the fridge before final trimming.
- (A plastic bench scraper is a great tool for squaring sides.): The bench scraper helps make clean corners and straight sides, and you will see the dough take on crisp lines that translate to neat slices. If you lack one, use the straight edge of a ruler wrapped in plastic, but be careful not to tear the wrap. Avoid over handling which can soften and distort the shape.
- Wrap dough log in plastic wrap: Wrapping seals in moisture and prevents surface drying, and chilling in wrap helps the dough retain its shape during trimming. You will notice the log becomes firmer after chilling. If unwrapped, the surface can form a thin skin that affects slicing precision.
- Repeat with remaining 3 dough portions: Working systematically ensures you have matching logs for assembly, and handling each portion the same way yields consistent logs. Keep completed logs chilled to maintain firmness, and if one log softens, return it to the fridge to avoid deformation during the next steps.
- Refrigerate for 2 hours: Chilling allows the butter to firm and flavors to meld, producing clean slices and minimal spreading in the oven. The dough will feel noticeably firmer when ready, almost cold to the touch. Rushing this step often results in misshapen cookies, so be patient and use this time to tidy the workspace.
- Preheat oven to 400°F (200°C): The oven should be fully heated so cookies bake quickly and set without excessive spreading. You will hear the oven fan settle and feel a consistent heat when the temperature is reached. An oven that is not hot enough can lead to pale, greasy bottoms, so use an oven thermometer if your appliance runs cool or hot.
- Line 2 to 3 rimmed baking sheets with parchment paper: Parchment prevents sticking and promotes even browning on the bottoms, and rimmed sheets keep any small crumbs contained. The lined sheets also help you move batches in and out quickly. Avoid using a greased sheet which can accelerate spreading.
- Using a sharp knife, trim sides of 1 plain dough log to create a 4 1/2-inch-long, 1 1/2-inch-wide square log: Trimming creates precise edges that make the checkerboard align, and a clean, sharp knife gives clean cuts without tearing. You will see small strips removed and a much neater log remain. Dull knives can drag and compress the dough, so sharpen or clean the blade between cuts for crisp edges.
- Slice dough log lengthwise into 3 equal strips: The slices should be even and reveal a smooth interior grain of dough. Even strips make the stacking process predictable, and you will notice the satisfying clean edges when the knife is sharp. Uneven strips lead to a skewed pattern, so measure or eye carefully for uniformity.
- Stack strips; cut stacked strips in thirds lengthwise to create 9 equal strips: Stacking and slicing improves speed and consistency, and you will end up with narrow, uniform strips that form the checkerboard squares. Keep the stack aligned, and wipe the knife between passes to maintain clean lines. If the stack slips, press gently along the edge to realign before continuing.
- Wipe knife clean, and repeat procedure with red dough log: Cleaning the knife prevents color transfer that would muddy the pattern, and a clean blade maintains sharp, bright edges. If you fail to clean the knife, the red might streak into the plain strips, reducing contrast. Take a moment to keep tools tidy for best results.
- Arrange a red strip, a plain strip, and a red strip side by side lengthwise: Laying strips in this order creates the foundational layer of the checkerboard, and you will see the contrast begin to emerge. Pressing gently helps maintain contact between strips so they adhere when stacked. If strips gap, press lightly to close seams and ensure they will hold during final slicing.
- Stack a plain strip, a red strip, and a plain strip side by side on top of first layer of strips: Building the second layer forms the alternating pattern, and you will notice the checkerboard starting to look very tidy. Align edges for a seamless result, and use light pressure to avoid squashing the pattern. Misaligned strips can be nudged into place before wrapping and chilling.
- Stack a red strip, a plain strip, and a red strip side by side on top of second layer of strips to create a checkerboard-patterned rectangular log: The three layer stack locks the pattern into a block that can be trimmed and sliced, and by now you will be pleased at how the squares line up. Press just enough to make contact, but avoid compressing the dough so much that the squares lose their definition. If the log bulges, rewrap and chill before final trimming.
- Repeat with remaining plain and red dough strips to create another checkerboard-patterned rectangular log, but begin pattern with a plain strip, a red strip, and a plain strip: Starting the second log with the opposite sequence gives you mirrored patterns across your batch, which is visually appealing when plated. Consistency in strip width is crucial so both logs bake evenly. If one log differs noticeably, trim and adjust to match before freezing.
- Gently press together strips of each checkerboard dough log; wrap each log in plastic wrap, and place on a small baking sheet: Wrapping stabilizes the pattern and keeps surfaces smooth, and placing on a sheet makes transferring to the freezer easy. Gentle pressing ensures seams adhere without crushing the squares. If seams are loose, a touch more pressure and a short chill will help them bond.
- (Aim for sides to be as flush and flat as possible, but it is fine if some sides are uneven. You will trim them further later.): Imperfect edges are normal at this stage, and the later trimming step is designed to give you exact squares. Focus on overall alignment rather than perfection. If sides are very uneven, a brief freeze can firm the dough and make trimming cleaner.
- Freeze for 15 minutes: A short freeze firms the log so it can be trimmed and sliced cleanly, and you will notice the dough changes from pliable to firm but not rock hard. This quick chill stabilizes the pattern and reduces smearing when you cut. If you skip freezing, the dough may compress and the checkerboard can blur during slicing.
- Repeat procedure with remaining plain and green dough logs: Creating the green variation gives you more color options and a festive batch. Follow the same stacking logic for consistent results, and keep logs chilled until ready to trim. If colors mix unintentionally, return to the freezer to firm up before correcting.
- Using a sharp knife, trim ends of 1 dough log: Cleanly trimmed ends reveal the checkerboard and remove any compression or imperfections from handling. The scent of butter and extracts becomes more pronounced as the exposed dough cools slightly. Dull blades cause ragged edges, so use a sharp, clean knife for crisp results.
- Slice log crosswise into 1/4-inch-thick square cookies: As you slice, you will hear a clean, satisfying cut and see perfect little checkerboard faces emerge. Uniform thickness ensures even baking, giving you consistent texture across the batch. If slices are uneven, the thinner ones will brown faster, so aim for steady, careful cuts with a steady hand.
- Trim and square edges of sliced cookies as needed: Small adjustments will sharpen corners and improve presentation, and you may notice a few slices need minor cleanup. Use the knife to square off any ragged bits and keep a trimmed discard for later reworking. If too much is trimmed away, press scraps back together for a marbled snack as suggested in the notes.
- (See PRO TIP.): Pro tips help rescue scraps and optimize baking, and following them can save time and reduce waste. If a step feels uncertain, consult the pro tip to avoid common pitfalls like overly soft transfer or insufficient chilling.
- Place 1 to 2 inches apart on prepared pans: Give cookies room to breathe so edges crisp slightly while centers remain tender; you will smell butter as edges begin to color in the oven. Crowding causes uneven browning and can ruin the pattern, so space them evenly. If your logs produced irregular slices, arrange them so thinner ones have more space to avoid overbrowning.
- Repeat with remaining logs: Working in batches keeps cookies uniform and lets you manage oven space, and the rhythm of slicing and arranging speeds up with practice. Keep unbaked slices chilled while you work to preserve shape. If your countertop gets warm, return trays to the fridge briefly before baking.
- Bake, one batch at a time, until bottoms are lightly golden, 6 to 8 minutes, rotating pan halfway through baking: The kitchen will fill with a toasty, buttery aroma as the edges take on a soft golden color, and rotating ensures even browning. Watch closely in the final minutes, as they can go from pale to overdone quickly. If cookies puff excessively, your dough was likely too warm, so chill the remaining slices before baking.
- Remove from pan, and let cool completely on wire racks: Cooling on racks prevents steam from softening the bottoms and preserves a delicate crispness. You will see the cookies set and firm as they cool, and handling them too soon can deform them. If cookies stick, let them cool another minute or two; they will release cleanly once they have set.
- Store in an airtight container for up to 5 days: Proper storage maintains freshness and texture, and the cookies will stay tender but slightly crisp at the edges. If you need longer storage, freeze the logs before slicing or freeze baked cookies with parchment between layers. Avoid humid storage which can soften the edges prematurely.
Recipe Tips about Vanilla Almond Checkerboard Cookies
These practical tips will help you get crisp patterning, vibrant color, and even baking every time. Follow them to minimize common mistakes and to streamline the process from dough to cooling racks.
- Measure precisely: Weighing ingredients like butter and all purpose flour keeps dough texture consistent and makes portioning into equal logs much easier.
- Work cold: Keep dough chilled between shaping steps to avoid color bleeding and to preserve square edges during trimming and slicing.
- Add color slowly: Especially with black gel food coloring, introduce tiny amounts and mix fully before deciding to add more to prevent muddy shades.
- Use a sharp knife: A razor sharp blade yields clean cuts and defined checkerboard squares, and wiping it between cuts prevents color transfer.
- Freeze briefly before slicing: A short freeze firms the log for neat slicing without cracking or smearing the pattern.
- Repurpose trimmings: Combine scraps to make marbled cookies, rolling between parchment for an attractive, zero waste treat.
Accompaniments for Vanilla Almond Checkerboard Cookies
These cookies pair well with simple drinks and make a lovely addition to dessert plates for holidays or casual gatherings. I like to present them with contrasting textures and small bites for a complete cookie spread. Store extras properly to maintain crunch or plan to freeze logs for future baking sessions.
- Serve with warm tea: A cup of warm tea highlights the buttery and almond notes without overwhelming the cookie’s delicate flavor.
- Include a variety of cookies: Plate these checkerboards alongside soft chewy cookies to offer textural contrast for parties or cookie swaps.
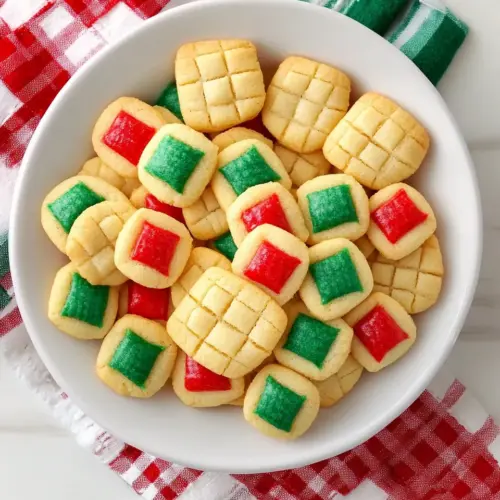
- Use for holiday platters: Their festive colors and pattern make them ideal for seasonal dessert tables and gift tins.
- Storage tip: Keep cookies in an airtight container at room temperature for up to five days, placing parchment between layers to avoid sticking.
- Freeze option: Freeze wrapped logs before slicing to store dough for months and slice as needed for fresh baking.
- Presentation: Arrange cookies on a flat tray in uniform rows to showcase the checkerboard pattern and make serving effortless.
FAQ
Conclusion
These Vanilla Almond Checkerboard Cookies stand out because they combine a reliably tender, buttery dough with playful, eye catching presentation that feels both nostalgic and special. Give them a try when you want a cookie that looks like a showstopper but is surprisingly manageable to make, especially when you plan ahead and chill the logs. I hope you enjoy the process of assembling the checkerboard as much as I do, and that these cookies become a festive favorite at your next gathering.
Vanilla Almond Checkerboard Cookies
Equipment
- Stand mixer
- Paddle attachment
- Mixing Bowl
- Sharp Knife
- Plastic Wrap
- Parchment Paper
- Rimmed Baking Sheet
- Wire Rack
- Bench scraper
Ingredients
- 1 cup (227 grams) unsalted butter, softened Creamed and softened to provide a rich, tender base that contributes moisture, flavor, and structure to the dough; helps create light, melt-in-your-mouth texture when properly incorporated with sugar and eggs.
- 1 cup (200 grams) granulated sugar Granulated sugar beaten with butter to aerate the batter, contributing sweetness, tenderness, and slight crispness at the cookie edges; helps with browning through caramelization during baking.
- 2 large eggs (100 grams), room temperature Beaten and added at room temperature to emulsify the dough, provide lift, richness, and structure; contributes moisture and helps bind dry ingredients for a cohesive cookie.
- 2 teaspoons (8 grams) vanilla extract Added for a warm, familiar flavor note and aromatic depth; enhances the overall vanilla profile and balances the nutty almond extract.
- 1 teaspoon (4 grams) almond extract Included to deliver a concentrated nutty aroma that complements vanilla, creating the classic almond-vanilla pairing; used sparingly to avoid overpowering the cookie.
- 3 1/3 cups (416 grams) all-purpose flour Incorporated to provide bulk, structure, and tender crumb through gluten formation; sifted or mixed just until combined to prevent tough cookies.
- 1 1/2 teaspoons (7.5 grams) baking powder Used as a leavening agent to create gentle rise and lightness in the cookies; balanced amount ensures subtle lift without altering the checkerboard shape.
- 1 teaspoon (3 grams) kosher salt Added in measured quantity to enhance and balance flavors while controlling dough strength; helps manage the overall seasoning and sweetness perception.
- Red gel food coloring Used sparingly to tint portions of the dough a vibrant red without altering texture; gel coloring provides concentrated hue with minimal liquid impact.
- Black gel food coloring Applied sparingly to create deep black accents in the checkerboard pattern; gel format ensures intense color without thinning the dough.
- Green gel food coloring Used to color sections of the dough green for decorative contrast; gel coloring maintains dough consistency while delivering bright, even color.
Instructions
- In the bowl of a stand mixer fitted with the paddle attachment, beat butter and sugar at medium speed until creamy, 2 to 3 minutes, stopping to scrape sides of bowl. Add eggs, one at a time, beating until combined after each addition. Beat in extracts.: You will notice the mixture turn pale and fluffy, releasing a rich, sweet butter scent that signals proper aeration. The creaming incorporates air essential for texture, and scraping the bowl periodically prevents pockets of unincorporated butter or sugar . If you skip scraping, the mixture may be uneven, leading to inconsistent dough. Aim for a smooth, homogeneous cream before moving on, and if the butter looks greasy you likely overbeaten it and should chill briefly.
- In a medium bowl, whisk together flour, baking powder, and salt. With mixer on low speed, gradually add flour mixture to butter mixture, beating just until a dough forms and stopping to scrape sides of bowl.: As you add each egg , the batter will become silkier and slightly glossy, the sound changing to a softer, more cohesive mixing. Adding eggs one at a time ensures they emulsify properly with the creamed butter and sugar , preventing separation. If you dump in all eggs at once, the mixture can curdle or appear lumpy; pause and scrape if you see streaks. Use room temperature eggs for smooth integration, and stop mixing as soon as each egg disappears into the batter.
- Turn out dough onto a large piece of parchment paper. Divide dough into 4 portions (about 230 grams each). Return 1 portion to bowl. Add red and black food coloring, and beat at low speed; repeat just until desired color is reached.: When the vanilla extract and almond extract are added, the aroma becomes immediately more complex and inviting, a sweet floral note from the vanilla extract and a nutty hint from the almond extract . These concentrated essences elevate the dough, but because they are potent you only need the stated amounts. Avoid over mixing at this point, and if your extracts taste especially strong, you can slightly reduce the almond extract to keep the flavor balanced.
- Clean bowl of stand mixer and paddle attachment. Place 1 portion plain dough in bowl. Add green and black food coloring, and beat at low speed; repeat just until desired color is reached. Leave remaining 2 dough portions plain.: The dry ingredients should smell faintly of grain and have a fine, even texture after whisking. This step ensures the baking powder and salt are evenly distributed, preventing pockets of leavening or salt in the cookies. If you skip whisking, some slices may puff differently or taste uneven. Take a moment to measure accurately, and if the flour seems clumpy, break it up with the whisk for a uniform mix.
- Place 1 dough portion on a sheet of plastic wrap. Shape into a 4 1/2-inch-long, 1 5/8- to 13/4-inch-wide square log. (A plastic bench scraper is a great tool for squaring sides.) Wrap dough log in plastic wrap. Repeat with remaining 3 dough portions. (It is OK if logs are not perfectly square at this point.) Refrigerate for 2 hours.: Gradual addition prevents flour clouds and overdevelopment of gluten, which would make cookies tough. The dough will transition from glossy to a soft, moldable mass, and you should stop as soon as it holds together. Over mixing after the flour goes in can yield dense cookies, so be conservative; a few streaks are better than overworked dough. If the dough appears too dry, briefly beat on low while monitoring texture, but resist the urge to rescue with extra liquid.
- Preheat oven to 400°F (200°C). Line 2 to 3 rimmed baking sheets with parchment paper.: The dough will feel cool and supple to the touch, slightly tacky but firm enough to handle. Working on parchment makes cleanup easier and prevents sticking. If the dough clings to your hands, chill it for 10 to 20 minutes so it is easier to divide and shape. Avoid adding extra flour while handling, as too much will alter the delicate texture.
- Using a sharp knife, trim sides of 1 plain dough log to create a 4 1/2-inch-long, 1 1/2-inch-wide square log. (See PRO TIP.) Slice dough log lengthwise into 3 equal strips. Stack strips; cut stacked strips in thirds lengthwise to create 9 equal strips. Wipe knife clean, and repeat procedure with red dough log.: Even portions help ensure consistent log sizes so the checkerboard pattern aligns. I weigh portions for accuracy, and you will notice the dough portion surface becomes smoother as you shape them. If portions vary greatly, the final cookie sizes will differ and slicing strategy becomes trickier. Use a bench scraper to lift dough cleanly and keep the workspace tidy.
- Arrange a red strip, a plain strip, and a red strip side by side lengthwise. Stack a plain strip, a red strip, and a plain strip side by side on top of first layer of strips. Stack a red strip, a plain strip, and a red strip side by side on top of second layer of strips to create a checkerboard-patterned rectangular log. Repeat with remaining plain and red dough strips to create another checkerboard-patterned rectangular log, but begin pattern with a plain strip, a red strip, and a plain strip. Gently press together strips of each checkerboard dough log; wrap each log in plastic wrap, and place on a small baking sheet. (Aim for sides to be as flush and flat as possible, but it is fine if some sides are uneven. You will trim them further later.) Freeze for 15 minutes. Repeat procedure with remaining plain and green dough logs.: Placing a portion back in the mixer bowl prepares it for coloring without contaminating the remaining dough. The bowl will show residual traces of dough, so a clean container helps when you switch colors. If the dough warms too much while handling, pop it in the fridge for a few minutes to firm up before coloring, otherwise the gel color might distribute unevenly.
- Using a sharp knife, trim ends of 1 dough log. Slice log crosswise into 1/4-inch-thick square cookies. Trim and square edges of sliced cookies as needed. (See PRO TIP.) Place 1 to 2 inches apart on prepared pans. Repeat with remaining logs.: As you mix in the gels, the dough will take on a glossy, saturated color. The black should be added sparingly to deepen tone without turning the red muddy. Mixing at low speed prevents splatters and allows you to watch color development. If you overadd black, the hue may become less vibrant; correct by incorporating a bit more plain dough, or start again with a fresh portion if necessary.
- Bake, one batch at a time, until bottoms are lightly golden, 6 to 8 minutes, rotating pan halfway through baking. Remove from pan, and let cool completely on wire racks. Store in an airtight container for up to 5 days.: A clean bowl prevents color contamination when making the next shade, ensuring each log remains pure. Wiping and drying the bowl also removes any warmed butter residue that could affect the next portion. Skipping this step risks dulling colors or creating unintended marbling.
- Place 1 portion plain dough in bowl: Returning a plain portion to the cleaned bowl readies it for the next color, and you will feel the dough's cool density as you press it in. Keep remaining portions wrapped to maintain chill. If the plain dough becomes too soft, refrigerate it briefly to make coloring easier and cleaner.
- Add green and black food coloring, and beat at low speed; repeat just until desired color is reached: The green will spread and deepen with each pass, and small additions of black will help reach a richer shade without dulling the vibrancy. Work slowly to avoid overworking the dough, which can warm it. If the green looks uneven, stop and fold gently with a spatula to finish mixing by hand.
- Leave remaining 2 dough portions plain: Keeping two portions uncolored gives you the contrasting neutral strips needed for the checkerboard. The plain dough will showcase the extracts and buttery notes, and its pale tone helps the colored strips pop. Keep these portions chilled until you're ready to shape them.
- Place 1 dough portion on a sheet of plastic wrap: Laying dough onto plastic wrap makes it easier to roll and shape into a log without sticking. The dough will feel pliable and slightly tacky, and the wrap lets you compress and square the sides neatly. If the dough resists shaping, chill it briefly so it firms up and becomes easier to square.
- Shape into a 4 1/2-inch-long, 1 5/8- to 13/4-inch-wide square log: Using your hands or a bench scraper, you will form a rough square. The edges do not need to be perfect, but aim for uniform thickness for even slices. A slightly warm dough will slump, so keep it cool and work quickly. If the edges gape, press gently and rewrap to rest in the fridge before final trimming.
- (A plastic bench scraper is a great tool for squaring sides.): The bench scraper helps make clean corners and straight sides, and you will see the dough take on crisp lines that translate to neat slices. If you lack one, use the straight edge of a ruler wrapped in plastic, but be careful not to tear the wrap. Avoid over handling which can soften and distort the shape.
- Wrap dough log in plastic wrap: Wrapping seals in moisture and prevents surface drying, and chilling in wrap helps the dough retain its shape during trimming. You will notice the log becomes firmer after chilling. If unwrapped, the surface can form a thin skin that affects slicing precision.
- Repeat with remaining 3 dough portions: Working systematically ensures you have matching logs for assembly, and handling each portion the same way yields consistent logs. Keep completed logs chilled to maintain firmness, and if one log softens, return it to the fridge to avoid deformation during the next steps.
- Refrigerate for 2 hours: Chilling allows the butter to firm and flavors to meld, producing clean slices and minimal spreading in the oven. The dough will feel noticeably firmer when ready, almost cold to the touch. Rushing this step often results in misshapen cookies, so be patient and use this time to tidy the workspace.
- Preheat oven to 400°F (200°C): The oven should be fully heated so cookies bake quickly and set without excessive spreading. You will hear the oven fan settle and feel a consistent heat when the temperature is reached. An oven that is not hot enough can lead to pale, greasy bottoms, so use an oven thermometer if your appliance runs cool or hot.
- Line 2 to 3 rimmed baking sheets with parchment paper: Parchment prevents sticking and promotes even browning on the bottoms, and rimmed sheets keep any small crumbs contained. The lined sheets also help you move batches in and out quickly. Avoid using a greased sheet which can accelerate spreading.
- Using a sharp knife, trim sides of 1 plain dough log to create a 4 1/2-inch-long, 1 1/2-inch-wide square log: Trimming creates precise edges that make the checkerboard align, and a clean, sharp knife gives clean cuts without tearing. You will see small strips removed and a much neater log remain. Dull knives can drag and compress the dough, so sharpen or clean the blade between cuts for crisp edges.
- Slice dough log lengthwise into 3 equal strips: The slices should be even and reveal a smooth interior grain of dough. Even strips make the stacking process predictable, and you will notice the satisfying clean edges when the knife is sharp. Uneven strips lead to a skewed pattern, so measure or eye carefully for uniformity.
- Stack strips; cut stacked strips in thirds lengthwise to create 9 equal strips: Stacking and slicing improves speed and consistency, and you will end up with narrow, uniform strips that form the checkerboard squares. Keep the stack aligned, and wipe the knife between passes to maintain clean lines. If the stack slips, press gently along the edge to realign before continuing.
- Wipe knife clean, and repeat procedure with red dough log: Cleaning the knife prevents color transfer that would muddy the pattern, and a clean blade maintains sharp, bright edges. If you fail to clean the knife, the red might streak into the plain strips, reducing contrast. Take a moment to keep tools tidy for best results.
- Arrange a red strip, a plain strip, and a red strip side by side lengthwise: Laying strips in this order creates the foundational layer of the checkerboard, and you will see the contrast begin to emerge. Pressing gently helps maintain contact between strips so they adhere when stacked. If strips gap, press lightly to close seams and ensure they will hold during final slicing.
- Stack a plain strip, a red strip, and a plain strip side by side on top of first layer of strips: Building the second layer forms the alternating pattern, and you will notice the checkerboard starting to look very tidy. Align edges for a seamless result, and use light pressure to avoid squashing the pattern. Misaligned strips can be nudged into place before wrapping and chilling.
- Stack a red strip, a plain strip, and a red strip side by side on top of second layer of strips to create a checkerboard-patterned rectangular log: The three layer stack locks the pattern into a block that can be trimmed and sliced, and by now you will be pleased at how the squares line up. Press just enough to make contact, but avoid compressing the dough so much that the squares lose their definition. If the log bulges, rewrap and chill before final trimming.
- Repeat with remaining plain and red dough strips to create another checkerboard-patterned rectangular log, but begin pattern with a plain strip, a red strip, and a plain strip: Starting the second log with the opposite sequence gives you mirrored patterns across your batch, which is visually appealing when plated. Consistency in strip width is crucial so both logs bake evenly. If one log differs noticeably, trim and adjust to match before freezing.
- Gently press together strips of each checkerboard dough log; wrap each log in plastic wrap, and place on a small baking sheet: Wrapping stabilizes the pattern and keeps surfaces smooth, and placing on a sheet makes transferring to the freezer easy. Gentle pressing ensures seams adhere without crushing the squares. If seams are loose, a touch more pressure and a short chill will help them bond.
- (Aim for sides to be as flush and flat as possible, but it is fine if some sides are uneven. You will trim them further later.): Imperfect edges are normal at this stage, and the later trimming step is designed to give you exact squares. Focus on overall alignment rather than perfection. If sides are very uneven, a brief freeze can firm the dough and make trimming cleaner.
- Freeze for 15 minutes: A short freeze firms the log so it can be trimmed and sliced cleanly, and you will notice the dough changes from pliable to firm but not rock hard. This quick chill stabilizes the pattern and reduces smearing when you cut. If you skip freezing, the dough may compress and the checkerboard can blur during slicing.
- Repeat procedure with remaining plain and green dough logs: Creating the green variation gives you more color options and a festive batch. Follow the same stacking logic for consistent results, and keep logs chilled until ready to trim. If colors mix unintentionally, return to the freezer to firm up before correcting.
- Using a sharp knife, trim ends of 1 dough log: Cleanly trimmed ends reveal the checkerboard and remove any compression or imperfections from handling. The scent of butter and extracts becomes more pronounced as the exposed dough cools slightly. Dull blades cause ragged edges, so use a sharp, clean knife for crisp results.
- Slice log crosswise into 1/4-inch-thick square cookies: As you slice, you will hear a clean, satisfying cut and see perfect little checkerboard faces emerge. Uniform thickness ensures even baking, giving you consistent texture across the batch. If slices are uneven, the thinner ones will brown faster, so aim for steady, careful cuts with a steady hand.
- Trim and square edges of sliced cookies as needed: Small adjustments will sharpen corners and improve presentation, and you may notice a few slices need minor cleanup. Use the knife to square off any ragged bits and keep a trimmed discard for later reworking. If too much is trimmed away, press scraps back together for a marbled snack as suggested in the notes.
- (See PRO TIP.): Pro tips help rescue scraps and optimize baking, and following them can save time and reduce waste. If a step feels uncertain, consult the pro tip to avoid common pitfalls like overly soft transfer or insufficient chilling.
- Place 1 to 2 inches apart on prepared pans: Give cookies room to breathe so edges crisp slightly while centers remain tender; you will smell butter as edges begin to color in the oven. Crowding causes uneven browning and can ruin the pattern, so space them evenly. If your logs produced irregular slices, arrange them so thinner ones have more space to avoid overbrowning.
- Repeat with remaining logs: Working in batches keeps cookies uniform and lets you manage oven space, and the rhythm of slicing and arranging speeds up with practice. Keep unbaked slices chilled while you work to preserve shape. If your countertop gets warm, return trays to the fridge briefly before baking.
- Bake, one batch at a time, until bottoms are lightly golden, 6 to 8 minutes, rotating pan halfway through baking: The kitchen will fill with a toasty, buttery aroma as the edges take on a soft golden color, and rotating ensures even browning. Watch closely in the final minutes, as they can go from pale to overdone quickly. If cookies puff excessively, your dough was likely too warm, so chill the remaining slices before baking.
- Remove from pan, and let cool completely on wire racks: Cooling on racks prevents steam from softening the bottoms and preserves a delicate crispness. You will see the cookies set and firm as they cool, and handling them too soon can deform them. If cookies stick, let them cool another minute or two; they will release cleanly once they have set.
- Store in an airtight container for up to 5 days: Proper storage maintains freshness and texture, and the cookies will stay tender but slightly crisp at the edges. If you need longer storage, freeze the logs before slicing or freeze baked cookies with parchment between layers. Avoid humid storage which can soften the edges prematurely.
Notes
- Measure precisely: Weighing ingredients like butter and all purpose flour keeps dough texture consistent and makes portioning into equal logs much easier.
- Work cold: Keep dough chilled between shaping steps to avoid color bleeding and to preserve square edges during trimming and slicing.
- Add color slowly: Especially with black gel food coloring, introduce tiny amounts and mix fully before deciding to add more to prevent muddy shades.
- Use a sharp knife: A razor sharp blade yields clean cuts and defined checkerboard squares, and wiping it between cuts prevents color transfer.
- Freeze briefly before slicing: A short freeze firms the log for neat slicing without cracking or smearing the pattern.
- Repurpose trimmings: Combine scraps to make marbled cookies, rolling between parchment for an attractive, zero waste treat.