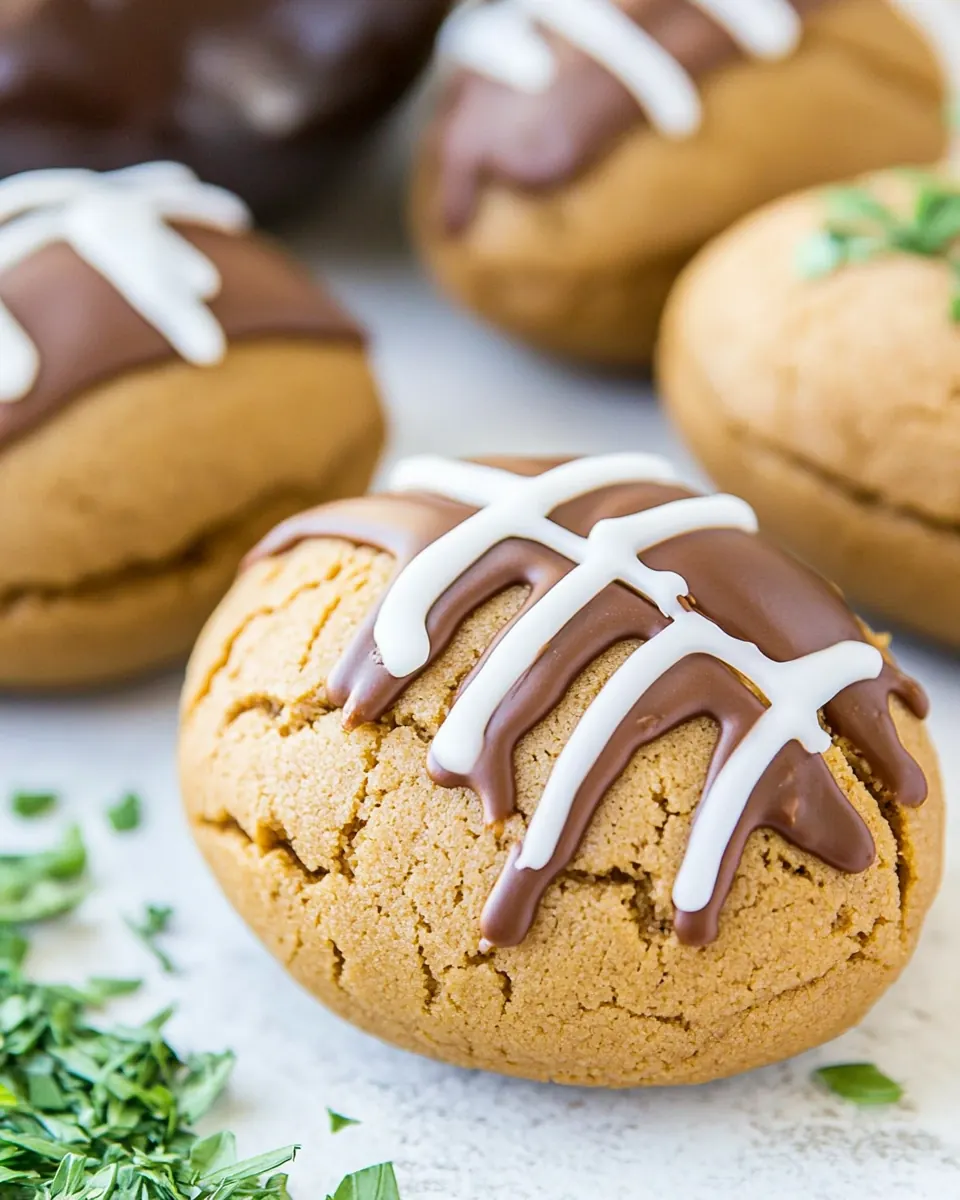
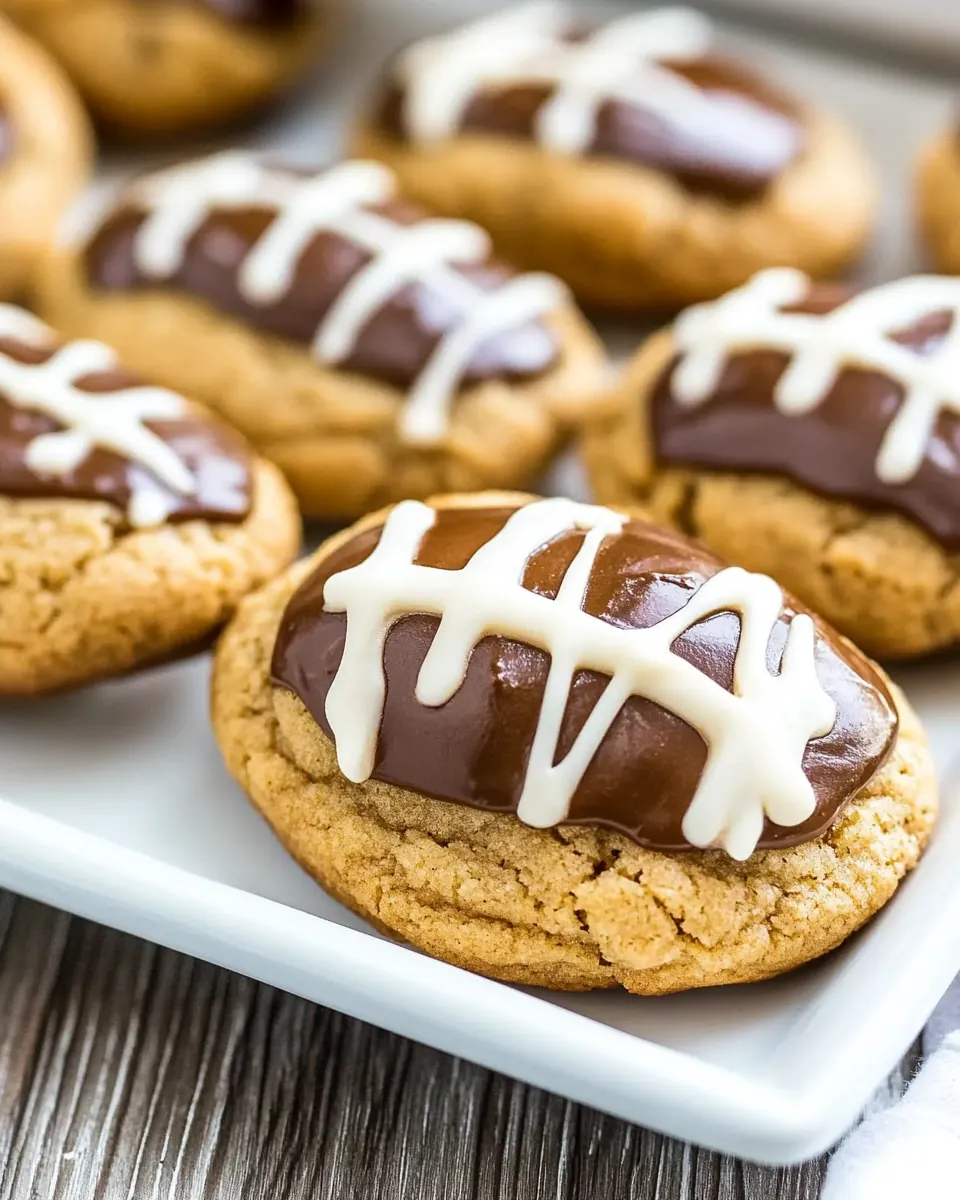
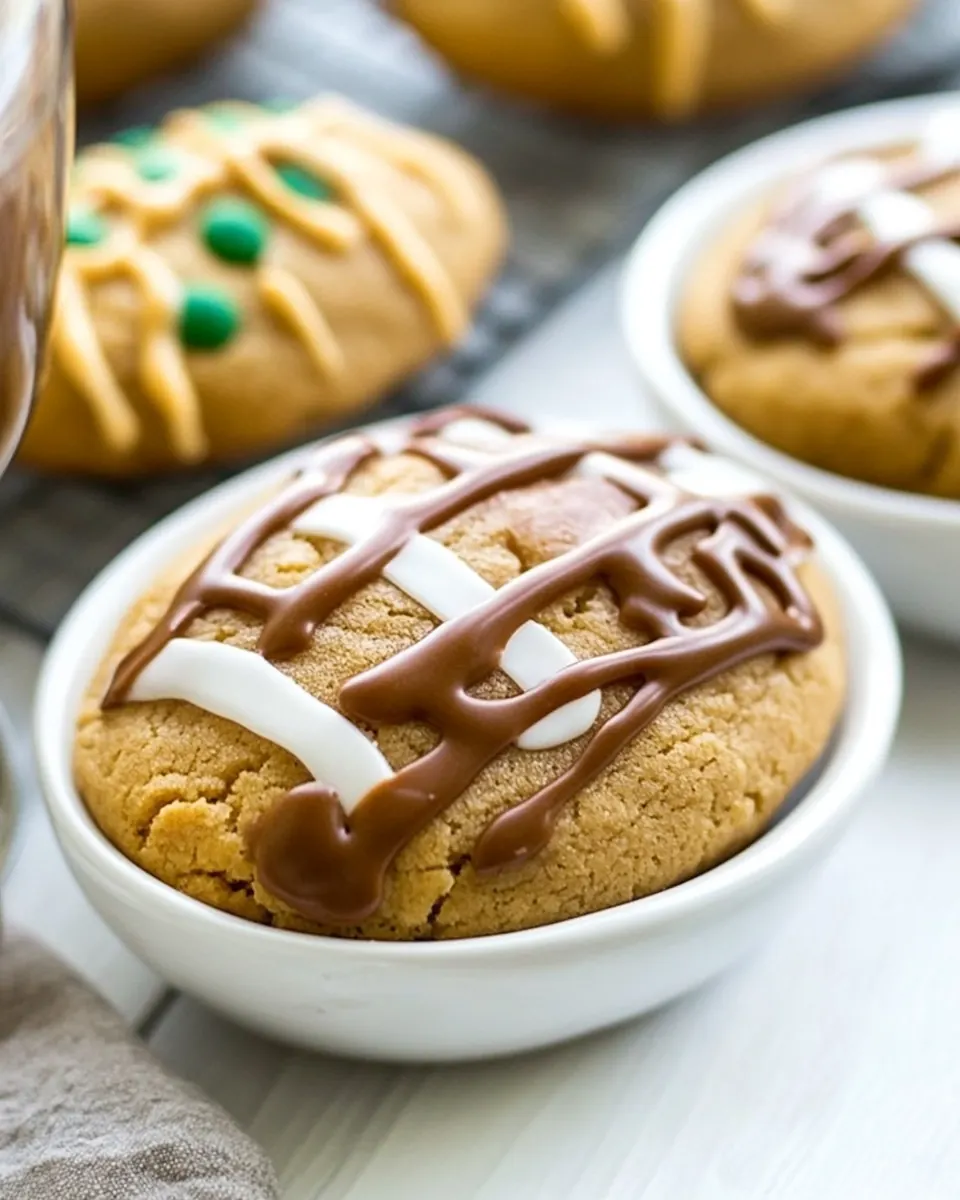
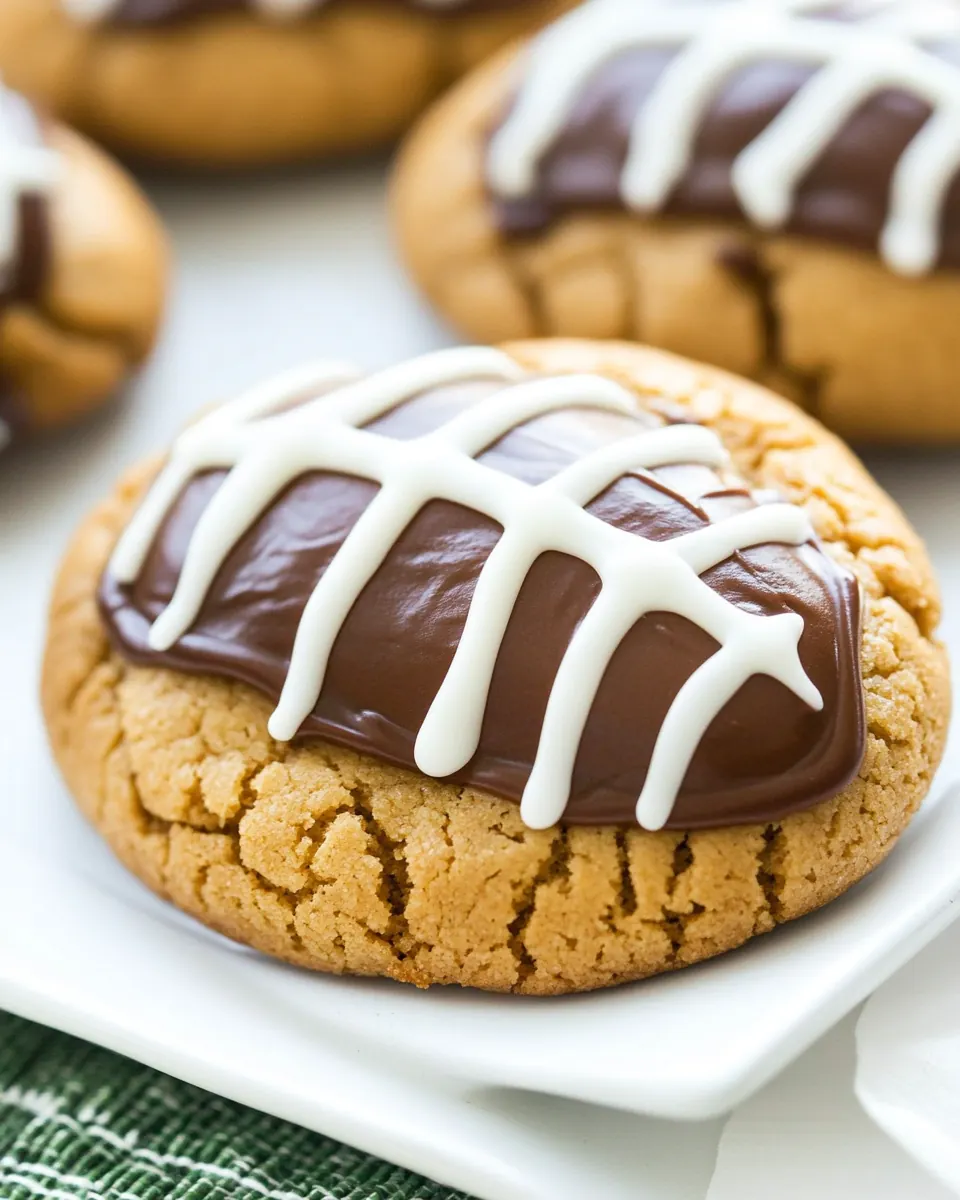
Peanut Butter Football Cookies
Peanut Butter Football Cookies started as a tiny tradition in my kitchen when my nephew asked for game day cookies that actually looked like footballs.
I remember juggling a bowl of warm dough while the TV played highlights, and how the scent of peanut butter and brown sugar filled the room, pulling everyone into the kitchen. I loved that these cookies were playful to shape, and that kids and adults both found joy in adding the little white icing laces. Over time, making Peanut Butter Football Cookies became less about perfection and more about the ritual of pressing the ends, filling the centers with glossy chocolate chips, and chilling them until they were just right.
What I appreciate most is that these treats feel nostalgic and simple, yet impressive. We often bake a double batch so we can decorate while we chat, and the leftovers always disappear first from the cookie tin. Whenever I bring a plate to a gathering, it’s the cookies that spark conversations about favorite games and family memories. If you enjoy a hands on baking moment that ends with a crunchy edge and a soft center, you’ll probably find yourself making Peanut Butter Football Cookies again and again.
Recipe Snapshot
1 hr 15 mins
60 mins
15 mins
Medium
120 kcal
American
Gluten-Free, Low FODMAP
Desserts
Electric mixer, Paddle attachment, Cookie sheets, Parchment, Silpat baking mats, Ziploc bag
What You’ll Enjoy About This Peanut Butter Football Cookies
They are instantly recognizable
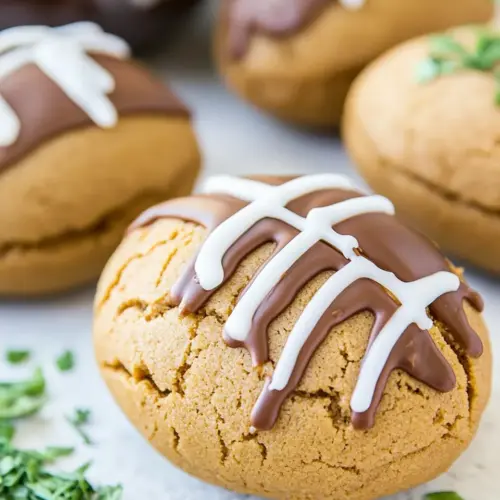
I love how these cookies look the part, and you get that visual payoff before anyone even takes a bite. The football shape, the shiny chocolate center, and the delicate white laces make them stand out on a platter, so they become the centerpiece at parties.
The flavor balance is comforting
Between peanut butter, brown sugar, and buttery notes from the unsalted butter, each bite offers a mix of sweet and slightly savory tones. I find that the small addition of salt and a touch of vanilla lifts the whole cookie, giving it depth beyond a straightforward peanut butter bite.
Textural contrast
What keeps me coming back is the contrast. The edges crisp up just enough while the center stays tender, and the hardened chocolate chips filling gives a satisfyingly firm bite against the soft cookie. That interplay makes them more interesting than a plain drop cookie.
Fun to make with others
I often invite family to help shape and decorate, because the steps are simple and playful. Pinching the ends to form football points is an easy task for kids, and piping the laces is a calm, meditative moment for adults. It becomes an activity, not just baking.
Reliable and forgiving
This recipe is friendly if your dough gets a bit warm, or if your scoops vary slightly. Because the cookies bake quickly and the chocolate sets after chilling, you can correct small imperfections and still end up with a tray of beautiful, tasty treats.
Everything You Need for Peanut Butter Football Cookies
These ingredients come together with a clear goal: butter and peanut butter create a rich base, sugars add moisture and caramel notes, and flour provides structure so the cookies hold that football shape. The chocolate and white icing are the finishing players, adding contrast and decoration.
- 1/2 cup (113 g) unsalted butter softened: Soften and cream to provide a tender, rich base for the dough; creates moisture and helps dissolve sugars for even texture during baking. Incorporate at room temperature to achieve a smooth, homogenous batter and improved spread control for cookies. Contributes subtle buttery flavor that balances sweetness and enhances overall mouthfeel.
- 3/4 cup (200 g) peanut butter: Provide concentrated nutty flavor and binding power while contributing fat for chewiness and richness in each cookie. Mix thoroughly with butter and sugars to create a cohesive dough and to impart classic peanut butter cookie taste. Also helps prevent over-spread and adds protein for structure.
- 3/4 cup (150 g) packed brown sugar: Add deep, caramel-like sweetness and moisture, promoting soft, chewy texture while enhancing flavor complexity. Cream with fats to help incorporate air for slight lift and tender crumb. Packed sugars also contribute to the cookie's chew and color as it caramelizes during baking.
- 1/4 cup (50 g) granulated sugar: Contribute bright sweetness and aid in proper creaming with butter to produce lightness and structure in the cookie dough. Provide additional sweetness balance to brown sugar and help with spread control. Granulated sugar helps achieve slight crispness on edges while keeping centers soft.
- 1 large egg: Bind ingredients together and provide structure from proteins and moisture, contributing to leavening and chewiness when combined with leavening agents. Incorporate at room temperature for best emulsion with fats and sugars, ensuring even texture. Also enriches flavor and gives a tender crumb.
- 1 teaspoon vanilla: Add aromatic sweetness and enhance overall flavor profile with warm, familiar notes that complement peanut butter and chocolate. Stir in with wet ingredients to distribute flavor evenly throughout the dough. Small amount amplifies perceived sweetness without adding extra sugar.
- 1 tablespoon (5 ml) milk: Supply a small amount of liquid to adjust dough consistency for easier mixing and shaping; helps achieve proper spread and moisture balance. Add with wet ingredients to ensure a cohesive, pliable dough that holds shape during baking. Also aids in dissolving dry ingredients slightly.
- 1/4 teaspoons salt: Enhance overall flavor by balancing sweetness and strengthening gluten interactions slightly, which affects texture and taste. Add to dough to control flavor profile and support proper chemical reactions during baking. Small quantity crucial for keeping balance without making dough too salty.
- 1/2 teaspoon baking soda: Act as a chemical leavening agent to produce carbon dioxide, giving slight lift and preventing dense cookies when combined with other ingredients. Dissolve evenly in the dough to ensure uniform rise and tender crumb. Helps create a lighter texture while maintaining chewiness.
- 1 3/4 cups (217 g) all purpose flour: Provide bulk and structure through gluten formation and starch gelatinization, forming the cookie's framework and determining chew and tenderness. Sift and measure accurately to maintain correct dough hydration and avoid toughness or dryness. All-purpose flour offers balanced protein for cookies.
- 1 1/2 cups (255 g) chocolate chips: Introduce pockets of melted chocolate flavor and texture contrast, adding richness and sweet bursts in each bite. Fold into dough to distribute evenly so each cookie has chocolate throughout. Quantity determines chocolate intensity and how cookies hold together when warm.
- 1 teaspoon Crisco or vegetable oil: Coat chocolate chips briefly to prevent melting into the dough and encourage retention of shape, or use to lightly grease tools for smoother release during decorating. Add a small amount when melting or coating to improve shine and flow of chocolate. Useful for achieving neat, well-defined chocolate pieces.
- White icing or white chocolate chips for the laces: Provide contrasting color and fine detail for decoration, allowing creation of football laces and accents that complete the cookie appearance. Pipe or place white icing or chips after baking to create visual appeal and suggestive texture. Adds a touch of extra sweetness and finishing flourish.
How to Assemble Peanut Butter Football Cookies
These assembly steps are straightforward, but I like to approach them calmly so each cookie ends up neat and satisfying. Keep your tools ready, work in small batches, and enjoy the decorating phase where the cookies truly come alive.
- Preheat oven to 350°F. Line 2 cookie sheets with parchment or silpat baking mats.: As you heat the oven to 350°F , notice the warm air that will soon crisp the edges of the cookies, and line your trays with parchment or silpat so the bottoms do not brown too quickly. The smell of the oven warming signals that baking is imminent. A common mistake is not preheating fully, which can cause uneven spread and texture, so wait until the oven reaches temperature. Also, make sure the racks sit evenly so the cookies bake consistently. If your sheets are thin, rotate them midway to avoid hot spots.
- Cream butter, peanut butter, and both sugars in the bowl of an electric mixer fitted with the paddle attachment. Add egg, vanilla, milk, and salt and baking soda. Mix until combined. Slowly add flour and mix until dough comes together.: When creaming unsalted butter , peanut butter , brown sugar , and granulated sugar , listen for the change to a lighter, slightly fluffy sound as air incorporates, which helps create a tender bite. Adding the egg , vanilla , milk , salt , and baking soda keeps the batter cohesive and flavorful, and slowly folding in the all purpose flour prevents overworking the gluten. You should stop mixing as soon as the dough forms; a tacky, slightly sticky dough indicates proper moisture. Overmixing will toughen the cookies, and undermixing leaves pockets of dry flour. Scrape the bowl to ensure even distribution.
- Scoop 1 tablespoon sized balls of dough. Place on cookie sheet 2" apart. Press lightly with your palm to flatten to about 1/2" thickness. Use your thumb and forefinger to pinch the ends to make the cookies look like footballs.: As you portion dough into 1 tablespoon balls, feel the pliable texture that holds shape yet yields to gentle pressure. Placing them about 2" apart prevents merging while allowing edges to crisp. Flatten to roughly 1/2" so the centers remain soft after baking, and use your thumb and forefinger to create tapered ends, forming the football silhouette. A common slip is making them too flat, which results in over crispness, or too tall, which prevents the chocolate filling from sitting properly. Keep each cookie uniform so baking time stays consistent.
- Bake for 8-10 minutes, until they just begin to brown. Cool completely on cookie sheets.: While baking for about 8 to 10 minutes, pay attention to the visual cue of the edges turning a light golden brown while the centers remain slightly soft. The kitchen will fill with the toasty scent of peanut butter and caramelized sugar, and you may hear faint crackles as edges set. Letting the cookies cool fully on the sheets helps them finish setting without collapsing. A frequent mistake is removing them too soon and moving them, causing them to break; let them rest until firm to the touch. If your oven runs hot, check a minute or two earlier to avoid overbrowning.
- Melt the chocolate chips with the crisco or oil, heating in 30 second increments, stirring after each, until smooth. Place chocolate in a ziploc bag and cut off a teeny tip (or use a squirt bottle). Outline the football shape on the cookie, then fill in with the chocolate. Tap the cookie sheet to even out any wrinkles in the chocolate, then chill to harden.: Melting the chocolate chips with a teaspoon of Crisco or vegetable oil yields a glossy, fluid ganache that flows into the football cavity. Heat gently in 30 second bursts and stir until silky; overheating causes graininess and a dull finish. Pipe an outline and then fill the center, watching how the chocolate levels when you tap the sheet gently, creating a smooth surface. Chill briefly so the chocolate firms cleanly. A common error is piping chocolate while it is too hot, which can soak into the cookie and make it soggy; allow it to cool slightly before filling.
- Make the laces with a little white frosting or some melted white chocolate chips. (White frosting is easier!): The final touch is the delicate white laces , which contrast beautifully with the dark filling and complete the football look. Use a small piping tip or a tiny cut on a ziploc bag to draw a center line and stitch marks. The texture of the white icing should be thick enough to hold shape but soft enough to pipe smoothly, and if you use melted white chocolate chips , let them cool a little so they do not run. A frequent mistake is applying the laces while the chocolate filling is still warm, causing smudging; wait until the filling is set.
- Store in an airtight container for up to 3 days.: When cooled and decorated, stacking the cookies with parchment layers in an airtight container preserves their texture for up to 3 days. The container will keep the crisp edges from going stale while maintaining the soft centers. If you live in a humid area, add parchment between layers to prevent sticking. The usual misstep is leaving them uncovered, which dries them out quickly, so seal tightly and store at room temperature.
Pro Tips and Tweaks
I like to keep a calm, organized table when decorating so each cookie gets attention. Below are practical tips I use to speed up the process and enhance the final look.
- Room temperature ingredients: Let the unsalted butter and peanut butter sit at room temperature so they cream smoothly and the dough mixes evenly.
- Uniform scoops: Use a small cookie scoop for consistent shapes, which ensures even baking across the tray.
- Melt carefully: Warm the chocolate chips in short bursts and stir often to keep the chocolate glossy and fluid for filling.
- Thin piping: For neat laces, pipe with a tiny tip or snip a very small piece off a ziploc bag so the lines are precise.
- Cooling patience: Allow cookies to cool completely on the tray before filling so the chocolate does not sink into warm dough.
- Storage method: Layer with parchment in an airtight container to prevent sticking and preserve texture for up to three days.
Serving Suggestions
These cookies are festive and versatile, great for gatherings or as a playful snack. Below are ideas for occasions and presentation that enhance their appeal.
- Game day platter: Arrange the cookies on a large platter with alternating orientations so the laces create a visual rhythm that reads well from across the room.
- Kid friendly snack: Place a small bowl of extra white icing and piping bags nearby so children can personalize additional laces or dots.
- Party favor: Stack three cookies in a clear cellophane bag tied with a ribbon for guests to take home as a themed treat.
- Seasonal tables: Use them for fall gatherings, pairing with warm drinks; the nutty aroma complements cooler weather perfectly.
- Storage tip: Keep stored at room temperature in an airtight container, adding parchment between layers to prevent sticking and maintain crisp edges.
- Serving style: Serve at room temperature so the filling is set but not overly firm, giving the best bite experience between crisp edge and soft center.
FAQ
Conclusion
These Peanut Butter Football Cookies stand out because they pair playful presentation with dependable, comforting flavors. They make for a memorable game day treat that both kids and adults can help create and enjoy. Give them a try the next time you want something festive and hands on, and take pleasure in the simple ritual of shaping, filling, and piping each little football. Share the batch with friends, and notice how a small decorative touch can turn an ordinary cookie into the highlight of the dessert table.
Peanut Butter Football Cookies
Equipment
- Electric Mixer
- Paddle attachment
- Cookie Sheets
- Parchment
- Silpat baking mats
- Ziploc bag
Ingredients
- 1/2 cup (113 g) unsalted butter softened Soften and cream to provide a tender, rich base for the dough; creates moisture and helps dissolve sugars for even texture during baking. Incorporate at room temperature to achieve a smooth, homogenous batter and improved spread control for cookies. Contributes subtle buttery flavor that balances sweetness and enhances overall mouthfeel.
- 3/4 cup (200 g) peanut butter Provide concentrated nutty flavor and binding power while contributing fat for chewiness and richness in each cookie. Mix thoroughly with butter and sugars to create a cohesive dough and to impart classic peanut butter cookie taste. Also helps prevent over-spread and adds protein for structure.
- 3/4 cup (150 g) packed brown sugar Add deep, caramel-like sweetness and moisture, promoting soft, chewy texture while enhancing flavor complexity. Cream with fats to help incorporate air for slight lift and tender crumb. Packed sugars also contribute to the cookie's chew and color as it caramelizes during baking.
- 1/4 cup (50 g) granulated sugar Contribute bright sweetness and aid in proper creaming with butter to produce lightness and structure in the cookie dough. Provide additional sweetness balance to brown sugar and help with spread control. Granulated sugar helps achieve slight crispness on edges while keeping centers soft.
- 1 large egg Bind ingredients together and provide structure from proteins and moisture, contributing to leavening and chewiness when combined with leavening agents. Incorporate at room temperature for best emulsion with fats and sugars, ensuring even texture. Also enriches flavor and gives a tender crumb.
- 1 teaspoon vanilla Add aromatic sweetness and enhance overall flavor profile with warm, familiar notes that complement peanut butter and chocolate. Stir in with wet ingredients to distribute flavor evenly throughout the dough. Small amount amplifies perceived sweetness without adding extra sugar.
- 1 tablespoon (5 ml) milk Supply a small amount of liquid to adjust dough consistency for easier mixing and shaping; helps achieve proper spread and moisture balance. Add with wet ingredients to ensure a cohesive, pliable dough that holds shape during baking. Also aids in dissolving dry ingredients slightly.
- 1/4 teaspoons salt Enhance overall flavor by balancing sweetness and strengthening gluten interactions slightly, which affects texture and taste. Add to dough to control flavor profile and support proper chemical reactions during baking. Small quantity crucial for keeping balance without making dough too salty.
- 1/2 teaspoon baking soda Act as a chemical leavening agent to produce carbon dioxide, giving slight lift and preventing dense cookies when combined with other ingredients. Dissolve evenly in the dough to ensure uniform rise and tender crumb. Helps create a lighter texture while maintaining chewiness.
- 1 3/4 cups (217 g) all purpose flour Provide bulk and structure through gluten formation and starch gelatinization, forming the cookie's framework and determining chew and tenderness. Sift and measure accurately to maintain correct dough hydration and avoid toughness or dryness. All-purpose flour offers balanced protein for cookies.
- 1 1/2 cups (255 g) chocolate chips Introduce pockets of melted chocolate flavor and texture contrast, adding richness and sweet bursts in each bite. Fold into dough to distribute evenly so each cookie has chocolate throughout. Quantity determines chocolate intensity and how cookies hold together when warm.
- 1 teaspoon Crisco or vegetable oil Coat chocolate chips briefly to prevent melting into the dough and encourage retention of shape, or use to lightly grease tools for smoother release during decorating. Add a small amount when melting or coating to improve shine and flow of chocolate. Useful for achieving neat, well-defined chocolate pieces.
- White icing or white chocolate chips for the laces Provide contrasting color and fine detail for decoration, allowing creation of football laces and accents that complete the cookie appearance. Pipe or place white icing or chips after baking to create visual appeal and suggestive texture. Adds a touch of extra sweetness and finishing flourish.
Instructions
- Preheat oven to 350°F. Line 2 cookie sheets with parchment or silpat baking mats.: As you heat the oven to 350°F , notice the warm air that will soon crisp the edges of the cookies, and line your trays with parchment or silpat so the bottoms do not brown too quickly. The smell of the oven warming signals that baking is imminent. A common mistake is not preheating fully, which can cause uneven spread and texture, so wait until the oven reaches temperature. Also, make sure the racks sit evenly so the cookies bake consistently. If your sheets are thin, rotate them midway to avoid hot spots.
- Cream butter, peanut butter, and both sugars in the bowl of an electric mixer fitted with the paddle attachment. Add egg, vanilla, milk, and salt and baking soda. Mix until combined. Slowly add flour and mix until dough comes together.: When creaming unsalted butter , peanut butter , brown sugar , and granulated sugar , listen for the change to a lighter, slightly fluffy sound as air incorporates, which helps create a tender bite. Adding the egg , vanilla , milk , salt , and baking soda keeps the batter cohesive and flavorful, and slowly folding in the all purpose flour prevents overworking the gluten. You should stop mixing as soon as the dough forms; a tacky, slightly sticky dough indicates proper moisture. Overmixing will toughen the cookies, and undermixing leaves pockets of dry flour. Scrape the bowl to ensure even distribution.
- Scoop 1 tablespoon sized balls of dough. Place on cookie sheet 2" apart. Press lightly with your palm to flatten to about 1/2" thickness. Use your thumb and forefinger to pinch the ends to make the cookies look like footballs.: As you portion dough into 1 tablespoon balls, feel the pliable texture that holds shape yet yields to gentle pressure. Placing them about 2" apart prevents merging while allowing edges to crisp. Flatten to roughly 1/2" so the centers remain soft after baking, and use your thumb and forefinger to create tapered ends, forming the football silhouette. A common slip is making them too flat, which results in over crispness, or too tall, which prevents the chocolate filling from sitting properly. Keep each cookie uniform so baking time stays consistent.
- Bake for 8-10 minutes, until they just begin to brown. Cool completely on cookie sheets.: While baking for about 8 to 10 minutes, pay attention to the visual cue of the edges turning a light golden brown while the centers remain slightly soft. The kitchen will fill with the toasty scent of peanut butter and caramelized sugar, and you may hear faint crackles as edges set. Letting the cookies cool fully on the sheets helps them finish setting without collapsing. A frequent mistake is removing them too soon and moving them, causing them to break; let them rest until firm to the touch. If your oven runs hot, check a minute or two earlier to avoid overbrowning.
- Melt the chocolate chips with the crisco or oil, heating in 30 second increments, stirring after each, until smooth. Place chocolate in a ziploc bag and cut off a teeny tip (or use a squirt bottle). Outline the football shape on the cookie, then fill in with the chocolate. Tap the cookie sheet to even out any wrinkles in the chocolate, then chill to harden.: Melting the chocolate chips with a teaspoon of Crisco or vegetable oil yields a glossy, fluid ganache that flows into the football cavity. Heat gently in 30 second bursts and stir until silky; overheating causes graininess and a dull finish. Pipe an outline and then fill the center, watching how the chocolate levels when you tap the sheet gently, creating a smooth surface. Chill briefly so the chocolate firms cleanly. A common error is piping chocolate while it is too hot, which can soak into the cookie and make it soggy; allow it to cool slightly before filling.
- Make the laces with a little white frosting or some melted white chocolate chips. (White frosting is easier!): The final touch is the delicate white laces , which contrast beautifully with the dark filling and complete the football look. Use a small piping tip or a tiny cut on a ziploc bag to draw a center line and stitch marks. The texture of the white icing should be thick enough to hold shape but soft enough to pipe smoothly, and if you use melted white chocolate chips , let them cool a little so they do not run. A frequent mistake is applying the laces while the chocolate filling is still warm, causing smudging; wait until the filling is set.
- Store in an airtight container for up to 3 days.: When cooled and decorated, stacking the cookies with parchment layers in an airtight container preserves their texture for up to 3 days. The container will keep the crisp edges from going stale while maintaining the soft centers. If you live in a humid area, add parchment between layers to prevent sticking. The usual misstep is leaving them uncovered, which dries them out quickly, so seal tightly and store at room temperature.
Notes
- Room temperature ingredients: Let the unsalted butter and peanut butter sit at room temperature so they cream smoothly and the dough mixes evenly.
- Uniform scoops: Use a small cookie scoop for consistent shapes, which ensures even baking across the tray.
- Melt carefully: Warm the chocolate chips in short bursts and stir often to keep the chocolate glossy and fluid for filling.
- Thin piping: For neat laces, pipe with a tiny tip or snip a very small piece off a ziploc bag so the lines are precise.
- Cooling patience: Allow cookies to cool completely on the tray before filling so the chocolate does not sink into warm dough.
- Storage method: Layer with parchment in an airtight container to prevent sticking and preserve texture for up to three days.