Lightened Up Soft Pretzels
Lightened Up Soft Pretzels have been a weekend ritual in my kitchen for years, a recipe I reach for when I want that warm, salt kissed comfort without feeling weighed down afterward.
One rainy afternoon, I pulled this batch together while my neighbor’s kids built a fort in my living room, and the house filled with the yeasty, toasty scent that says home louder than words. I remember laughing as small hands twisted dough into lopsided pretzels and sticks, each one a little different but all promising that perfect contrast of soft interior and slightly crisp exterior. Over time I learned small swaps that lighten the texture and keep the flavor bright, so these pretzels feel indulgent but not heavy.
What I love most about Lightened Up Soft Pretzels is how approachable they are, whether you are kneading for the first time or teaching a kid how to shape dough. The process becomes a ritual, a way to slow down and create something satisfying with minimal fuss. If you are craving fresh baked bread but want something a little more playful, these pretzels answer that call. They pair beautifully with simple dips, and they store well enough to be enjoyed for a day or two, though they are best right out of the oven.
Recipe Snapshot
25 mins
10 mins
15 mins
Easy
180 kcal
American
Vegan, Gluten-Free
Appetizers
Standing mixer, Rolling pin, Pizza cutter, Baking sheet
Why We Love This Lightened Up Soft Pretzels
Soft and Tender Inside
I adore how the crumb of these Lightened Up Soft Pretzels stays pillow soft, even when we go lighter on the fat. The combination of a warm water start with active yeast helps build a great rise, so each bite feels airy and pleasantly chewy.
Quick to Make, Big on Flavor
We get to the oven fast, which matters on busy days. With a short rise and a focused knead, you still capture that toasty, slightly sweet profile from the sugar without long fermentation. That makes this recipe ideal when you want fresh baked goods the same day.
Kid Friendly and Customizable
These pretzels invite creativity. I let kids shape dough into twists or sticks, which makes baking together fun and low pressure. Sprinkling coarse salt or a pinch of garlic powder personalizes each pretzel without changing the base technique.
Healthier Texture Without Sacrificing Bite
Using half whole wheat flour keeps structure and adds subtle nuttiness while preserving the classic chew. The mix of all purpose flour and whole wheat keeps them tender rather than dense, giving you a lighter feel without blandness.
Versatile Serving Options
I love that these pretzels work for snacks, lunch boxes, or as an appetizer at small gatherings. They warm up beautifully in a low oven, and they pair with many dips, so they’re a reliable crowd pleaser whenever I need something simple and satisfying.
Lightened Up Soft Pretzels Shopping List
The philosophy behind these ingredients is simple balance. Each component plays a clear role, from the active life of yeast to the structure provided by the flours. I think of the sugar as a gentle boost for fermentation, while salt tames the sweetness and builds flavor. The very warm water activates the yeast just enough to produce consistent rise without long waits.
- 2 1/4 tsp . yeast, or one packet: Activate yeast by dissolving it in the warm water to begin fermentation and leavening; allow it to sit until foamy to ensure freshness and proper rise. Yeast works slowly in cooler doughs, so proofing confirms it's active and will create airiness in the pretzels.
- 1 1/2 cup very warm water, about 102 degrees F: Provide warm liquid at about 102°F to hydrate the yeast and flour, encouraging fermentation and forming a workable dough; maintain temperature to avoid killing yeast. Water temperature also influences dough texture and elasticity during kneading.
- 5 cups all-purpose flour, I used half white/half whole wheat: Combine flour to build the structure and bulk of the pretzels; using a mix of white and whole wheat balances chewiness, flavor, and nutrition. Adjust flour amount slightly while kneading to achieve a smooth, elastic dough that holds gas produced by the yeast.
- 1 tbsp sugar: Sweeten slightly to feed the yeast and improve browning and flavor; sugar accelerates fermentation and helps develop a golden crust during baking. Keep the amount modest to maintain the classic pretzel taste while ensuring active yeast activity.
- 1 tsp salt: Season the dough by strengthening gluten and balancing flavors; salt controls yeast fermentation and enhances overall taste without inhibiting rise when used in moderate amounts. Dissolve salt into the dry ingredients or water to distribute evenly and avoid direct contact with yeast.
How to Make Lightened Up Soft Pretzels
These directions walk you through shaping, baking, and finishing the pretzels in a conversational, step by step way. I like to keep the rhythm calm and patient, listening to the dough as much as watching it, so the results are relaxed and satisfying.
- Add the yeast to the warm water and stir until muddy, let it sit till it foams on top.: The moment you combine the warm water and active yeast , you should sense a mild breadlike aroma as the mixture sits and begins to foam, which signals healthy fermentation. Visually, small bubbles and a clouded surface mean the yeast is awake; if nothing happens after ten minutes, it may be inactive and you should start over with fresh yeast . A common mistake is skipping the proofing step, which can lead to dense dough and poor rise. Trust the foam, and if it looks sluggish, give it a few more minutes in a slightly warmer spot.
- Pour into a standing mixer and add the sugar and salt. Slowly add the flour, one cup at a time until it’s all mixed in and no longer sticky. Place the dough on a floured counter top and roll out the dough with a rolling pin. Use a pizza or dough cutter to slice into strips.: As you add the sugar and salt , you will notice the mixture taking on a more structured feel, a little tacky at first then coming together as the flour is worked in. The sound shifts to a quiet, consistent folding noise in the mixer, and the dough will begin to pull away from the bowl in soft arcs. When you transfer the dough to a floured surface, the texture should be supple but not sticky, springing back when pressed gently. Rolling it out creates a uniform thickness so strips bake evenly, and using a pizza cutter gives clean edges that hold shape. One troubleshooting tip, overflouring during this step can make the dough dry and tough, so add the flour gradually and stop when the dough is manageable.
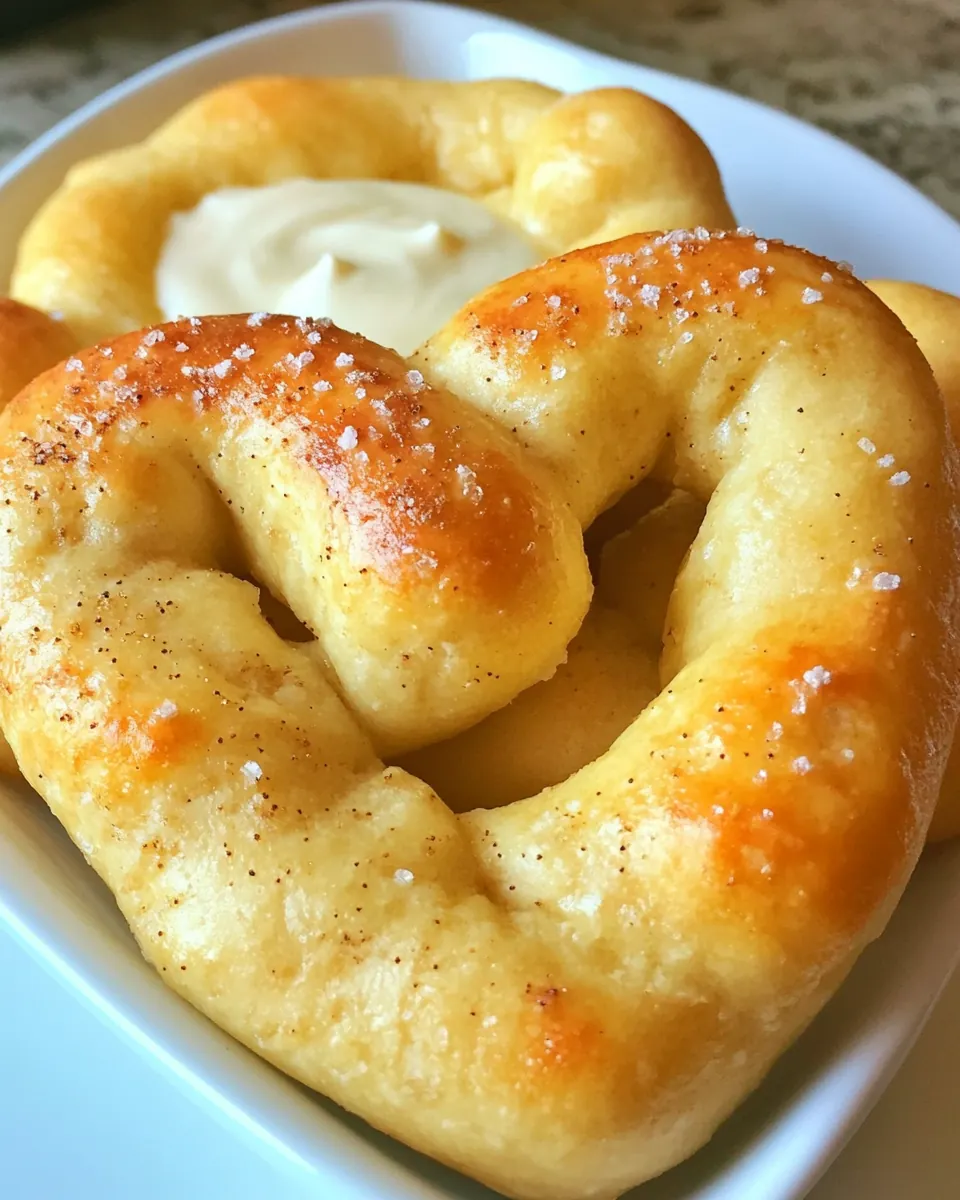
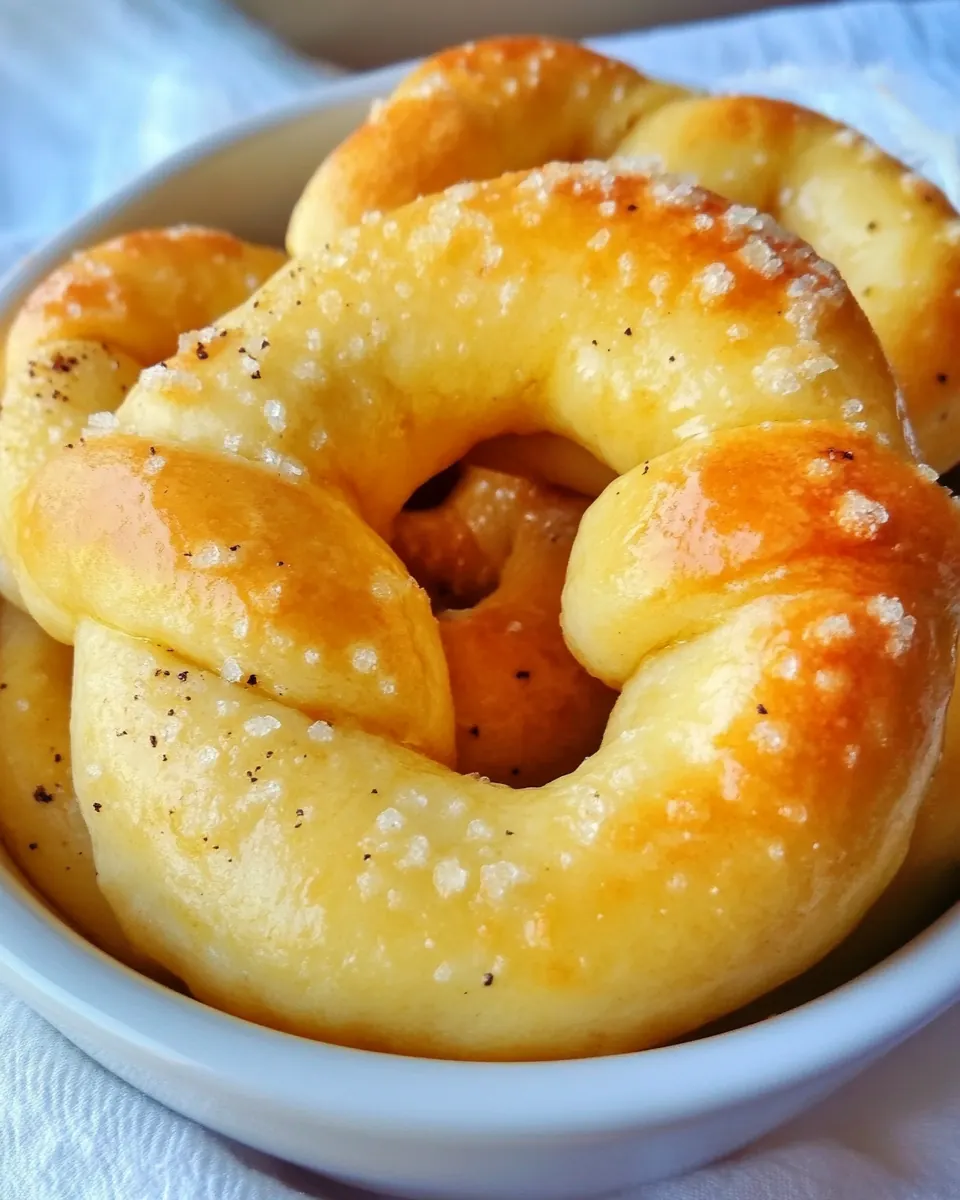
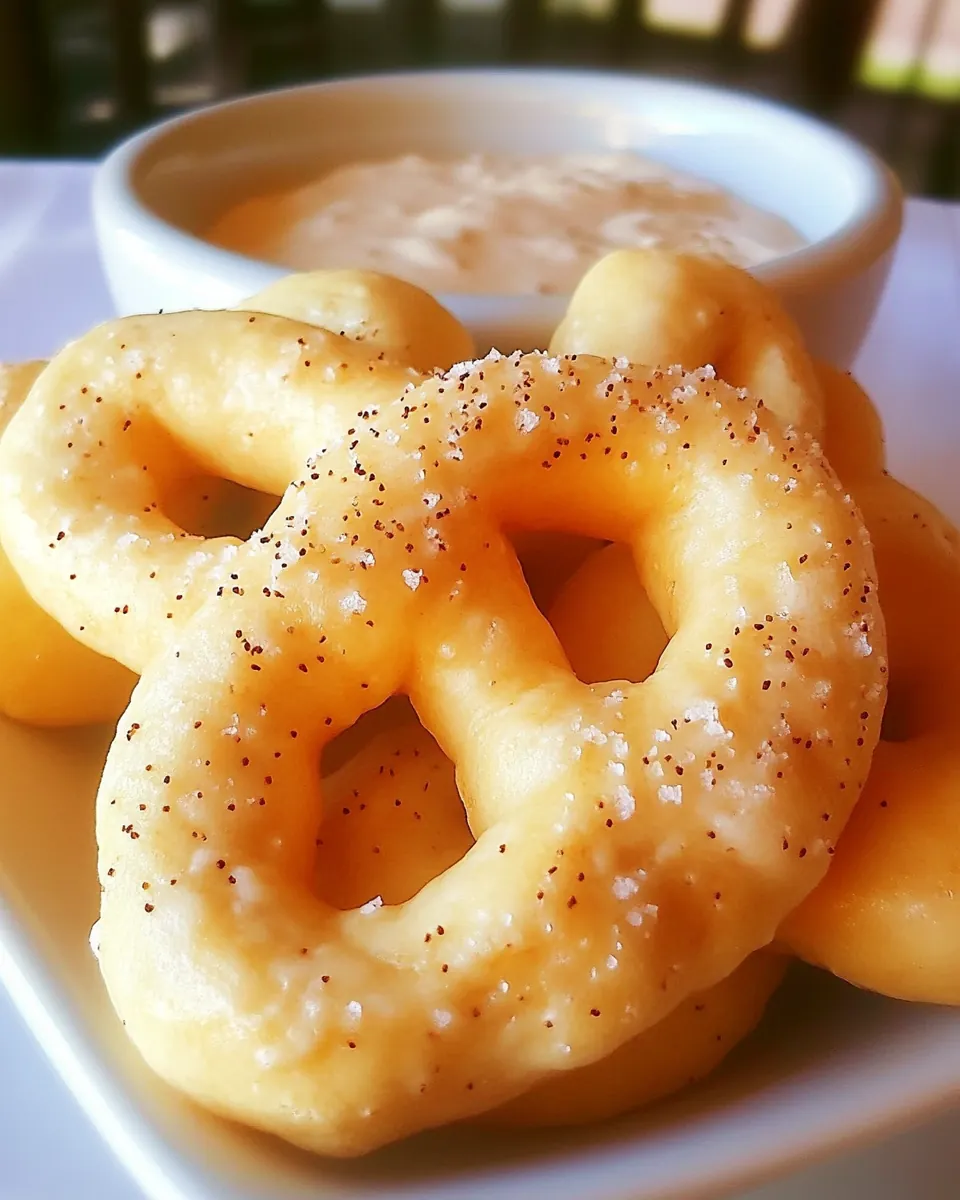
- Wrap the dough into the traditional pretzel form or into sticks, let your kids make their own shapes!: Shaping is where the dough transforms into personality, and you will feel the elasticity of the gluten as you stretch and twist. The visual cue to watch for is a smooth surface without large tears, which indicates proper gluten development. Encourage creative shapes, but avoid overworking the dough which can warm it too much and cause slackness. If the dough feels resistant, let it rest for a few minutes to relax the gluten; forcing it will create irregular textures during baking.
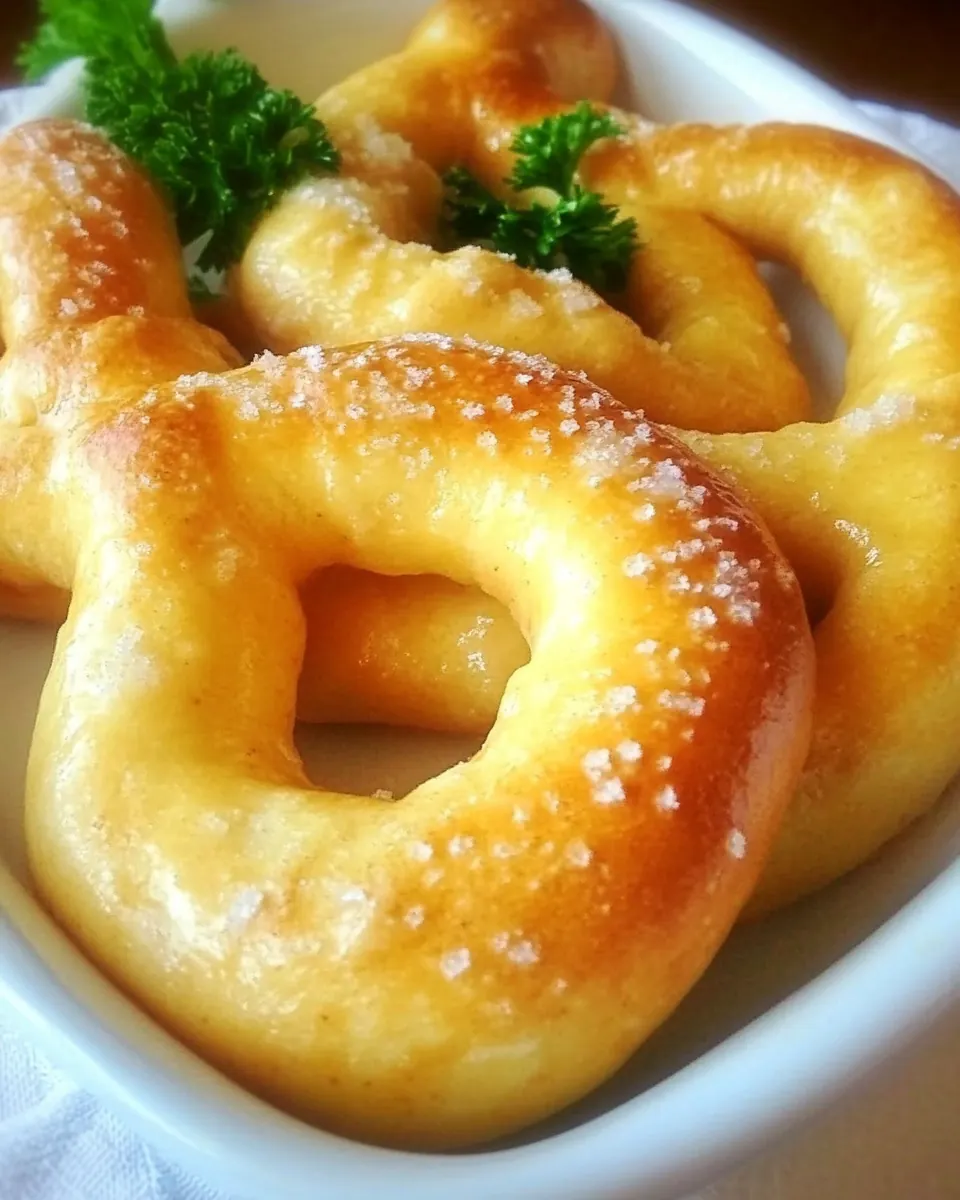
- I sprayed my pretzels with Pam (butter flavor) to get a more crisp outside, then baked them at 425 degrees for 12-15 minutes, or until light brown. You can also sprinkle with coarse salt, garlic powder, chopped onion, or any other favorite spice or herb! I used garlic powder for mine.: As the pretzels enter the oven, you will begin to smell a toasty, slightly nutty aroma as the surface browns. The sound is subtle, a quiet settling as steam escapes; visually, aim for an even light brown color across the surface, which signals Maillard reaction and a pleasant exterior. Spraying a light fat layer helps the crust crisp without adding heavy oil, and the short, hot bake keeps the interior tender. A frequent error is overbaking, which dries the interior; pull them when they are light to medium brown and let carryover heat finish the set.
- You can also sprinkle with coarse salt, garlic powder, chopped onion, or any other favorite spice or herb! I used garlic powder for mine.: Adding toppings right after spraying or an egg wash lets them adhere and roast gently, releasing fragrant notes under heat. Coarse salt provides that classic contrast, while powdered seasonings like garlic powder deepen umami tones as they toast. Watch for scorching, especially with fine powders, which can become bitter if exposed to intense heat for too long. If a topping looks like it is browning too quickly, tent the pretzels with foil for the last minute or two.
Tips and Tricks about Lightened Up Soft Pretzels
These tips reflect what I have learned from repeated batches. They help you get consistent texture and flavor while keeping the process friendly for all skill levels.
- Proof your yeast right: If the yeast does not foam within ten minutes, it is likely inactive and the dough will not rise properly.
- Use very warm water: Aim for roughly 102 degrees F as given, which encourages a predictable rise without stressing the yeast.
- Mix flours for balance: Combining white and whole wheat creates structure and tenderness; measure carefully to avoid dryness.
- Shape with confidence: Slightly under stretching yields better oven spring than overworked, cold dough that resists forming.
- Watch the bake time: Pull when pretzels are light brown for best texture, as extended time can dry the crumb.
What Complements This Lightened Up Soft Pretzels
These pretzels play nicely across many meals. Serve them as a snack, part of a casual lunch spread, or as an appetizer for gatherings. Their adaptability makes them suitable for family dinners, party platters, and midday cravings alike.
- Simple dips: Pair with plain mustard or a yogurt based dip for a bright contrast.
- Occasions: Great for casual get togethers, kids parties, or relaxing weekend afternoons.
- Storage: Keep at room temperature in an airtight container for a day, or refrigerate to extend life by a day, reheating briefly in a warm oven to revive texture.
- Seasonal pairings: Works well year round, especially during cooler months when warm baked goods feel most comforting.
- Serving style: Serve warm on a platter with small bowls of dipping sauces, allowing guests to choose their favorites.
FAQ
Conclusion
These Lightened Up Soft Pretzels are special because they combine approachable techniques with balanced ingredients to create warm, lightly crisp pretzels that feel indulgent without heaviness. Give them a try on a weekend afternoon or when you want a hands on baking project that welcomes helpers and rewards patience with comforting flavor. They are flexible, forgiving, and consistently satisfying, making them one of my go to recipes for sharing with friends and family.

Lightened Up Soft Pretzels
Equipment
- Standing mixer
- Rolling Pin
- Pizza Cutter
- Baking Sheet
Ingredients
- 2 1/4 tsp . yeast, or one packet Activate yeast by dissolving it in the warm water to begin fermentation and leavening; allow it to sit until foamy to ensure freshness and proper rise. Yeast works slowly in cooler doughs, so proofing confirms it's active and will create airiness in the pretzels.
- 1 1/2 cup very warm water, about 102 degrees F Provide warm liquid at about 102°F to hydrate the yeast and flour, encouraging fermentation and forming a workable dough; maintain temperature to avoid killing yeast. Water temperature also influences dough texture and elasticity during kneading.
- 5 cups all-purpose flour, I used half white/half whole wheat Combine flour to build the structure and bulk of the pretzels; using a mix of white and whole wheat balances chewiness, flavor, and nutrition. Adjust flour amount slightly while kneading to achieve a smooth, elastic dough that holds gas produced by the yeast.
- 1 tbsp sugar Sweeten slightly to feed the yeast and improve browning and flavor; sugar accelerates fermentation and helps develop a golden crust during baking. Keep the amount modest to maintain the classic pretzel taste while ensuring active yeast activity.
- 1 tsp salt Season the dough by strengthening gluten and balancing flavors; salt controls yeast fermentation and enhances overall taste without inhibiting rise when used in moderate amounts. Dissolve salt into the dry ingredients or water to distribute evenly and avoid direct contact with yeast.
Instructions
- Add the yeast to the warm water and stir until muddy, let it sit till it foams on top.: The moment you combine the warm water and active yeast , you should sense a mild breadlike aroma as the mixture sits and begins to foam, which signals healthy fermentation. Visually, small bubbles and a clouded surface mean the yeast is awake; if nothing happens after ten minutes, it may be inactive and you should start over with fresh yeast . A common mistake is skipping the proofing step, which can lead to dense dough and poor rise. Trust the foam, and if it looks sluggish, give it a few more minutes in a slightly warmer spot.
- Pour into a standing mixer and add the sugar and salt. Slowly add the flour, one cup at a time until it’s all mixed in and no longer sticky. Place the dough on a floured counter top and roll out the dough with a rolling pin. Use a pizza or dough cutter to slice into strips.: As you add the sugar and salt , you will notice the mixture taking on a more structured feel, a little tacky at first then coming together as the flour is worked in. The sound shifts to a quiet, consistent folding noise in the mixer, and the dough will begin to pull away from the bowl in soft arcs. When you transfer the dough to a floured surface, the texture should be supple but not sticky, springing back when pressed gently. Rolling it out creates a uniform thickness so strips bake evenly, and using a pizza cutter gives clean edges that hold shape. One troubleshooting tip, overflouring during this step can make the dough dry and tough, so add the flour gradually and stop when the dough is manageable.
- Wrap the dough into the traditional pretzel form or into sticks, let your kids make their own shapes!: Shaping is where the dough transforms into personality, and you will feel the elasticity of the gluten as you stretch and twist. The visual cue to watch for is a smooth surface without large tears, which indicates proper gluten development. Encourage creative shapes, but avoid overworking the dough which can warm it too much and cause slackness. If the dough feels resistant, let it rest for a few minutes to relax the gluten; forcing it will create irregular textures during baking.
- I sprayed my pretzels with Pam (butter flavor) to get a more crisp outside, then baked them at 425 degrees for 12-15 minutes, or until light brown. You can also sprinkle with coarse salt, garlic powder, chopped onion, or any other favorite spice or herb! I used garlic powder for mine.: As the pretzels enter the oven, you will begin to smell a toasty, slightly nutty aroma as the surface browns. The sound is subtle, a quiet settling as steam escapes; visually, aim for an even light brown color across the surface, which signals Maillard reaction and a pleasant exterior. Spraying a light fat layer helps the crust crisp without adding heavy oil, and the short, hot bake keeps the interior tender. A frequent error is overbaking, which dries the interior; pull them when they are light to medium brown and let carryover heat finish the set.
- You can also sprinkle with coarse salt, garlic powder, chopped onion, or any other favorite spice or herb! I used garlic powder for mine.: Adding toppings right after spraying or an egg wash lets them adhere and roast gently, releasing fragrant notes under heat. Coarse salt provides that classic contrast, while powdered seasonings like garlic powder deepen umami tones as they toast. Watch for scorching, especially with fine powders, which can become bitter if exposed to intense heat for too long. If a topping looks like it is browning too quickly, tent the pretzels with foil for the last minute or two.
Notes
- Proof your yeast right: If the yeast does not foam within ten minutes, it is likely inactive and the dough will not rise properly.
- Use very warm water: Aim for roughly 102 degrees F as given, which encourages a predictable rise without stressing the yeast.
- Mix flours for balance: Combining white and whole wheat creates structure and tenderness; measure carefully to avoid dryness.
- Shape with confidence: Slightly under stretching yields better oven spring than overworked, cold dough that resists forming.
- Watch the bake time: Pull when pretzels are light brown for best texture, as extended time can dry the crumb.