Air Fryer Mozzarella Sticks
Air Fryer Mozzarella Sticks are one of those snack-time heroes I fall back on whenever friends pop over or the kids demand something crunchy and cheesy.
My first memory of making Air Fryer Mozzarella Sticks is of a rainy Saturday when the oven refused to cooperate and I decided to test the air fryer for the first time. I remember the thrill when the first batch came out golden and crisp, the cheese still melty inside, and how we all huddled around the counter dipping them into warm marinara. That afternoon taught me to trust quick techniques and simple prep, and it turned into my go to for last minute gatherings.
I tend to make a double batch because they vanish fast, and I like how the breading gets extra crunchy after a brief rest. Over time I learned small tricks, like freezing between coats and using a three bowl assembly line, that keep the cheese from escaping and make every piece evenly coated. Those little details transformed a so so snack into a small celebration, and I always smile when someone asks for the recipe.
Recipe Snapshot
1 hr 25 mins
80 mins
5 mins
Medium
300 kcal
Italian
Paleo, Gluten-Free
Appetizers
Air Fryer, Cookie Sheet, Bowls, Whisk
The Best Thing About This Air Fryer Mozzarella Sticks
Quick Crunch, Big Payoff
I love how Air Fryer Mozzarella Sticks deliver instant gratification, a crispy shell with molten cheese inside, without turning on the whole oven. The air fryer concentrates heat and airflow, which means you get that desirable golden color and a crisp texture in minutes.
Kid Friendly and Crowd Approved
These sticks are an easy win for picky eaters. The familiar shape and the act of dipping into warm marinara sauce make them approachable, and they work great as finger food for parties, movie nights, or casual weeknight treats.
Simple Pantry Ingredients
The ingredient list is reassuringly short. With basic items like eggs, flour, and italian breadcrumbs, you can pull these together quickly. There is no complex prep, and the steps are repeatable, which is why I keep these components on hand.
Reliable Technique
The double dredge and the freezing steps are sacramental in my kitchen. I trust them because they prevent leaks, create a thicker crust, and let the interior heat through without the cheese spilling out. When I teach friends, this method is usually the aha moment for getting consistent results.
Versatile Serving Options
While dipping in warm marinara sauce is classic, these sticks also pair well with other savory sauces. I like serving them as an appetizer, a snack, or as part of a casual meal. Their ease and crowd pleasing nature make them a go to when the timing is tight.
Air Fryer Mozzarella Sticks Ingredients
These ingredients work together to form a crisp, golden shell around molten cheese. The key players are simple: a binding wet element, a dry flour base for adhesion, and seasoned breadcrumbs for texture and flavor. Each item has a role in creating structure, sealing in moisture, and delivering that irresistible crunch.
- 8 mozzarella sticks: Melting and stringy when heated, provides the gooey center that defines mozzarella sticks; choose low-moisture mozzarella for best frying results. Helps create contrast with the crispy exterior and carries mild dairy flavor that pairs well with marinara or dips.
- 2 to 3 eggs: Beaten to create an egg wash that helps coatings adhere and promotes an even golden crust when air-fried; adjust quantity to fully coat all sticks without excess. Adds a bit of richness and moisture to the breading process, improving texture and binding.
- 1/3 cup flour: Used to lightly dust the cheese sticks before dredging to help the egg wash and breadcrumbs cling more effectively. Adds a neutral, slightly starchy layer that assists in forming a uniform coating and helps prevent sogginess during cooking.
- 1/2 teaspoon garlic powder: Provides a burst of savory, aromatic flavor when mixed into the breadcrumb coating and enhances the overall taste of the fried exterior. Complements the cheese and breading with a subtle garlic note that elevates the snack without overpowering it.
- 1/4 teaspoons salt: Used sparingly in the breading mixture to season the coating and balance flavors; helps bring out savory notes in the cheese and breadcrumbs. Contributes slight salinity to the crust, so measure carefully to avoid over-salting.
- 3/4 cup italian breadcrumbs: Forms the main crunchy exterior when combined with seasonings and applied to the cheese sticks; Italian-style crumbs add herb and Parmesan accents. Creates the desirable crisp texture in the air fryer and browns attractively while sealing in melted cheese.
- 1/4 teaspoon dried parsley: Added to the breadcrumb mixture to impart a mild herbaceous flavor and visual flecks that complement the Italian breadcrumbs. Enhances the aroma and overall seasoning profile of the crust without introducing moisture.
- 1 cup marinara sauce ( for dipping) (optional): Served warm as an optional dipping sauce that adds acidity, herbs, and tomato sweetness to balance the rich, melty cheese. Provides a classic accompaniment that enhances flavor contrast and makes each bite more savory and tangy.
The Method for Air Fryer Mozzarella Sticks

This method breaks the process into manageable actions that prioritize coating adhesion and freeze time to prevent leaks. Follow the sequence and pay attention to sensory cues so you know when each stage is done.
- Line the cookie sheet with wax (or parchment) paper, cut the mozzarella sticks in half, and set aside while assembling the bowls.: The aroma of fresh mozzarella is subtle and milky at this stage, and the quiet scratch of the knife signals proper portioning. Lining a sheet with wax or parchment ensures the pieces won’t stick as they freeze, which helps preserve the coating. This step matters because evenly sized pieces cook at the same rate, preventing some from over melting while others remain cool. A common mistake is slicing uneven pieces which causes inconsistent cooking; take an extra moment to match sizes and lay them spaced apart so cold air can circulate while freezing.
- Assemble the first bowl by whisking the eggs until smooth.: Whisking produces a glossy, slightly viscous liquid that clings to the cheese , and you should hear a light whisking sound as bubbles form. The eggs serve as the first adhesive, so their texture matters; a lumpy or under whisked egg will coat unevenly. This technique ensures the later layers will adhere properly, creating a seal that helps prevent leakage. A pitfall here is overwhisking with too much air, which can create frothy pockets that destabilize the coating, so a smooth, even mixture is ideal.
- Assemble the second bowl by stirring the flour, garlic powder, and salt together.: The dry mixture should smell faintly of roasted garlic from the garlic powder , and the texture should be fine and crumb free. This bowl adds the first dry barrier to the cheese , helping the egg cling and absorbing excess moisture. Properly mixed flour ensures even seasoning and adhesion, which prevents bare spots that can expose the cheese. Avoid clumped flour by sifting or vigorously stirring before use, as clumps can cause irregular coating when dredged.
- Assemble the third bowl by stirring together the breadcrumbs and parsley.: The breadcrumb bowl should be fragrant with herbs and have a sandy texture that compresses slightly when pinched. These crumbs toast and create the crunchy exterior, so even distribution of parsley ensures balanced flavor. This step is crucial for texture contrast, turning soft interior into a crispy experience. A mistake to avoid is using overly fine crumbs that can pack and become gummy; choose a breadcrumb consistency that remains coarse enough to crisp well.
- Dip one mozzarella stick into the egg bowl, covering completely and allowing to drip off any excess, then dip into the flour bowl, covering completely.: You will notice the egg makes the surface glossy and the flour powdery; that tactile change is important. The sequence builds layers for adhesion, and the light tap after the flour removes excess that could clump. The why behind this is structural, the flour gives the next wet layer something to hold onto, preventing the coating from sliding off. A common mistake is leaving too much egg on the stick which results in clumpy breading later, so let it drip briefly.
- Dip it back into the egg mixture, and then dip into the breadcrumb mixture, covering completely.: After the second egg bath the breadcrumbs adhere uniformly, and you should feel the slight granular texture under your fingers. This dual dip produces a thicker, more stable crust which resists splitting during cooking, so it is essential for preventing leaks. Listen for the quiet pat as excess crumbs fall back into the bowl, and press lightly to set the crumbs without compressing them flat. Avoid pressing too hard, which can compact the crumbs and lead to a less crunchy final texture.
- Repeat with all of the mozzarella sticks. Place on the lined cookie sheet and place in the freezer for 25 minutes.: As the sticks cool, the coated exterior firms and you may hear a faint settling as condensation stops forming. Freezing sets the layers, making the coating less likely to slip during the next handling and initial cooking. This rest is what gives you confidence that the cheese will stay contained while the crust crisps. A frequent oversight is skipping the freeze, which often causes fillings to ooze prematurely.
- Once frozen, repeat the process of dipping each stick into the egg mixture, then the breadcrumbs.: The second coating builds a thicker shell and you will notice the breadcrumb layer becomes noticeably denser and more uniform. This reinforcement helps the crust withstand the air flow and heat in the fryer without separating. The visual cue is a fuller, matte exterior that looks well sealed. Avoid rushing this step, as a rushed second coat can be uneven and prone to flaking during cooking.
- Place back into the freezer for at least 25 minutes.: The second freeze crystallizes the layers and gives you a reliable window for cooking later, and you might detect a cold metallic sigh in the air when you open the freezer door. This second chill is the backbone of success, letting you handle the sticks without deforming them and preventing premature melting during the initial heat up. Do not skip this rest, because insufficient freezing is the primary cause of bursting cheese during cooking.
- Spray the air fryer and the mozzarella sticks with cooking spray.: A fine mist of spray creates immediate sizzling and browning when the sticks hit the hot basket, and you will hear the tiny hiss as oil meets hot metal. This light oiling encourages an even golden crust without deep frying, and it protects the coating from drying out. Be careful not to over spray which can pool and cause uneven cook marks; a quick, even pass is enough.
- Preheat the air fryer to 380℉, place the mozzarella sticks spread out when preheated, and cook for 5 to 7 minutes, checking in on them and possibly flipping them at 4 minutes.: When preheated, the fryer emits a warm, dry heat that crisps the breadcrumbs rapidly. You want to hear a gentle sizzling and watch for the coating to go golden, while the interior begins to soften. Flipping helps both sides brown evenly; the visual cue is a uniform golden color and faint bubbling at the seams. A common error is overcrowding the basket which blocks airflow and leads to uneven browning, so keep space between pieces.
- Remove from the air fryer when the cheese starts to bubble and cool slightly before serving with marinara sauce!: The bubbling indicates the interior is fully molten and ready, and the aroma of toasted breadcrumbs and warm cheese is unmistakable. Allow a short cooling period so the cheese sets slightly and you avoid burns when biting in. This pause also lets juices redistribute, improving texture and reducing runny cheese. Rushing to serve too hot often results in molten spills, so give them a brief resting moment for best enjoyment.
Recipe Variations about Air Fryer Mozzarella Sticks

These variations keep the core technique but let you adapt flavor and texture. Below are practical ideas to experiment with while staying true to the recipe structure.
- Extra Crispy Double Coat Try a second breadcrumb coat after the initial freeze for a thicker crust that stands up to dipping and transport.
- Herbed Breadcrumbs Stir extra dried herbs into your breadcrumbs for aromatic notes that toast while cooking.
- Seasoned Flour Adding a pinch of seasoning to the flour bowl gives a subtle backbone of flavor beneath the breadcrumb layer.
- Smaller Bites Cutting the sticks into thirds shortens cook time and makes them perfect for party platters.
- Single Serve Prep Freeze on a sheet, then transfer to a bag for quick baking later, you can cook from frozen with a slightly extended time.
Serve This Air Fryer Mozzarella Sticks With
Serving is where these sticks shine. Below are ideas to present them for different occasions, plus storage and pairing tips to keep them tasting fresh.
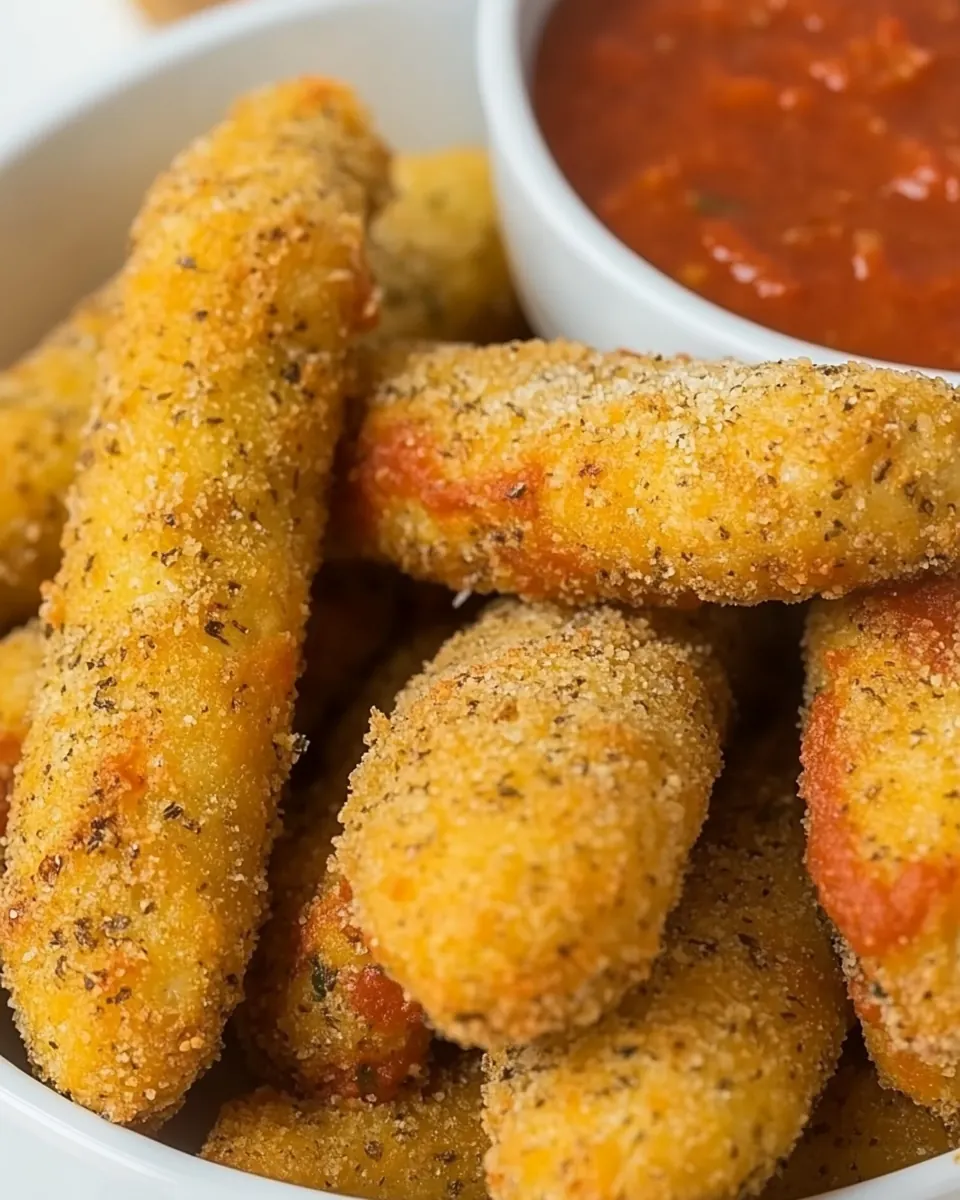
- Classic Marinara Serve warm marinara sauce in small bowls for dipping, its acidity cuts richness and is the classic companion.
- Casual Movie Night Arrange on a large platter with toothpicks for easy grabbing during films and casual gatherings.
- Party Platter Combine with other finger foods for variety and place the marinara sauce in the center for a communal dip station.
- Storage Tip Cool completely, flash freeze on a tray, then store in an airtight bag; reheat in the air fryer to restore crunch.
- Occasions Great for game day, casual lunches, or anytime you need a quick appetizer that appeals to many palates.
FAQ
Conclusion
What makes this recipe special is its brilliant simplicity and the way a few small technique choices yield consistently crisp, melty results. Try it when you need a quick party appetizer or a comforting snack that everyone will reach for. Have fun with the assembly, freeze between coats, and enjoy the satisfying contrast of crunchy exterior and gooey cheese inside; this one is always a crowd pleaser and worth the small steps it takes to get it right.

Air Fryer Mozzarella Sticks
Equipment
- Air Fryer
- Cookie Sheet
- Bowls
- Whisk
Ingredients
- 8 mozzarella sticks Melting and stringy when heated, provides the gooey center that defines mozzarella sticks; choose low-moisture mozzarella for best frying results. Helps create contrast with the crispy exterior and carries mild dairy flavor that pairs well with marinara or dips.
- 2 to 3 eggs Beaten to create an egg wash that helps coatings adhere and promotes an even golden crust when air-fried; adjust quantity to fully coat all sticks without excess. Adds a bit of richness and moisture to the breading process, improving texture and binding.
- 1/3 cup flour Used to lightly dust the cheese sticks before dredging to help the egg wash and breadcrumbs cling more effectively. Adds a neutral, slightly starchy layer that assists in forming a uniform coating and helps prevent sogginess during cooking.
- 1/2 teaspoon garlic powder Provides a burst of savory, aromatic flavor when mixed into the breadcrumb coating and enhances the overall taste of the fried exterior. Complements the cheese and breading with a subtle garlic note that elevates the snack without overpowering it.
- 1/4 teaspoons salt Used sparingly in the breading mixture to season the coating and balance flavors; helps bring out savory notes in the cheese and breadcrumbs. Contributes slight salinity to the crust, so measure carefully to avoid over-salting.
- 3/4 cup italian breadcrumbs Forms the main crunchy exterior when combined with seasonings and applied to the cheese sticks; Italian-style crumbs add herb and Parmesan accents. Creates the desirable crisp texture in the air fryer and browns attractively while sealing in melted cheese.
- 1/4 teaspoon dried parsley Added to the breadcrumb mixture to impart a mild herbaceous flavor and visual flecks that complement the Italian breadcrumbs. Enhances the aroma and overall seasoning profile of the crust without introducing moisture.
- 1 cup marinara sauce (optional for dipping) Served warm as an optional dipping sauce that adds acidity, herbs, and tomato sweetness to balance the rich, melty cheese. Provides a classic accompaniment that enhances flavor contrast and makes each bite more savory and tangy.
Instructions
- Line the cookie sheet with wax (or parchment) paper, cut the mozzarella sticks in half, and set aside while assembling the bowls.: The aroma of fresh mozzarella is subtle and milky at this stage, and the quiet scratch of the knife signals proper portioning. Lining a sheet with wax or parchment ensures the pieces won’t stick as they freeze, which helps preserve the coating. This step matters because evenly sized pieces cook at the same rate, preventing some from over melting while others remain cool. A common mistake is slicing uneven pieces which causes inconsistent cooking; take an extra moment to match sizes and lay them spaced apart so cold air can circulate while freezing.
- Assemble the first bowl by whisking the eggs until smooth.: Whisking produces a glossy, slightly viscous liquid that clings to the cheese , and you should hear a light whisking sound as bubbles form. The eggs serve as the first adhesive, so their texture matters; a lumpy or under whisked egg will coat unevenly. This technique ensures the later layers will adhere properly, creating a seal that helps prevent leakage. A pitfall here is overwhisking with too much air, which can create frothy pockets that destabilize the coating, so a smooth, even mixture is ideal.
- Assemble the second bowl by stirring the flour, garlic powder, and salt together.: The dry mixture should smell faintly of roasted garlic from the garlic powder , and the texture should be fine and crumb free. This bowl adds the first dry barrier to the cheese , helping the egg cling and absorbing excess moisture. Properly mixed flour ensures even seasoning and adhesion, which prevents bare spots that can expose the cheese. Avoid clumped flour by sifting or vigorously stirring before use, as clumps can cause irregular coating when dredged.
- Assemble the third bowl by stirring together the breadcrumbs and parsley.: The breadcrumb bowl should be fragrant with herbs and have a sandy texture that compresses slightly when pinched. These crumbs toast and create the crunchy exterior, so even distribution of parsley ensures balanced flavor. This step is crucial for texture contrast, turning soft interior into a crispy experience. A mistake to avoid is using overly fine crumbs that can pack and become gummy; choose a breadcrumb consistency that remains coarse enough to crisp well.
- Dip one mozzarella stick into the egg bowl, covering completely and allowing to drip off any excess, then dip into the flour bowl, covering completely.: You will notice the egg makes the surface glossy and the flour powdery; that tactile change is important. The sequence builds layers for adhesion, and the light tap after the flour removes excess that could clump. The why behind this is structural, the flour gives the next wet layer something to hold onto, preventing the coating from sliding off. A common mistake is leaving too much egg on the stick which results in clumpy breading later, so let it drip briefly.
- Dip it back into the egg mixture, and then dip into the breadcrumb mixture, covering completely.: After the second egg bath the breadcrumbs adhere uniformly, and you should feel the slight granular texture under your fingers. This dual dip produces a thicker, more stable crust which resists splitting during cooking, so it is essential for preventing leaks. Listen for the quiet pat as excess crumbs fall back into the bowl, and press lightly to set the crumbs without compressing them flat. Avoid pressing too hard, which can compact the crumbs and lead to a less crunchy final texture.
- Repeat with all of the mozzarella sticks. Place on the lined cookie sheet and place in the freezer for 25 minutes.: As the sticks cool, the coated exterior firms and you may hear a faint settling as condensation stops forming. Freezing sets the layers, making the coating less likely to slip during the next handling and initial cooking. This rest is what gives you confidence that the cheese will stay contained while the crust crisps. A frequent oversight is skipping the freeze, which often causes fillings to ooze prematurely.
- Once frozen, repeat the process of dipping each stick into the egg mixture, then the breadcrumbs.: The second coating builds a thicker shell and you will notice the breadcrumb layer becomes noticeably denser and more uniform. This reinforcement helps the crust withstand the air flow and heat in the fryer without separating. The visual cue is a fuller, matte exterior that looks well sealed. Avoid rushing this step, as a rushed second coat can be uneven and prone to flaking during cooking.
- Place back into the freezer for at least 25 minutes.: The second freeze crystallizes the layers and gives you a reliable window for cooking later, and you might detect a cold metallic sigh in the air when you open the freezer door. This second chill is the backbone of success, letting you handle the sticks without deforming them and preventing premature melting during the initial heat up. Do not skip this rest, because insufficient freezing is the primary cause of bursting cheese during cooking.
- Spray the air fryer and the mozzarella sticks with cooking spray.: A fine mist of spray creates immediate sizzling and browning when the sticks hit the hot basket, and you will hear the tiny hiss as oil meets hot metal. This light oiling encourages an even golden crust without deep frying, and it protects the coating from drying out. Be careful not to over spray which can pool and cause uneven cook marks; a quick, even pass is enough.
- Preheat the air fryer to 380℉, place the mozzarella sticks spread out when preheated, and cook for 5 to 7 minutes, checking in on them and possibly flipping them at 4 minutes.: When preheated, the fryer emits a warm, dry heat that crisps the breadcrumbs rapidly. You want to hear a gentle sizzling and watch for the coating to go golden, while the interior begins to soften. Flipping helps both sides brown evenly; the visual cue is a uniform golden color and faint bubbling at the seams. A common error is overcrowding the basket which blocks airflow and leads to uneven browning, so keep space between pieces.
- Remove from the air fryer when the cheese starts to bubble and cool slightly before serving with marinara sauce!: The bubbling indicates the interior is fully molten and ready, and the aroma of toasted breadcrumbs and warm cheese is unmistakable. Allow a short cooling period so the cheese sets slightly and you avoid burns when biting in. This pause also lets juices redistribute, improving texture and reducing runny cheese. Rushing to serve too hot often results in molten spills, so give them a brief resting moment for best enjoyment.
Notes
- Extra Crispy Double Coat Try a second breadcrumb coat after the initial freeze for a thicker crust that stands up to dipping and transport.
- Herbed Breadcrumbs Stir extra dried herbs into your breadcrumbs for aromatic notes that toast while cooking.
- Seasoned Flour Adding a pinch of seasoning to the flour bowl gives a subtle backbone of flavor beneath the breadcrumb layer.
- Smaller Bites Cutting the sticks into thirds shortens cook time and makes them perfect for party platters.
- Single Serve Prep Freeze on a sheet, then transfer to a bag for quick baking later, you can cook from frozen with a slightly extended time.