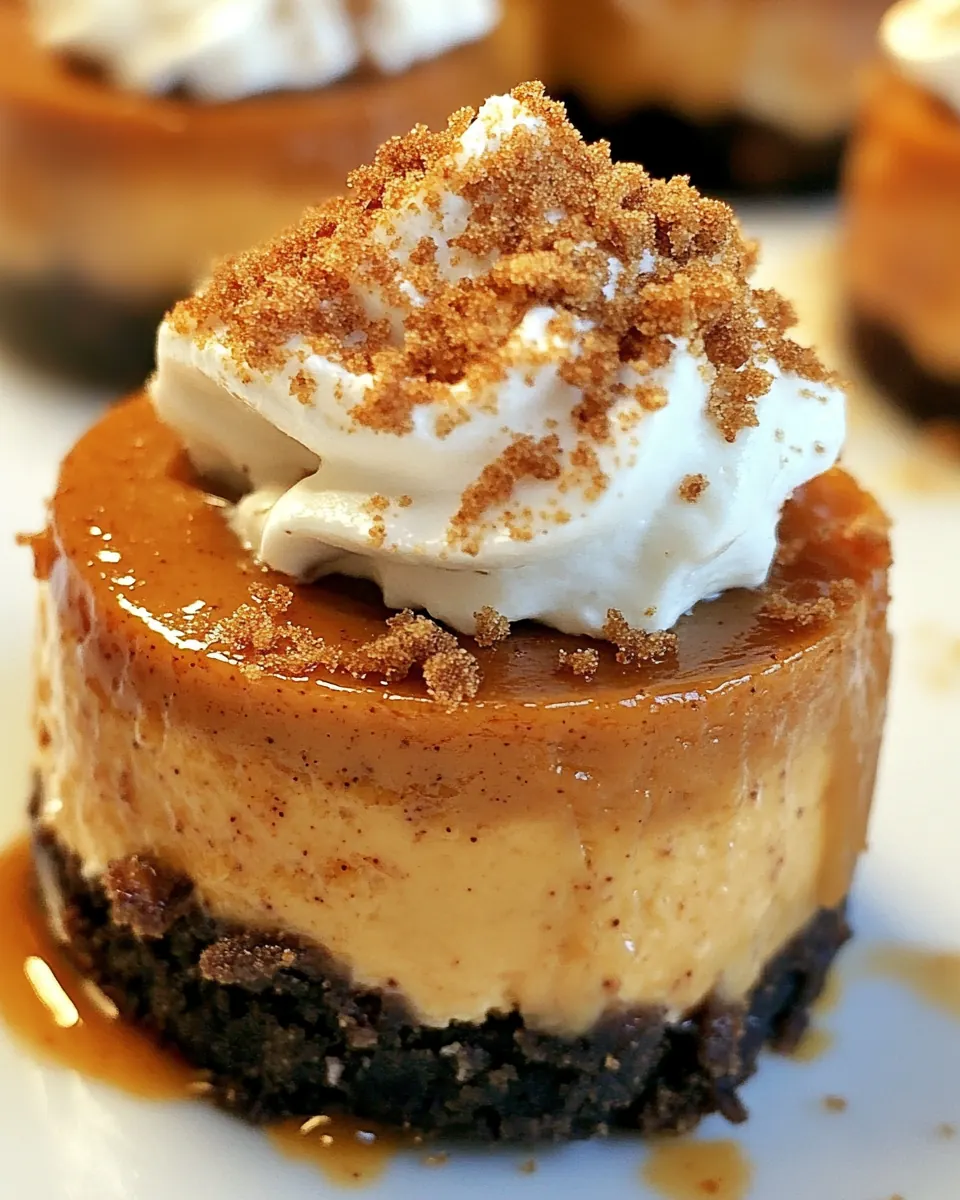
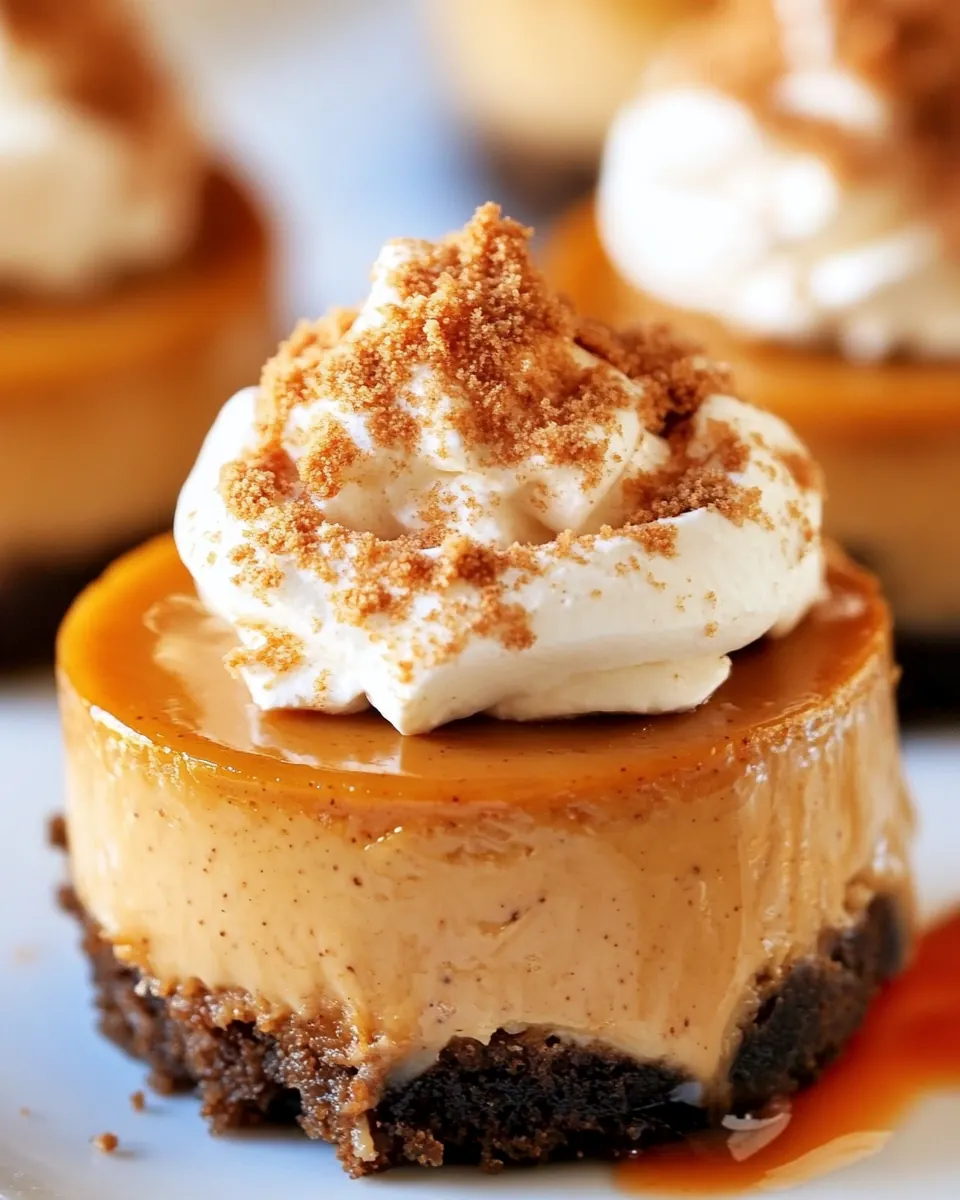
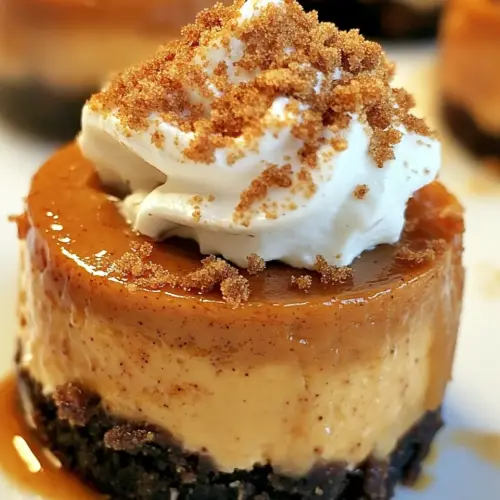
Mini Pumpkin Cheesecakes With Gingersnap Crust
Mini Pumpkin Cheesecakes With Gingersnap Crust stole my heart the first autumn I tried to scale down Thanksgiving desserts so everyone could sample more than one sweet. I remember carrying a tray of these little cups to a potluck where the air smelled of cinnamon and roasted nuts, and watching neighbors trade forks like they were swapping secrets. They vanished faster than any other dessert, and I realized these tiny treats say everything a big pie does, but in a more joyful, bite sized way.
I started making Mini Pumpkin Cheesecakes With Gingersnap Crust when I wanted something festive that did not dominate the table. I love that each bite offers a crisp, spicy crust followed by a creamy pumpkin center, and the portion control meant I could taste test every batch without guilt. Over time, I tuned the spices and the bake time so the centers set silky and the edges stay tender. Friends often ask for the recipe, and I always tell them the secret is patience with cooling and chilling, which brings out the best texture and flavor.
Recipe Snapshot
40 mins
15 mins
25 mins
Easy
250 kcal
American
Keto, Gluten-Free
Desserts
Food processor, Mini cheesecake pan, Electric mixer
The Charm of This Mini Pumpkin Cheesecakes With Gingersnap Crust
Comfort in a Compact Dessert
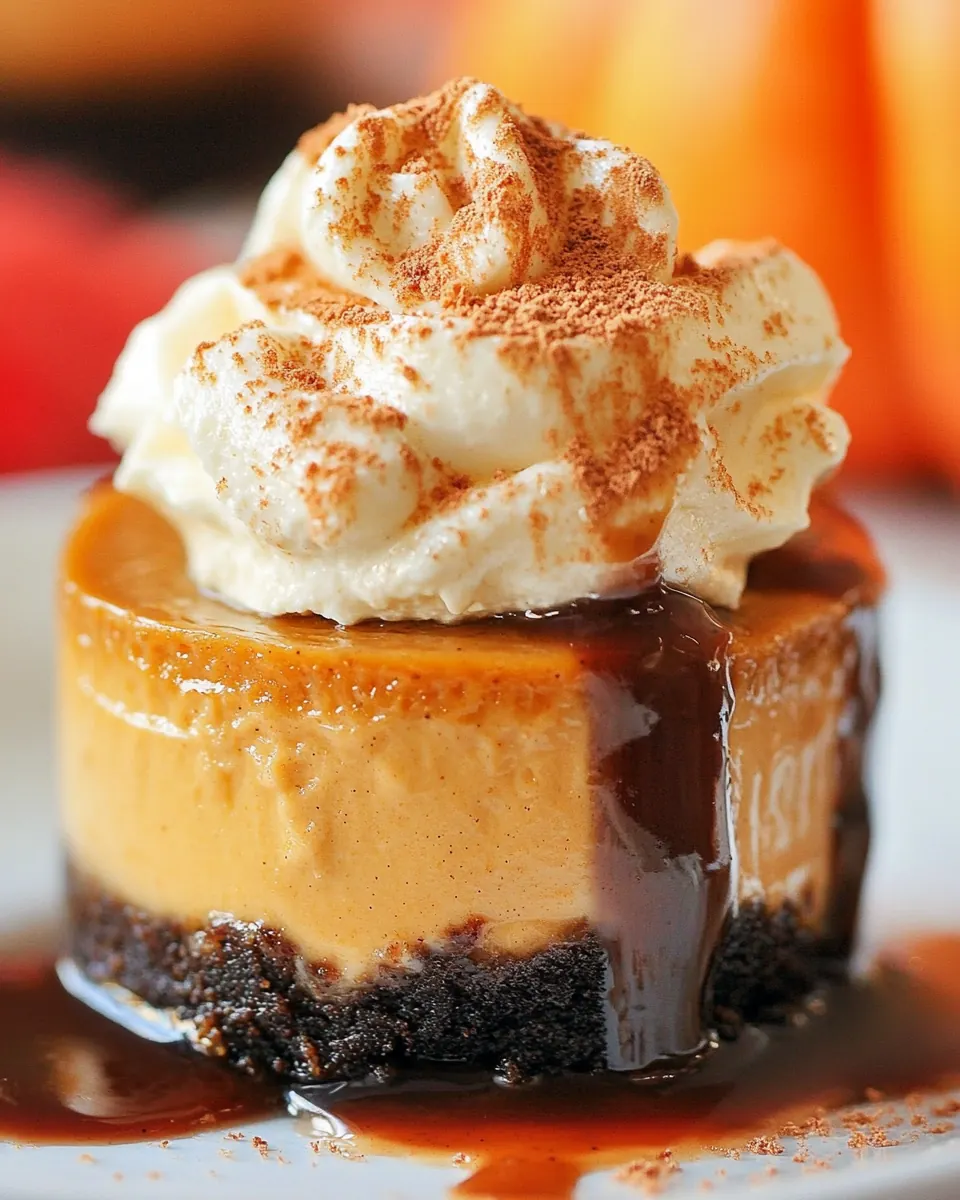
I adore how Mini Pumpkin Cheesecakes With Gingersnap Crust condense the cozy flavors of fall into a small package. You get creamy cream cheese with warm pumpkin and baking spices, all balanced by a crunchy gingersnap base. They hit the same nostalgic notes as a slice of pumpkin pie, while feeling fresh and modern.
Perfect for Entertaining
These minis are made for gatherings. I can bake a dozen at once, and they look elegant without fuss. Because each serving is individual, plating is simple and everyone feels pampered. They are a hostess friendly dessert that heartens even the busiest tables.
Texture Contrast That Charms
The textural play is what makes me keep returning to this recipe. The crumbly, spiced crust snaps under your fork, then gives way to the velvety, slightly dense cheesecake filling. That contrast makes every bite interesting and satisfying.
Flexible and forgiving
I appreciate a recipe that forgives small mistakes. Slightly over beating the filling or a touch more bake time can be remedied by extra chilling, and the flavors still shine. I often tinker with the spices to make them brighter or more subdued depending on who I am serving.
Seasonal star
These cheesecakes feel particularly right for fall and holiday meals. The spices and pumpkin root them in the season, but because they are compact, they fit both casual and formal tables with equal grace. That versatility keeps them in my rotation year after year.
Key Ingredients for Mini Pumpkin Cheesecakes With Gingersnap Crust
These ingredients are chosen to create a harmony of spice, creaminess, and crunch. The foundation is a robust spiced crust that anchors a lush, pumpkin laced cheesecake filling. Each component plays a clear role: the crust provides texture and spice, the cream cheese ensures richness, and the pumpkin plus spices deliver seasonal flavor. Together, they form a balanced dessert that is both comforting and refined.
- 24 g ingersnap Cookies: Crush finely to form a crunchy base that provides sweet, spiced texture for the gingersnap crust.
- 3 tablespoons melted butter: Melt thoroughly to bind crumbs together and create a crisp, buttery crust that holds its shape.
- 1 package 8 ounces PHILADELPHIA Cream Cheese, softened: Soften fully to ensure a silky, lump-free filling that contributes rich, creamy body and tang.
- 1/2 cup canned pumpkin: Puree smoothly to add moist pumpkin flavor and tenderize the filling while lending autumnal color.
- 1/2 cup sugar: Dissolve completely to sweeten the cheesecake, balance spices, and help control overall sweetness.
- 1/2 tsp vanilla: Add gently to enhance flavor depth and floral notes while contributing aromatic sweetness to the filling.
- 1/2 teaspoon cinnamon: Sprinkle evenly to contribute warm, woody spice and complement the pumpkin and ginger flavors.
- 1/2 teaspoon pumpkin pie spice: Incorporate carefully to introduce a blend of warming spices that intensifies classic pumpkin pie character.
- 1/4 tsp salt (optional): Use sparingly to balance flavors and heighten sweetness while preserving the filling's flavor profile.
- 1 egg: Beat lightly to provide structure and richness, helping the filling set while adding a smooth texture.
- COOL WHIP Whipped Topping if desired: Spoon lightly on finished cheesecakes if desired to add airy, chilled sweetness and creamy contrast.
- Caramel sauce if desired: Drizzle optionally over servings to introduce sticky, sweet caramel notes and enhance presentation.
How to Cook Mini Pumpkin Cheesecakes With Gingersnap Crust
These instructions guide you from prep to chilled perfection. The technique is simple but precise, and the steps explain what to watch, smell, and feel so your minis come out consistently excellent. Keep your tools at hand and give the chilled stage its due respect for the best texture.
- Preheat oven to 350 degrees F.: You will notice a faint warmth in the kitchen as the oven reaches 350 degrees F , which is ideal for a gentle set that keeps the centers creamy rather than dry. This temperature encourages the edges to firm slightly while the middle finishes with a custardy texture. A common error is placing the pan in before the oven is fully heated, which can produce uneven set and longer bake times. If your oven runs hot, consider checking with an oven thermometer so you do not overbake.
- In a food processor, grind gingersnap cookies to crumbs. Add melted butter and pulse until mixed.: As you pulse, the room will fill with sharp ginger and molasses aromas from the gingersnap crumbs, and the crumbs will begin to clump as the butter coats them. This signals that the mixture will press into a cohesive crust that holds together when baked. If the crumbs look dry or powdery after the first pulses, add the butter a little at a time until the texture resembles damp sand. Over processing can make the mixture too fine and pasty, which reduces the crunchy contrast, so pulse in short bursts.
- Lightly spray mini cheesecake pan with non stick cooking spray.: The faint hiss of spray prevents sticking and helps the crust and filling release cleanly, keeping the mini shapes intact. Even with a good crust bind, a non stick barrier makes unmolding effortless and preserves presentation. Avoid heavy spraying, which can pool and create oily spots; a light, even coat is all you need.
- Place approximately 1 tablespoon of gingersnap crust mixture into each of the 12 cheesecake cavities in pan. Press down with spoon or small glass.: When you press the crust, you will feel it compact and hold shape beneath your tool, and the surface should be even and firm enough to support the filling. This tactile feedback is important to ensure an even bake and a stable base for each mini. Press too lightly and the crust may crumble when served, press too hard and it will become dense instead of crisp. Aim for firm but not packed solid.
- Beat cream cheese, pumpkin, sugar, vanilla, salt and spices with electric mixer on medium speed until well blended. Add eggs and beat until just blended.: As you blend, the batter transforms from curdled lumps into a glossy, smooth mixture, and the room will smell warmly spiced. The cream cheese must be fully softened so the mixer produces a velvety texture without streaks. Scrape the bowl to incorporate any pockets of unblended cheese. A frequent mistake is over mixing at high speed, which introduces too much air and can cause a top that cracks when baking, so keep the speed moderate.
- Spoon cream cheese mixture into mini cheesecake pan on top of gingersnap crusts. Bake for 20-25 minutes until set. Remove from oven and let cool in pan for at least 30 minutes. Chill for at least two hours, or preferably overnight.: When you add the egg , beat only until the streaks disappear and the batter reads homogeneous; this restraint keeps the texture dense and creamy rather than souffle like. You'll notice the batter become slightly looser and silkier, a visual cue that it is ready to be portioned. Overbeating at this stage traps air and can lead to puffed centers that collapse as they cool.
- Spoon cream cheese mixture into mini cheesecake pan on top of gingersnap crusts.: As you spoon, watch the contrast between the pale, glossy filling and the deeper crust tone. The filling should settle smoothly without large air pockets, and a gentle tap on the counter can coax out tiny bubbles. If you see large pockets of air, use a toothpick to release them before baking. Filling the cups unevenly will cause inconsistent bake times, so aim for uniform portions.
- Bake for 20 to 25 minutes until set.: During baking, the aroma of warm spices will intensify and the edges will gain a faint hint of golden color while the centers remain slightly jiggly but not liquid. This visual cue is crucial: a slight wobble in the middle indicates a creamy finish, while a fully firm center can mean overbaking. Opening the oven frequently causes temperature swings, so avoid it; instead, rely on the gentle jiggle test near the lower end of the time window.
- Remove from oven and let cool in pan for at least 30 minutes.: After baking, the softened centers will continue to set as they cool, and you may notice the surface settling and the aroma mellowing. Letting them rest in the pan prevents sudden cooling that could cause cracking, and it also firms the crust so the minis hold shape during removal. A mistake is attempting to unmold while too warm, which often leads to collapsed or messy edges; patience here pays off.
- Chill for at least two hours, or preferably overnight.: Chilling transforms the texture, making the filling dense and slice able while the spices meld and the crust firms further. Overnight chilling deepens flavor and produces a clean bite when served. Resist the temptation to skip this stage, as serving slightly warm will yield a looser, less cohesive texture.
Tips for Success

Some small techniques deliver consistently great results with these mini cheesecakes. The right crust texture, gentle mixing, and patient chilling are the three pillars I rely on. Below are detailed tips that I use every time I make Mini Pumpkin Cheesecakes With Gingersnap Crust.
- Soften the cream cheese Properly softened cream cheese blends smoothly. Take it out of the fridge at least 30 minutes before you plan to mix, or microwave in short 5 second bursts if you are short on time, checking often to avoid melting. Cold lumps cause a grainy texture that no amount of mixing can fully erase.
- Measure spices carefully Spices like cinnamon and pumpkin pie spice are potent. Add them precisely and taste the batter if you want to adjust, but remember that chilling intensifies spice perception slightly. Over spicing will mask the pumpkin and cream cheese balance.
- Bind the crust right The crumb and butter ratio creates the ideal crust. If the mixture does not clump when pressed between fingers, add a touch more melted butter sparingly. Too much butter makes the crust greasy, too little makes it crumbly.
- Use consistent portions Scoop the filling with a small cookie scoop or tablespoon to keep the bake uniform. Uniform portions mean uniform doneness across all minis. Different sized portions will bake at different rates and lead to uneven texture.
- Avoid overmixing Once the egg is added, mix only until combined. Overbeating incorporates air which raises the batter and then collapses, creating a cracked top. Gentle mixing preserves the dense, creamy texture you want.
Side Dish Ideas for Mini Pumpkin Cheesecakes With Gingersnap Crust
These mini cheesecakes are dessert, so the side ideas focus on presentation, pairing, and occasions. They complement autumn menus beautifully and can be adapted for formal or casual events. Below are serving suggestions and storage tips to help you plan when to make them and how to present them.
- Elegant platter service Arrange the minis on a decorative platter lined with parchment and sprinkle with a light dusting of cinnamon or a few gingersnap crumbs for contrast. This creates an attractive centerpiece for a holiday dessert table.
- Individual plates Serve one or two minis per guest with a small drizzle of caramel sauce and a dollop of COOL WHIP for a refined dessert course. This presentation is perfect for dinner parties where plating matters.
- Casual potluck Transport the minis in the baking pan, chilled and covered, and provide a small bowl of caramel sauce and a container of COOL WHIP so guests can customize. This works well for communal meals where ease is key.
- Occasions These are ideal for Thanksgiving, fall gatherings, and small celebrations. Their portion size makes them perfect for sampling several desserts without committing to a whole slice of pie.
- Storage Store in an airtight container in the refrigerator for up to five days. For longer storage, freeze on a tray until solid, then transfer to a sealed container for up to one month. Thaw in the refrigerator before serving to maintain texture.
- Seasonal pairing Pair with warm beverages like spiced tea or coffee for cozy autumn moments. The spices in the gingersnap and filling harmonize with hot drinks and amplify the seasonal experience.
FAQ
Conclusion
What makes these mini cheesecakes special is the perfect balance between the crisp, spiced gingersnap base and the lush, pumpkin studded filling. They deliver all the warmth of holiday baking in a neat, individual portion that is both charming and practical. Try them for your next fall gathering, and you will see how quickly they become a requested favorite. They are easy to prepare, forgiving in execution, and rewarding on the plate, so give yourself the treat of baking a batch and enjoy the smiles they bring.
Mini Pumpkin Cheesecakes With Gingersnap Crust
Equipment
- Food Processor
- Mini cheesecake pan
- Electric Mixer
Ingredients
- 24 g ingersnap Cookies Crush finely to form a crunchy base that provides sweet, spiced texture for the gingersnap crust.
- 3 tablespoons melted butter Melt thoroughly to bind crumbs together and create a crisp, buttery crust that holds its shape.
- 1 package 8 ounces PHILADELPHIA Cream Cheese, softened Soften fully to ensure a silky, lump-free filling that contributes rich, creamy body and tang.
- 1/2 cup canned pumpkin Puree smoothly to add moist pumpkin flavor and tenderize the filling while lending autumnal color.
- 1/2 cup sugar Dissolve completely to sweeten the cheesecake, balance spices, and help control overall sweetness.
- 1/2 tsp vanilla Add gently to enhance flavor depth and floral notes while contributing aromatic sweetness to the filling.
- 1/2 teaspoon cinnamon Sprinkle evenly to contribute warm, woody spice and complement the pumpkin and ginger flavors.
- 1/2 teaspoon pumpkin pie spice Incorporate carefully to introduce a blend of warming spices that intensifies classic pumpkin pie character.
- 1/4 tsp salt optional Use sparingly to balance flavors and heighten sweetness while preserving the filling's flavor profile.
- 1 egg Beat lightly to provide structure and richness, helping the filling set while adding a smooth texture.
- COOL WHIP Whipped Topping if desired Spoon lightly on finished cheesecakes if desired to add airy, chilled sweetness and creamy contrast.
- Caramel sauce if desired Drizzle optionally over servings to introduce sticky, sweet caramel notes and enhance presentation.
Instructions
- Preheat oven to 350 degrees F.: You will notice a faint warmth in the kitchen as the oven reaches 350 degrees F , which is ideal for a gentle set that keeps the centers creamy rather than dry. This temperature encourages the edges to firm slightly while the middle finishes with a custardy texture. A common error is placing the pan in before the oven is fully heated, which can produce uneven set and longer bake times. If your oven runs hot, consider checking with an oven thermometer so you do not overbake.
- In a food processor, grind gingersnap cookies to crumbs. Add melted butter and pulse until mixed.: As you pulse, the room will fill with sharp ginger and molasses aromas from the gingersnap crumbs, and the crumbs will begin to clump as the butter coats them. This signals that the mixture will press into a cohesive crust that holds together when baked. If the crumbs look dry or powdery after the first pulses, add the butter a little at a time until the texture resembles damp sand. Over processing can make the mixture too fine and pasty, which reduces the crunchy contrast, so pulse in short bursts.
- Lightly spray mini cheesecake pan with non stick cooking spray.: The faint hiss of spray prevents sticking and helps the crust and filling release cleanly, keeping the mini shapes intact. Even with a good crust bind, a non stick barrier makes unmolding effortless and preserves presentation. Avoid heavy spraying, which can pool and create oily spots; a light, even coat is all you need.
- Place approximately 1 tablespoon of gingersnap crust mixture into each of the 12 cheesecake cavities in pan. Press down with spoon or small glass.: When you press the crust, you will feel it compact and hold shape beneath your tool, and the surface should be even and firm enough to support the filling. This tactile feedback is important to ensure an even bake and a stable base for each mini. Press too lightly and the crust may crumble when served, press too hard and it will become dense instead of crisp. Aim for firm but not packed solid.
- Beat cream cheese, pumpkin, sugar, vanilla, salt and spices with electric mixer on medium speed until well blended. Add eggs and beat until just blended.: As you blend, the batter transforms from curdled lumps into a glossy, smooth mixture, and the room will smell warmly spiced. The cream cheese must be fully softened so the mixer produces a velvety texture without streaks. Scrape the bowl to incorporate any pockets of unblended cheese. A frequent mistake is over mixing at high speed, which introduces too much air and can cause a top that cracks when baking, so keep the speed moderate.
- Spoon cream cheese mixture into mini cheesecake pan on top of gingersnap crusts. Bake for 20-25 minutes until set. Remove from oven and let cool in pan for at least 30 minutes. Chill for at least two hours, or preferably overnight.: When you add the egg , beat only until the streaks disappear and the batter reads homogeneous; this restraint keeps the texture dense and creamy rather than souffle like. You'll notice the batter become slightly looser and silkier, a visual cue that it is ready to be portioned. Overbeating at this stage traps air and can lead to puffed centers that collapse as they cool.
- Spoon cream cheese mixture into mini cheesecake pan on top of gingersnap crusts.: As you spoon, watch the contrast between the pale, glossy filling and the deeper crust tone. The filling should settle smoothly without large air pockets, and a gentle tap on the counter can coax out tiny bubbles. If you see large pockets of air, use a toothpick to release them before baking. Filling the cups unevenly will cause inconsistent bake times, so aim for uniform portions.
- Bake for 20 to 25 minutes until set.: During baking, the aroma of warm spices will intensify and the edges will gain a faint hint of golden color while the centers remain slightly jiggly but not liquid. This visual cue is crucial: a slight wobble in the middle indicates a creamy finish, while a fully firm center can mean overbaking. Opening the oven frequently causes temperature swings, so avoid it; instead, rely on the gentle jiggle test near the lower end of the time window.
- Remove from oven and let cool in pan for at least 30 minutes.: After baking, the softened centers will continue to set as they cool, and you may notice the surface settling and the aroma mellowing. Letting them rest in the pan prevents sudden cooling that could cause cracking, and it also firms the crust so the minis hold shape during removal. A mistake is attempting to unmold while too warm, which often leads to collapsed or messy edges; patience here pays off.
- Chill for at least two hours, or preferably overnight.: Chilling transforms the texture, making the filling dense and slice able while the spices meld and the crust firms further. Overnight chilling deepens flavor and produces a clean bite when served. Resist the temptation to skip this stage, as serving slightly warm will yield a looser, less cohesive texture.
Notes
- Soften the cream cheese Properly softened cream cheese blends smoothly. Take it out of the fridge at least 30 minutes before you plan to mix, or microwave in short 5 second bursts if you are short on time, checking often to avoid melting. Cold lumps cause a grainy texture that no amount of mixing can fully erase.
- Measure spices carefully Spices like cinnamon and pumpkin pie spice are potent. Add them precisely and taste the batter if you want to adjust, but remember that chilling intensifies spice perception slightly. Over spicing will mask the pumpkin and cream cheese balance.
- Bind the crust right The crumb and butter ratio creates the ideal crust. If the mixture does not clump when pressed between fingers, add a touch more melted butter sparingly. Too much butter makes the crust greasy, too little makes it crumbly.
- Use consistent portions Scoop the filling with a small cookie scoop or tablespoon to keep the bake uniform. Uniform portions mean uniform doneness across all minis. Different sized portions will bake at different rates and lead to uneven texture.
- Avoid overmixing Once the egg is added, mix only until combined. Overbeating incorporates air which raises the batter and then collapses, creating a cracked top. Gentle mixing preserves the dense, creamy texture you want.