Strawberry Shortcake Crumbs
Strawberry Shortcake Crumbs came into my kitchen on a rainy afternoon when I was craving something bright and textural to scatter over bowls of yogurt and leftover cake pieces.
I remember unpacking a tiny box of strawberry Jell o and thinking about how its concentrated flavor could be coaxed into crunchy bits that sing of summer. I set up bowls, chilled butter, and a quiet playlist, and the simple, satisfying action of rubbing flour and butter together felt almost meditative. By the time the tray came out of the oven the house smelled faintly of strawberry and warm sugar, and I felt a small proudness in having turned pantry staples into a versatile crunchy topping. Over the next few weeks I found myself adding these crumbles to breakfasts, gifting jars to neighbors, and tucking them into picnic baskets. They became my go to for adding a pop of color and a playful crunch to otherwise ordinary dishes.
What I love most about Strawberry Shortcake Crumbs is how forgiving the process is. You do not need fancy tools or a long list of ingredients, and yet the result elevates everything it touches. The recipe encourages little experiments, like swapping the base flour amount between the two crumble mixes to change texture, or chilling the butter a touch longer for extra flakiness. After a busy day it is a tiny, joyful ritual to make a batch, let it cool, and know there is a fridge jar waiting to brighten a morning bowl or an afternoon treat.
Recipe Snapshot
20 mins
10 mins
10 mins
Medium
150 kcal
American
Gluten-Free, Low FODMAP
Desserts
Baking sheet, Parchment paper, Medium bowl, Fork
Why Try This Strawberry Shortcake Crumbs
Bright, concentrated strawberry flavor
I adore how Strawberry Shortcake Crumbs capture that unmistakable boxed strawberry taste and make it more interesting. Using the strawberry Jell o concentrates flavor so you get a punch of berry in every bite, without needing fresh fruit or long prep. This is perfect when you want a bold strawberry note that does not dilute with cooking.
Textural contrast on demand
The combination of flour and cold butter creates a crisp, sandy crumb that contrasts beautifully with creamy elements. I use these crumbles to add crunch to soft desserts and creamy breakfasts, and they never fail to lift the dish. You will notice a pleasant audible crunch and a slight melt on the tongue, which makes eating more fun.
Fast and pantry friendly
This is a recipe I reach for when I have limited time. The ingredients are basic flour, butter, sugar, and a box of strawberry Jell o, so it is ideal for last minute garnish needs. I often make a batch in under 30 minutes and keep it in the fridge for quick use, which makes entertaining less stressful.
Versatility across dishes
I find myself sprinkling these crumbs over yogurt, ice cream, and even simple pound cake slices. They add color, flavor, and a nostalgic note that works for kid friendly treats and grown up desserts alike. Because they store well chilled, they are a handy multi purpose element for many recipes.
Simple technique, reliable results
The method is straightforward, and that is precisely what I appreciate. There is little room for error if you follow the steps for cold butter and proper mixing. Even when I am rushing, the process is forgiving enough to still yield satisfying crumbs, which builds confidence in the kitchen.
What You Need for Strawberry Shortcake Crumbs
These ingredients are intentionally minimal, designed to work together to create crunchy, flavored crumbles. The star is the strawberry Jell o which provides concentrated berry flavor, while the flour and cold butter create the crisp, sandy texture. Sugar adds sweetness and a caramelizing note during baking, and a touch of vanilla rounds out the aroma.
- 3 ounces box strawberry flavored Jell-o: Adds bright strawberry flavor and color while contributing soluble gelatin to help bind and set crumbs; dissolve into dry ingredients or melt with butter for even distribution. Enhances aroma and provides a nostalgic, concentrated fruit note without fresh strawberries.
- 1 cup all-purpose flour divided: Provides structure and bulk to the crumb mixture, with 1 cup measured and part held back for dusting or adjusting texture; develop lightness by sifting and combining with fat. Enables proper hydration and browning during baking or toasting when mixed with other dry ingredients.
- 1/2 cup unsalted butter cold and divided: Contributes richness, moisture, and tenderness when cold and cut or grated into the flour to create flaky crumb clusters; divide as directed to control texture and to cream with sugar if needed. Supplies flavor and helps bind ingredients when melted or incorporated, supporting both crumble and shortcake textures.
- 1/2 cup white granulated sugar: Imparts sweetness and assists in browning and tenderizing the crumb; creamed with butter can create a lighter, aerated texture and helps dissolve powdered or flavored gelatin. Balances tartness of the strawberry flavoring and enhances overall mouthfeel without adding excessive moisture.
- 1 teaspoon vanilla extract: Adds sweet floral notes and depth to the overall flavor profile while enhancing perceived sweetness without additional sugar; stir in toward the end to preserve aroma. Complements the strawberry Jell-o and rounds flavor, preventing flatness in the finished crumbs.
Cooking Method for Strawberry Shortcake Crumbs
These instructions are conversational and friendly, designed to guide you step by step while explaining what to expect at each stage. I will walk you through combining the mixes, arranging them on a sheet, and baking for a short time to achieve a crisp, flavorful crumb. Pay attention to the sensory cues and cool the tray fully before storing.
- Preheat oven to 350 degrees F.: As you set the temperature, notice the warmth building in the oven and the faint metallic hum as the elements engage, this ensures consistent heat so the crumbs bake quickly and evenly. The why here is simple, a properly preheated oven gives immediate browning and prevents sogginess. A common mistake is skipping the preheat, which leads to uneven texture and underbaked centers. If your oven runs hot, use an oven thermometer to verify the temperature.
- In a medium bowl using a fork stir Jell-o with 1/2 cup flour and 1/4 cup butter, until you get a crumble mixture.: Right after combining, you will smell a concentrated strawberry scent, and the texture should resemble coarse sand with small butter flecks. This strawberry forward crumble forms the colorful component and the cold butter creates little pockets that crisp in the oven. Why this matters, the separate strawberry mix preserves bright flavor and color without overworking the dough. Avoid over mixing which melts the butter , leading to dense clumps instead of separate crumbles.
- In another medium bowl stir 1/2 cup flour, with 1/2 cup sugar, and 1/4 cup butter, plus 1 teaspoon vanilla. Mix until you get a crumble mixture.: When you fold these together you will detect a sweet scent with warm vanilla undernotes, and the texture should again be sandy but slightly more cohesive because of the sugar and vanilla . This vanilla crumble provides a balancing flavor to the strawberry bits, adding warmth and caramelizing potential. The technique matters because keeping the butter cold creates a lighter, crisper result. A frequent error is using softened butter , which yields a pasty mixture rather than distinct crumbs.
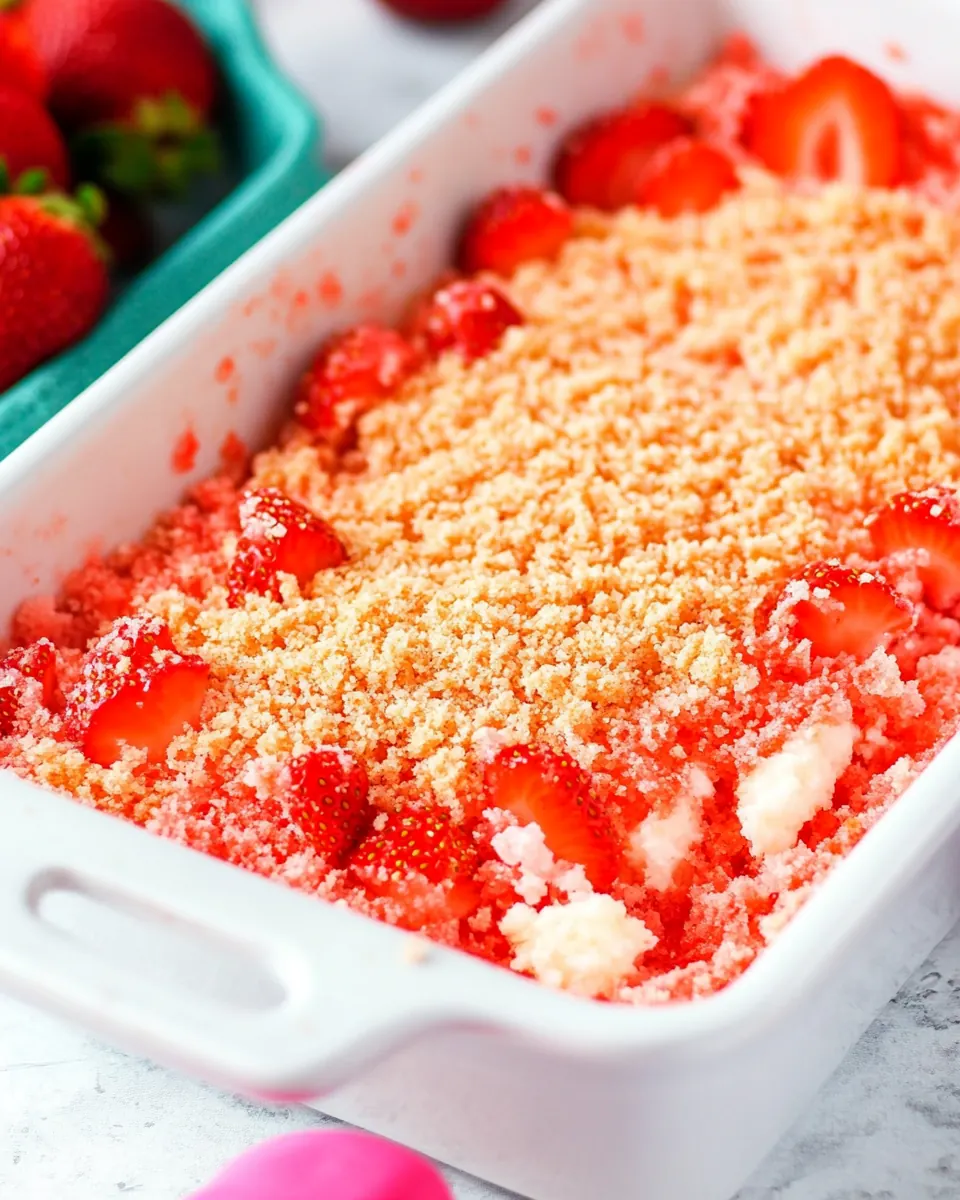
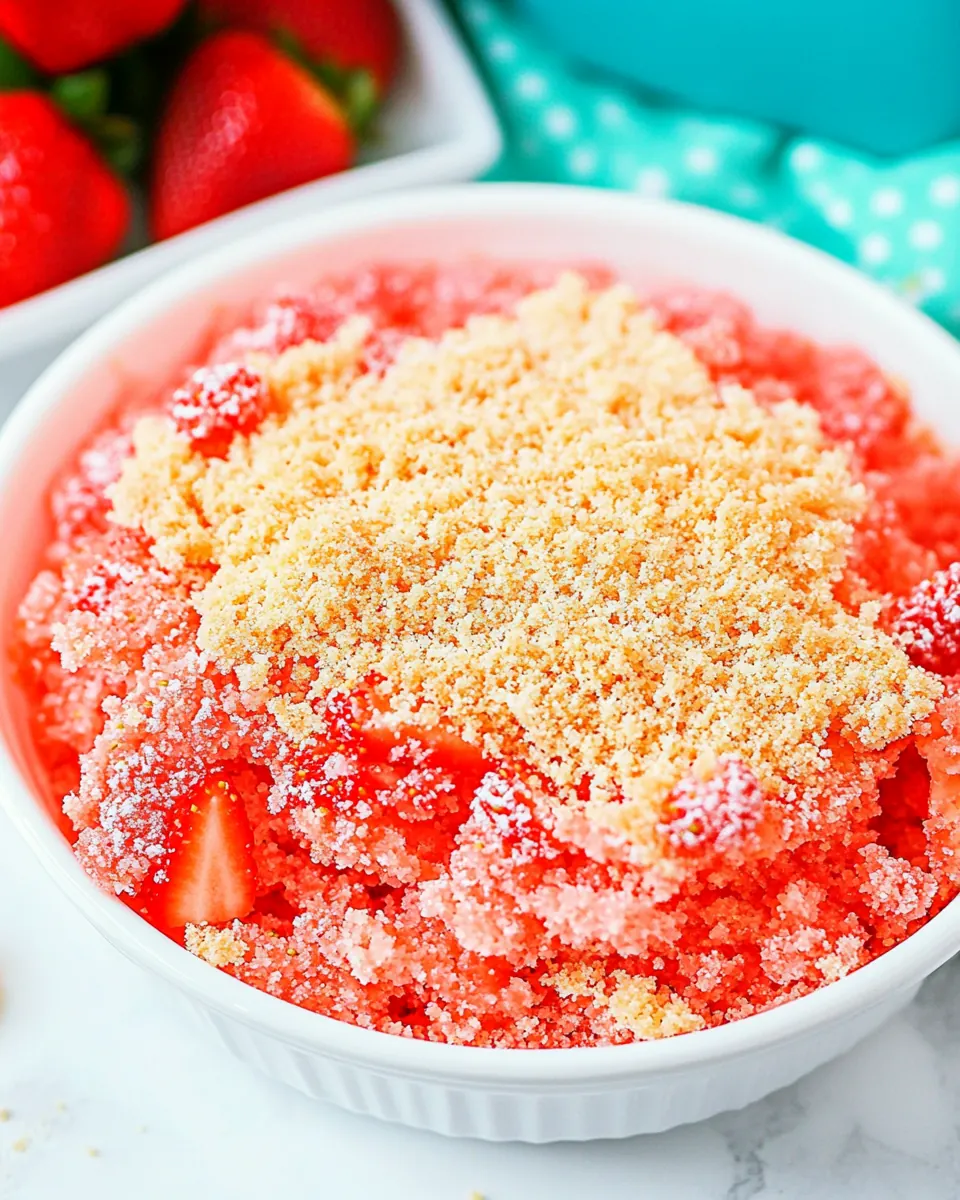
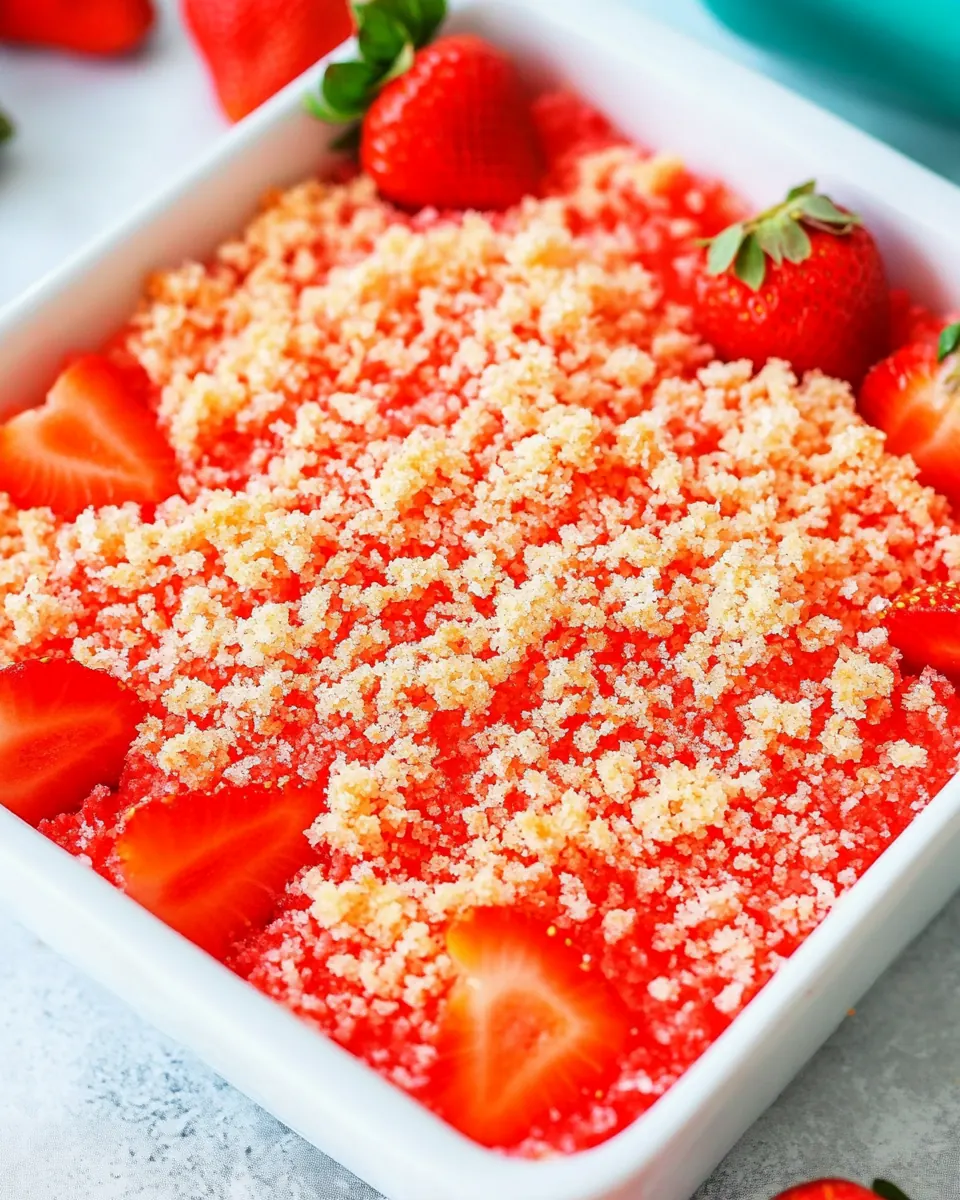
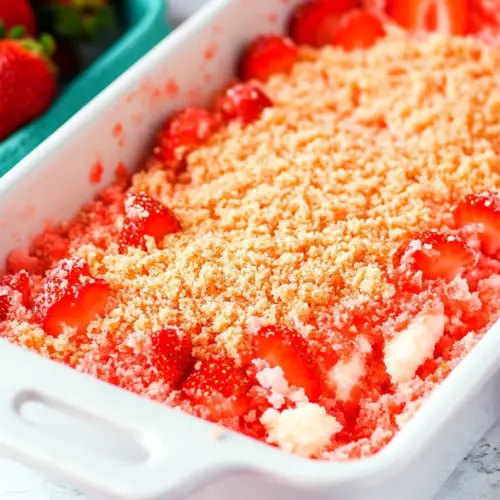
- Line a baking sheet with parchment paper and sprinkle on it the strawberry crumbles. Next, sprinkle on the vanilla crumbles, and slightly mix them.: As you layer the crumbles you will see a pretty contrast between pink and pale crumbs, and the parchment prevents sticking while allowing an easy transfer. Slightly mixing them gives visual interest and ensures both flavors mingle on the tray without fully blending. The reason this step is done separately is to preserve the integrity of each crumble so they brown at slightly different rates. A usual slip is packing the crumbs too tightly on the sheet, which prevents airflow and causes uneven browning.
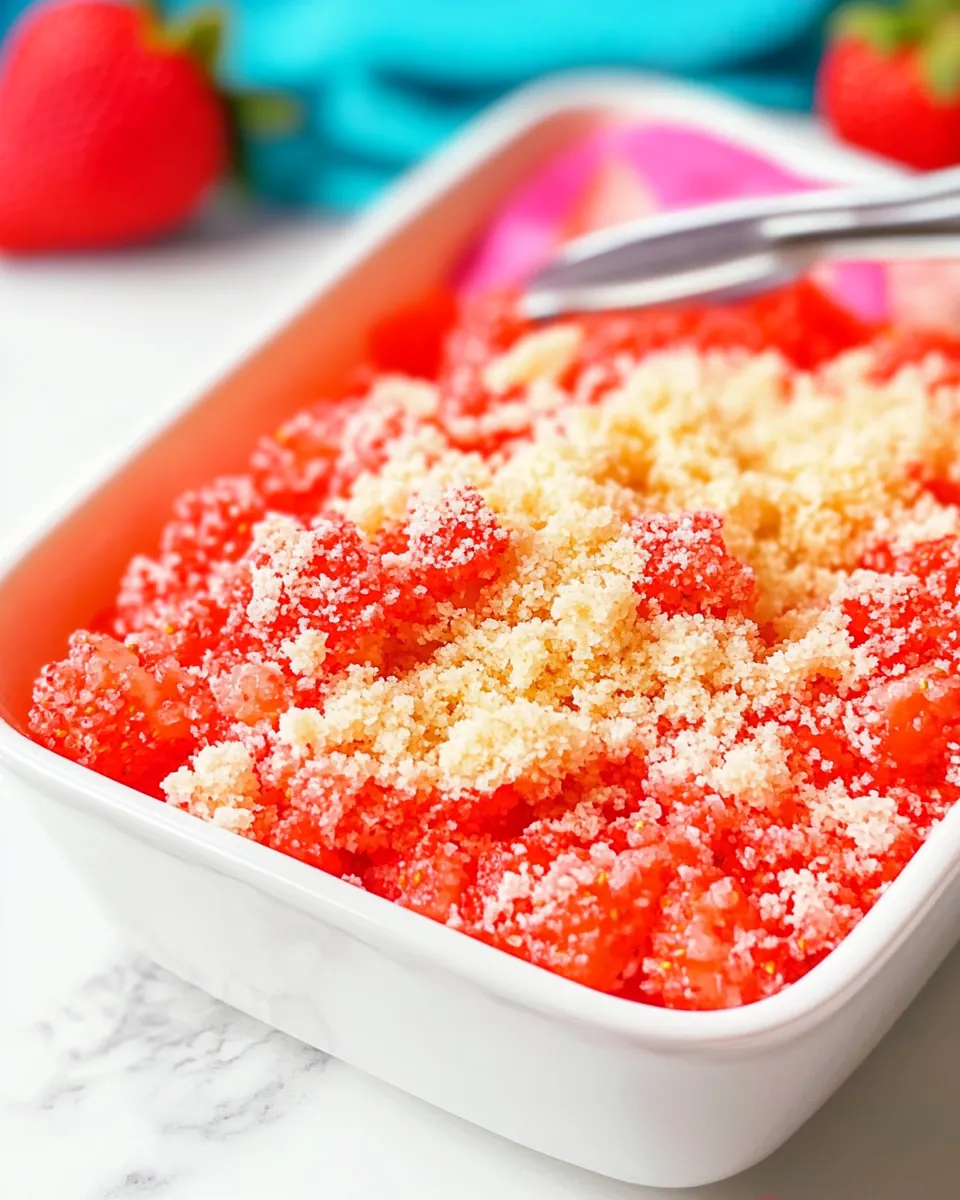
- Bake for 7-8 minutes and do NOT stir.: During baking you will hear a faint crackle and soon smell that warm, sugared aroma; the edges will just begin to color. Leaving them undisturbed allows the crumbs to crisp and set, forming a brittle texture as the sugar melts and rehardens. The technique matters because stirring mid bake can break developing crisp edges and make clumps. If the crumbs brown too quickly, reduce the oven temperature slightly on the next batch to prevent burning.
- Remove from the oven and let cool completely on the baking sheet before storing into an airtight container in the fridge. When ready to use, take a fork and stir them first as they tend to stick together a bit.: Cooling on the sheet lets the crumbs finish firming up and you will notice the texture shift from warm and slightly soft to snap crisp. Storing chilled preserves their crunch and keeps the color bright. The why is that residual heat can create steam trapped in the container, making them soggy if stored warm. A mistake to avoid is transferring to a container while warm which ruins the crispness; always cool fully.
- The recipe makes 3 cups of crumbles.: When you open the jar, the first sensory cue is the fresh aroma, and stirring with a fork will break apart small clusters, restoring individual crumbles. This quick action ensures you get an even distribution when sprinkling over dishes. The reason clusters form is sugar and residual moisture causing bits to clump, so gentle agitation restores texture. Avoid using hands that may warm the crumbs and soften them; a fork does the job cleanly.
- The recipe makes 3 cups of crumbles.: Measuring out the finished volume helps you plan how much to use and how to store it, and the sight of three cups of colorful crumbs is satisfying and practical for portioning. Knowing the yield lets you decide if you should double or halve the batch depending on your needs. The why is that consistent yields allow repeatable results and help with recipe scaling. A common oversight is not accounting for jars or containers large enough for the full yield; choose containers that leave a bit of headroom to avoid crushing the crumbs.
Recipe Tips about Strawberry Shortcake Crumbs
These tips come from repeated batches and small adjustments that improved texture and flavor for me. I share what I learned so you can get consistent, crunchy results every time.
- Chill the butter: Keep your butter cold until the moment you work it into the flour; this protects the crumb structure and prevents grease bleeding.
- Measure accurately: Spoon the flour into the cup and level it for consistent results, too much flour yields dry crumbs while too little makes them flimsy.
- Layer sparingly: Spread crumbs in a single layer on parchment so each piece gets hot air contact and browns uniformly.
- Watch the oven closely: Because the bake time is short, peek through the window rather than opening the door to preserve heat and monitor color.
- Cool completely: Let the tray come to room temperature before transferring to an airtight container to keep the texture crisp.
Perfect Matches for Strawberry Shortcake Crumbs
These crumbles pair wonderfully with creamy, chilled, or soft desserts and are ideal for quick finishes when hosting or packing snacks. Use them to add crunch, color, and a strawberry note to many simple dishes.
- Yogurt or Greek yogurt: Sprinkle a generous handful over a bowl of plain or lightly sweetened yogurt for a bright, textured breakfast or snack.
- Ice cream or frozen desserts: Use as a topping for vanilla or strawberry ice cream to add crunch and extra berry punch during summer gatherings.
- Pound cake or shortcake: Scatter over sliced pound cake or classic shortcakes to enhance both flavor and mouthfeel, perfect for casual dessert plates.
- Parfaits: Layer with fruit and cream for pretty parfaits that work well for brunch or potlucks, adding visual appeal and crispness.
- Picnic packs and gift jars: Pack into small jars as edible gifts, or tuck a container into a picnic basket to finish desserts without fuss.
- Storage tips: Keep in an airtight container in the fridge for up to two weeks, and break apart clusters with a fork when ready to use to maintain the best texture.
FAQ
Conclusion
Strawberry Shortcake Crumbs are special because they transform a tiny handful of pantry staples into a vibrant, crunchy garnish that lifts simple dishes. Give this recipe a try when you want an easy way to add berry flavor, color, and texture to yogurt, ice cream, or cake. It is a quick, low stress recipe that rewards small attention to technique with delicious, repeatable results, and I hope it becomes one of your go to toppings for brightening everyday desserts.
Strawberry Shortcake Crumbs
Equipment
- Baking Sheet
- Parchment Paper
- Medium Bowl
- Fork
Ingredients
- 3 ounces box strawberry flavored Jell-o Adds bright strawberry flavor and color while contributing soluble gelatin to help bind and set crumbs; dissolve into dry ingredients or melt with butter for even distribution. Enhances aroma and provides a nostalgic, concentrated fruit note without fresh strawberries.
- 1 cup all-purpose flour divided Provides structure and bulk to the crumb mixture, with 1 cup measured and part held back for dusting or adjusting texture; develop lightness by sifting and combining with fat. Enables proper hydration and browning during baking or toasting when mixed with other dry ingredients.
- 1/2 cup unsalted butter cold and divided Contributes richness, moisture, and tenderness when cold and cut or grated into the flour to create flaky crumb clusters; divide as directed to control texture and to cream with sugar if needed. Supplies flavor and helps bind ingredients when melted or incorporated, supporting both crumble and shortcake textures.
- 1/2 cup white granulated sugar Imparts sweetness and assists in browning and tenderizing the crumb; creamed with butter can create a lighter, aerated texture and helps dissolve powdered or flavored gelatin. Balances tartness of the strawberry flavoring and enhances overall mouthfeel without adding excessive moisture.
- 1 teaspoon vanilla extract Adds sweet floral notes and depth to the overall flavor profile while enhancing perceived sweetness without additional sugar; stir in toward the end to preserve aroma. Complements the strawberry Jell-o and rounds flavor, preventing flatness in the finished crumbs.
Instructions
- Preheat oven to 350 degrees F.: As you set the temperature, notice the warmth building in the oven and the faint metallic hum as the elements engage, this ensures consistent heat so the crumbs bake quickly and evenly. The why here is simple, a properly preheated oven gives immediate browning and prevents sogginess. A common mistake is skipping the preheat, which leads to uneven texture and underbaked centers. If your oven runs hot, use an oven thermometer to verify the temperature.
- In a medium bowl using a fork stir Jell-o with 1/2 cup flour and 1/4 cup butter, until you get a crumble mixture.: Right after combining, you will smell a concentrated strawberry scent, and the texture should resemble coarse sand with small butter flecks. This strawberry forward crumble forms the colorful component and the cold butter creates little pockets that crisp in the oven. Why this matters, the separate strawberry mix preserves bright flavor and color without overworking the dough. Avoid over mixing which melts the butter , leading to dense clumps instead of separate crumbles.
- In another medium bowl stir 1/2 cup flour, with 1/2 cup sugar, and 1/4 cup butter, plus 1 teaspoon vanilla. Mix until you get a crumble mixture.: When you fold these together you will detect a sweet scent with warm vanilla undernotes, and the texture should again be sandy but slightly more cohesive because of the sugar and vanilla . This vanilla crumble provides a balancing flavor to the strawberry bits, adding warmth and caramelizing potential. The technique matters because keeping the butter cold creates a lighter, crisper result. A frequent error is using softened butter , which yields a pasty mixture rather than distinct crumbs.
- Line a baking sheet with parchment paper and sprinkle on it the strawberry crumbles. Next, sprinkle on the vanilla crumbles, and slightly mix them.: As you layer the crumbles you will see a pretty contrast between pink and pale crumbs, and the parchment prevents sticking while allowing an easy transfer. Slightly mixing them gives visual interest and ensures both flavors mingle on the tray without fully blending. The reason this step is done separately is to preserve the integrity of each crumble so they brown at slightly different rates. A usual slip is packing the crumbs too tightly on the sheet, which prevents airflow and causes uneven browning.
- Bake for 7-8 minutes and do NOT stir.: During baking you will hear a faint crackle and soon smell that warm, sugared aroma; the edges will just begin to color. Leaving them undisturbed allows the crumbs to crisp and set, forming a brittle texture as the sugar melts and rehardens. The technique matters because stirring mid bake can break developing crisp edges and make clumps. If the crumbs brown too quickly, reduce the oven temperature slightly on the next batch to prevent burning.
- Remove from the oven and let cool completely on the baking sheet before storing into an airtight container in the fridge. When ready to use, take a fork and stir them first as they tend to stick together a bit.: Cooling on the sheet lets the crumbs finish firming up and you will notice the texture shift from warm and slightly soft to snap crisp. Storing chilled preserves their crunch and keeps the color bright. The why is that residual heat can create steam trapped in the container, making them soggy if stored warm. A mistake to avoid is transferring to a container while warm which ruins the crispness; always cool fully.
- The recipe makes 3 cups of crumbles.: When you open the jar, the first sensory cue is the fresh aroma, and stirring with a fork will break apart small clusters, restoring individual crumbles. This quick action ensures you get an even distribution when sprinkling over dishes. The reason clusters form is sugar and residual moisture causing bits to clump, so gentle agitation restores texture. Avoid using hands that may warm the crumbs and soften them; a fork does the job cleanly.
- The recipe makes 3 cups of crumbles.: Measuring out the finished volume helps you plan how much to use and how to store it, and the sight of three cups of colorful crumbs is satisfying and practical for portioning. Knowing the yield lets you decide if you should double or halve the batch depending on your needs. The why is that consistent yields allow repeatable results and help with recipe scaling. A common oversight is not accounting for jars or containers large enough for the full yield; choose containers that leave a bit of headroom to avoid crushing the crumbs.
Notes
- Chill the butter: Keep your butter cold until the moment you work it into the flour; this protects the crumb structure and prevents grease bleeding.
- Measure accurately: Spoon the flour into the cup and level it for consistent results, too much flour yields dry crumbs while too little makes them flimsy.
- Layer sparingly: Spread crumbs in a single layer on parchment so each piece gets hot air contact and browns uniformly.
- Watch the oven closely: Because the bake time is short, peek through the window rather than opening the door to preserve heat and monitor color.
- Cool completely: Let the tray come to room temperature before transferring to an airtight container to keep the texture crisp.