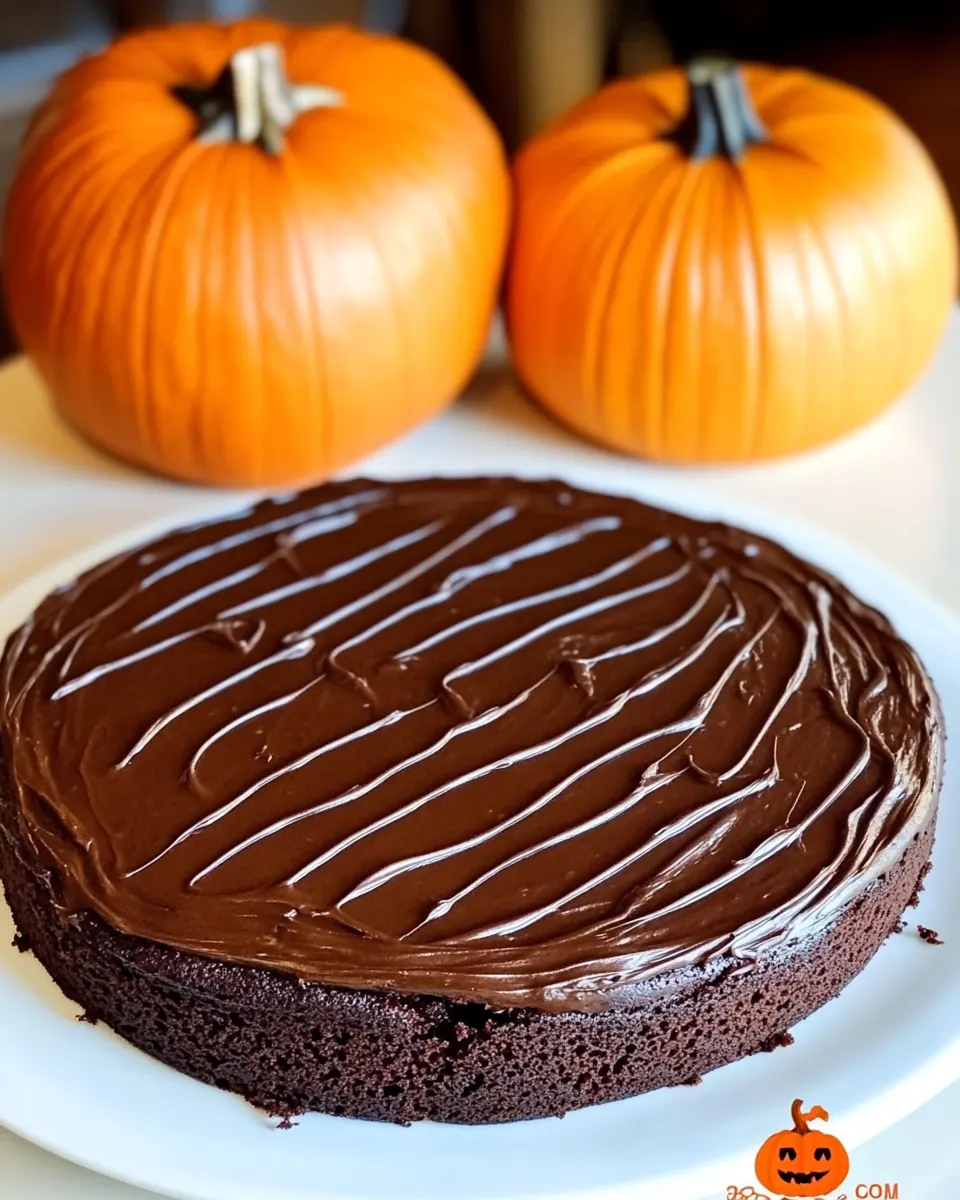
Chocolate Pumpkin Cake
Chocolate Pumpkin Cake has been a quiet staple in my kitchen for years, the kind of dessert I reach for when I want comfort without fuss. The first time I combined rich cocoa with earthy pumpkin it surprised me how well they harmonized, the chocolate lifting the squash sweetness into something almost nostalgic. I remember serving a slice at a small dinner and watching the conversation slow as forks paused, everyone savoring that soft crumb and lightly spiced warmth.
Over different seasons I have tweaked this recipe to suit what’s in the pantry, and that flexibility is part of why I adore this cake. Sometimes I use almond butter for a denser texture, other times a neutral oil for a silkier crumb. The recipe is forgiving, which makes it perfect for busy afternoons when you want a homemade treat without anxiety.
The version I share here yields a moist, lightly chocolatey layer cake that tastes even better the next day, after the flavors settle and the crumb relaxes. I often make it the night before a gathering so it has time to develop depth. You will notice a subtle spice undertone, but nothing overpowering, letting the interplay of chocolate and pumpkin shine. Serve it slightly chilled or at room temperature depending on your mood.
Recipe Snapshot
40 mins
15 mins
25 mins
Easy
350 kcal
American
Gluten-Free, Vegan
Desserts
8 inch cake pans or 9×13 inch pan, Parchment paper, Mixing bowls, Spatula
Why This Chocolate Pumpkin Cake Shines
1. Balanced flavor pairing
I love how the robust chocolate and mellow pumpkin counterpoint each other. The cocoa adds that bittersweet backbone while the puree keeps the crumb tender and adds natural sweetness, which means I can reduce refined sugar without losing body.
2. Impressive but approachable
This cake looks like something you might buy at a bakery, yet it is surprisingly simple to make. I appreciate recipes that let me feel proud without demanding hours of precise technique.
3. Pantry friendly and adaptable
I often make this when I have spare flour and canned pumpkin, and it performs well with a few swaps. That practicality makes it a weekday hero and a weekend showstopper.
4. Great texture and day two magic
The texture mellows overnight, which I find elevates the eating experience. If you can wait, the cake becomes more cohesive and the flavors marry into something richer.
5. Crowd pleaser for seasonal gatherings
For fall events, this is a recipe I reach for because it nods to the season without being predictable. People ask for seconds, which is always a good sign when you bring dessert.
Ingredients You’ll Need for Chocolate Pumpkin Cake
These ingredients are chosen to create a moist, tender cake where texture and flavor balance matter. The dry components build structure, the pumpkin supplies moisture and subtle sweetness, and the fats keep the crumb rich. The list is straightforward, and each item plays a clear role in the final result.
- 2 cups flour: Provides the structural base and bulk for the cake, forming the gluten network that traps gases for rise; sieve to remove lumps for an even crumb.
- 1/2 cup unsweetened cocoa powder: Lends deep chocolate flavor and contributes dry richness; sift together with the flour to ensure even distribution and avoid clumps.
- 1/4 cup Dutch cocoa powder or additional unsweetened cocoa: Adds additional chocolate intensity or a milder cocoa note depending on choice; use Dutch for smoother, less acidic flavor or unsweetened for brighter cocoa presence.
- 1 tsp each: baking soda, salt, and cinnamon (optional): Leavens the batter and balances flavor while cinnamon (if used) adds warm spice; combine and whisk into dry mix to activate evenly when wet ingredients are added.
- 1 1/3 cup water: Moistens the batter and helps dissolve sugar while allowing starches to hydrate; warm or room-temperature water integrates more smoothly with other liquids.
- 1 1/2 cups sugar (unrefined or xylitol if desired): Sweetens and tenderizes the cake while contributing moisture; choose unrefined sugar for depth or xylitol for lower glycemic impact, adjusting texture slightly if substituted.
- 2/3 cup pumpkin puree (sweet potato puree also works): Provides moisture, body, and subtle sweetness with pumpkin's natural fibers enhancing texture; sweet potato puree can be interchanged for a similar moisture and flavor profile.
- 1/2 cup almond butter or oil: Adds fat for tenderness and contributes nutty or neutral fat depending on choice; almond butter yields richer flavor and structure while oil creates a lighter texture.
- 1 1/2 tbsp pure vanilla extract: Imparts fragrant sweetness and rounds out flavors; stir into the wet ingredients to evenly distribute aromatic vanilla notes throughout the batter.
- 3/4 cup mini chocolate chips () (optional): Offers pockets of melted chocolate for bursts of flavor and textural contrast; fold in gently at the end to prevent overmixing and uneven distribution.
Directions for Chocolate Pumpkin Cake
I like to keep the process relaxed and methodical so I can enjoy the smells and the small wins along the way. Below I expand the provided directions into detailed steps that will help you identify the right visual and aromatic cues, and avoid common mistakes.
- Frosting ideas are included earlier in the post. The recipe works with spelt, white all purpose, or some brands of gluten free all purpose flour. There is also a flourless version included above. To make the chocolate pumpkin cake, line the bottom of two 8 inch pans (or one 9×13 inch pan) with parchment paper. Preheat oven to 350 F. Combine dry ingredients, and stir very well. Evenly stir in remaining ingredients. Pour into prepared pans. Sprinkle chips on top if desired. Bake on the center rack for 25 minutes. Let cool completely. Cover loosely with a towel overnight, either refrigerated or on the counter – it’s best not to eat the cake until the next day, because taste and texture are much better!: Warm, inviting aromas will greet you if you prepare a frosting, and thinking ahead about a complementary frosting lets you choose textures that echo the tender cake . When selecting a frosting, balance sweetness with structure, since an overly runny topping will make slices messy. A common mistake is applying frosting when the cake is still warm, which causes sliding and sogginess; always cool completely to achieve a stable finish.
- The recipe works with spelt, white all purpose, or some brands of gluten free all purpose flour: As you mix different flours you will notice batter thickness vary, which affects crumb. Spelt gives a nuttier note and a slightly denser crumb, while gluten free blends may need a touch more liquid; trust the batter appearance more than exact measurements. Avoid overmixing, because that develops gluten in wheat flours and can create a tougher texture.
- There is also a flourless version included above: Flourless cakes will feel different in the oven, often setting rapidly and producing a denser, fudgier internal texture. Watch for visual cues like a set edge and a slightly jiggly center to prevent overbaking. If you attempt a flourless iteration, check doneness earlier, because it can go from perfect to dry quickly.
- To make the chocolate pumpkin cake, line the bottom of two 8 inch pans or one 9×13 inch pan with parchment paper: When the pans are prepared they ensure a clean release and intact edges, and you will enjoy lifting whole layers without tearing. The parchment also prevents hot spots where the cake could brown unevenly. A frequent error is skipping parchment and only greasing, which can still stick; I always use both for insurance.
- Preheat oven to 350 F: The oven temperature sets the pace for rise and crust formation, producing that gentle lift and even bake. Preheating ensures the batter begins baking immediately, giving predictable oven spring and a consistent crumb. Do not place the cake in if the oven is still adjusting, as temperature swings can make the center sink.
- Combine dry ingredients, and stir very well: At this stage you will see uniform color and no streaks of cocoa or flour, which guarantees even distribution of leavening and flavors. Sifting or vigorous whisking removes lumps and aerates the mix, contributing to a lighter crumb. A common mistake is leaving pockets of baking soda or salt, which create pockets of off flavor or uneven rise.
- Evenly stir in remaining ingredients: As you fold in the wet ingredients you will notice the batter become glossy and cohesive; this is the moment to stop mixing and avoid developing gluten. The batter should be homogenous with a pourable yet substantial consistency. Overmixing at this stage is the top reason for a tight, dense crumb, so mix until combined.
- Pour into prepared pans: The batter should fill the pans evenly for uniform baking, giving you matching layer heights if using two pans. Smooth the tops with a spatula to remove air pockets and to ensure even baking. If you see large air bubbles, tap the pans gently on the counter once to settle the batter.
- Sprinkle chips on top if desired: The mini chocolate chips will melt into small pockets, introducing concentrated chocolate notes. Scatter them evenly to avoid clumping, and press lightly so they adhere to the surface. Avoid folding too many chips into very thin batter, because they can sink and create tunnels.
- Bake on the center rack for 25 minutes: During baking you will notice the aroma of cocoa intensify and the top will set with a slight spring when touched. The edges may pull away a touch from the pan, which is a good indicator of doneness. A toothpick inserted near the center should come out with a few moist crumbs, not wet batter; overbaking will yield a dry result, so start checking a few minutes early if your oven runs hot.
- Let cool completely: Cooling lets internal steam redistribute, preventing a gummy or collapsed center, and it firms the crumb for clean slicing. The cake will release more of its flavor as it cools, and the texture will become more cohesive. Rushing to cut while warm is a frequent mistake, resulting in a crumbly, messy presentation.
- Cover loosely with a towel overnight either refrigerated or on the counter: This resting period allows the flavors to marry and the crumb to relax, producing a more integrated taste and improved mouthfeel. I prefer loose cover so the cake does not sweat while still protecting it from drying out. Do not wrap tightly while warm, because trapped steam can create sogginess.
- It is best not to eat the cake until the next day because taste and texture are much better: Waiting yields a more harmonious flavor and a moister texture as the pumpkin continues to infuse the crumb. The difference is noticeable, with spice and chocolate notes settling into a softer profile. If you must serve the same day, chill briefly to help set the structure, but the ideal experience is patience.
Ways to Adapt This Recipe
This section explores flexible ways to make the Chocolate Pumpkin Cake suit different diets, textures, and occasions. Below are practical adaptations and ideas to help you tailor the recipe without losing its core appeal.
- Swap the flour Use spelt or a tested gluten free blend if you need a different flour. Keep an eye on batter thickness, adding a splash of water if it seems too stiff, and avoid overmixing to preserve tenderness.
- Choose your fat Opt for almond butter for a richer, nuttier profile, or a neutral oil for a lighter crumb. When using nut butter, stir gently to incorporate and expect a slightly denser texture.
- Adjust sweetness Use unrefined sugar for deeper flavor, or try xylitol for a lower glycemic option, keeping in mind xylitol has different browning properties and may affect crust color.
- Mix in extras Toss in mini chocolate chips or leave them off for a cleaner crumb. If adding chips, distribute them across the surface to prevent sinking during baking.
- Frosting choices Pair with a thin chocolate glaze for shine or a lightly sweetened whipped topping for airiness. Apply frosting only after the cake is fully cooled to prevent sliding or melting.
- Make it ahead The cake improves overnight, so bake a day before serving and store loosely covered. This approach deepens flavor and makes entertaining easier.
How to Enjoy Chocolate Pumpkin Cake
This cake is versatile enough for small gatherings or a quiet slice with coffee. Below are serving ideas, pairings, and storage tips to help you present it beautifully and keep it tasting great.
- Serve slightly chilled or at room temperature Both work well; chilling firms the crumb for neat slices while room temperature highlights the pumpkin and chocolate flavors.
- Pair with warm beverages A cup of coffee or a spiced tea complements the cake’s depth, bringing out chocolate notes and providing a contrast to the cake’s tender crumb.
- Occasions The cake is perfect for fall brunches, Halloween gatherings, or casual weeknight desserts when you want something comforting yet simple to prepare.
- Storage Keep loosely covered at room temperature for up to two days, or refrigerate for up to five days. If chilled, remove from the fridge about 20 to 30 minutes before serving for best texture.
- Make ahead Bake the day before and keep covered overnight to allow flavors to marry. This yields a more cohesive texture and deeper taste that guests will notice.
- Portioning For neat slices, use a sharp knife warmed under hot water and wiped dry between cuts to create clean edges without tearing the crumb.
FAQ
Conclusion
This Chocolate Pumpkin Cake stands out for its balance of rich cocoa and moist pumpkin, delivering a comforting yet refined dessert experience. Give it a try when you want a simple, seasonal treat that feels special, and consider making it a day ahead to let the flavors deepen. It’s forgiving, adaptable, and rewarding, perfect for serving at casual gatherings or enjoying as a cozy slice with your favorite hot beverage.

Chocolate Pumpkin Cake
Equipment
- 8 inch cake pans or 9x13 inch pan
- Parchment Paper
- Mixing Bowls
- Spatula
Ingredients
- 2 cups flour Provides the structural base and bulk for the cake, forming the gluten network that traps gases for rise; sieve to remove lumps for an even crumb.
- 1/2 cup unsweetened cocoa powder Lends deep chocolate flavor and contributes dry richness; sift together with the flour to ensure even distribution and avoid clumps.
- 1/4 cup Dutch cocoa powder or additional unsweetened cocoa Adds additional chocolate intensity or a milder cocoa note depending on choice; use Dutch for smoother, less acidic flavor or unsweetened for brighter cocoa presence.
- 1 tsp each: baking soda, salt, and optional cinnamon Leavens the batter and balances flavor while cinnamon (if used) adds warm spice; combine and whisk into dry mix to activate evenly when wet ingredients are added.
- 1 1/3 cup water Moistens the batter and helps dissolve sugar while allowing starches to hydrate; warm or room-temperature water integrates more smoothly with other liquids.
- 1 1/2 cups sugar (unrefined or xylitol if desired) Sweetens and tenderizes the cake while contributing moisture; choose unrefined sugar for depth or xylitol for lower glycemic impact, adjusting texture slightly if substituted.
- 2/3 cup pumpkin puree (sweet potato puree also works) Provides moisture, body, and subtle sweetness with pumpkin's natural fibers enhancing texture; sweet potato puree can be interchanged for a similar moisture and flavor profile.
- 1/2 cup almond butter or oil Adds fat for tenderness and contributes nutty or neutral fat depending on choice; almond butter yields richer flavor and structure while oil creates a lighter texture.
- 1 1/2 tbsp pure vanilla extract Imparts fragrant sweetness and rounds out flavors; stir into the wet ingredients to evenly distribute aromatic vanilla notes throughout the batter.
- 3/4 cup mini chocolate chips (optional) Offers pockets of melted chocolate for bursts of flavor and textural contrast; fold in gently at the end to prevent overmixing and uneven distribution.
Instructions
- Frosting ideas are included earlier in the post. The recipe works with spelt, white all purpose, or some brands of gluten free all purpose flour. There is also a flourless version included above. To make the chocolate pumpkin cake, line the bottom of two 8 inch pans (or one 9×13 inch pan) with parchment paper. Preheat oven to 350 F. Combine dry ingredients, and stir very well. Evenly stir in remaining ingredients. Pour into prepared pans. Sprinkle chips on top if desired. Bake on the center rack for 25 minutes. Let cool completely. Cover loosely with a towel overnight, either refrigerated or on the counter – it’s best not to eat the cake until the next day, because taste and texture are much better!: Warm, inviting aromas will greet you if you prepare a frosting, and thinking ahead about a complementary frosting lets you choose textures that echo the tender cake . When selecting a frosting, balance sweetness with structure, since an overly runny topping will make slices messy. A common mistake is applying frosting when the cake is still warm, which causes sliding and sogginess; always cool completely to achieve a stable finish.
- The recipe works with spelt, white all purpose, or some brands of gluten free all purpose flour: As you mix different flours you will notice batter thickness vary, which affects crumb. Spelt gives a nuttier note and a slightly denser crumb, while gluten free blends may need a touch more liquid; trust the batter appearance more than exact measurements. Avoid overmixing, because that develops gluten in wheat flours and can create a tougher texture.
- There is also a flourless version included above: Flourless cakes will feel different in the oven, often setting rapidly and producing a denser, fudgier internal texture. Watch for visual cues like a set edge and a slightly jiggly center to prevent overbaking. If you attempt a flourless iteration, check doneness earlier, because it can go from perfect to dry quickly.
- To make the chocolate pumpkin cake, line the bottom of two 8 inch pans or one 9×13 inch pan with parchment paper: When the pans are prepared they ensure a clean release and intact edges, and you will enjoy lifting whole layers without tearing. The parchment also prevents hot spots where the cake could brown unevenly. A frequent error is skipping parchment and only greasing, which can still stick; I always use both for insurance.
- Preheat oven to 350 F: The oven temperature sets the pace for rise and crust formation, producing that gentle lift and even bake. Preheating ensures the batter begins baking immediately, giving predictable oven spring and a consistent crumb. Do not place the cake in if the oven is still adjusting, as temperature swings can make the center sink.
- Combine dry ingredients, and stir very well: At this stage you will see uniform color and no streaks of cocoa or flour, which guarantees even distribution of leavening and flavors. Sifting or vigorous whisking removes lumps and aerates the mix, contributing to a lighter crumb. A common mistake is leaving pockets of baking soda or salt, which create pockets of off flavor or uneven rise.
- Evenly stir in remaining ingredients: As you fold in the wet ingredients you will notice the batter become glossy and cohesive; this is the moment to stop mixing and avoid developing gluten. The batter should be homogenous with a pourable yet substantial consistency. Overmixing at this stage is the top reason for a tight, dense crumb, so mix until combined.
- Pour into prepared pans: The batter should fill the pans evenly for uniform baking, giving you matching layer heights if using two pans. Smooth the tops with a spatula to remove air pockets and to ensure even baking. If you see large air bubbles, tap the pans gently on the counter once to settle the batter.
- Sprinkle chips on top if desired: The mini chocolate chips will melt into small pockets, introducing concentrated chocolate notes. Scatter them evenly to avoid clumping, and press lightly so they adhere to the surface. Avoid folding too many chips into very thin batter, because they can sink and create tunnels.
- Bake on the center rack for 25 minutes: During baking you will notice the aroma of cocoa intensify and the top will set with a slight spring when touched. The edges may pull away a touch from the pan, which is a good indicator of doneness. A toothpick inserted near the center should come out with a few moist crumbs, not wet batter; overbaking will yield a dry result, so start checking a few minutes early if your oven runs hot.
- Let cool completely: Cooling lets internal steam redistribute, preventing a gummy or collapsed center, and it firms the crumb for clean slicing. The cake will release more of its flavor as it cools, and the texture will become more cohesive. Rushing to cut while warm is a frequent mistake, resulting in a crumbly, messy presentation.
- Cover loosely with a towel overnight either refrigerated or on the counter: This resting period allows the flavors to marry and the crumb to relax, producing a more integrated taste and improved mouthfeel. I prefer loose cover so the cake does not sweat while still protecting it from drying out. Do not wrap tightly while warm, because trapped steam can create sogginess.
- It is best not to eat the cake until the next day because taste and texture are much better: Waiting yields a more harmonious flavor and a moister texture as the pumpkin continues to infuse the crumb. The difference is noticeable, with spice and chocolate notes settling into a softer profile. If you must serve the same day, chill briefly to help set the structure, but the ideal experience is patience.
Notes
- Swap the flour Use spelt or a tested gluten free blend if you need a different flour. Keep an eye on batter thickness, adding a splash of water if it seems too stiff, and avoid overmixing to preserve tenderness.
- Choose your fat Opt for almond butter for a richer, nuttier profile, or a neutral oil for a lighter crumb. When using nut butter, stir gently to incorporate and expect a slightly denser texture.
- Adjust sweetness Use unrefined sugar for deeper flavor, or try xylitol for a lower glycemic option, keeping in mind xylitol has different browning properties and may affect crust color.
- Mix in extras Toss in mini chocolate chips or leave them off for a cleaner crumb. If adding chips, distribute them across the surface to prevent sinking during baking.
- Frosting choices Pair with a thin chocolate glaze for shine or a lightly sweetened whipped topping for airiness. Apply frosting only after the cake is fully cooled to prevent sliding or melting.
- Make it ahead The cake improves overnight, so bake a day before serving and store loosely covered. This approach deepens flavor and makes entertaining easier.