Homemade Peanut Butter Eggs
Homemade Peanut Butter Eggs are one of those treats I reach for every spring when Easter plans start to swirl and I want something nostalgic yet homemade.
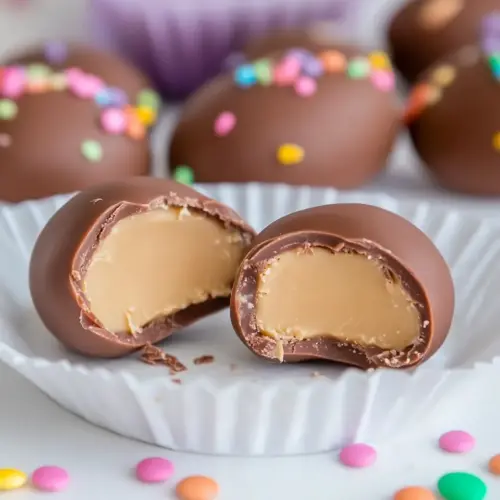
I remember the first time I made these, standing at the counter with a mug of tea, shaping each little oval with sticky fingers while a playlist hummed in the background. There is a small, consoling rhythm to the process, and every pause to wipe my hands off felt like a tiny reward. The creamy center gives way to a thin, glossy shell of chocolate, and I could not stop myself from testing one before they were even chilled.
Over the years I have tweaked texture and sweetness until the balance felt just right for my family. I love that these are simple enough for a weekend project, yet special enough to tuck into baskets or hand out as neighbors visit. When friends ask for the recipe, they always want to know how I get the center so smooth and how I keep the chocolate from looking streaky, and I gladly walk them through it while sharing a cup of coffee.
Recipe Snapshot
1 hr 30 mins
30 mins
60 mins
Medium
250 kcal
American
Gluten-Free, Low FODMAP
Desserts
Medium saucepan, Baking sheet, Parchment paper, Cookie scoop, Microwave safe bowl, Fork
Why This Homemade Peanut Butter Eggs Works
Classic Candy Shop Flavor at Home
I love that Homemade Peanut Butter Eggs echo the flavors of store bought favorites, yet feel fresher and more personal. The combination of peanut butter and milk chocolate chips creates that familiar creamy, sweet pairing that makes people smile. Making them yourself means you can control sweetness, salt, and texture, and that control turns a good candy into a signature one.
Easy Techniques, Big Results
One reason I keep coming back to this method is its simplicity. You melt, mix, shape, and dip, and the techniques are forgiving. That makes it perfect for bakers who want great results without fuss. I find that the small steps let you focus on texture, ensuring each egg is silky inside and crisp enough outside to create a satisfying bite.
Customizable for Taste and Occasion
These eggs are a blank canvas. I often switch to a darker chocolate for a richer coating, and sometimes add decorative sprinkles for holidays. Because the recipe is straightforward, substitutions and small tweaks are easy to test. That flexibility means I can make a batch for a crowd or keep a few for midnight snacking.
Make Ahead and Gift Friendly
I appreciate that Homemade Peanut Butter Eggs store beautifully in the refrigerator and freeze well for longer keeping. That storage stability makes them ideal for gifting. I will often make a double batch, chill, and wrap groups of eggs in small boxes for neighbors and friends.
Kid Friendly and Fun to Assemble
Shaping and dipping are fun tasks to hand off to kids or guests. It turns candy making into a shared activity, and the messier moments always become the best memories. When I host an assembly session, the kitchen buzzes with chatter and the result is dozens of imperfect but lovable eggs.
Ingredients for Homemade Peanut Butter Eggs
The philosophy behind these ingredients is all about texture and contrast. A smooth, slightly salty peanut butter center needs a touch of unsalted butter and light brown sugar to round flavor and create structure, while powdered sugar firms the paste so it holds shape. The coating of milk chocolate chips and a little vegetable shortening yields a shiny, snappy shell that complements the creamy interior.
- 1 cup (258 g) creamy peanut butter: Creamy and smooth, provides the rich peanut flavor and silky texture that forms the filling's base, binding other filling ingredients together for scoopable consistency. Adds natural oils that contribute to mouthfeel and help achieve a fudgy interior after chilling. Enhances overall peanut-forward taste and balances sweetness from sugars.
- 1/4 cup (56.75 g) unsalted butter: Softened and slightly savory, contributes fat that enriches the filling's creaminess and helps achieve a spreadable, cohesive texture when beaten into peanut butter. Adds subtle buttery notes that round out the sweetness and improve mouthfeel. Helps the filling set more firmly when chilled.
- 1/4 cup (55 g) light brown sugar: Moist and mildly caramel-like, adds sweetness and depth while helping to tenderize the filling for a pleasant chewiness. Dissolves into the mixture to balance salt and enhance overall flavor complexity. Works with butter to provide structure and subtle molasses undertones.
- 1 1/4 cup (150 g) powdered sugar: Light and powdery, supplies concentrated sweetness and helps the filling thicken to a dough-like consistency for shaping into egg forms. Absorbs excess oil from peanut butter to prevent greasiness and contributes smooth, even sweetness throughout. Ensures the filling holds shape without being grainy when properly sifted and mixed.
- 2 cups (360 g) milk chocolate chips, (or 12 ounces milk chocolate, chopped): Melty and glossy, provides the chocolate coating that surrounds the peanut butter centers, offering contrast in texture and a sweet, creamy chocolate flavor. Melts smoothly for dipping and sets into a firm shell that protects and complements the filling. Can be swapped between chips or chopped bars without altering coating function.
- 2 tablespoons vegetable shortening: Solid and neutral-flavored, stabilizes the melted chocolate to create a shinier, firmer coating that snaps upon set and resists blooming. Helps thin and loosen chocolate for smoother dipping while improving shelf stability at room temperature. Also aids in achieving an even, glossy finish on the exterior.
How to Assemble Homemade Peanut Butter Eggs
These steps guide you from mixing to chilling to dipping. The sequence is simple, and I explain the sensory cues so you know when the mixture is ready at each stage. Take your time when shaping, and use a chilled baking sheet to speed setting.
- Line a baking sheet with wax paper or parchment paper; set aside.: You will notice the smooth, slightly tacky surface of the paper as you place formed eggs onto it, which keeps them from sticking and makes transfer effortless. Having the sheet ready is important because once the filling is shaped, you want a clean surface to chill them on. A common mistake is to skip lining, which leads to delicate eggs tearing when removed. If the room is warm, place the tray briefly in the refrigerator before shaping to keep the filling cool to the touch.
- In a medium saucepan, combine the peanut butter, butter, and brown sugar over medium heat. Heat until completely melted and starting to simmer, stirring constantly. Remove from the heat.: Sweet, nutty steam will rise as the peanut butter melds with melted butter and light brown sugar , releasing a warm aroma. Stirring constantly prevents the mixture from sticking and burning, and you should aim for a smooth, glossy texture before pulling it off the heat. This step builds the base flavor and ensures the sugar dissolves. Watch for any scorching; if you see dark specks, discard and start again, as burnt notes will carry through to the final candy.
- Add the powdered sugar a 1/4 cup at a time, stirring until completely combined with the peanut butter mixture after each addition. Set aside and let cool to room temperature.: As you add powdered sugar , the mixture will thicken and lose some sheen, becoming dough like and slightly pliable. Stir thoroughly after each addition so there are no streaks of dry sugar. Cooling to room temperature is essential so the filling is firm enough to shape, and you will feel the mixture become less sticky. Rushing this step can lead to filling that oozes when dipped, so be patient and test a small scoop to see if it holds its shape.
- Using a medium cookie scoop or a heaping tablespoon, scoop out peanut butter mixture and shape into eggs. I found it easiest to roll the scoop into a ball, and then roll it into a short cylinder. I placed it on the baking sheet, and then used my fingers to shape the ends into an egg-like oval. Refrigerate to allow the peanut butter eggs to set, about 30 minutes.: The tactile process of shaping is satisfying, you will feel the pliable filling come together in your hands as you roll it into an oval. I found it easiest to roll the scoop into a ball, and then roll it into a short cylinder. Placing them on the lined baking sheet, gently press the ends to create that classic egg silhouette. Refrigerate to allow the peanut butter eggs to set, about 30 minutes. If the mixture sticks to your hands, dampen them slightly or refrigerate the mixture for a few extra minutes. Overhandling can warm the filling too much, making them soft and harder to coat.
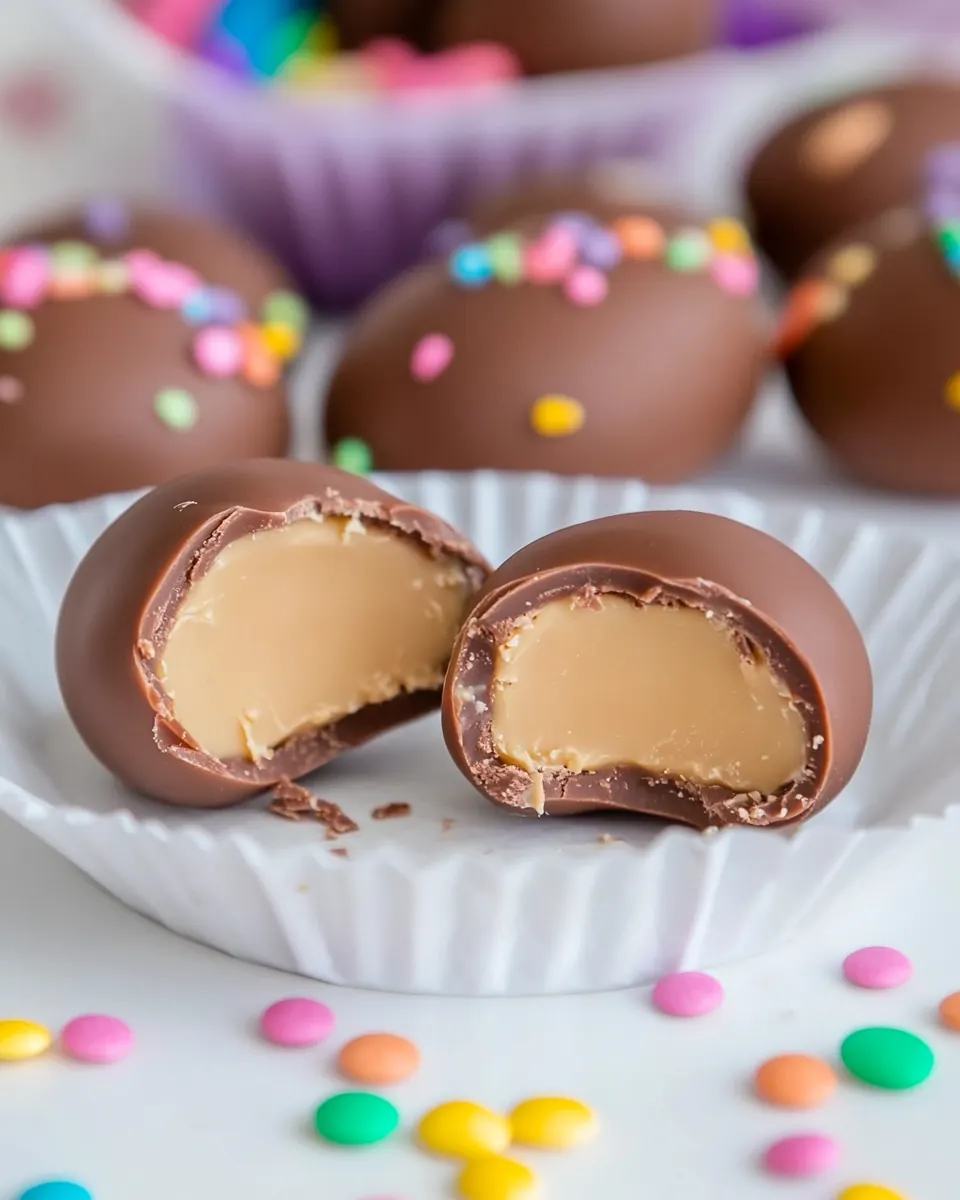
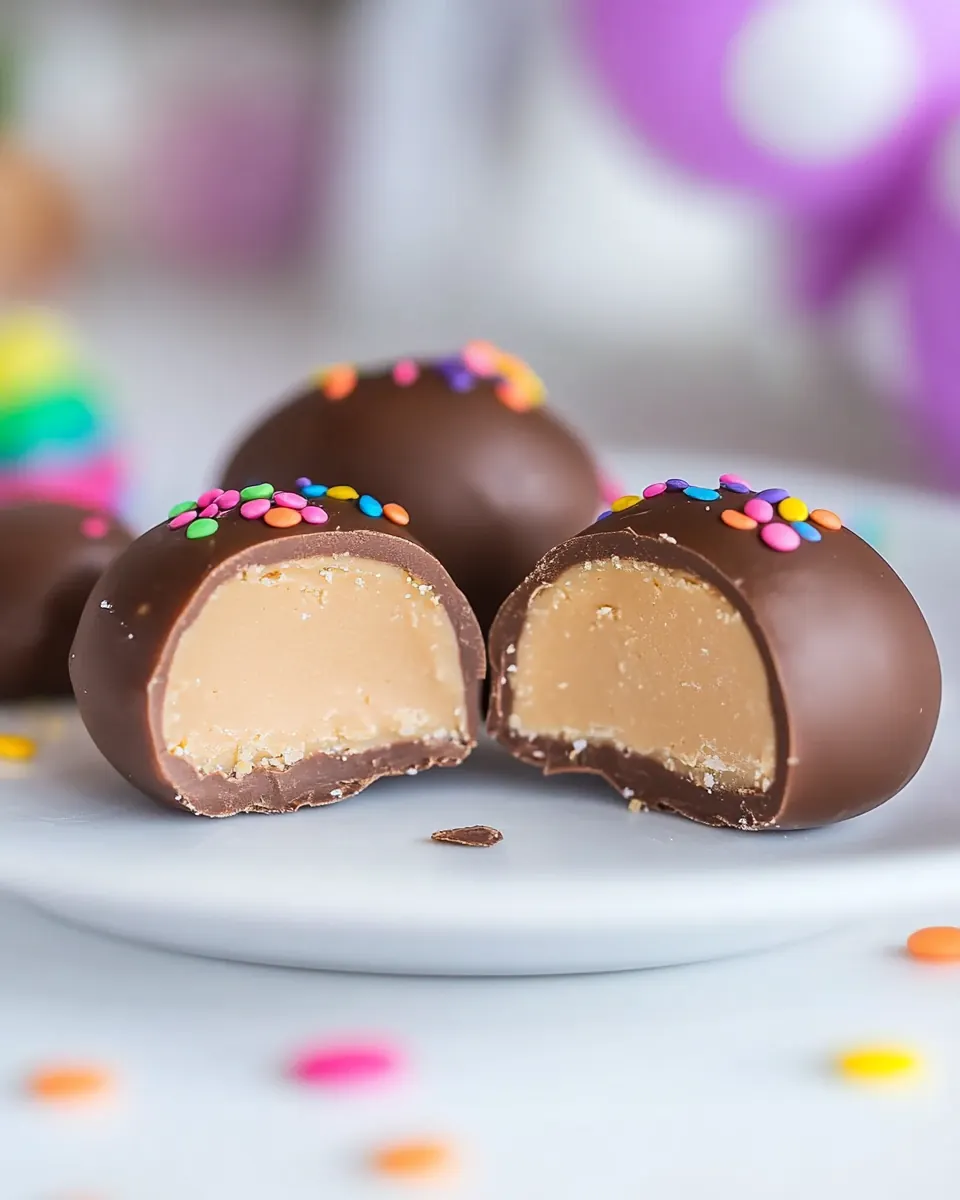
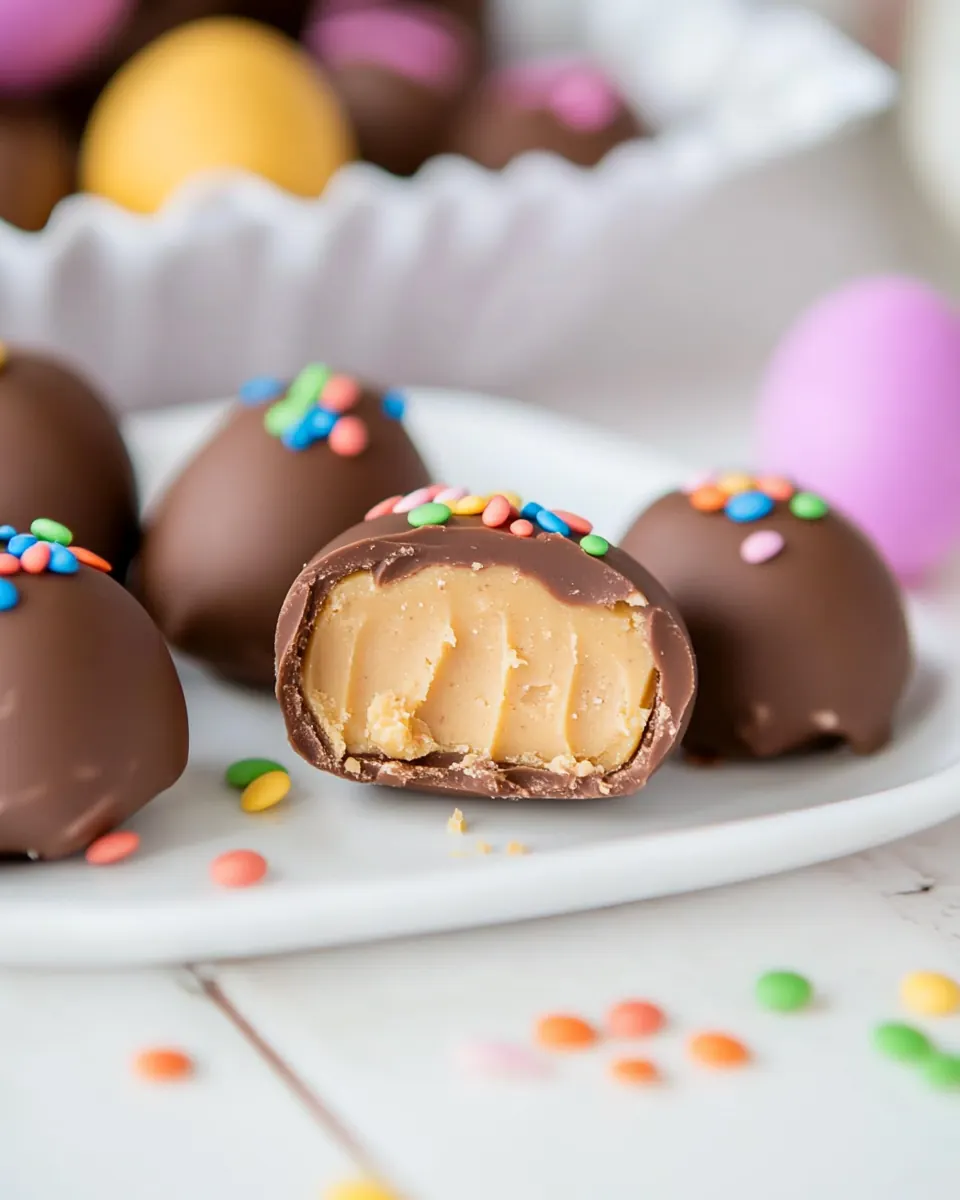
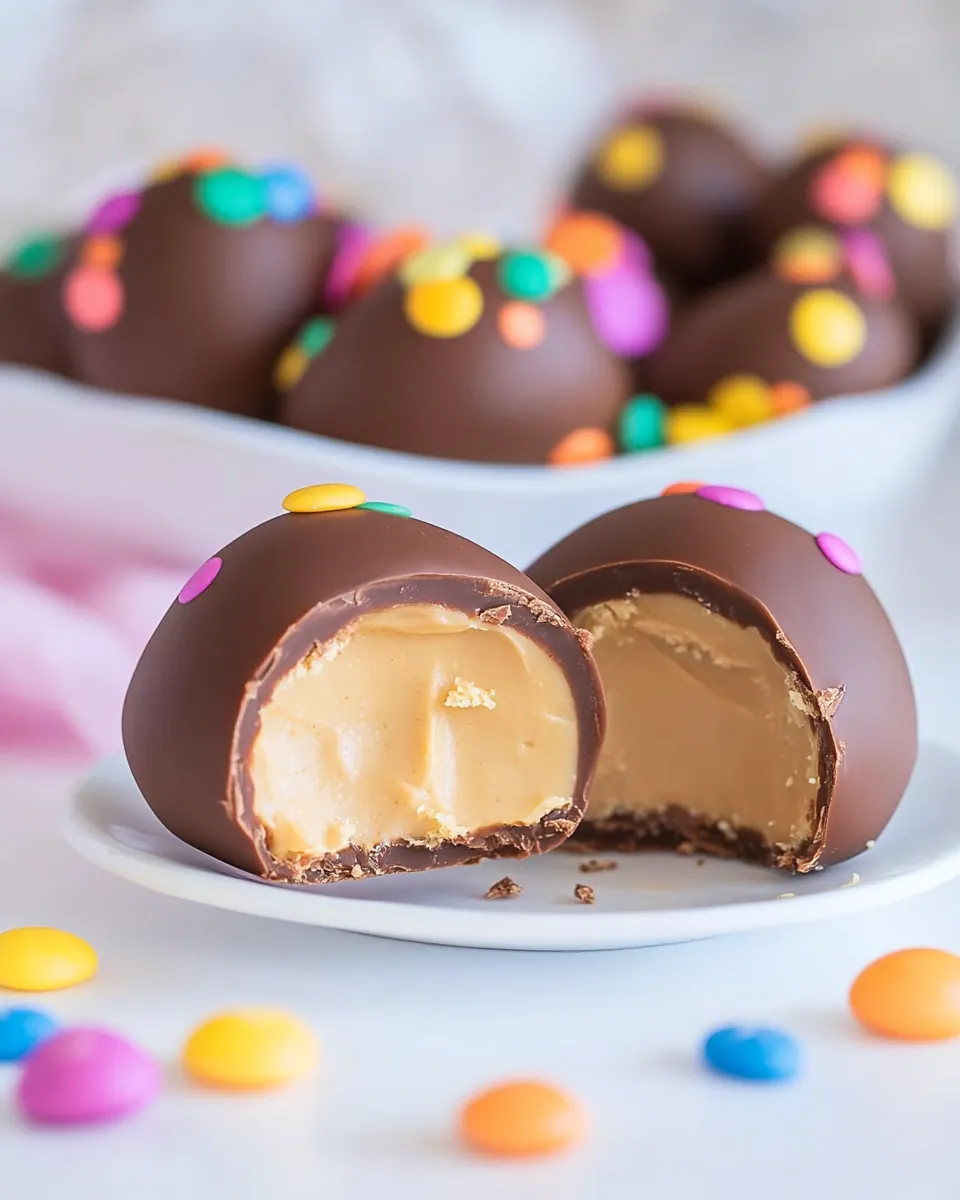
- Once the peanut butter eggs are set, melt the chocolate chips and shortening together in the microwave on 50% power in 30-second increments, stirring after each, until completely melted. One at a time, dip a peanut butter egg into the chocolate and, using a fork, flip it over so it is completely covered. Remove it from the bowl, letting any excess chocolate drip off. Return it to the baking sheet, and repeat with all of the peanut butter eggs. Sprinkle with decorations, if desired.: The chocolate will transform from grainy clumps to a velvety liquid, releasing a comforting, sweet chocolate scent. Stirring between bursts distributes heat and prevents scorching, creating a glossy finish aided by the vegetable shortening . If you overheat, the chocolate can seize or become dull, so use short increments and stir frequently. A smooth, slightly viscous texture indicates it is ready for dipping.
- Return the chocolate-covered peanut butter eggs to the refrigerator to allow the chocolate to set, about 30 minutes. The peanut butter eggs can be stored in an airtight container in the refrigerator for up to 1 month. They can be frozen for up to 3 months.: As you dip, listen for a soft rinse of chocolate and watch it flow around the egg into a silky coat. Use the fork to lift and let excess drip back into the bowl, then tap lightly on the bowl edge to remove extra chocolate so the coating is even. Work over the lined sheet and repeat with all eggs. A frequent slip up is dipping when the filling is not cold enough, which can cause the center to soften and lose shape. If that happens, chill the formed eggs a bit longer before continuing.
- Remove it from the bowl, letting any excess chocolate drip off. Return it to the baking sheet, and repeat with all of the peanut butter eggs: After you set each coated egg down, the chocolate will begin to dull slightly as it cools, and you may see a thin ridge form around the base where excess chocolate pooled. That is normal and can be smoothed with a small offset spatula if you prefer. Keep the bowl warm but not hot to maintain a dip friendly viscosity. A common error is overcrowding the tray which can cause eggs to touch and stick together as they set.
- Sprinkle with decorations, if desired: When you add decorations, they will press gently into the warm coating, adhering as it firms and adding a festive appearance. I like to vary textures, for instance a light dusting of colored sprinkles or crushed nuts, which contrast the glossy chocolate. Add decorations quickly after dipping so they stick, otherwise the chocolate may start to set and prevent adherence. Avoid heavy decorations that can weigh down the shell and cause indentation.
- Return the chocolate-covered peanut butter eggs to the refrigerator to allow the chocolate to set, about 30 minutes: As they chill, the chocolate will harden into a crisp shell while the center remains creamy, creating that perfect textural contrast. You will see the surface go from glossy to slightly firmer and cooler to the touch. Proper chilling also helps the chocolate stabilize so it does not bloom as quickly. Leaving them at room temperature for too long may soften the center and make handling messy, so don’t skip this step.
- The peanut butter eggs can be stored in an airtight container in the refrigerator for up to 1 month: Stored cold, they retain texture and freshness, and the chocolate stays intact. For longer keeping, freeze them for up to 3 months, wrapped well to prevent freezer burn. Thaw in the refrigerator before serving to avoid condensation on the chocolate. A mistake I see is storing them at room temperature in warm kitchens, which can make the chocolate sweat or the filling soften.
Recipe Notes about Homemade Peanut Butter Eggs
These notes expand on common questions and substitutions. I use them when I want a consistent result or when adapting the recipe for different tastes.
- Do not use natural peanut butter in this recipe, as natural versions are too oily and the eggs will not set properly. The extra oil separates and prevents the filling from firming, making shaping and dipping messy.
- You can substitute another stable nut butter for the peanut butter, but again avoid natural, oil separated varieties. Almond or cashew butters that are smooth and commercially emulsified work well and bring a different flavor profile.
- Swap chocolate types by using semisweet or dark chocolate for the coating if you prefer a less sweet exterior. Note that darker chocolate will alter the overall sweetness and balance, so taste a small piece first.
- Refined coconut oil alternative can be used instead of vegetable shortening in the coating to help thin the chocolate and add shine. Use refined to avoid a coconut flavor if you want the classic profile.
- Decorations and add ins such as colored sugars or sprinkles are best applied immediately after dipping while the chocolate is still wet, so they adhere cleanly and look professional.
What to Serve Alongside Homemade Peanut Butter Eggs
These little treats pair well with simple beverages and seasonal gatherings. Serve them on a dessert platter, tuck them into baskets for holiday sharing, or include them in a coffee hour spread. They are versatile and travel well for potlucks or gift boxes.
- Spring brunch or Easter basket: Include Homemade Peanut Butter Eggs in a basket with pastel wrapped candies and fresh fruit for a festive presentation suitable for holiday celebrations.
- After dinner dessert platter: Arrange alongside cookies and small fruit tarts for a sweet finish, balancing the richer eggs with lighter bites and fresh berries.
- Party favors: Wrap several eggs in parchment and tie with ribbon for guest takeaways, they keep well in the refrigerator for a week which is helpful when preparing in advance.
- Pair with coffee or tea: The creamy peanut butter center and sweet chocolate coating harmonize with a cup of strong coffee or a milder black tea, making them a nice accompaniment to afternoon gatherings.
- Storage suggestions: Keep stored in an airtight container in the refrigerator for up to one month, or freeze for up to three months. Thaw slowly in the fridge to avoid condensation on the chocolate.
FAQ
Conclusion
What makes this recipe special is the satisfying contrast between the creamy, nutty center and the crisp chocolate shell. The straightforward technique and pantry friendly ingredients let you craft a candy that tastes like it came from a candy shop, while being unmistakably homemade. Give it a try on a quiet afternoon or when you want an easy, crowd pleasing treat to share, and enjoy the small ritual of shaping, dipping, and gifting these charming eggs.
Homemade Peanut Butter Eggs
Equipment
- Medium Saucepan
- Baking Sheet
- Parchment Paper
- Cookie Scoop
- Microwave-safe Bowl
- Fork
Ingredients
- 1 cup (258 g) creamy peanut butter Creamy and smooth, provides the rich peanut flavor and silky texture that forms the filling's base, binding other filling ingredients together for scoopable consistency. Adds natural oils that contribute to mouthfeel and help achieve a fudgy interior after chilling. Enhances overall peanut-forward taste and balances sweetness from sugars.
- 1/4 cup (56.75 g) unsalted butter Softened and slightly savory, contributes fat that enriches the filling's creaminess and helps achieve a spreadable, cohesive texture when beaten into peanut butter. Adds subtle buttery notes that round out the sweetness and improve mouthfeel. Helps the filling set more firmly when chilled.
- 1/4 cup (55 g) light brown sugar Moist and mildly caramel-like, adds sweetness and depth while helping to tenderize the filling for a pleasant chewiness. Dissolves into the mixture to balance salt and enhance overall flavor complexity. Works with butter to provide structure and subtle molasses undertones.
- 1 1/4 cup (150 g) powdered sugar Light and powdery, supplies concentrated sweetness and helps the filling thicken to a dough-like consistency for shaping into egg forms. Absorbs excess oil from peanut butter to prevent greasiness and contributes smooth, even sweetness throughout. Ensures the filling holds shape without being grainy when properly sifted and mixed.
- 2 cups (360 g) milk chocolate chips, (or 12 ounces milk chocolate, chopped) Melty and glossy, provides the chocolate coating that surrounds the peanut butter centers, offering contrast in texture and a sweet, creamy chocolate flavor. Melts smoothly for dipping and sets into a firm shell that protects and complements the filling. Can be swapped between chips or chopped bars without altering coating function.
- 2 tablespoons vegetable shortening Solid and neutral-flavored, stabilizes the melted chocolate to create a shinier, firmer coating that snaps upon set and resists blooming. Helps thin and loosen chocolate for smoother dipping while improving shelf stability at room temperature. Also aids in achieving an even, glossy finish on the exterior.
Instructions
- Line a baking sheet with wax paper or parchment paper; set aside.: You will notice the smooth, slightly tacky surface of the paper as you place formed eggs onto it, which keeps them from sticking and makes transfer effortless. Having the sheet ready is important because once the filling is shaped, you want a clean surface to chill them on. A common mistake is to skip lining, which leads to delicate eggs tearing when removed. If the room is warm, place the tray briefly in the refrigerator before shaping to keep the filling cool to the touch.
- In a medium saucepan, combine the peanut butter, butter, and brown sugar over medium heat. Heat until completely melted and starting to simmer, stirring constantly. Remove from the heat.: Sweet, nutty steam will rise as the peanut butter melds with melted butter and light brown sugar , releasing a warm aroma. Stirring constantly prevents the mixture from sticking and burning, and you should aim for a smooth, glossy texture before pulling it off the heat. This step builds the base flavor and ensures the sugar dissolves. Watch for any scorching; if you see dark specks, discard and start again, as burnt notes will carry through to the final candy.
- Add the powdered sugar a 1/4 cup at a time, stirring until completely combined with the peanut butter mixture after each addition. Set aside and let cool to room temperature.: As you add powdered sugar , the mixture will thicken and lose some sheen, becoming dough like and slightly pliable. Stir thoroughly after each addition so there are no streaks of dry sugar. Cooling to room temperature is essential so the filling is firm enough to shape, and you will feel the mixture become less sticky. Rushing this step can lead to filling that oozes when dipped, so be patient and test a small scoop to see if it holds its shape.
- Using a medium cookie scoop or a heaping tablespoon, scoop out peanut butter mixture and shape into eggs. I found it easiest to roll the scoop into a ball, and then roll it into a short cylinder. I placed it on the baking sheet, and then used my fingers to shape the ends into an egg-like oval. Refrigerate to allow the peanut butter eggs to set, about 30 minutes.: The tactile process of shaping is satisfying, you will feel the pliable filling come together in your hands as you roll it into an oval. I found it easiest to roll the scoop into a ball, and then roll it into a short cylinder. Placing them on the lined baking sheet, gently press the ends to create that classic egg silhouette. Refrigerate to allow the peanut butter eggs to set, about 30 minutes. If the mixture sticks to your hands, dampen them slightly or refrigerate the mixture for a few extra minutes. Overhandling can warm the filling too much, making them soft and harder to coat.
- Once the peanut butter eggs are set, melt the chocolate chips and shortening together in the microwave on 50% power in 30-second increments, stirring after each, until completely melted. One at a time, dip a peanut butter egg into the chocolate and, using a fork, flip it over so it is completely covered. Remove it from the bowl, letting any excess chocolate drip off. Return it to the baking sheet, and repeat with all of the peanut butter eggs. Sprinkle with decorations, if desired.: The chocolate will transform from grainy clumps to a velvety liquid, releasing a comforting, sweet chocolate scent. Stirring between bursts distributes heat and prevents scorching, creating a glossy finish aided by the vegetable shortening . If you overheat, the chocolate can seize or become dull, so use short increments and stir frequently. A smooth, slightly viscous texture indicates it is ready for dipping.
- Return the chocolate-covered peanut butter eggs to the refrigerator to allow the chocolate to set, about 30 minutes. The peanut butter eggs can be stored in an airtight container in the refrigerator for up to 1 month. They can be frozen for up to 3 months.: As you dip, listen for a soft rinse of chocolate and watch it flow around the egg into a silky coat. Use the fork to lift and let excess drip back into the bowl, then tap lightly on the bowl edge to remove extra chocolate so the coating is even. Work over the lined sheet and repeat with all eggs. A frequent slip up is dipping when the filling is not cold enough, which can cause the center to soften and lose shape. If that happens, chill the formed eggs a bit longer before continuing.
- Remove it from the bowl, letting any excess chocolate drip off. Return it to the baking sheet, and repeat with all of the peanut butter eggs: After you set each coated egg down, the chocolate will begin to dull slightly as it cools, and you may see a thin ridge form around the base where excess chocolate pooled. That is normal and can be smoothed with a small offset spatula if you prefer. Keep the bowl warm but not hot to maintain a dip friendly viscosity. A common error is overcrowding the tray which can cause eggs to touch and stick together as they set.
- Sprinkle with decorations, if desired: When you add decorations, they will press gently into the warm coating, adhering as it firms and adding a festive appearance. I like to vary textures, for instance a light dusting of colored sprinkles or crushed nuts, which contrast the glossy chocolate. Add decorations quickly after dipping so they stick, otherwise the chocolate may start to set and prevent adherence. Avoid heavy decorations that can weigh down the shell and cause indentation.
- Return the chocolate-covered peanut butter eggs to the refrigerator to allow the chocolate to set, about 30 minutes: As they chill, the chocolate will harden into a crisp shell while the center remains creamy, creating that perfect textural contrast. You will see the surface go from glossy to slightly firmer and cooler to the touch. Proper chilling also helps the chocolate stabilize so it does not bloom as quickly. Leaving them at room temperature for too long may soften the center and make handling messy, so don’t skip this step.
- The peanut butter eggs can be stored in an airtight container in the refrigerator for up to 1 month: Stored cold, they retain texture and freshness, and the chocolate stays intact. For longer keeping, freeze them for up to 3 months, wrapped well to prevent freezer burn. Thaw in the refrigerator before serving to avoid condensation on the chocolate. A mistake I see is storing them at room temperature in warm kitchens, which can make the chocolate sweat or the filling soften.
Notes
- Do not use natural peanut butter in this recipe, as natural versions are too oily and the eggs will not set properly. The extra oil separates and prevents the filling from firming, making shaping and dipping messy.
- You can substitute another stable nut butter for the peanut butter, but again avoid natural, oil separated varieties. Almond or cashew butters that are smooth and commercially emulsified work well and bring a different flavor profile.
- Swap chocolate types by using semisweet or dark chocolate for the coating if you prefer a less sweet exterior. Note that darker chocolate will alter the overall sweetness and balance, so taste a small piece first.
- Refined coconut oil alternative can be used instead of vegetable shortening in the coating to help thin the chocolate and add shine. Use refined to avoid a coconut flavor if you want the classic profile.
- Decorations and add ins such as colored sugars or sprinkles are best applied immediately after dipping while the chocolate is still wet, so they adhere cleanly and look professional.