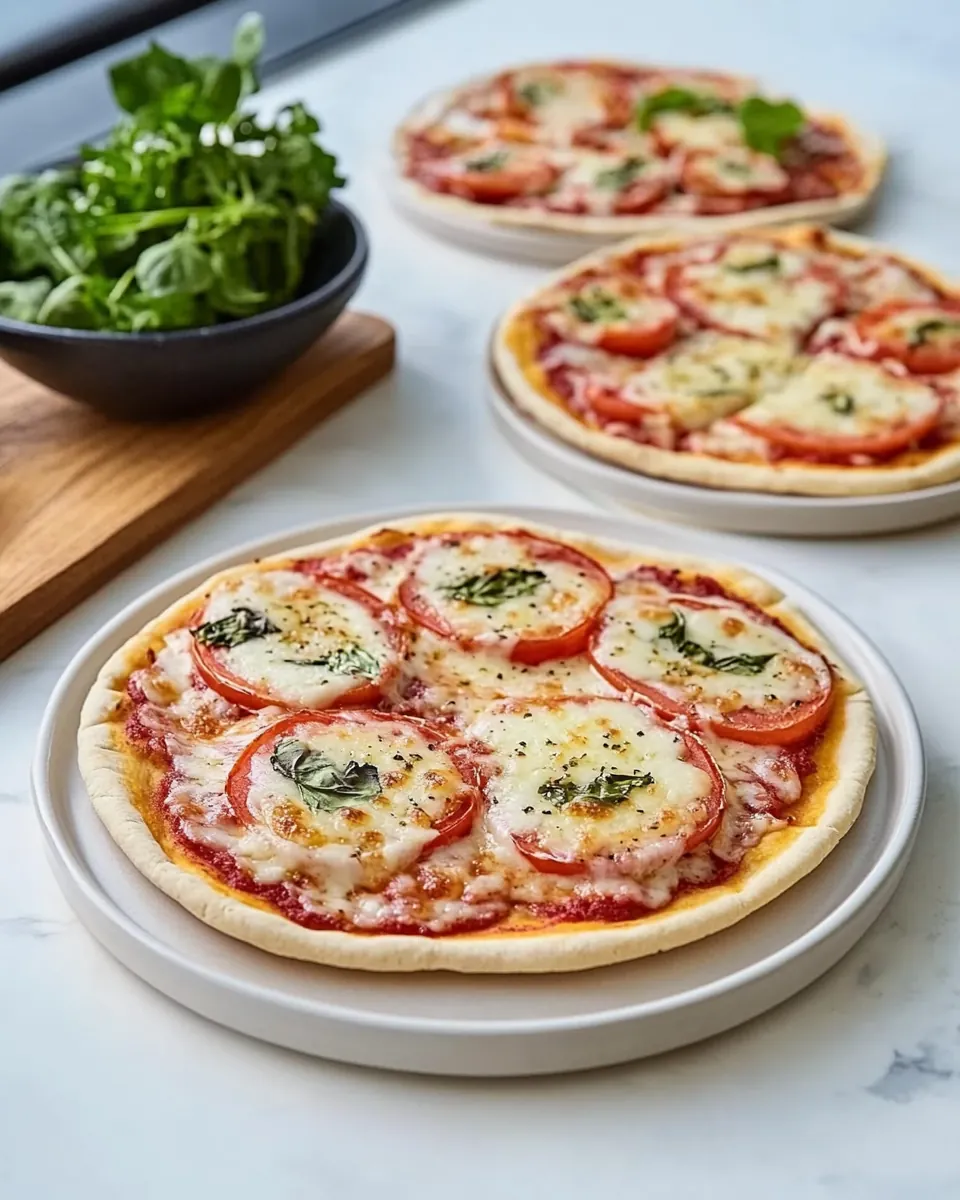
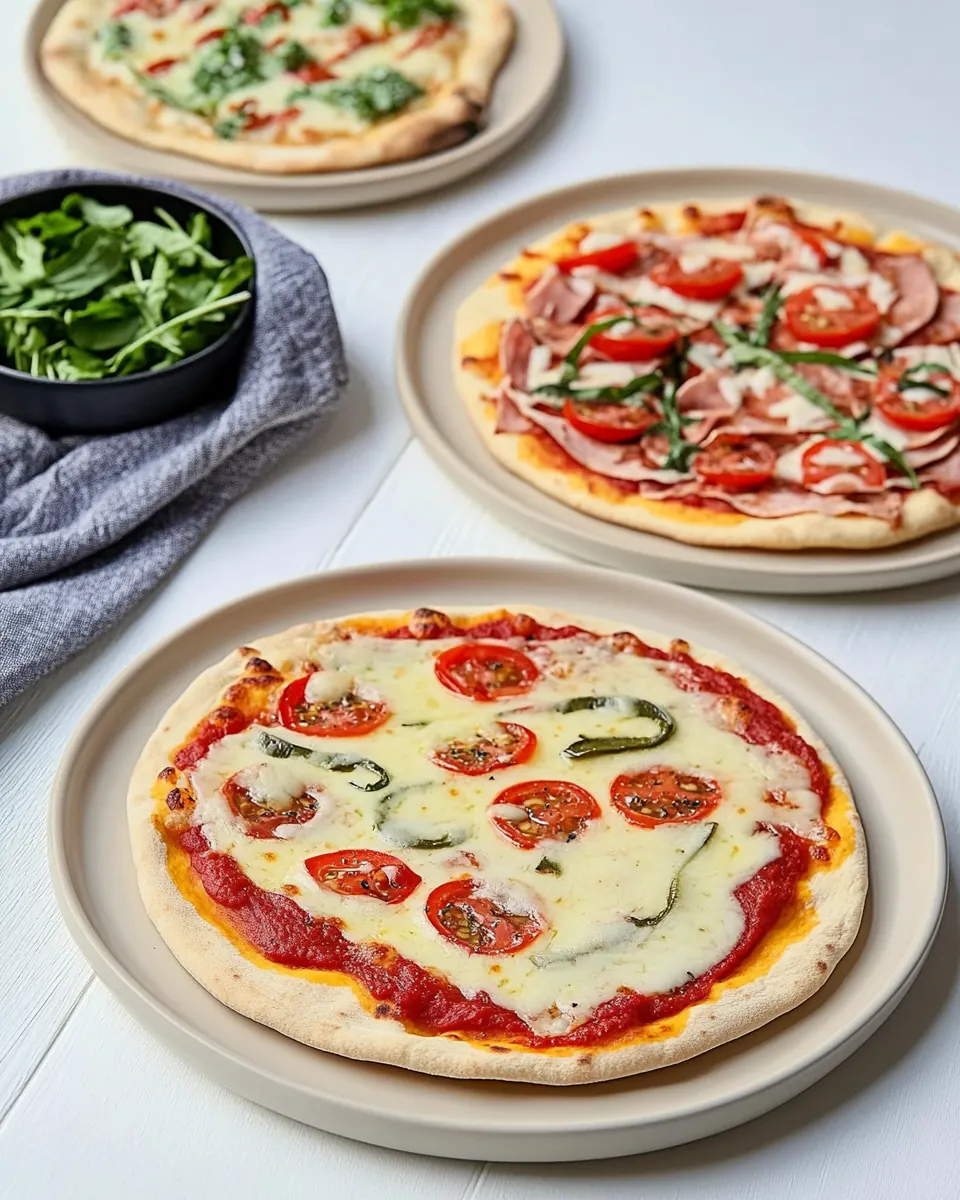
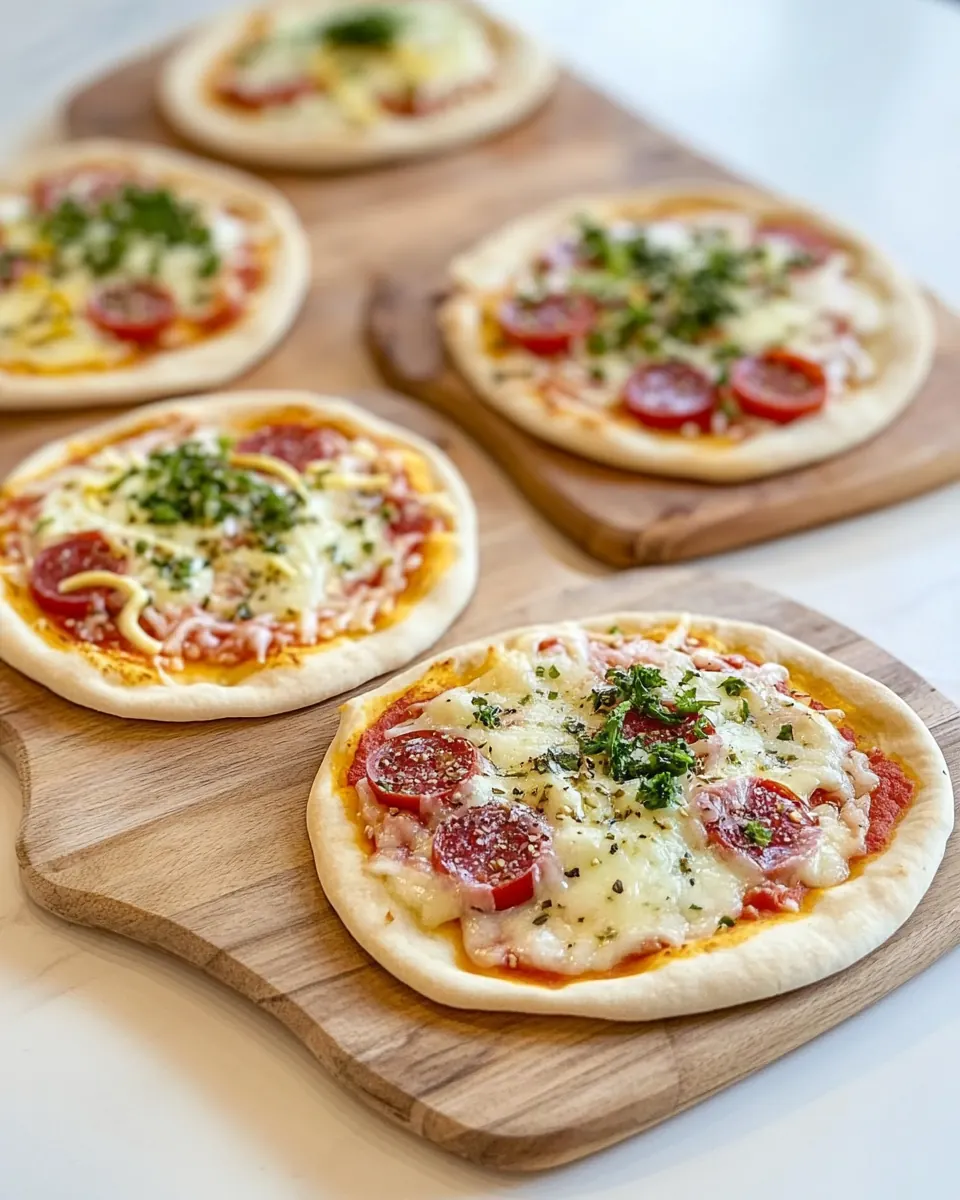
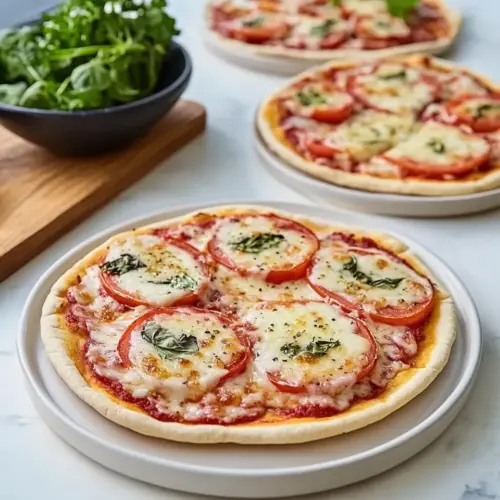
Pita Pizzas
Pita Pizzas have been my go to when I want something quick, satisfying, and customizable, and that is exactly why they show up on my busiest nights. I remember the first time I layered a warm, toasty pita with bright tomato sauce and a blanket of gooey mozzarella cheese, then popped it into the oven. The smell filled the kitchen and it felt like a tiny, personal celebration without the fuss.
Over time I learned how small changes transform these mini pies. Swapping in whole wheat pita makes them heartier, while a scatter of sliced black olives adds salty pops that keep every bite interesting. I often make a trayful and let everyone pick toppings of choice so each person ends up with their perfect slice.
Recipe Snapshot
12 mins
2 mins
10 mins
Easy
300 kcal
Mediterranean
Gluten-Free, Vegan
Dinner
Oven, Baking sheet, Mixing bowl, Knife or pizza cutter
Why This Pita Pizzas Is So Good
Fast and friendly to busy lives
I love how Pita Pizzas come together in minutes, which makes them ideal when time is tight. You do not need fancy prep or a long ingredient list, just a few staples that most kitchens already have. Because I value speed without sacrificing flavor, this recipe fits right into my weeknight rotation.
Customization is the real joy
One of my favorite things about Pita Pizzas is how they invite creativity. I let people choose toppings of choice so each pizza becomes personal. It is a low stress way to entertain, and I often use leftovers in the fridge to finish them off.
Kid friendly and approachable
My kids adore assembling their own Pita Pizzas. It becomes a hands on activity that still feels like a grown up meal. They get to practice small tasks, and I get to relax in the kitchen while everything bakes to bubbling perfection.
Healthful base, indulgent finish
Using whole wheat pita gives a nuttier, more substantial base, so a single mini pizza can be surprisingly filling. Pairing that with a moderate amount of melted mozzarella cheese strikes a nice balance between comfort and nutrition. I often pair these with a simple green side to round out the meal.
Perfect for sharing and scaling
Whether you are feeding four or a crowd, Pita Pizzas scale effortlessly. I can make a handful for a snack or a full sheet pan to feed a small group. Cleanup is minimal, and that convenience keeps me coming back when I want something tasty without the aftermath.
Recipe Ingredients for Pita Pizzas
These ingredients are intentionally simple, designed to work together in texture and flavor. The tomato sauce provides acidity and moisture, while the garlic powder and Italian herbs layer savory aromatics. Kosher salt brightens, mozzarella cheese melts into comforting strands, and the whole wheat pita forms a sturdy, slightly nutty base. Black olives add salty complexity and toppings of choice let you finish with personal flair.
- 1 cup tomato sauce: Provides a flavorful base for the pizza, giving moisture and tomato richness that carries herbs and spices. Helps bind other toppings to the pita and creates a saucy layer that caramelizes slightly in the oven. Can be seasoned further if desired to intensify overall flavor.
- 1/2 teaspoon garlic powder: Adds a warm, savory note and subtle garlic aroma that enhances the tomato sauce without overpowering other seasonings. Dissolves into the sauce during baking to round out the flavor profile and complements the cheese. Works well in small amounts to prevent bitterness.
- 1/2 teaspoon Italian herbs: Imparts a classic Mediterranean herb blend that brightens the sauce with oregano, basil, and other aromatics. Balances acidity and adds complexity to each bite when mixed into tomato sauce. Helps create a familiar pizza-herb character.
- 1/2 teaspoon kosher salt: Contributes controlled salinity to enhance all flavors in the sauce and toppings while preventing blandness. Aids in balancing sweetness from the tomatoes and richness from the cheese. Using kosher salt ensures easy pinch control and even distribution.
- 1 cup mozzarella cheese, grated: Provides creamy, melty texture and rich dairy flavor that creates the traditional pizza topping experience. Grated form melts evenly across the pita, browns attractively, and helps hold other toppings in place. Quantity offers generous coverage for four mini pitas.
- 4 whole wheat pita (I used mini pita from Trader Joe’s): Serves as the sturdy, portable pizza crust that crisps at the edges while remaining soft inside. Whole wheat variety adds a nutty flavor and extra fiber compared with white pita. Mini size yields individual portions that are quick to bake and serve.
- 1/3 cup black olives, sliced: Gives a briny, salty contrast and pleasant bite that pairs well with cheese and tomato sauce. Sliced form distributes evenly so each pizza receives a taste of olive without overwhelming other flavors. Adds visual contrast and Mediterranean character.
- toppings of choice: Provides customizable finishing touches that personalize each pizza to taste, such as veggies, meats, or herbs. Allows for texture and flavor variety while keeping preparation simple and fast. Encourages creativity and accommodates dietary preferences.
Making Pita Pizzas
These instructions are straightforward, and they let you focus on sensory cues while you build layers of flavor. Work confidently, and you will notice the way the kitchen fills with tomato aroma as the mozzarella cheese begins to melt. Follow each step to get consistent, crispy results.
- Preheat oven to 400 degrees.: You will smell a faint warmth in the air as the oven comes up to temperature, and that ready heat is what crisps the edges of the pita while melting the mozzarella cheese . Preheating matters because it ensures even baking start to finish, preventing soggy centers. A common error is skipping preheat, which leads to unevenly melted cheese and limp pita . If your oven runs hot, watch the first batch closely for golden edges.
- Place the first 4 ingredients in a bowl to combine.: After combining the tomato sauce , garlic powder , Italian herbs , and kosher salt , inhale the fragrant mix of herbs and garlic; this blend should smell balanced, not sharp. Mixing allows the seasoning to infuse the sauce, so each spoonful will coat the pita uniformly. If the sauce tastes flat, adjust with a pinch more kosher salt . Be careful not to over-season, which can mask the delicate herb notes.
- Cover the pitas with 1/4 cup sauce, 1/4 cup cheese and slices of black olives and other desired toppings.: When you spread about 1/4 cup of the seasoned tomato sauce onto each pita , notice the contrast between the sauce’s sheen and the dry surface of the bread. Sprinkle 1/4 cup grated mozzarella cheese so it nests into the sauce, and place sliced black olives on top so they brown slightly rather than sink. This order prevents sogginess and ensures even melting. Avoid piling toppings too high, as that can prevent the pita from crisping and result in a floppy base.
- Place on a foil lined cookie sheet and bake for 10 minutes or until cheese is melted.: As the tray goes into the oven you will start to notice a warm, toasty aroma. Around the halfway mark the mozzarella cheese will soften and then begin to bubble and lightly brown at the edges, signaling readiness. Baking on foil makes cleanup simpler and reflects heat for a crisper underside. A frequent mistake is leaving them in too long, which can dry out the pita and make the cheese rubbery. Check at the nine minute mark and remove once the cheese looks glossy and has small golden spots.
- Cut and serve.: Right after removing from the oven the cheese will be molten and strings will form when you lift a slice, offering a pleasing pull and aroma. Use a pizza cutter or sharp knife to divide each mini pizza into pieces, and serve while hot so the texture remains at its best. If you wait too long, the mozzarella cheese firms up and the experience changes from gooey to chewy, which some prefer, but it will feel less indulgent. Let the pizzas rest a minute if the cheese is dangerously hot before serving to young diners.
Ways to Customize

There are many ways to make Pita Pizzas your own. Below are thoughtful suggestions that preserve the simple method while letting flavors shine through. Each tip focuses on one practical idea so you can mix and match based on pantry supplies and mood.
- Double the herbs: Try increasing the amount of Italian herbs in the sauce mixture to intensify the background aromatics, which pairs well with the mildness of the mozzarella cheese.
- Layer for texture: Spread a thin smear of sauce first, then a light sprinkle of mozzarella cheese, followed by additional sauce and more cheese to create a layered melt that is creamier in the center.
- Olive placement: Scatter black olives on top rather than under the cheese to keep them slightly roasted and to preserve their briny punch in each bite.
- Pita prep: For extra crispness, toast the whole wheat pita for 1 to 2 minutes before assembling so it develops a firmer base that resists sogginess.
- Even cheese distribution: Measure 1/4 cup of grated mozzarella cheese per pita to ensure consistent melting and avoid dry or overly cheesy pies.
- Serve hot: Aim to serve the pizzas right out of the oven when the mozzarella cheese is glossy and molten, that is when textures and flavors are most harmonious.
Serve This Pita Pizzas With
These serving ideas are designed to complement the simple, satisfying profile of Pita Pizzas. Whether for a casual lunch or a light dinner, choose accompaniments that add freshness, crunch, or cooling contrast. Below are versatile pairings and practical storage tips you can use anytime.
- Simple green salad: Toss crisp greens with a light vinaigrette to cut through the richness of the melted mozzarella cheese and cleanse the palate between bites.
- Veggie sticks: Serve raw cucumber, carrot, or bell pepper sticks to add crunchy texture and a refreshing counterpoint to the warm, toasty pita base.
- Family style tray: Arrange multiple assembled Pita Pizzas on a large platter so guests can mix and match slices and toppings of choice, making it perfect for casual gatherings.
- Storage tip: Keep leftover pizzas in an airtight container in the refrigerator for up to two days, and reheat in a 350 degree oven for a few minutes to revive crisp edges and melty mozzarella cheese.
- Occasion pairing: These work well for lunch, a light dinner, or during Ramadan Iftar as a quick, shareable option that comes together fast after breaking the fast.
- Seasonal note: Because the ingredients are pantry friendly, Pita Pizzas are a great evergreen choice, fitting every season and easy to adapt with seasonal toppings.
FAQ
Conclusion
Pita Pizzas shine because they deliver that comforting pizza feeling with minimal effort and total flexibility. They are fast to assemble, customizable for everyone at the table, and they crisp up beautifully while still feeling substantial thanks to whole wheat pitas. Give them a try the next time you want a simple, satisfying meal that comes together quickly, and let the toppings of choice reflect your pantry and mood. When served hot, with bubbling cheese and a hint of herbs, these mini pizzas are an easy favorite for busy nights and casual gatherings.
Pita Pizzas
Equipment
- Oven
- Baking Sheet
- Mixing Bowl
- Knife or pizza cutter
Ingredients
- 1 cup tomato sauce Provides a flavorful base for the pizza, giving moisture and tomato richness that carries herbs and spices. Helps bind other toppings to the pita and creates a saucy layer that caramelizes slightly in the oven. Can be seasoned further if desired to intensify overall flavor.
- 1/2 teaspoon garlic powder Adds a warm, savory note and subtle garlic aroma that enhances the tomato sauce without overpowering other seasonings. Dissolves into the sauce during baking to round out the flavor profile and complements the cheese. Works well in small amounts to prevent bitterness.
- 1/2 teaspoon Italian herbs Imparts a classic Mediterranean herb blend that brightens the sauce with oregano, basil, and other aromatics. Balances acidity and adds complexity to each bite when mixed into tomato sauce. Helps create a familiar pizza-herb character.
- 1/2 teaspoon kosher salt Contributes controlled salinity to enhance all flavors in the sauce and toppings while preventing blandness. Aids in balancing sweetness from the tomatoes and richness from the cheese. Using kosher salt ensures easy pinch control and even distribution.
- 1 cup mozzarella cheese, grated Provides creamy, melty texture and rich dairy flavor that creates the traditional pizza topping experience. Grated form melts evenly across the pita, browns attractively, and helps hold other toppings in place. Quantity offers generous coverage for four mini pitas.
- 4 whole wheat pita (I used mini pita from Trader Joe’s) Serves as the sturdy, portable pizza crust that crisps at the edges while remaining soft inside. Whole wheat variety adds a nutty flavor and extra fiber compared with white pita. Mini size yields individual portions that are quick to bake and serve.
- 1/3 cup black olives, sliced Gives a briny, salty contrast and pleasant bite that pairs well with cheese and tomato sauce. Sliced form distributes evenly so each pizza receives a taste of olive without overwhelming other flavors. Adds visual contrast and Mediterranean character.
- toppings of choice Provides customizable finishing touches that personalize each pizza to taste, such as veggies, meats, or herbs. Allows for texture and flavor variety while keeping preparation simple and fast. Encourages creativity and accommodates dietary preferences.
Instructions
- Preheat oven to 400 degrees.: You will smell a faint warmth in the air as the oven comes up to temperature, and that ready heat is what crisps the edges of the pita while melting the mozzarella cheese . Preheating matters because it ensures even baking start to finish, preventing soggy centers. A common error is skipping preheat, which leads to unevenly melted cheese and limp pita . If your oven runs hot, watch the first batch closely for golden edges.
- Place the first 4 ingredients in a bowl to combine.: After combining the tomato sauce , garlic powder , Italian herbs , and kosher salt , inhale the fragrant mix of herbs and garlic; this blend should smell balanced, not sharp. Mixing allows the seasoning to infuse the sauce, so each spoonful will coat the pita uniformly. If the sauce tastes flat, adjust with a pinch more kosher salt . Be careful not to over-season, which can mask the delicate herb notes.
- Cover the pitas with 1/4 cup sauce, 1/4 cup cheese and slices of black olives and other desired toppings.: When you spread about 1/4 cup of the seasoned tomato sauce onto each pita , notice the contrast between the sauce’s sheen and the dry surface of the bread. Sprinkle 1/4 cup grated mozzarella cheese so it nests into the sauce, and place sliced black olives on top so they brown slightly rather than sink. This order prevents sogginess and ensures even melting. Avoid piling toppings too high, as that can prevent the pita from crisping and result in a floppy base.
- Place on a foil lined cookie sheet and bake for 10 minutes or until cheese is melted.: As the tray goes into the oven you will start to notice a warm, toasty aroma. Around the halfway mark the mozzarella cheese will soften and then begin to bubble and lightly brown at the edges, signaling readiness. Baking on foil makes cleanup simpler and reflects heat for a crisper underside. A frequent mistake is leaving them in too long, which can dry out the pita and make the cheese rubbery. Check at the nine minute mark and remove once the cheese looks glossy and has small golden spots.
- Cut and serve.: Right after removing from the oven the cheese will be molten and strings will form when you lift a slice, offering a pleasing pull and aroma. Use a pizza cutter or sharp knife to divide each mini pizza into pieces, and serve while hot so the texture remains at its best. If you wait too long, the mozzarella cheese firms up and the experience changes from gooey to chewy, which some prefer, but it will feel less indulgent. Let the pizzas rest a minute if the cheese is dangerously hot before serving to young diners.
Notes
- Double the herbs: Try increasing the amount of Italian herbs in the sauce mixture to intensify the background aromatics, which pairs well with the mildness of the mozzarella cheese.
- Layer for texture: Spread a thin smear of sauce first, then a light sprinkle of mozzarella cheese, followed by additional sauce and more cheese to create a layered melt that is creamier in the center.
- Olive placement: Scatter black olives on top rather than under the cheese to keep them slightly roasted and to preserve their briny punch in each bite.
- Pita prep: For extra crispness, toast the whole wheat pita for 1 to 2 minutes before assembling so it develops a firmer base that resists sogginess.
- Even cheese distribution: Measure 1/4 cup of grated mozzarella cheese per pita to ensure consistent melting and avoid dry or overly cheesy pies.
- Serve hot: Aim to serve the pizzas right out of the oven when the mozzarella cheese is glossy and molten, that is when textures and flavors are most harmonious.