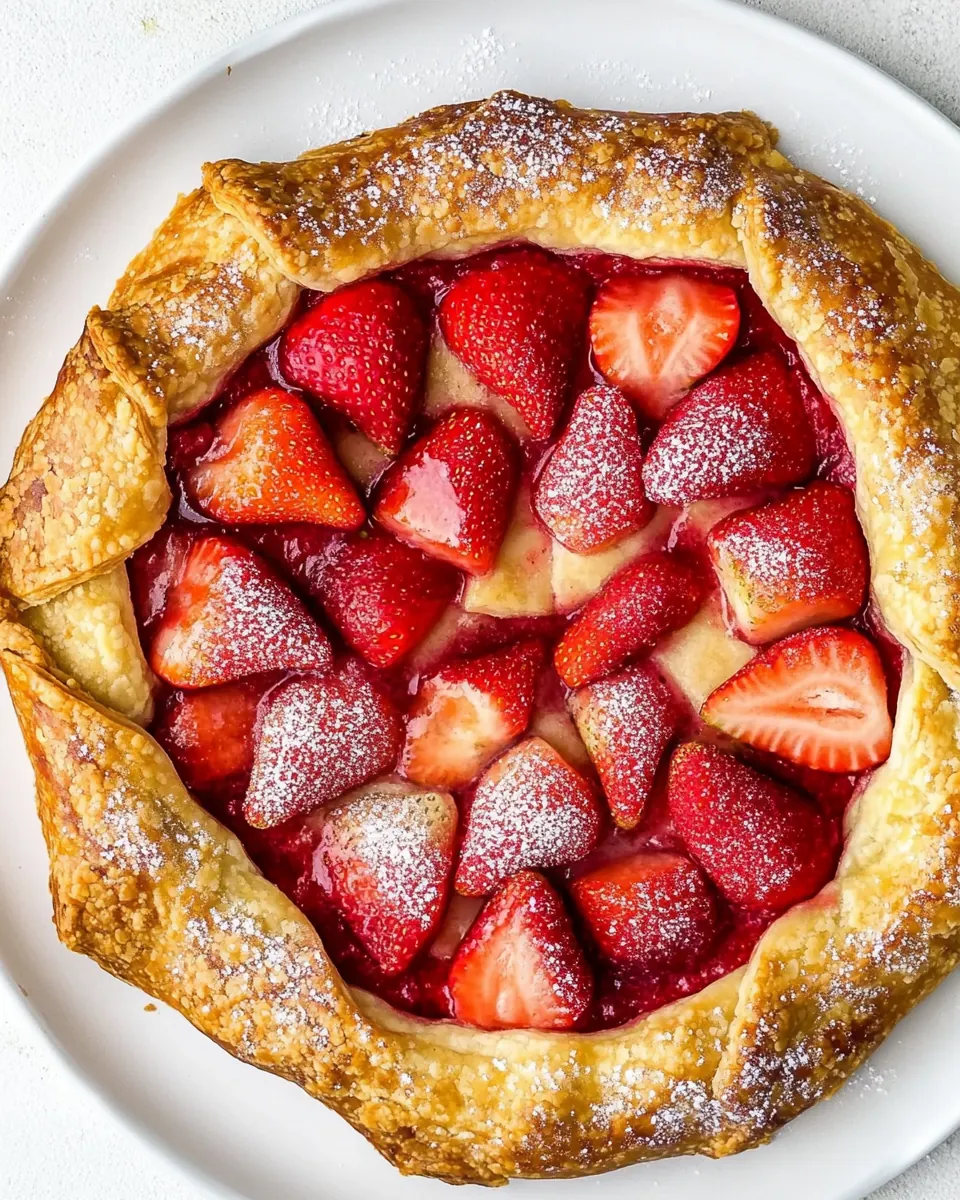
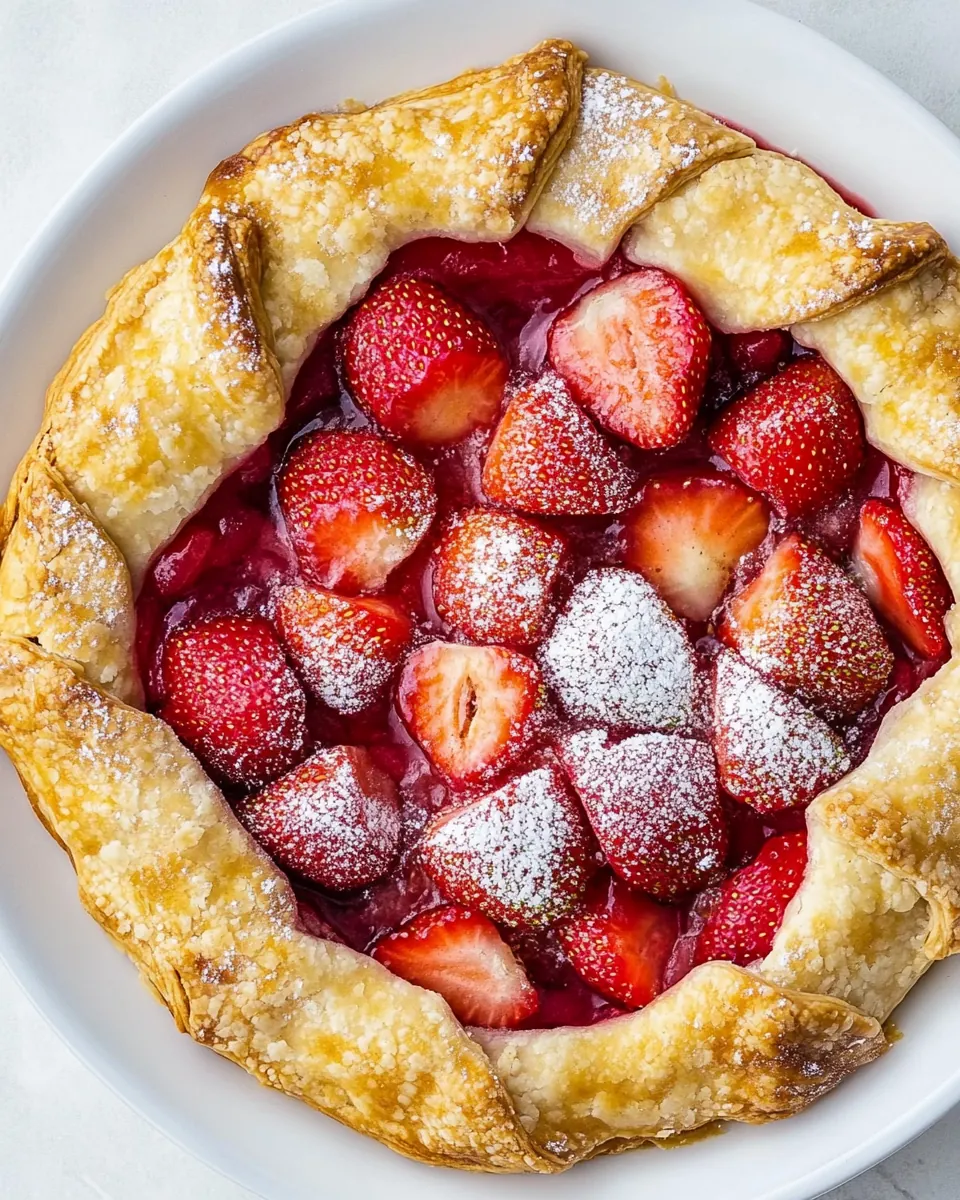
Strawberry Galette
Strawberry Galette is one of those treats I reach for when I want something that feels both rustic and special, and it always brings back a particular afternoon I spent in my grandmother’s sunlit kitchen.
That day I was armed with a bowl of bright strawberries, a flaky butter forward crust, and zero patience for perfection. I remember the warm scent of fruit softening on the counter as we folded the edges of the crust together, laughing about how every galette looks a little different and that is precisely the point. I love how the uneven, crimped edges invite curiosity, and the jammy filling spills just enough to make each slice a little messy and utterly irresistible.
What I also love about the Strawberry Galette is how it feels approachable. You do not need perfect rolling skills or elaborate equipment, just a willingness to get your hands a bit floury and to follow a few forgiving techniques. Over time I learned small tricks, like chilling the dough until it is manageable, and using a glossy jam glaze for that professional finish. Those tiny choices transform simple strawberries and a humble crust into something that tastes like celebration.
Every time I slice into a warm galette and the fruit sighs out steam, I am reminded that baking is as much about the moments we create as the flavors we layer. Whether you are sharing this with friends or keeping most of the first slice for yourself, the Strawberry Galette rewards patience and curiosity in equal measure. It is the kind of recipe I return to again and again, because it always makes the kitchen feel like home.
Recipe Snapshot
60 mins
25 mins
35 mins
Medium
250 kcal
American
Gluten-Free, Low FODMAP
Desserts
Food processor, Parchment paper, Rolling Pin, Plastic wrap, Baking sheet, Pastry brush
The Appeal of This Strawberry Galette
It is unfussy but elegant
The Strawberry Galette is proof that elegance does not require fuss. You get a crisp, flaky butter laden crust that frames a simple fruit filling, and yet the result reads as refined. I love serving this when I want something that looks impressive without hours of effort, because the rustic fold gives a handmade charm that guests instantly notice.
Fruit forward and seasonal
Using fresh strawberries elevates this galette in a way jam alone cannot. In spring the berries are at their brightest, and that bright acidity balances the rich crust. I pick berries that are fragrant and firm, because they keep structure when baked, and the natural sugars caramelize to give little pockets of jammy sweetness.
Flexible technique
Whether you make the dough by hand or in a food processor, the technique is forgiving. I often switch methods depending on time and mood. The dough only needs to come together without being overworked, and chilling gives you time to slow down, which often leads to better texture and fewer mistakes.
Great for sharing or solo treats
A single galette serves a crowd or makes a lovely personal indulgence. I appreciate that you can scale the experience up by pairing it with a scoop of cold vanilla ice cream, or keep things simple and enjoy it with coffee. The texture contrast between the warm filling and a cool garnish creates a memorable bite.
Hands on, comforting process
There is something meditative about folding the dough and arranging the filling, and that tactile involvement translates into pride when you pull a golden galette from the oven. I find the process calming, and the result reliably wins smiles.
Strawberry Galette Ingredients
These ingredients are deliberately simple, each playing a clear role. The flour and cornmeal build a tender, slightly textured crust, while the butter provides flakiness and flavor. The strawberries create the juicy, bright heart of the galette, with cornstarch and a touch of sugar to ensure the filling sets without getting watery. Together, they make a balanced treat that is all about contrast between crisp and tender, sweet and tangy.
- 1 1/2 cups all-purpose flour: Provides structure and body to the pastry; its gluten develops when mixed, giving the crust enough strength to hold filling while keeping a tender crumb when handled minimally. Use as measured to ensure proper dough texture and balance with fats and liquids for a flaky result.
- 1/4 cup finely ground white cornmeal: Adds a slight grainy texture and subtle corn flavor to the crust; helps absorb some moisture and contributes to a more rustic, golden bake. Finely ground cornmeal also prevents the pastry from becoming soggy where it contacts the fruit filling.
- 1 tablespoon granulated sugar: Balances sweetness in the dough and enhances browning during baking; a small amount subtly lifts flavor without making the crust noticeably sweet. Dissolve into dry ingredients to distribute evenly for consistent taste and color.
- 1/4 teaspoon salt: Defines basic seasoning for the pastry and controls flavor balance; salt strengthens gluten slightly and brightens the overall taste of both crust and filling. Mix with dry ingredients to ensure even seasoning throughout the dough.
- 1 stick (8 tablespoons) unsalted butter cubed: Provides cold fat necessary for flaky layers; cubed butter distributed throughout the dough creates steam pockets that separate layers during baking. Keep butter cold and work quickly to maintain distinct pieces for optimal flakiness.
- 1/4 cup (4 tablespoons/60ml) ice water divided: Hydrates the flour to form dough while keeping the mixture cold; dividing the water helps control consistency so dough comes together without becoming sticky. Use ice water to minimize butter melting and preserve flakiness in the pastry.
- 1 egg for egg wash mixed with 1 teaspoon of water: Forms a glossy, golden finish on the baked crust; beaten together, the egg and water create an egg wash that promotes even browning and helps jams or sugars adhere. Brush on just before baking for a shiny, attractive appearance.
- 3 cups strawberries sliced: Provides the primary fresh fruit component and natural sweetness; sliced strawberries release juices and soften during baking to create a saucy, fruity filling. Choose ripe strawberries and slice uniformly to ensure even cooking and texture.
- 1 tablespoon lemon juice: Adds bright acidity to balance sweetness and enhance fruit flavor; lemon juice helps macerate the strawberries and prevents them from tasting flat. Mix into the fruit to lift flavors and contribute subtle tartness.
- 1 tablespoon granulated sugar: Contributes additional sweetness to the filling and assists in caramelization; sprinkling sugar over the fruit helps draw out juices and creates a syrupy consistency during baking. Adjust slightly for fruit ripeness but maintain the measured amount for balance.
- 2 tablespoons cornstarch: Thickens the strawberry juices released during baking into a cohesive filling; cornstarch forms a smooth, clear gel when heated with fruit liquids. Toss with the fruit to coat pieces evenly and prevent a runny galette.
- 1 tablespoon strawberry jam: Adds sheen and concentrated strawberry flavor to the finished filling; warming and brushing jam over the top enhances gloss and reinforces fruit taste. Thin slightly if needed before brushing to ensure smooth application and even coverage.
- 1 teaspoon water: Thins and helps dissolve the jam for glazing while controlling consistency; a small splash of water loosens the jam so it spreads smoothly without clumping. Mix with the jam before brushing to achieve an even, shiny glaze on the galette.
How to Assemble Strawberry Galette
Assembling a Strawberry Galette is a hands on, sensory experience that rewards attention to texture and temperature. Below I expand each direction into guided, tactile steps so you can sense when you are on track, and avoid common slip ups.
- By hand: In a large bowl, combine the flour with cornmeal, salt, and sugar. Add the butter, and using a pastry cutter, cut the butter into the flour until it resembles coarse sand. Gradually add the water until the dough comes together but not wet.: In a large bowl, combine the flour with cornmeal, salt, and sugar. Add the butter, and using a pastry cutter, cut the butter into the flour until it resembles coarse sand. Gradually add the water until the dough comes together but not wet. : The moment you begin this step you will notice the dry flour mixture smelling faintly nutty from the cornmeal . As you work the cold cubed butter in with a pastry cutter, listen for the rustling of the butter being broken into small pieces, and watch the mixture change from dusty to pebbly, with small butter bits distributed through the flour. This texture is crucial because those pockets of butter melt during baking and create flaky layers. Add the ice water tablespoon by tablespoon and stop when the dough just holds together when pinched, you should not see it become wet or tacky. A common mistake is adding too much water which yields a dense, tough crust, so err on the side of dryness and chill the dough if it feels soft.
- Using a food processor: Combine the dry ingredients, then add the butter and pulse 10-12 times and the mixture will resemble coarse sand. Gradually add the water (1 tablespoon at a time, you might not need all of the water) until the dough comes together but not too moist (about 1/4 a cup, 60 ml).: Combine the dry ingredients, then add the butter and pulse 10-12 times and the mixture will resemble coarse sand. Gradually add the water (1 tablespoon at a time, you might not need all of the water) until the dough comes together but not too moist (about 1/4 a cup, 60 ml). : When using a food processor , the process is faster and you will hear quick pulses as the butter is cut into the dry mix. Stop pulsing when the texture looks like coarse sand with pea sized butter pieces. The dough will clump when you squeeze it, but should not be glossy. The advantage here is minimal handling so the butter stays cold, which equals a flakier crust. Avoid overprocessing; if the mixture becomes too smooth you will lose those desirable pastry layers.
- Over plastic wrap, shape the dough into a flat disk and chill in the fridge for 30 minutes and up to an hour.: After forming the dough into a disk, you will feel it firm as it chills. This resting period relaxes the gluten in the dough, which prevents shrinking during baking, and it rehardens the butter , so it creates steam pockets when baked. You might notice the dough tightening slightly; that is normal. Skipping this chill time often leads to a tough crust or a dough that tears easily while rolling.
- Preheat the oven to 400°F (200°C). The galette will be baked on the middle rack.: A fully preheated oven ensures even browning and a crisp bottom. You will be greeted with a dry oven scent and a steady warm hush; this means the environment is right for good oven spring. Placing the galette on the middle rack promotes even heat exposure top to bottom. If you slide it into an oven that is not hot enough, the crust will absorb more moisture and become soggy instead of crisp.
- Between 2 pieces of parchment paper, roll out the dough into a 12-inch circle.: Rolling between parchment prevents sticking and keeps the dough intact. As you press and roll, you will feel the dough soften slightly; if it becomes too pliable, pop it back in the fridge for a few minutes. Aim for even thickness so the crust cooks uniformly, and try to keep the edges a bit thicker to hold the filling. Rolling a smaller disk will yield a thicker, heavier crust that bakes chewier, which is a common error.
- To make the filling, in a bowl combine the sliced strawberries with sugar, lemon juice, and cornstarch.: When you toss the strawberries with the sugar , they will start to exude juices within minutes, creating a fragrant, syrupy perfume. The cornstarch will look dusty at first but dissolves into the juices as the mixture rests. The lemon brightens the profile, cutting through the sweetness. Let the mixture sit briefly so the cornstarch hydrates and the berries macerate. A typical misstep is not allowing the juices to mingle, which can cause the filling to be too dry or unevenly sweet.
- Place the galette over a baking sheet and add the filling into the center of the pie leaving about 2-2.5 inches border and then fold the edges over the filling. Brush with the egg wash and sprinkle with granulated sugar if desired.: As you scoop the filling onto the dough, you will hear a soft thud and see a glossy mound of pink-red berries. Leave the exposed border so you can fold it up and create those rustic pleats that hold the filling. The egg wash gives the crust a luminous, deep golden tone, and a sprinkle of sugar adds a crunchy contrast. Be cautious not to overfill; too much filling can gush out and make the crust soggy. Tucking and sealing the edges prevents juice leakage during baking.
- Bake until the pie crust is deep golden brown for about 30-35 minutes. Transfer to a wire rack to cool completely before you brush the fruit with glaze and serve.: During baking you will notice the crust turning from pale to a warm amber, and the filling will bubble gently, releasing a sweet, roasted berry aroma. The sound of the oven quiets as moisture evaporates, and small caramelized spots may appear on the fruit surface. Cooling on a wire rack allows steam to escape from beneath the crust so it keeps crispness. If you cut into the galette too soon, the filling will run, so patience at this stage pays off.
- Mix the jam with the water then carefully brush the glaze over the strawberries (the filling will be soft, so do it carefully).: The glaze adds shine and intensifies flavor; when you brush it on, do so with gentle strokes so you do not disturb the soft berries. The glossy top cools and sets quickly, giving the galette a bakery finish. A heavy hand with the brush can smudge the fruit and make the surface uneven, so be deliberate and light.
- Serve the galette with vanilla ice cream, whipped cream, whipped mascarpone cream, or on its own.: When plated, you will notice steam rising from the warm filling and a contrast of temperatures if you add cold ice cream. The creamy element softens the tart edges of the strawberries and balances the buttery crust. Serving immediately offers a dynamic texture contrast, while waiting a bit allows the filling to set firmer. Avoid leaving toppings on too long, as they can melt and dilute the flavors.
Tips and Variations
This short intro highlights practical tweaks and thoughtful swaps to make the most of your Strawberry Galette. Below are tested tips and variations I use regularly to influence texture, timing, and presentation.
- Chill for flakiness: Always chill the dough after shaping it into a disk; cold dough keeps the butter solid so it creates better steam pockets in the oven for a flaky crust.
- Pulse in a food processor: If you are short on time, the food processor method is faster and reduces handling, which helps maintain the butter in small pieces for a tender result.
- Don’t overfill: Too many strawberries will release extra juice when baking; measure the filling so the border can fold up and hold everything without leaking.
- Use a light wash: The egg and water wash gives a golden sheen; apply it with a soft pastry brush to avoid tearing or pushing the dough outward.
- Glaze for shine: Heat the strawberry jam with a teaspoon of water and brush after cooling for a vibrant, glossy finish that brightens flavor.
How to Serve Strawberry Galette
The Strawberry Galette makes a warm, inviting centerpiece for many occasions. It works beautifully as a casual dessert for a weeknight meal or as a showstopper for a spring gathering. Below I outline serving ideas, pairings, and storage notes so you can plan around your occasion.
- Serve warm with ice cream: A scoop of cold vanilla contrasts with the hot, jammy filling and enhances the buttery crust.
- Offer whipped toppings: Whipped cream or whipped mascarpone provides a lightly sweet, airy counterpoint to the dense pastry.
- Casual brunch centerpiece: Place the galette on a wooden board with simple forks and plates for a relaxed brunch style presentation.
- Spring picnic dessert: Pack the galette cooled and whole, then slice at the picnic spot for an effortless, seasonal dessert.
- Storage for leftovers: Keep any leftovers in the refrigerator covered loosely with foil for up to 3 days; reheat briefly in a 350°F oven to re-crisp the crust.
- Occasion ideas: Great for spring gatherings, Mother’s Day, light dinners, or anytime you want a fruit forward dessert that is simple yet elegant.
FAQ
Conclusion
The Strawberry Galette shines because it pairs simple, high quality ingredients with a hands on, comforting assembly that produces a flakey crust and a glossy, jammy filling. Give it a try when you want a dessert that feels homemade and impressive at once. Baking this galette rewards patience and small techniques, and I hope it becomes one of those recipes you return to whenever fresh berries are at their sweetest.
Strawberry Galette
Equipment
- Food Processor
- Parchment Paper
- Rolling Pin
- Plastic Wrap
- Baking Sheet
- Pastry Brush
Ingredients
- 1 1/2 cups all-purpose flour Provides structure and body to the pastry; its gluten develops when mixed, giving the crust enough strength to hold filling while keeping a tender crumb when handled minimally. Use as measured to ensure proper dough texture and balance with fats and liquids for a flaky result.
- 1/4 cup finely ground white cornmeal Adds a slight grainy texture and subtle corn flavor to the crust; helps absorb some moisture and contributes to a more rustic, golden bake. Finely ground cornmeal also prevents the pastry from becoming soggy where it contacts the fruit filling.
- 1 tablespoon granulated sugar Balances sweetness in the dough and enhances browning during baking; a small amount subtly lifts flavor without making the crust noticeably sweet. Dissolve into dry ingredients to distribute evenly for consistent taste and color.
- 1/4 teaspoon salt Defines basic seasoning for the pastry and controls flavor balance; salt strengthens gluten slightly and brightens the overall taste of both crust and filling. Mix with dry ingredients to ensure even seasoning throughout the dough.
- 1 stick (8 tablespoons) unsalted butter cubed Provides cold fat necessary for flaky layers; cubed butter distributed throughout the dough creates steam pockets that separate layers during baking. Keep butter cold and work quickly to maintain distinct pieces for optimal flakiness.
- 1/4 cup (4 tablespoons/60ml) ice water divided Hydrates the flour to form dough while keeping the mixture cold; dividing the water helps control consistency so dough comes together without becoming sticky. Use ice water to minimize butter melting and preserve flakiness in the pastry.
- 1 egg for egg wash mixed with 1 teaspoon of water Forms a glossy, golden finish on the baked crust; beaten together, the egg and water create an egg wash that promotes even browning and helps jams or sugars adhere. Brush on just before baking for a shiny, attractive appearance.
- 3 cups strawberries sliced Provides the primary fresh fruit component and natural sweetness; sliced strawberries release juices and soften during baking to create a saucy, fruity filling. Choose ripe strawberries and slice uniformly to ensure even cooking and texture.
- 1 tablespoon lemon juice Adds bright acidity to balance sweetness and enhance fruit flavor; lemon juice helps macerate the strawberries and prevents them from tasting flat. Mix into the fruit to lift flavors and contribute subtle tartness.
- 1 tablespoon granulated sugar Contributes additional sweetness to the filling and assists in caramelization; sprinkling sugar over the fruit helps draw out juices and creates a syrupy consistency during baking. Adjust slightly for fruit ripeness but maintain the measured amount for balance.
- 2 tablespoons cornstarch Thickens the strawberry juices released during baking into a cohesive filling; cornstarch forms a smooth, clear gel when heated with fruit liquids. Toss with the fruit to coat pieces evenly and prevent a runny galette.
- 1 tablespoon strawberry jam Adds sheen and concentrated strawberry flavor to the finished filling; warming and brushing jam over the top enhances gloss and reinforces fruit taste. Thin slightly if needed before brushing to ensure smooth application and even coverage.
- 1 teaspoon water Thins and helps dissolve the jam for glazing while controlling consistency; a small splash of water loosens the jam so it spreads smoothly without clumping. Mix with the jam before brushing to achieve an even, shiny glaze on the galette.
Instructions
- By hand: In a large bowl, combine the flour with cornmeal, salt, and sugar. Add the butter, and using a pastry cutter, cut the butter into the flour until it resembles coarse sand. Gradually add the water until the dough comes together but not wet.: In a large bowl, combine the flour with cornmeal, salt, and sugar. Add the butter, and using a pastry cutter, cut the butter into the flour until it resembles coarse sand. Gradually add the water until the dough comes together but not wet. : The moment you begin this step you will notice the dry flour mixture smelling faintly nutty from the cornmeal . As you work the cold cubed butter in with a pastry cutter, listen for the rustling of the butter being broken into small pieces, and watch the mixture change from dusty to pebbly, with small butter bits distributed through the flour. This texture is crucial because those pockets of butter melt during baking and create flaky layers. Add the ice water tablespoon by tablespoon and stop when the dough just holds together when pinched, you should not see it become wet or tacky. A common mistake is adding too much water which yields a dense, tough crust, so err on the side of dryness and chill the dough if it feels soft.
- Using a food processor: Combine the dry ingredients, then add the butter and pulse 10-12 times and the mixture will resemble coarse sand. Gradually add the water (1 tablespoon at a time, you might not need all of the water) until the dough comes together but not too moist (about 1/4 a cup, 60 ml).: Combine the dry ingredients, then add the butter and pulse 10-12 times and the mixture will resemble coarse sand. Gradually add the water (1 tablespoon at a time, you might not need all of the water) until the dough comes together but not too moist (about 1/4 a cup, 60 ml). : When using a food processor , the process is faster and you will hear quick pulses as the butter is cut into the dry mix. Stop pulsing when the texture looks like coarse sand with pea sized butter pieces. The dough will clump when you squeeze it, but should not be glossy. The advantage here is minimal handling so the butter stays cold, which equals a flakier crust. Avoid overprocessing; if the mixture becomes too smooth you will lose those desirable pastry layers.
- Over plastic wrap, shape the dough into a flat disk and chill in the fridge for 30 minutes and up to an hour.: After forming the dough into a disk, you will feel it firm as it chills. This resting period relaxes the gluten in the dough, which prevents shrinking during baking, and it rehardens the butter , so it creates steam pockets when baked. You might notice the dough tightening slightly; that is normal. Skipping this chill time often leads to a tough crust or a dough that tears easily while rolling.
- Preheat the oven to 400°F (200°C). The galette will be baked on the middle rack.: A fully preheated oven ensures even browning and a crisp bottom. You will be greeted with a dry oven scent and a steady warm hush; this means the environment is right for good oven spring. Placing the galette on the middle rack promotes even heat exposure top to bottom. If you slide it into an oven that is not hot enough, the crust will absorb more moisture and become soggy instead of crisp.
- Between 2 pieces of parchment paper, roll out the dough into a 12-inch circle.: Rolling between parchment prevents sticking and keeps the dough intact. As you press and roll, you will feel the dough soften slightly; if it becomes too pliable, pop it back in the fridge for a few minutes. Aim for even thickness so the crust cooks uniformly, and try to keep the edges a bit thicker to hold the filling. Rolling a smaller disk will yield a thicker, heavier crust that bakes chewier, which is a common error.
- To make the filling, in a bowl combine the sliced strawberries with sugar, lemon juice, and cornstarch.: When you toss the strawberries with the sugar , they will start to exude juices within minutes, creating a fragrant, syrupy perfume. The cornstarch will look dusty at first but dissolves into the juices as the mixture rests. The lemon brightens the profile, cutting through the sweetness. Let the mixture sit briefly so the cornstarch hydrates and the berries macerate. A typical misstep is not allowing the juices to mingle, which can cause the filling to be too dry or unevenly sweet.
- Place the galette over a baking sheet and add the filling into the center of the pie leaving about 2-2.5 inches border and then fold the edges over the filling. Brush with the egg wash and sprinkle with granulated sugar if desired.: As you scoop the filling onto the dough, you will hear a soft thud and see a glossy mound of pink-red berries. Leave the exposed border so you can fold it up and create those rustic pleats that hold the filling. The egg wash gives the crust a luminous, deep golden tone, and a sprinkle of sugar adds a crunchy contrast. Be cautious not to overfill; too much filling can gush out and make the crust soggy. Tucking and sealing the edges prevents juice leakage during baking.
- Bake until the pie crust is deep golden brown for about 30-35 minutes. Transfer to a wire rack to cool completely before you brush the fruit with glaze and serve.: During baking you will notice the crust turning from pale to a warm amber, and the filling will bubble gently, releasing a sweet, roasted berry aroma. The sound of the oven quiets as moisture evaporates, and small caramelized spots may appear on the fruit surface. Cooling on a wire rack allows steam to escape from beneath the crust so it keeps crispness. If you cut into the galette too soon, the filling will run, so patience at this stage pays off.
- Mix the jam with the water then carefully brush the glaze over the strawberries (the filling will be soft, so do it carefully).: The glaze adds shine and intensifies flavor; when you brush it on, do so with gentle strokes so you do not disturb the soft berries. The glossy top cools and sets quickly, giving the galette a bakery finish. A heavy hand with the brush can smudge the fruit and make the surface uneven, so be deliberate and light.
- Serve the galette with vanilla ice cream, whipped cream, whipped mascarpone cream, or on its own.: When plated, you will notice steam rising from the warm filling and a contrast of temperatures if you add cold ice cream. The creamy element softens the tart edges of the strawberries and balances the buttery crust. Serving immediately offers a dynamic texture contrast, while waiting a bit allows the filling to set firmer. Avoid leaving toppings on too long, as they can melt and dilute the flavors.
Notes
- Chill for flakiness: Always chill the dough after shaping it into a disk; cold dough keeps the butter solid so it creates better steam pockets in the oven for a flaky crust.
- Pulse in a food processor: If you are short on time, the food processor method is faster and reduces handling, which helps maintain the butter in small pieces for a tender result.
- Don’t overfill: Too many strawberries will release extra juice when baking; measure the filling so the border can fold up and hold everything without leaking.
- Use a light wash: The egg and water wash gives a golden sheen; apply it with a soft pastry brush to avoid tearing or pushing the dough outward.
- Glaze for shine: Heat the strawberry jam with a teaspoon of water and brush after cooling for a vibrant, glossy finish that brightens flavor.