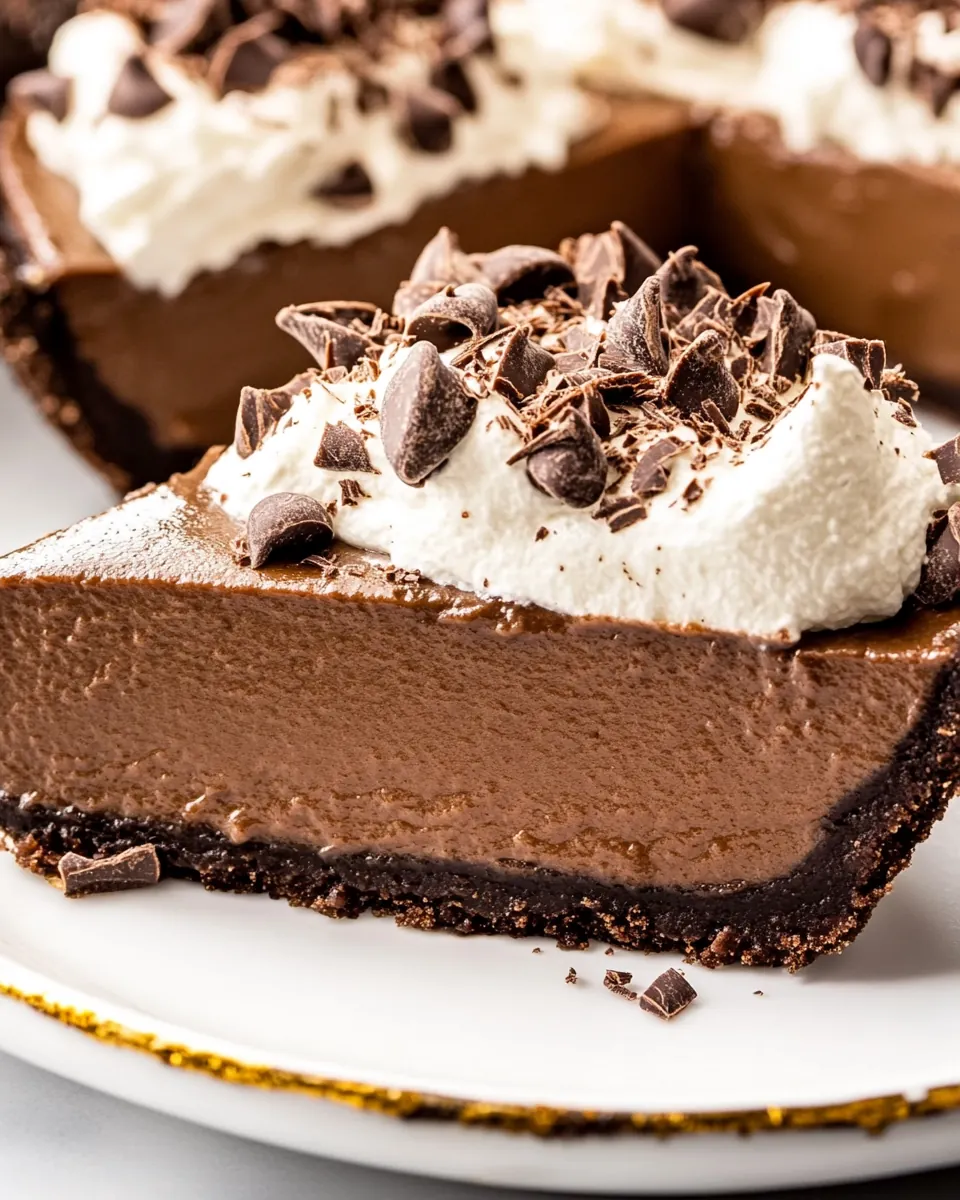
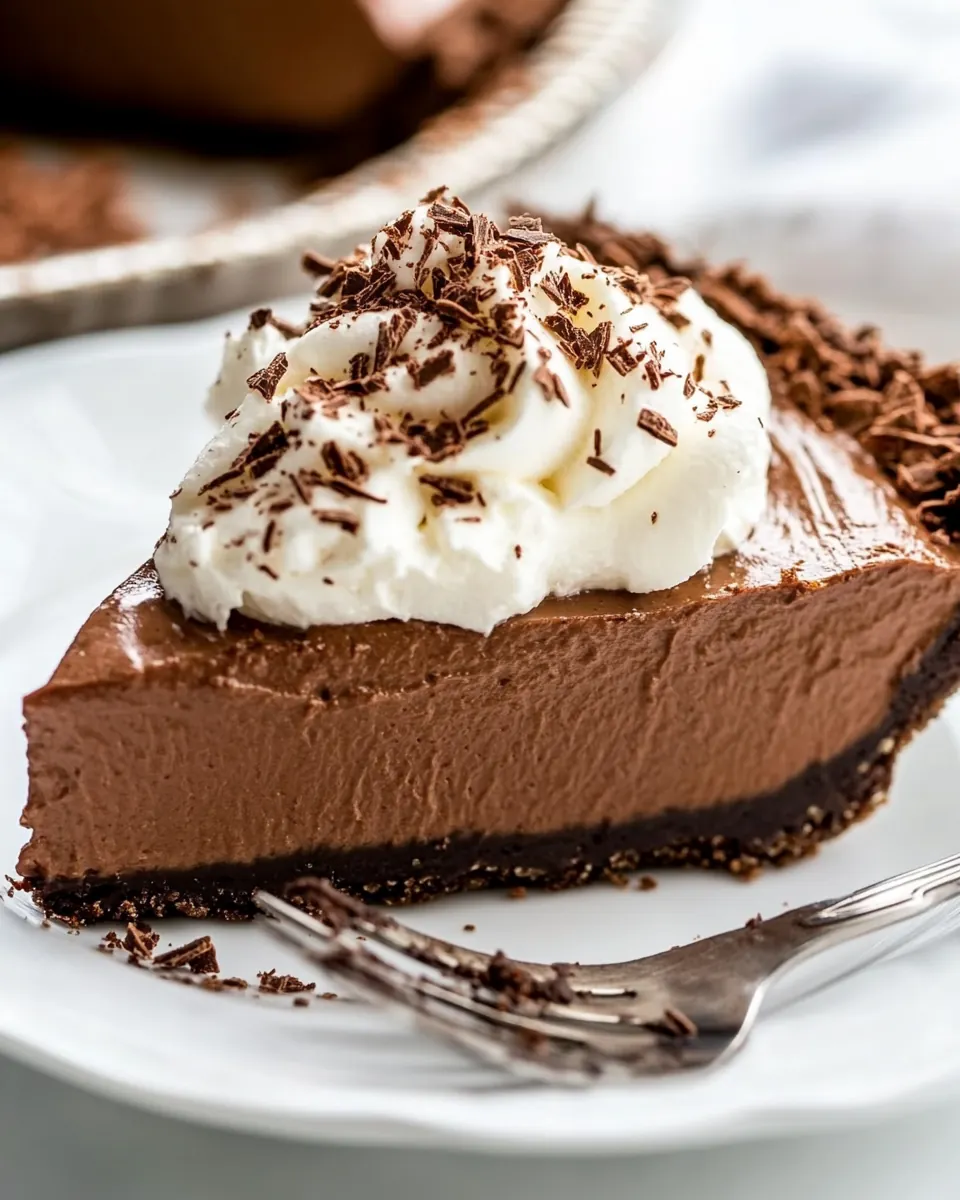
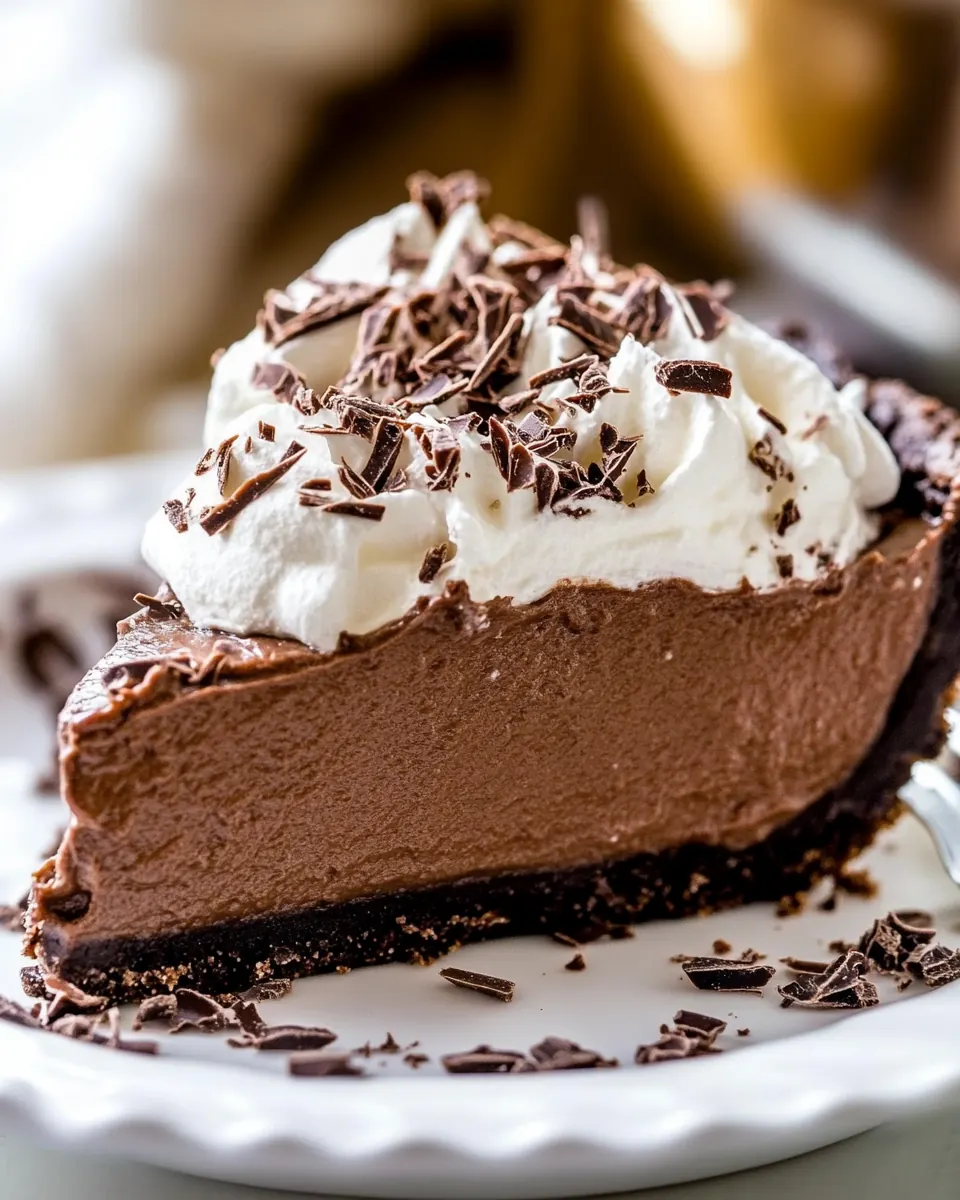
Vegan Chocolate Pie
Vegan Chocolate Pie started showing up in my life the moment I wanted a dessert that felt indulgent yet simple, a sweet that respected my plant based pantry and still impressed guests.
Years ago I brought a make ahead dessert to a friend group gathering where someone admitted they had low expectations for vegan treats, and then asked for seconds of my Vegan Chocolate Pie without believing me when I told them it had no dairy. That evening taught me that a few thoughtful ingredients can turn humble pantry staples into something luxurious, and it made me fall in love with recipes that are forgiving and fast.
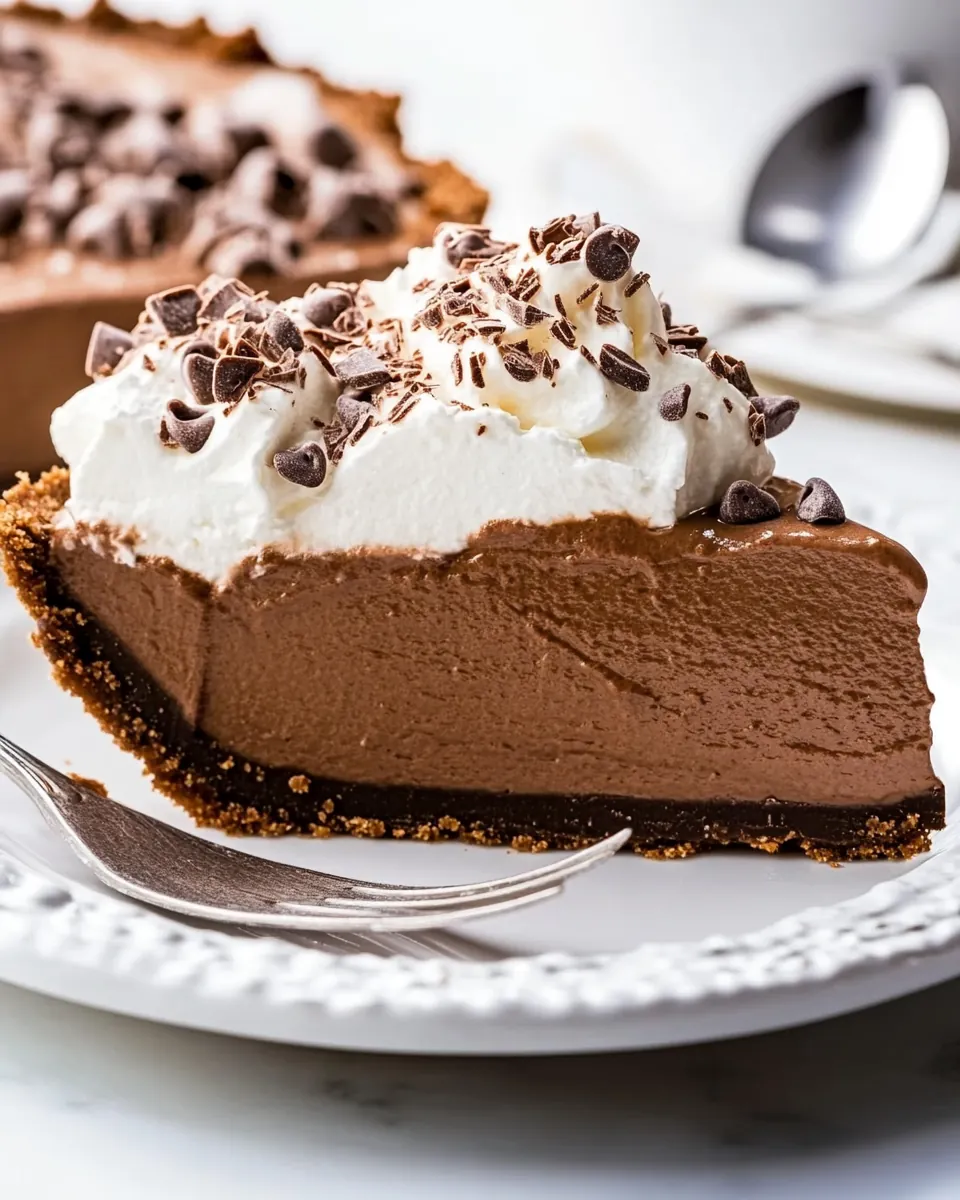
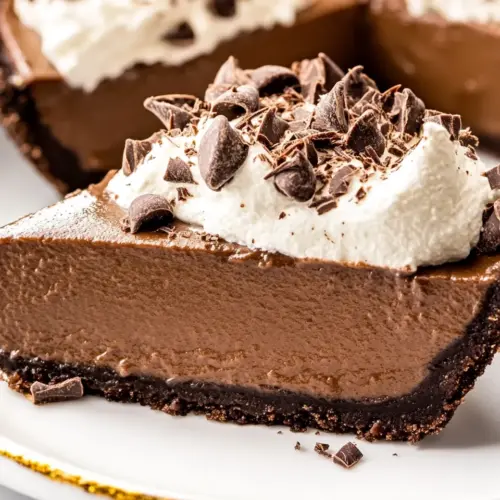
Since then I’ve kept this recipe on hand for last minute celebrations and quiet weeknight endings. I love that it lives comfortably in a pie crust, or confidently on its own as a crustless mousse. The texture is creamy yet holds shape after chilling, and the chocolate flavor reads deep and satisfying while still being approachable. I often tweak the sweetness depending on the occasion, but the core idea remains the same, which is why the Vegan Chocolate Pie is a go to that never feels tired.
Recipe Snapshot
6 mins
5 mins
1 mins
Easy
250 kcal
Vegan
Gluten-Free, Vegan
Desserts
Food Processor, Saucepan or Microwave Safe Bowl, Pie Dish or Ramekins
Why This Vegan Chocolate Pie Stands Out
Silky texture without dairy
I adore how this recipe uses firm tofu to create a cushiony, mousse like texture that still slices cleanly when chilled. The mouthfeel is rich and velvety, yet it stays entirely plant based, so you get that decadent experience without dairy.
Speed and simplicity
I can usually have this dessert ready to chill in under 20 minutes of active time, which is lifesaving when company calls at the last minute. Melting chocolate and blending with a few extra ingredients is straightforward, and I love how the process feels almost therapeutic.
Flexible and forgiving
Whether you prefer a crust or a crustless presentation, this recipe adapts. You can swap in sugar free chocolate chips, add a spoonful of peanut butter for depth, or stir in a pinch of instant coffee to heighten the chocolate profile. I often change the sweetener amount to suit my mood, and it still turns out great.
Accessible pantry ingredients
This is a recipe I learned to trust because the components are things I usually have on hand. Chocolate chips, a pinch of salt, optional peanut butter, and tofu all come together with minimal fuss. That accessibility makes it a reliable dessert for spontaneous gatherings.
Diet friendly and crowd pleasing
People often assume this pie will taste healthy or restrained, and then they are surprised by how indulgent it is. The plant based ingredients keep it friendly for many diets, and it’s an easy dessert to bring to potlucks because it stays firm after chilling and travels well.
Everything You Need for Vegan Chocolate Pie
This ingredient list reflects a philosophy of minimalism and impact. Each item plays a clear role, with firm tofu providing structure and creaminess, chocolate chips delivering the main flavor, and small players like salt and milk of choice rounding the taste and texture. Optional ingredients let you nudge the profile toward nutty or mocha notes, while keeping the method delightfully simple.
- 12 oz firm tofu: Blend until smooth to provide a silky, protein-rich base that sets the pie's creamy texture without dairy. Firm tofu also helps stabilize the filling and carries flavors well when blended with chocolate.
- 2 tsp cocoa powder: Add for deep chocolate flavor and subtle bitterness that enhances overall cocoa intensity. Cocoa powder contributes dry chocolate concentration and helps balance sweetness in the filling.
- 1 1/2 cup chocolate chips or 10 oz chopped chocolate: Melt and fold to supply the primary chocolate body and richness; use either chips or chopped chocolate depending on melting preference. Chocolate contributes structure, glossy sheen, and the dominant flavor profile of the pie.
- 1 pinch salt: Sprinkle sparingly to enhance and balance sweetness while opening up chocolate flavors with a faint savory accent. Salt also rounds out the profile and prevents the filling from tasting flat.
- 2 1/2 tbsp milk of choice: Stir in to adjust consistency and smoothness of the filling while contributing a touch of creaminess. Milk of choice helps achieve a velvety texture and can thin the mixture if needed.
- 2 3 tbsp sweetener of choice: Sweeten to taste to create the desired level of sweetness and balance the bitterness of chocolate and cocoa. Sweetener also affects texture and binding slightly, depending on type and amount used.
- 1/2 cup peanut butter (optional): Swirl or layer optionally to add nutty richness and additional creaminess, enhancing flavor complexity and mouthfeel. Peanut butter can contribute protein and a savory-sweet contrast when desired.
- pinch instant coffee (optional): Dissolve optionally to intensify and round out chocolate notes with a subtle espresso-like depth and complexity. Instant coffee acts as a flavor enhancer without making the pie taste overtly like coffee.
How to Cook Vegan Chocolate Pie
This method emphasizes gentle melting, careful blending, and patient chilling to create a silky, sliceable filling. Read each step before you begin, assemble your tools, and plan for adequate chilling time so the pie sets properly.
- For a sugar free version, use Sugar Free Chocolate Chips. Carefully melt the chocolate, either on the stovetop or in the microwave. If using refrigerated tofu, let it come to room temperature. Combine all ingredients in a food processor until completely smooth. Pour into a pie crust if desired, or keep it crustless or pour into ramekins to make chocolate mousse. Refrigerate until firm. View Nutrition Facts: The aroma of melted sugar free chocolate chips is slightly less caramelized than sugared versions, with a cleaner cocoa tone. I recommend testing a small batch if you have not used sugar free chips before, because some brands can be less glossy or grainy when melted. Why this matters, the sugar free option keeps sweetness lower while retaining structure, but the texture can be subtly different. Troubleshooting tip, if the chocolate looks dull or grainy, warm it gently and stir constantly to revive gloss.
- Carefully melt the chocolate, either on the stovetop or in the microwave: You will notice a warm, fragrant chocolate scent as the chips begin to soften, with gentle steam rising if using the stovetop. Melting on low heat over a double boiler gives you maximum control and prevents scorch, while brief microwave bursts at 15 second intervals with stirring avoid hotspots. This technique ensures a smooth, glossy base that blends easily with the tofu. Mistake to avoid, overheating chocolate which causes separation and a grainy texture, so remove it from heat just before fully melted and stir until smooth.
- If using refrigerated tofu, let it come to room temperature: Bringing firm tofu closer to room temperature softens it slightly and helps the blender create a uniform texture, without cold pockets that can make the filling seem lumpy. The subtle warming also helps the melted chocolate incorporate more readily. A common pitfall is blending ice cold tofu straight away, which may require extra processing and can still leave a less creamy mouthfeel.
- Combine all ingredients in a food processor until completely smooth: As you blend, listen for a steady hum and look for a glossy, homogeneous mixture without streaks, and you will smell the chocolate deepen as air incorporates. This step creates the luxurious texture that distinguishes the pie from a simple pudding. Use pulses at first, then a continuous run to achieve silkiness, scraping down the sides as needed. Watch for overheating the motor by blending too long; pulse more and check frequently to avoid warming the filling excessively.
- Pour into a pie crust if desired, or keep it crustless or pour into ramekins to make chocolate mousse: When you transfer the filling, admire how it flows smooth and shiny, then settles slowly into place. A crust adds textural contrast and a finished look, while ramekins create elegant individual servings. The choice changes presentation, but not the fundamental taste. Avoid overfilling dishes, because the filling firms as it chills and you want neat edges for slicing or serving.
- Refrigerate until firm: Cooling brings the final transformation, from a soft filling to a sliceable pie, and you will feel the kitchen cool slightly and notice the surface lose a bit of sheen as it sets. Allow several hours or overnight for the best texture and clean slices. Rushing this step leads to a filling that is too soft to slice cleanly, so be patient and resist the urge to sample before it is set.
Making Adjustments
I like to treat this section as a small toolbox of adjustments so you can tailor the Vegan Chocolate Pie to your pantry and preferences. Below are focused tips that help with texture, sweetness, and presentation.
- Swap chocolate types If you prefer a more intense profile, use darker chocolate, and if you want a milder, sweeter result, choose vegan milk chocolate chips. Different chocolates have different cocoa butter contents which affect gloss and firmness.
- Adjust sweetness carefully Start with two tablespoons of your chosen sweetener and add gradually, tasting after blending to reach the right balance without oversweetening the gentle chocolate notes.
- Add peanut butter for richness Stir in optional peanut butter to introduce a creamy, nutty layer that also helps with setting and mouthfeel; pick smooth, well stirred peanut butter for best incorporation.
- Use instant coffee sparingly A tiny pinch of instant coffee will amplify cocoa tones without turning the pie into coffee flavored dessert, so add incrementally and taste.
- Make sugar free adjustments Use sugar free chocolate chips and confirm texture as some sugar substitutes change melting behavior; you may need a touch more milk of choice to smooth out the filling.
- Serve crustless for ease Skipping the crust simplifies the recipe and highlights the filling texture, making it easier to portion into ramekins for individual servings.
Perfect Pairings for Vegan Chocolate Pie
This dessert pairs wonderfully with simple contrasts that highlight its richness. Think light, crisp accompaniments and occasions where a make ahead sweet is appreciated. Below are serving ideas, seasonal suggestions, and storage guidance to help you present the pie with confidence.
- Fresh berries A scattering of raspberries or sliced strawberries adds bright acidity and color, cutting through the pie’s richness and making each bite pop.
- Whipped coconut cream Dollops of slightly sweetened coconut cream add a cloud like contrast to the dense filling and make slices feel more festive for special occasions.
- Plate for dinner parties Serve slices with a small spoon of fruit compote for a composed dessert course during dinner, where the pie’s deep chocolate notes will end the meal on a memorable high.
- Ramekins for casual gatherings Pour into ramekins for individual portions, which is perfect for potlucks or when you want to portion ahead and avoid slicing logistics.
- Storage tips Keep the pie covered in the refrigerator for up to four days, and for longer storage freeze portions tightly wrapped; thaw in the fridge overnight before serving for best texture.
- Seasonal serving This recipe works any time of year, but in colder months pair with warm spices or a cinnamon dusting, while in summer keep it chilled and bright with citrus accents.
FAQ
Conclusion
What makes this recipe special is how a handful of simple, plant based ingredients transform into a rich, sliceable dessert that feels indulgent yet approachable. The combination of melted chocolate and firm tofu yields a silky texture that holds up for serving, and the ease of preparation makes it ideal for busy evenings or last minute gatherings. Give this Vegan Chocolate Pie a try the next time you want a dessert that will surprise and satisfy; it’s a dependable recipe that earns compliments without demanding hours in the kitchen.
Vegan Chocolate Pie
Equipment
- Food Processor
- Saucepan or microwave safe bowl
- Pie Dish or Ramekins
Ingredients
- 12 oz firm tofu Blend until smooth to provide a silky, protein-rich base that sets the pie's creamy texture without dairy. Firm tofu also helps stabilize the filling and carries flavors well when blended with chocolate.
- 2 tsp cocoa powder Add for deep chocolate flavor and subtle bitterness that enhances overall cocoa intensity. Cocoa powder contributes dry chocolate concentration and helps balance sweetness in the filling.
- 1 1/2 cup chocolate chips or 10 oz chopped chocolate Melt and fold to supply the primary chocolate body and richness; use either chips or chopped chocolate depending on melting preference. Chocolate contributes structure, glossy sheen, and the dominant flavor profile of the pie.
- 1 pinch salt Sprinkle sparingly to enhance and balance sweetness while opening up chocolate flavors with a faint savory accent. Salt also rounds out the profile and prevents the filling from tasting flat.
- 2 1/2 tbsp milk of choice Stir in to adjust consistency and smoothness of the filling while contributing a touch of creaminess. Milk of choice helps achieve a velvety texture and can thin the mixture if needed.
- 2 -3 tbsp sweetener of choice Sweeten to taste to create the desired level of sweetness and balance the bitterness of chocolate and cocoa. Sweetener also affects texture and binding slightly, depending on type and amount used.
- optional 1/2 cup peanut butter Swirl or layer optionally to add nutty richness and additional creaminess, enhancing flavor complexity and mouthfeel. Peanut butter can contribute protein and a savory-sweet contrast when desired.
- optional pinch instant coffee Dissolve optionally to intensify and round out chocolate notes with a subtle espresso-like depth and complexity. Instant coffee acts as a flavor enhancer without making the pie taste overtly like coffee.
Instructions
- For a sugar free version, use Sugar Free Chocolate Chips. Carefully melt the chocolate, either on the stovetop or in the microwave. If using refrigerated tofu, let it come to room temperature. Combine all ingredients in a food processor until completely smooth. Pour into a pie crust if desired, or keep it crustless or pour into ramekins to make chocolate mousse. Refrigerate until firm. View Nutrition Facts: The aroma of melted sugar free chocolate chips is slightly less caramelized than sugared versions, with a cleaner cocoa tone. I recommend testing a small batch if you have not used sugar free chips before, because some brands can be less glossy or grainy when melted. Why this matters, the sugar free option keeps sweetness lower while retaining structure, but the texture can be subtly different. Troubleshooting tip, if the chocolate looks dull or grainy, warm it gently and stir constantly to revive gloss.
- Carefully melt the chocolate, either on the stovetop or in the microwave: You will notice a warm, fragrant chocolate scent as the chips begin to soften, with gentle steam rising if using the stovetop. Melting on low heat over a double boiler gives you maximum control and prevents scorch, while brief microwave bursts at 15 second intervals with stirring avoid hotspots. This technique ensures a smooth, glossy base that blends easily with the tofu. Mistake to avoid, overheating chocolate which causes separation and a grainy texture, so remove it from heat just before fully melted and stir until smooth.
- If using refrigerated tofu, let it come to room temperature: Bringing firm tofu closer to room temperature softens it slightly and helps the blender create a uniform texture, without cold pockets that can make the filling seem lumpy. The subtle warming also helps the melted chocolate incorporate more readily. A common pitfall is blending ice cold tofu straight away, which may require extra processing and can still leave a less creamy mouthfeel.
- Combine all ingredients in a food processor until completely smooth: As you blend, listen for a steady hum and look for a glossy, homogeneous mixture without streaks, and you will smell the chocolate deepen as air incorporates. This step creates the luxurious texture that distinguishes the pie from a simple pudding. Use pulses at first, then a continuous run to achieve silkiness, scraping down the sides as needed. Watch for overheating the motor by blending too long; pulse more and check frequently to avoid warming the filling excessively.
- Pour into a pie crust if desired, or keep it crustless or pour into ramekins to make chocolate mousse: When you transfer the filling, admire how it flows smooth and shiny, then settles slowly into place. A crust adds textural contrast and a finished look, while ramekins create elegant individual servings. The choice changes presentation, but not the fundamental taste. Avoid overfilling dishes, because the filling firms as it chills and you want neat edges for slicing or serving.
- Refrigerate until firm: Cooling brings the final transformation, from a soft filling to a sliceable pie, and you will feel the kitchen cool slightly and notice the surface lose a bit of sheen as it sets. Allow several hours or overnight for the best texture and clean slices. Rushing this step leads to a filling that is too soft to slice cleanly, so be patient and resist the urge to sample before it is set.
Notes
- Swap chocolate types If you prefer a more intense profile, use darker chocolate, and if you want a milder, sweeter result, choose vegan milk chocolate chips. Different chocolates have different cocoa butter contents which affect gloss and firmness.
- Adjust sweetness carefully Start with two tablespoons of your chosen sweetener and add gradually, tasting after blending to reach the right balance without oversweetening the gentle chocolate notes.
- Add peanut butter for richness Stir in optional peanut butter to introduce a creamy, nutty layer that also helps with setting and mouthfeel; pick smooth, well stirred peanut butter for best incorporation.
- Use instant coffee sparingly A tiny pinch of instant coffee will amplify cocoa tones without turning the pie into coffee flavored dessert, so add incrementally and taste.
- Make sugar free adjustments Use sugar free chocolate chips and confirm texture as some sugar substitutes change melting behavior; you may need a touch more milk of choice to smooth out the filling.
- Serve crustless for ease Skipping the crust simplifies the recipe and highlights the filling texture, making it easier to portion into ramekins for individual servings.