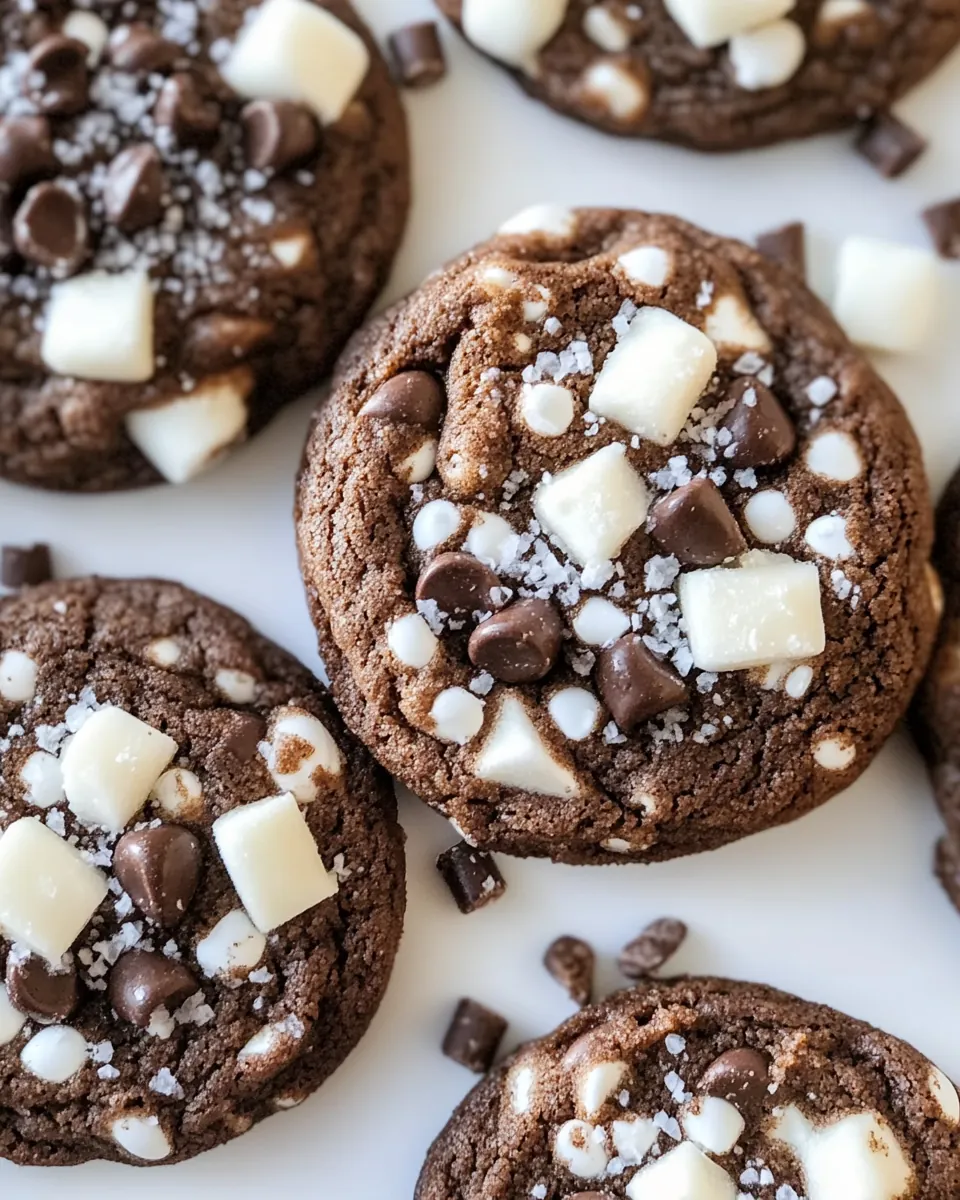
Hot Cocoa Cookies
Hot Cocoa Cookies began as my cozy answer to cold evenings when I wanted something chocolatey and nostalgic without fuss.
One I remember clearly involved an impromptu snowstorm and a single bar of chocolate that I chopped into eager pieces, while my kitchen filled with the warm, slightly toasty scent of cocoa and sugar caramelizing. I was nursing a mug of cocoa and decided to translate that comforting drink into a hand held treat, something that would melt partly on your tongue and give the soft chew of marshmallow in the center.
Over the next few tries I tweaked the dough until it felt right, balancing the cocoa with a hint of brown sugar to give depth, and folding in chopped chocolate so each bite had pockets of molten goodness. I learned to press extra chocolate on top so you get a glossy, almost fudgy crown after baking, and to nudge mini marshmallows in at the right moment so they puff and then set into gooey islands.
Friends who tasted these cookies asked for the recipe by text, not by call, because they wanted to save the words for later baking sessions. I still make them when I need uncomplicated comfort, and they never disappoint when served warm with a steaming drink. They are simple, satisfying, and just a bit nostalgic.
Recipe Snapshot
25 mins
15 mins
10 mins
Medium
150 kcal
American
Vegan, Gluten-Free
Desserts
Oven, Mixing bowl, Hand mixer or stand mixer, Baking sheet, Parchment paper, Spatula, Wire rack
Why This Hot Cocoa Cookies Is So Good
Chocolatey, but not cloying
I love how Hot Cocoa Cookies deliver intense cocoa flavor without overwhelming sweetness. The combination of cane sugar and packed brown sugar gives a rounded sweetness and a hint of molasses, which keeps the cookie interesting bite after bite.
Texture that hugs your teeth
These cookies find the perfect balance between tender and chewy. The inclusion of cornstarch helps create a soft interior, while chilling is not necessary because the dough spreads and puffs just right during baking.
Melty chocolate pockets
I always fold most of the chopped chocolate into the dough, then reserve some to press on top. That little trick creates molten streaks of chocolate and a pretty glossy top, so every bite feels indulgent.
Vegan and approachable
Using a flaxseed binder instead of eggs and vegan butter makes these cookies accessible to many diets without sacrificing flavor. I appreciate how they stay tender, and friends who try them are often surprised they are plant based.
Fun to decorate and personal
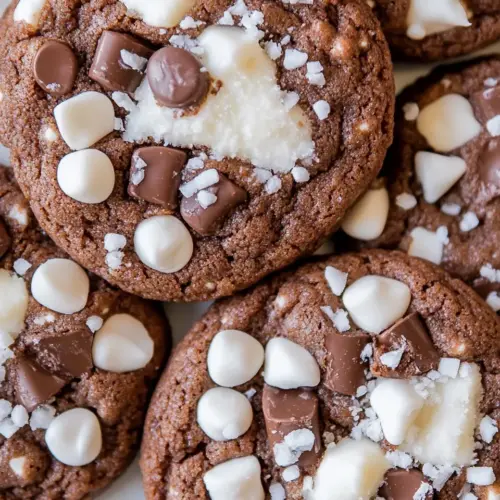
The final marshmallow pop makes these cookies playful and seasonal. I like the way a few mini marshmallows soften and barely toast, giving a contrast between airy marshmallow and dense cookie. It is a small flourish that makes them feel celebratory.
What You’ll Need for Hot Cocoa Cookies

These ingredients come together to recreate a hot cocoa moment in cookie form. The key players are the cocoa powder and chopped chocolate for depth, the sugars for flavor complexity, and the flaxseed plus water which act as a gentle binder in place of eggs. Each component has a job, from structure to chew to melt.
- 1 tablespoon ground flaxseed: Provide a binder and egg substitute in vegan baking by combining with water to form a flax egg that helps cookies hold together and adds subtle nuttiness. Create a gel-like texture when mixed with water to mimic eggs, improving dough structure and moisture retention during baking. Use as a plant-based thickening component that contributes minimal flavor while enhancing chewiness in the finished cookie.
- 2 1/2 tablespoons water: Create the liquid component needed to hydrate the ground flaxseed and activate the flax egg, ensuring proper gel formation for binding in the dough. Regulate dough consistency by adding moisture without making the batter overly wet, helping ingredients incorporate evenly. Allow the mixture to sit briefly so the flaxseed and water combine into a cohesive gel that performs similarly to an egg.
- 1/2 cup vegan butter softened to room temperature: Add richness and tender crumb by incorporating room–temperature vegan butter that creams easily with sugars to trap air and build cookie structure. Improve mouthfeel with fat that contributes to flavor, spread, and softness, helping cookies brown and develop a pleasant texture. Ensure even creaming to create a light but resilient dough that yields chewy cookies with a buttery note.
- 1/2 cup cane sugar: Provide sweetness and contribute to cookie browning through caramelization during baking, helping develop flavor depth and crisp edges. Assist with creaming to incorporate air into the dough, promoting a lighter texture while balancing other flavors like cocoa and chocolate. Use to control overall sweetness level and influence moisture, since granulated sugar can affect spread and chewiness.
- 1/2 cup packed brown sugar: Contribute moistness and a deeper caramel-like flavor through packed brown sugar, enhancing chewiness and a soft center in the cookies. Add extra moisture because of its molasses content, which also aids in browning and tenderizing the crumb. Balance sweetness and complement chocolate notes while helping maintain a gooey texture.
- 1 teaspoon vanilla extract: Enhance flavor complexity by imparting warm, familiar vanilla aroma that heightens the perception of sweetness and chocolate notes. Round out flavors in the dough, masking any bitters from cocoa while contributing a subtle fragrance in the finished cookie. Blend smoothly into creamed fats and sugars to distribute aromatic character throughout the batter.
- 1 1/4 cup all purpose flour spooned and leveled: Provide the primary structure and bulk to the cookies by supplying gluten and crumb-forming proteins that create chewiness and stability. Control texture when spooned and leveled properly to ensure accurate measurement, influencing spread, density, and baking time. Combine with leaveners and starches to form the dough matrix that holds fats, sugars, and mix-ins together.
- 1/4 cup cocoa powder: Intensify chocolate flavor and contribute color with unsweetened cocoa powder, bringing rich, deep cocoa notes to the cookie base. Absorb some moisture and slightly dry the dough, which can concentrate flavors and influence texture when balanced with fats and sugars. Pair with chocolate pieces and marshmallows to create a layered hot cocoa profile in each bite.
- 2 teaspoons cornstarch: Provide a light thickening effect that helps stabilize the cookie dough and contributes to a tender, slightly cakey crumb without heaviness. Improve texture by reducing spread during baking, promoting a thicker center and soft bite. Work with flour and leavening agents to fine-tune the cookie's density and mouthfeel.
- 1/2 teaspoon baking soda: Act as a leavening modifier that helps cookies rise modestly and develop a soft texture by neutralizing acids and providing lift. Adjust dough pH slightly, which can influence browning and flavor development, ensuring a balanced rise and pleasant surface. Work in small quantities to control texture without causing excessive puffing or collapse.
- 1/4 teaspoon salt: Balance flavors and enhance overall taste by subtly seasoning the dough, which also helps accentuate sweetness and chocolate notes. Regulate the perception of sweetness and deepen savory undertones for a more complex finished cookie. Use sparingly to avoid overt saltiness while improving aroma and flavor contrast.
- 3/4 cup chopped chocolate bar or chocolate chips divided: Contribute melty chocolate pockets and textural contrast when folded into dough, providing bursts of richness in every bite with about three-quarters reserved for mixing and topping. Add glossy, molten centers when baked and maintain some chunkiness for chew and interest, enhancing the hot cocoa effect alongside cocoa powder and marshmallows. Choose quality chocolate bars or chips for best flavor and melting behavior.
- 1/2 cup vegan mini marshmallows (about 3-4 per cookie); see note: Provide sweet, pillowy pockets that mimic hot cocoa toppings, offering chew and a toasted finish when baked and slightly melted into the cookie surface. Add visual and textural contrast while reinforcing the drink-inspired theme, with suggested amount yielding about 3–4 marshmallows per cookie. Fold gently to keep marshmallows distributed and prevent excessive melting or burning during baking.
Cooking Method for Hot Cocoa Cookies
Baking these cookies is straightforward, but I treat each step like part of a ritual to coax out cozy chocolate notes. Below I expanded the original directions into vivid, hands on steps so you can tune into smells and sights as you work.
- Prep: Preheat the oven to 350 F and grease or line a baking sheet with parchment paper. Combine the ground flax with the water in a small bowl and mix well; let sit for 5 minutes, to thicken.: Preheat the oven to 350 F and grease or line a baking sheet with parchment paper : As the oven warms you will notice a rising warmth that promises browning and set in the cookie edges, and the gentle hum of the oven tells you it is ready. Preparing the baking sheet with parchment paper prevents sticking and makes cleanup effortless, and greasing is an option if you prefer a slightly crisper underside. A common mistake is not preheating fully, which leads to uneven spread and texture, so wait until the oven reaches the full temperature before baking. Visually you want the oven at a steady heat so the cookies puff then set, not collapse.
- Cream the Butter: Add the butter, brown sugar, and cane sugar to a large bowl and use a hand mixer (or bowl of a stand mixer) to cream them together until smooth, 2 to 3 minutes. Add the thickened flax seed and vanilla to the butter mixture. Mix again until combined.: After stirring, the mixture will become glossy and slightly gelatinous, a sign the flaxseed has hydrated and is ready to act as a binder. This creates a sticky, egg like texture that helps the dough hold together and contributes to tenderness. If you skip the rest time the binding will be weaker and the dough may crumble, so be patient. The smell is mild and nutty, nothing overpowering, but you will feel the change in viscosity as it thickens.
- Make the Dough: Add the flour to the mixing bowl and sift the cocoa powder on top to prevent clumps. Add in cornstarch, baking soda, and salt to the bowl and mix well with a spatula. Add 1/2 cup of the chopped chocolate to the bowl and fold into the dough.: Add the butter, brown sugar, and cane sugar to a large bowl and use a hand mixer or stand mixer to cream them together until smooth, 2 to 3 minutes : As you beat, the mixture will lighten in color and become airy, with the butter and sugars forming tiny pockets of air that help the cookies rise and have a tender crumb. Scrape the bowl sides to ensure even creaming, and then add the thickened flaxseed and vanilla , mixing until integrated. One common error is undercreaming which yields dense cookies, so take the time to reach a fluffy consistency. The aroma becomes sweeter and more buttery as the sugar dissolves into the fat.
- Roll: Divide the dough into 12 equal balls, roughly 3 tablespoons each. Place each cookie dough ball 2 inches apart on the baking sheet, then top with the remaining 1/4 cup (~40 g) of chocolate, pressing it into the top of the ball slightly so it sticks. Do not flatten the cookies on the baking sheet as they will spread when they cook.: Add the flour to the mixing bowl and sift the cocoa powder on top to prevent clumps : Sifting the cocoa powder directly over the flour helps distribute it evenly and avoids dark streaks. Add cornstarch , baking soda , and salt , then fold gently with a spatula until mostly combined before adding 1/2 cup of the chopped chocolate . Folding minimizes gluten development, keeping the dough tender, and the batter will feel thick and slightly tacky. A frequent mistake is overmixing after the flour goes in, which toughens the cookie; stop as soon as dry streaks disappear. Visually, the dough becomes uniformly cocoa colored with flecks of chocolate.
- Bake: Bake for 7 minutes, until the cookies have spread and are puffy. Remove the cookies from the oven and quickly press in 3-4 mini marshmallows per cookie; it’s ok if they flatten slightly as you decorate. Return the cookies to the oven and bake for an additional 2 minutes, to set the marshmallows.: Divide the dough into 12 equal balls, roughly 3 tablespoons each : As you roll, the dough will warm slightly and become even more pliable, and you will see soft lumps that hold shape but will spread. Placing them 2 inches apart allows room for spreading, and topping each ball with the reserved 1/4 cup of chopped chocolate so it adheres to the surface creates a glossy finish after baking. Avoid flattening them on the sheet because they need to dome to achieve the right texture; pressing too much early will make them thin and crispy instead of soft and puffy. The cookie dough should look slightly rounded and dense.
- Cool: Remove the cookies from the oven and let sit on the baking sheet for 10 to 15 minutes, to allow them to set. Use a spatula to transfer the cookies to a wire rack and let them cool completely (or enjoy warm!).: Bake for 7 minutes, until the cookies have spread and are puffy : You will hear no crackle, but visually the cookies will expand and their surfaces will set while the centers remain soft. The edges may begin to hint at firmness, and the aroma of cocoa and caramelized sugars will bloom through your kitchen. After the initial bake, quickly press 3 to 4 mini marshmallows into each cookie and return to the oven for an additional 2 minutes to set the marshmallows without burning them. The mistake to avoid is overbaking in either phase, which dries the cookie and makes the marshmallows hard instead of pillowy.
- Serve & Store: Let the chocolate fully cool and solidify before storing. Store cookies in an airtight container at room temperature for up to 4 days, or in the freezer for up to one month.: Remove the cookies from the oven and let sit on the baking sheet for 10 to 15 minutes, to allow them to set : Letting the cookies rest on the warm sheet allows residual heat to finish cooking the center gently, and you will notice the chocolate on top begin to solidify into glossy patches. Using a spatula to transfer them to a wire rack prevents them from steaming on the hot sheet, preserving texture. A common pitfall is moving them too soon, which can cause them to break apart while still soft. The cooled cookies should hold their shape and have a tender interior.
- Serve & Store: Let the chocolate fully cool and solidify before storing : Once cooled, place the cookies in an airtight container at room temperature for up to 4 days, or freeze them for up to one month. Proper storage preserves the contrast between the soft center and the slightly firmer exterior. The most frequent storage mistake is stacking warm cookies which leads to sogginess, so always cool completely before layering. When serving, slightly warmed cookies bring back that freshly baked gooeyness, while chilled ones offer a firmer bite.
Pro Tips and Tweaks
I like to think of these tips as small experiments you can try to make the cookies your own. A few adjustments to technique or timing will noticeably shift the texture and flavor, so tweak with confidence and observe the cues.
- Use room temperature vegan butter so it creams properly with the sugars, yielding a lighter, airier dough that bakes into a tender cookie.
- Sift the cocoa powder to avoid lumps and ensure even chocolate color and flavor; untamed clumps can leave dry pockets in the baked cookie.
- Divide and weigh dough balls for even baking; consistent size makes sure all cookies finish at the same time and keep a uniform texture.
- Press reserved chocolate on top instead of mixing it all in to create pretty glossy tops and concentrated molten bites when warm.
- Choose vegan marshmallows carefully because many brands use gelatin, pick plant based mini marshmallows for the right texture and to keep this recipe vegan friendly.
- Freeze dough balls for later by flash freezing on a tray, then storing in a bag for quick baking sessions; add an extra minute or two to the bake if baking from frozen.
Perfect Matches for Hot Cocoa Cookies
These cookies pair beautifully with warm drinks and casual gatherings, and they are flexible enough for holiday baking or an everyday treat. Below are serving suggestions and storage notes to keep them tasting fresh.
- Serve warm with a cup of hot cocoa for a double chocolate experience that feels indulgent and perfectly on theme for cold weather or winter gatherings.
- Plate for holiday parties arranged on a platter with small garnishes, they work well for Christmas cookie swaps and casual festive dessert tables.
- Pack in lunchboxes as a sweet treat for afternoon snacks, wrapped individually so the marshmallows do not stick to other items.
- Store at room temperature in an airtight container for up to four days, placing parchment between layers to prevent sticking and preserve texture.
- Freeze for longer storage by sealing cooled cookies in a frozen safe container for up to one month, thawing at room temperature before serving to regain a soft chew.
- Occasion pairing is ideal for winter evenings, cozy nights in, or casual dessert options during holiday gatherings when you want something easy and crowd pleasing.
FAQ
Conclusion
These Hot Cocoa Cookies are special because they capture the comfort of a hot chocolate in a tender, chocolate studded cookie with a pillowy marshmallow finish. Give them a try on a chilly afternoon or when you need a simple, satisfying treat; they are forgiving and built for sharing. I hope you enjoy how the chocolate pockets and soft centers come together, and that these cookies become one of your go to cozy recipes to bake for friends or to keep warm at home.
Hot Cocoa Cookies
Equipment
- Oven
- Mixing Bowl
- Hand mixer or stand mixer
- Baking Sheet
- Parchment Paper
- Spatula
- Wire Rack
Ingredients
- 1 tablespoon ground flaxseed Provide a binder and egg substitute in vegan baking by combining with water to form a flax egg that helps cookies hold together and adds subtle nuttiness. Create a gel-like texture when mixed with water to mimic eggs, improving dough structure and moisture retention during baking. Use as a plant-based thickening component that contributes minimal flavor while enhancing chewiness in the finished cookie.
- 2 1/2 tablespoons water Create the liquid component needed to hydrate the ground flaxseed and activate the flax egg, ensuring proper gel formation for binding in the dough. Regulate dough consistency by adding moisture without making the batter overly wet, helping ingredients incorporate evenly. Allow the mixture to sit briefly so the flaxseed and water combine into a cohesive gel that performs similarly to an egg.
- 1/2 cup vegan butter softened to room temperature Add richness and tender crumb by incorporating room-temperature vegan butter that creams easily with sugars to trap air and build cookie structure. Improve mouthfeel with fat that contributes to flavor, spread, and softness, helping cookies brown and develop a pleasant texture. Ensure even creaming to create a light but resilient dough that yields chewy cookies with a buttery note.
- 1/2 cup cane sugar Provide sweetness and contribute to cookie browning through caramelization during baking, helping develop flavor depth and crisp edges. Assist with creaming to incorporate air into the dough, promoting a lighter texture while balancing other flavors like cocoa and chocolate. Use to control overall sweetness level and influence moisture, since granulated sugar can affect spread and chewiness.
- 1/2 cup packed brown sugar Contribute moistness and a deeper caramel-like flavor through packed brown sugar, enhancing chewiness and a soft center in the cookies. Add extra moisture because of its molasses content, which also aids in browning and tenderizing the crumb. Balance sweetness and complement chocolate notes while helping maintain a gooey texture.
- 1 teaspoon vanilla extract Enhance flavor complexity by imparting warm, familiar vanilla aroma that heightens the perception of sweetness and chocolate notes. Round out flavors in the dough, masking any bitters from cocoa while contributing a subtle fragrance in the finished cookie. Blend smoothly into creamed fats and sugars to distribute aromatic character throughout the batter.
- 1 1/4 cup all purpose flour spooned and leveled Provide the primary structure and bulk to the cookies by supplying gluten and crumb-forming proteins that create chewiness and stability. Control texture when spooned and leveled properly to ensure accurate measurement, influencing spread, density, and baking time. Combine with leaveners and starches to form the dough matrix that holds fats, sugars, and mix-ins together.
- 1/4 cup cocoa powder Intensify chocolate flavor and contribute color with unsweetened cocoa powder, bringing rich, deep cocoa notes to the cookie base. Absorb some moisture and slightly dry the dough, which can concentrate flavors and influence texture when balanced with fats and sugars. Pair with chocolate pieces and marshmallows to create a layered hot cocoa profile in each bite.
- 2 teaspoons cornstarch Provide a light thickening effect that helps stabilize the cookie dough and contributes to a tender, slightly cakey crumb without heaviness. Improve texture by reducing spread during baking, promoting a thicker center and soft bite. Work with flour and leavening agents to fine-tune the cookie's density and mouthfeel.
- 1/2 teaspoon baking soda Act as a leavening modifier that helps cookies rise modestly and develop a soft texture by neutralizing acids and providing lift. Adjust dough pH slightly, which can influence browning and flavor development, ensuring a balanced rise and pleasant surface. Work in small quantities to control texture without causing excessive puffing or collapse.
- 1/4 teaspoon salt Balance flavors and enhance overall taste by subtly seasoning the dough, which also helps accentuate sweetness and chocolate notes. Regulate the perception of sweetness and deepen savory undertones for a more complex finished cookie. Use sparingly to avoid overt saltiness while improving aroma and flavor contrast.
- 3/4 cup chopped chocolate bar or chocolate chips divided Contribute melty chocolate pockets and textural contrast when folded into dough, providing bursts of richness in every bite with about three-quarters reserved for mixing and topping. Add glossy, molten centers when baked and maintain some chunkiness for chew and interest, enhancing the hot cocoa effect alongside cocoa powder and marshmallows. Choose quality chocolate bars or chips for best flavor and melting behavior.
- 1/2 cup vegan mini marshmallows (about 3-4 per cookie); see note Provide sweet, pillowy pockets that mimic hot cocoa toppings, offering chew and a toasted finish when baked and slightly melted into the cookie surface. Add visual and textural contrast while reinforcing the drink-inspired theme, with suggested amount yielding about 3–4 marshmallows per cookie. Fold gently to keep marshmallows distributed and prevent excessive melting or burning during baking.
Instructions
- Prep: Preheat the oven to 350 F and grease or line a baking sheet with parchment paper. Combine the ground flax with the water in a small bowl and mix well; let sit for 5 minutes, to thicken.: Preheat the oven to 350 F and grease or line a baking sheet with parchment paper : As the oven warms you will notice a rising warmth that promises browning and set in the cookie edges, and the gentle hum of the oven tells you it is ready. Preparing the baking sheet with parchment paper prevents sticking and makes cleanup effortless, and greasing is an option if you prefer a slightly crisper underside. A common mistake is not preheating fully, which leads to uneven spread and texture, so wait until the oven reaches the full temperature before baking. Visually you want the oven at a steady heat so the cookies puff then set, not collapse.
- Cream the Butter: Add the butter, brown sugar, and cane sugar to a large bowl and use a hand mixer (or bowl of a stand mixer) to cream them together until smooth, 2 to 3 minutes. Add the thickened flax seed and vanilla to the butter mixture. Mix again until combined.: After stirring, the mixture will become glossy and slightly gelatinous, a sign the flaxseed has hydrated and is ready to act as a binder. This creates a sticky, egg like texture that helps the dough hold together and contributes to tenderness. If you skip the rest time the binding will be weaker and the dough may crumble, so be patient. The smell is mild and nutty, nothing overpowering, but you will feel the change in viscosity as it thickens.
- Make the Dough: Add the flour to the mixing bowl and sift the cocoa powder on top to prevent clumps. Add in cornstarch, baking soda, and salt to the bowl and mix well with a spatula. Add 1/2 cup of the chopped chocolate to the bowl and fold into the dough.: Add the butter, brown sugar, and cane sugar to a large bowl and use a hand mixer or stand mixer to cream them together until smooth, 2 to 3 minutes : As you beat, the mixture will lighten in color and become airy, with the butter and sugars forming tiny pockets of air that help the cookies rise and have a tender crumb. Scrape the bowl sides to ensure even creaming, and then add the thickened flaxseed and vanilla , mixing until integrated. One common error is undercreaming which yields dense cookies, so take the time to reach a fluffy consistency. The aroma becomes sweeter and more buttery as the sugar dissolves into the fat.
- Roll: Divide the dough into 12 equal balls, roughly 3 tablespoons each. Place each cookie dough ball 2 inches apart on the baking sheet, then top with the remaining 1/4 cup (~40 g) of chocolate, pressing it into the top of the ball slightly so it sticks. Do not flatten the cookies on the baking sheet as they will spread when they cook.: Add the flour to the mixing bowl and sift the cocoa powder on top to prevent clumps : Sifting the cocoa powder directly over the flour helps distribute it evenly and avoids dark streaks. Add cornstarch , baking soda , and salt , then fold gently with a spatula until mostly combined before adding 1/2 cup of the chopped chocolate . Folding minimizes gluten development, keeping the dough tender, and the batter will feel thick and slightly tacky. A frequent mistake is overmixing after the flour goes in, which toughens the cookie; stop as soon as dry streaks disappear. Visually, the dough becomes uniformly cocoa colored with flecks of chocolate.
- Bake: Bake for 7 minutes, until the cookies have spread and are puffy. Remove the cookies from the oven and quickly press in 3-4 mini marshmallows per cookie; it’s ok if they flatten slightly as you decorate. Return the cookies to the oven and bake for an additional 2 minutes, to set the marshmallows.: Divide the dough into 12 equal balls, roughly 3 tablespoons each : As you roll, the dough will warm slightly and become even more pliable, and you will see soft lumps that hold shape but will spread. Placing them 2 inches apart allows room for spreading, and topping each ball with the reserved 1/4 cup of chopped chocolate so it adheres to the surface creates a glossy finish after baking. Avoid flattening them on the sheet because they need to dome to achieve the right texture; pressing too much early will make them thin and crispy instead of soft and puffy. The cookie dough should look slightly rounded and dense.
- Cool: Remove the cookies from the oven and let sit on the baking sheet for 10 to 15 minutes, to allow them to set. Use a spatula to transfer the cookies to a wire rack and let them cool completely (or enjoy warm!).: Bake for 7 minutes, until the cookies have spread and are puffy : You will hear no crackle, but visually the cookies will expand and their surfaces will set while the centers remain soft. The edges may begin to hint at firmness, and the aroma of cocoa and caramelized sugars will bloom through your kitchen. After the initial bake, quickly press 3 to 4 mini marshmallows into each cookie and return to the oven for an additional 2 minutes to set the marshmallows without burning them. The mistake to avoid is overbaking in either phase, which dries the cookie and makes the marshmallows hard instead of pillowy.
- Serve & Store: Let the chocolate fully cool and solidify before storing. Store cookies in an airtight container at room temperature for up to 4 days, or in the freezer for up to one month.: Remove the cookies from the oven and let sit on the baking sheet for 10 to 15 minutes, to allow them to set : Letting the cookies rest on the warm sheet allows residual heat to finish cooking the center gently, and you will notice the chocolate on top begin to solidify into glossy patches. Using a spatula to transfer them to a wire rack prevents them from steaming on the hot sheet, preserving texture. A common pitfall is moving them too soon, which can cause them to break apart while still soft. The cooled cookies should hold their shape and have a tender interior.
- Serve & Store: Let the chocolate fully cool and solidify before storing : Once cooled, place the cookies in an airtight container at room temperature for up to 4 days, or freeze them for up to one month. Proper storage preserves the contrast between the soft center and the slightly firmer exterior. The most frequent storage mistake is stacking warm cookies which leads to sogginess, so always cool completely before layering. When serving, slightly warmed cookies bring back that freshly baked gooeyness, while chilled ones offer a firmer bite.
Notes
- Use room temperature vegan butter so it creams properly with the sugars, yielding a lighter, airier dough that bakes into a tender cookie.
- Sift the cocoa powder to avoid lumps and ensure even chocolate color and flavor; untamed clumps can leave dry pockets in the baked cookie.
- Divide and weigh dough balls for even baking; consistent size makes sure all cookies finish at the same time and keep a uniform texture.
- Press reserved chocolate on top instead of mixing it all in to create pretty glossy tops and concentrated molten bites when warm.
- Choose vegan marshmallows carefully because many brands use gelatin, pick plant based mini marshmallows for the right texture and to keep this recipe vegan friendly.
- Freeze dough balls for later by flash freezing on a tray, then storing in a bag for quick baking sessions; add an extra minute or two to the bake if baking from frozen.