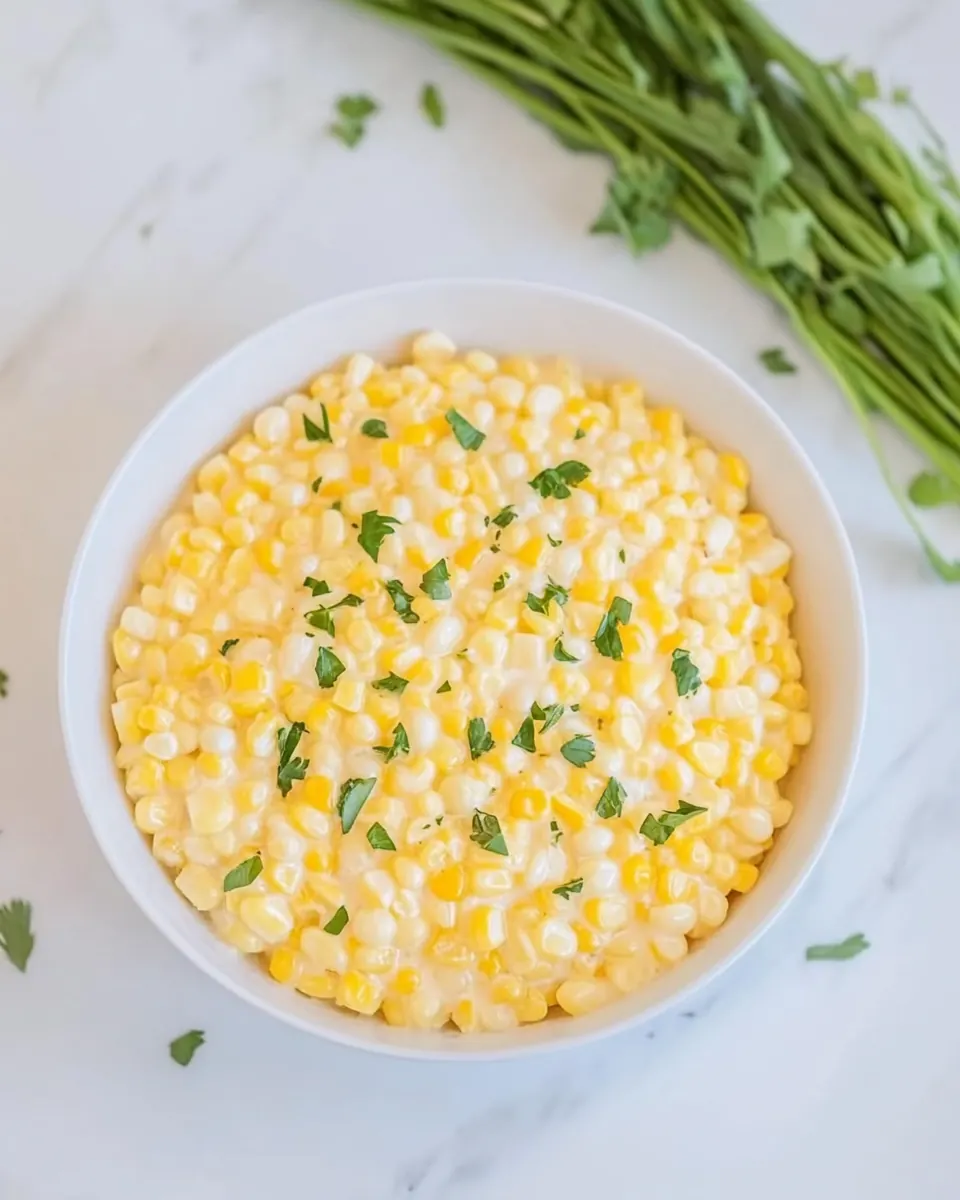
Instant Pot Creamed Corn
Instant Pot Creamed Corn is the kind of comfort food I reach for when I want something rich, simple, and honestly a little nostalgic. Growing up, my family treated creamed corn as the secret side that could soothe a frantic weeknight or steal the show at holiday dinners. I still remember the first time I experimented with making it in my pressure cooker, curious to see if that velvety texture could survive the quick, high heat of an electric pot. It did, and the result felt like a cozy, creamy hug in a bowl.
There are moments when I crave that familiar sweetness and buttery mouthfeel, and this version delivers without fuss. I like to keep the technique straightforward, relying on a few high quality pantry items and the steady, reliable steam of the Instant Pot. Over the years I have tweaked amounts and order of assembly to make sure the cream and cream cheese meld into the kernels without breaking or separating, and I love how the corn itself stays bright, not mushy.
When I serve Instant Pot Creamed Corn I often pair it with something herb forward to cut through the richness, or I spoon it over roasted vegetables for extra comfort. Making it in the pressure cooker means I can walk away and come back to a warm, aromatic pot that smells like butter and sweet corn. The texture is indulgent but not heavy, and leftovers reheat beautifully, so I tend to make a double batch when I know friends are coming by.
Recipe Snapshot
5 mins
2 mins
3 mins
Easy
220 kcal
American
Gluten-Free, Low FODMAP
Side Dishes
Electric Pressure Cooker (6 or 8 quart)
The Best Thing About This Instant Pot Creamed Corn
Comfort with Speed
I love that Instant Pot Creamed Corn brings the slow cooked feel of a classic creamed side to the table in a fraction of the time. The pressure environment intensifies flavors while keeping the kernels tender, and I appreciate being able to get creamy results without babysitting a pot on the stove.
Reliable Texture
One standout for me is texture control. With the exact assembly order and the brief high pressure cook, the corn retains body while the dairy melts into a silky sauce. I notice a better mouthfeel compared to longer simmer methods, and that balance is why I return to this recipe.
Simple Ingredient List
There are no fancy extras required, just smart staples like low sodium broth, heavy cream, and full fat cream cheese. I find that each ingredient plays a clear role, which makes substitutions unnecessary and the result consistently satisfying.
Great for Gatherings
Because it scales and reheats well, I rely on this recipe for holidays and weeknight dinners alike. The dish rides the line between indulgent and approachable, so guests often ask for the recipe after tasting it. I love that versatility.
Low Fuss, High Reward
Finally, using an electric pressure cooker means hands off time and minimal cleanup. I can prep, seal, and come back to a dish that tastes like I spent much more time on it than I actually did. That convenience keeps me making Instant Pot Creamed Corn again and again.
Instant Pot Creamed Corn Ingredients
The philosophy behind these ingredients is straightforward: each item has a job that contributes to the final luscious texture and balanced flavor. The broth gives savory backbone without overpowering, the heavy cream and cream cheese create the velvety body, and butter finishes with glossy richness. Together, they let the natural sweetness of the corn shine while yielding a smooth, spoonable consistency.
- 1/2 cup low-sodium vegetable broth, or chicken broth: Add to the pressure cooker to provide a flavorful, low-sodium liquid base that deglazes the pot and helps steam the corn evenly; choose chicken broth only if vegetable broth is not desired and expect a slightly different savory note. Use the specified amount to control consistency and prevent diluting the creamed texture.
- 1 tablespoon granulated sugar: Sprinkle in to impart a touch of sweetness that balances the savory elements and enhances the natural corn flavor; dissolve it into the broth so it melds during cooking. Adjust sparingly to avoid making the dish overtly sweet.
- 1/2 teaspoon ground black pepper: Season to add a subtle heat and aromatic depth that complements the sweet corn while enhancing overall flavor; grind fresh for the best aroma. Add during seasoning so the pepper integrates into the creamed base.
- 1 teaspoon kosher salt: Measure precisely to provide essential savory seasoning and bring out the sweetness of the corn while helping to round the dish's overall taste profile; kosher salt dissolves well in the cooking liquid. Stir in early so it permeates the creamed mixture evenly.
- 32 ounces corn kernels: Pour in as the primary component that delivers natural sweetness, body, and texture; use fresh or frozen kernels that will break down slightly to create the classic creamed consistency. The volume specified ensures a hearty yield and maintains the intended corn-to-cream ratio.
- 3/4 cup heavy cream, NO substitutions: Pour in after pressure cooking to enrich the sauce with a rich, silky mouthfeel that anchors the creamed texture; use exactly full-fat heavy cream for proper thickness and stability when combined with the cheese and butter. Heat gently to avoid separating while stirring into the hot corn.
- 8 ounces full-fat cream cheese: Stir in to provide creaminess, tang, and body that thickens the mixture as it melts into the hot corn; full-fat cream cheese contributes a smooth, slightly tangy backbone to the creamed sauce. Soften or cube before adding for easier incorporation and even melting.
- 1/4 cup unsalted butter, cut into parts: Dot throughout and melt into the finished dish to add a glossy finish, richness, and a buttery flavor that enhances mouthfeel; cutting into parts helps it melt uniformly. Use unsalted butter here to maintain control over final seasoning.
Recipe Directions for Instant Pot Creamed Corn

These directions are written to guide you through each sensory cue and decision so you get consistently creamy results. I walk you through assembly, cooking on high pressure, and how to finish for best texture, with troubleshooting notes included for common hiccups.
- Combine 1/2 cup low-sodium vegetable broth, 1 tablespoon granulated sugar, 1/2 teaspoon ground black pepper, and 1 teaspoon kosher salt together in the inner pot. Add in 32 ounces corn kernels then 3/4 cup heavy cream, in that order. Top with 8 ounces full-fat cream cheese and dollop with 1/4 cup unsalted butter. DO NOT stir.: As you mix these seasonings with the broth , you will notice the aroma turns savory with a hint of sweetness from the sugar, and that initial scent tells you the base is balanced. This combination is crucial because it frames the whole dish, ensuring the dairy does not make things overly bland. A common mistake is adding dairy too early or over stirring now, which can cause pockets of unmelted dairy later. Keep the mixture uniform, and avoid adding extra liquid beyond what is indicated, because too much will prevent thickening after cooking.
- Place the lid on the pressure cooker, seal the vent knob, and set it to cook on high pressure for 3 minutes. Keep in mind it will take a long time to come to pressure if your corn is frozen.: When you pour the corn into the seasoned broth , the pot will take on a sweet, vegetal scent that signals the primary flavor is in place. Adding the heavy cream after the corn helps coat the kernels and limits splashing when the pot comes to pressure. This order matters because it controls how the cream interacts with starch released from the corn . One trap is dumping everything at once, which can create uneven layering and leave the cream sitting on top rather than integrating during cooking. Gently level the surface so steam distributes evenly.
- Once the cooking time has elapsed, allow the pressure to release naturally for at least 10 minutes. After 10 minutes, you can do a quick release of the remaining pressure if desired.: Placing the solid cream cheese and pats of butter on top rather than stirring them in preserves their texture as they soften under pressure and then melt into a silky emulsion. You will notice a rich buttery perfume as they heat, and this approach reduces the risk of the dairy scorching on the pot bottom. A frequent error is breaking up the cream cheese into tiny pieces now, which makes it harder to integrate smoothly later; leave larger pieces so they melt gently during the natural release.
- Give everything a stir to combine. The creamed corn will appear rather loose but will thicken up as it cools slightly.: Leaving the ingredients undisturbed creates a gentle layering that helps prevent dairy from sticking to the base as the cooker reaches pressure. The pot will hiss and build steam steadily, and avoiding stirring reduces the chance of scorching or clumping. If you stir too vigorously at this stage you can force dairy into contact with hot spots, leading to separation. Trust the process, and keep the lid off until it is time to seal.
- Serve with diced green onions if desired.: You will hear the cooker come to life, the motor humming and the pressure indicator gradually rising; for frozen corn this phase may take noticeably longer. The brief high pressure magically melds the dairy into the kernels without overcooking them, preserving bite and sweetness. A common misconception is that a longer cook time equals better texture, but overcooking at high pressure will make the kernels soft and the sauce grainy, so stick to the specified short time.
- Keep in mind it will take a long time to come to pressure if your corn is frozen: If using frozen corn , the cooker will expend time melting ice and building steam, and during that warm up the internal temperature rises slowly which affects timing. I pay attention to the extended preheat because it influences overall timing and final tenderness. The main troubleshooting point here is patience; forcing a quick release because you think it is done can yield undercooked kernels, so allow the machine to reach full pressure naturally.
- Once the cooking time has elapsed, allow the pressure to release naturally for at least 10 minutes: During the natural release, you will detect a gentle steam exhalation and a soft settling of the surface as the cream cheese and butter begin to melt and unite with the cream . This resting phase is essential because it lets the emulsion stabilize; venting too early often causes the sauce to separate or become watery. If you need to speed up, a short quick release after the initial natural release is acceptable, but avoid yanking the valve immediately after the cook time.
- After 10 minutes, you can do a quick release of the remaining pressure if desired: The quick release will produce a louder hiss and a visible plume of steam, and that sharp finish helps stop cooking quickly so the kernels maintain texture. If you skip this and let full natural release occur, the corn may soften further and the sauce can thicken more. Be careful to keep hands and face away from the steam to avoid burns, which is a very common hazard during this step.
- Give everything a stir to combine: At first stir the mixture may look loose and glossy; as you fold the softened cream cheese and melted butter in, the texture should transform into a thick, velvety sauce clinging to each kernel. The scent at this point becomes buttery and slightly tangy, indicating successful emulsion. If you notice graininess or lumps, continue stirring gently while warming on low to coax them smooth, but avoid high heat which can break the dairy.
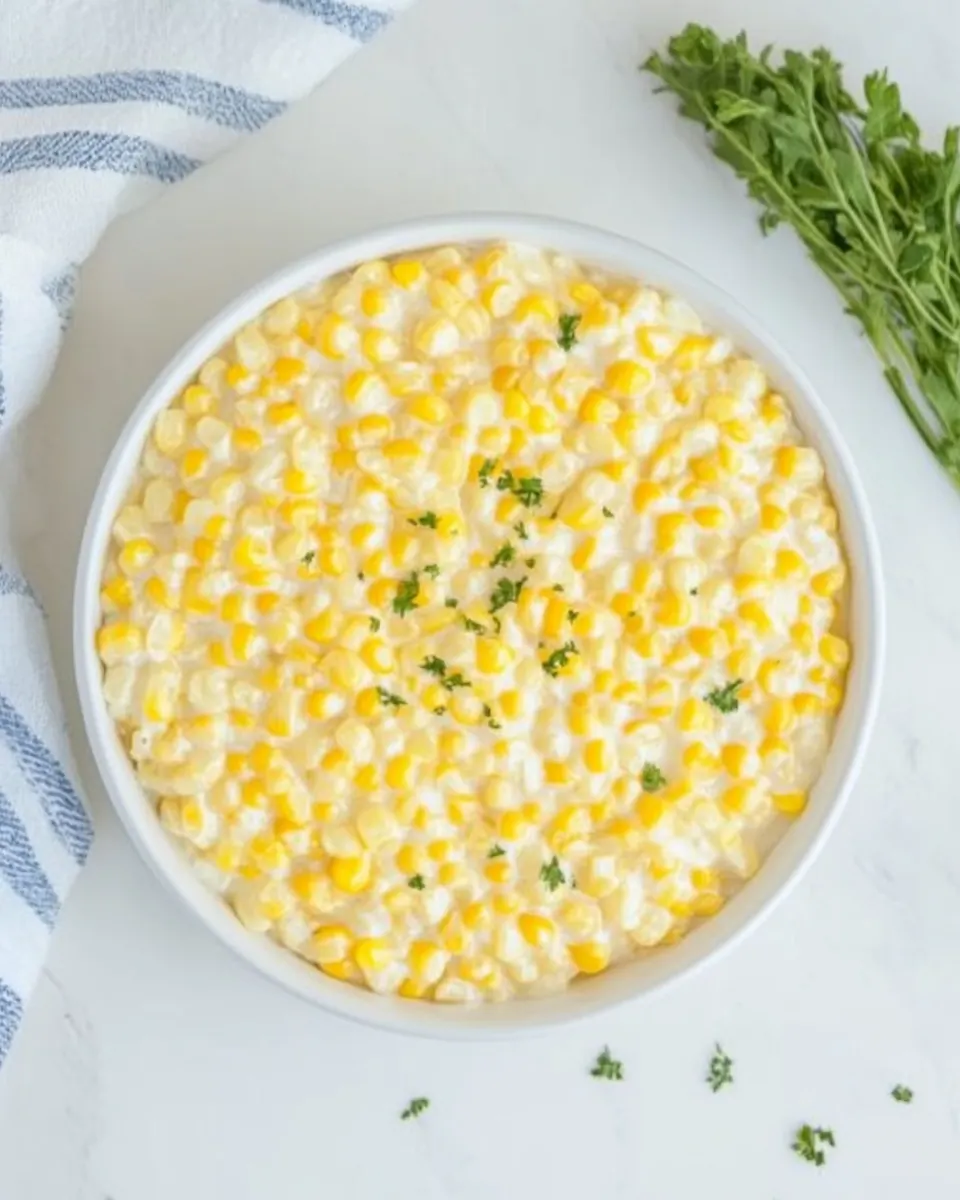
- The creamed corn will appear rather loose but will thicken up as it cools slightly: Cooling allows the sauce to set and the starchy juices from the corn to bind, giving you that spoonable consistency. I usually let it rest for a few minutes while the flavors marry, and that pause also prevents serving overly hot creamed dairy. The main mistake here is serving immediately, when the sauce can seem too thin; a short rest improves texture dramatically.
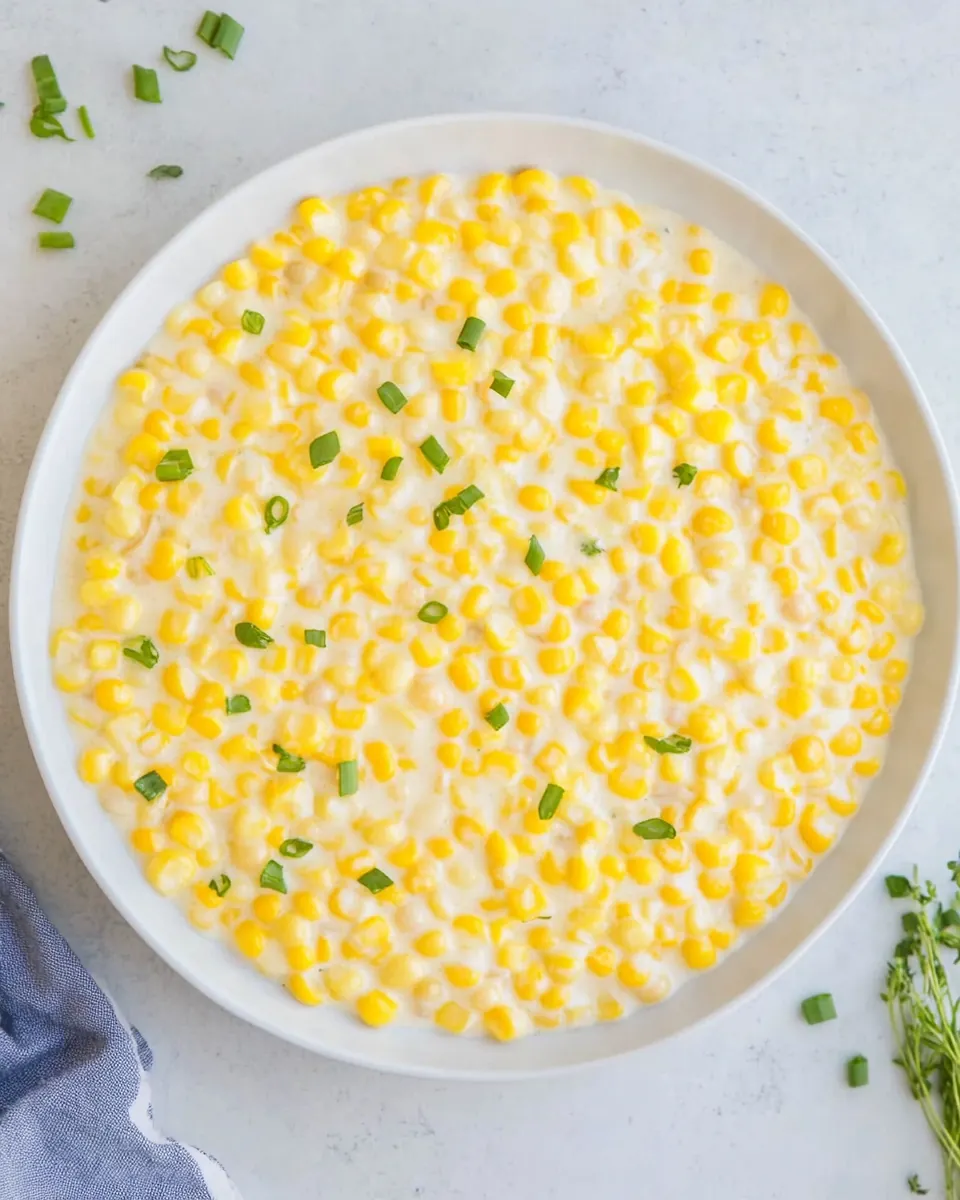
- Serve with diced green onions if desired: A scatter of diced green onions adds color contrast and a fresh, bright bite that balances the richness. You will notice the aroma shift with the herbal lift, and that contrast is what makes the dish feel complete. Avoid overpowering garnishes that compete with the gentle sweetness of the corn .
Tips and Tricks about Instant Pot Creamed Corn
I like to gather a few practical pointers before I start, because they save time and improve results. Below are tips I use every time I make Instant Pot Creamed Corn, expanded from the recipe notes so you can adjust confidently for pot size, frozen corn, and reheating.
- Adjust the batch for pot size The recipe must be halved for a 3 quart cooker. Using a 6 quart, you can opt to cut it in half, but note that with an 8 quart you cannot adjust the recipe smaller without affecting results. Scale cautiously and keep the same liquid to corn ratio to maintain texture.
- Expect longer pressurizing with frozen corn Whether you use frozen or thawed frozen corn, the cook time at pressure stays the same, but coming to pressure will take longer with frozen corn. This affects total time, so plan ahead if you are short on time and allow extra minutes for the machine to heat and melt ice.
- Storage and reheating Cool slightly then transfer to an airtight container and refrigerate up to three days, or freeze in a freezer safe container for up to three months. Reheat gently on low heat while stirring, or microwave in 60 second intervals, stirring between each interval to restore creaminess.
- Do not substitute heavy cream The specified 3 quarters cup of heavy cream is important for texture stability. Lighter creams or milk will not provide the same mouthfeel and can lead to separation, so keep to the ingredient list for reliable results.
- Finish with green onions if you like contrast A small sprinkle of diced green onions adds bright color and a fresh counterpoint to the rich sauce. Add them at the end so they retain their crunch and vibrant flavor.
Perfect Pairings for Instant Pot Creamed Corn
Instant Pot Creamed Corn pairs beautifully with many mains and occasions. Its rich, velvety profile works as a hearty side for weeknight dinners or as a comforting dish at celebratory meals. Below I outline pairing ideas, serving styles, and storage approaches to help you present it thoughtfully.
- Classic holiday plate Serve alongside roasted vegetables and a green salad to cut through the richness, providing balance to heavier mains. The creamy texture complements roasted root vegetables in colder months.
- Weeknight comfort Spoon over baked vegetables or serve next to simple roasted proteins for an easy weeknight dinner that feels indulgent without fuss.
- Casual gatherings Keep it warm in a shallow dish on the buffet so guests can help themselves. The dish reheats well, so you can prepare ahead and refresh gently on the stove.
- Seasonal serving In winter, pair with roasted squash or braised greens to emphasize seasonal flavors. The warm, buttery notes of the creamed corn make it particularly cozier in colder months.
- Storage advice Cool to room temperature before refrigerating. For best texture when reheating, warm slowly over low heat while stirring to reincorporate fats evenly and restore creaminess.
- Portioning tips Because the recipe yields a generous amount, serve in small bowls as a rich side rather than the main starch, and offer a bright garnish like scallions for contrast.
FAQ
Conclusion
What makes this recipe special is its ability to deliver a truly creamy, indulgent side with very little hands on time. The pressure cooker does the heavy lifting while careful assembly and a short natural release ensure a silky texture and bright corn flavor. Try it when you want an easy yet impressive addition to the table, whether for a cozy weeknight or a festive meal, and you may find it becoming a staple in your rotation. Share it warm, and enjoy how a few simple ingredients can create something that tastes lovingly homemade.
Instant Pot Creamed Corn
Equipment
- Electric Pressure Cooker (6 or 8 quart)
Ingredients
- 1/2 cup low-sodium vegetable broth, or chicken broth Add to the pressure cooker to provide a flavorful, low-sodium liquid base that deglazes the pot and helps steam the corn evenly; choose chicken broth only if vegetable broth is not desired and expect a slightly different savory note. Use the specified amount to control consistency and prevent diluting the creamed texture.
- 1 tablespoon granulated sugar Sprinkle in to impart a touch of sweetness that balances the savory elements and enhances the natural corn flavor; dissolve it into the broth so it melds during cooking. Adjust sparingly to avoid making the dish overtly sweet.
- 1/2 teaspoon ground black pepper Season to add a subtle heat and aromatic depth that complements the sweet corn while enhancing overall flavor; grind fresh for the best aroma. Add during seasoning so the pepper integrates into the creamed base.
- 1 teaspoon kosher salt Measure precisely to provide essential savory seasoning and bring out the sweetness of the corn while helping to round the dish's overall taste profile; kosher salt dissolves well in the cooking liquid. Stir in early so it permeates the creamed mixture evenly.
- 32 ounces corn kernels Pour in as the primary component that delivers natural sweetness, body, and texture; use fresh or frozen kernels that will break down slightly to create the classic creamed consistency. The volume specified ensures a hearty yield and maintains the intended corn-to-cream ratio.
- 3/4 cup heavy cream, NO substitutions Pour in after pressure cooking to enrich the sauce with a rich, silky mouthfeel that anchors the creamed texture; use exactly full-fat heavy cream for proper thickness and stability when combined with the cheese and butter. Heat gently to avoid separating while stirring into the hot corn.
- 8 ounces full-fat cream cheese Stir in to provide creaminess, tang, and body that thickens the mixture as it melts into the hot corn; full-fat cream cheese contributes a smooth, slightly tangy backbone to the creamed sauce. Soften or cube before adding for easier incorporation and even melting.
- 1/4 cup unsalted butter, cut into parts Dot throughout and melt into the finished dish to add a glossy finish, richness, and a buttery flavor that enhances mouthfeel; cutting into parts helps it melt uniformly. Use unsalted butter here to maintain control over final seasoning.
Instructions
- Combine 1/2 cup low-sodium vegetable broth, 1 tablespoon granulated sugar, 1/2 teaspoon ground black pepper, and 1 teaspoon kosher salt together in the inner pot. Add in 32 ounces corn kernels then 3/4 cup heavy cream, in that order. Top with 8 ounces full-fat cream cheese and dollop with 1/4 cup unsalted butter. DO NOT stir.: As you mix these seasonings with the broth , you will notice the aroma turns savory with a hint of sweetness from the sugar, and that initial scent tells you the base is balanced. This combination is crucial because it frames the whole dish, ensuring the dairy does not make things overly bland. A common mistake is adding dairy too early or over stirring now, which can cause pockets of unmelted dairy later. Keep the mixture uniform, and avoid adding extra liquid beyond what is indicated, because too much will prevent thickening after cooking.
- Place the lid on the pressure cooker, seal the vent knob, and set it to cook on high pressure for 3 minutes. Keep in mind it will take a long time to come to pressure if your corn is frozen.: When you pour the corn into the seasoned broth , the pot will take on a sweet, vegetal scent that signals the primary flavor is in place. Adding the heavy cream after the corn helps coat the kernels and limits splashing when the pot comes to pressure. This order matters because it controls how the cream interacts with starch released from the corn . One trap is dumping everything at once, which can create uneven layering and leave the cream sitting on top rather than integrating during cooking. Gently level the surface so steam distributes evenly.
- Once the cooking time has elapsed, allow the pressure to release naturally for at least 10 minutes. After 10 minutes, you can do a quick release of the remaining pressure if desired.: Placing the solid cream cheese and pats of butter on top rather than stirring them in preserves their texture as they soften under pressure and then melt into a silky emulsion. You will notice a rich buttery perfume as they heat, and this approach reduces the risk of the dairy scorching on the pot bottom. A frequent error is breaking up the cream cheese into tiny pieces now, which makes it harder to integrate smoothly later; leave larger pieces so they melt gently during the natural release.
- Give everything a stir to combine. The creamed corn will appear rather loose but will thicken up as it cools slightly.: Leaving the ingredients undisturbed creates a gentle layering that helps prevent dairy from sticking to the base as the cooker reaches pressure. The pot will hiss and build steam steadily, and avoiding stirring reduces the chance of scorching or clumping. If you stir too vigorously at this stage you can force dairy into contact with hot spots, leading to separation. Trust the process, and keep the lid off until it is time to seal.
- Serve with diced green onions if desired.: You will hear the cooker come to life, the motor humming and the pressure indicator gradually rising; for frozen corn this phase may take noticeably longer. The brief high pressure magically melds the dairy into the kernels without overcooking them, preserving bite and sweetness. A common misconception is that a longer cook time equals better texture, but overcooking at high pressure will make the kernels soft and the sauce grainy, so stick to the specified short time.
- Keep in mind it will take a long time to come to pressure if your corn is frozen: If using frozen corn , the cooker will expend time melting ice and building steam, and during that warm up the internal temperature rises slowly which affects timing. I pay attention to the extended preheat because it influences overall timing and final tenderness. The main troubleshooting point here is patience; forcing a quick release because you think it is done can yield undercooked kernels, so allow the machine to reach full pressure naturally.
- Once the cooking time has elapsed, allow the pressure to release naturally for at least 10 minutes: During the natural release, you will detect a gentle steam exhalation and a soft settling of the surface as the cream cheese and butter begin to melt and unite with the cream . This resting phase is essential because it lets the emulsion stabilize; venting too early often causes the sauce to separate or become watery. If you need to speed up, a short quick release after the initial natural release is acceptable, but avoid yanking the valve immediately after the cook time.
- After 10 minutes, you can do a quick release of the remaining pressure if desired: The quick release will produce a louder hiss and a visible plume of steam, and that sharp finish helps stop cooking quickly so the kernels maintain texture. If you skip this and let full natural release occur, the corn may soften further and the sauce can thicken more. Be careful to keep hands and face away from the steam to avoid burns, which is a very common hazard during this step.
- Give everything a stir to combine: At first stir the mixture may look loose and glossy; as you fold the softened cream cheese and melted butter in, the texture should transform into a thick, velvety sauce clinging to each kernel. The scent at this point becomes buttery and slightly tangy, indicating successful emulsion. If you notice graininess or lumps, continue stirring gently while warming on low to coax them smooth, but avoid high heat which can break the dairy.
- The creamed corn will appear rather loose but will thicken up as it cools slightly: Cooling allows the sauce to set and the starchy juices from the corn to bind, giving you that spoonable consistency. I usually let it rest for a few minutes while the flavors marry, and that pause also prevents serving overly hot creamed dairy. The main mistake here is serving immediately, when the sauce can seem too thin; a short rest improves texture dramatically.
- Serve with diced green onions if desired: A scatter of diced green onions adds color contrast and a fresh, bright bite that balances the richness. You will notice the aroma shift with the herbal lift, and that contrast is what makes the dish feel complete. Avoid overpowering garnishes that compete with the gentle sweetness of the corn .
Notes
- Adjust the batch for pot size The recipe must be halved for a 3 quart cooker. Using a 6 quart, you can opt to cut it in half, but note that with an 8 quart you cannot adjust the recipe smaller without affecting results. Scale cautiously and keep the same liquid to corn ratio to maintain texture.
- Expect longer pressurizing with frozen corn Whether you use frozen or thawed frozen corn, the cook time at pressure stays the same, but coming to pressure will take longer with frozen corn. This affects total time, so plan ahead if you are short on time and allow extra minutes for the machine to heat and melt ice.
- Storage and reheating Cool slightly then transfer to an airtight container and refrigerate up to three days, or freeze in a freezer safe container for up to three months. Reheat gently on low heat while stirring, or microwave in 60 second intervals, stirring between each interval to restore creaminess.
- Do not substitute heavy cream The specified 3 quarters cup of heavy cream is important for texture stability. Lighter creams or milk will not provide the same mouthfeel and can lead to separation, so keep to the ingredient list for reliable results.
- Finish with green onions if you like contrast A small sprinkle of diced green onions adds bright color and a fresh counterpoint to the rich sauce. Add them at the end so they retain their crunch and vibrant flavor.