Sourdough Crackers with Field Garlic
Sourdough Crackers with Field Garlic started as an experiment in my tiny kitchen when I had more sourdough discard than jars and fewer snacks than patience. The first sentence you read names the recipe because these crackers are the reason I keep a jar of discard on the counter, ready to be turned into something crisp and comforting. I remember the first batch: the dough smelled faintly tangy, the air filled with a green garlicky perfume from the field garlic I picked that morning, and the oven hummed like a friendly neighbor.
I made those crackers on a rainy afternoon, folding simple pantry staples into a buttery dough and rolling it paper thin. As they baked, the kitchen filled with an aroma that felt like home, earthy and slightly sweet from the sourdough discard and rich from the butter. I kept stealing tastes, delighted by the contrast of fragile crunch and rustic garlic notes. Friends who tried them asked for the recipe, and I loved telling the story of how a humble jar of discard became our new favorite nibble.
Over time I’ve tweaked minor details, but the soul of the recipe never changed: flour, sourdough discard, butter, a whisper of salt, and those grassy sprigs of field garlic. I find they pair perfectly with cheese boards, soups, or just a cup of tea when I need something to crunch on while reading. Every time I make them I think of that rainy day, and I hope these crackers will become a small ritual in your kitchen too.
Recipe Snapshot
40 mins
15 mins
25 mins
Easy
150 kcal
American
Gluten-Free, Low FODMAP
Appetizers
Oven, Baking sheet, Parchment paper, Rolling pin, Wire rack, Mixing bowl, Pizza cutter
Why You’ll Love This Sourdough Crackers with Field Garlic
I love how waste becomes wonder
Turning leftover sourdough discard into a crunchy snack feels like magic. Rather than tossing that jar into the compost, I get a crisp, tangy canvas that carries flavor and purpose. It’s simple conservation that rewards you with texture and taste.
The texture is endlessly satisfying
These crackers bake ultra thin and shatter delightfully, which is a rare thing to achieve without fuss. When I bite in, I listen for that clear snap, and the lightness keeps me reaching for more without feeling heavy. That crunch makes them perfect for gatherings where finger food matters.
Field garlic lifts the whole profile
Using fresh field garlic gives the crackers a grassy, green aroma that differs from typical dried garlic. I appreciate the subtle floral note it brings, especially when paired with the rich mouthfeel of melted butter. It feels fresh and seasonal, and makes each bite interesting.
Minimal ingredients, maximum charm
With just a few pantry staples you can make something that feels artisanal. The combination of all purpose flour, sourdough discard, butter, and salt keeps things straightforward, and each component has a clear job that you can taste in the finished cracker.
Flexible and social
I love that these crackers slot into many occasions. They are easy to scale, transport, and riff on, which makes them a reliable choice for impromptu picnics or curated snack boards. When friends arrive unannounced, I already know these will go fast.
Shopping List for Sourdough Crackers with Field Garlic
These ingredients reflect a philosophy of simplicity and seasonality. The few items work in harmony to create a cracker that is crisp, flavorful, and rooted in the tang of sourdough. The all purpose flour builds structure, the sourdough discard contributes tang and lift, while butter delivers richness. A pinch of sea salt sharpens flavors and the fresh field garlic gives an herbaceous edge that keeps the crackers bright.
- 1 cup all-purpose flour: Provides structure and body to the dough, forming the base matrix that holds other ingredients together. Adds lightness and a tender crumb when combined with fat and liquid, and contributes to browning during baking.
- 1/2 teaspoon of sea salt: Enhances overall flavor by bringing a briny, mineral backbone that balances richness. Helps to season the dough evenly and can accentuate the savory notes of garlic and butter.
- 2 tablespoons chopped fresh field garlic (you can substitute any kind of garlic, but you won't get the same flavor): Imparts a pronounced garlicky, wild-allium aroma and a subtle vegetal bite that distinguishes the crackers. Contributes small bits of texture and fresh herbal complexity, elevating the savory profile.
- 1 cup sourdough discard: Adds acidity and fermented flavor, contributing tangy depth and complexity to the crackers. Helps hydrate the flour while offering leavening potential and a characteristic sourdough aroma.
- 3/4 cup of butter: Contributes rich fat for flakiness and tenderness, producing a crisp, buttery texture when baked. Aids in mouthfeel, promotes browning, and carries flavor throughout the cracker.
Making This Sourdough Crackers with Field Garlic
These directions keep things approachable, but they reward care. I like to move methodically, paying attention to dough texture and visual cues so each batch comes out crisp and evenly browned. Below I expand each step so you know what to listen for, smell, and avoid.
- In a small bowl, combine flour, discard, and melted butter. Stir until well-combined. Preheat your oven to 350 degrees F. Line a baking sheet with parchment paper and set it aside.: The moment you mix the all purpose flour , sourdough discard , and melted butter , you will notice a change in texture from powder to a silky mass, with a faint tang and buttery scent rising. This blend forms the gluten network and distributes fat for flakiness. Work gently until just combined, because overmixing activates too much gluten and makes crackers chewy instead of crisp. If the dough feels dry, it may need a touch more sourdough discard , but add sparingly; if too sticky, rest it 5 minutes so the flour hydrates. A common mistake is heating the butter too hot then adding it, which can cook the discard slightly and alter fermentation notes, so ensure butter is warm but not scalding.
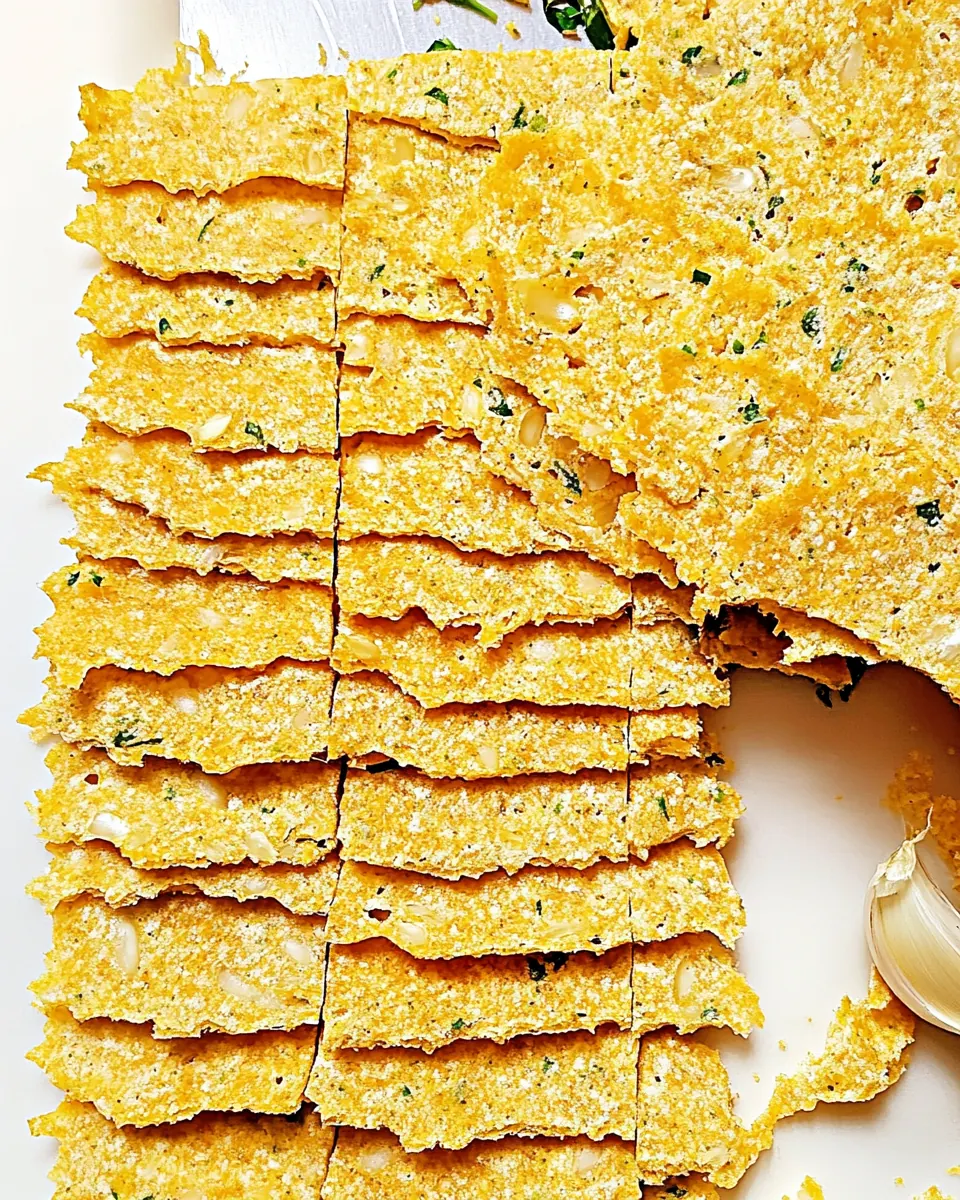
- Roll out your cracker dough until it is about 1/8-inch thick—you want this to be as thin as possible so that when they bake up, they will be crunchy like crackers! If desired, use a pizza cutter or a crinkle rotary cutter to cut them into squares (instead of using cookie cutters).: As you stir, pay attention to how the mixture comes together, becoming cohesive and slightly glossy from the butter . The sound will shift from a dry scrape to a smooth, almost slippery swoosh against the bowl, and the aroma will be a soft blend of butter and mild tang. This stage matters because uneven mixing creates pockets of flour or butter, leading to inconsistent baking. If you see dry streaks, fold them in with a spatula rather than beating, and avoid adding extra flour which will toughen the crackers. One pitfall is adding cold ingredients that arrest cohesion, so ensure components are at similar temperatures.
- Lightly brush tops with more butter or oil if desired and top with coarse sea salt.: As the oven warms to 350 degrees F , notice how the kitchen gradually becomes cozy and the air takes on a faint toasted scent. Preheating ensures immediate oven spring and predictable browning, which is crucial for thin crackers that bake quickly. If you skip this, crackers can absorb oil and become limp rather than crisp. A frequent error is placing dough in an oven that is not fully up to temperature, causing uneven texture, so use your oven thermometer if you have one.
- Bake crackers for 20-25 minutes until golden brown – remove from oven when done and cool on a wire rack before serving.: Lining with parchment prevents sticking and promotes even heat transfer, letting the bottom of each cracker crisp without burning. The parchment also helps you move large sheets in and out with ease, keeping edges intact. Press the dough gently into a sheet on top to transfer later, and avoid using greased pans which can cause spreading and irregular browning. A mistake people make is skipping parchment and then trying to pry crackers off a hot pan, which leads to breakage and lost pieces.
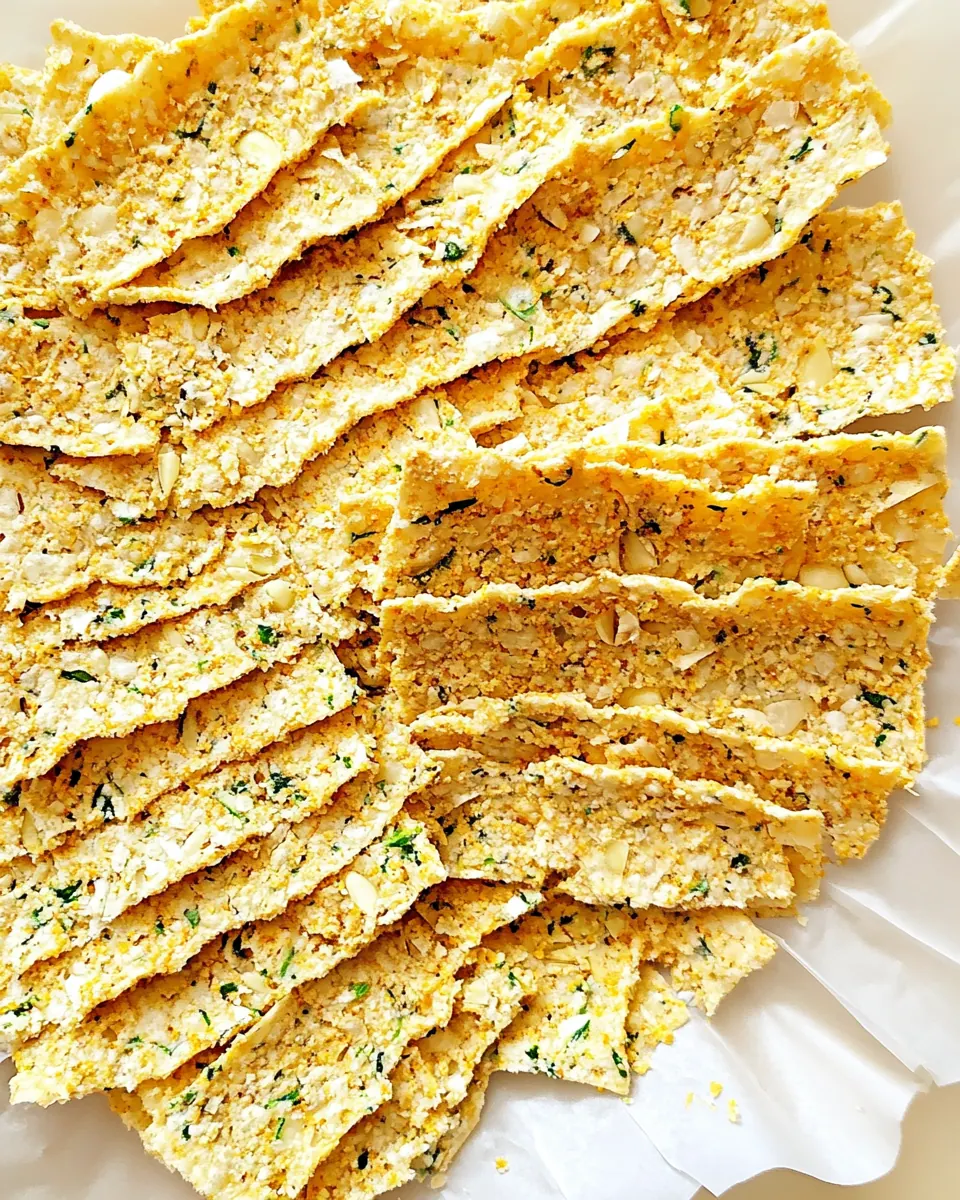
- Roll out your cracker dough until it is about 1/8 inch thick you want this to be as thin as possible so that when they bake up they will be crunchy like crackers: Rolling to about 1/8 inch creates the ideal balance between fragility and structure, and as you roll you'll feel the dough become almost translucent in places, an encouraging sign. Use even pressure and rotate the dough regularly to maintain uniform thickness, and dust lightly with flour to prevent sticking. You should hear a soft whisper as the rolling pin glides; if it tears, patch it gently rather than reworking the whole sheet which can over-develop gluten. A common issue is rolling unevenly which leads to some pieces burning while others remain pale, so aim for consistency across the sheet.
- If desired use a pizza cutter or a crinkle rotary cutter to cut them into squares instead of using cookie cutters: When you cut the dough with a sharp tool like a pizza cutter or crinkle rotary cutter, the edges seal cleanly and the shapes are uniform, which helps them bake uniformly. Cutting before baking also means you will have neat, easy to separate crackers when they come out, reducing breakage. Press straight down without dragging to avoid compressing the dough edges too much which can hinder lift. One trap is cutting too close together, creating tiny pieces that can overbrown, so leave small gaps between shapes.
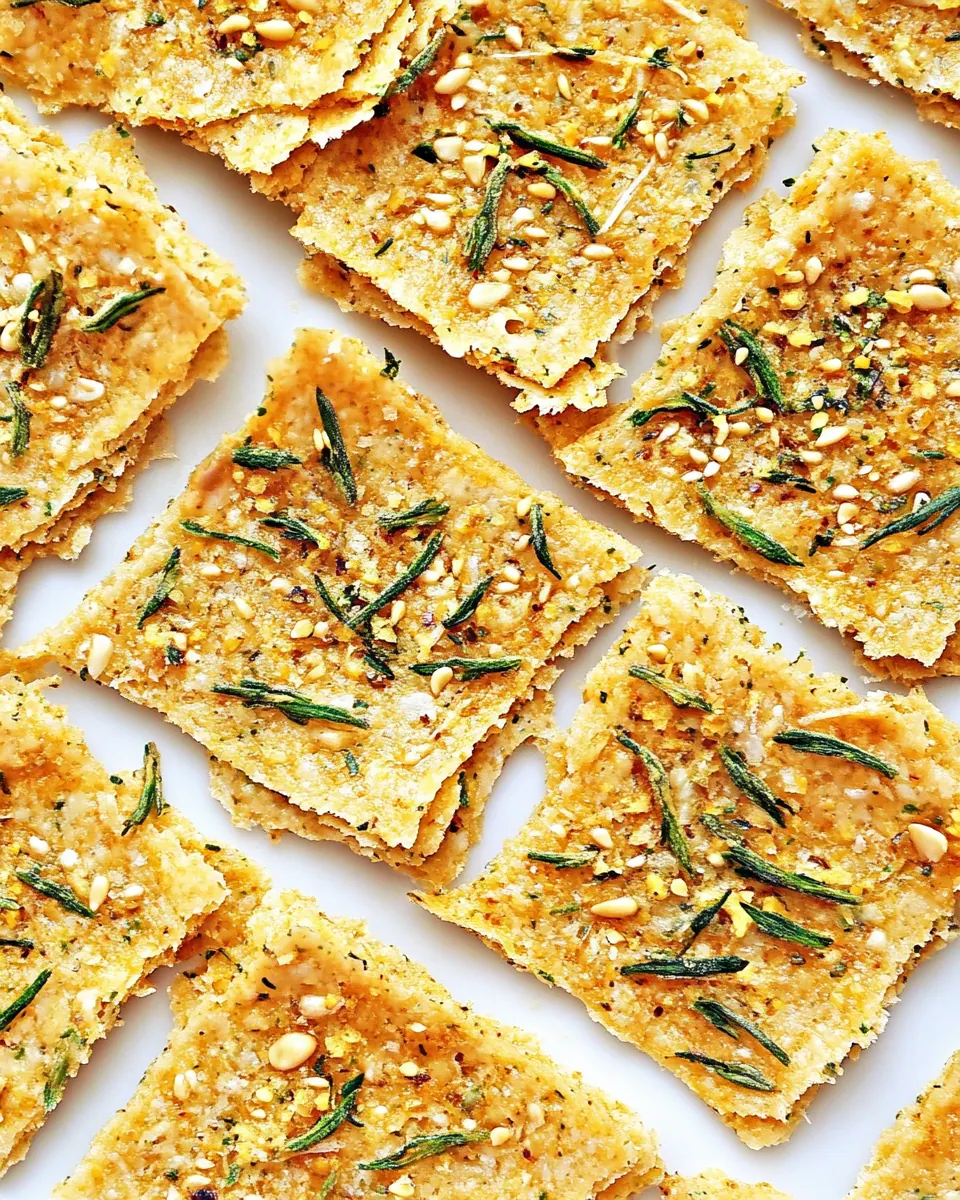
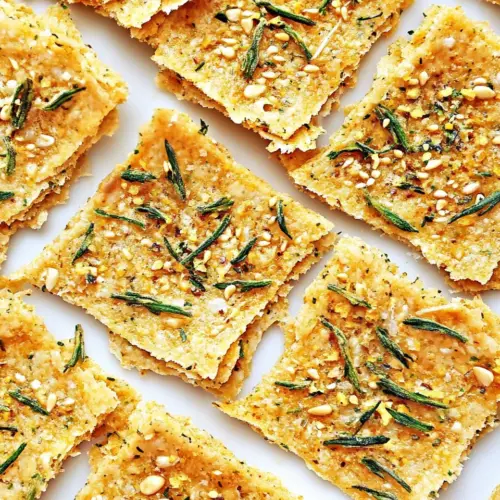
- Lightly brush tops with more butter or oil if desired and top with coarse sea salt: Brushing with melted butter or a neutral oil adds gloss and a toasty surface flavor, while a sprinkle of coarse sea salt provides crunchy bursts of seasoning. As you brush, the crackers will gleam and you may smell the butter bloom, which amplifies the savory notes. Apply sparingly to avoid soggy spots, and press the salt lightly so it adheres. A typical mistake is overbrushing, which can make the center soft rather than crisp, so keep it light and even.
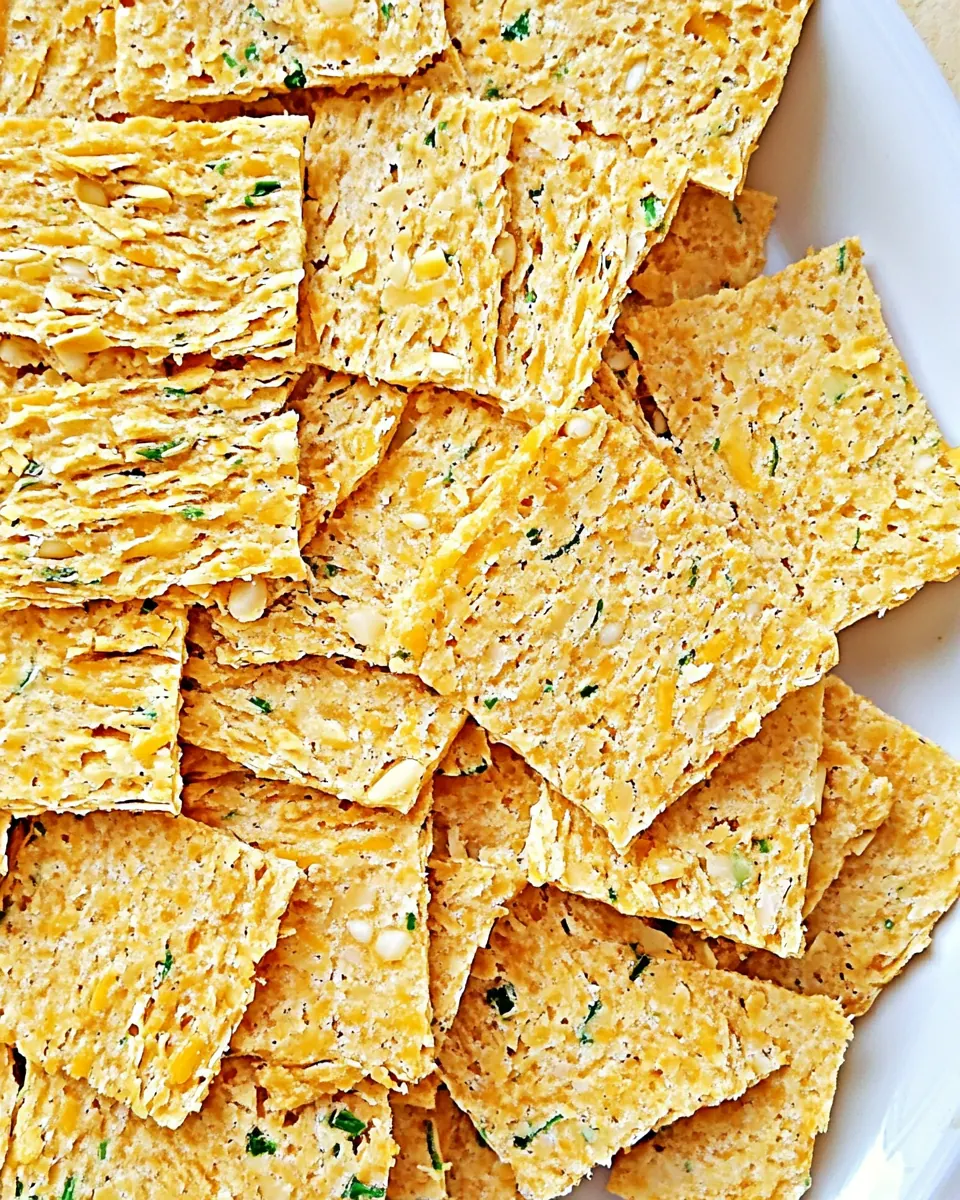
- Bake crackers for 20 to 25 minutes until golden brown: During baking you will see edges take on a warm, golden hue and the kitchen will fill with a toasty, garlic kissed aroma from the field garlic . Listen for a faint sizzle as moisture leaves the dough, and watch carefully in the final minutes because thin crackers can go from perfect to overdone quickly. The goal is an even, dry crispness without dark spots. If some pieces brown faster, rotate the pan midbake for even color. A common error is leaving them too long which yields a bitter taste, so remove them once they look uniformly golden.
- Remove from oven when done and cool on a wire rack before serving: Cooling on a wire rack lets air circulate beneath, preventing trapped steam that would make crackers limp. As they cool, you'll hear that satisfying snap when you test one, and the flavors settle into a clean, balanced finish. Let them rest fully before stacking to avoid sogginess, and store in an airtight container once cool. A common mistake is packing them away warm, which creates condensation and ruins the crisp texture.
Tips and Variations
These tips help you get the most from the recipe, whether you are on your first batch or the fiftieth. Small adjustments change texture and flavor significantly, so I describe practical variations that keep the spirit of the crackers intact.
- Use chilled or room temperature discard – If your sourdough discard is very cold, let it sit for 10 minutes so it combines smoothly without clumping, which helps the dough roll out evenly.
- Adjust thickness for crunch – Roll to about 1/8 inch for a crisp snap; thicker dough yields a biscuit like bite, which is a different but pleasant outcome.
- Brush sparingly – A light glaze of melted butter enhances browning and flavor, but too much will make centers soft, so apply a thin, even coat.
- Mince field garlic finely – Small, even pieces of field garlic distribute flavor without burning, preserving the fresh aromatic quality that defines the crackers.
- Store airtight after cooling – Once completely cool, place crackers in an airtight container to keep them crisp for several days, and avoid stacking warm crackers which traps steam.
Great Combinations for Sourdough Crackers with Field Garlic
These crackers can be served casually or as part of a more composed spread. Below I outline pairings, occasions, and storage ideas so you can match them to the moment. Think of them as a versatile vehicle for flavors, and choose accompaniments that complement the grassy garlic note and buttery crunch.
- Cheese boards – Pair with a selection of mild to medium cheeses for a balanced tasting, and let guests enjoy the contrast between the cracker’s tang and creamy cheeses.
- Soup accompaniment – Serve alongside brothy or creamy soups; the crisp texture provides a satisfying counterpoint to smooth textures.
- Seasonal occasions – These feel right for spring gatherings thanks to the field garlic; bring them to picnics or light holiday lunches for a fresh touch.
- Storage tips – Keep in an airtight container at room temperature after full cooling for best crunch, and refresh slightly in a warm oven for minutes if they soften.
- Snack moments – Pack a few in a small container for casual nibbling during work breaks or while reading, their lightness makes them ideal everyday treats.
- Presentation – Arrange on a wooden board with small bowls of olive oil or seasoned butter for dipping, enhancing the crackers’ rustic charm.
FAQ
Conclusion
These Sourdough Crackers with Field Garlic shine because they transform simple pantry staples into a crunchy, flavorful snack that celebrates both tang and freshness. You get a perfect balance of buttery richness, a snap that makes them addictive, and the subtle green lift of field garlic. I encourage you to try them soon, enjoy the process of rolling and cutting, and notice how a small batch can elevate snacks and gatherings with very little fuss. They are quick to make, satisfying to eat, and a lovely way to use up sourdough discard while creating something everyone will ask for again.
Sourdough Crackers with Field Garlic
Equipment
- Oven
- Baking Sheet
- Parchment Paper
- Rolling Pin
- Wire Rack
- Mixing Bowl
- Pizza Cutter
Ingredients
- 1 cup all-purpose flour Provides structure and body to the dough, forming the base matrix that holds other ingredients together. Adds lightness and a tender crumb when combined with fat and liquid, and contributes to browning during baking.
- 1/2 teaspoon of sea salt Enhances overall flavor by bringing a briny, mineral backbone that balances richness. Helps to season the dough evenly and can accentuate the savory notes of garlic and butter.
- 2 tablespoons chopped fresh field garlic (you can substitute any kind of garlic, but you won't get the same flavor) Imparts a pronounced garlicky, wild-allium aroma and a subtle vegetal bite that distinguishes the crackers. Contributes small bits of texture and fresh herbal complexity, elevating the savory profile.
- 1 cup sourdough discard Adds acidity and fermented flavor, contributing tangy depth and complexity to the crackers. Helps hydrate the flour while offering leavening potential and a characteristic sourdough aroma.
- 3/4 cup of butter Contributes rich fat for flakiness and tenderness, producing a crisp, buttery texture when baked. Aids in mouthfeel, promotes browning, and carries flavor throughout the cracker.
Instructions
- In a small bowl, combine flour, discard, and melted butter. Stir until well-combined. Preheat your oven to 350 degrees F. Line a baking sheet with parchment paper and set it aside.: The moment you mix the all purpose flour , sourdough discard , and melted butter , you will notice a change in texture from powder to a silky mass, with a faint tang and buttery scent rising. This blend forms the gluten network and distributes fat for flakiness. Work gently until just combined, because overmixing activates too much gluten and makes crackers chewy instead of crisp. If the dough feels dry, it may need a touch more sourdough discard , but add sparingly; if too sticky, rest it 5 minutes so the flour hydrates. A common mistake is heating the butter too hot then adding it, which can cook the discard slightly and alter fermentation notes, so ensure butter is warm but not scalding.
- Roll out your cracker dough until it is about 1/8-inch thick—you want this to be as thin as possible so that when they bake up, they will be crunchy like crackers! If desired, use a pizza cutter or a crinkle rotary cutter to cut them into squares (instead of using cookie cutters).: As you stir, pay attention to how the mixture comes together, becoming cohesive and slightly glossy from the butter . The sound will shift from a dry scrape to a smooth, almost slippery swoosh against the bowl, and the aroma will be a soft blend of butter and mild tang. This stage matters because uneven mixing creates pockets of flour or butter, leading to inconsistent baking. If you see dry streaks, fold them in with a spatula rather than beating, and avoid adding extra flour which will toughen the crackers. One pitfall is adding cold ingredients that arrest cohesion, so ensure components are at similar temperatures.
- Lightly brush tops with more butter or oil if desired and top with coarse sea salt.: As the oven warms to 350 degrees F , notice how the kitchen gradually becomes cozy and the air takes on a faint toasted scent. Preheating ensures immediate oven spring and predictable browning, which is crucial for thin crackers that bake quickly. If you skip this, crackers can absorb oil and become limp rather than crisp. A frequent error is placing dough in an oven that is not fully up to temperature, causing uneven texture, so use your oven thermometer if you have one.
- Bake crackers for 20-25 minutes until golden brown - remove from oven when done and cool on a wire rack before serving.: Lining with parchment prevents sticking and promotes even heat transfer, letting the bottom of each cracker crisp without burning. The parchment also helps you move large sheets in and out with ease, keeping edges intact. Press the dough gently into a sheet on top to transfer later, and avoid using greased pans which can cause spreading and irregular browning. A mistake people make is skipping parchment and then trying to pry crackers off a hot pan, which leads to breakage and lost pieces.
- Roll out your cracker dough until it is about 1/8 inch thick you want this to be as thin as possible so that when they bake up they will be crunchy like crackers: Rolling to about 1/8 inch creates the ideal balance between fragility and structure, and as you roll you'll feel the dough become almost translucent in places, an encouraging sign. Use even pressure and rotate the dough regularly to maintain uniform thickness, and dust lightly with flour to prevent sticking. You should hear a soft whisper as the rolling pin glides; if it tears, patch it gently rather than reworking the whole sheet which can over-develop gluten. A common issue is rolling unevenly which leads to some pieces burning while others remain pale, so aim for consistency across the sheet.
- If desired use a pizza cutter or a crinkle rotary cutter to cut them into squares instead of using cookie cutters: When you cut the dough with a sharp tool like a pizza cutter or crinkle rotary cutter, the edges seal cleanly and the shapes are uniform, which helps them bake uniformly. Cutting before baking also means you will have neat, easy to separate crackers when they come out, reducing breakage. Press straight down without dragging to avoid compressing the dough edges too much which can hinder lift. One trap is cutting too close together, creating tiny pieces that can overbrown, so leave small gaps between shapes.
- Lightly brush tops with more butter or oil if desired and top with coarse sea salt: Brushing with melted butter or a neutral oil adds gloss and a toasty surface flavor, while a sprinkle of coarse sea salt provides crunchy bursts of seasoning. As you brush, the crackers will gleam and you may smell the butter bloom, which amplifies the savory notes. Apply sparingly to avoid soggy spots, and press the salt lightly so it adheres. A typical mistake is overbrushing, which can make the center soft rather than crisp, so keep it light and even.
- Bake crackers for 20 to 25 minutes until golden brown: During baking you will see edges take on a warm, golden hue and the kitchen will fill with a toasty, garlic kissed aroma from the field garlic . Listen for a faint sizzle as moisture leaves the dough, and watch carefully in the final minutes because thin crackers can go from perfect to overdone quickly. The goal is an even, dry crispness without dark spots. If some pieces brown faster, rotate the pan midbake for even color. A common error is leaving them too long which yields a bitter taste, so remove them once they look uniformly golden.
- Remove from oven when done and cool on a wire rack before serving: Cooling on a wire rack lets air circulate beneath, preventing trapped steam that would make crackers limp. As they cool, you'll hear that satisfying snap when you test one, and the flavors settle into a clean, balanced finish. Let them rest fully before stacking to avoid sogginess, and store in an airtight container once cool. A common mistake is packing them away warm, which creates condensation and ruins the crisp texture.
Notes
- Use chilled or room temperature discard - If your sourdough discard is very cold, let it sit for 10 minutes so it combines smoothly without clumping, which helps the dough roll out evenly.
- Adjust thickness for crunch - Roll to about 1/8 inch for a crisp snap; thicker dough yields a biscuit like bite, which is a different but pleasant outcome.
- Brush sparingly - A light glaze of melted butter enhances browning and flavor, but too much will make centers soft, so apply a thin, even coat.
- Mince field garlic finely - Small, even pieces of field garlic distribute flavor without burning, preserving the fresh aromatic quality that defines the crackers.
- Store airtight after cooling - Once completely cool, place crackers in an airtight container to keep them crisp for several days, and avoid stacking warm crackers which traps steam.