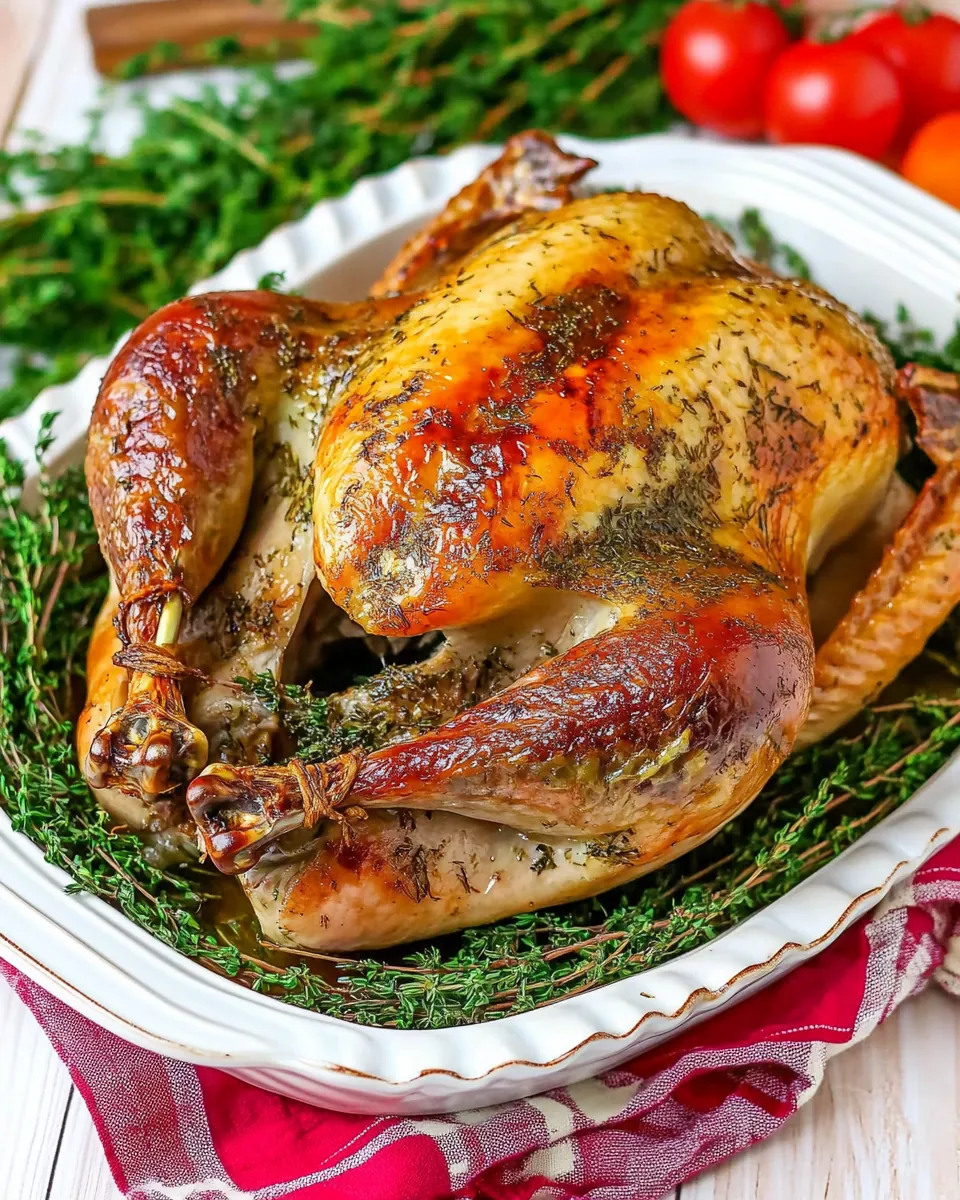
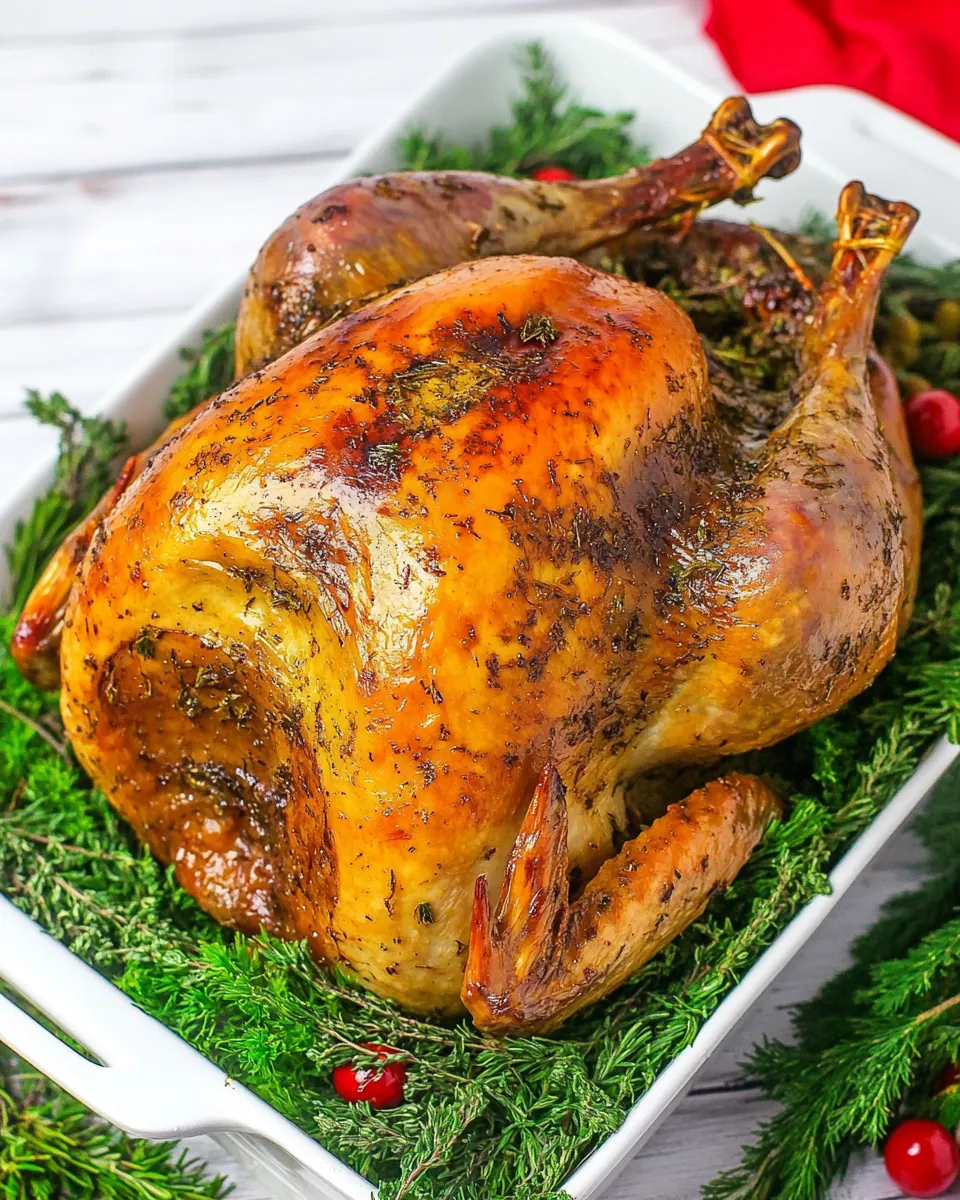
Herb Roasted Turkey
Herb Roasted Turkey has been my go to showstopper for family gatherings ever since I first tried brining a bird years ago, and that first unforgettable roast still makes me smile. I remember juggling a cooler on the back porch, the scent of smashed garlic mixing with citrus, and the quiet confidence I felt knowing the bird would come out juicy and fragrant. That moment taught me that a little planning and the right ingredients turn an ordinary holiday into something warmly memorable.
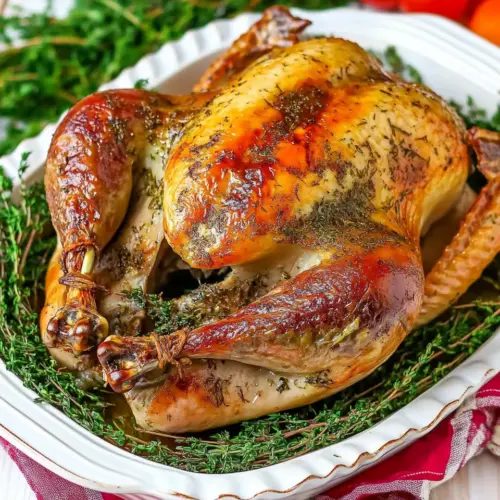
On a brisk autumn morning I often slow down with a cup of tea, thinking through the layers I want in my roast, imagining how the fresh rosemary and thyme will crisp against golden skin. Guests arrive, cabinets open, and the kitchen hum begins; the turkey becomes the anchor of conversation and the most requested slice on every plate. I still get a thrill when carving, spotting that perfect, moist white meat, and seeing the gravy glisten beside it.
Recipe Snapshot
4 hr 30 mins
60 mins
210 mins
Hard
450 kcal
American
Gluten-Free, Paleo
Dinner
Roasting pan, Roasting rack, Food processor, Meat thermometer, Large cooler or brining bucket, Saucepan
The Charm of This Herb Roasted Turkey
Deep, Infused Flavor from Brining
I love how the brine soaks right into the meat, not just seasoning the surface. The combination of salt, brown sugar, white sugar, aromatic onion and smashed garlic creates a foundation of savory sweetness that translates into every bite, keeping the turkey tender and flavorful even after long roasting.
Aromatic Herb Butter Finish
Rubbing the bird with an herbed butter blend builds a sensational outer layer. As it melts, the butter carries chopped sage, minced garlic, and leaves of rosemary and thyme into the skin, producing that irresistible browned crust and herb scent that draws everyone to the kitchen.
Layered Techniques for Reliable Results
I appreciate the mix of careful brining, a high heat blast, and then steady roasting. That initial high oven temperature helps jumpstart browning while the lower temperature that follows cooks the meat evenly. This balance prevents dried breast meat, and I always feel more confident serving slices that stay juicy.
Simple but Elegant Gravy
Spooning pan drippings into a saucepan and whisking in a roux makes a gravy that tastes like you spent all day on it, even when it came together quickly. The glossy, silky texture and savory depth come from patience and taste checks, and it elevates the whole meal without being fussy.
Versatile Presentation and Make Ahead Perks
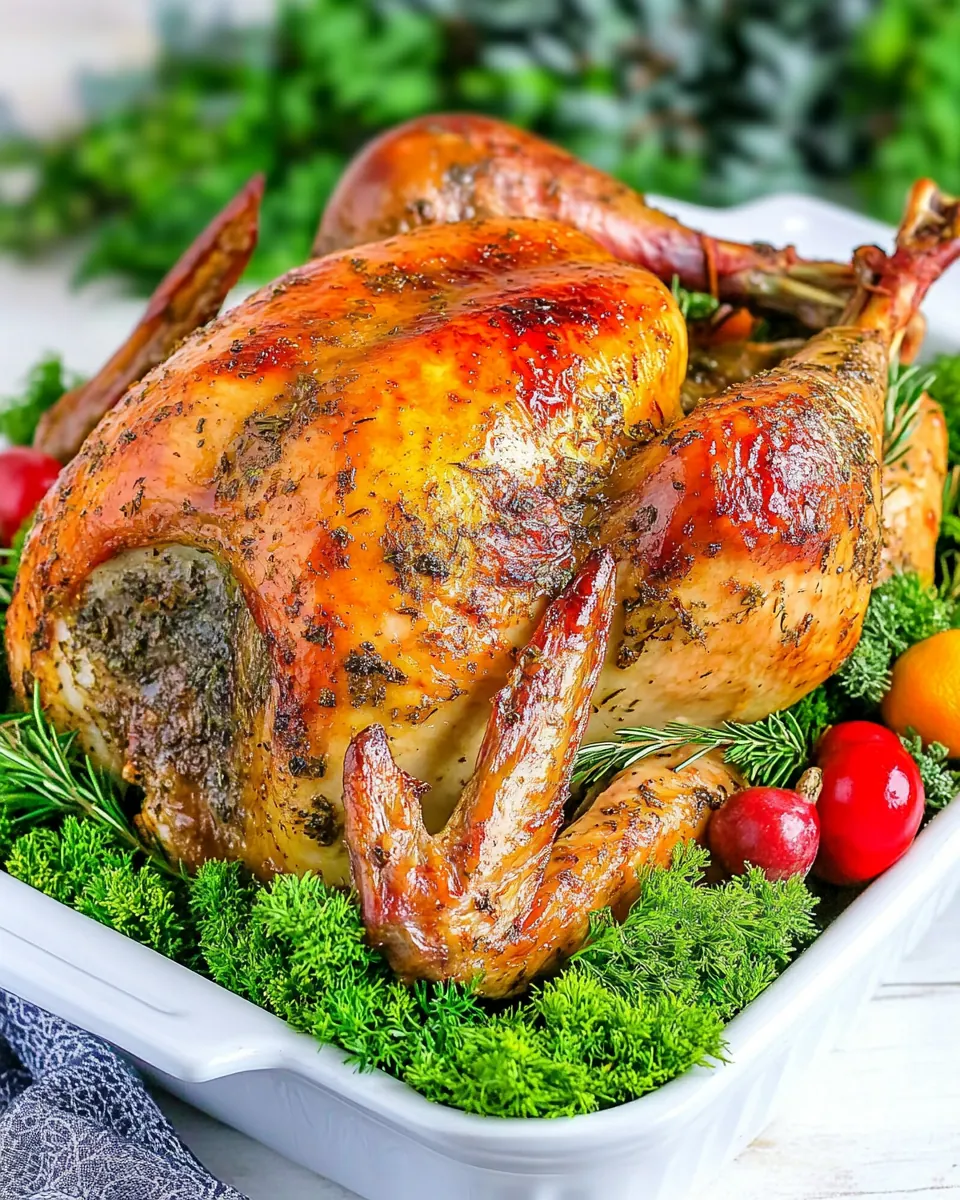
This recipe gives you flexibility. You can brine well ahead of time, prepare the herb butter in advance, and warm the gravy while guests relax. That calm leads to better hosting, and the finished platter of sliced turkey with herb sprigs always looks like a centerpiece worth photographing.
Key Ingredients for Herb Roasted Turkey
These ingredients play distinct roles in both flavor and technique. The brine components saturate the meat for juiciness, while the fresh herbs and butter create the aromatic, golden crust we crave. The aromatics inside the cavity steam the bird from within, and the broth and roux transform drippings into a silky gravy. Together they form a simple, time tested strategy to achieve a moist, savory roast.
- 1 gallon warm water more as needed: Dissolve sugars and salt in warm water to create a brine that seasons and tenderizes the turkey over several hours; adjust warm water as needed to fully submerge the bird. Add aromatics or chill before use to ensure safe brining temperatures and even flavor penetration throughout the meat.
- 1 cup brown sugar: Provide deep, molasses-like sweetness and help balance savory flavors when added to the brine; brown sugar also promotes attractive browning on the skin during roasting. Measure accurately to maintain proper brine concentration and avoid overly sweet results.
- 1 cup white sugar: Add clean, neutral sweetness to the brine to complement brown sugar and help with caramelization of the skin while roasting; white sugar enhances balanced sweetness without altering savory notes. Use together with brown sugar for layered sweetness and consistent brining performance.
- 1 cup salt: Create the primary curing agent in the brine to season and tenderize the turkey by drawing moisture and enhancing protein structure; salt concentration is critical for both safety and flavor. Dissolve fully and measure precisely to prevent over-salting or under-seasoning.
- 2 large red onions roughly chopped: Contribute robust, sweet-onion aromatics to the brine or roasting cavity to infuse savory layers into the meat; rough chopping increases surface area for better flavor release. Use in both brine and roasting pan for complementary aromatic depth.
- 8 cloves garlic smashed: Provide pungent, savory aromatics to the brine and cavity; smashing releases essential oils and increases infusion into the meat. Distribute evenly to enhance overall garlic presence without overpowering other herbs.
- 2 tablespoons whole peppercorns: Offer piquant, warm spice notes to the brine, adding subtle complexity and a peppery undertone that complements herbs; whole peppercorns are easy to strain from the brine afterward. Include for balanced heat and aromatic depth without grinding into the mix.
- 2 tablespoons fresh rosemary roughly chopped: Add pine-like, resinous herb flavor and aromatics when roughly chopped for brining or rubbing; fresh rosemary helps build savory complexity and pairs well with other herbs and citrus. Use rough chopping to release oils while keeping some texture.
- 2 tablespoons fresh thyme: Contribute bright, savory, slightly floral notes and visual appeal; fresh thyme works well in brine or in herb butter under the skin to impart evenly distributed flavor. Include sprigs whole or chopped depending on desired intensity and removal method.
- 1 lemon juiced: Provide bright, acidic balance when juiced into the brine to enhance protein breakdown and complement herbs; lemon juice adds freshness and helps tenderize the turkey. Use fresh juice for best flavor and acidity control.
- 15 pound turkey: Serve as the main protein centerpiece that will be brined, seasoned, and roasted to serve a large gathering; weight determines brining time, oven temperature, and cooking duration. Plan trussing, stuffing, and resting time according to size for safe, even cooking.
- 12 tablespoons butter softened: Add rich, silky fat when softened and spread under skin or used in compound butter to baste and brown the turkey while keeping meat moist. Soften to a workable texture for easy blending with herbs and seasoning.
- 6 cloves garlic minced: Provide concentrated garlic flavor when minced and mixed into herb butter or rubs; minced garlic disperses evenly to penetrate meat and enrich savory notes. Combine with softened butter for an aromatic compound spread under the skin.
- 2 tablespoons fresh sage leaves finely chopped: Add earthy, savory sage flavor when finely chopped to complement poultry and other herbs in compound butter or stuffing; finely chopping ensures even distribution and maximum surface contact. Use sparingly to avoid overpowering delicate flavors.
- 2 tablespoons fresh rosemary finely chopped: Introduce additional rosemary flavor in finely chopped form for incorporation into compound butter or stuffing; finely chopping releases oils for immediate flavor impact. Layer with other herbs for balanced herbal complexity.
- 2 tablespoons fresh thyme leaves finely chopped: Provide concentrated thyme flavor with tender leaves finely chopped for mixing into butter or rubs; thyme adds subtle floral, savory notes that marry well with poultry. Use chopped leaves to avoid woody stems in the final texture.
- 2 tablespoons fresh parsley leaves finely chopped: Offer fresh, bright herbaceousness with parsley leaves finely chopped to add color and mild green flavor to butter, stuffing, or gravy; parsley balances richer tastes and refreshes the palate. Finely chopping ensures even distribution.
- 2 tablespoons fresh basil leaves finely chopped: Bring sweet, slightly peppery notes with basil leaves finely chopped to add a fresh aromatic lift when mixed into compound butter or stuffing; basil pairs surprisingly well with citrus and garlic. Chop finely to integrate without large leaf pieces.
- 1 tablespoon lemon zest: Provide concentrated citrus aroma and bright flavor when zested; lemon zest adds sharp, fragrant oils that lift and cut through richness in herb butter and brines. Use fresh zest to maximize aromatic potency and avoid bitter pith.
- 1 teaspoon paprika: Contribute warm, slightly smoky color and mild depth when applied as a spice to the turkey skin or rub; paprika enhances appearance and subtle flavor without heat. Sprinkle evenly to create appealing roasted color.
- Salt and pepper to taste: Season to personal preference during and after cooking to balance flavors and enhance overall savory profile; add salt and pepper to taste at multiple stages for control. Taste juices or finished meat before final seasoning adjustments.
- 1 onion peeled and quartered: Give aromatic base and moisture absorption when peeled and quartered into the roasting cavity or pan; onion quarters release savory-sweet juices that flavor drippings and stuffing. Place to support even cooking and provide aromatic steam inside the bird.
- 1 lemon washed quartered: Add bright citrus aroma and subtle acidity when washed and quartered for the cavity or roasting pan; quartered lemon contributes both flavor and steam to the roasting environment. Use washed fruit to avoid unwanted residues and to freshen the bird's interior.
- 4 whole garlic cloves: Provide mellow roasted garlic flavor when added whole to the cavity or pan; whole cloves soften and sweeten with roasting, lending subtle depth to drippings and meat. Position strategically to avoid accidental biting into large pungent pieces.
- 1 cup assorted herbs whole sprigs from the ones you used above to stuff inside the turkey: Offer concentrated herbal aroma when whole sprigs are used to stuff inside the turkey; assorted whole sprigs release fragrant oils during roasting to infuse the bird from the inside. Use sprigs of previously used herbs for cohesive flavor that can be removed before carving.
- 3 cups chicken broth: Supply a savory liquid base for basting and pan sauce development; chicken broth adds flavor and moisture to the roasting pan while helping deglaze drippings for gravy. Monitor levels and add as needed to prevent burning of pan juices.
- 2 tablespoons unsalted butter: Add a small amount of butter to enrich gravies or baste the turkey, providing silkiness and additional flavor; unsalted butter allows precise salt control in the final sauce. Melt gently and whisk into pan juices for a glossy finish.
- 2 tablespoons all-purpose flour of gluten-free: Create a thickening agent when combined with fat and cooked into a roux to produce a smooth gravy; all-purpose flour can be substituted with gluten–free alternatives if needed. Cook the flour briefly to remove raw taste before adding broth for proper texture.
- 2 cups chicken broth: Provide additional liquid for gravy preparation and to adjust consistency while deglazing the roasting pan; extra chicken broth ensures sufficient volume and depth of flavor for sauces. Warm before adding to roux to prevent lumps.
- Assorted herbs: Act as complementary garnishes or aromatics to finish and present the dish; assorted herbs scattered after carving provide fresh color and flavor echoes. Use the same herb varieties used in cooking to maintain cohesive flavor profiles.
- Fresh cranberries: Contribute bright, tart-sweet notes when used as garnishes or in side preparations; fresh cranberries can be cooked into sauces or left whole for contrast. Include sparingly to avoid overwhelming the savory elements of the meal.
- Apples, pears, grapes: Provide seasonal fruit accents for presentation or a subtle sweet component in side dishes; apples, pears, and grapes can be roasted or served fresh to complement turkey richness. Choose ripe, firm fruit for best texture and balance.
The Method for Herb Roasted Turkey
These steps guide you from brine to carved platter with sensory cues and practical troubleshooting. I wrote each core instruction from the original directions and expanded it so you know what to expect at every stage, how it should look and smell, and what common mistakes to sidestep.
- Place a gallon of warm water in a large clean bucket or cooler that would fit the bird.: The first sensation is the slight steam rising from the warm water as you pour it into a clean, food safe cooler; this warmth helps dissolve the brine ingredients quickly. You should notice no gritty salt left floating after stirring because the salts and sugars should dissolve fully in warm liquid. It's important the container is large enough so the turkey can be fully submerged without folding, otherwise the brine will not penetrate evenly. A common error is using a container that is too small, which leads to uneven brining and blotchy seasoning. If the bucket feels flimsy, transfer to a sturdier vessel to avoid spills and contamination.
- Add the rest of the ingredients and stir to dissolve the salt and sugar.: As you add salt , brown sugar , white sugar , onion , smashed garlic , peppercorns , and herbs the mixture will smell layered with sweet, savory, and herbal notes. Use a long handled spoon to stir until the granules are fully dissolved and the liquid looks clear rather than cloudy from undissolved bits. This step matters because undissolved crystals can cause spots of over salting on the meat. Be careful not to over stir aggressively, which can introduce too much air; gentle agitation is enough to incorporate everything.
- Carefully submerge the turkey in the brine. Add more water as needed to make sure the brine covers the turkey entirely.: You will feel the weight of the turkey as you lower it, and the brine should lap over the breast and thighs completely. If part of the bird sits above the surface, add cold water gradually to top off and ensure full coverage. Avoid using hot water that could partially cook exposed areas. A frequent mistake is assuming partial coverage is fine; that causes inconsistent seasoning and texture, so check all sides and rotate if necessary.
- Cover with a lid or plastic wrap and place in the refrigerator for 1 to 3 days.: The enclosed smell in the fridge will be aromatic but not overpowering, as the onion and garlic infuse slowly into the bird. Chilling for extended periods improves flavor but keep the container sealed to prevent cross contamination and fridge odors. Make sure your refrigerator can maintain a safe temperature near 40 degrees F, because warmer temps risk bacterial growth. Avoid leaving the brine at room temperature, which is unsafe.
- The brining time depends on the size of the turkey. For a turkey weighing 15 pounds or less, brine it for 24 to 36 hours. If the turkey is larger than 15 pounds, brine it for up to 3 days.: You will notice the bird becoming subtly seasoned the longer it sits, and texture will become more tender due to salt’s effect on muscle proteins. Follow the size based timing so you do not over brine smaller birds, which can make them too salty or mushy. A common pitfall is applying the same long brine to every size; match time to weight for best results.
- If your turkey is much smaller and you want to brine it for a longer time, reduce the salt to 1/2 cup.: When brining smaller birds, this reduced salt prevents over seasoning while still allowing prolonged flavor infusion. The tactile cue is the bird will not taste overtly salty when you sample the outer surface after rinsing. Never skip rinsing entirely if salt levels are high, since excess will remain on the skin. Overlooking salt reduction on smaller birds often leads to an unpleasantly salty final product.
- Take the turkey out of the brine and place it on a rack inside a roasting pan in the fridge for 3-5 hours to dry thoroughly. Pat it dry with paper towels as well.: When you remove the bird, the surface should feel cool and slightly tacky; patting it dry removes excess moisture that would otherwise steam rather than crisp during roasting. The fridge drying step tightens the skin and produces a crisper exterior when roasted. A misstep is skipping the drying time, which results in a steamed, less browned skin. Use clean paper towels and change them if they become saturated.
- Preheat the oven to 450 degrees F.: You will hear the oven click and feel a burst of hot air when you open the door to place the pan inside, signaling the start of surface browning. The initial high heat jumpstarts Maillard reactions for color and flavor. Make sure the rack is centered so heat circulates evenly. A common issue is not preheating fully, which prevents the early browning that sets the roast's crust.
- Remove the turkey from the refrigerator and let it stand at room temperature for 30 minutes.: Bringing the cold turkey closer to room temperature reduces shock when it hits the high heat, promoting even cooking; you should feel the chill dissipate but the bird should not be warm. This short rest also helps the skin relax so your trussing and butter application go smoothly. Do not leave the turkey out longer than recommended, because extended exposure risks bacterial growth. If the kitchen is particularly warm, shorten this rest slightly.
- Tuck the turkey wings under the body. Season the cavity of the turkey with salt and pepper, and then stuff the bird with the quartered onion, quartered lemon, whole garlic cloves and assorted herbs sprigs.: Tucking the wings creates a compact shape that browns more uniformly. When you season the cavity and add aromatics, lift the scents as you work; the lemon and whole garlic will perfume the steam released during roasting. Stuff loosely to allow heat flow; over stuffing traps heat and affects cooking times. A typical error is packing the cavity too tightly, which leads to uneven internal cooking.
- Tie the turkey legs together with kitchen twine.: Trussing gives the bird a tidy silhouette and helps the legs and breasts cook at a similar rate. When tied, the turkey should feel secure and compact, not constricted. Use heat safe twine and knot firmly but not overly tight. Skipping trussing can lead to flopping legs and uneven browning.
- Add the butter, minced garlic, sage, rosemary, thyme, parsley, lemon zest, basil, paprika, and salt and pepper to taste to the bowl of a food processor and blend until smooth.: As you pulse the mixture it should transform into a fragrant, paste like butter that smells herbaceous and citrus bright. This emulsified butter spreads easily, carrying flavors deep under the skin and across the surface. Using room temperature butter ensures a smooth paste; if ingredients are too cold the blend will be lumpy. Avoid over processing into a liquid, you want a spreadable consistency.
- Thoroughly rub the butter mixture over the turkey's skin and gently pull up the breast skin to apply some underneath. Season with salt and pepper.: Pressing the herb butter into the skin makes it adhere and melt during roasting, releasing aromatic oils and improving browning. When you slide fingers under the breast skin, you will feel a cool cushion ready for butter; apply evenly for consistent flavor. Leaving the butter only on top results in less flavor integration, so be generous underneath. Avoid tearing the skin while lifting, as it will compromise moisture retention.
- Heat chicken broth either in a medium saucepan or in the microwave and set aside.: Warm chicken broth used for basting should shimmer slightly and give off savory steam, which helps temper the oven when you baste. Keep it warm throughout roasting; cold broth lowers oven temperature and interrupts cooking. A mistake is forgetting to heat enough liquid, forcing you to add cold broth mid roast which can affect timing.
- Place the turkey in a large, lightly greased roasting pan, preferably on a rack inside the pan, and bake for 1 hour at 450 degrees F.: When the bird hits the hot oven you should hear a faint sizzle as the butter begins to render and the skin starts to brown. This first hour builds a caramelized crust and sets the exterior texture. Use a rack to allow hot air to circulate and fat to drip away. If the pan is overcrowded with vegetables or foil, air circulation will be impaired and browning will suffer.
- Reduce the oven temperature to 350 degrees Fahrenheit and continue roasting the turkey until it is fully cooked. In the meantime, baste the bird every 30 to 40 minutes with warm chicken broth. The turkey will take approximately 3 hours to bake. If the bird begins to brown too quickly, cover it with foil; uncover it during the last 30 minutes of roasting.: Lowering the temperature encourages even cooking all the way through while periodic basting adds moisture and flavor. You will notice the skin deepen to a rich gold, and the aroma will become intensely savory. Covering with foil tames excessive browning, but remove it near the end to regain crispness. One trap is basting too often which drastically lowers oven temperature, so follow the recommended interval.
- The turkey is done when a meat thermometer inserted into the thickest part of the bird's thigh reads 165 degrees F.: The definitive cue is the probe slipping into tender meat and the digital readout hitting 165 degrees F . The juices should run clear, not pink. Leaving a thermometer in while resting is fine, but do not rely on color alone; temperature is the accurate indicator. Overcooking past this temperature will dry the meat, so pull the bird promptly.
- Remove it from the oven and cover it loosely with foil. Let it rest for 30 minutes before slicing and serving.: Resting allows juices to redistribute, so when you slice the meat it will remain moist rather than spilling savory liquids on the cutting board. The bird will continue to carry residual heat and reach a perfect serving temperature during this interval. Cutting too early causes juicy loss, so be patient for the best texture and flavor.
- Strain the drippings into a saucepan over medium heat.: The strained drippings provide a concentrated, savory base for gravy, with a glossy sheen and intense aroma. Removing solids prevents graininess in the final sauce. A common oversight is not skimming excess fat first, which can leave the gravy greasy. Use a fine mesh strainer for a clean result.
- Make a roux from 2 tablespoons of butter and two tablespoons of flour, and add it to the saucepan. Stir until the mixture thickens.: As the butter melts and the flour cooks, the mixture will bubble and smell toasty, losing any raw flour scent. This caramelized base builds body for a velvety gravy. Cook the roux just long enough to eliminate rawness, but not so long it darkens excessively, which can shift flavors bitterly.
- Slowly whisk in 1-2 cups of turkey or chicken broth until smooth, and simmer. Taste and season the gravy with salt and pepper.: As you whisk in the warm chicken broth the sauce will become glossy and thick, coating the back of a spoon. Simmering melds flavors and reduces any thinness. Always taste before final seasoning, since the drippings can be quite salty already. A frequent error is adding too much salt at this stage; adjust gradually and rely on tasting.
Tips and Tricks about Herb Roasted Turkey
This collection of tips expands the notes and practical adjustments I use every holiday. They cover timing, temperature, and presentation to help you feel confident from brine to carving.
- Follow weight based roasting guidance, use the weight specific timing in the notes to match the initial high heat and the subsequent lower temperature to your bird size, preventing over or under cooking.
- Prepare the herb butter ahead, blending the butter and herbs ahead of time saves stress on roast day and lets flavors meld for a more cohesive rub.
- Keep a well calibrated thermometer, check the thigh temperature rather than relying on time alone, since oven variations change cook times substantially.
- Don’t skip the fridge drying step, an overnight or several hour dry in the fridge tightens skin and leads to a crisp, bronzed exterior when you roast.
- Warm your basting liquid so the oven recovers quickly after each baste, avoiding long drops in temperature that extend total cook time.
Serving Options for Herb Roasted Turkey
After the long careful process of brining and roasting, how you serve the bird matters. Below you will find practical serving suggestions, side pairings, and storage ideas that respect the recipe’s flavors and create a memorable meal.
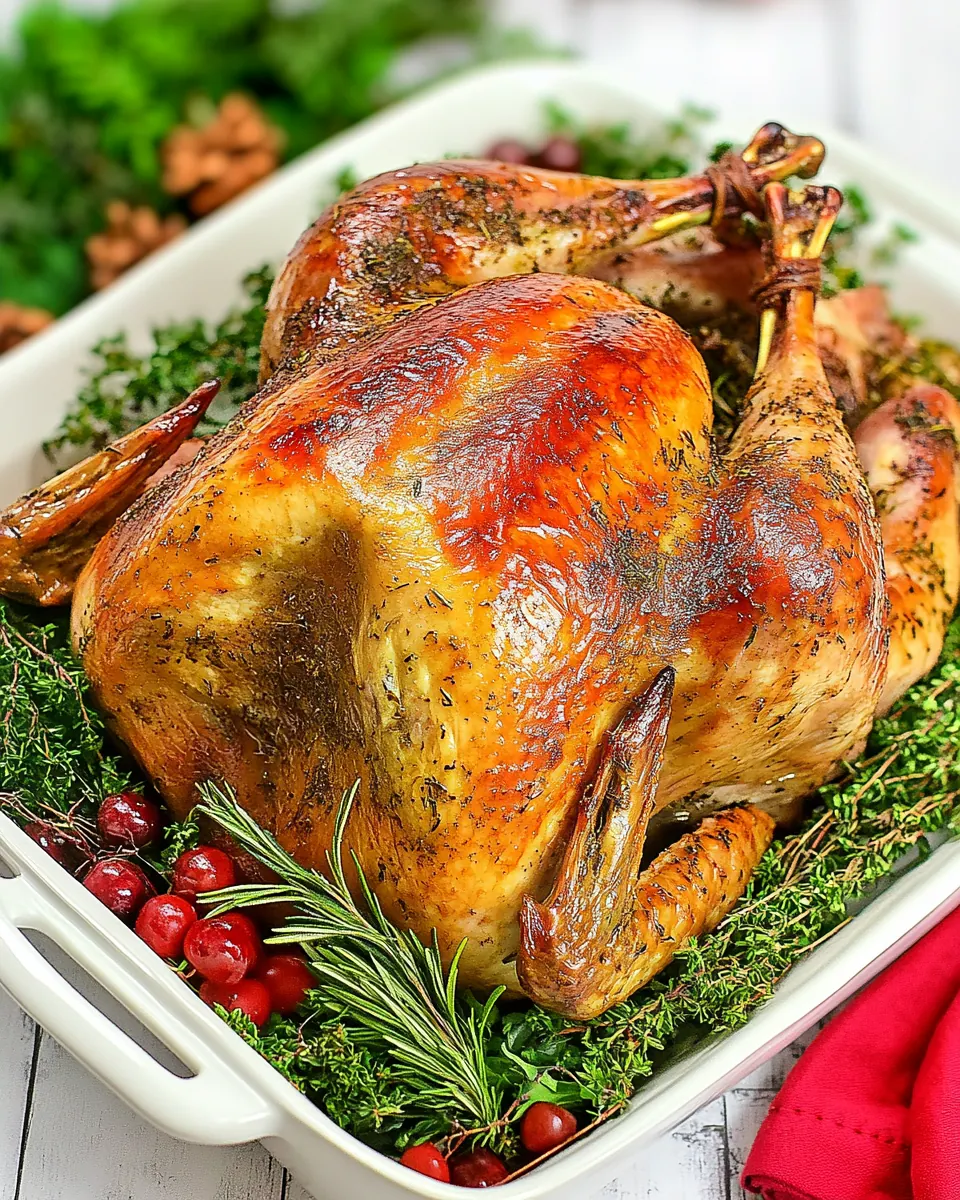
- Classic holiday platter, arrange thick carved slices of dark and white meat on a warmed platter with sprigs of rosemary, thyme, and quartered lemon for color and aroma.
- Warm gravy service, offer the freshly made gravy in a warmed boat beside the bird so guests can spoon as desired, ensuring plates stay moist and glossy.
- Seasonal sides, pair with roasted root vegetables and a tart cranberry compote made from the fresh cranberries listed, balancing richness with acidity.
- Occasion ideas, this roast is ideal for Thanksgiving and fall gatherings, but it also works for any large dinner where a comforting centerpiece is desired.
- Leftover storage, cool carved meat promptly, store in airtight containers, and keep refrigerated for up to four days; freeze portions if you need longer storage.
- Reheating tips, gently reheat slices in a covered dish with a splash of warm broth to preserve moisture rather than using high dry heat which can dry the meat.
FAQ
Conclusion
This Herb Roasted Turkey stands out because it combines a thoughtful brine with an herbaceous butter rub to produce moist, flavorful meat and a beautifully browned crust. Try it to experience how simple techniques like brining, a high heat sear, and a patient roast deliver reliably impressive results. Make time to rest the bird before carving, serve with warm gravy, and enjoy the satisfied smiles at the table as you savor the fruits of careful preparation and good company.
Herb Roasted Turkey
Equipment
- Roasting Pan
- Roasting rack
- Food Processor
- Meat Thermometer
- Large cooler or brining bucket
- Saucepan
Ingredients
- 1 gallon warm water more as needed Dissolve sugars and salt in warm water to create a brine that seasons and tenderizes the turkey over several hours; adjust warm water as needed to fully submerge the bird. Add aromatics or chill before use to ensure safe brining temperatures and even flavor penetration throughout the meat.
- 1 cup brown sugar Provide deep, molasses-like sweetness and help balance savory flavors when added to the brine; brown sugar also promotes attractive browning on the skin during roasting. Measure accurately to maintain proper brine concentration and avoid overly sweet results.
- 1 cup white sugar Add clean, neutral sweetness to the brine to complement brown sugar and help with caramelization of the skin while roasting; white sugar enhances balanced sweetness without altering savory notes. Use together with brown sugar for layered sweetness and consistent brining performance.
- 1 cup salt Create the primary curing agent in the brine to season and tenderize the turkey by drawing moisture and enhancing protein structure; salt concentration is critical for both safety and flavor. Dissolve fully and measure precisely to prevent over-salting or under-seasoning.
- 2 large red onions roughly chopped Contribute robust, sweet-onion aromatics to the brine or roasting cavity to infuse savory layers into the meat; rough chopping increases surface area for better flavor release. Use in both brine and roasting pan for complementary aromatic depth.
- 8 cloves garlic smashed Provide pungent, savory aromatics to the brine and cavity; smashing releases essential oils and increases infusion into the meat. Distribute evenly to enhance overall garlic presence without overpowering other herbs.
- 2 tablespoons whole peppercorns Offer piquant, warm spice notes to the brine, adding subtle complexity and a peppery undertone that complements herbs; whole peppercorns are easy to strain from the brine afterward. Include for balanced heat and aromatic depth without grinding into the mix.
- 2 tablespoons fresh rosemary roughly chopped Add pine-like, resinous herb flavor and aromatics when roughly chopped for brining or rubbing; fresh rosemary helps build savory complexity and pairs well with other herbs and citrus. Use rough chopping to release oils while keeping some texture.
- 2 tablespoons fresh thyme Contribute bright, savory, slightly floral notes and visual appeal; fresh thyme works well in brine or in herb butter under the skin to impart evenly distributed flavor. Include sprigs whole or chopped depending on desired intensity and removal method.
- 1 lemon juiced Provide bright, acidic balance when juiced into the brine to enhance protein breakdown and complement herbs; lemon juice adds freshness and helps tenderize the turkey. Use fresh juice for best flavor and acidity control.
- 15 pound turkey Serve as the main protein centerpiece that will be brined, seasoned, and roasted to serve a large gathering; weight determines brining time, oven temperature, and cooking duration. Plan trussing, stuffing, and resting time according to size for safe, even cooking.
- 12 tablespoons butter softened Add rich, silky fat when softened and spread under skin or used in compound butter to baste and brown the turkey while keeping meat moist. Soften to a workable texture for easy blending with herbs and seasoning.
- 6 cloves garlic minced Provide concentrated garlic flavor when minced and mixed into herb butter or rubs; minced garlic disperses evenly to penetrate meat and enrich savory notes. Combine with softened butter for an aromatic compound spread under the skin.
- 2 tablespoons fresh sage leaves finely chopped Add earthy, savory sage flavor when finely chopped to complement poultry and other herbs in compound butter or stuffing; finely chopping ensures even distribution and maximum surface contact. Use sparingly to avoid overpowering delicate flavors.
- 2 tablespoons fresh rosemary finely chopped Introduce additional rosemary flavor in finely chopped form for incorporation into compound butter or stuffing; finely chopping releases oils for immediate flavor impact. Layer with other herbs for balanced herbal complexity.
- 2 tablespoons fresh thyme leaves finely chopped Provide concentrated thyme flavor with tender leaves finely chopped for mixing into butter or rubs; thyme adds subtle floral, savory notes that marry well with poultry. Use chopped leaves to avoid woody stems in the final texture.
- 2 tablespoons fresh parsley leaves finely chopped Offer fresh, bright herbaceousness with parsley leaves finely chopped to add color and mild green flavor to butter, stuffing, or gravy; parsley balances richer tastes and refreshes the palate. Finely chopping ensures even distribution.
- 2 tablespoons fresh basil leaves finely chopped Bring sweet, slightly peppery notes with basil leaves finely chopped to add a fresh aromatic lift when mixed into compound butter or stuffing; basil pairs surprisingly well with citrus and garlic. Chop finely to integrate without large leaf pieces.
- 1 tablespoon lemon zest Provide concentrated citrus aroma and bright flavor when zested; lemon zest adds sharp, fragrant oils that lift and cut through richness in herb butter and brines. Use fresh zest to maximize aromatic potency and avoid bitter pith.
- 1 teaspoon paprika Contribute warm, slightly smoky color and mild depth when applied as a spice to the turkey skin or rub; paprika enhances appearance and subtle flavor without heat. Sprinkle evenly to create appealing roasted color.
- Salt and pepper to taste Season to personal preference during and after cooking to balance flavors and enhance overall savory profile; add salt and pepper to taste at multiple stages for control. Taste juices or finished meat before final seasoning adjustments.
- 1 onion peeled and quartered Give aromatic base and moisture absorption when peeled and quartered into the roasting cavity or pan; onion quarters release savory-sweet juices that flavor drippings and stuffing. Place to support even cooking and provide aromatic steam inside the bird.
- 1 lemon washed quartered Add bright citrus aroma and subtle acidity when washed and quartered for the cavity or roasting pan; quartered lemon contributes both flavor and steam to the roasting environment. Use washed fruit to avoid unwanted residues and to freshen the bird's interior.
- 4 whole garlic cloves Provide mellow roasted garlic flavor when added whole to the cavity or pan; whole cloves soften and sweeten with roasting, lending subtle depth to drippings and meat. Position strategically to avoid accidental biting into large pungent pieces.
- 1 cup assorted herbs whole sprigs from the ones you used above to stuff inside the turkey Offer concentrated herbal aroma when whole sprigs are used to stuff inside the turkey; assorted whole sprigs release fragrant oils during roasting to infuse the bird from the inside. Use sprigs of previously used herbs for cohesive flavor that can be removed before carving.
- 3 cups chicken broth Supply a savory liquid base for basting and pan sauce development; chicken broth adds flavor and moisture to the roasting pan while helping deglaze drippings for gravy. Monitor levels and add as needed to prevent burning of pan juices.
- 2 tablespoons unsalted butter Add a small amount of butter to enrich gravies or baste the turkey, providing silkiness and additional flavor; unsalted butter allows precise salt control in the final sauce. Melt gently and whisk into pan juices for a glossy finish.
- 2 tablespoons all-purpose flour of gluten-free Create a thickening agent when combined with fat and cooked into a roux to produce a smooth gravy; all-purpose flour can be substituted with gluten-free alternatives if needed. Cook the flour briefly to remove raw taste before adding broth for proper texture.
- 2 cups chicken broth Provide additional liquid for gravy preparation and to adjust consistency while deglazing the roasting pan; extra chicken broth ensures sufficient volume and depth of flavor for sauces. Warm before adding to roux to prevent lumps.
- Assorted herbs Act as complementary garnishes or aromatics to finish and present the dish; assorted herbs scattered after carving provide fresh color and flavor echoes. Use the same herb varieties used in cooking to maintain cohesive flavor profiles.
- Fresh cranberries Contribute bright, tart-sweet notes when used as garnishes or in side preparations; fresh cranberries can be cooked into sauces or left whole for contrast. Include sparingly to avoid overwhelming the savory elements of the meal.
- Apples, pears, grapes Provide seasonal fruit accents for presentation or a subtle sweet component in side dishes; apples, pears, and grapes can be roasted or served fresh to complement turkey richness. Choose ripe, firm fruit for best texture and balance.
Instructions
- Place a gallon of warm water in a large clean bucket or cooler that would fit the bird.: The first sensation is the slight steam rising from the warm water as you pour it into a clean, food safe cooler; this warmth helps dissolve the brine ingredients quickly. You should notice no gritty salt left floating after stirring because the salts and sugars should dissolve fully in warm liquid. It's important the container is large enough so the turkey can be fully submerged without folding, otherwise the brine will not penetrate evenly. A common error is using a container that is too small, which leads to uneven brining and blotchy seasoning. If the bucket feels flimsy, transfer to a sturdier vessel to avoid spills and contamination.
- Add the rest of the ingredients and stir to dissolve the salt and sugar.: As you add salt , brown sugar , white sugar , onion , smashed garlic , peppercorns , and herbs the mixture will smell layered with sweet, savory, and herbal notes. Use a long handled spoon to stir until the granules are fully dissolved and the liquid looks clear rather than cloudy from undissolved bits. This step matters because undissolved crystals can cause spots of over salting on the meat. Be careful not to over stir aggressively, which can introduce too much air; gentle agitation is enough to incorporate everything.
- Carefully submerge the turkey in the brine. Add more water as needed to make sure the brine covers the turkey entirely.: You will feel the weight of the turkey as you lower it, and the brine should lap over the breast and thighs completely. If part of the bird sits above the surface, add cold water gradually to top off and ensure full coverage. Avoid using hot water that could partially cook exposed areas. A frequent mistake is assuming partial coverage is fine; that causes inconsistent seasoning and texture, so check all sides and rotate if necessary.
- Cover with a lid or plastic wrap and place in the refrigerator for 1 to 3 days.: The enclosed smell in the fridge will be aromatic but not overpowering, as the onion and garlic infuse slowly into the bird. Chilling for extended periods improves flavor but keep the container sealed to prevent cross contamination and fridge odors. Make sure your refrigerator can maintain a safe temperature near 40 degrees F, because warmer temps risk bacterial growth. Avoid leaving the brine at room temperature, which is unsafe.
- The brining time depends on the size of the turkey. For a turkey weighing 15 pounds or less, brine it for 24 to 36 hours. If the turkey is larger than 15 pounds, brine it for up to 3 days.: You will notice the bird becoming subtly seasoned the longer it sits, and texture will become more tender due to salt’s effect on muscle proteins. Follow the size based timing so you do not over brine smaller birds, which can make them too salty or mushy. A common pitfall is applying the same long brine to every size; match time to weight for best results.
- If your turkey is much smaller and you want to brine it for a longer time, reduce the salt to 1/2 cup.: When brining smaller birds, this reduced salt prevents over seasoning while still allowing prolonged flavor infusion. The tactile cue is the bird will not taste overtly salty when you sample the outer surface after rinsing. Never skip rinsing entirely if salt levels are high, since excess will remain on the skin. Overlooking salt reduction on smaller birds often leads to an unpleasantly salty final product.
- Take the turkey out of the brine and place it on a rack inside a roasting pan in the fridge for 3-5 hours to dry thoroughly. Pat it dry with paper towels as well.: When you remove the bird, the surface should feel cool and slightly tacky; patting it dry removes excess moisture that would otherwise steam rather than crisp during roasting. The fridge drying step tightens the skin and produces a crisper exterior when roasted. A misstep is skipping the drying time, which results in a steamed, less browned skin. Use clean paper towels and change them if they become saturated.
- Preheat the oven to 450 degrees F.: You will hear the oven click and feel a burst of hot air when you open the door to place the pan inside, signaling the start of surface browning. The initial high heat jumpstarts Maillard reactions for color and flavor. Make sure the rack is centered so heat circulates evenly. A common issue is not preheating fully, which prevents the early browning that sets the roast's crust.
- Remove the turkey from the refrigerator and let it stand at room temperature for 30 minutes.: Bringing the cold turkey closer to room temperature reduces shock when it hits the high heat, promoting even cooking; you should feel the chill dissipate but the bird should not be warm. This short rest also helps the skin relax so your trussing and butter application go smoothly. Do not leave the turkey out longer than recommended, because extended exposure risks bacterial growth. If the kitchen is particularly warm, shorten this rest slightly.
- Tuck the turkey wings under the body. Season the cavity of the turkey with salt and pepper, and then stuff the bird with the quartered onion, quartered lemon, whole garlic cloves and assorted herbs sprigs.: Tucking the wings creates a compact shape that browns more uniformly. When you season the cavity and add aromatics, lift the scents as you work; the lemon and whole garlic will perfume the steam released during roasting. Stuff loosely to allow heat flow; over stuffing traps heat and affects cooking times. A typical error is packing the cavity too tightly, which leads to uneven internal cooking.
- Tie the turkey legs together with kitchen twine.: Trussing gives the bird a tidy silhouette and helps the legs and breasts cook at a similar rate. When tied, the turkey should feel secure and compact, not constricted. Use heat safe twine and knot firmly but not overly tight. Skipping trussing can lead to flopping legs and uneven browning.
- Add the butter, minced garlic, sage, rosemary, thyme, parsley, lemon zest, basil, paprika, and salt and pepper to taste to the bowl of a food processor and blend until smooth.: As you pulse the mixture it should transform into a fragrant, paste like butter that smells herbaceous and citrus bright. This emulsified butter spreads easily, carrying flavors deep under the skin and across the surface. Using room temperature butter ensures a smooth paste; if ingredients are too cold the blend will be lumpy. Avoid over processing into a liquid, you want a spreadable consistency.
- Thoroughly rub the butter mixture over the turkey's skin and gently pull up the breast skin to apply some underneath. Season with salt and pepper.: Pressing the herb butter into the skin makes it adhere and melt during roasting, releasing aromatic oils and improving browning. When you slide fingers under the breast skin, you will feel a cool cushion ready for butter; apply evenly for consistent flavor. Leaving the butter only on top results in less flavor integration, so be generous underneath. Avoid tearing the skin while lifting, as it will compromise moisture retention.
- Heat chicken broth either in a medium saucepan or in the microwave and set aside.: Warm chicken broth used for basting should shimmer slightly and give off savory steam, which helps temper the oven when you baste. Keep it warm throughout roasting; cold broth lowers oven temperature and interrupts cooking. A mistake is forgetting to heat enough liquid, forcing you to add cold broth mid roast which can affect timing.
- Place the turkey in a large, lightly greased roasting pan, preferably on a rack inside the pan, and bake for 1 hour at 450 degrees F.: When the bird hits the hot oven you should hear a faint sizzle as the butter begins to render and the skin starts to brown. This first hour builds a caramelized crust and sets the exterior texture. Use a rack to allow hot air to circulate and fat to drip away. If the pan is overcrowded with vegetables or foil, air circulation will be impaired and browning will suffer.
- Reduce the oven temperature to 350 degrees Fahrenheit and continue roasting the turkey until it is fully cooked. In the meantime, baste the bird every 30 to 40 minutes with warm chicken broth. The turkey will take approximately 3 hours to bake. If the bird begins to brown too quickly, cover it with foil; uncover it during the last 30 minutes of roasting.: Lowering the temperature encourages even cooking all the way through while periodic basting adds moisture and flavor. You will notice the skin deepen to a rich gold, and the aroma will become intensely savory. Covering with foil tames excessive browning, but remove it near the end to regain crispness. One trap is basting too often which drastically lowers oven temperature, so follow the recommended interval.
- The turkey is done when a meat thermometer inserted into the thickest part of the bird's thigh reads 165 degrees F.: The definitive cue is the probe slipping into tender meat and the digital readout hitting 165 degrees F . The juices should run clear, not pink. Leaving a thermometer in while resting is fine, but do not rely on color alone; temperature is the accurate indicator. Overcooking past this temperature will dry the meat, so pull the bird promptly.
- Remove it from the oven and cover it loosely with foil. Let it rest for 30 minutes before slicing and serving.: Resting allows juices to redistribute, so when you slice the meat it will remain moist rather than spilling savory liquids on the cutting board. The bird will continue to carry residual heat and reach a perfect serving temperature during this interval. Cutting too early causes juicy loss, so be patient for the best texture and flavor.
- Strain the drippings into a saucepan over medium heat.: The strained drippings provide a concentrated, savory base for gravy, with a glossy sheen and intense aroma. Removing solids prevents graininess in the final sauce. A common oversight is not skimming excess fat first, which can leave the gravy greasy. Use a fine mesh strainer for a clean result.
- Make a roux from 2 tablespoons of butter and two tablespoons of flour, and add it to the saucepan. Stir until the mixture thickens.: As the butter melts and the flour cooks, the mixture will bubble and smell toasty, losing any raw flour scent. This caramelized base builds body for a velvety gravy. Cook the roux just long enough to eliminate rawness, but not so long it darkens excessively, which can shift flavors bitterly.
- Slowly whisk in 1-2 cups of turkey or chicken broth until smooth, and simmer. Taste and season the gravy with salt and pepper.: As you whisk in the warm chicken broth the sauce will become glossy and thick, coating the back of a spoon. Simmering melds flavors and reduces any thinness. Always taste before final seasoning, since the drippings can be quite salty already. A frequent error is adding too much salt at this stage; adjust gradually and rely on tasting.
Notes
- Follow weight based roasting guidance, use the weight specific timing in the notes to match the initial high heat and the subsequent lower temperature to your bird size, preventing over or under cooking.
- Prepare the herb butter ahead, blending the butter and herbs ahead of time saves stress on roast day and lets flavors meld for a more cohesive rub.
- Keep a well calibrated thermometer, check the thigh temperature rather than relying on time alone, since oven variations change cook times substantially.
- Don’t skip the fridge drying step, an overnight or several hour dry in the fridge tightens skin and leads to a crisp, bronzed exterior when you roast.
- Warm your basting liquid so the oven recovers quickly after each baste, avoiding long drops in temperature that extend total cook time.