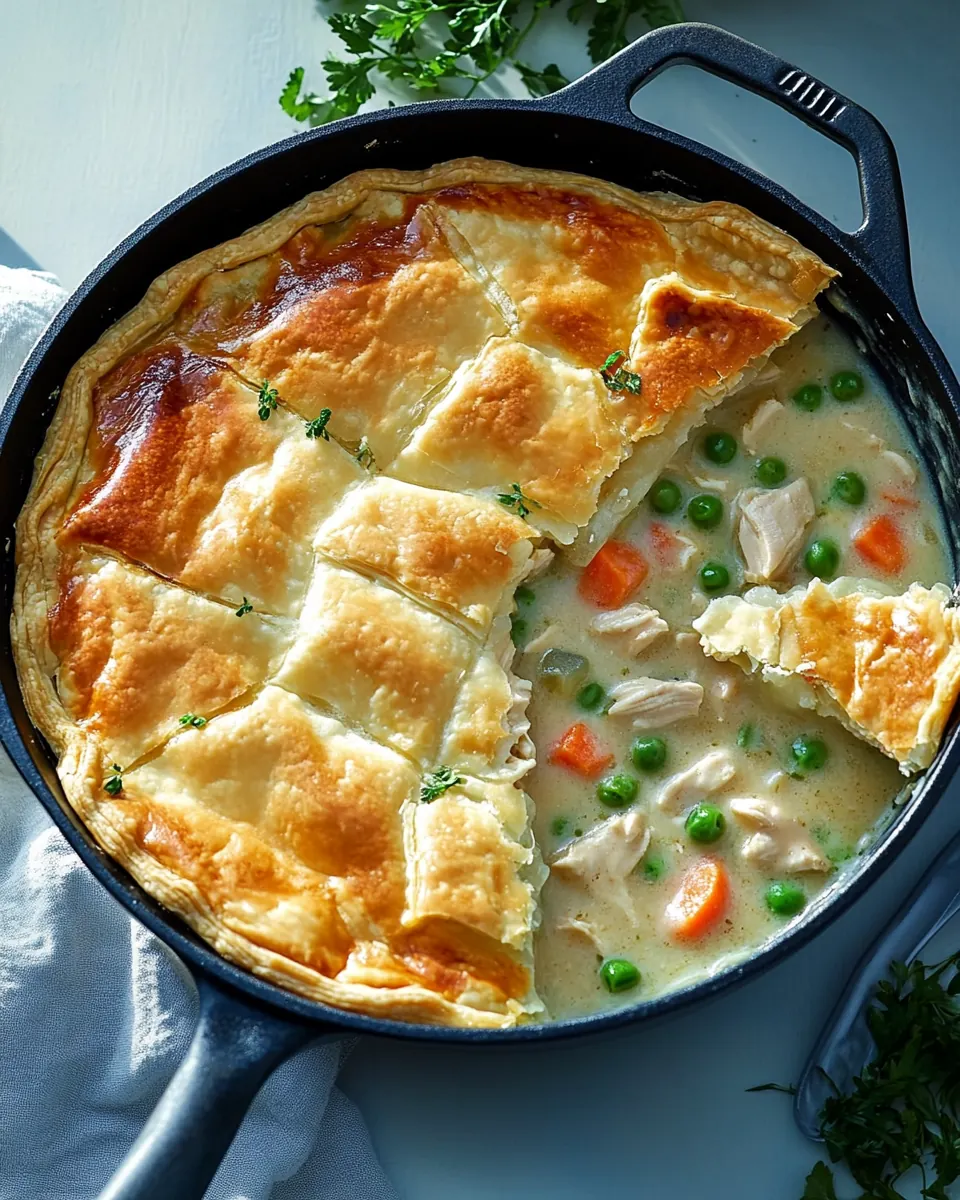
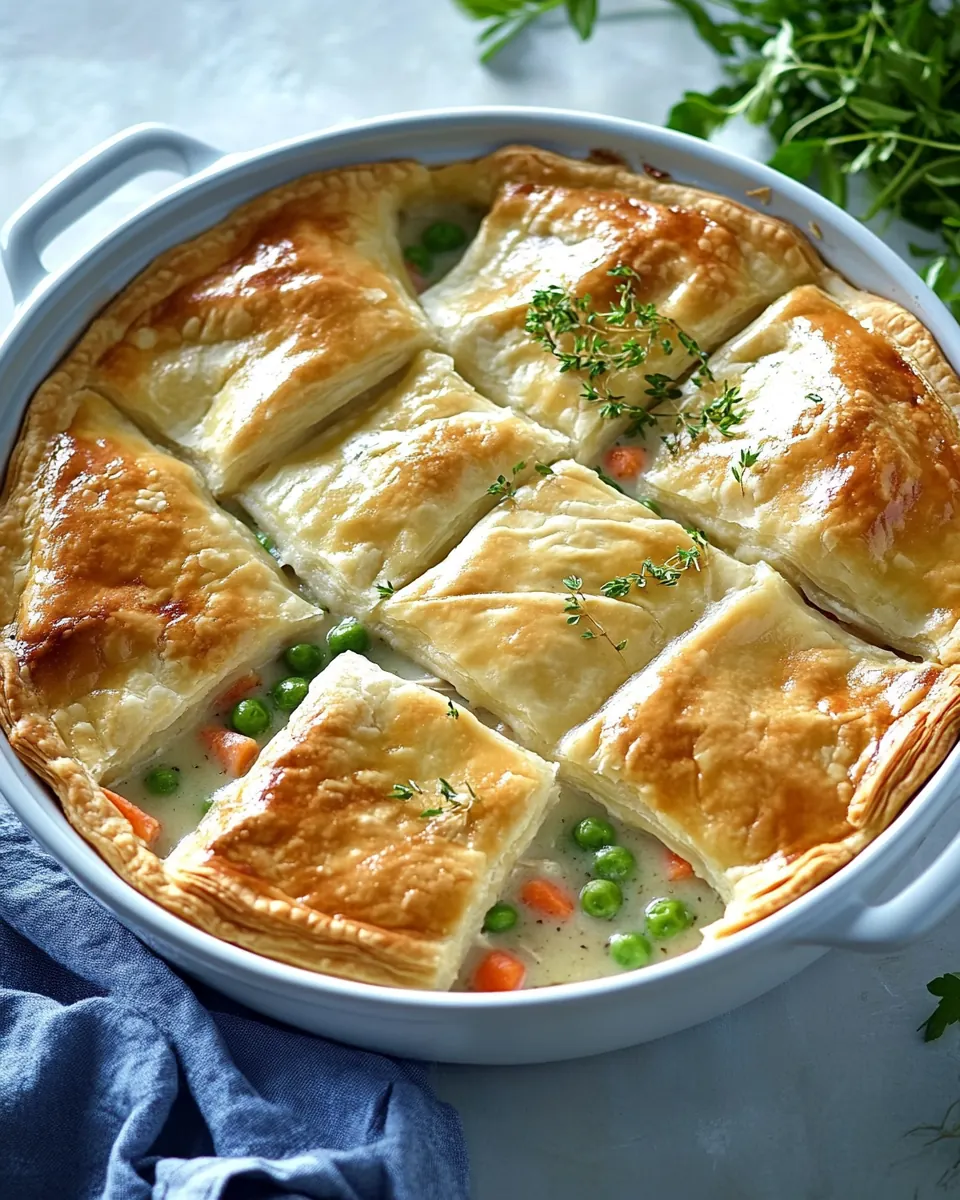
Skillet Chicken Pot Pie
Skillet Chicken Pot Pie has been my go to when the week tightens and I want something cozy without fuss. The first time I made it I was juggling a sick child, a late work call, and a pantry that was not exactly inspiring, yet the aroma of butter and softened onion filling the kitchen felt like an instant comfort blanket. I remember pausing mid stir to inhale that warm, savory steam, thinking how food can fix the edges of a chaotic day.
Over the years this dish became a living recipe that evolved in small, useful ways. I learned when to pull back the heat so the roux smells nutty but does not burn, and how the flaky top transforms the leftovers into something almost celebratory. Guests often ask for the secret, and my answer is always a smile and a list of tiny, intentional choices: quality chicken, good stock, and the patience to let the filling thicken properly. Those little decisions are why this version sings.
Recipe Snapshot
50 mins
15 mins
35 mins
Medium
400 kcal
American
Gluten-Free, Low FODMAP
Dinner
12 inch ovenproof skillet, Oven, Baking sheet, Whisk, Knife
What’s Great About This Skillet Chicken Pot Pie
It is comfort food that actually fits real life
I love that Skillet Chicken Pot Pie feels indulgent, yet it comes together quickly with pantry and fridge staples. When evenings are tight I reach for a recipe that gives maximum warmth for minimal fuss, and this one does exactly that. The combination of a creamy, savory filling and golden, buttery pastry on top makes it feel like a treat, but it is still approachable enough for a weeknight.
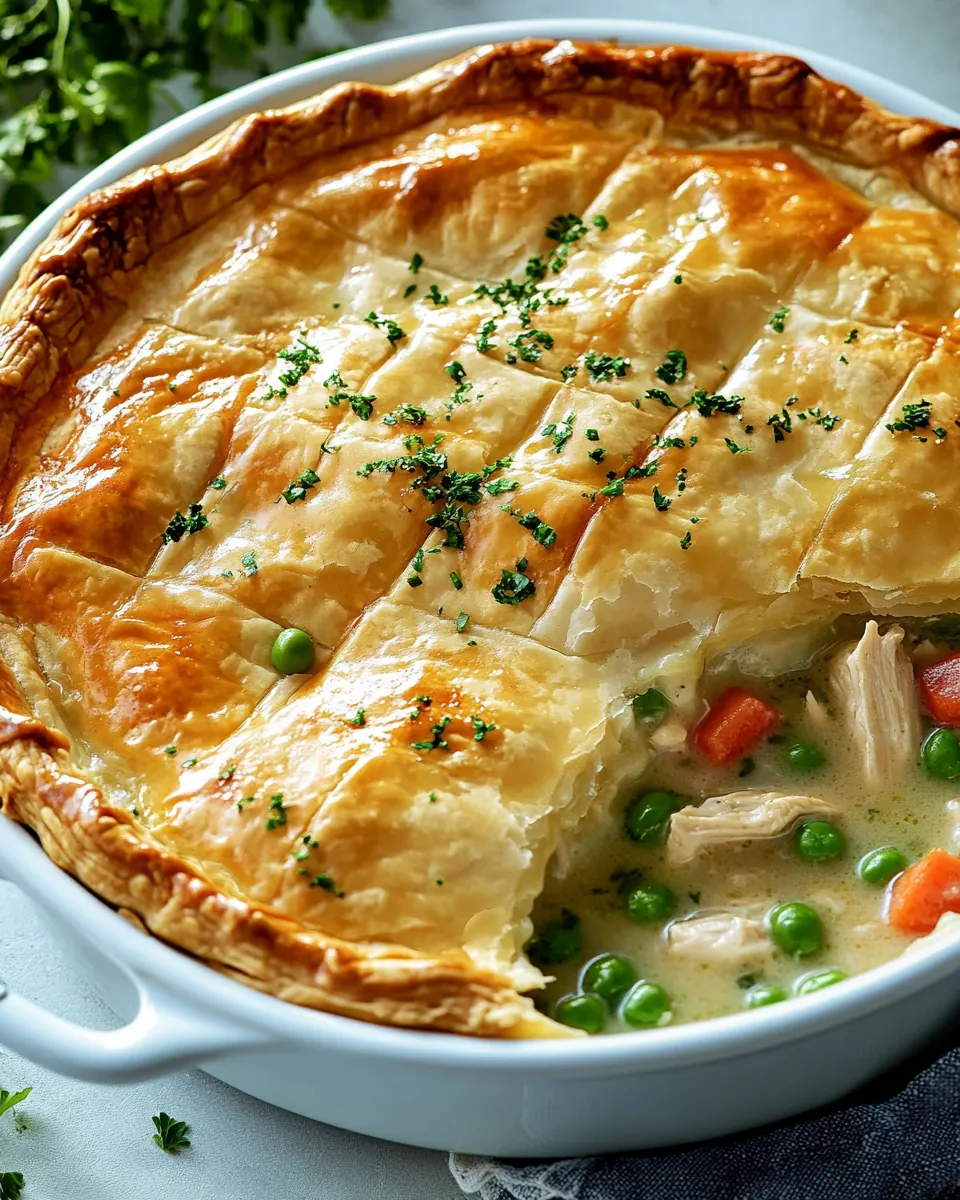
Layered textures that satisfy
The contrast between the silky filling and the crisp, flaky puff pastry is why I keep making this. Each bite gives a soft chicken and vegetable center, then a crisp top that shatters just enough. Textural contrast is a simple trick to elevate home cooking, and here it is front and center.
Flexible and forgiving
I often use leftover roast or rotisserie chicken, and the recipe welcomes substitutions without punishment. If you have slightly fewer vegetables or a different spice on hand, the structure carries the changes. For busy cooks, recipes that adapt are lifelines, and this one is particularly forgiving.
Comfort with smart technique
There is technique here, but nothing intimidating. Making a quick roux with butter and flour and gradually adding chicken broth and milk teaches control over texture. I find that understanding that step unlocks so many other weekday dishes for home cooks.
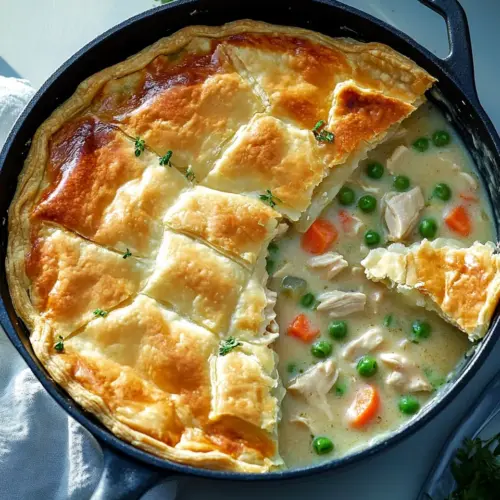
Family friendly and shareable
This recipe serves a crowd yet feels intimate. I enjoy serving it straight from the skillet, letting everyone break into the flaky top, and that ritual makes meals feel connected. It is a reliable winner for casual dinners and small celebrations alike.
Ingredients Overview for Skillet Chicken Pot Pie
These ingredients are chosen to build a rich, savory filling that holds up under a crisp top. The creamy base needs a starchy binder, the aromatics bring depth, and the cooked chicken and frozen vegetables provide familiar, hearty flavor. Each player has a clear job, and together they create a comforting, balanced dish.
- 1/2 cup unsalted butter: Provide rich, silky fat for sautéing aromatics and forming the roux; melts to coat vegetables and adds a golden, buttery flavor that enriches the filling. Also helps create a glossy mouthfeel and carries seasonings throughout the dish.
- 1 cup chopped onion: Add savory sweetness and aromatic depth when softened; cooks until translucent to build the base flavor for the pot pie filling. Provides structure and a pleasant texture contrast to the creamy sauce.
- 1 cup sliced celery: Contribute a mild, celery-like crunch and vegetal aroma when sliced and sautéed; softens while retaining slight bite to balance the creamy sauce. Adds classic pot pie flavor and freshness to the filling.
- 2 cloves garlic, minced: Impart a sharp, pungent layer of flavor when minced and briefly cooked; helps brighten and deepen the overall savory profile. Releases aromatic oils that enhance the savory base of the dish.
- 1/2 cup all-purpose flour: Thicken the sauce by forming a roux with butter; absorbs fat and liquid to create a velvety, cohesive filling. Provides body and a lightly cooked flour flavor that stabilizes the final texture.
- 2 cups low-sodium chicken broth: Supply savory liquid and chicken flavor to hydrate and thin the roux into a flavorful sauce; low-sodium version allows precise seasoning control. Helps achieve the proper consistency and imparts umami from the stock.
- 1 cup milk: Add creaminess and lighten the sauce while contributing a subtle dairy sweetness; combines with broth and roux to form a smooth, rich filling. Balances the flavors and contributes to a tender mouthfeel.
- 1 teaspoon kosher salt, (if using table salt just use 1/2 teaspoon): Enhance overall seasoning with moderate salty uplift and flavor balance; kosher salt dissolves easily to season the filling evenly. Optionally reduced to half the amount if using table salt to prevent over-salting.
- 1/2 teaspoon celery seed: Bring a concentrated celery-like, slightly nutty flavor that complements the fresh celery; a small amount enhances the savory bouquet without overpowering. Adds aromatic complexity associated with classic pot pie seasoning.
- 1/2 teaspoon poultry seasoning: Introduce a warm, herby blend that reinforces poultry flavors and traditional pot pie aroma; used sparingly to complement chicken and vegetables. Contributes background notes of sage, thyme, and savory herbs.
- 1/4 teaspoon pepper: Provide gentle heat and savoriness to balance the richness; ground pepper sharpens flavors without overwhelming the dish. Sprinkled into the sauce to heighten overall taste perception.
- 3 cups diced rotisserie chicken, (or any leftover chicken): Deliver tender, cooked chicken protein and robust roasted flavor; diced rotisserie or leftover chicken adds convenience and depth. Contributes substance and classic chicken pot pie character to every serving.
- 2 cups frozen carrots and peas: Offer sweet, tender vegetable bites and color contrast when warmed through; frozen carrots and peas cook quickly in the sauce and retain pleasant texture. Add nutritional value and familiar pot pie elements.
- 1 sheet frozen puff pastry, thawed, (from a 17.3 ounce package of 2): Form a flaky, golden top crust when thawed and baked over the filling; puff pastry provides buttery layers and a crisp finish. Makes assembly simple while delivering an attractive, elevated presentation.
- 1 egg: Create an egg wash to brush over the pastry, promoting glossy browning and an appealing crust; beaten egg helps pastry bake to a rich color and sheen. Also aids in sealing edges if needed.
Instructions for Skillet Chicken Pot Pie
This recipe unfolds in a few clear stages, and I like to work from the savory base outward so everything finishes at the right moment. Read each step fully, prepare your mise en place, and keep sensory cues in mind so you can trust your instincts while following the structure.
- In a 12 inch ovenproof skillet, melt butter and cook onions and celery in butter over medium heat until soft and translucent. Add the garlic and cook for 30 seconds. Stir in flour and cook for a minute.: When the butter hits the pan it should gently foam and release a warm, nutty aroma, not brown aggressively. As the onion and celery sweat, you will notice their scent deepen and a slight sweet steam rise, signaling they are softening. Use a wooden spoon to stir every 30 seconds to keep even contact with the pan, and aim for translucent, tender pieces rather than caramelized edges. This step builds the flavor foundation, softening fibrous vegetables and releasing sugars that balance the final sauce. A common mistake is turning the heat too high, which can make the vegetables brown too quickly and introduce bitter notes.
- Slowly stir in chicken broth and milk. Add the salt, celery seed, poultry seasoning, and pepper. Simmer over medium-low heat until thick.: The moment you add minced garlic , the kitchen will fill with a sharp, aromatic burst that mellows rapidly, so time this carefully. After 30 seconds the raw edge will round off and it will begin to smell toasty, but if you let it sit longer it can scorch and turn acrid. Stir continuously and watch the pan closely, because garlic transitions quickly from fragrant to burnt. The purpose here is to layer in an aromatic lift without overpowering the base flavors.
- Remove from heat and stir in chicken, carrots and peas.: When you incorporate the flour into the butter and vegetables, you are creating a roux that will thicken the sauce. The mixture should smell faintly nutty after about a minute, losing its raw flour scent. Stir constantly to prevent lumps and to toast the flour just enough to add depth. If you undercook it the final sauce can taste floury, while overcooking risks a dry, pasty texture, so keep the heat moderate and the motion steady.
- Roll out pastry puff just a little thinner. Cut into a 4×4 square (16 pieces). Layer pieces on top of the chicken filling in any pattern you like. Whisk egg with a tablespoon of water and brush puff pastry with it.: As you add the chicken broth and then the milk , pour in a steady stream while whisking or stirring so the roux disperses evenly. You will hear a soft simmer as the liquid loosens the roux and the sauce begins to thicken. The aroma will deepen into a rich, savory scent and the texture should move from pasty to velvety. If you add the liquids too fast, lumps may form, so patience is the key. The goal is a smooth, clingy sauce that coats a spoon.
- Bake in the preheated oven for 25 to 30 minutes on a baking sheet, or until pastry puff is golden brown and filling is bubbly. Cool for 10 minutes before serving.: Seasoning now lets the spices bloom into the warmed sauce, releasing their herbal and slightly nutty notes. Stir these in and let the mixture simmer on medium low until it develops body and a sheen. Taste carefully, because the chicken broth might already contain sodium, and adjust as needed. Adding too much salt early can be hard to correct, so season gradually and reassess after the filling cools slightly.
- Simmer over medium-low heat until thick: As the mixture simmers, you will notice it reduce and take on a creamy thickness that clings to the back of a spoon, and tiny bubbles should break gently at the edges. This transformation concentrates flavor and ensures the filling will not be watery under the pastry. Keep the heat moderate so it does not boil vigorously, which can thin the sauce by breaking down starches. A common error is rushing this step, resulting in a runny filling under the pastry.
- Remove from heat and stir in chicken, carrots and peas: Off the heat, fold in the diced rotisserie chicken and frozen vegetables so they warm through without overcooking. The residual heat will soften the peas and carrots while keeping their texture intact. Stir gently to distribute ingredients evenly, and notice how the mixture becomes more homogenous and visually appealing. If you stir too vigorously you can break up the chicken into shreds, which changes the mouthfeel.
- Roll out pastry puff just a little thinner: On a lightly floured surface, ease the thawed puff pastry a touch thinner so it browns evenly and is easy to cut. You should feel a supple, cool dough that responds to gentle pressure. Rolling too thin makes it fragile and liable to soak up filling moisture, while too thick can bake unevenly. Keep it chilled enough to handle without sticking, and work quickly so the butter layers stay distinct for flakiness.
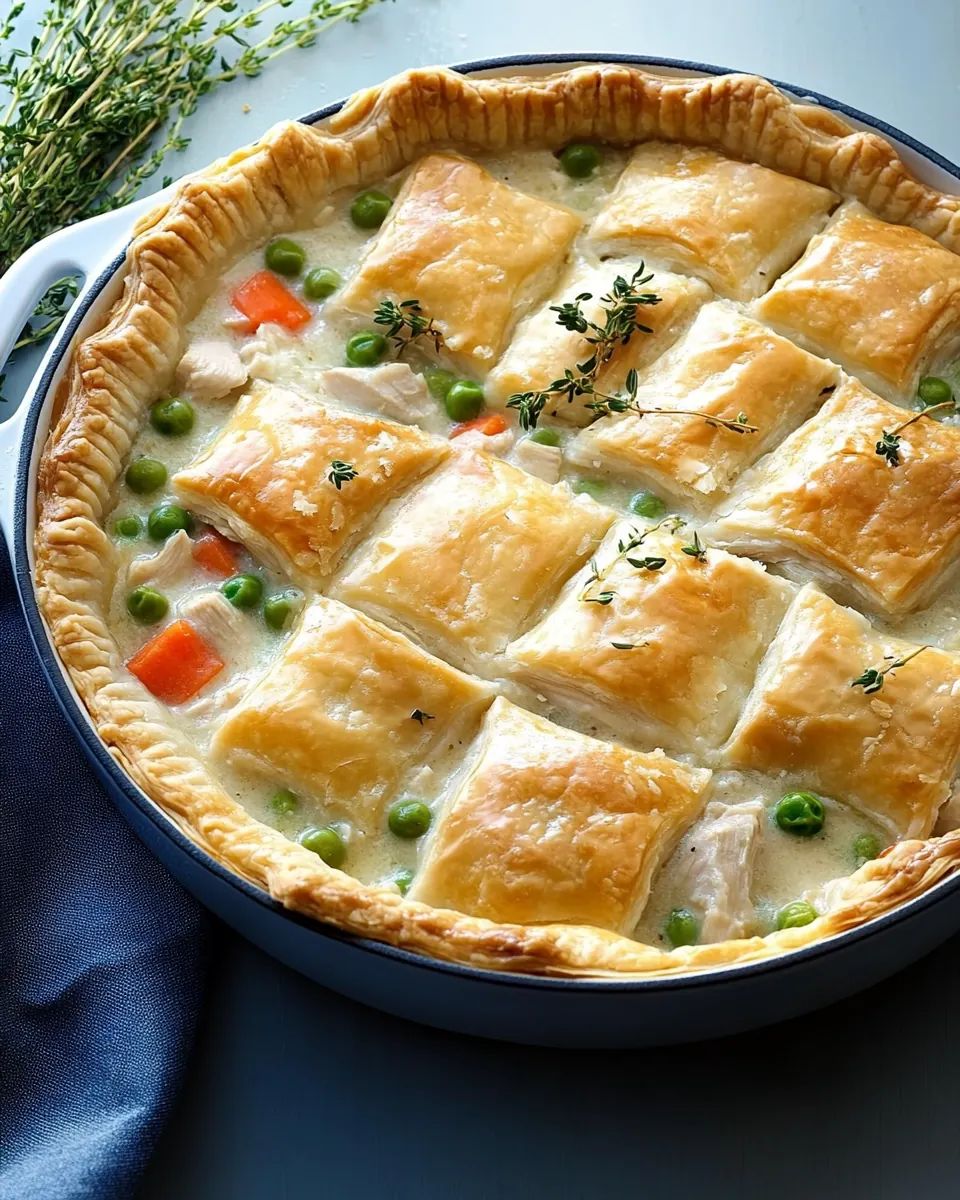
- Cut into a 4×4 square (16 pieces): When you cut the pastry into a 4 by 4 grid, you create bite sized tiles that will puff individually and crisp beautifully. Use a sharp knife or pizza cutter for clean edges so the pieces rise uniformly. The visual pattern also helps steam escape in small channels, preventing sogginess. Dull blades can compress the layers and inhibit puffing.
- Layer pieces on top of the chicken filling in any pattern you like: Arrange the pastry pieces over the filling in a single layer, leaving small gaps for steam. As the pastry browns, you will hear a faint popping and see edges lift, creating a mosaic of golden pockets. This playful layering lets you control coverage and steam release. Overlapping too much can trap moisture and prevent full crisping at the edges.
- Whisk egg with a tablespoon of water and brush puff pastry with it: The egg wash should be smooth and glossy, and brushing it onto the pastry will give a deep, even golden color while helping pieces cling. Use a light, even coat and avoid heavy pooling. Excessive egg wash can run into seams and inhibit crisping, leading to a sticky finish rather than a shiny, crisp top.
- Bake in the preheated oven for 25 to 30 minutes on a baking sheet, or until pastry puff is golden brown and filling is bubbly: During baking you will smell a rich, toasty aroma and see the pastry turn a beautiful deep gold while the filling bubbles at the edges. Baking on a sheet catches any spills and promotes even heat circulation. If the pastry browns too quickly on top, tent lightly with foil to prevent burning while the filling finishes. Underbaking leaves the center cool and the pastry pale, so ensure the filling is bubbling and the crust is golden.
- Cool for 10 minutes before serving: Allow the skillet to rest so the filling settles and the steam dissipates, making scooping easier and safer. The heat will mellow and the texture will firm slightly, giving cleaner portions. Serving immediately risks burns and a soupy texture, while waiting too long can cool the filling excessively. Ten minutes is the sweet spot for serving with confidence.
Recipe Tips about Skillet Chicken Pot Pie
This section collects practical tips I use every time I make Skillet Chicken Pot Pie. These are based on habits that protect texture and boost flavor without extra fuss. Keep these in mind while cooking and your results will be consistently good.
- Control the heat When sautéing the onion and celery, keep the pan at medium so they soften evenly without browning too fast. Gentle cooking brings sweetness and avoids bitter charred notes.
- Whisk liquids slowly Add the chicken broth and milk gradually while stirring to prevent lumps in the roux, producing a silky, lump free sauce that clings to the filling.
- Use cooked chicken Leftover or rotisserie chicken works best because it warms through quickly and retains juicy texture, making prep fast and flavorful.
- Keep pastry cold Handle the puff pastry lightly and keep it cool to maintain distinct layers, which gives you that desirable flaky rise during baking.
- Check for bubbling Bake until the filling is actively bubbling at the edges; that indicates the interior is hot enough and the sauce has thickened properly for serving.
Serving Ideas for Skillet Chicken Pot Pie
This dish is hearty enough to be a main and versatile enough to pair with many sides. Here are thoughtful serving suggestions, storage ideas, and occasions where it shines. I like to present it straight from the skillet for a warm, communal vibe.
- Casual weeknight dinner Serve a wedge of the pie with a simple green salad dressed in a light vinaigrette to cut the richness and add freshness.
- Comforting lunch Pair slices with warm crusty bread or a bowl of mixed greens to keep the meal balanced and approachable for midday gatherings.
- Family style on a cold evening Bring the skillet to the table and let everyone help themselves, which creates a cozy, communal atmosphere during winter nights.
- Leftover strategy Cool completely, cover, and refrigerate for up to three days; reheat in a moderate oven to revive crispness rather than microwaving to avoid soggy pastry.
- Make ahead option Assemble the filling ahead and store chilled, then top with thawed puff pastry and bake when ready, saving active time on the day of serving.
- Seasonal pairings This fits well into fall and winter menus with roasted root vegetables or a bright citrus salad to contrast the savory richness.
- Portion ideas For casual gatherings, cut into squares for buffet style serving, or plate individual wedges for a more formal presentation with garnishes like chopped parsley.
- Occasion suggestions It works for cozy family dinners, potlucks where it travels well if kept warm, and anytime you need a reliable comfort dish that appeals to many tastes.
- Storage tips For longer keeping, freeze portions wrapped tightly and reheat from frozen in the oven, adding a short tent with foil to avoid overbrowning.
- Presentation hint A light sprinkle of fresh herbs after baking adds color and a fresh herbal note that lifts the dish visually and on the palate.
FAQ
Conclusion
This Skillet Chicken Pot Pie stands out for its balance of creamy, savory filling and flaky, golden pastry. It brings comforting textures and familiar flavors together in a way that feels both special and accessible, perfect for family dinners or casual gatherings. I encourage you to give it a try on a busy evening when you want something nourishing with minimal fuss. Let the simple techniques guide you, and enjoy the warm, satisfying results that make this recipe a dependable favorite.
Skillet Chicken Pot Pie
Equipment
- 12 inch ovenproof skillet
- Oven
- Baking Sheet
- Whisk
- Knife
Ingredients
- 1/2 cup unsalted butter Provide rich, silky fat for sautéing aromatics and forming the roux; melts to coat vegetables and adds a golden, buttery flavor that enriches the filling. Also helps create a glossy mouthfeel and carries seasonings throughout the dish.
- 1 cup chopped onion Add savory sweetness and aromatic depth when softened; cooks until translucent to build the base flavor for the pot pie filling. Provides structure and a pleasant texture contrast to the creamy sauce.
- 1 cup sliced celery Contribute a mild, celery-like crunch and vegetal aroma when sliced and sautéed; softens while retaining slight bite to balance the creamy sauce. Adds classic pot pie flavor and freshness to the filling.
- 2 cloves garlic, minced Impart a sharp, pungent layer of flavor when minced and briefly cooked; helps brighten and deepen the overall savory profile. Releases aromatic oils that enhance the savory base of the dish.
- 1/2 cup all-purpose flour Thicken the sauce by forming a roux with butter; absorbs fat and liquid to create a velvety, cohesive filling. Provides body and a lightly cooked flour flavor that stabilizes the final texture.
- 2 cups low-sodium chicken broth Supply savory liquid and chicken flavor to hydrate and thin the roux into a flavorful sauce; low-sodium version allows precise seasoning control. Helps achieve the proper consistency and imparts umami from the stock.
- 1 cup milk Add creaminess and lighten the sauce while contributing a subtle dairy sweetness; combines with broth and roux to form a smooth, rich filling. Balances the flavors and contributes to a tender mouthfeel.
- 1 teaspoon kosher salt, (if using table salt just use 1/2 teaspoon) Enhance overall seasoning with moderate salty uplift and flavor balance; kosher salt dissolves easily to season the filling evenly. Optionally reduced to half the amount if using table salt to prevent over-salting.
- 1/2 teaspoon celery seed Bring a concentrated celery-like, slightly nutty flavor that complements the fresh celery; a small amount enhances the savory bouquet without overpowering. Adds aromatic complexity associated with classic pot pie seasoning.
- 1/2 teaspoon poultry seasoning Introduce a warm, herby blend that reinforces poultry flavors and traditional pot pie aroma; used sparingly to complement chicken and vegetables. Contributes background notes of sage, thyme, and savory herbs.
- 1/4 teaspoon pepper Provide gentle heat and savoriness to balance the richness; ground pepper sharpens flavors without overwhelming the dish. Sprinkled into the sauce to heighten overall taste perception.
- 3 cups diced rotisserie chicken, (or any leftover chicken) Deliver tender, cooked chicken protein and robust roasted flavor; diced rotisserie or leftover chicken adds convenience and depth. Contributes substance and classic chicken pot pie character to every serving.
- 2 cups frozen carrots and peas Offer sweet, tender vegetable bites and color contrast when warmed through; frozen carrots and peas cook quickly in the sauce and retain pleasant texture. Add nutritional value and familiar pot pie elements.
- 1 sheet frozen puff pastry, thawed, (from a 17.3 ounce package of 2) Form a flaky, golden top crust when thawed and baked over the filling; puff pastry provides buttery layers and a crisp finish. Makes assembly simple while delivering an attractive, elevated presentation.
- 1 egg Create an egg wash to brush over the pastry, promoting glossy browning and an appealing crust; beaten egg helps pastry bake to a rich color and sheen. Also aids in sealing edges if needed.
Instructions
- In a 12 inch ovenproof skillet, melt butter and cook onions and celery in butter over medium heat until soft and translucent. Add the garlic and cook for 30 seconds. Stir in flour and cook for a minute.: When the butter hits the pan it should gently foam and release a warm, nutty aroma, not brown aggressively. As the onion and celery sweat, you will notice their scent deepen and a slight sweet steam rise, signaling they are softening. Use a wooden spoon to stir every 30 seconds to keep even contact with the pan, and aim for translucent, tender pieces rather than caramelized edges. This step builds the flavor foundation, softening fibrous vegetables and releasing sugars that balance the final sauce. A common mistake is turning the heat too high, which can make the vegetables brown too quickly and introduce bitter notes.
- Slowly stir in chicken broth and milk. Add the salt, celery seed, poultry seasoning, and pepper. Simmer over medium-low heat until thick.: The moment you add minced garlic , the kitchen will fill with a sharp, aromatic burst that mellows rapidly, so time this carefully. After 30 seconds the raw edge will round off and it will begin to smell toasty, but if you let it sit longer it can scorch and turn acrid. Stir continuously and watch the pan closely, because garlic transitions quickly from fragrant to burnt. The purpose here is to layer in an aromatic lift without overpowering the base flavors.
- Remove from heat and stir in chicken, carrots and peas.: When you incorporate the flour into the butter and vegetables, you are creating a roux that will thicken the sauce. The mixture should smell faintly nutty after about a minute, losing its raw flour scent. Stir constantly to prevent lumps and to toast the flour just enough to add depth. If you undercook it the final sauce can taste floury, while overcooking risks a dry, pasty texture, so keep the heat moderate and the motion steady.
- Roll out pastry puff just a little thinner. Cut into a 4×4 square (16 pieces). Layer pieces on top of the chicken filling in any pattern you like. Whisk egg with a tablespoon of water and brush puff pastry with it.: As you add the chicken broth and then the milk , pour in a steady stream while whisking or stirring so the roux disperses evenly. You will hear a soft simmer as the liquid loosens the roux and the sauce begins to thicken. The aroma will deepen into a rich, savory scent and the texture should move from pasty to velvety. If you add the liquids too fast, lumps may form, so patience is the key. The goal is a smooth, clingy sauce that coats a spoon.
- Bake in the preheated oven for 25 to 30 minutes on a baking sheet, or until pastry puff is golden brown and filling is bubbly. Cool for 10 minutes before serving.: Seasoning now lets the spices bloom into the warmed sauce, releasing their herbal and slightly nutty notes. Stir these in and let the mixture simmer on medium low until it develops body and a sheen. Taste carefully, because the chicken broth might already contain sodium, and adjust as needed. Adding too much salt early can be hard to correct, so season gradually and reassess after the filling cools slightly.
- Simmer over medium-low heat until thick: As the mixture simmers, you will notice it reduce and take on a creamy thickness that clings to the back of a spoon, and tiny bubbles should break gently at the edges. This transformation concentrates flavor and ensures the filling will not be watery under the pastry. Keep the heat moderate so it does not boil vigorously, which can thin the sauce by breaking down starches. A common error is rushing this step, resulting in a runny filling under the pastry.
- Remove from heat and stir in chicken, carrots and peas: Off the heat, fold in the diced rotisserie chicken and frozen vegetables so they warm through without overcooking. The residual heat will soften the peas and carrots while keeping their texture intact. Stir gently to distribute ingredients evenly, and notice how the mixture becomes more homogenous and visually appealing. If you stir too vigorously you can break up the chicken into shreds, which changes the mouthfeel.
- Roll out pastry puff just a little thinner: On a lightly floured surface, ease the thawed puff pastry a touch thinner so it browns evenly and is easy to cut. You should feel a supple, cool dough that responds to gentle pressure. Rolling too thin makes it fragile and liable to soak up filling moisture, while too thick can bake unevenly. Keep it chilled enough to handle without sticking, and work quickly so the butter layers stay distinct for flakiness.
- Cut into a 4×4 square (16 pieces): When you cut the pastry into a 4 by 4 grid, you create bite sized tiles that will puff individually and crisp beautifully. Use a sharp knife or pizza cutter for clean edges so the pieces rise uniformly. The visual pattern also helps steam escape in small channels, preventing sogginess. Dull blades can compress the layers and inhibit puffing.
- Layer pieces on top of the chicken filling in any pattern you like: Arrange the pastry pieces over the filling in a single layer, leaving small gaps for steam. As the pastry browns, you will hear a faint popping and see edges lift, creating a mosaic of golden pockets. This playful layering lets you control coverage and steam release. Overlapping too much can trap moisture and prevent full crisping at the edges.
- Whisk egg with a tablespoon of water and brush puff pastry with it: The egg wash should be smooth and glossy, and brushing it onto the pastry will give a deep, even golden color while helping pieces cling. Use a light, even coat and avoid heavy pooling. Excessive egg wash can run into seams and inhibit crisping, leading to a sticky finish rather than a shiny, crisp top.
- Bake in the preheated oven for 25 to 30 minutes on a baking sheet, or until pastry puff is golden brown and filling is bubbly: During baking you will smell a rich, toasty aroma and see the pastry turn a beautiful deep gold while the filling bubbles at the edges. Baking on a sheet catches any spills and promotes even heat circulation. If the pastry browns too quickly on top, tent lightly with foil to prevent burning while the filling finishes. Underbaking leaves the center cool and the pastry pale, so ensure the filling is bubbling and the crust is golden.
- Cool for 10 minutes before serving: Allow the skillet to rest so the filling settles and the steam dissipates, making scooping easier and safer. The heat will mellow and the texture will firm slightly, giving cleaner portions. Serving immediately risks burns and a soupy texture, while waiting too long can cool the filling excessively. Ten minutes is the sweet spot for serving with confidence.
Notes
- Control the heat When sautéing the onion and celery, keep the pan at medium so they soften evenly without browning too fast. Gentle cooking brings sweetness and avoids bitter charred notes.
- Whisk liquids slowly Add the chicken broth and milk gradually while stirring to prevent lumps in the roux, producing a silky, lump free sauce that clings to the filling.
- Use cooked chicken Leftover or rotisserie chicken works best because it warms through quickly and retains juicy texture, making prep fast and flavorful.
- Keep pastry cold Handle the puff pastry lightly and keep it cool to maintain distinct layers, which gives you that desirable flaky rise during baking.
- Check for bubbling Bake until the filling is actively bubbling at the edges; that indicates the interior is hot enough and the sauce has thickened properly for serving.