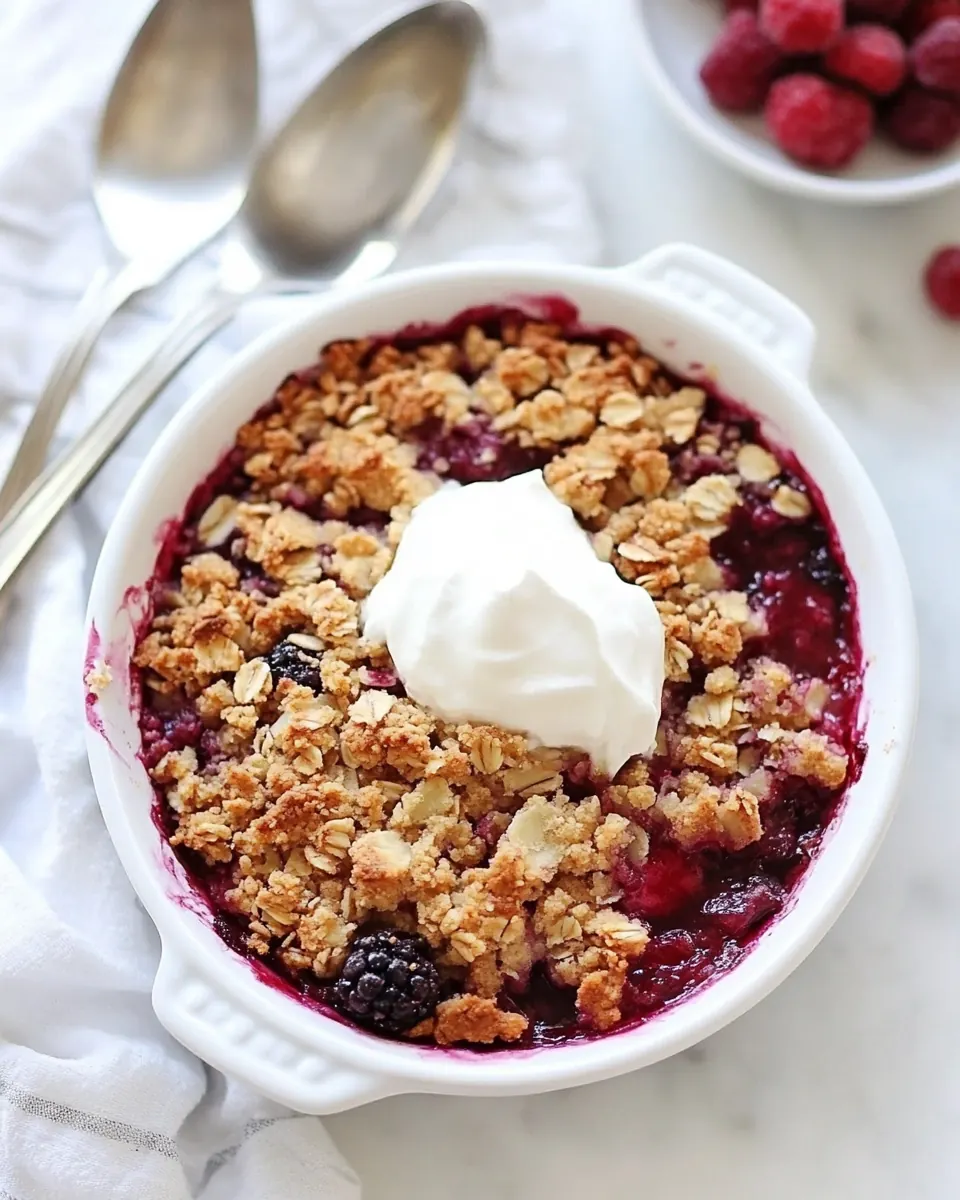
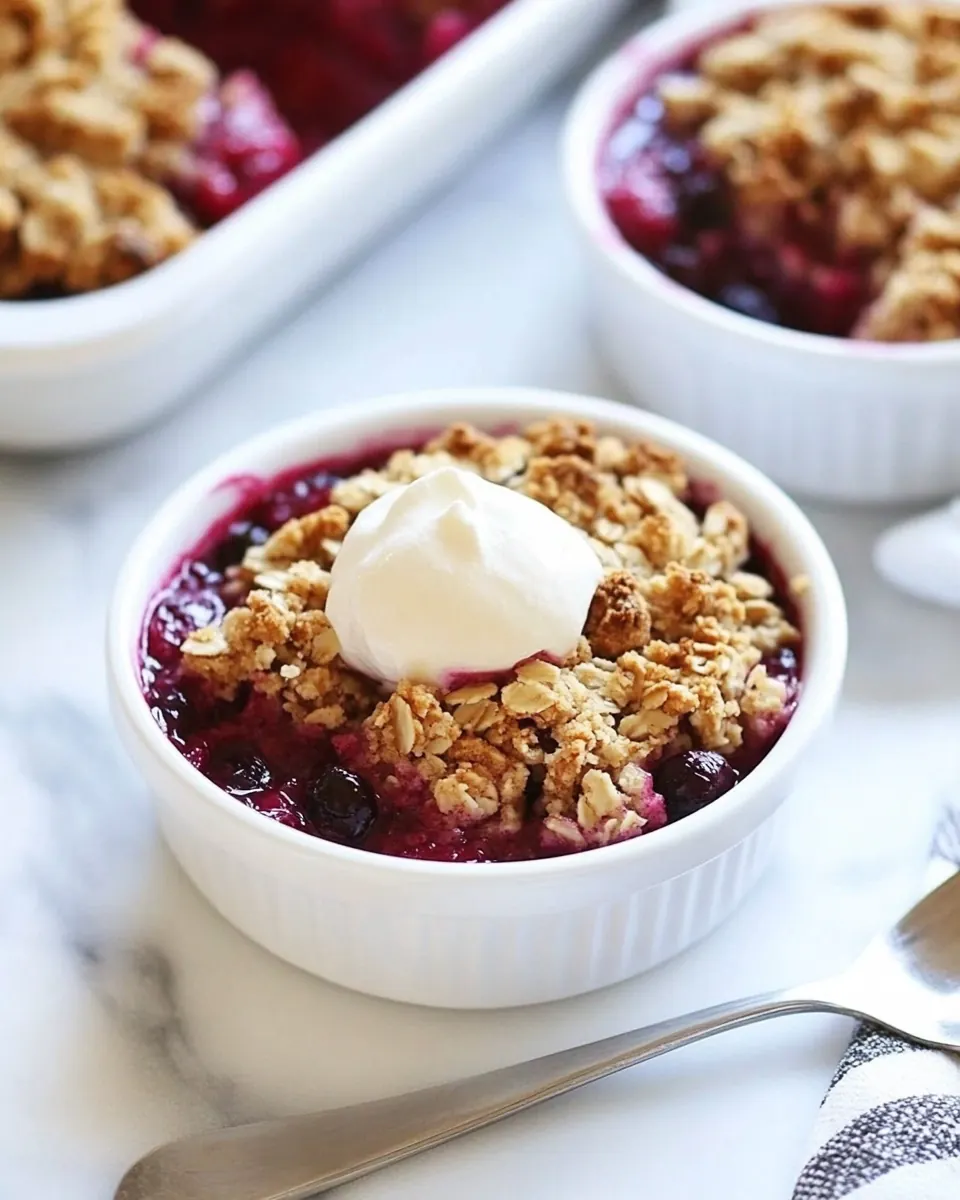
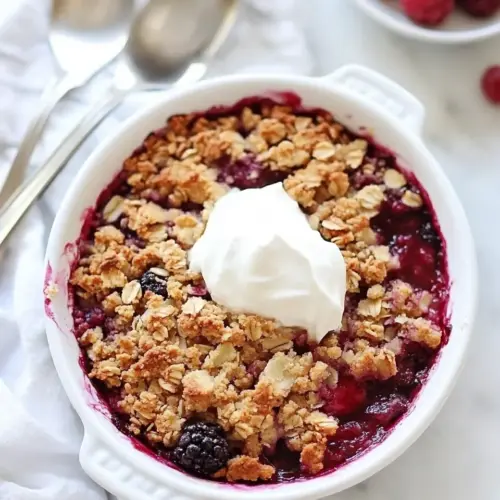
Rhubarb Berry Crisp
Rhubarb Berry Crisp is the kind of dessert that always takes me back to spring afternoons in my grandmother’s sunlit kitchen. I remember standing on a stool while she sorted through a bowl of bright rhubarb stalks and the last of the frozen berries from the winter stash, chatting about neighborhood gossip as the scent of orange zest filled the room. Those small moments taught me how a simple fruit crisp can be comforting and celebratory at once, effortless enough for a weeknight and lovely enough to bring to a gathering.
When I make Rhubarb Berry Crisp now, I lean into the contrast that made it memorable then, the tart snap of rhubarb against the juicy sweetness of mixed berries. I like to think of the topping as a crunchy blanket of oats and browned butter that locks in juices until everything bubbles and caramelizes at the edges. Over the years I have tweaked the balance of sugar and citrus so the filling tastes layered, never cloying.
Recipe Snapshot
45 mins
15 mins
30 mins
Medium
250 kcal
American
Gluten-Free, Vegan
Desserts
Oven, Ramekins, Mixing bowls, Baking sheet
Why This Rhubarb Berry Crisp Hits Different
Bright seasonal flavor
I adore how Rhubarb Berry Crisp celebrates spring produce. The sharpness of rhubarb plays off the sweetness of mixed berries, so every spoonful feels lively. I often find myself nudging the orange zest a touch higher when the fruit seems shy, because that citrus lift makes the whole dish pop.
Textures that sing
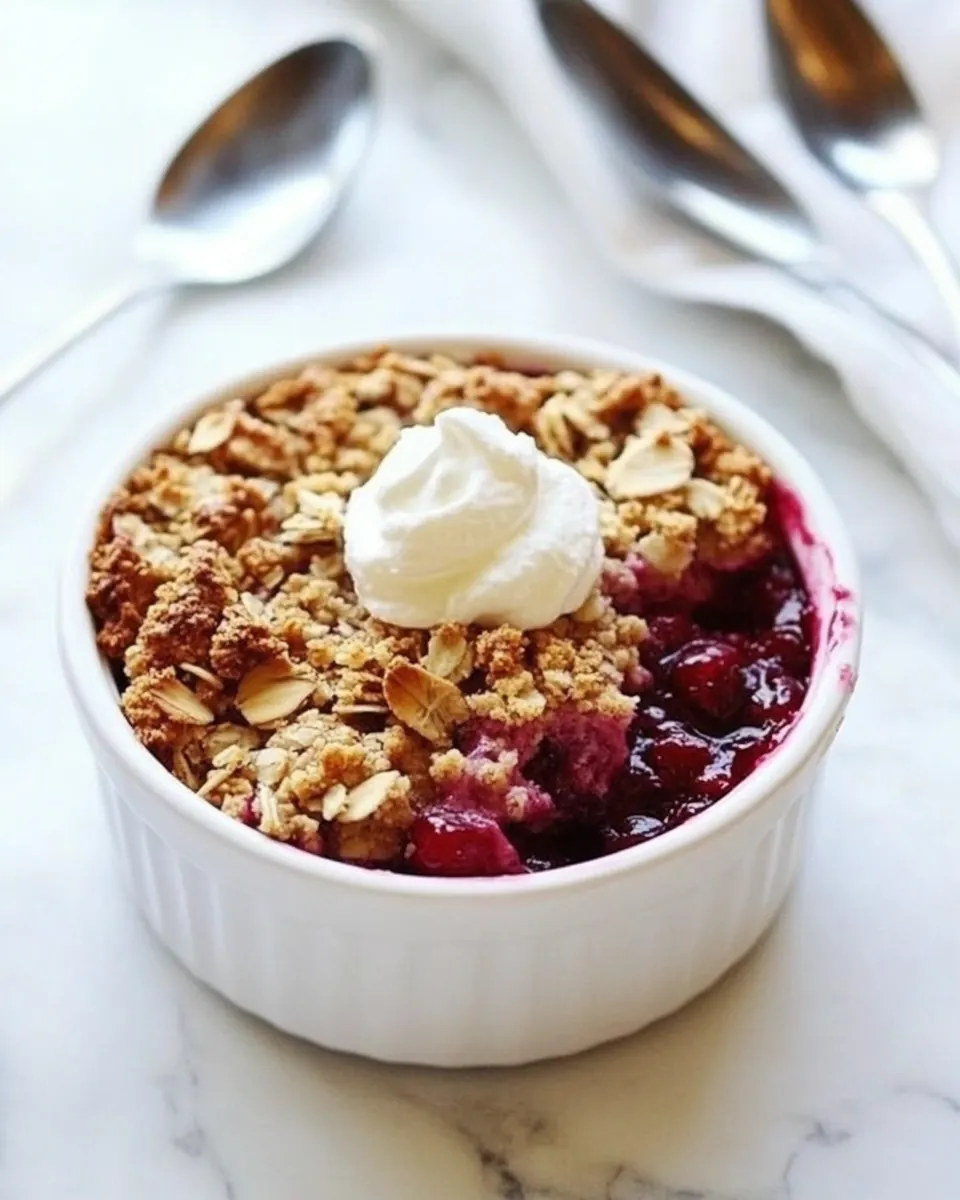
The contrast between the bubbling, tender fruit and the toasty, slightly chewy oat topping is everything. When I bite into it warm, I can hear the faint crumble and taste the warm butter and brown sugar notes, which together give a homely yet elevated feel. That crunch versus softness dynamic is why I keep returning to this recipe.
Flexible and forgiving
I love that you can scale this recipe easily. I sometimes make individual ramekins for guests, or use a single 9 inch dish if I want to feed a family. The steps are forgiving, and substitutions like gluten free oats or alternative flour work well, so it’s a low stress dessert for busy nights or last minute gatherings.
Comfort with a bright twist
This recipe manages to be cozy without being heavy. The orange zest and touch of vanilla lift the fruit, while the browned butter in the topping gives warmth. I reach for this when I want something that feels like a hug, yet still lively and fresh on the palate.
Make ahead friendly
I often assemble the crisp topping ahead of time and keep it chilled, then spoon it onto the fruit just before baking. That way I can prepare for guests without a last minute rush, and the topping still turns perfectly golden and crunchy in the oven.
What You Need for Rhubarb Berry Crisp
These ingredients are chosen to create a balanced fruit filling with a comforting, crunchy topping. The rhubarb and mixed berries provide bright, tangy fruit flavors, while cornstarch stabilizes the filling so it becomes thick and glossy. For the topping, old fashioned oats, flour, and butter combine for texture and golden flavor. Each component plays a clear role in creating a crisp that is lively, not overly sweet, and texturally satisfying.
- 2 cups chopped rhubarb: Provide tart, fibrous stalks that lend a bright, slightly sour backbone to the filling; chop into uniform pieces so they soften evenly while retaining some texture during baking.
- 2 1/2 cups mixed frozen berries I used blackberries, blueberries, and raspberries: Add a blend of sweet and tangy frozen berries that contribute deep color, juicy burst and complementary flavors; use them straight from frozen to prevent a watery filling and fold gently with other filling components.
- 1/2 cup granulated sugar: Sweeten the filling to balance rhubarb’s tartness and enhance fruit flavors; dissolve into the fruit mixture so sugar integrates and helps draw juices for a saucy interior.
- 1 tablespoon orange zest: Deliver concentrated citrus aroma and bright flavor that lifts the fruit combination; finely grate to avoid bitter pith and sprinkle directly into the filling for even distribution.
- 1 tablespoon fresh orange juice: Introduce fresh acidity and subtle citrus notes to round out flavors and help macerate the fruit; juice and stir into the fruit mixture to integrate evenly without overpowering.
- 1/2 teaspoon vanilla extract: Bring warm, rounded vanilla aroma that enhances the overall sweetness and depth of the filling; add and mix in with other liquid flavorings to infuse the fruit evenly.
- 1 tablespoon cornstarch: Thicken the fruit juices as they cook to create a cohesive filling and prevent dryness in the topping; mix with sugar and liquids before combining with fruit to avoid lumps.
- 1 1/2 cups old-fashioned oats use gluten-free oats for gf: Provide hearty texture and chewiness to the crisp topping while contributing to browning; stir together with dry topping ingredients so oats are evenly coated with butter for crisp edges.
- 1/2 cup white whole wheat flour or flour of your choice, use gluten-free flour for gf: Add structure and a tender crumb to the topping while balancing oats; choose preferred flour or a gluten–free alternative and combine with dry sugars and spices for even texture.
- 1/2 cup packed brown sugar: Contribute deep molasses-like sweetness and moisture to the topping, aiding in caramelization; pack and mix with oats and flour so the topping binds when butter is added.
- 3/4 teaspoon ground cinnamon: Impart warm spice and aroma that complements fruit and balances sweetness; measure carefully and blend into the dry topping ingredients for even flavor distribution.
- 1/4 teaspoons salt: Enhance and balance overall taste by sharpening flavors and controlling sweetness; dissolve into dry or wet components as specified to ensure consistent seasoning.
- 6 tablespoons butter melted: Bind the topping ingredients, add richness and promote golden browning when melted and mixed through the oat-flour–sugar mixture; pour warmed butter over dry topping and toss until clumps form.
- Ice cream or whipped cream for serving (optional): Provide a cool, creamy contrast when serving, adding richness and balance to the warm crisp; spoon or scoop over portions just before serving for best texture contrast.
Recipe Directions for Rhubarb Berry Crisp
I like to think of the cooking process as a rhythm, starting with preheating and finishing when the filling is bubbling and the topping is golden. Follow these steps closely, and you will be rewarded with a crisp that smells like spring and tastes like a cozy memory. Gather your ingredients and tools so you can focus on the sensory cues as the dessert transforms in the oven.
- Preheat the oven to 375 degrees F. Grease 7 (6 oz) ramekins with cooking spray and place on a large baking sheet. Set aside.: You will first notice the warm oven air as the temperature climbs, and it helps set expectations for the final browning of the topping. Preheating ensures the topping begins to crisp as soon as the dish goes in, creating contrast with the bubbling filling. A common mistake is skipping preheat, which can result in a soggy topping and uneven cook. Be mindful of oven accuracy, and use a thermometer if your oven runs cool or hot.
- First, make the filling. In a large bowl, combine rhubarb and berries. In a small bowl, combine sugar and orange zest. Rub together with your fingers until fragrant. Add the sugar mixture to the rhubarb and berries. Add the orange juice, vanilla, and cornstarch. Stir gently to combine. Set aside.: As you mix, inhale the citrus and fruit aroma, which should smell bright and slightly floral. The cornstarch will start to coat the fruit pieces and will thicken as it heats, giving you a glossy finish rather than a soupy mess. Stirring gently preserves berry shape and prevents turning the juice into purple mush. Avoid overmixing, which releases too much juice and can dilute the cornstarch's thickening effect.
- In a medium bowl, combine oats, flour, brown sugar, ground cinnamon, salt, and melted butter. Stir until mixture is moistened.: You will feel the mixture change texture as the melted butter integrates, from dry and crumbly to clumpy and slightly shiny. The aroma of warm sugar and cinnamon should be comforting and toasty. Mixing until just moistened gives you little clusters that crisp up; overworking the topping can create a dense, cakey texture instead of a crisp.
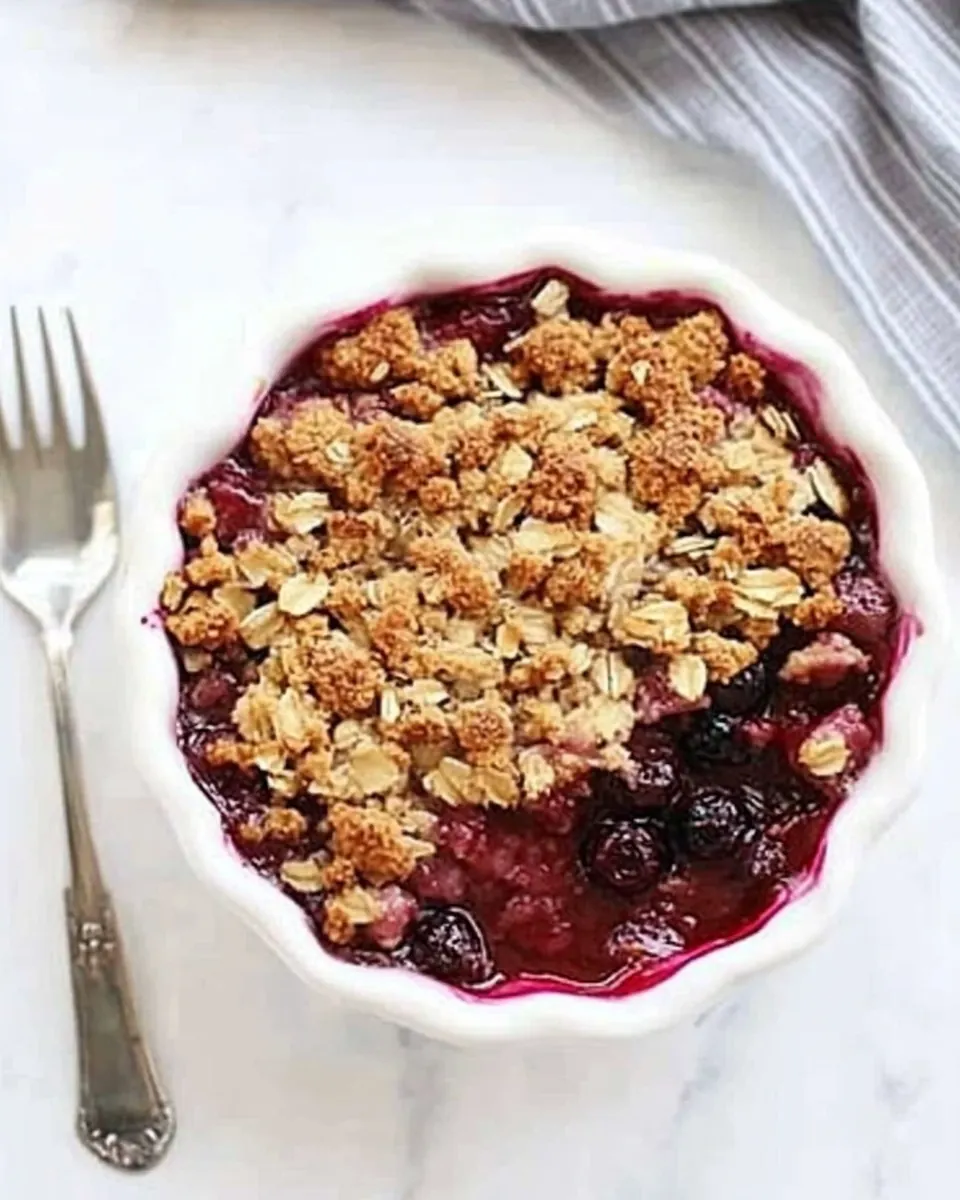
- Spoon rhubarb and berry mixture into prepared ramekins, about 3/4 full. Crumble oat topping over the rhubarb and berries evenly. Bake for 25-30 minutes or until topping is browned and rhubarb berry mixture is bubbling. Serve warm or at room temperature with ice cream or whipped cream, if desired.: As the ramekins bake, listen for the faint sizzle and watch for deep purple juices bubbling at the edges, a sign the filling is thick and hot. The topping should turn a warm golden brown with darker edges where the butter caramelizes; that nutty scent is a good indicator of doneness. A common pitfall is removing the crisps too early, which leaves undercooked rhubarb and a limp topping. Let the dishes sit for several minutes after baking so the filling firms slightly, and always place ramekins on a sheet pan in case of overflow.
- Note-you can make this crisp in a 9-inch baking dish or deep dish pie plate instead of ramekins. If you are making the recipe gluten-free make sure you use gluten-free oats and flour. If you have fresh berries, you can use them instead of frozen berries.: Using a larger dish will change the depth and baking dynamics, so expect shorter baking time and check for bubbling earlier. For fresh berries , the juices tend to be brighter and may cook down a bit faster, while frozen fruit releases extra liquid as it thaws and heats. One common error is not adjusting bake time for dish size, leading to either burnt topping or undercooked fruit; always look for bubbling and a golden top to judge doneness.
Make It Your Own
I like offering small, effective tweaks that let you personalize Rhubarb Berry Crisp without compromising its identity. These bite sized tips help whether you want a gluten–free version, a faster assembly, or a show stopping serving.
- Swap to gluten-free: Use certified gluten–free old fashioned oats and a 1 to 1 gluten–free flour to keep texture similar while making the recipe safe for gluten sensitive eaters.
- Boost citrus notes: Increase the orange zest by half a teaspoon for a brighter flavor profile that lifts the rhubarb and berries without changing sweetness levels.
- Make ahead the topping: Prepare the oat mixture and store it chilled for up to 48 hours, then crumble over the filling just before baking so it stays fresh and crisp.
- Individual portions: Use 6 ounce ramekins for elegant single servings that are perfect for dinner parties and help with portion control.
- Serve warm with contrast: Pair with a scoop of cold ice cream or a spoon of airy whipped cream to create a pleasing temperature and texture contrast with the hot, bubbling fruit.
Perfect Matches for Rhubarb Berry Crisp
This dessert is wonderfully versatile, and how you serve it can transform the occasion. Whether you want an intimate treat after a weeknight meal or a centerpiece for a spring brunch, these pairing ideas and serving tips will help you present Rhubarb Berry Crisp with confidence.
- Casual family dessert: Serve warm from the oven in a 9 inch dish with a scoop of ice cream for a comforting end to a busy day.
- Brunch addition: Offer individual ramekins alongside coffee and light pastries to add a fruity, homey note to a morning spread.
- Spring gathering: Present small portions on dessert plates with a drizzle of extra orange juice syrup to accentuate the citrus lift, ideal for alfresco meals or potlucks.
- Storage tips: Refrigerate leftovers covered for up to three days; reheat briefly in a warm oven to revive the crisp topping before serving.
- Seasonal pairing: Highlight the spring harvest by serving with simple green salads or mild cheeses for an informal dessert buffet during seasonal celebrations.
FAQ
Conclusion
This recipe shines because it balances tart rhubarb and sweet berries beneath a toasty oat topping, giving you both bright flavor and comforting texture. Give it a try the next time you want a simple dessert that feels thoughtful and seasonal. I hope it becomes one of your go to recipes for spring entertaining and quiet evenings alike.
Rhubarb Berry Crisp
Equipment
- Oven
- Ramekins
- Mixing Bowls
- Baking Sheet
Ingredients
- 2 cups chopped rhubarb Provide tart, fibrous stalks that lend a bright, slightly sour backbone to the filling; chop into uniform pieces so they soften evenly while retaining some texture during baking.
- 2 1/2 cups mixed frozen berries I used blackberries, blueberries, and raspberries Add a blend of sweet and tangy frozen berries that contribute deep color, juicy burst and complementary flavors; use them straight from frozen to prevent a watery filling and fold gently with other filling components.
- 1/2 cup granulated sugar Sweeten the filling to balance rhubarb’s tartness and enhance fruit flavors; dissolve into the fruit mixture so sugar integrates and helps draw juices for a saucy interior.
- 1 tablespoon orange zest Deliver concentrated citrus aroma and bright flavor that lifts the fruit combination; finely grate to avoid bitter pith and sprinkle directly into the filling for even distribution.
- 1 tablespoon fresh orange juice Introduce fresh acidity and subtle citrus notes to round out flavors and help macerate the fruit; juice and stir into the fruit mixture to integrate evenly without overpowering.
- 1/2 teaspoon vanilla extract Bring warm, rounded vanilla aroma that enhances the overall sweetness and depth of the filling; add and mix in with other liquid flavorings to infuse the fruit evenly.
- 1 tablespoon cornstarch Thicken the fruit juices as they cook to create a cohesive filling and prevent dryness in the topping; mix with sugar and liquids before combining with fruit to avoid lumps.
- 1 1/2 cups old-fashioned oats use gluten-free oats for gf Provide hearty texture and chewiness to the crisp topping while contributing to browning; stir together with dry topping ingredients so oats are evenly coated with butter for crisp edges.
- 1/2 cup white whole wheat flour or flour of your choice, use gluten-free flour for gf Add structure and a tender crumb to the topping while balancing oats; choose preferred flour or a gluten-free alternative and combine with dry sugars and spices for even texture.
- 1/2 cup packed brown sugar Contribute deep molasses-like sweetness and moisture to the topping, aiding in caramelization; pack and mix with oats and flour so the topping binds when butter is added.
- 3/4 teaspoon ground cinnamon Impart warm spice and aroma that complements fruit and balances sweetness; measure carefully and blend into the dry topping ingredients for even flavor distribution.
- 1/4 teaspoons salt Enhance and balance overall taste by sharpening flavors and controlling sweetness; dissolve into dry or wet components as specified to ensure consistent seasoning.
- 6 tablespoons butter melted Bind the topping ingredients, add richness and promote golden browning when melted and mixed through the oat-flour-sugar mixture; pour warmed butter over dry topping and toss until clumps form.
- Ice cream or whipped cream for serving optional Provide a cool, creamy contrast when serving, adding richness and balance to the warm crisp; spoon or scoop over portions just before serving for best texture contrast.
Instructions
- Preheat the oven to 375 degrees F. Grease 7 (6 oz) ramekins with cooking spray and place on a large baking sheet. Set aside.: You will first notice the warm oven air as the temperature climbs, and it helps set expectations for the final browning of the topping. Preheating ensures the topping begins to crisp as soon as the dish goes in, creating contrast with the bubbling filling. A common mistake is skipping preheat, which can result in a soggy topping and uneven cook. Be mindful of oven accuracy, and use a thermometer if your oven runs cool or hot.
- First, make the filling. In a large bowl, combine rhubarb and berries. In a small bowl, combine sugar and orange zest. Rub together with your fingers until fragrant. Add the sugar mixture to the rhubarb and berries. Add the orange juice, vanilla, and cornstarch. Stir gently to combine. Set aside.: As you mix, inhale the citrus and fruit aroma, which should smell bright and slightly floral. The cornstarch will start to coat the fruit pieces and will thicken as it heats, giving you a glossy finish rather than a soupy mess. Stirring gently preserves berry shape and prevents turning the juice into purple mush. Avoid overmixing, which releases too much juice and can dilute the cornstarch's thickening effect.
- In a medium bowl, combine oats, flour, brown sugar, ground cinnamon, salt, and melted butter. Stir until mixture is moistened.: You will feel the mixture change texture as the melted butter integrates, from dry and crumbly to clumpy and slightly shiny. The aroma of warm sugar and cinnamon should be comforting and toasty. Mixing until just moistened gives you little clusters that crisp up; overworking the topping can create a dense, cakey texture instead of a crisp.
- Spoon rhubarb and berry mixture into prepared ramekins, about 3/4 full. Crumble oat topping over the rhubarb and berries evenly. Bake for 25-30 minutes or until topping is browned and rhubarb berry mixture is bubbling. Serve warm or at room temperature with ice cream or whipped cream, if desired.: As the ramekins bake, listen for the faint sizzle and watch for deep purple juices bubbling at the edges, a sign the filling is thick and hot. The topping should turn a warm golden brown with darker edges where the butter caramelizes; that nutty scent is a good indicator of doneness. A common pitfall is removing the crisps too early, which leaves undercooked rhubarb and a limp topping. Let the dishes sit for several minutes after baking so the filling firms slightly, and always place ramekins on a sheet pan in case of overflow.
- Note-you can make this crisp in a 9-inch baking dish or deep dish pie plate instead of ramekins. If you are making the recipe gluten-free make sure you use gluten-free oats and flour. If you have fresh berries, you can use them instead of frozen berries.: Using a larger dish will change the depth and baking dynamics, so expect shorter baking time and check for bubbling earlier. For fresh berries , the juices tend to be brighter and may cook down a bit faster, while frozen fruit releases extra liquid as it thaws and heats. One common error is not adjusting bake time for dish size, leading to either burnt topping or undercooked fruit; always look for bubbling and a golden top to judge doneness.
Notes
- Swap to gluten-free: Use certified gluten-free old fashioned oats and a 1 to 1 gluten-free flour to keep texture similar while making the recipe safe for gluten sensitive eaters.
- Boost citrus notes: Increase the orange zest by half a teaspoon for a brighter flavor profile that lifts the rhubarb and berries without changing sweetness levels.
- Make ahead the topping: Prepare the oat mixture and store it chilled for up to 48 hours, then crumble over the filling just before baking so it stays fresh and crisp.
- Individual portions: Use 6 ounce ramekins for elegant single servings that are perfect for dinner parties and help with portion control.
- Serve warm with contrast: Pair with a scoop of cold ice cream or a spoon of airy whipped cream to create a pleasing temperature and texture contrast with the hot, bubbling fruit.