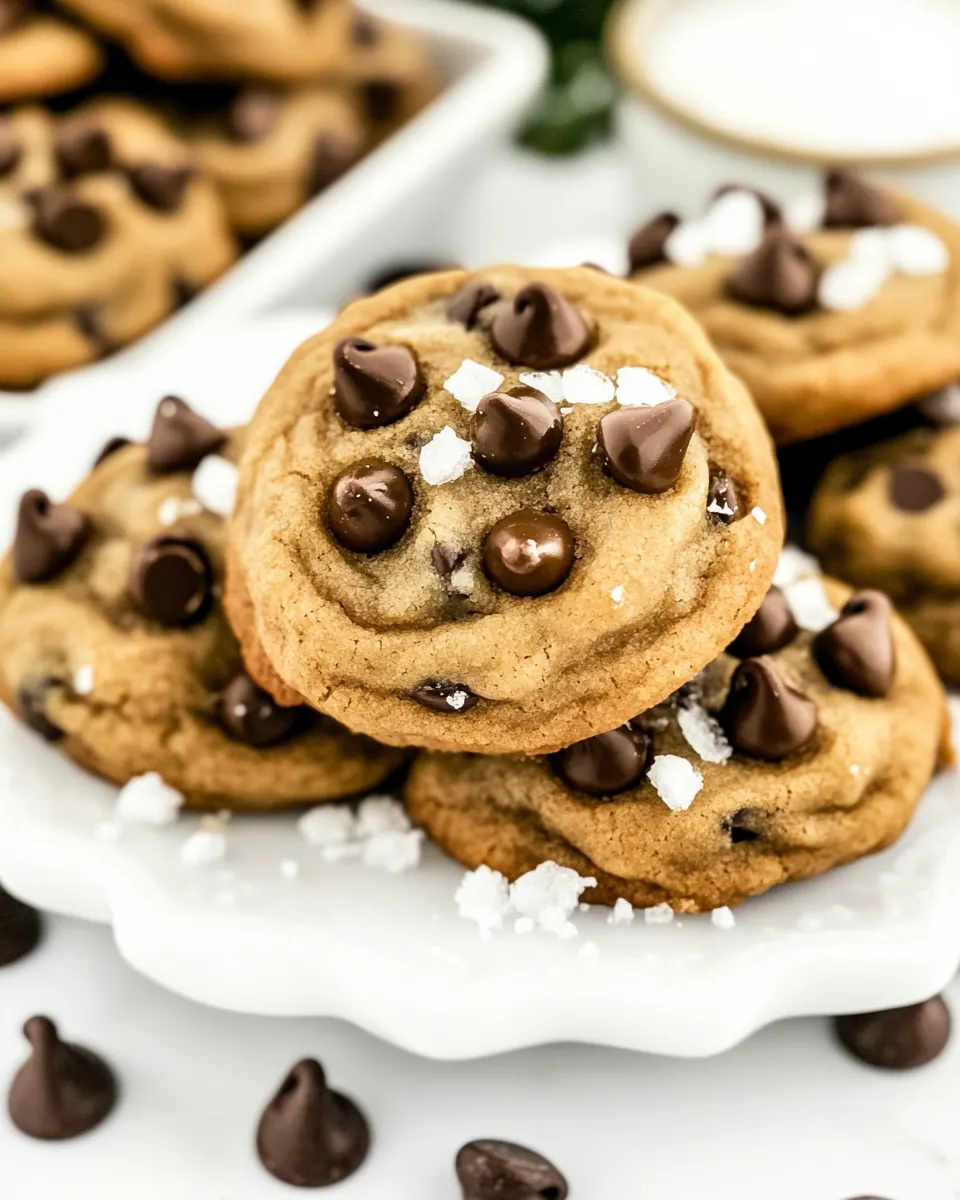
Salted Chocolate Chip Cookies
Salted Chocolate Chip Cookies have a way of turning any ordinary afternoon into an event at my house. The very first sentence of this essay needs to tell you that these cookies are the reason my kitchen often smells like warm comfort and celebration all at once. I remember the day I learned to brown butter for cookies, how the nutty aroma filled the room and everyone circled the countertop like moths to a porch light. That memory shaped how I approach baking, teaching me that small techniques make huge differences.
There is a rhythm to making Salted Chocolate Chip Cookies, a gentle back and forth between patience and reward. I like to listen to the butter as it foams and crackles in the pan, and I watch the dough transform from shaggy to glossy as the sugars dissolve and the egg binds everything together. Friends have texted me mid-batch asking when they can swing by, because the scent alone is an invitation. Over time I learned little habits that keep the process relaxed, like chilling the dough so the flavors deepen and the cookies spread just right.
Recipe Snapshot
1 hr 25 mins
25 mins
60 mins
Medium
200 kcal
American
Gluten-Free, Low FODMAP
Desserts
Saucepan, Mixing bowl, Cookie sheet, Parchment paper or silicone baking mat, Scoop
The Best Thing About This Salted Chocolate Chip Cookies
Flavor Contrast That Sparks Joy
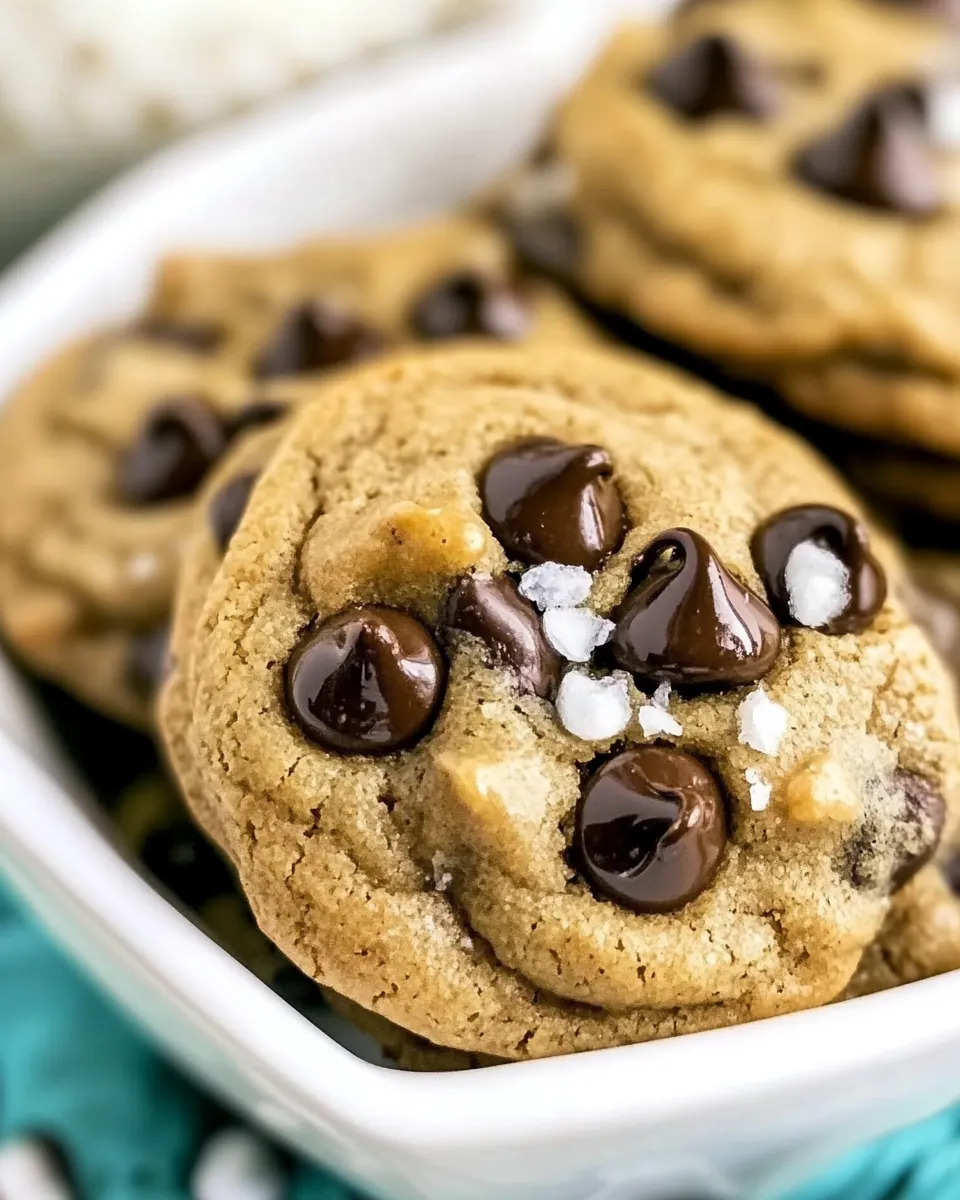
What really makes me fall for Salted Chocolate Chip Cookies is the tension between sweet and salty. The coarse sea salt on top wakes up the chocolate, and the browned butter brings in deep, toasty notes that feel almost caramel like. I love how each bite can alternate between gentle sweetness and a little pop of salt that keeps you coming back for another piece.
Simple Ingredients, Big Impact
These cookies remind me that you do not need a long ingredient list to achieve complexity. With staples like all-purpose flour and chocolate chips, the technique of browning butter and chilling the dough creates layers of texture and taste. I often tell friends that a modest shopping list can still produce bakery quality results at home.
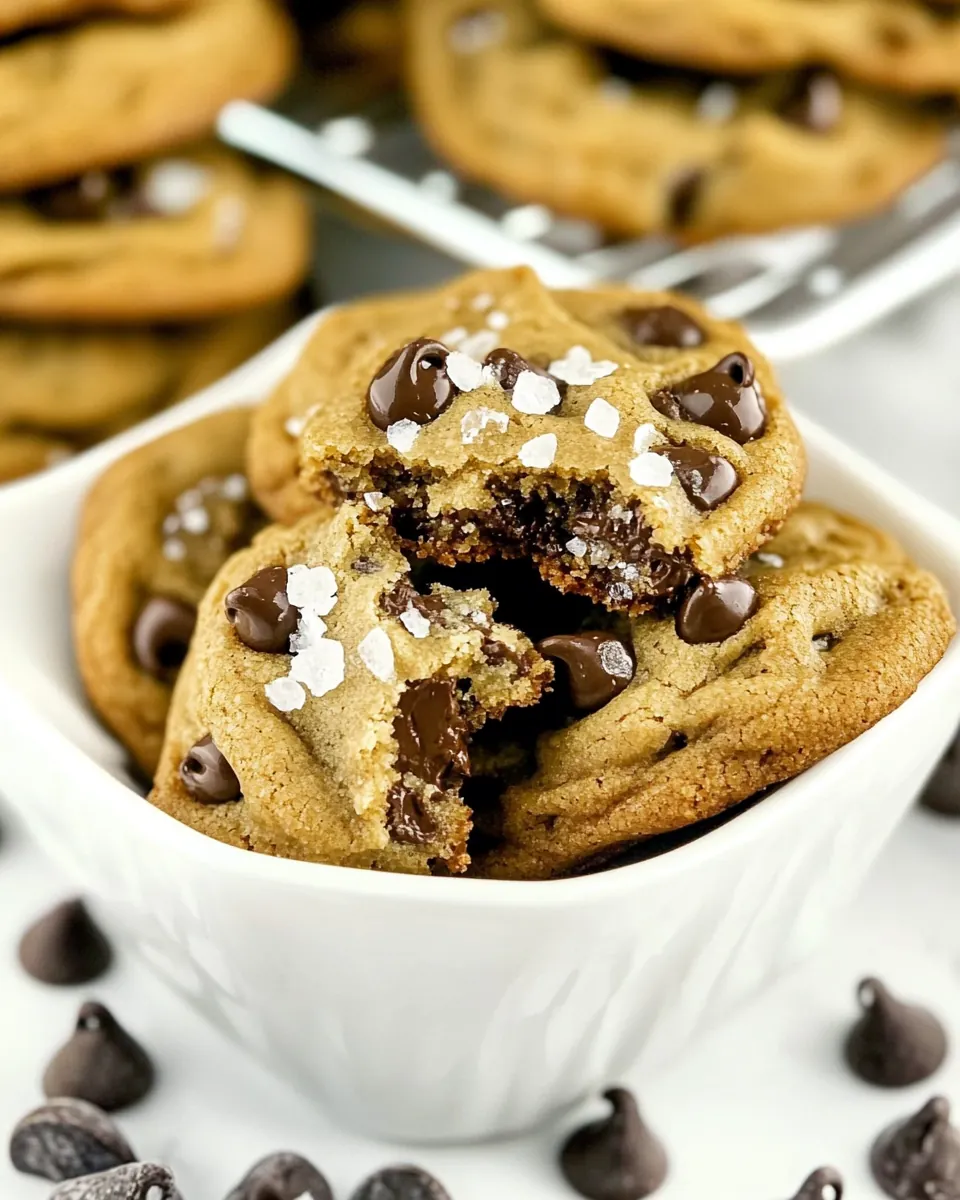
Texture That’s Truly Satisfying
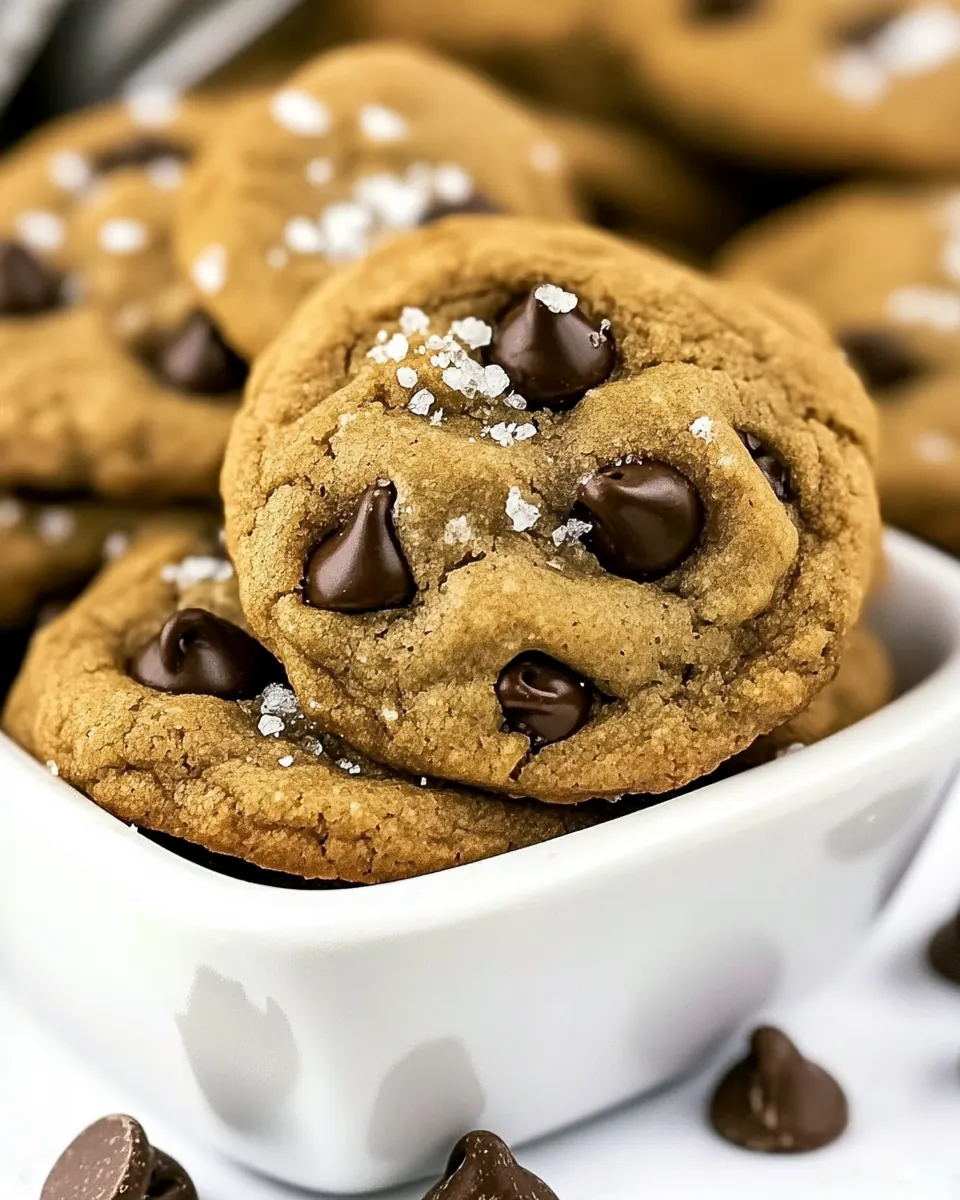
I adore the slightly crisp edges and tender, chewy centers these cookies deliver. The method of chilling the scoops before baking controls spread, giving you a pillowy center without a cakey crumb. When I bite into one fresh from the oven, I listen for that delicate, crackly surface and feel the soft interior yield, and that combination is addictive.
Reliable and Crowd Friendly
Whenever I bring a batch of Salted Chocolate Chip Cookies to a gathering, they disappear fast. They are forgiving enough for novice bakers, yet the browning technique and sea salt finish let experienced cooks show off a bit. I appreciate recipes that work for both casual afternoons and last minute get togethers, and this one checks those boxes.
Flexible for Storing and Sharing
Finally, these cookies are practical. I often make a big batch, store some in an airtight container for the week, and freeze portions for later. The dough holds up well chilled, and the baked cookies keep their texture if stored correctly. That reliability makes them a go to when I want something homemade without fuss.
Shopping List for Salted Chocolate Chip Cookies
I see the ingredients for Salted Chocolate Chip Cookies as a small orchestra where each player has a clear job. The browned butter provides a nutty foundation, the sugars balance moisture and chew, the egg binds, and the chocolate chips bring the star power. When combined in the right order, these components produce cookies that are both familiar and elevated.
- 1/2 cup (113 g) unsalted butter, sliced into tablespoons: Soften and enrich: adds a creamy fat base that provides tenderness, structure, and flavor when creamed with sugars; slicing into tablespoons helps it reach room temperature quickly and incorporate evenly into the dough.
- 1/2 cup (100 g) packed brown sugar: Sweeten and moisten: contributes deep caramel-like sweetness and moisture that enhances chewiness and complex flavor; packing ensures consistent measure and even distribution throughout the cookie batter.
- 1/3 cup (67 g) granulated sugar: Lighten and sweeten: supplies pure sweetness and helps with browning and crisp edges when creamed with butter; granulated texture also assists in aeration for better cookie spread.
- 1 large egg: Bind and leaven: contributes moisture, protein, and emulsification that help bind ingredients and create structure while aiding in gentle lift and tender crumb when baked.
- 1 teaspoon vanilla extract: Flavor and aroma: imparts warm, sweet aromatic notes that round out the cookie's flavor profile and enhances the perception of sweetness without adding moisture.
- 1/2 teaspoon salt: Season and balance: provides a savory counterpoint that amplifies sweetness and chocolate flavor while regulating yeast-like rise and improving overall taste balance.
- 1/2 teaspoon baking soda: React and leaven: produces carbon dioxide when activated by moisture and acid, contributing to cookie rise and lightness while helping achieve a soft yet slightly airy texture.
- 1 1/2 cups (186 g) all-purpose flour: Structure and chew: supplies the gluten-forming proteins and starches that establish dough structure, absorb moisture, and contribute to chewiness and proper cookie thickness.
- 1 1/2 cups (255 g) chocolate chips: Flavorful chunks and texture: delivers pockets of rich chocolate flavor and melting texture that contrast with the dough, creating familiar chocolatey bites throughout each cookie.
- Coarse sea salt for topping: Finish and contrast: adds crunchy, briny flakes on top that heighten overall flavor through a savory burst and textural contrast against the sweet, soft cookie interior.
Preparation Steps for Salted Chocolate Chip Cookies
Baking these cookies is a hands on, sensory experience. I like to work methodically so each step builds flavor and texture. Follow the sequence and listen for small cues, like butter foaming or dough firming in the fridge, and you will be rewarded with dependable results.
- Add sliced butter to a saucepan and heat over medium-low heat until melted. Continue cooking, stirring often, until the butter foams and reduces, then turns brown (little flecks of brown will appear). Don't walk away, this can happen quickly and it can burn fast. Remove from heat.: The pan will first hiss as the butter melts, then foam as the water content evaporates, and finally develop tiny brown flecks with a pronounced nutty, toasty aroma. This is the Maillard effect at work, concentrating flavor so the finished cookies taste richer and more complex. Stirring constantly prevents localized burning, and using a light colored saucepan helps you see the color change. A common mistake is attempting this on too high heat, which speeds up browning and easily leads to charred bits, resulting in a bitter taste.
- Transfer melted butter to a bowl and stir in both sugars until smooth. Mix in egg, vanilla, baking soda, and salt. Stir in flour, then stir in chocolate chips.: As the butter transitions from clear to golden to brown, the scent in your kitchen will shift from buttery to nutty and toasty, with caramel like notes. The reduction concentrates flavor and removes excess water, which helps the cookies set properly during baking. Stirring and removing the pan from heat just as brown flecks form prevents burning and preserves the desired aroma. Avoid walking away here, because the window between browned and burned can be very short.
- Scoop 2 tablespoon size balls of cookie dough onto a cookie sheet lined with parchment paper or a silicone baking mat. No need to space them at this time. Chill at least 1 hour.: You will notice a rapid change in both smell and color, and it is essential to stay attentive. Keep a close eye, and have a bowl ready to transfer the butter once it reaches the brown fleck stage so residual heat does not continue to cook it. One troubleshooting tip is to briefly lift the pan off the burner while stirring to moderate the heat. Failing to do this often results in an acrid note that cannot be masked later.
- Preheat oven to 350°F. Space the cookies 2 inches apart on 2 cookie sheets lined with parchment or silicone mats, then bake 10-15 minutes or until they just lose their glossy sheen.: When the butter has the right color and aroma, transfer it immediately to a cool bowl to stop the cooking process. The sensory cue is a warm, nutty scent and the visual cue is tiny toasted bits. Cooling slightly before combining with sugars prevents scrambling the egg when added later. If you leave the butter in the hot pan, carryover heat can push it from perfect to overdone, spoiling the batch.
- When done baking, press additional chocolate chips on top and sprinkle with sea salt.: The sugars will dissolve into the warm butter , creating a glossy, cohesive base for the dough. You will feel the mixture change under the spoon as it becomes unified, and the aroma will deepen into sweet toasted notes. This step contributes to chew and color in the finished cookie. If the mixture looks grainy, continue stirring gently until smooth, because undissolved sugar can create uneven texture.
- Mix in egg, vanilla, baking soda, and salt: As you add the egg , the mixture will thicken and gain elasticity, and the vanilla will brighten the aroma. The baking soda will be the leavening agent that reacts later with heat to create lift, and the salt balances sweetness. Mix until uniformly combined, scraping the bowl so there are no pockets of unmixed ingredients. Overmixing at this point can incorporate too much air, which changes the cookie structure, so stir just until combined.
- Stir in flour, then stir in chocolate chips: When the flour is folded in, the dough will transform from glossy to thicker and more cohesive, giving visual assurance that the structure is forming. The chocolate chips will disperse, providing pockets of melty chocolate after baking. Use gentle folding motions to avoid developing gluten, which keeps the cookies tender. A frequent error is overworking the dough, which makes the final cookie tough rather than chewy.
- Scoop 2 tablespoon size balls of cookie dough onto a cookie sheet lined with parchment paper or a silicone baking mat: The scooped mounds should be uniform so they bake evenly, and their surface will be slightly glossy from the sugar and butter. I like to use a small scoop for consistency, pressing the dough gently to smooth the top. No need to space them at this time, as chilling will firm them and control spread. If you skip portioning evenly, some cookies will over bake while others remain underdone.
- No need to space them at this time: Chilling the scoops together concentrates flavor and firms the dough, preventing premature spreading. The cold interior slows how fast the cookie spreads in the oven, producing a thicker, chewier center. Place the tray in the refrigerator level so the scoops chill uniformly. A common slip is trying to bake dough that is too warm, which leads to flat, thin cookies.
- Chill at least 1 hour: During chilling, the fats solidify and the flavors meld, which improves texture and depth. You may notice the dough becomes denser and easier to handle, and the chilled surface browns more slowly, giving you those desired glossy centers with crisp edges. If you are short on time, a brief freeze helps, but longer chilling often yields better flavor. Avoid baking immediately, or you will lose the controlled spread that makes these cookies ideal.
- Preheat oven to 350°F: Allow the oven to fully reach the temperature so the cookies begin to set immediately upon entering, which fosters proper rise and edge formation. The preheated environment encourages the exterior to firm while the interior stays tender. If you put cookies into an oven that is not hot enough, they will spread too thin and lack the desired chew.
- Space the cookies 2 inches apart on 2 cookie sheets lined with parchment or silicone mats, then bake 10 to 15 minutes or until they just lose their glossy sheen: As the cookies bake, watch for the glossy tops to dull and the edges to take on a light golden color, which indicates doneness. You will hear a gentle sizzle as moisture evaporates and the surface sets. Baking time controls the final texture, with shorter times yielding softer centers and longer times producing firmer edges. Avoid waiting for deep browning, which signals overbaking and dryness.
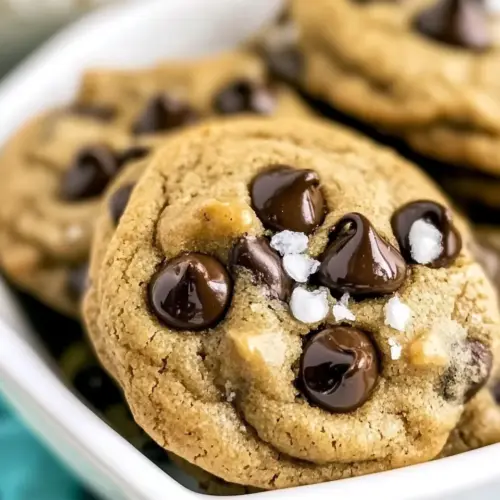
- When done baking, press additional chocolate chips on top and sprinkle with sea salt: Right out of the oven, the cookies are warm and slightly glossy, perfect for pressing on extra chocolate chips that will soften and look shiny, and for scattering coarse sea salt which melts slightly into the surface, giving delightful contrast. The aroma at this stage is intensely chocolatey with browned butter undertones. If you wait too long to add the chips and salt, they will not adhere, and the finishing touch will be lost.
Change It Up
Here are practical ways I like to vary Salted Chocolate Chip Cookies while keeping the base method intact. These tips help you adapt texture, presentation, and storage without altering the simple ingredient list.
- Chill Longer For a deeper flavor and firmer dough, refrigerate the scooped dough overnight to allow enzymes to mellow and flavors to develop, which often yields more complex tasting cookies.
- Double Press Right after baking, press a few extra chocolate chips into each cookie to create glossy chocolate pockets on the surface for a bakery style look.
- Salt Finish Sprinkle just a pinch of coarse sea salt on each warm cookie so the crystals soften slightly and provide a bright contrast to the sweet interior.
- Measure Carefully Spoon and level the flour to avoid dense cookies; packing the flour can alter texture and spread significantly.
- Use Room Temperature Egg Allow the egg to come to room temperature so it blends smoothly into the warm butter and sugar mixture, preventing partial cooking or curdling.
- Freeze Scoops Freeze the scooped dough on a tray, then transfer to a bag for long term storage; bake from frozen adding a minute or two to the time if needed.
What to Serve Alongside Salted Chocolate Chip Cookies
Cookies are versatile, and how you serve them can set the mood for any occasion. Below are ideas that cover everyday moments and special gatherings, with serving tips and storage suggestions to keep the cookies tasting their best.
- Simple Snack Pairing Serve a plate of Salted Chocolate Chip Cookies on a casual coffee break for a cozy treat that pairs well with hot beverages. Arrange them so the glossy chips face up, and provide napkins for easy sharing.
- After Dinner Treat Present the cookies as a small dessert after a relaxed meal, placing one or two on dessert plates with extra chocolate chips on top for visual appeal. This works well for family dinners or informal evenings with friends.
- Party Platter For gatherings, stack cookies on tiered trays to create an inviting dessert display. Keep extras in airtight containers and replenish the platter as needed. Labeling as freshly baked helps guests choose warm pieces.
- Gifting Option Wrap a dozen cooled cookies in parchment and tie with twine for a thoughtful homemade gift. Include a note about storage: keep airtight at room temperature for four to five days, or freeze for longer storage.
- Seasonal Serving These cookies fit any season, from picnic afternoons to cozy winter tea times. The profile is versatile, so you can include them in holiday cookie swaps or casual weekend treats without fuss.
- Storage Tips To maintain chewiness, store baked cookies at room temperature in an airtight container with a slice of bread to help retain moisture for up to four to five days. For long term storage, freeze cooled cookies in a sealed bag for a few months.
FAQ
Conclusion
Salted Chocolate Chip Cookies combine browned butter, balanced sugars, and a sprinkle of sea salt to deliver richly flavored, chewy cookies with crisp edges. This recipe shines because small technique choices, like browning the butter and chilling the dough, transform simple ingredients into something memorable. I encourage you to give this method a try, paying attention to sensory cues and resisting the urge to rush the chilling stage. It is a comforting, reliable recipe that rewards patience and tastes like a true homemade treat.
Salted Chocolate Chip Cookies
Equipment
- Saucepan
- Mixing Bowl
- Cookie Sheet
- Parchment paper or silicone baking mat
- Scoop
Ingredients
- 1/2 cup (113 g) unsalted butter, sliced into tablespoons Soften and enrich: adds a creamy fat base that provides tenderness, structure, and flavor when creamed with sugars; slicing into tablespoons helps it reach room temperature quickly and incorporate evenly into the dough.
- 1/2 cup (100 g) packed brown sugar Sweeten and moisten: contributes deep caramel-like sweetness and moisture that enhances chewiness and complex flavor; packing ensures consistent measure and even distribution throughout the cookie batter.
- 1/3 cup (67 g) granulated sugar Lighten and sweeten: supplies pure sweetness and helps with browning and crisp edges when creamed with butter; granulated texture also assists in aeration for better cookie spread.
- 1 large egg Bind and leaven: contributes moisture, protein, and emulsification that help bind ingredients and create structure while aiding in gentle lift and tender crumb when baked.
- 1 teaspoon vanilla extract Flavor and aroma: imparts warm, sweet aromatic notes that round out the cookie's flavor profile and enhances the perception of sweetness without adding moisture.
- 1/2 teaspoon salt Season and balance: provides a savory counterpoint that amplifies sweetness and chocolate flavor while regulating yeast-like rise and improving overall taste balance.
- 1/2 teaspoon baking soda React and leaven: produces carbon dioxide when activated by moisture and acid, contributing to cookie rise and lightness while helping achieve a soft yet slightly airy texture.
- 1 1/2 cups (186 g) all-purpose flour Structure and chew: supplies the gluten-forming proteins and starches that establish dough structure, absorb moisture, and contribute to chewiness and proper cookie thickness.
- 1 1/2 cups (255 g) chocolate chips Flavorful chunks and texture: delivers pockets of rich chocolate flavor and melting texture that contrast with the dough, creating familiar chocolatey bites throughout each cookie.
- Coarse sea salt for topping Finish and contrast: adds crunchy, briny flakes on top that heighten overall flavor through a savory burst and textural contrast against the sweet, soft cookie interior.
Instructions
- Add sliced butter to a saucepan and heat over medium-low heat until melted. Continue cooking, stirring often, until the butter foams and reduces, then turns brown (little flecks of brown will appear). Don't walk away, this can happen quickly and it can burn fast. Remove from heat.: The pan will first hiss as the butter melts, then foam as the water content evaporates, and finally develop tiny brown flecks with a pronounced nutty, toasty aroma. This is the Maillard effect at work, concentrating flavor so the finished cookies taste richer and more complex. Stirring constantly prevents localized burning, and using a light colored saucepan helps you see the color change. A common mistake is attempting this on too high heat, which speeds up browning and easily leads to charred bits, resulting in a bitter taste.
- Transfer melted butter to a bowl and stir in both sugars until smooth. Mix in egg, vanilla, baking soda, and salt. Stir in flour, then stir in chocolate chips.: As the butter transitions from clear to golden to brown, the scent in your kitchen will shift from buttery to nutty and toasty, with caramel like notes. The reduction concentrates flavor and removes excess water, which helps the cookies set properly during baking. Stirring and removing the pan from heat just as brown flecks form prevents burning and preserves the desired aroma. Avoid walking away here, because the window between browned and burned can be very short.
- Scoop 2 tablespoon size balls of cookie dough onto a cookie sheet lined with parchment paper or a silicone baking mat. No need to space them at this time. Chill at least 1 hour.: You will notice a rapid change in both smell and color, and it is essential to stay attentive. Keep a close eye, and have a bowl ready to transfer the butter once it reaches the brown fleck stage so residual heat does not continue to cook it. One troubleshooting tip is to briefly lift the pan off the burner while stirring to moderate the heat. Failing to do this often results in an acrid note that cannot be masked later.
- Preheat oven to 350°F. Space the cookies 2 inches apart on 2 cookie sheets lined with parchment or silicone mats, then bake 10-15 minutes or until they just lose their glossy sheen.: When the butter has the right color and aroma, transfer it immediately to a cool bowl to stop the cooking process. The sensory cue is a warm, nutty scent and the visual cue is tiny toasted bits. Cooling slightly before combining with sugars prevents scrambling the egg when added later. If you leave the butter in the hot pan, carryover heat can push it from perfect to overdone, spoiling the batch.
- When done baking, press additional chocolate chips on top and sprinkle with sea salt.: The sugars will dissolve into the warm butter , creating a glossy, cohesive base for the dough. You will feel the mixture change under the spoon as it becomes unified, and the aroma will deepen into sweet toasted notes. This step contributes to chew and color in the finished cookie. If the mixture looks grainy, continue stirring gently until smooth, because undissolved sugar can create uneven texture.
- Mix in egg, vanilla, baking soda, and salt: As you add the egg , the mixture will thicken and gain elasticity, and the vanilla will brighten the aroma. The baking soda will be the leavening agent that reacts later with heat to create lift, and the salt balances sweetness. Mix until uniformly combined, scraping the bowl so there are no pockets of unmixed ingredients. Overmixing at this point can incorporate too much air, which changes the cookie structure, so stir just until combined.
- Stir in flour, then stir in chocolate chips: When the flour is folded in, the dough will transform from glossy to thicker and more cohesive, giving visual assurance that the structure is forming. The chocolate chips will disperse, providing pockets of melty chocolate after baking. Use gentle folding motions to avoid developing gluten, which keeps the cookies tender. A frequent error is overworking the dough, which makes the final cookie tough rather than chewy.
- Scoop 2 tablespoon size balls of cookie dough onto a cookie sheet lined with parchment paper or a silicone baking mat: The scooped mounds should be uniform so they bake evenly, and their surface will be slightly glossy from the sugar and butter. I like to use a small scoop for consistency, pressing the dough gently to smooth the top. No need to space them at this time, as chilling will firm them and control spread. If you skip portioning evenly, some cookies will over bake while others remain underdone.
- No need to space them at this time: Chilling the scoops together concentrates flavor and firms the dough, preventing premature spreading. The cold interior slows how fast the cookie spreads in the oven, producing a thicker, chewier center. Place the tray in the refrigerator level so the scoops chill uniformly. A common slip is trying to bake dough that is too warm, which leads to flat, thin cookies.
- Chill at least 1 hour: During chilling, the fats solidify and the flavors meld, which improves texture and depth. You may notice the dough becomes denser and easier to handle, and the chilled surface browns more slowly, giving you those desired glossy centers with crisp edges. If you are short on time, a brief freeze helps, but longer chilling often yields better flavor. Avoid baking immediately, or you will lose the controlled spread that makes these cookies ideal.
- Preheat oven to 350°F: Allow the oven to fully reach the temperature so the cookies begin to set immediately upon entering, which fosters proper rise and edge formation. The preheated environment encourages the exterior to firm while the interior stays tender. If you put cookies into an oven that is not hot enough, they will spread too thin and lack the desired chew.
- Space the cookies 2 inches apart on 2 cookie sheets lined with parchment or silicone mats, then bake 10 to 15 minutes or until they just lose their glossy sheen: As the cookies bake, watch for the glossy tops to dull and the edges to take on a light golden color, which indicates doneness. You will hear a gentle sizzle as moisture evaporates and the surface sets. Baking time controls the final texture, with shorter times yielding softer centers and longer times producing firmer edges. Avoid waiting for deep browning, which signals overbaking and dryness.
- When done baking, press additional chocolate chips on top and sprinkle with sea salt: Right out of the oven, the cookies are warm and slightly glossy, perfect for pressing on extra chocolate chips that will soften and look shiny, and for scattering coarse sea salt which melts slightly into the surface, giving delightful contrast. The aroma at this stage is intensely chocolatey with browned butter undertones. If you wait too long to add the chips and salt, they will not adhere, and the finishing touch will be lost.
Notes
- Chill Longer For a deeper flavor and firmer dough, refrigerate the scooped dough overnight to allow enzymes to mellow and flavors to develop, which often yields more complex tasting cookies.
- Double Press Right after baking, press a few extra chocolate chips into each cookie to create glossy chocolate pockets on the surface for a bakery style look.
- Salt Finish Sprinkle just a pinch of coarse sea salt on each warm cookie so the crystals soften slightly and provide a bright contrast to the sweet interior.
- Measure Carefully Spoon and level the flour to avoid dense cookies; packing the flour can alter texture and spread significantly.
- Use Room Temperature Egg Allow the egg to come to room temperature so it blends smoothly into the warm butter and sugar mixture, preventing partial cooking or curdling.
- Freeze Scoops Freeze the scooped dough on a tray, then transfer to a bag for long term storage; bake from frozen adding a minute or two to the time if needed.