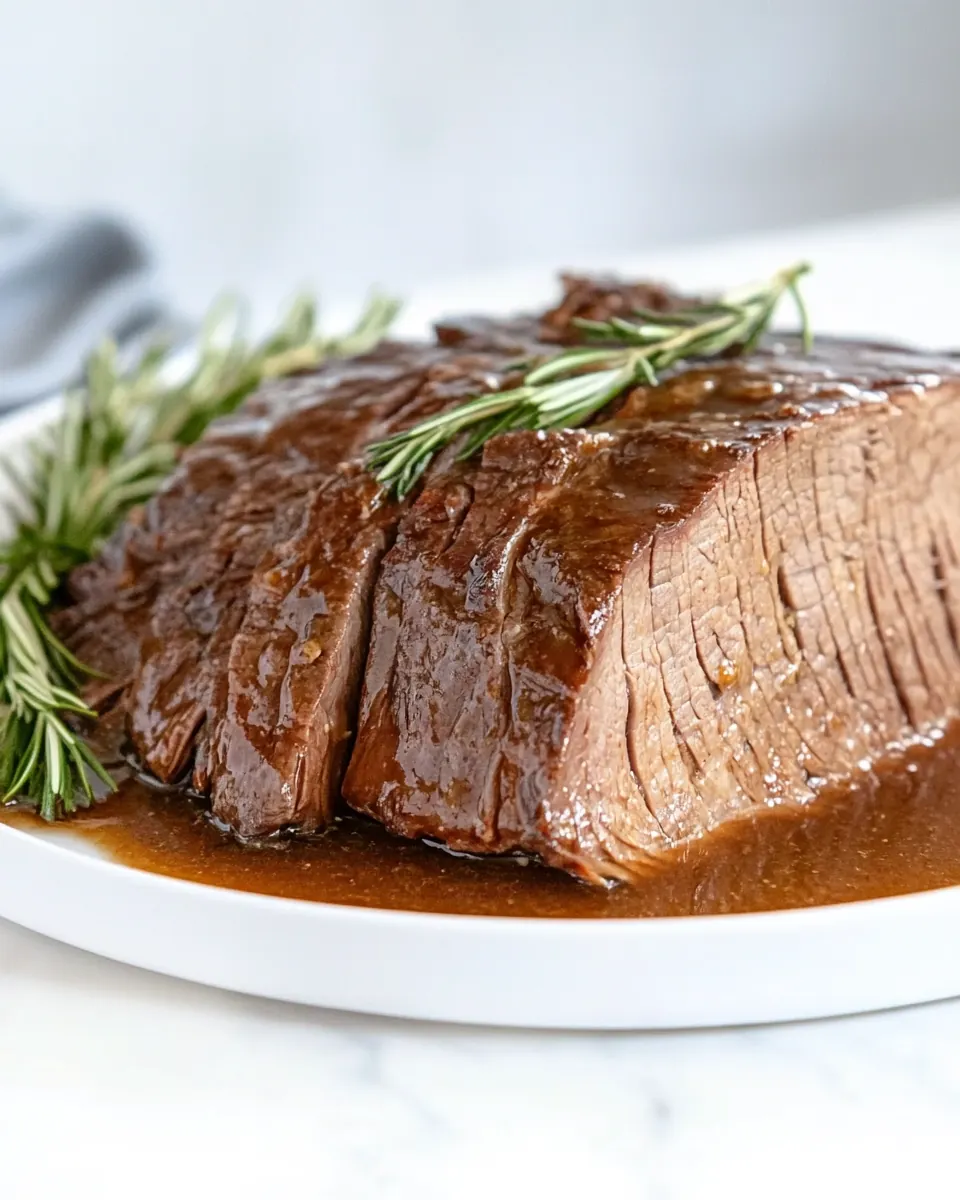
Instant Pot Tri Tip
Instant Pot Tri Tip is the kind of dish that sneaks up on you, turning a modest cut of beef into something that feels celebratory without the fuss. The first time I cooked it, I was racing the clock between errands and an unexpected dinner guest, and the Instant Pot rescued me. I still remember the quick sear, the way the kitchen filled with warm, savory aromas, and how the meat sliced like butter when it came time to eat.
Over the years I have refined the seasoning so the natural flavor of the tri tip shines through, while the spice rub gives it a touch of sweetness and heat. This version uses pantry staples, and the technique makes it approachable whether you’re cooking for family or friends. I like that it feels impressive, yet it doesn’t demand constant attention, which makes it a weekday hero and a weekend showstopper.
Recipe Snapshot
55 mins
5 mins
50 mins
Medium
450 kcal
American
Gluten-Free, Keto
Dinner
Instant Pot, Tongs, Wooden spoon
The Beauty of This Instant Pot Tri Tip
Reliable, fast results
I love that Instant Pot Tri Tip takes a cut that can be intimidating and renders it tender in under an hour. The pressure, combined with a short sear, breaks down connective tissue without drying the meat, so you get consistent results even on busy nights.
Bold but balanced flavor
The blend of garlic powder, onion powder, paprika, and a hint of brown sugar creates a crust that is savory with a whisper of sweetness. I use crushed red pepper very sparingly to add warmth without overwhelming the beef.
Minimal equipment, maximum impact
Using an electric pressure cooker simplifies the process, and you don’t need a long list of gadgets. That means less cleanup, and more time to focus on sides or conversation with guests, which I always appreciate.
Versatile serving options
The finished tri tip slices beautifully against the grain, making it perfect for plated dinners, sandwiches, or a protein-forward salad. I often change the accompaniments depending on season and mood, and it always plays nicely with simple pan sauces.
Great for hosting
Because much of the work happens hands off, I can prep earlier and use those final minutes to set the table. That makes this recipe a go to whenever I want food that feels cared for without constant babysitting.
Instant Pot Tri Tip Shopping List
These ingredients are chosen to celebrate the meat while building a compact, layered flavor profile. The spice rub brings sweet, smoky, and savory notes, while the beef broth in the pot supplies moisture and amplifies the fond from searing. Key players like olive oil and garlic support texture and aromatic depth, making every bite satisfying.
- 2 pounds tri-tip: Season generously and help form a flavorful crust on the roast during searing; provides the primary protein and texture for the dish, requiring even cooking and resting after pressure release to maintain juiciness.
- 1/2 teaspoon garlic powder: Add pungent, savory depth and enhance browned flavors; works well rubbed into the meat to create an aromatic base that complements the other dry seasonings during pressure cooking.
- 2 teaspoons onion powder: Impart a sweet, savory oniony note and boost overall umami; sprinkle evenly over the tri-tip to meld with the garlic powder and create balanced seasoning throughout the roast.
- 1 1/2 teaspoons paprika: Deliver warm color and mild smoky sweetness while rounding out the rub; contributes to both appearance and subtle warmth that pairs well with the beef’s natural flavors.
- 2 teaspoons brown sugar: Provide a touch of sweetness to balance the savory and spicy elements; helps caramelize during searing and slightly enhance the sauce richness in the Instant Pot.
- 1 teaspoon salt: Enhance and intensify overall flavor while helping to tenderize proteins slightly; must be measured carefully to maintain a balanced seasoning profile without overpowering the meat.
- 1/4 teaspoon crushed red pepper: Add concentrated heat and a pleasant lingering kick; use sparingly in the rub to introduce a subtle background spice that complements the paprika and black pepper.
- 1/2 teaspoon black pepper: Contribute sharp, warming heat and complexity to the seasoning blend; cracked or ground, it supports the savory profile and pairs with the red pepper for cohesive spice.
- 2 teaspoons olive oil: Lubricate the pan for searing and help develop a deep brown crust on the tri-tip; also assists in transferring heat evenly and building fond for deglazing with broth.
- 1 small onion chopped: Provide aromatic sweetness and savory body when softened; sliced or chopped, it melts into the cooking liquid, contributing to the sauce’s flavor and overall depth.
- 1 tablespoon minced garlic: Deliver fresh, pungent aromatic intensity that brightens the meat’s flavor; minced garlic releases oils when sautéed, building a fragrant base before pressure cooking.
- 1 cup beef broth: Supply savory liquid for braising and deglazing, adding concentrated beef flavor; helps create a cooking environment for tenderizing the tri-tip and forms the basis of the pan sauce.
Putting Together Instant Pot Tri Tip
Bringing this recipe together is about controlled heat, timing, and attention to aroma. I like to move deliberately through searing, sautéing aromatics, and then letting the Instant Pot do the heavy lifting. Below I expand each direction into sensory rich guidance so you know when you are on the right track.
- Trim off any excess fat from the tri-tip. In a small bowl, mix garlic powder, onion powder, paprika, brown sugar, salt, crushed red pepper, and black pepper. Rub the spice blend all over the meat.: As you feel the surface of the tri tip , removing thick pockets of fat helps the seasoning adhere and promotes even searing; the meat should feel firm with a thin connective layer left in place to keep moisture. You will notice a cleaner sear without large fat flare ups. A common mistake is cutting too aggressively, which can dry the edges during high heat cooking, so leave a thin protective layer rather than shaving every trace.
- Set the Instant Pot to the sauté mode and add olive oil. Sear the tri-tip on all sides until a brown crust forms, about 1-2 minutes per side. Remove the meat and set aside. Add the chopped onion to the pot and cook until soft, about 5-7 minutes. Then stir in the minced garlic for about 1 minute.: When you whisk these dry spices together, inhale a chorus of warm, roasted aromas from the paprika and brown sugar , and a sharp savory edge from the powders. This uniform blend ensures every surface of the beef gets the same flavor, preventing pockets of over or under seasoned areas. Avoid overblending with wet hands, which can clump the rub and make it hard to distribute.
- Pour in the beef broth and use a wooden spoon to scrape up all the brown bits from the bottom of the pot. This adds flavor and prevents burning.: As you massage the mix into the tri tip , feel the coarse texture of the rub anchoring to the meat; the scent will intensify and the exterior will look evenly coated. Even pressure and time ensure the granulated sugars begin to adhere, priming the meat for caramelization. A frequent error here is rubbing too little, resulting in a bland crust, so be generous and thorough.
- Place the trivet in the Instant Pot. Lay the seared tri-tip on top of the trivet so that the meat is not sitting in the liquid.: When the pot heats, you will hear the oil thinly ripple and the surface may shimmer. Adding olive oil to a fully hot pot is key to instant surface searing; if the oil smokes excessively, the heat is too high, so reduce it to protect flavors. Do not add the meat to a cold pan, which will prevent proper browning.
- Seal the Instant Pot and set it to high pressure for 25 minutes. Once the cooking cycle is complete, allow the pressure to release naturally for about 10 minutes before doing a quick release of any remaining steam.: As you press the tri tip to the hot surface, you should hear an assertive sizzle and witness a rich, mahogany crust develop within minutes; this Maillard reaction creates deep savory notes. Turn carefully with tongs to maintain the crust. A common slip is moving the meat too soon which rips the developing crust, so wait until it releases naturally before flipping.
- Remove the tri-tip and let it rest for 5 minutes. Slice the meat against the grain and serve immediately.: After searing, the tri tip will feel firmer and will carry a fragrant, roasted aroma; resting briefly keeps juices from running out when placed directly into the pot. Use a plate that catches any juices to keep them for later. Avoid stacking hot pieces, which can trap steam and soften the crust prematurely.
- Add the chopped onion to the pot and cook until soft about 5 to 7 minutes: As the onion softens it will release a sweet perfume and take on a translucent sheen, signaling that its natural sugars are becoming more pronounced. Stir occasionally so it browns lightly but does not burn. If you rush this step and crank the heat, the onion will char and turn bitter, which dulls the final flavor.
- Then stir in the minced garlic for about 1 minute: Fresh garlic will pop with a green sharpness then mellow into a warm, toasty aroma in under a minute; the moment is brief so watch it closely. This step adds immediate aromatic lift to the broth. Overcooking the garlic will make it taste bitter, so remove from direct heat once it becomes fragrant.
- Pour in the beef broth and use a wooden spoon to scrape up all the brown bits from the bottom of the pot: When the broth hits the hot surface you will see steam rise and the browned fond dissolve into the liquid, releasing deep, meaty aroma. Scraping integrates those concentrated flavors into the cooking liquid, which the meat will absorb. Failing to deglaze can leave burnt bits that trigger a burn warning, so be thorough until the bottom looks clean.
- Place the trivet in the Instant Pot: Setting the trivet lifts the tri tip above the liquid, ensuring it steams rather than braises, which preserves a seared exterior while allowing internal collagen to break down; visually the trivet forms a stable platform. If you skip the trivet, the meat will sit in broth and the crust may soften too much, losing texture.
- Lay the seared tri-tip on top of the trivet so that the meat is not sitting in the liquid: As you position the roast, notice how the juices that remain on the plate run down to the pot and mingle with the broth, adding flavor below; the meat should sit elevated to keep the crust intact. Make sure it is centered and stable so it cooks evenly. A typical error is crowding the pot, which forces uneven cooking, so use a single, well placed roast.
- Seal the Instant Pot and set it to high pressure for 25 minutes: Once sealed, the air will thicken and the pressure will build, producing a gentle but consistent environment that transforms connective tissue into silky tenderness; you might hear a low hum as it comes to pressure. This timing balances doneness with moisture. Overcooking at pressure can make meat stringy, so adhere to the recommended minutes for best texture.
- Once the cooking cycle is complete allow the pressure to release naturally for about 10 minutes before doing a quick release of any remaining steam: During the natural release the pot slowly equalizes temperature, which helps the meat finish gently and retain juices; you will notice less violent bubbling and a calmer sound. Quick releasing too early can cause a sudden loss of juices and a tougher texture, so give that quiet ten minutes for optimal results.
- Remove the tri-tip and let it rest for 5 minutes: Resting lets the internal juices redistribute so slices stay juicy, and the surface cools just enough to be handled; you may feel a faint, warm steam as you tent it. Cutting too soon causes the juices to run out, leaving drier slices, so patience at this stage pays off.
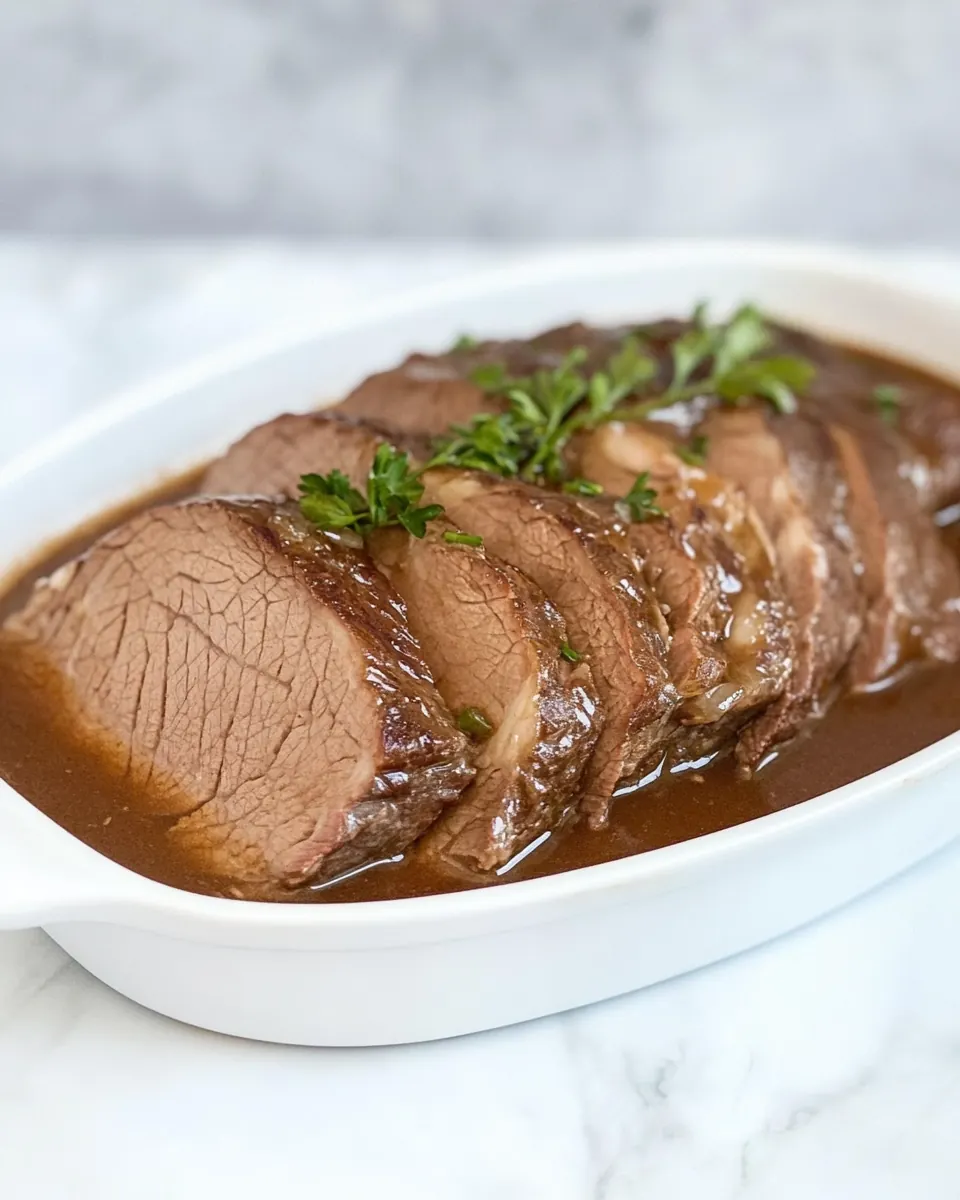
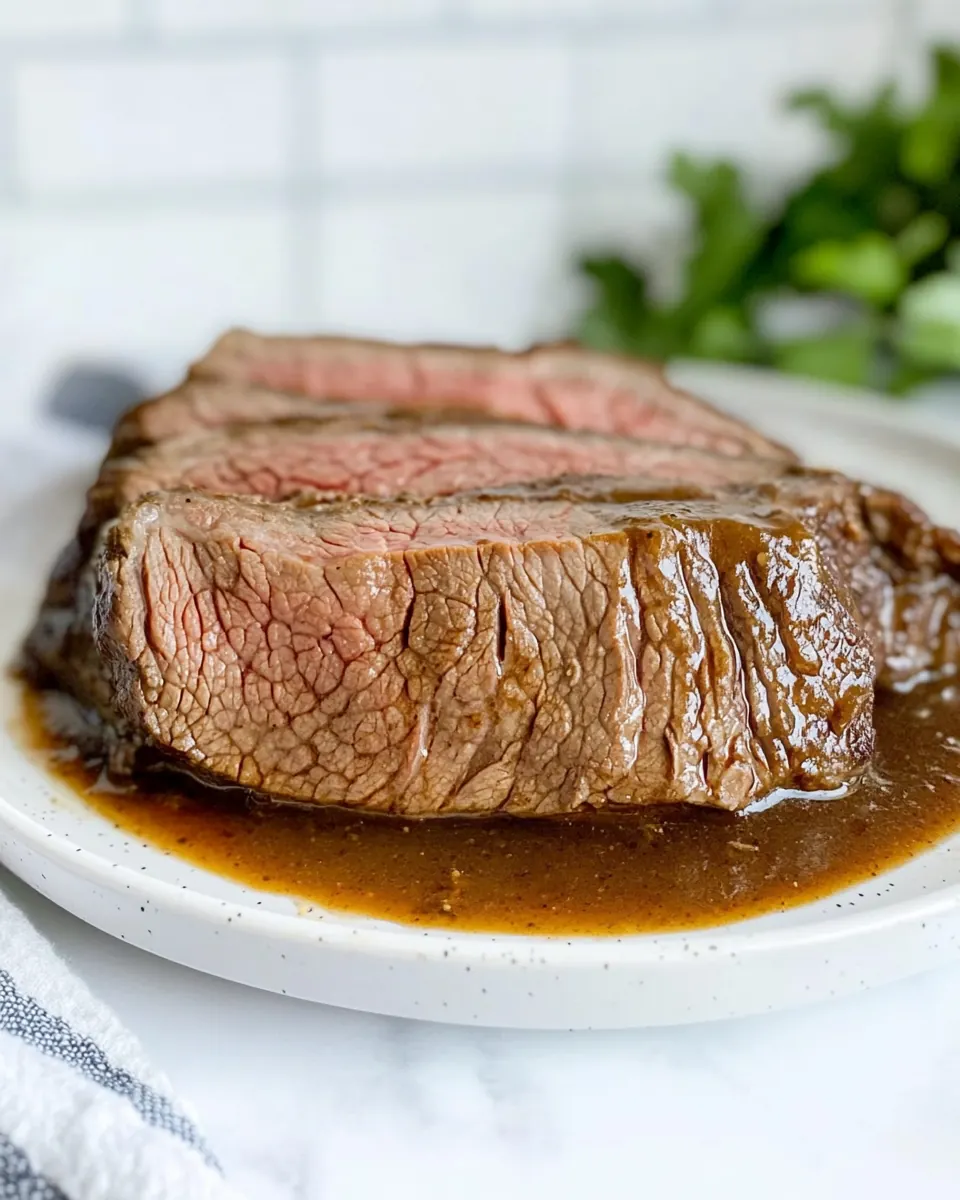
- Slice the meat against the grain and serve immediately: As you cut across the grain, the beef will reveal a rosy interior with clean fibers, and each bite will feel tender and cohesive. Proper slicing shortens the muscle fibers, enhancing perceived tenderness. Cutting with the grain or in too-thick slabs makes chewiness more noticeable, so choose thin, deliberate slices.
Helpful Notes about Instant Pot Tri Tip

This section gathers practical advice I have learned through making this recipe often, from timing tricks to presentation pointers. These ideas help you get consistently tender, flavorful results while minimizing stress and cleanup.
- Bring to room temperature Before you start, let the tri tip sit out for 20 to 30 minutes so it cooks more evenly and reaches desired tenderness without overcooking the exterior.
- Dry the surface Pat the meat dry with paper towels prior to rubbing to ensure the spice mixture sticks and a strong crust forms during searing.
- Don’t overcrowd the pot If you try to sear too many pieces at once the pan will cool and steam will form, which prevents proper browning; work in batches if needed.
- Check the trivet placement Make sure the trivet sits level so the roast does not tip and cook unevenly; stability during pressure cooking matters for uniform doneness.
- Save the cooking juices After removing the meat, skim and reduce the liquid on sauté for a minute for a quick pan sauce that concentrates flavor and is perfect for serving.
Serve This Instant Pot Tri Tip With
This roast is friendly with a wide variety of sides and serving styles, from casual sandwiches to a composed dinner plate. Think about texture contrast, such as a crisp vegetable or a creamy mash, and temperature balance, like a warm sauce versus cool greens. Below I outline ideas and pairings that have worked well for lunch or dinner occasions.
- Plated dinner Serve sliced tri tip alongside roasted vegetables and a simple pan sauce made from the cooking liquid for a tidy, satisfying dinner.
- Sandwiches Thin slices piled on a sturdy roll with a smear of mustard or a light aioli create a hearty lunch option that highlights the meat.
- Family gatherings This recipe scales well, and the hands off nature means you can time it around guests arriving, making it suitable for weekend meals and casual entertaining.
- Storage Leftovers keep well refrigerated for a few days, slice thin and store in an airtight container with a little reserved broth to maintain moisture, ideal for quick meals later.
- Seasonal pairing In colder months the warm, savory profile pairs nicely with root vegetables and hearty grains, making it a comforting winter main.
FAQ
Conclusion
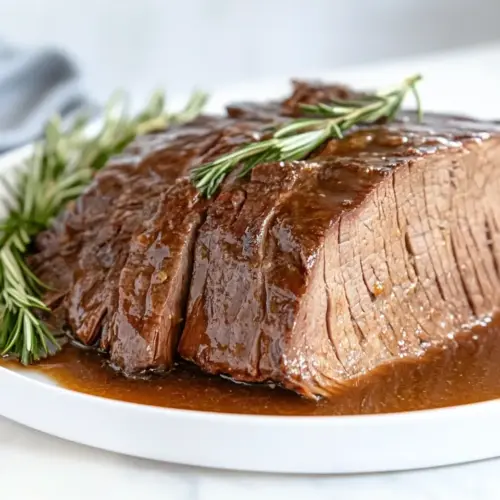
This Instant Pot Tri Tip stands out because it turns a simple roast into tender, flavorful slices with minimal hands on time. I encourage you to try it when you want an easy but impressive main, whether for a weeknight dinner or when guests arrive. The balance of the spice rub, searing, and pressure cooking creates a satisfying texture and aroma that makes serving it feel like a thoughtful gesture. Give it a go, and enjoy the relaxed confidence that comes from a reliable, delicious roast.
Instant Pot Tri Tip
Equipment
- Instant Pot
- Tongs
- Wooden Spoon
Ingredients
- 2 pounds tri-tip Season generously and help form a flavorful crust on the roast during searing; provides the primary protein and texture for the dish, requiring even cooking and resting after pressure release to maintain juiciness.
- 1/2 teaspoon garlic powder Add pungent, savory depth and enhance browned flavors; works well rubbed into the meat to create an aromatic base that complements the other dry seasonings during pressure cooking.
- 2 teaspoons onion powder Impart a sweet, savory oniony note and boost overall umami; sprinkle evenly over the tri-tip to meld with the garlic powder and create balanced seasoning throughout the roast.
- 1 1/2 teaspoons paprika Deliver warm color and mild smoky sweetness while rounding out the rub; contributes to both appearance and subtle warmth that pairs well with the beef’s natural flavors.
- 2 teaspoons brown sugar Provide a touch of sweetness to balance the savory and spicy elements; helps caramelize during searing and slightly enhance the sauce richness in the Instant Pot.
- 1 teaspoon salt Enhance and intensify overall flavor while helping to tenderize proteins slightly; must be measured carefully to maintain a balanced seasoning profile without overpowering the meat.
- 1/4 teaspoon crushed red pepper Add concentrated heat and a pleasant lingering kick; use sparingly in the rub to introduce a subtle background spice that complements the paprika and black pepper.
- 1/2 teaspoon black pepper Contribute sharp, warming heat and complexity to the seasoning blend; cracked or ground, it supports the savory profile and pairs with the red pepper for cohesive spice.
- 2 teaspoons olive oil Lubricate the pan for searing and help develop a deep brown crust on the tri-tip; also assists in transferring heat evenly and building fond for deglazing with broth.
- 1 small onion chopped Provide aromatic sweetness and savory body when softened; sliced or chopped, it melts into the cooking liquid, contributing to the sauce’s flavor and overall depth.
- 1 tablespoon minced garlic Deliver fresh, pungent aromatic intensity that brightens the meat’s flavor; minced garlic releases oils when sautéed, building a fragrant base before pressure cooking.
- 1 cup beef broth Supply savory liquid for braising and deglazing, adding concentrated beef flavor; helps create a cooking environment for tenderizing the tri-tip and forms the basis of the pan sauce.
Instructions
- Trim off any excess fat from the tri-tip. In a small bowl, mix garlic powder, onion powder, paprika, brown sugar, salt, crushed red pepper, and black pepper. Rub the spice blend all over the meat.: As you feel the surface of the tri tip , removing thick pockets of fat helps the seasoning adhere and promotes even searing; the meat should feel firm with a thin connective layer left in place to keep moisture. You will notice a cleaner sear without large fat flare ups. A common mistake is cutting too aggressively, which can dry the edges during high heat cooking, so leave a thin protective layer rather than shaving every trace.
- Set the Instant Pot to the sauté mode and add olive oil. Sear the tri-tip on all sides until a brown crust forms, about 1-2 minutes per side. Remove the meat and set aside. Add the chopped onion to the pot and cook until soft, about 5-7 minutes. Then stir in the minced garlic for about 1 minute.: When you whisk these dry spices together, inhale a chorus of warm, roasted aromas from the paprika and brown sugar , and a sharp savory edge from the powders. This uniform blend ensures every surface of the beef gets the same flavor, preventing pockets of over or under seasoned areas. Avoid overblending with wet hands, which can clump the rub and make it hard to distribute.
- Pour in the beef broth and use a wooden spoon to scrape up all the brown bits from the bottom of the pot. This adds flavor and prevents burning.: As you massage the mix into the tri tip , feel the coarse texture of the rub anchoring to the meat; the scent will intensify and the exterior will look evenly coated. Even pressure and time ensure the granulated sugars begin to adhere, priming the meat for caramelization. A frequent error here is rubbing too little, resulting in a bland crust, so be generous and thorough.
- Place the trivet in the Instant Pot. Lay the seared tri-tip on top of the trivet so that the meat is not sitting in the liquid.: When the pot heats, you will hear the oil thinly ripple and the surface may shimmer. Adding olive oil to a fully hot pot is key to instant surface searing; if the oil smokes excessively, the heat is too high, so reduce it to protect flavors. Do not add the meat to a cold pan, which will prevent proper browning.
- Seal the Instant Pot and set it to high pressure for 25 minutes. Once the cooking cycle is complete, allow the pressure to release naturally for about 10 minutes before doing a quick release of any remaining steam.: As you press the tri tip to the hot surface, you should hear an assertive sizzle and witness a rich, mahogany crust develop within minutes; this Maillard reaction creates deep savory notes. Turn carefully with tongs to maintain the crust. A common slip is moving the meat too soon which rips the developing crust, so wait until it releases naturally before flipping.
- Remove the tri-tip and let it rest for 5 minutes. Slice the meat against the grain and serve immediately.: After searing, the tri tip will feel firmer and will carry a fragrant, roasted aroma; resting briefly keeps juices from running out when placed directly into the pot. Use a plate that catches any juices to keep them for later. Avoid stacking hot pieces, which can trap steam and soften the crust prematurely.
- Add the chopped onion to the pot and cook until soft about 5 to 7 minutes: As the onion softens it will release a sweet perfume and take on a translucent sheen, signaling that its natural sugars are becoming more pronounced. Stir occasionally so it browns lightly but does not burn. If you rush this step and crank the heat, the onion will char and turn bitter, which dulls the final flavor.
- Then stir in the minced garlic for about 1 minute: Fresh garlic will pop with a green sharpness then mellow into a warm, toasty aroma in under a minute; the moment is brief so watch it closely. This step adds immediate aromatic lift to the broth. Overcooking the garlic will make it taste bitter, so remove from direct heat once it becomes fragrant.
- Pour in the beef broth and use a wooden spoon to scrape up all the brown bits from the bottom of the pot: When the broth hits the hot surface you will see steam rise and the browned fond dissolve into the liquid, releasing deep, meaty aroma. Scraping integrates those concentrated flavors into the cooking liquid, which the meat will absorb. Failing to deglaze can leave burnt bits that trigger a burn warning, so be thorough until the bottom looks clean.
- Place the trivet in the Instant Pot: Setting the trivet lifts the tri tip above the liquid, ensuring it steams rather than braises, which preserves a seared exterior while allowing internal collagen to break down; visually the trivet forms a stable platform. If you skip the trivet, the meat will sit in broth and the crust may soften too much, losing texture.
- Lay the seared tri-tip on top of the trivet so that the meat is not sitting in the liquid: As you position the roast, notice how the juices that remain on the plate run down to the pot and mingle with the broth, adding flavor below; the meat should sit elevated to keep the crust intact. Make sure it is centered and stable so it cooks evenly. A typical error is crowding the pot, which forces uneven cooking, so use a single, well placed roast.
- Seal the Instant Pot and set it to high pressure for 25 minutes: Once sealed, the air will thicken and the pressure will build, producing a gentle but consistent environment that transforms connective tissue into silky tenderness; you might hear a low hum as it comes to pressure. This timing balances doneness with moisture. Overcooking at pressure can make meat stringy, so adhere to the recommended minutes for best texture.
- Once the cooking cycle is complete allow the pressure to release naturally for about 10 minutes before doing a quick release of any remaining steam: During the natural release the pot slowly equalizes temperature, which helps the meat finish gently and retain juices; you will notice less violent bubbling and a calmer sound. Quick releasing too early can cause a sudden loss of juices and a tougher texture, so give that quiet ten minutes for optimal results.
- Remove the tri-tip and let it rest for 5 minutes: Resting lets the internal juices redistribute so slices stay juicy, and the surface cools just enough to be handled; you may feel a faint, warm steam as you tent it. Cutting too soon causes the juices to run out, leaving drier slices, so patience at this stage pays off.
- Slice the meat against the grain and serve immediately: As you cut across the grain, the beef will reveal a rosy interior with clean fibers, and each bite will feel tender and cohesive. Proper slicing shortens the muscle fibers, enhancing perceived tenderness. Cutting with the grain or in too-thick slabs makes chewiness more noticeable, so choose thin, deliberate slices.
Notes
- Bring to room temperature Before you start, let the tri tip sit out for 20 to 30 minutes so it cooks more evenly and reaches desired tenderness without overcooking the exterior.
- Dry the surface Pat the meat dry with paper towels prior to rubbing to ensure the spice mixture sticks and a strong crust forms during searing.
- Don't overcrowd the pot If you try to sear too many pieces at once the pan will cool and steam will form, which prevents proper browning; work in batches if needed.
- Check the trivet placement Make sure the trivet sits level so the roast does not tip and cook unevenly; stability during pressure cooking matters for uniform doneness.
- Save the cooking juices After removing the meat, skim and reduce the liquid on sauté for a minute for a quick pan sauce that concentrates flavor and is perfect for serving.