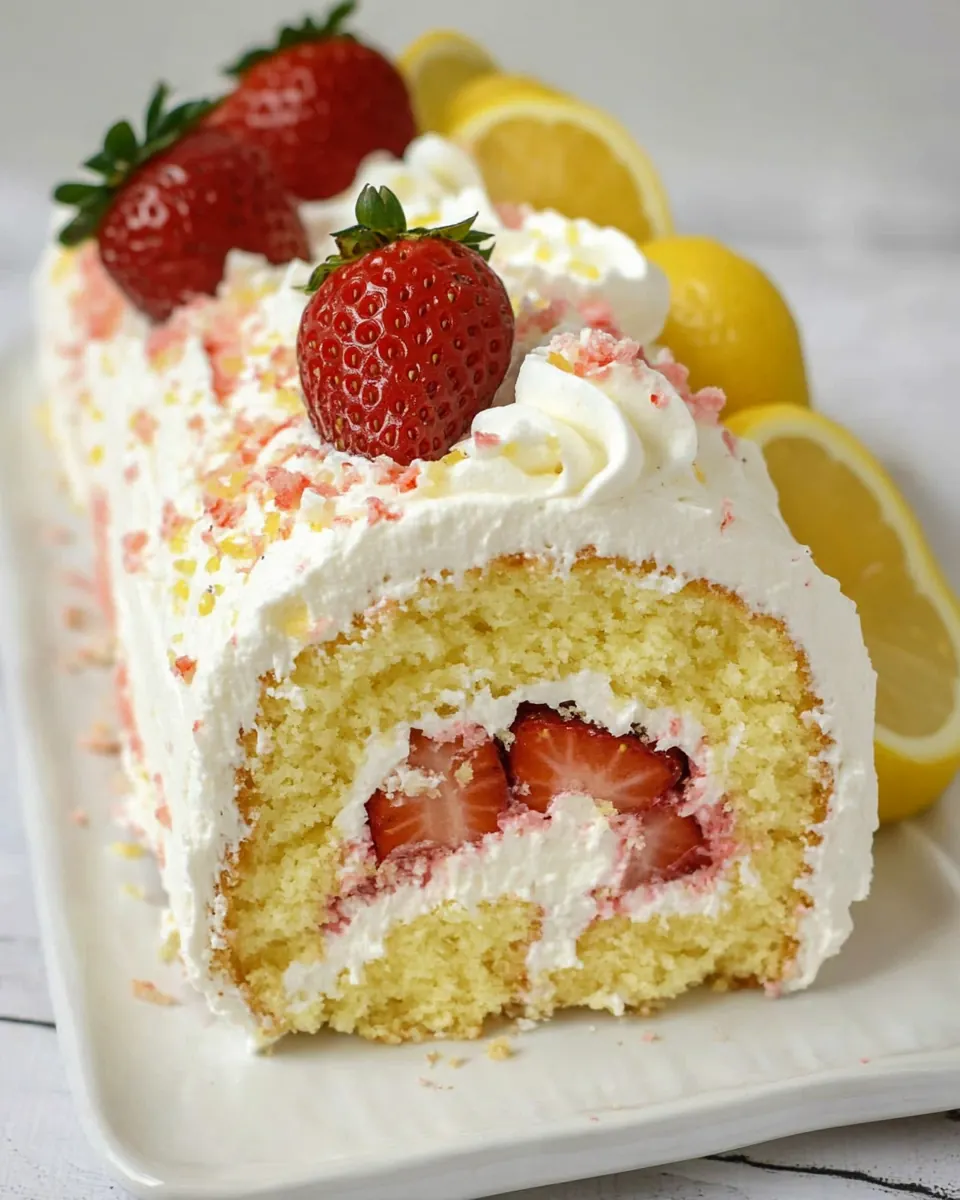
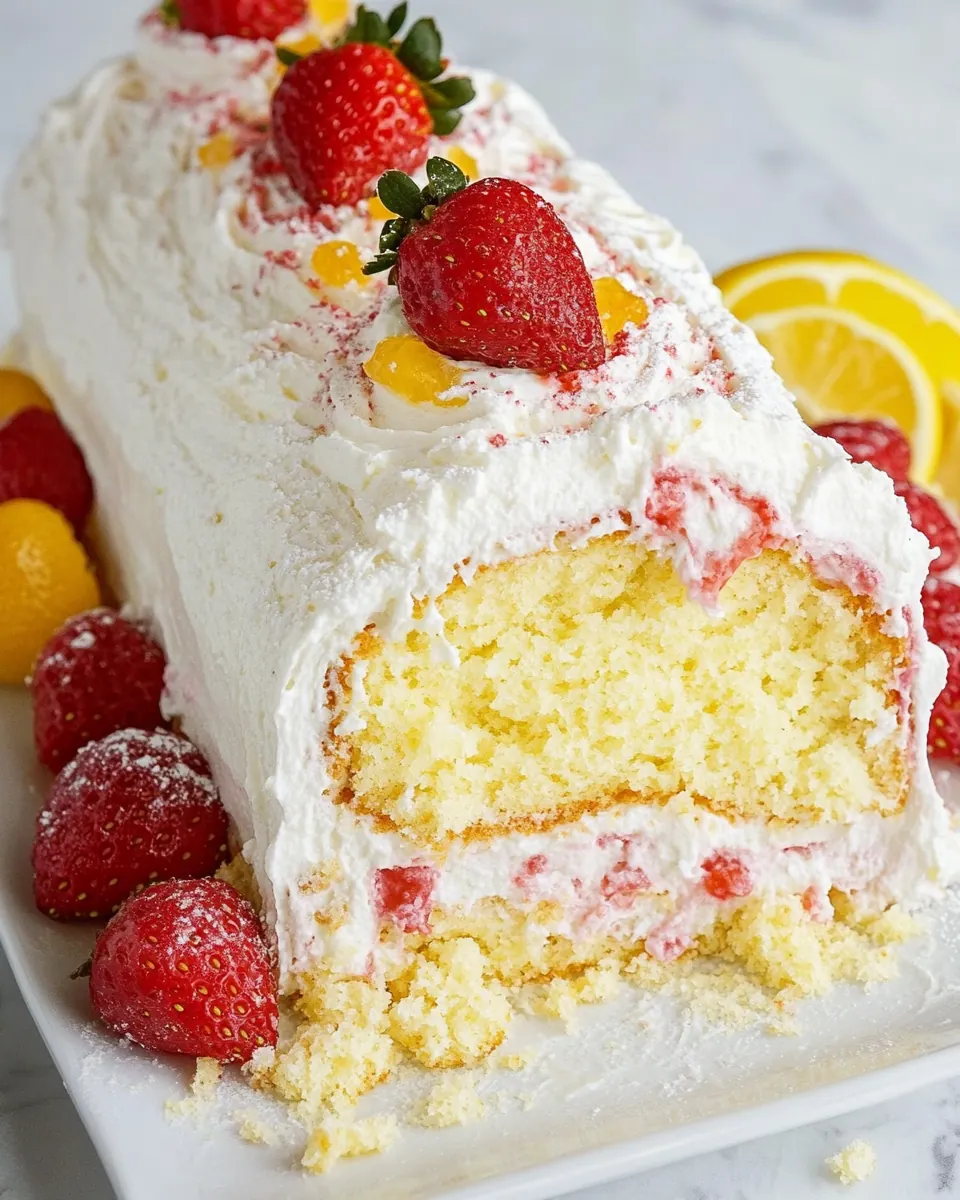
Lemon Strawberry Shortcake Cake Roll
Lemon Strawberry Shortcake Cake Roll has been one of my go to showstopper desserts for spring gatherings, and I still remember the first time I rolled a warm sponge around a towel and felt that tiny thrill of magic. The very first slice I served at a small backyard brunch earned surprised smiles and a chorus of questions about how the cake stayed so light and pillowy, even after being rolled, filled, and chilled.
I learned to lean into simple technique and good ingredients for this recipe, and that approach has served me well whether I am feeding a neighborhood potluck or a quiet afternoon tea. The balance of bright lemon and juicy strawberries feels effortlessly festive, and yet the cake itself is humble enough to make on a weekday if you plan ahead. Over the years I have adjusted the way I beat the eggs and fold in the flour so the sponge stays flexible, and that small change has saved more than one potential cracking catastrophe.
There is also something nostalgic about the whole process, from dusting the towel with powdered sugar to the slow, satisfying roll that becomes a swirled ribbon of cake and cream. Serving it chilled keeps the whipped cream stable, and the clean, sunshiny flavors practically demand a light celebration. I hope this version of Lemon Strawberry Shortcake Cake Roll becomes a recipe you turn to when you want something pretty, seasonal, and reliably delicious.
Recipe Snapshot
60 mins
45 mins
15 mins
Medium
300 kcal
American
Gluten-Free, Low FODMAP
Desserts
Jelly roll pan, Stand mixer or hand mixer, Spatula, Mixing bowls, Kitchen towel, Plastic wrap, Serrated knife
Why This Lemon Strawberry Shortcake Cake Roll Shines
Bright, balanced flavor
I love how lemon lifts the entire dessert, cutting through the richness of the whipped cream and making the strawberries pop. For me this contrast is what turns a pretty cake into an unforgettable bite.
Feather light sponge
The sponge in this Lemon Strawberry Shortcake Cake Roll is thin but tender, so it holds a roll without cracking when made correctly. I rely on whipped eggs and careful folding to create that airy texture, and it rewards patience with a yield that feels almost cloudlike.
Make ahead friendly
I appreciate that you can bake the cake a day ahead and keep it wrapped, which frees up the day of serving. The whipped cream filling does best when made and assembled close to serving, yet the overall prep schedule is flexible enough to suit busy hosts.
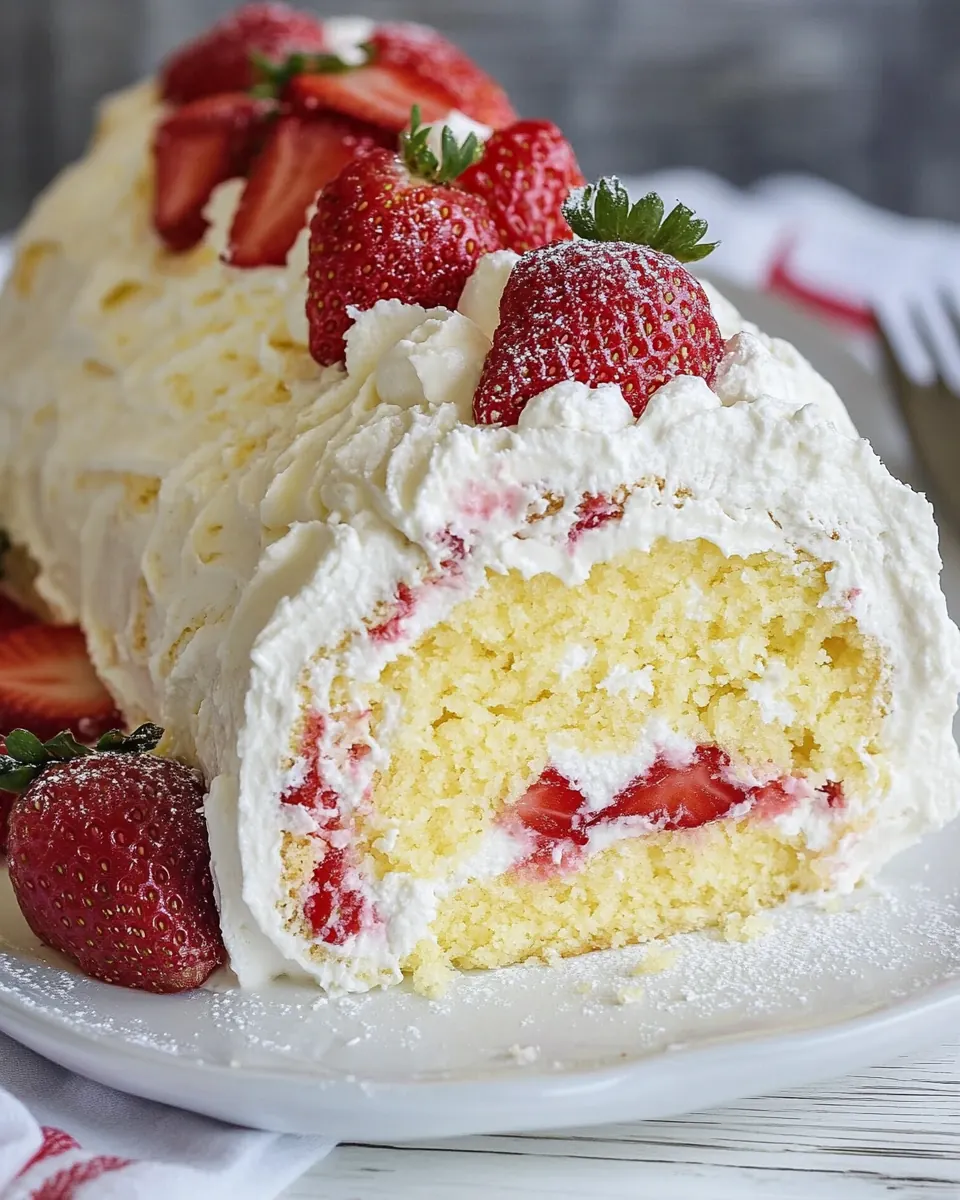
Visual wow factor
There is something theatrical about unrolling the cake to reveal the swirl, then re rolling it into a perfect log. Guests are always impressed by a dessert that looks complicated but is really straightforward, and this recipe delivers that effect without requiring advanced skills.
Versatile and seasonal
I turn to this recipe in spring when strawberries are at their best, but the framework works with other berries or citrus notes. The technique remains the same and that adaptability keeps me coming back to the formula.
What to Gather for Lemon Strawberry Shortcake Cake Roll
The ingredient list for Lemon Strawberry Shortcake Cake Roll is elegantly simple. Each element plays a small but essential role: the eggs create structure and lift, the sugar sweetens and stabilizes, the flour gives just enough body to form a flexible sponge, and the whipped cream and strawberries provide moistness and bright, fresh flavor. Together these components yield a light, rolled cake that tastes more delicate than the effort required.
- 3 large eggs: Whisk vigorously to incorporate air and provide structure to the sponge, ensuring a light and flexible cake roll; eggs also help bind the ingredients and contribute moisture during baking.
- 3/4 cup (150 g) granulated sugar: Dissolve thoroughly to sweeten the batter and help stabilize the whipped texture, aiding in browning and improving mouthfeel of the cake roll.
- 2 tablespoons (30 ml) lemon juice: Squeeze freshly to add bright acidity and balance sweetness while tenderizing the crumb; lemon juice also reacts with leavening for a subtle lift.
- Zest of one lemon: Zest finely to impart concentrated citrus aroma and essential oils that intensify lemon flavor without adding extra liquid; adds freshness and depth to the dessert.
- 1/4 teaspoons salt: Season sparingly to enhance overall flavors and balance sweetness, while also strengthening gluten slightly to improve cake texture.
- 1 teaspoon baking powder: Leaven gently to provide a small rise and added lightness to the sponge; baking powder helps produce an even, tender crumb suitable for rolling.
- 3/4 cup (93 g) all purpose flour: Sift or fold carefully to maintain a delicate structure and provide the primary bulk of the cake; all purpose flour contributes starch and protein for crumb formation.
- Powdered sugar to aid in rolling: Dust lightly on a towel or the cake surface to prevent sticking during the rolling process and to absorb any excess moisture while maintaining a neat appearance.
- 2 cups (474 ml) cold heavy whipping cream: Chill thoroughly before whipping to achieve maximum volume and stability; cold heavy cream whips into a rich, stable filling that holds shape inside the roll.
- 3 tablespoons (21 g) powdered sugar: Sprinkle gradually while whipping to lightly sweeten and stabilize the cream, improving texture and helping it hold peaks for filling and decoration.
- 1 teaspoon vanilla extract: Add sparingly for subtle warmth and depth of flavor that complements the lemon and strawberry notes; vanilla enhances aromatic complexity in the filling.
- 1 2 cups chopped strawberries: Chop uniformly to provide fresh bursts of fruity sweetness and texture inside the roll; strawberries add color contrast, juicy pockets, and seasonal flavor.
The Process for Making Lemon Strawberry Shortcake Cake Roll
Making this cake roll rewards gentle technique and attention to sensory cues. I like to move through the steps deliberately, listening for texture changes and watching color, because those signals tell you when to move on. Below I expand each direction into thorough guidance so you can feel confident at every turn.
- Preheat oven to 350°F. Line a jelly roll (10×15”) pan with foil and spray with cooking spray (I like to use the spray with flour).: You will notice the kitchen warming and a faint metallic smell as the oven comes up to 350°F , which sets the stage for an even bake. Preparing a jelly roll pan with foil and a flour containing spray ensures the delicate sponge releases cleanly; this step is crucial because any sticking will make rolling difficult. I always press the foil into the corners so the batter spreads evenly, and I also smooth the spray into a thin, even layer to avoid pooling. If you skip lining or spraying properly the cake may cling and tear during unrolling. A common mistake is preheating to the wrong temperature, so double check your oven dial and consider an oven thermometer for accuracy.
- Beat eggs at high speed for 5 minutes, until frothy and dark yellow. Beat in sugar, lemon juice, and zest.: As you beat, the mixture transforms into a lively, frothy mass that smells faintly of fresh lemon and warmed egg. High speed whips in air creating volume, and you should see ribbons form when you lift the beater, signaling ready structure. When you add the sugar , it dissolves into the foam, giving a glossy sheen and a stable batter. The aroma of citrus becomes more pronounced after the lemon juice and zest are folded in, and that bright scent indicates a good balance of flavor. Underbeating here leads to a flat sponge and possible cracking, so resist the urge to move on early. If your mixture looks pale but not airy, keep beating in 30 second bursts until you get the right lift.
- Whisk together salt, baking powder, and flour. Stir into wet ingredients just until blended.: The dry mix should be pale and evenly combined, smelling faintly of flour and a trace of chemical lift from the baking powder . When you fold the dry ingredients in, you will see the batter lose some of its gloss as the flour hydrates. The crucial sensory cue is a uniform, ribbonlike batter with no streaks of dry flour remaining. Stirring just until blended prevents gluten overdevelopment, which would make the sponge tougher and harder to roll. Avoid vigorous mixing, and if you overmix, you will notice a denser, less flexible batter and potential cracking later.
- Spread in prepared pan. Batter will be in a very thin layer and you will need to use a wooden spoon or spatula to spread it to all the corners of the pan. Bake for 10-15 minutes (mine took 11).: As you spread the thin batter across the jelly roll pan , it should look even and glossy. The thinness helps the cake bake quickly and stay pliable. In the oven you will see the top set and turn a pale golden color, and the aroma will shift to a warm, baked note with citrus hints. Start checking around 10 minutes to avoid overbaking. Overbaking dries the sponge and makes it likely to crack during rolling. When done, the surface should spring back slightly to the touch and have a uniform, lightly golden color.
- While the cake is baking, set a clean kitchen towel out on a large work surface. Sprinkle liberally with powdered sugar (about 1/4 cup). As soon as the cake comes out of the oven, turn it over on the kitchen towel sprinkled with powdered sugar. Remove foil carefully.: The towel preparation is tactile and a bit ritualistic; the powdered sugar creates a barrier that prevents sticking and adds a sweet note to the outer layer. When you invert the hot cake onto the towel, steam will rise and the cake surface will look glossy. Removing the foil must be done gently so the sponge does not tear. If the foil clings, use a thin knife edge between the foil and cake to help lift it off slowly. Not dusting enough powdered sugar is a common error that can lead to sticking and tearing during the next rolling step.
- Working at the short end, fold the edge of the towel over the cake. Roll tightly, rolling up the cake into the towel. Let cool completely while rolled, at least one hour.: Rolling while hot allows the cake to form the memory of the spiral, which prevents cracking later. You will feel the warmth dissipate as it cools, and the towel will hold the shape. Letting it cool fully is critical because rolling a warm filled cake can cause the whipped cream to melt and the roll to lose definition. A common misstep is not rolling tightly enough, which creates large air pockets; aim for a snug roll that still has a gentle give.
- While the cake is chilling, make the filling. Beat the heavy whipping cream and powdered sugar until stiff peaks form. Chill until ready to use.: Cold cream whips up into a creamy cloud, and you will hear a subtle change in the mixer sound as the texture transforms from liquid to soft and then to stiff peaks. The mixture should hold a peak that stands upright but still feels light, and the powdered sugar will melt gently into the cream, smoothing it and adding stability. If the cream is too warm it will not thicken properly, so keep everything chilled. Overbeating will turn the cream grainy and eventually into butter, so stop as soon as firm peaks appear.
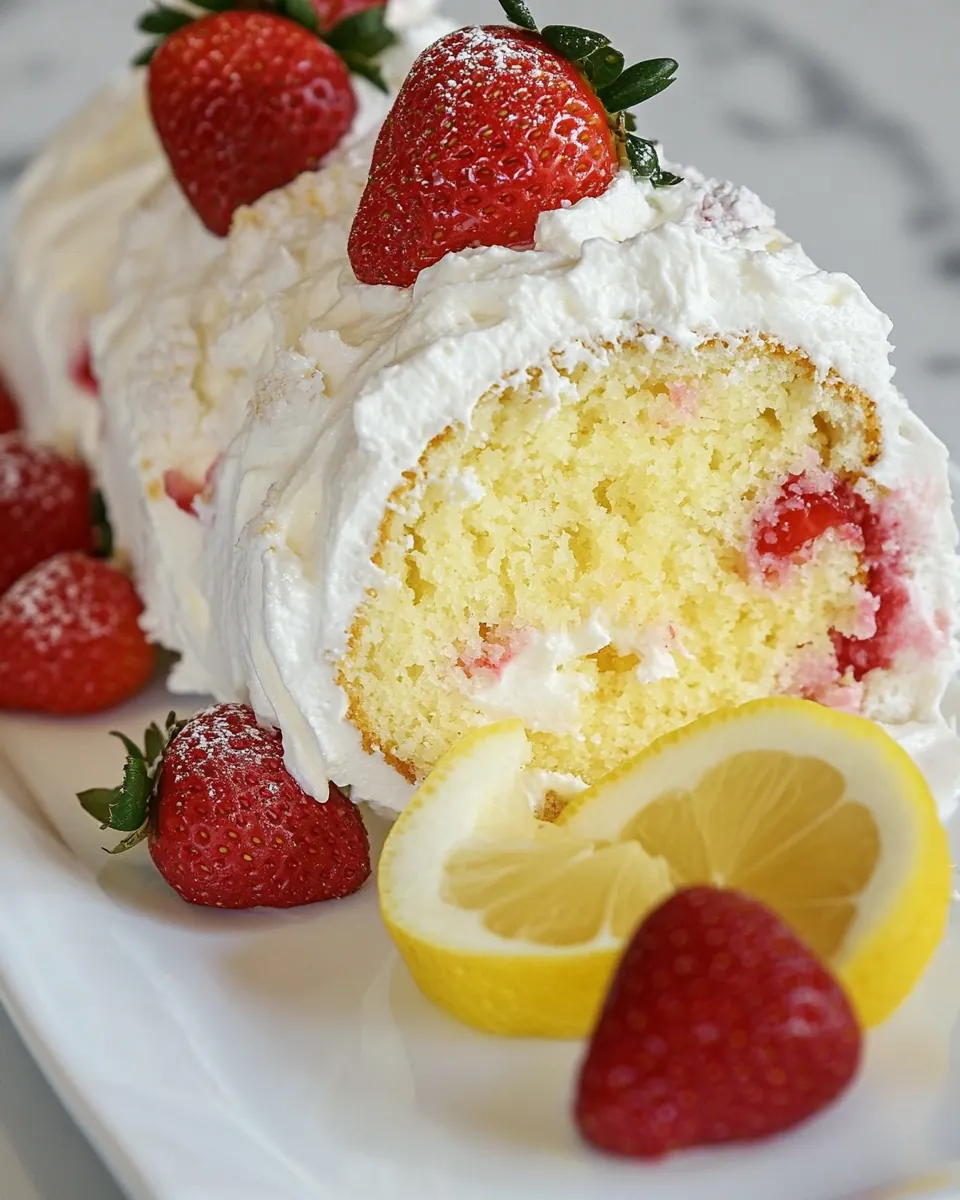
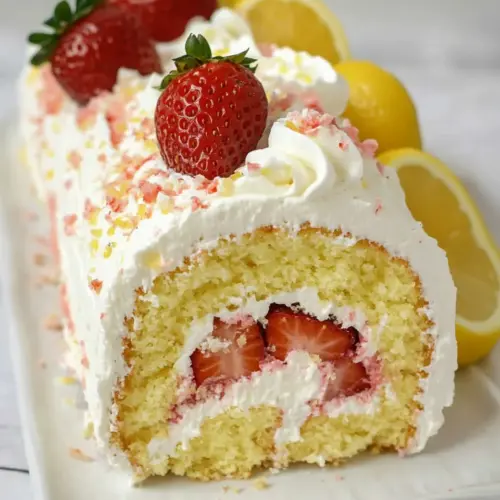
- When cake is cool, carefully unroll the towel. Spread the whipped cream over the cake. (You will have some whipped cream left over.) Sprinkle with chopped strawberries. Gently but tightly, re-roll the cake and wrap it in plastic wrap. Chill until it firms up a bit, at least one hour or overnight.: Unrolling reveals the delicate inner surface of the sponge, which should be slightly matte and soft. Spreading the whipped cream should feel silky under your spatula, and the chopped strawberries introduce juicy bursts that contrast the airy cream. Re rolling should be done with a steady hand; the log should be compact without squeezing out the filling. Wrapping and chilling lets the flavors meld and firms the shape for clean slicing. A frequent error is overfilling, which makes sealing the roll messy and causes leakage when slicing.
- If desired, use the rest of the whipped cream to frost the outside. Garnish with berries.: Smearing a thin crumb coat of remaining whipped cream gives the roll a polished look and adds extra creaminess. The surface should be smooth and cool to the touch, and bright strawberries on top create an attractive contrast. Keep decorations minimal so the spiral remains the focal point. If you try to frost with warm cream it will slide off, so ensure the cake is well chilled first.
- Slice and serve. Store in refrigerator. Once frosted with the whipped cream, it’s best served the same day. You can make the cake up to 2 days ahead.: Slicing reveals the spiral, and you should see defined layers of sponge, cream, and fruit. A serrated knife and gentle sawing motion help preserve the swirl. The cake tastes brightest the day it is frosted because whipped cream can soften over time, but storing covered in the refrigerator keeps it safe for up to 48 hours. Common mistakes include slicing with a dull knife, which squashes the roll, so use a sharp serrated blade for clean pieces.
Recipe Variations about Lemon Strawberry Shortcake Cake Roll
This cake roll is a flexible template. Small swaps in fruit, flavoring, or decoration let you adapt it for different occasions while preserving the core technique. Below are practical variations and ideas you can try based on what you have on hand or the occasion you are planning around.
- Classic strawberry focus, use a full 2 cups of chopped strawberries for a bolder berry presence, making each slice bursting with texture and freshness.
- Extra lemon lift, increase the lemon zest by half a lemon for a more aromatic and citrus forward profile, which brightens each bite.
- Light frosting, use a thin layer of the remaining whipped cream as a delicate outer coat to keep the presentation clean and add creaminess without overwhelming the spiral.
- Advance prep, bake the sponge up to two days ahead and keep tightly wrapped, then whip the cream and assemble on the day you serve for the best texture.
- Texture contrast, fold a small handful of finely chopped strawberries into part of the whipped cream to create pockets of jam like fruit in the filling.
What Complements This Lemon Strawberry Shortcake Cake Roll
The light citrus and berry notes of Lemon Strawberry Shortcake Cake Roll pair well with clean, simple accompaniments that do not overpower the dessert. Serve it with small, bright elements and easy beverages so the cake remains the star of the table. Here are serving ideas and practical notes for occasions and storage.
- Afternoon tea, serve thin slices alongside a pot of lightly brewed black tea or a citrusy herbal infusion for a relaxed tea time.
- Spring brunch, place the roll on a communal platter with fresh extra strawberries and a small bowl of extra whipped cream so guests can add more if they want.
- Make ahead strategy, bake the sponge up to 48 hours before, wrap it well and keep refrigerated. Whip the cream and assemble on the day of serving to preserve texture.
- Storage, keep the assembled roll wrapped in plastic in the refrigerator for up to two days. Slices hold their shape best when chilled and should be eaten within that window for the brightest flavor.
- Seasonal pairing, this cake shines in spring when berries are sweet and fragrant, but you can also use late summer berries to similar effect if strawberries are at their peak then.
- Portioning, for a crowd, slice the roll into 12 even pieces as directed in the yield. Use a serrated knife and a gentle sawing motion for the cleanest presentation.
FAQ
Conclusion
This recipe stands out because it marries a feather light sponge with bright lemon notes and fresh strawberries for a dessert that is both elegant and approachable. I encourage you to give the rolling technique a try, because mastering that simple step unlocks many beautiful, sliced presentations. Whether you are serving friends at brunch or marking a small celebration, this cake roll rewards patience with crisp visual appeal and a fresh, satisfying flavor profile.
Lemon Strawberry Shortcake Cake Roll
Equipment
- Jelly Roll Pan
- Stand mixer or hand mixer
- Spatula
- Mixing Bowls
- Kitchen Towel
- Plastic Wrap
- Serrated Knife
Ingredients
- 3 large eggs Whisk vigorously to incorporate air and provide structure to the sponge, ensuring a light and flexible cake roll; eggs also help bind the ingredients and contribute moisture during baking.
- 3/4 cup (150 g) granulated sugar Dissolve thoroughly to sweeten the batter and help stabilize the whipped texture, aiding in browning and improving mouthfeel of the cake roll.
- 2 tablespoons (30 ml) lemon juice Squeeze freshly to add bright acidity and balance sweetness while tenderizing the crumb; lemon juice also reacts with leavening for a subtle lift.
- Zest of one lemon Zest finely to impart concentrated citrus aroma and essential oils that intensify lemon flavor without adding extra liquid; adds freshness and depth to the dessert.
- 1/4 teaspoons salt Season sparingly to enhance overall flavors and balance sweetness, while also strengthening gluten slightly to improve cake texture.
- 1 teaspoon baking powder Leaven gently to provide a small rise and added lightness to the sponge; baking powder helps produce an even, tender crumb suitable for rolling.
- 3/4 cup (93 g) all purpose flour Sift or fold carefully to maintain a delicate structure and provide the primary bulk of the cake; all purpose flour contributes starch and protein for crumb formation.
- Powdered sugar to aid in rolling Dust lightly on a towel or the cake surface to prevent sticking during the rolling process and to absorb any excess moisture while maintaining a neat appearance.
- 2 cups (474 ml) cold heavy whipping cream Chill thoroughly before whipping to achieve maximum volume and stability; cold heavy cream whips into a rich, stable filling that holds shape inside the roll.
- 3 tablespoons (21 g) powdered sugar Sprinkle gradually while whipping to lightly sweeten and stabilize the cream, improving texture and helping it hold peaks for filling and decoration.
- 1 teaspoon vanilla extract Add sparingly for subtle warmth and depth of flavor that complements the lemon and strawberry notes; vanilla enhances aromatic complexity in the filling.
- 1 -2 cups chopped strawberries Chop uniformly to provide fresh bursts of fruity sweetness and texture inside the roll; strawberries add color contrast, juicy pockets, and seasonal flavor.
Instructions
- Preheat oven to 350°F. Line a jelly roll (10×15”) pan with foil and spray with cooking spray (I like to use the spray with flour).: You will notice the kitchen warming and a faint metallic smell as the oven comes up to 350°F , which sets the stage for an even bake. Preparing a jelly roll pan with foil and a flour containing spray ensures the delicate sponge releases cleanly; this step is crucial because any sticking will make rolling difficult. I always press the foil into the corners so the batter spreads evenly, and I also smooth the spray into a thin, even layer to avoid pooling. If you skip lining or spraying properly the cake may cling and tear during unrolling. A common mistake is preheating to the wrong temperature, so double check your oven dial and consider an oven thermometer for accuracy.
- Beat eggs at high speed for 5 minutes, until frothy and dark yellow. Beat in sugar, lemon juice, and zest.: As you beat, the mixture transforms into a lively, frothy mass that smells faintly of fresh lemon and warmed egg. High speed whips in air creating volume, and you should see ribbons form when you lift the beater, signaling ready structure. When you add the sugar , it dissolves into the foam, giving a glossy sheen and a stable batter. The aroma of citrus becomes more pronounced after the lemon juice and zest are folded in, and that bright scent indicates a good balance of flavor. Underbeating here leads to a flat sponge and possible cracking, so resist the urge to move on early. If your mixture looks pale but not airy, keep beating in 30 second bursts until you get the right lift.
- Whisk together salt, baking powder, and flour. Stir into wet ingredients just until blended.: The dry mix should be pale and evenly combined, smelling faintly of flour and a trace of chemical lift from the baking powder . When you fold the dry ingredients in, you will see the batter lose some of its gloss as the flour hydrates. The crucial sensory cue is a uniform, ribbonlike batter with no streaks of dry flour remaining. Stirring just until blended prevents gluten overdevelopment, which would make the sponge tougher and harder to roll. Avoid vigorous mixing, and if you overmix, you will notice a denser, less flexible batter and potential cracking later.
- Spread in prepared pan. Batter will be in a very thin layer and you will need to use a wooden spoon or spatula to spread it to all the corners of the pan. Bake for 10-15 minutes (mine took 11).: As you spread the thin batter across the jelly roll pan , it should look even and glossy. The thinness helps the cake bake quickly and stay pliable. In the oven you will see the top set and turn a pale golden color, and the aroma will shift to a warm, baked note with citrus hints. Start checking around 10 minutes to avoid overbaking. Overbaking dries the sponge and makes it likely to crack during rolling. When done, the surface should spring back slightly to the touch and have a uniform, lightly golden color.
- While the cake is baking, set a clean kitchen towel out on a large work surface. Sprinkle liberally with powdered sugar (about 1/4 cup). As soon as the cake comes out of the oven, turn it over on the kitchen towel sprinkled with powdered sugar. Remove foil carefully.: The towel preparation is tactile and a bit ritualistic; the powdered sugar creates a barrier that prevents sticking and adds a sweet note to the outer layer. When you invert the hot cake onto the towel, steam will rise and the cake surface will look glossy. Removing the foil must be done gently so the sponge does not tear. If the foil clings, use a thin knife edge between the foil and cake to help lift it off slowly. Not dusting enough powdered sugar is a common error that can lead to sticking and tearing during the next rolling step.
- Working at the short end, fold the edge of the towel over the cake. Roll tightly, rolling up the cake into the towel. Let cool completely while rolled, at least one hour.: Rolling while hot allows the cake to form the memory of the spiral, which prevents cracking later. You will feel the warmth dissipate as it cools, and the towel will hold the shape. Letting it cool fully is critical because rolling a warm filled cake can cause the whipped cream to melt and the roll to lose definition. A common misstep is not rolling tightly enough, which creates large air pockets; aim for a snug roll that still has a gentle give.
- While the cake is chilling, make the filling. Beat the heavy whipping cream and powdered sugar until stiff peaks form. Chill until ready to use.: Cold cream whips up into a creamy cloud, and you will hear a subtle change in the mixer sound as the texture transforms from liquid to soft and then to stiff peaks. The mixture should hold a peak that stands upright but still feels light, and the powdered sugar will melt gently into the cream, smoothing it and adding stability. If the cream is too warm it will not thicken properly, so keep everything chilled. Overbeating will turn the cream grainy and eventually into butter, so stop as soon as firm peaks appear.
- When cake is cool, carefully unroll the towel. Spread the whipped cream over the cake. (You will have some whipped cream left over.) Sprinkle with chopped strawberries. Gently but tightly, re-roll the cake and wrap it in plastic wrap. Chill until it firms up a bit, at least one hour or overnight.: Unrolling reveals the delicate inner surface of the sponge, which should be slightly matte and soft. Spreading the whipped cream should feel silky under your spatula, and the chopped strawberries introduce juicy bursts that contrast the airy cream. Re rolling should be done with a steady hand; the log should be compact without squeezing out the filling. Wrapping and chilling lets the flavors meld and firms the shape for clean slicing. A frequent error is overfilling, which makes sealing the roll messy and causes leakage when slicing.
- If desired, use the rest of the whipped cream to frost the outside. Garnish with berries.: Smearing a thin crumb coat of remaining whipped cream gives the roll a polished look and adds extra creaminess. The surface should be smooth and cool to the touch, and bright strawberries on top create an attractive contrast. Keep decorations minimal so the spiral remains the focal point. If you try to frost with warm cream it will slide off, so ensure the cake is well chilled first.
- Slice and serve. Store in refrigerator. Once frosted with the whipped cream, it’s best served the same day. You can make the cake up to 2 days ahead.: Slicing reveals the spiral, and you should see defined layers of sponge, cream, and fruit. A serrated knife and gentle sawing motion help preserve the swirl. The cake tastes brightest the day it is frosted because whipped cream can soften over time, but storing covered in the refrigerator keeps it safe for up to 48 hours. Common mistakes include slicing with a dull knife, which squashes the roll, so use a sharp serrated blade for clean pieces.
Notes
- Classic strawberry focus, use a full 2 cups of chopped strawberries for a bolder berry presence, making each slice bursting with texture and freshness.
- Extra lemon lift, increase the lemon zest by half a lemon for a more aromatic and citrus forward profile, which brightens each bite.
- Light frosting, use a thin layer of the remaining whipped cream as a delicate outer coat to keep the presentation clean and add creaminess without overwhelming the spiral.
- Advance prep, bake the sponge up to two days ahead and keep tightly wrapped, then whip the cream and assemble on the day you serve for the best texture.
- Texture contrast, fold a small handful of finely chopped strawberries into part of the whipped cream to create pockets of jam like fruit in the filling.