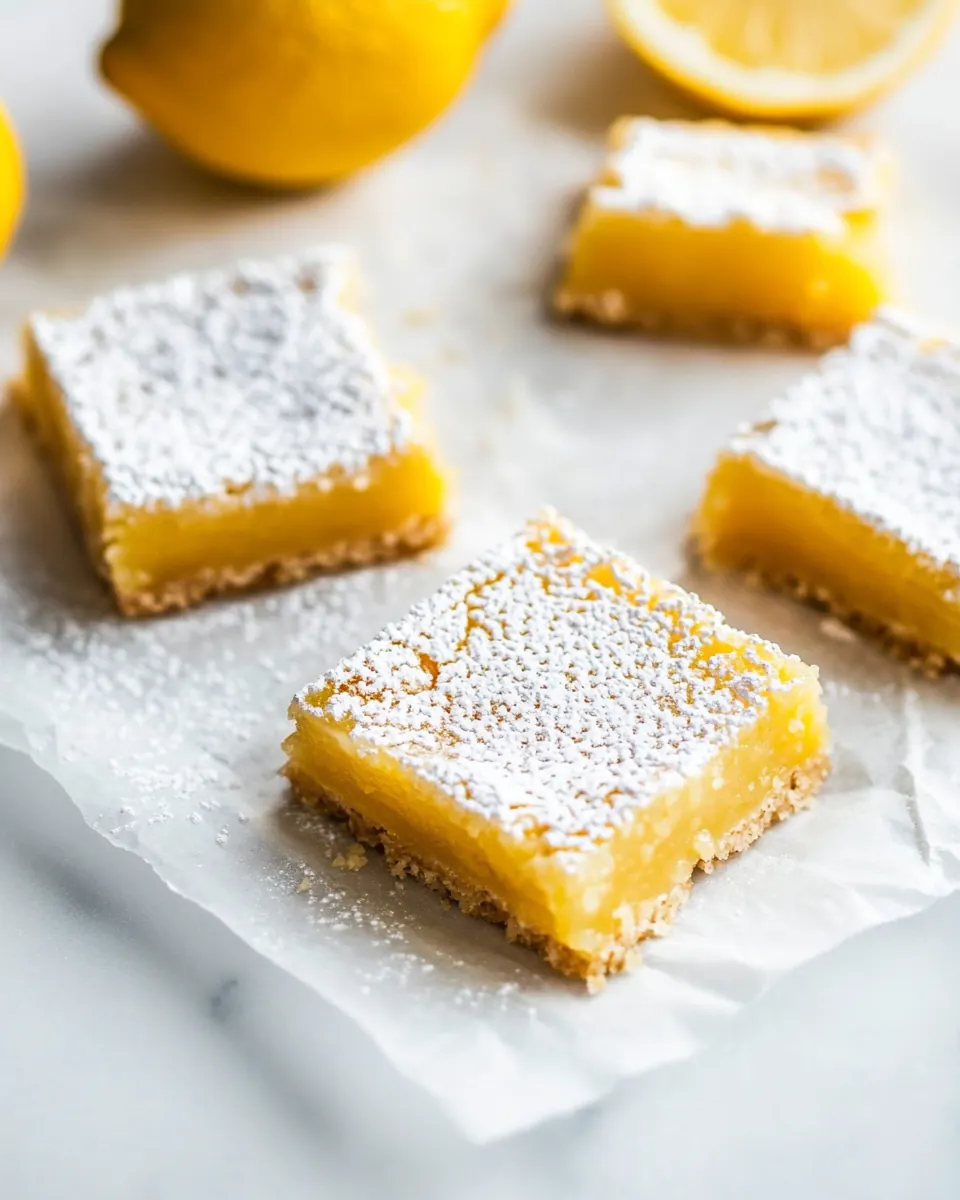
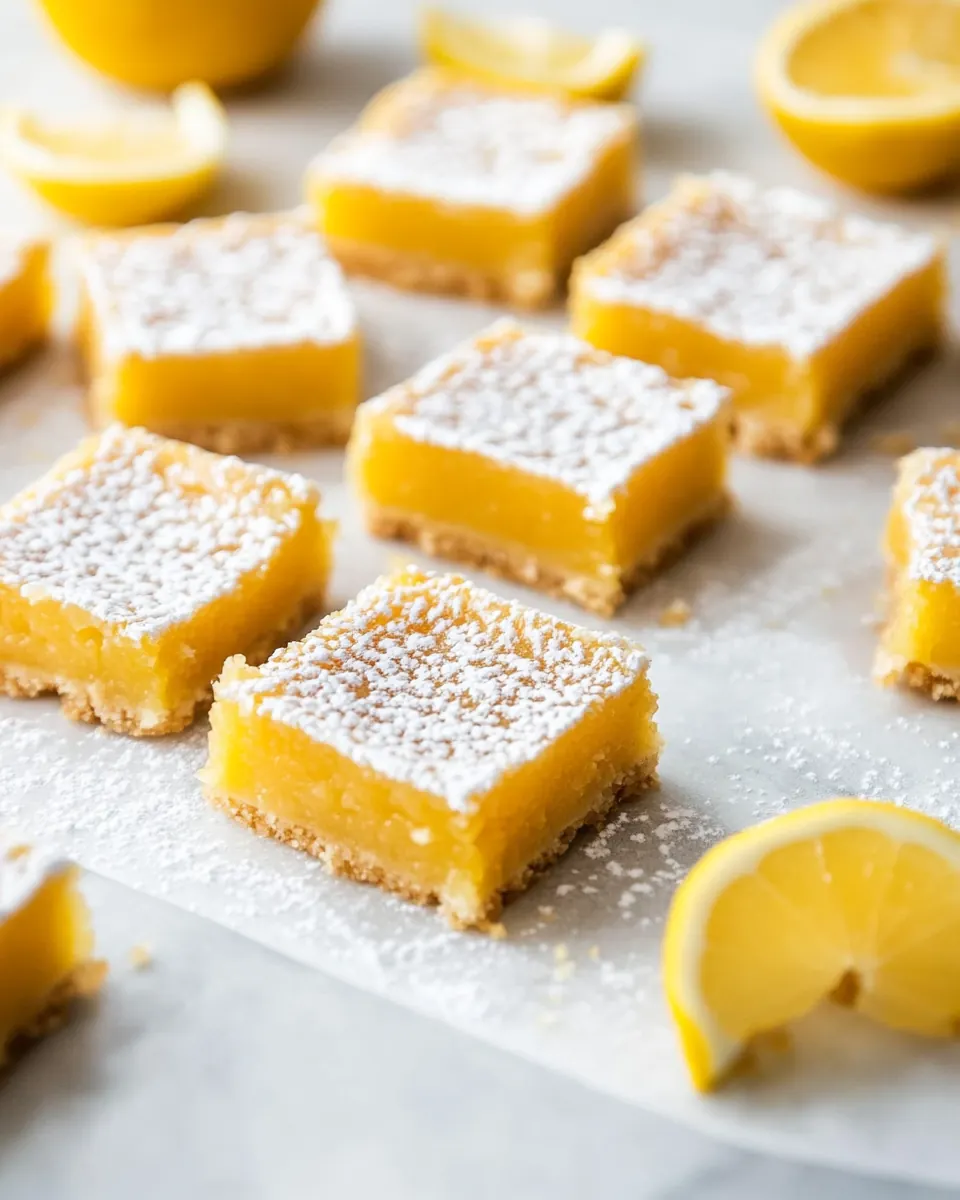
Lemon Bars
Lemon Bars are the kind of treat that make a sunny afternoon feel intentional and cheerful, and I remember the first time I learned to make them for a neighborhood potluck. I arrived carrying a pan that smelled like bright citrus and butter, and people kept coming back for another square, asking for the recipe. That instant validation taught me that a few simple ingredients, handled with care, can create something truly memorable.
Over the years I’ve tweaked the balance between tart and sweet, and the texture between silky and firm. I learned to trust the tactile cues when pressing the crust, and how the lemon filling should wobble slightly before it firms. There’s comfort in the repetition, and joy in watching family members argue over who gets the corner piece. When I bring Lemon Bars to gatherings, the pan rarely comes home whole, and that sense of shared delight is the reason I keep making them.
Recipe Snapshot
60 mins
15 mins
45 mins
Medium
200 kcal
American
Gluten-Free, Low FODMAP
Desserts
Stand mixer, 9×13 inch glass baking pan, Parchment paper, Whisk
Why This Lemon Bars Works
Bright, focused flavor
I love how Lemon Bars deliver an immediate burst of citrus that wakes the palate. The lemon juice and zest combine to create a clean, tangy note that balances the sugar, so every bite feels lively. I enjoy this contrast, especially when you want a dessert that does not overwhelm but leaves a lasting impression.
Simple, pantry friendly ingredients
These bars rely on everyday staples like butter, flour, and sugar, which means you can usually throw them together without a special shopping trip. I often make a batch on short notice because the ingredient list is predictable and forgiving, which is great when life is busy.
Texture that satisfies
The combination of a tender, buttery crust with a silky, set lemon filling is why I keep coming back to this recipe. The crust gives you a slight crumbly bite while the filling is smooth and just firm enough to hold neat squares, creating contrast in every mouthful.
Versatile for occasions
Lemon Bars work for casual coffee dates or more formal gatherings. I appreciate how they can be portioned easily, chilled ahead, and presented simply with a dusting of confectioner’s sugar. They travel well and are an excellent option when you need a make-ahead dessert.
Easy to learn, fun to perfect
This recipe teaches technique without intimidation. From pressing the crust to judging when the filling is set, each step builds confidence. I find that once you understand the sensory cues, you can adapt with ease, making minor tweaks to suit your taste.
Ingredients for Lemon Bars
These ingredients form a simple, harmonious team. The crust is a foundation built from butter and flour, which provide richness and a tender crumb. The filling uses eggs and lemon juice for structure and brightness, while sugar and lemon zest deliver sweetness and aromatic lift. Together they balance texture, flavor, and stability so the bars hold their shape yet remain delightfully soft.
- 1 cup unsalted butter, at cool room temperature: Cream until soft and spreadable; provides the rich, buttery base for the shortbread crust and helps bind dry ingredients together. Chill briefly if too soft to ensure proper dough texture and even baking. Contributes tenderness and a golden color to the finished bars.
- 1/2 cup granulated sugar: Sweeten and help tenderize the crust while adding structure when creamed with butter; dissolves into the dough to create a fine crumb. Helps balance the tart lemon filling and enhances overall sweetness. Can be measured precisely to control texture.
- 1/2 teaspoon pure vanilla extract: Add a floral, warm aroma that deepens flavor complexity; balances the citrus brightness and rounds out sweetness in both crust and filling. Use pure extract for a clean, natural vanilla note without bitterness. Incorporates easily when mixed with wet ingredients.
- 2 cups all-purpose flour: Provide structure and body to the shortbread crust; combine with butter and sugar to form a cohesive dough that holds shape when baked. Contains gluten which creates a tender yet sturdy base for the lemon topping. Sift or whisk to ensure even distribution and prevent lumps.
- 1/2 teaspoon kosher salt: Enhance and balance flavor by amplifying sweetness while subtly rounding sharper notes; helps strengthen gluten structure slightly in the crust. Use kosher salt for clean, measured seasoning without overpowering the lemon. Dissolve evenly into dry ingredients for consistent taste.
- 2 cups granulated sugar: Sweeten the lemon filling significantly and contribute to its syrupy texture when combined with eggs and lemon juice. Dissolve fully to avoid graininess and help set the filling during baking. Amount controls final sweetness and shelf life of the bars.
- Zest of 2 large lemons: Provide intense citrus aroma and concentrated lemon oil for bright, fresh flavor; zest adds complexity beyond juice alone. Finely grate only the yellow part to avoid bitterness from the pith. Stir into the filling so oils distribute evenly and intensify the lemon character.
- 1/4 cup all-purpose flour: Lighten and slightly thicken the lemon filling, helping to stabilize the custard as it bakes. Acts as a binder with eggs and sugar to create a smooth, set texture without making it overly heavy. Whisk thoroughly to prevent lumps before adding liquids.
- 4 large eggs: Bind the filling and create a rich, custard-like texture when beaten with sugar and lemon juice; eggs also help the filling set during baking. Bring to room temperature for even mixing and smoother incorporation. Beat just until combined to avoid over-aeration that can cause cracks.
- 2/3 cup fresh lemon juice: Provide the primary tart, acidic flavor that defines lemon bars and helps the filling set when cooked with eggs and sugar. Freshly squeezed juice offers the brightest, most natural citrus taste compared to bottled options. Strain if desired to remove pulp and seeds for a silky filling.
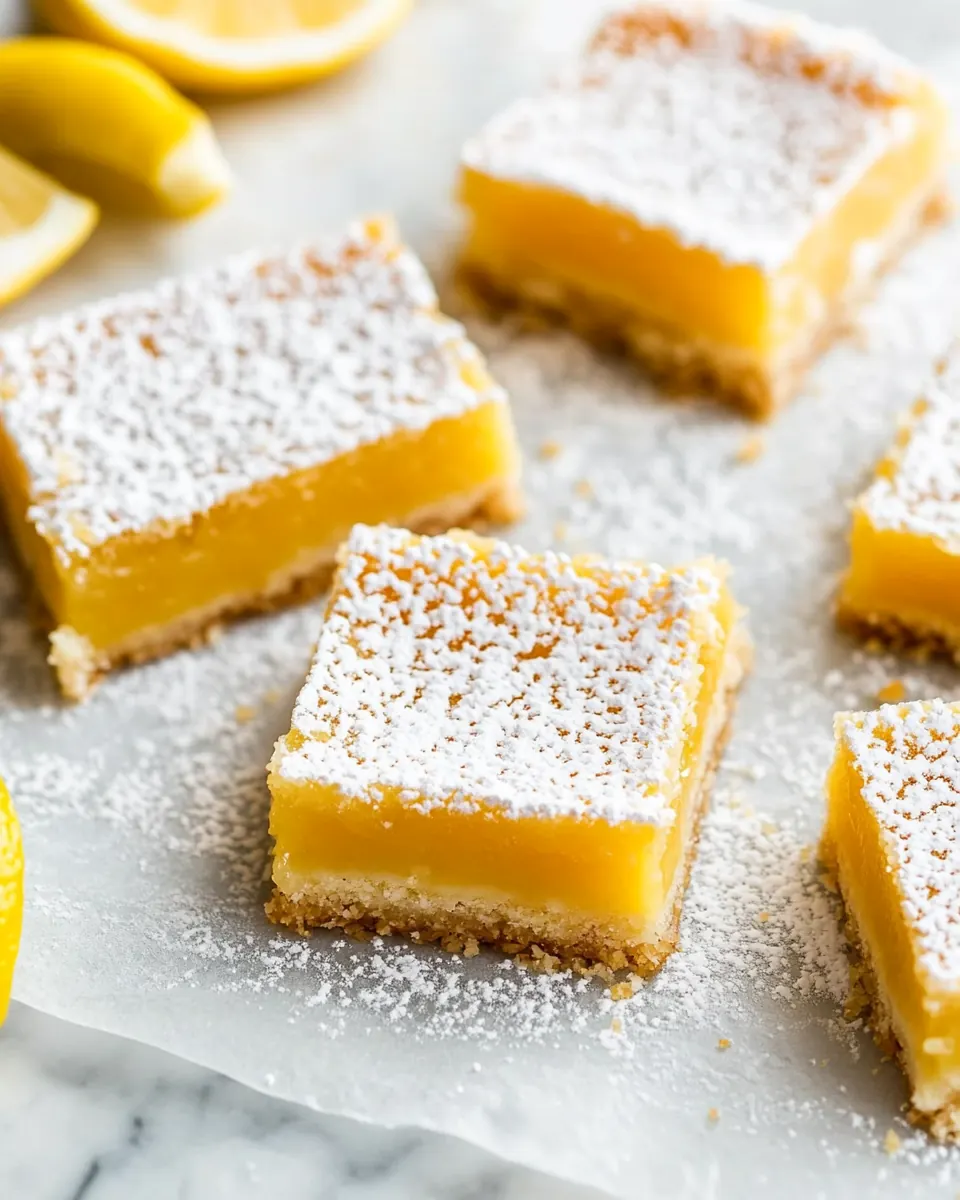
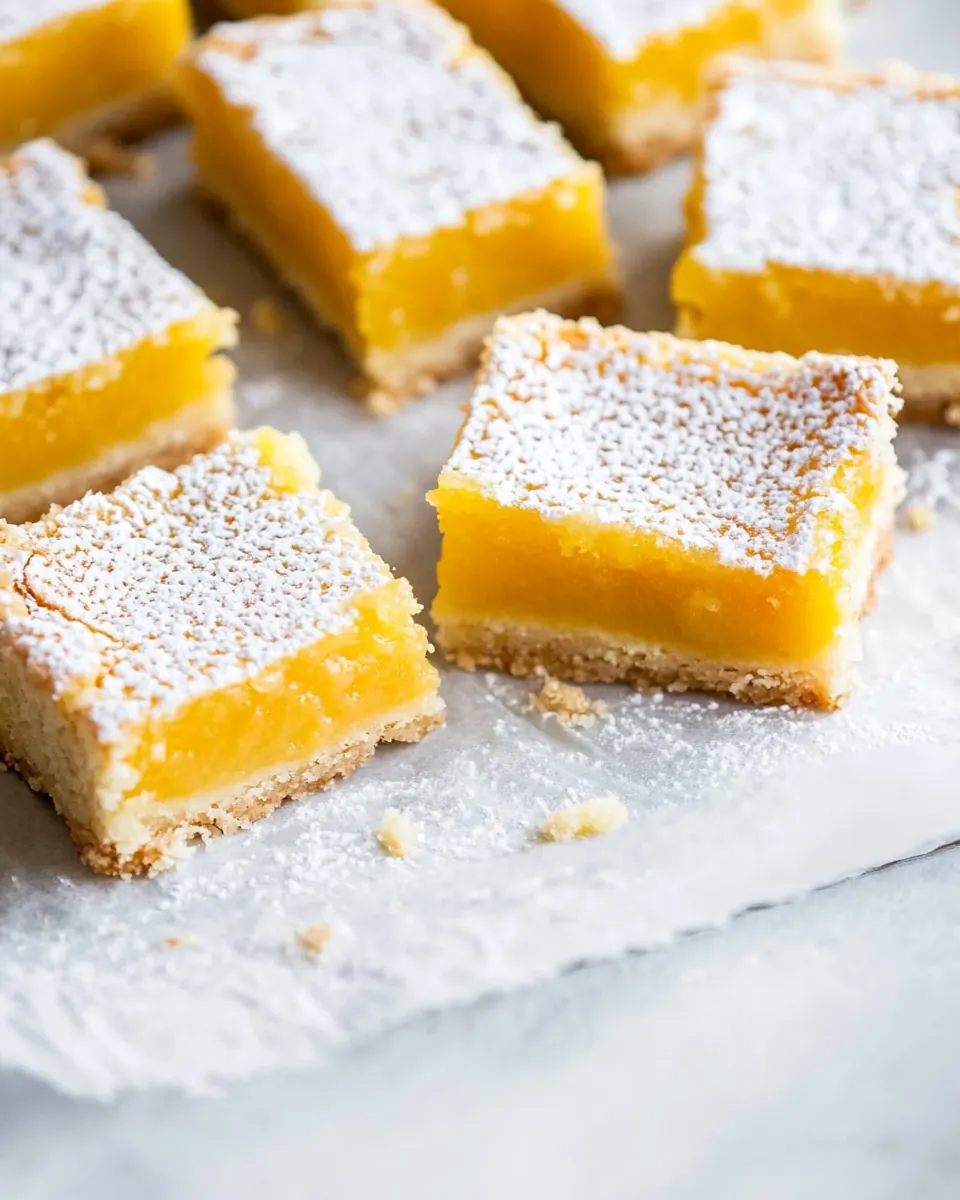
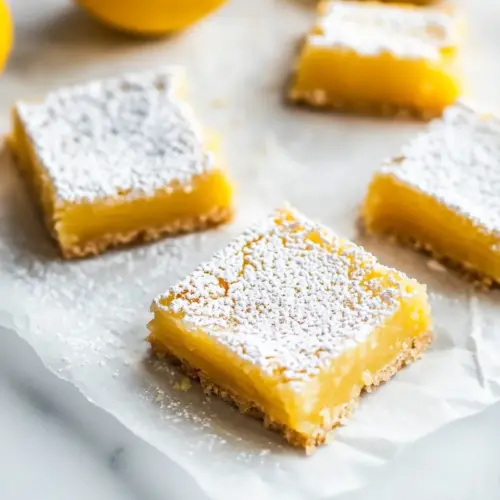
- Confectioner’s sugar, for sprinkling on bars: Dust over finished bars to add a sweet, delicate finish and visual contrast; provides a snow-like appearance and slight extra sweetness on each bite. Sift before sprinkling to prevent clumps and ensure even coverage. Apply after cooling to avoid melting into the topping.
How to Make Lemon Bars
I like to approach these steps with patience, paying attention to texture and aroma as the crust bakes and the filling sets. The process is straightforward, but the details matter. Keep your tools ready and enjoy the sensory clues that tell you when each stage is just right.
- Preheat oven to 350 degrees F. Line a 9×13-inch glass baking pan with parchment paper, leaving an overhang on the sides so you can easily lift out the bars. Spray with nonstick cooking spray and set aside.: You'll notice the oven warming with a faint dry heat smell that signals readiness, and the glass pan will distribute heat evenly for a consistent crust bake. Using parchment with an overhang makes lifting the entire slab simple, avoiding any jostling that would crack the filling. A common pitfall is skipping the spray under the parchment, which can cause the paper to shift when pressing the crust, making the edges uneven.
- In the bowl of a stand mixer, beat the butter and sugar together until creamy and smooth. Mix in the vanilla extract. Add the flour and salt and mix just until combined.: As you cream butter with sugar , you should see the mixture lighten in color and become silky to the touch, with a faint sweet aroma. Adding vanilla extract at this point amplifies these aromas. When the flour and salt are incorporated, stop mixing to prevent gluten formation that would toughen the crust. A frequent error is overbeating after adding flour , which changes the texture from tender to chewy.
- Press the dough evenly into the prepared pan. Bake for 20 to 22 minutes or until the edges are lightly golden brown.: Pressing the dough should feel firm and even under your fingertips, creating a uniform thickness that bakes consistently. As it bakes, the oven will give off a warm, toasty aroma and you will see the edges develop a pale golden hue. If the crust puffs in spots, gently press it back down immediately after removing it from the oven so the filling sits on a flat surface. Avoid pressing it too thin, which can produce a brittle base that doesn't support the filling.
- While the crust is baking, make the lemon filling. In a large bowl, combine the sugar and lemon zest. Rub together with your fingers until fragrant. Add the flour and whisk together.: Rubbing lemon zest with sugar releases essential oils, producing an instant citrus perfume that signals the filling will be flavorful. Whisking in the small amount of flour helps distribute it evenly, ensuring the filling sets uniformly. A common oversight is skipping the rubbing step, which diminishes the lemon aroma in the final bars.
- Add the eggs and lemon juice. Whisk until combined. Pour the lemon filling over the warm crust.: When you add the eggs and lemon juice , the mixture will brighten visually and emit a sharp, citrusy scent. Whisking until homogenous ensures there are no streaks of yolk or pockets of flour. Pouring the filling over a warm but not hot crust helps it start to set evenly from the bottom. If the crust is too hot, the filling can bubble and create an uneven surface, so allow the crust to cool for a minute if it seems excessively warm.
- Bake for 20 to 25 minutes or until the center is set. Remove the bars from the oven and cool completely at room temperature. When the bars are cool, transfer the pan to the refrigerator and chill until cold and firm, at least 2 hours.: During this bake, the filling will go from glossy and jiggly to matte and gently firm, and the oven will give a subtle caramelized note at the edges. Cooling at room temperature prevents thermal shock that can crack the top, and chilling solidifies the custard so you can cut clean squares. A common mistake is skimping on chilling time, which leads to sloppy slices and a runny texture.
- When ready to serve, remove the pan from the fridge and dust with confectioner’s sugar. Cut into squares and serve.: Dusting with confectioner’s sugar adds a soft sweetness and a pretty visual finish that contrasts with the lemon color. Use a sharp knife wiped between cuts for neat edges, and you will hear a slight, satisfying clean slice rather than a sticky tear. Avoid cutting the bars while too warm, which causes the filling to smear and the squares to lose shape.
Helpful Hints
I like to present a few focused tips that keep the process smooth and results consistent. These notes cover timing, texture, and presentation so you can get the best possible batch with minimal fuss.
- Chill before slicing: Allow the pan to cool completely and then chill for at least two hours so the filling firms. This prevents the bars from collapsing when cut and makes for neater servings.
- Measure flour correctly: Spoon and level your flour when measuring to avoid dense or dry crusts. Compacting flour in the cup adds too much, altering texture.
- Rub zest with sugar: Rubbing the lemon zest into sugar releases aromatic oils and amplifies citrus flavor in the filling, giving a brighter, fresher result.
- Use fresh lemon juice: Fresh lemon juice provides clearer acidity and nuanced flavor that bottled juice lacks, affecting both taste and aroma.
- Line the pan with parchment: Using parchment with an overhang makes it easy to lift the entire slab out for clean cutting and serving, avoiding jagged edges or broken pieces.
How to Enjoy Lemon Bars
These bars are a great make ahead dessert that shine in many contexts, from afternoon tea to festive gatherings. I often serve them chilled, because the firm texture allows for clean squares that look as good as they taste. Below are several serving ideas and pairings to help you plan the occasion.
- Casual coffee or tea: Place chilled Lemon Bars on a platter with small dessert plates and forks for a relaxed afternoon gathering. They pair nicely with a medium roast coffee or a mild black tea.
- Brunch spread: Offer Lemon Bars alongside fruit salads and scones for a bright finishing note. Their clean citrus character balances richer savory items without overpowering the table.
- Picnic or potluck: Transfer cooled bars to a shallow tin lined with parchment for easy transport. The bars hold up well at room temperature for several hours, making them picnic friendly.
- Seasonal gatherings: Serve Lemon Bars during spring or summer holidays as a lighter dessert option. Their refreshing flavor cuts through heavier holiday fare for a pleasant palate cleanser.
- Storage and make ahead: Keep the bars chilled in an airtight container for up to five days, or freeze cut squares wrapped tightly for longer storage. Thaw in the refrigerator before serving, and dust with confectioner’s sugar just before presenting.
- Presentation tips: Dust with confectioner’s sugar and garnish the serving platter with thin lemon slices or extra zest for an attractive finish. Use a hot, clean knife for each cut to keep edges tidy.
FAQ
Conclusion
What makes this recipe special is the harmony between a tender, buttery crust and a bright, silky lemon filling that cleanses the palate with every bite. The balance of textures and flavors is simple yet precise, and it rewards careful attention to small techniques like zesting and chilling. I encourage you to give these Lemon Bars a try the next time you want a dessert that is both approachable and impressive. Enjoy the process, and savor how a few humble ingredients can produce something that brings people together.
Lemon Bars
Equipment
- Stand mixer
- 9x13 inch glass baking pan
- Parchment Paper
- Whisk
Ingredients
- 1 cup unsalted butter, at cool room temperature Cream until soft and spreadable; provides the rich, buttery base for the shortbread crust and helps bind dry ingredients together. Chill briefly if too soft to ensure proper dough texture and even baking. Contributes tenderness and a golden color to the finished bars.
- 1/2 cup granulated sugar Sweeten and help tenderize the crust while adding structure when creamed with butter; dissolves into the dough to create a fine crumb. Helps balance the tart lemon filling and enhances overall sweetness. Can be measured precisely to control texture.
- 1/2 teaspoon pure vanilla extract Add a floral, warm aroma that deepens flavor complexity; balances the citrus brightness and rounds out sweetness in both crust and filling. Use pure extract for a clean, natural vanilla note without bitterness. Incorporates easily when mixed with wet ingredients.
- 2 cups all-purpose flour Provide structure and body to the shortbread crust; combine with butter and sugar to form a cohesive dough that holds shape when baked. Contains gluten which creates a tender yet sturdy base for the lemon topping. Sift or whisk to ensure even distribution and prevent lumps.
- 1/2 teaspoon kosher salt Enhance and balance flavor by amplifying sweetness while subtly rounding sharper notes; helps strengthen gluten structure slightly in the crust. Use kosher salt for clean, measured seasoning without overpowering the lemon. Dissolve evenly into dry ingredients for consistent taste.
- 2 cups granulated sugar Sweeten the lemon filling significantly and contribute to its syrupy texture when combined with eggs and lemon juice. Dissolve fully to avoid graininess and help set the filling during baking. Amount controls final sweetness and shelf life of the bars.
- Zest of 2 large lemons Provide intense citrus aroma and concentrated lemon oil for bright, fresh flavor; zest adds complexity beyond juice alone. Finely grate only the yellow part to avoid bitterness from the pith. Stir into the filling so oils distribute evenly and intensify the lemon character.
- 1/4 cup all-purpose flour Lighten and slightly thicken the lemon filling, helping to stabilize the custard as it bakes. Acts as a binder with eggs and sugar to create a smooth, set texture without making it overly heavy. Whisk thoroughly to prevent lumps before adding liquids.
- 4 large eggs Bind the filling and create a rich, custard-like texture when beaten with sugar and lemon juice; eggs also help the filling set during baking. Bring to room temperature for even mixing and smoother incorporation. Beat just until combined to avoid over-aeration that can cause cracks.
- 2/3 cup fresh lemon juice Provide the primary tart, acidic flavor that defines lemon bars and helps the filling set when cooked with eggs and sugar. Freshly squeezed juice offers the brightest, most natural citrus taste compared to bottled options. Strain if desired to remove pulp and seeds for a silky filling.
- Confectioner’s sugar, for sprinkling on bars Dust over finished bars to add a sweet, delicate finish and visual contrast; provides a snow-like appearance and slight extra sweetness on each bite. Sift before sprinkling to prevent clumps and ensure even coverage. Apply after cooling to avoid melting into the topping.
Instructions
- Preheat oven to 350 degrees F. Line a 9×13-inch glass baking pan with parchment paper, leaving an overhang on the sides so you can easily lift out the bars. Spray with nonstick cooking spray and set aside.: You'll notice the oven warming with a faint dry heat smell that signals readiness, and the glass pan will distribute heat evenly for a consistent crust bake. Using parchment with an overhang makes lifting the entire slab simple, avoiding any jostling that would crack the filling. A common pitfall is skipping the spray under the parchment, which can cause the paper to shift when pressing the crust, making the edges uneven.
- In the bowl of a stand mixer, beat the butter and sugar together until creamy and smooth. Mix in the vanilla extract. Add the flour and salt and mix just until combined.: As you cream butter with sugar , you should see the mixture lighten in color and become silky to the touch, with a faint sweet aroma. Adding vanilla extract at this point amplifies these aromas. When the flour and salt are incorporated, stop mixing to prevent gluten formation that would toughen the crust. A frequent error is overbeating after adding flour , which changes the texture from tender to chewy.
- Press the dough evenly into the prepared pan. Bake for 20 to 22 minutes or until the edges are lightly golden brown.: Pressing the dough should feel firm and even under your fingertips, creating a uniform thickness that bakes consistently. As it bakes, the oven will give off a warm, toasty aroma and you will see the edges develop a pale golden hue. If the crust puffs in spots, gently press it back down immediately after removing it from the oven so the filling sits on a flat surface. Avoid pressing it too thin, which can produce a brittle base that doesn't support the filling.
- While the crust is baking, make the lemon filling. In a large bowl, combine the sugar and lemon zest. Rub together with your fingers until fragrant. Add the flour and whisk together.: Rubbing lemon zest with sugar releases essential oils, producing an instant citrus perfume that signals the filling will be flavorful. Whisking in the small amount of flour helps distribute it evenly, ensuring the filling sets uniformly. A common oversight is skipping the rubbing step, which diminishes the lemon aroma in the final bars.
- Add the eggs and lemon juice. Whisk until combined. Pour the lemon filling over the warm crust.: When you add the eggs and lemon juice , the mixture will brighten visually and emit a sharp, citrusy scent. Whisking until homogenous ensures there are no streaks of yolk or pockets of flour. Pouring the filling over a warm but not hot crust helps it start to set evenly from the bottom. If the crust is too hot, the filling can bubble and create an uneven surface, so allow the crust to cool for a minute if it seems excessively warm.
- Bake for 20 to 25 minutes or until the center is set. Remove the bars from the oven and cool completely at room temperature. When the bars are cool, transfer the pan to the refrigerator and chill until cold and firm, at least 2 hours.: During this bake, the filling will go from glossy and jiggly to matte and gently firm, and the oven will give a subtle caramelized note at the edges. Cooling at room temperature prevents thermal shock that can crack the top, and chilling solidifies the custard so you can cut clean squares. A common mistake is skimping on chilling time, which leads to sloppy slices and a runny texture.
- When ready to serve, remove the pan from the fridge and dust with confectioner’s sugar. Cut into squares and serve.: Dusting with confectioner’s sugar adds a soft sweetness and a pretty visual finish that contrasts with the lemon color. Use a sharp knife wiped between cuts for neat edges, and you will hear a slight, satisfying clean slice rather than a sticky tear. Avoid cutting the bars while too warm, which causes the filling to smear and the squares to lose shape.
Notes
- Chill before slicing: Allow the pan to cool completely and then chill for at least two hours so the filling firms. This prevents the bars from collapsing when cut and makes for neater servings.
- Measure flour correctly: Spoon and level your flour when measuring to avoid dense or dry crusts. Compacting flour in the cup adds too much, altering texture.
- Rub zest with sugar: Rubbing the lemon zest into sugar releases aromatic oils and amplifies citrus flavor in the filling, giving a brighter, fresher result.
- Use fresh lemon juice: Fresh lemon juice provides clearer acidity and nuanced flavor that bottled juice lacks, affecting both taste and aroma.
- Line the pan with parchment: Using parchment with an overhang makes it easy to lift the entire slab out for clean cutting and serving, avoiding jagged edges or broken pieces.