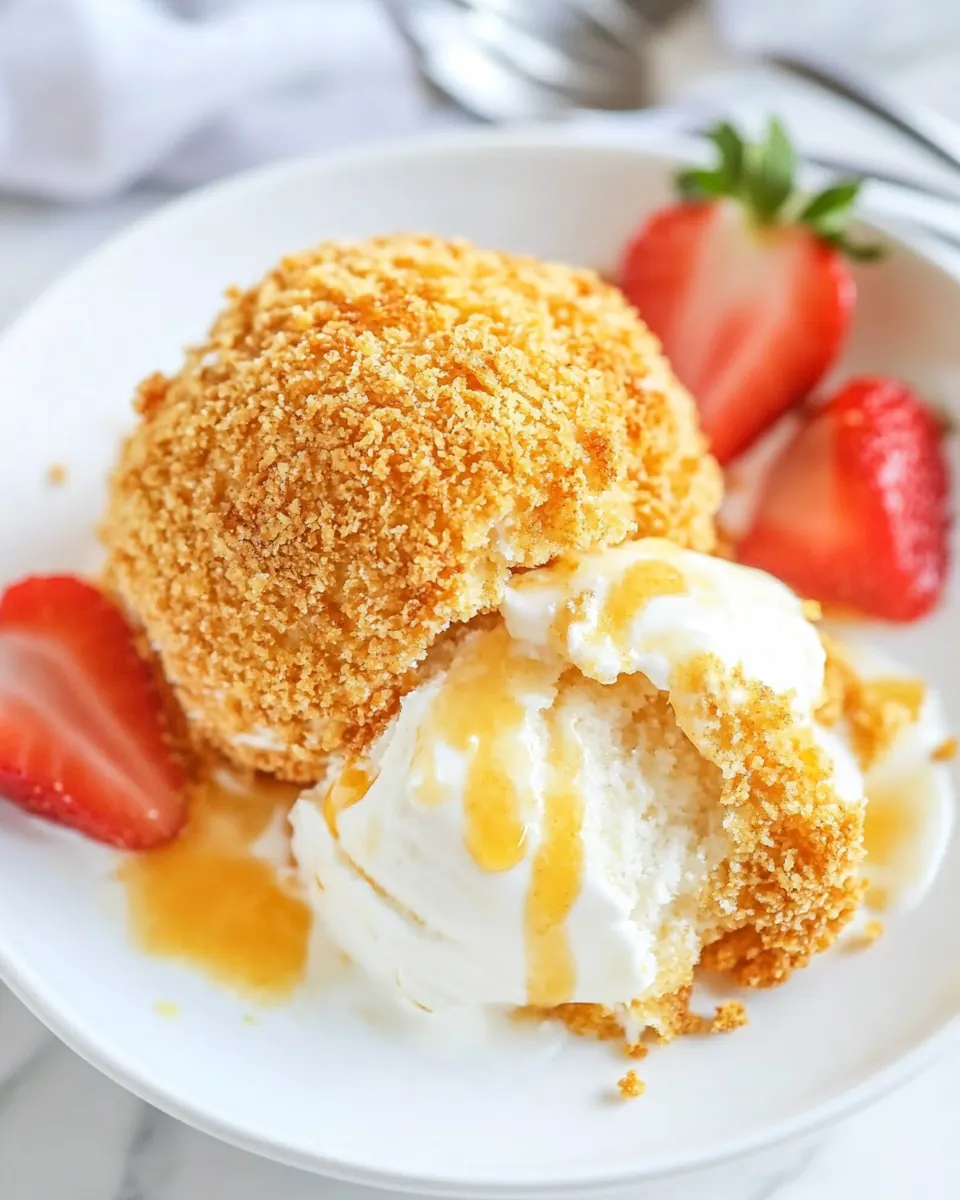
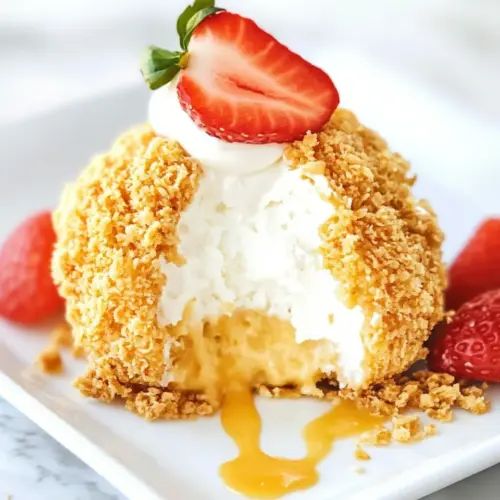
Mexican Fried Ice Cream
Mexican Fried Ice Cream first stole my heart on a sweltering summer evening at a tiny street market, where the scent of warm cinnamon met the cold, creamy tang of vanilla and I could not help but grin at every crunchy bite.
That night I learned how playful contrasts can be, how a fleeting crisp shell can keep a frozen center from melting too fast, and how simple pantry staples can feel celebratory. I came home determined to recreate that balance, experimenting until the coating stayed crunchy and the center stayed dreamy and cold. Each attempt taught me something new about timing and temperature, and soon the recipe became a joyful ritual for hot afternoons and casual dinner parties.
Over time I started serving Mexican Fried Ice Cream with bright berries and a drizzle of honey, letting the fruit and syrup add a fresh counterpoint to the warm cinnamon crunch. Friends always ask how I get the exterior so golden without turning the inside to soup, and I tell them it is all about proper freezing and a very hot oil. I still remember the first perfectly crisp ball I pulled from the oil, steam rising, coating crackling under my fork, and that satisfying contrast has kept this dessert in my regular rotation ever since.
Recipe Snapshot
17 mins
15 mins
2 mins
Easy
300 kcal
Mexican
Gluten-Free, Low FODMAP
Desserts
Heavy bottomed pot, Candy thermometer, Slotted spoon, Shallow dishes, Freezer
Why This Mexican Fried Ice Cream Works
Unexpected Texture Play
I love how Mexican Fried Ice Cream delivers an immediate textural surprise. The first bite is crisp and crackly from the cornflakes, then your fork breaks through to reveal cold, silky vanilla ice cream. That contrast is the reason I pull this out when I want to elicit audible delight around the table.
Simple Ingredients, Big Flavor
This recipe shines because it uses straightforward items you likely have on hand. The combination of crunchy cornflakes and aromatic cinnamon elevates plain vanilla ice cream into something festive without complicated prep. I appreciate dishes that are greater than the sum of their parts, and this is one of them.
Make Ahead Friendly
One of my favorite things is the ability to prepare the coated ice cream days in advance. Once frozen solid, these balls hold up well, so I often assemble them ahead to reduce last minute fuss. That practicality makes them a perfect choice for gatherings where you want to spend time with guests instead of fussing in the kitchen.
Showstopper Yet Accessible
Despite looking fancy when served, Mexican Fried Ice Cream is approachable. The technique is forgiving, so you can achieve a dramatic result with minimal risk. I especially love pulling this out to end a summer meal on a playful note.
Versatile Presentation
Whether you plate a single ball with a ribbon of honey and a few berries or present a platter for guests to choose from, this dessert adapts to your setting. I mix up garnishes depending on the season, and it always feels appropriate from casual weeknight treats to weekend entertaining.
What’s In This Mexican Fried Ice Cream
These ingredients are all about contrast and simplicity. The core players are the cold, creamy vanilla ice cream and the crunchy, lightly spiced coating made from cornflakes and cinnamon. The egg whites act as a light binder so the cereal adheres, and hot oil gives you an instant, golden shell. Fresh berries, whipped cream, and honey finish the dish with brightness and a touch of sweetness.
- 1 quart vanilla ice cream: Churned into a smooth, creamy base that provides the cold, sweet foundation for the dessert and balances the warm fried exterior when scooped and frozen solid before frying.
- 3 cups crushed cornflakes cereal, about 5 cups uncrushed: Coated and crushed to create a crunchy shell that adheres to the ice cream for texture contrast; measure roughly 3 cups once pulverized and used to encrust each ball evenly.
- 1 teaspoon cinnamon: Sprinkled into the coating mixture to add warm, aromatic spice that complements the sweetness and enhances the flavor profile of the fried crust without overpowering.
- 4 egg whites: Beaten until frothy to act as an egg wash that helps the cornflake coating stick to the ice cream, providing a glue-like layer for a secure, crisp exterior when fried.
- vegetable oil or canola oil, for frying: Heated to a shimmering temperature in a deep pan to quickly crisp the coated ice cream balls, creating a golden shell while leaving the interior cold and intact.
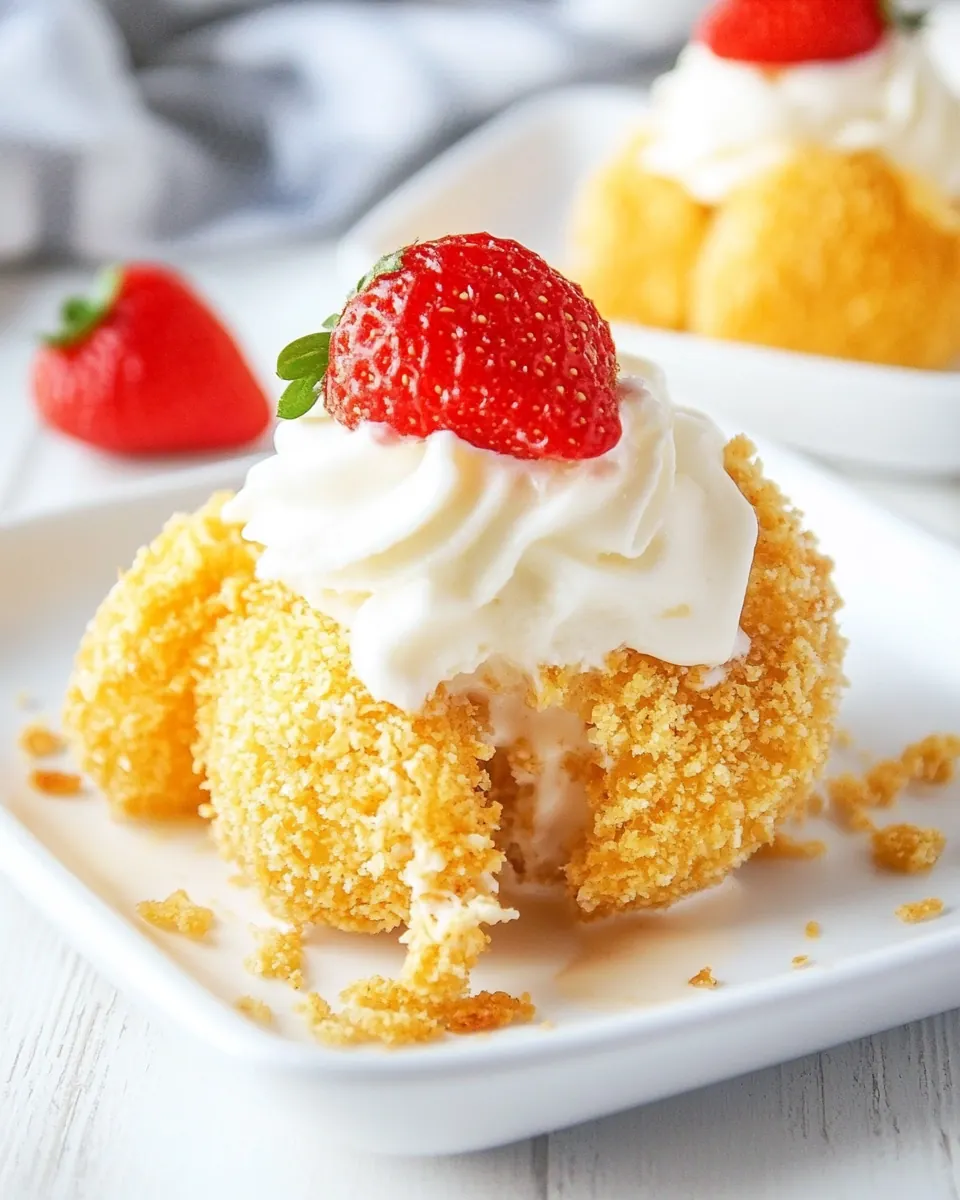
- fresh berries: Garnishing with seasonal fresh berries introduces bright acidity and a juicy contrast that cuts through sweetness and adds a colorful, fresh element to each serving.
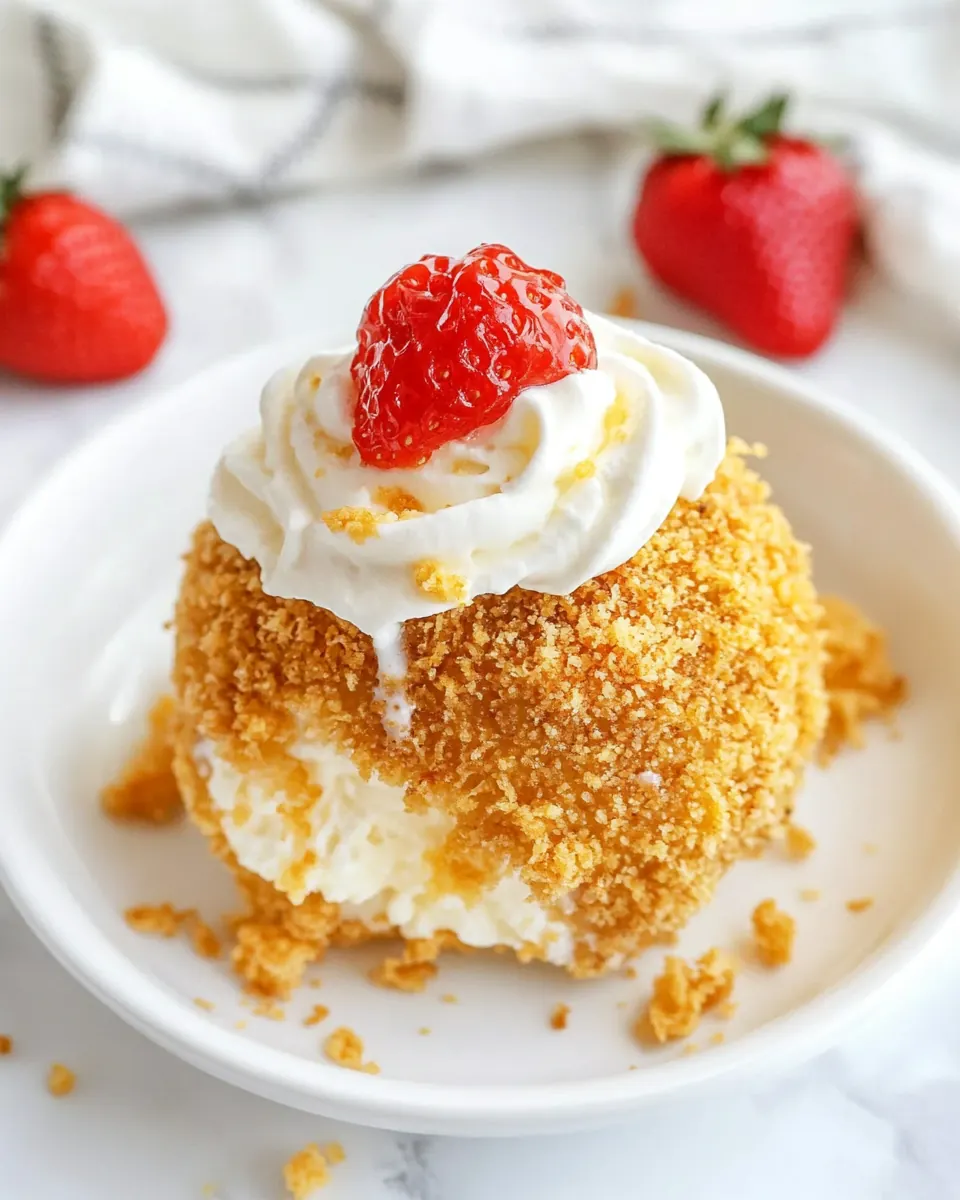
- whipped cream: Dolloped on top to add airy richness and creamy texture that complements both the cold ice cream and crunchy coating for a classic dessert finish.
- honey: Drizzled over the finished dish to contribute a sticky, floral sweetness that ties flavors together and adds gloss and extra sweetness to each bite.
Preparation Steps for Mexican Fried Ice Cream
These directions may look compact, but each step benefits from attention to timing and texture. Read through once so you understand the freezing and frying rhythm, then proceed with confidence.
- Scoop the ice cream into 1/2 cup balls and freeze for one hour, until firm.: The sensory cue here is the firmness when you press the scoop gently, it should yield slightly but not slush, indicating it is holding shape. Freezing for an hour sets the outer layer, which helps the coating stick in later steps. The why is that a slightly set surface prevents the ice cream from melting when you handle it. A common mistake is making the balls too large, which increases the risk the inside softens during frying.
- In a shallow dish, whisk together the crushed cornflakes and cinnamon. In another shallow dish, beat the egg whites until frothy.: You should notice the cinnamon scent blooming as you mix it into the cornflakes , and the egg whites will look glossy and bubbly, not stiff. This separation of dry and wet components ensures even coating and prevents soggy spots. The purpose is to set up a two step dredge that creates a sealed, crunchy shell. Avoid overbeating the egg whites , since overly stiff whites can make the coating clump unevenly.
- Dip each of the ice cream balls in the egg whites, then roll in the cornflakes, coating the ice cream completely. Repeat once more, dipping first in the egg whites and then again in the cornflakes, coating completely.: You will feel the textured crumbs adhere to the chilled surface and hear a faint scraping as you roll. Repeating the dip and roll ensures a thicker, more robust crust that tolerates the hot oil for those quick seconds. The reason this double coating matters is that it forms a stronger barrier to slow melting and gives you theatrical crunch. Resist the urge to press hard when coating, as compacting the crumbs can create dense pockets that do not crisp properly.
- Return the ice cream balls to the freezer and freeze until solid, 2-3 hours.: The balls should be rock solid to the touch and will sound slightly muted when tapped, this indicates the core is frozen through. Deep freezing is essential so that the interior stays cold during the brief fry, preserving texture. If they are not frozen enough, the center will soften too quickly and may leak when fried.
- When ready to serve, heat the oil in a heavy-bottomed pot to 375°F. Using a slotted spoon, add the ice cream balls to the hot oil. Cook 10-15 seconds, until golden, turning to ensure both sides get browned.: Listen for the quiet shimmer of hot oil before you add anything, and look for the slight wavy movement on the surface rather than smoking. A thermometer is critical here because the narrow frying window seals the crust in seconds. If the oil is too cool the coating will absorb oil and become greasy, and if it is too hot the exterior can overbrown in an instant while the interior remains icy cold but the shell is brittle.
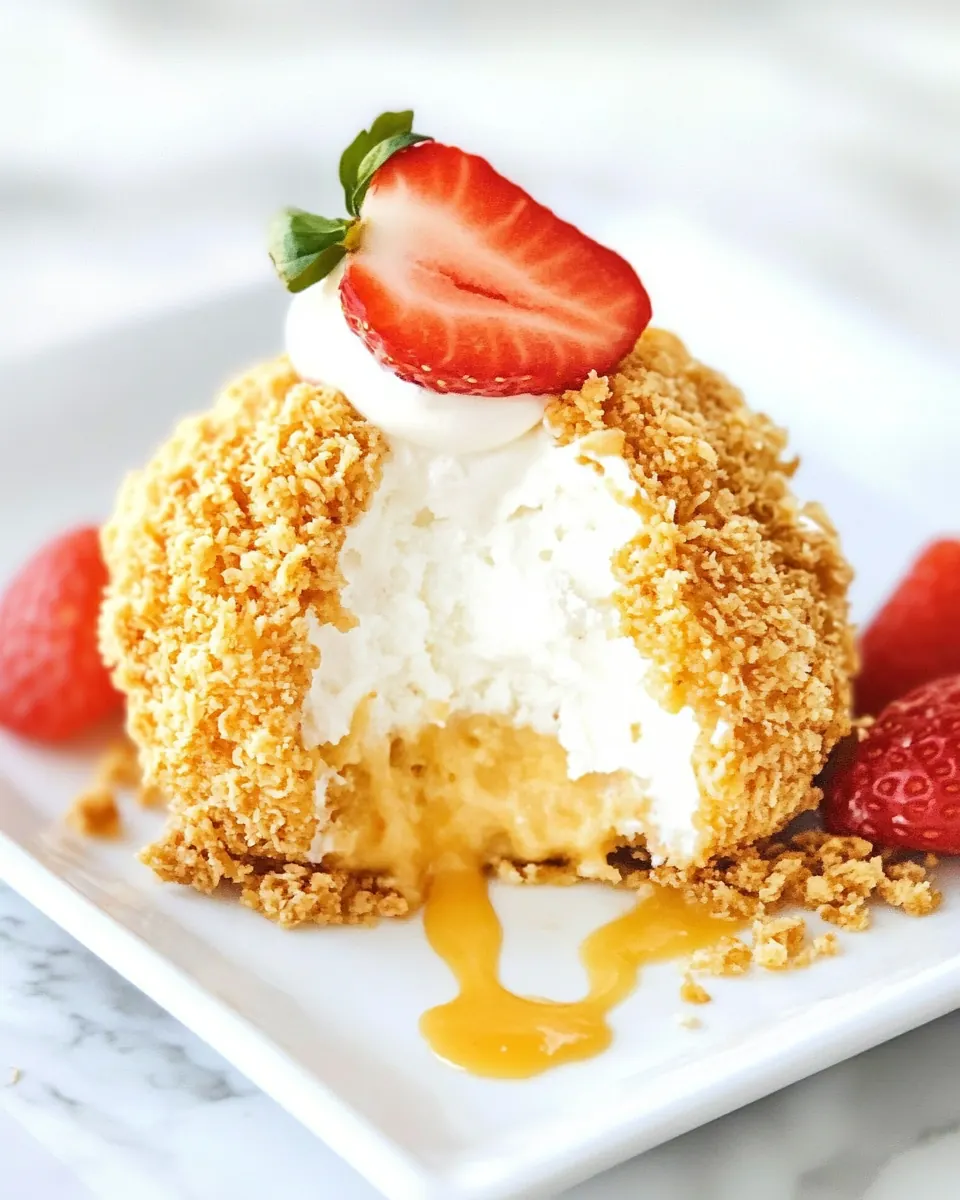
- Let the ice cream balls drain on paper towels for 1-2 minutes, then serve immediately with whipped cream and berries, drizzled with honey.: You will hear a delicate crackle as the crust browns and see a brief steam plume rise, that is the coating crispening without the interior melting. The short cook time is what makes this dessert magical, giving you a warm shell and cold center. A common trap is overcooking; even a few extra seconds flood the interior with heat and ruins the contrast.
- Let the ice cream balls drain on paper towels for 1 to 2 minutes, then serve immediately with whipped cream and berries, drizzled with honey: As they rest, the coating will stay crisp while residual steam dissipates, and the aroma of toasted cinnamon and warm crumbs will mingle with the cold perfume of vanilla ice cream . Serve promptly so the contrast remains vivid, and use a slotted spoon to lift them carefully so the coating does not crack. Waiting too long before serving causes the interior to warm and the shell to soften, so timing is everything here.
Tips and Variations
Here are practical ideas and small shifts you can make to personalize Mexican Fried Ice Cream. These tips help with prep, texture, and presentation for different occasions.
- Make ahead Prepare and freeze the coated balls in a single layer before transferring to a container, they will keep well for up to one month if wrapped tightly, making party day effortless.
- Oil choice Use neutral oil with a high smoke point like vegetable oil or canola oil, this prevents off flavors and allows rapid browning without smoking.
- Texture control Keep the cornflakes crushed coarsely rather than powdering them, that coarse texture is what gives the satisfying crack when you bite in.
- Binding technique Beat the egg whites only until frothy and glossy, this creates a light tack that helps crumbs cling without creating thick, gummy layers.
- Serving timing Fry right before plating and serve immediately with whipped cream and fresh berries, the contrast between hot and cold is the point, so minimize delays.
- Presentation Drizzle with honey just before serving for shine and a touch of floral sweetness that ties the flavors together.
What Complements This Mexican Fried Ice Cream
This dessert pairs beautifully with light, refreshing accompaniments and suits casual to festive occasions. I like to think about balance, offering something bright and acidic to cut through the richness and something airy to echo the frozen center.
- Fresh seasonal berries Strawberries, raspberries, or blueberries add bright acidity, color contrast, and a fresh mouthfeel that complements the warm cinnamon crust.
- Whipped cream A small dollop softens each bite and provides a creamy counterpoint to the crunchy exterior without competing with the vanilla ice cream.
- Honey drizzle A thin stream of honey adds floral sweetness and a glossy finish that lifts the overall presentation and flavor profile.
- Occasion fit This dessert is great for summer gatherings, casual dinner parties, and celebratory meals where you want a playful, theatrical finish that is quick to execute.
- Plating style Serve single portions on chilled plates to keep the center colder longer, or present a platter for guests to assemble, making it interactive and fun.
- Storage note Keep any prepared, un-fried balls frozen solid in an airtight container. Fry only when you plan to serve to preserve the crisp coating and cold interior.
- Seasonal pairing In summer, choose bright berries; in cooler months, a small spoonful of warmed fruit compote beside the ball can add comforting notes while still keeping the interior cold.
FAQ
Conclusion
Mexican Fried Ice Cream stands out because it pairs a warm, aromatic, crunchy shell with an icy, creamy center, creating a playful contrast that always gets a reaction. It is approachable to make, tolerant of make ahead prep, and dramatic enough for guests, so I encourage you to give it a try the next time you want a showstopping dessert. Gather your favorite vanilla ice cream, crush some cornflakes, and enjoy the joyful textures and flavors that make this treat so memorable.
Mexican Fried Ice Cream
Equipment
- Heavy-bottomed pot
- Candy thermometer
- Slotted Spoon
- Shallow Dishes
- Freezer
Ingredients
- 1 quart vanilla ice cream Churned into a smooth, creamy base that provides the cold, sweet foundation for the dessert and balances the warm fried exterior when scooped and frozen solid before frying.
- 3 cups crushed cornflakes cereal, about 5 cups uncrushed Coated and crushed to create a crunchy shell that adheres to the ice cream for texture contrast; measure roughly 3 cups once pulverized and used to encrust each ball evenly.
- 1 teaspoon cinnamon Sprinkled into the coating mixture to add warm, aromatic spice that complements the sweetness and enhances the flavor profile of the fried crust without overpowering.
- 4 egg whites Beaten until frothy to act as an egg wash that helps the cornflake coating stick to the ice cream, providing a glue-like layer for a secure, crisp exterior when fried.
- vegetable oil or canola oil, for frying Heated to a shimmering temperature in a deep pan to quickly crisp the coated ice cream balls, creating a golden shell while leaving the interior cold and intact.
- fresh berries Garnishing with seasonal fresh berries introduces bright acidity and a juicy contrast that cuts through sweetness and adds a colorful, fresh element to each serving.
- whipped cream Dolloped on top to add airy richness and creamy texture that complements both the cold ice cream and crunchy coating for a classic dessert finish.
- honey Drizzled over the finished dish to contribute a sticky, floral sweetness that ties flavors together and adds gloss and extra sweetness to each bite.
Instructions
- Scoop the ice cream into 1/2 cup balls and freeze for one hour, until firm.: The sensory cue here is the firmness when you press the scoop gently, it should yield slightly but not slush, indicating it is holding shape. Freezing for an hour sets the outer layer, which helps the coating stick in later steps. The why is that a slightly set surface prevents the ice cream from melting when you handle it. A common mistake is making the balls too large, which increases the risk the inside softens during frying.
- In a shallow dish, whisk together the crushed cornflakes and cinnamon. In another shallow dish, beat the egg whites until frothy.: You should notice the cinnamon scent blooming as you mix it into the cornflakes , and the egg whites will look glossy and bubbly, not stiff. This separation of dry and wet components ensures even coating and prevents soggy spots. The purpose is to set up a two step dredge that creates a sealed, crunchy shell. Avoid overbeating the egg whites , since overly stiff whites can make the coating clump unevenly.
- Dip each of the ice cream balls in the egg whites, then roll in the cornflakes, coating the ice cream completely. Repeat once more, dipping first in the egg whites and then again in the cornflakes, coating completely.: You will feel the textured crumbs adhere to the chilled surface and hear a faint scraping as you roll. Repeating the dip and roll ensures a thicker, more robust crust that tolerates the hot oil for those quick seconds. The reason this double coating matters is that it forms a stronger barrier to slow melting and gives you theatrical crunch. Resist the urge to press hard when coating, as compacting the crumbs can create dense pockets that do not crisp properly.
- Return the ice cream balls to the freezer and freeze until solid, 2-3 hours.: The balls should be rock solid to the touch and will sound slightly muted when tapped, this indicates the core is frozen through. Deep freezing is essential so that the interior stays cold during the brief fry, preserving texture. If they are not frozen enough, the center will soften too quickly and may leak when fried.
- When ready to serve, heat the oil in a heavy-bottomed pot to 375°F. Using a slotted spoon, add the ice cream balls to the hot oil. Cook 10-15 seconds, until golden, turning to ensure both sides get browned.: Listen for the quiet shimmer of hot oil before you add anything, and look for the slight wavy movement on the surface rather than smoking. A thermometer is critical here because the narrow frying window seals the crust in seconds. If the oil is too cool the coating will absorb oil and become greasy, and if it is too hot the exterior can overbrown in an instant while the interior remains icy cold but the shell is brittle.
- Let the ice cream balls drain on paper towels for 1-2 minutes, then serve immediately with whipped cream and berries, drizzled with honey.: You will hear a delicate crackle as the crust browns and see a brief steam plume rise, that is the coating crispening without the interior melting. The short cook time is what makes this dessert magical, giving you a warm shell and cold center. A common trap is overcooking; even a few extra seconds flood the interior with heat and ruins the contrast.
- Let the ice cream balls drain on paper towels for 1 to 2 minutes, then serve immediately with whipped cream and berries, drizzled with honey: As they rest, the coating will stay crisp while residual steam dissipates, and the aroma of toasted cinnamon and warm crumbs will mingle with the cold perfume of vanilla ice cream . Serve promptly so the contrast remains vivid, and use a slotted spoon to lift them carefully so the coating does not crack. Waiting too long before serving causes the interior to warm and the shell to soften, so timing is everything here.
Notes
- Make ahead Prepare and freeze the coated balls in a single layer before transferring to a container, they will keep well for up to one month if wrapped tightly, making party day effortless.
- Oil choice Use neutral oil with a high smoke point like vegetable oil or canola oil, this prevents off flavors and allows rapid browning without smoking.
- Texture control Keep the cornflakes crushed coarsely rather than powdering them, that coarse texture is what gives the satisfying crack when you bite in.
- Binding technique Beat the egg whites only until frothy and glossy, this creates a light tack that helps crumbs cling without creating thick, gummy layers.
- Serving timing Fry right before plating and serve immediately with whipped cream and fresh berries, the contrast between hot and cold is the point, so minimize delays.
- Presentation Drizzle with honey just before serving for shine and a touch of floral sweetness that ties the flavors together.