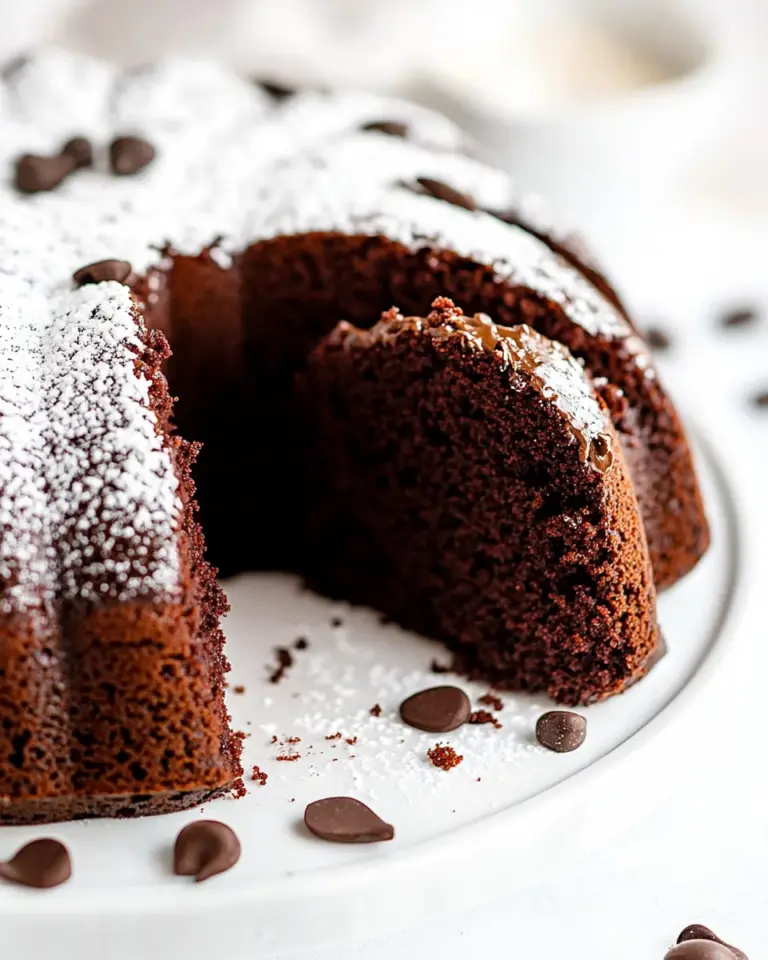
S’mores Dip
S’mores Dip has become my go to for easy gatherings when I want the nostalgia of a campfire without leaving the kitchen. The first time I made it I was juggling a bowl of anxious kids, a stack of graham crackers, and a blazer hot from the oven, and the room filled with that unmistakable smell of toasted marshmallow and warm chocolate. That moment made me realize how food can anchor memories, and this simple skillet of molten chocolate and pillowy marshmallows does exactly that.
I remember watching the marshmallows puff up slowly, turning that soft ivory into flecks of caramelized gold, and everyone leaning in to scoop a warm, sticky bite. It felt less like dessert and more like an invitation to linger, to trade stories while fingers got delightfully messy. Over time I tweaked the ratio of chocolate to heavy cream, learning how a touch more cream gives silkier texture, and how thinly spread marshmallows brown faster, so patience matters.
Recipe Snapshot
14 mins
5 mins
9 mins
Easy
250 kcal
American
Gluten-Free, Low FODMAP
Desserts
Baking Pan (9×9) or equivalent sized pan (holds 6 cups), Microwave and oven safe dish, Rubber Scraper (Rubber Spatula)
The Best Thing About This S’mores Dip
Instant crowd pleaser that feels nostalgic
I love serving S’mores Dip because it takes everyone back to campfire nights, but without the smoke or fuss. I can see smiles appear as soon as the dish comes out, and that shared, cozy moment is priceless. The combination of molten chocolate and gooey marshmallows is physically comforting, and it hits that universal sweet spot.
Fast, forgiving, and flexible
This recipe is forgiving enough for cooks of any skill level. I often improvise by swapping chocolate varieties, and the dip still turns out luscious. The method tolerates a little impatience in the microwave or oven without collapsing, so you can multitask while it bakes. That ease is why I keep this recipe in my rotation for unexpected company.
Perfect for dipping and sharing
I adore how S’mores Dip transforms casual ingredients into a communal experience. You can set out an assortment of dippers and let everyone customize their bites. That interactive element turns dessert into an activity, which is especially useful during parties when I want guests to mingle and nibble.
Small batch, big impact
The proportions are ideal for a small group, yet striking on a dessert table. I like that it does not feel heavy despite being rich, because the bright crunch of Graham Crackers or a crisp pretzel provides balance. It’s a high reward recipe for minimal effort, which is a combination I always champion.
Adaptable and seasonless
Whether it is a winter movie night or a backyard summer evening, S’mores Dip feels appropriate. I often pair it with seasonal fruit when I want a slightly fresher bite, or keep it classic with crackers when I want that old fashioned s’more profile. Its versatility makes it a staple in my kitchen.
Key Ingredients for S’mores Dip
These components work together to recreate the campfire s’more experience in a single dish. The core philosophy is simple: a silky chocolate base, a touch of heavy cream and butter for richness, a pinch of salt to lift the flavors, and puffy marshmallows to provide the signature charred top. Each plays a distinct role to balance texture and flavor.
- 2 cups chocolate chips, milk, semi-sweet, or dark chocolate or chopped chocolate bars: Melted and glossy, provides the primary sweet, rich chocolate base that becomes the dip’s creamy foundation when combined with cream and butter. Offers depth of flavor and structure; choose milk, semi–sweet, or dark to adjust sweetness and intensity. Chopped chocolate bars melt smoothly and can create a silkier texture compared with chips.
- 1/2 cup heavy cream: Adds silkiness and helps create a luscious, pourable ganache by loosening the melted chocolate and improving mouthfeel. Contributes a subtle richness that balances the sweetness of the chocolate and marshmallows; full-fat cream yields the creamiest dip. Warm the cream slightly before combining to ensure smooth incorporation.
- 1 tablespoon butter: Enriches flavor and contributes to a glossy, smooth texture when stirred into melted chocolate and cream. Helps stabilize the ganache, adds a hint of savory butteriness, and can prevent the chocolate from becoming grainy as it cools. Use unsalted butter unless offsetting with a pinch of salt.
- 1 pinch salt (optional): Enhances and balances sweetness by adding a faint savory contrast that brightens chocolate and marshmallow flavors when desired. A small pinch will round flavors without tasting salty; optional depending on personal preference or if using salted butter. Dissolve it into the warm mixture for even distribution.
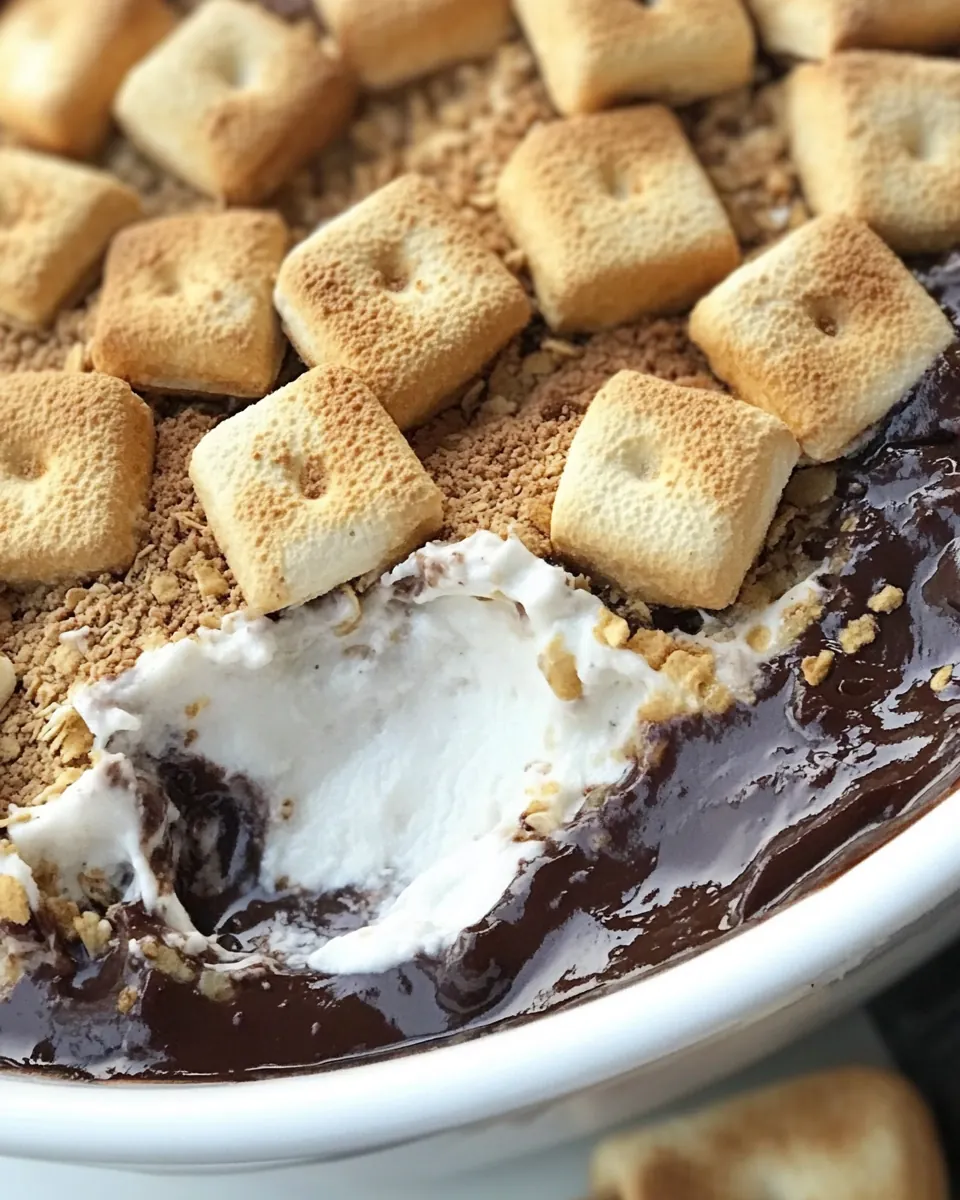
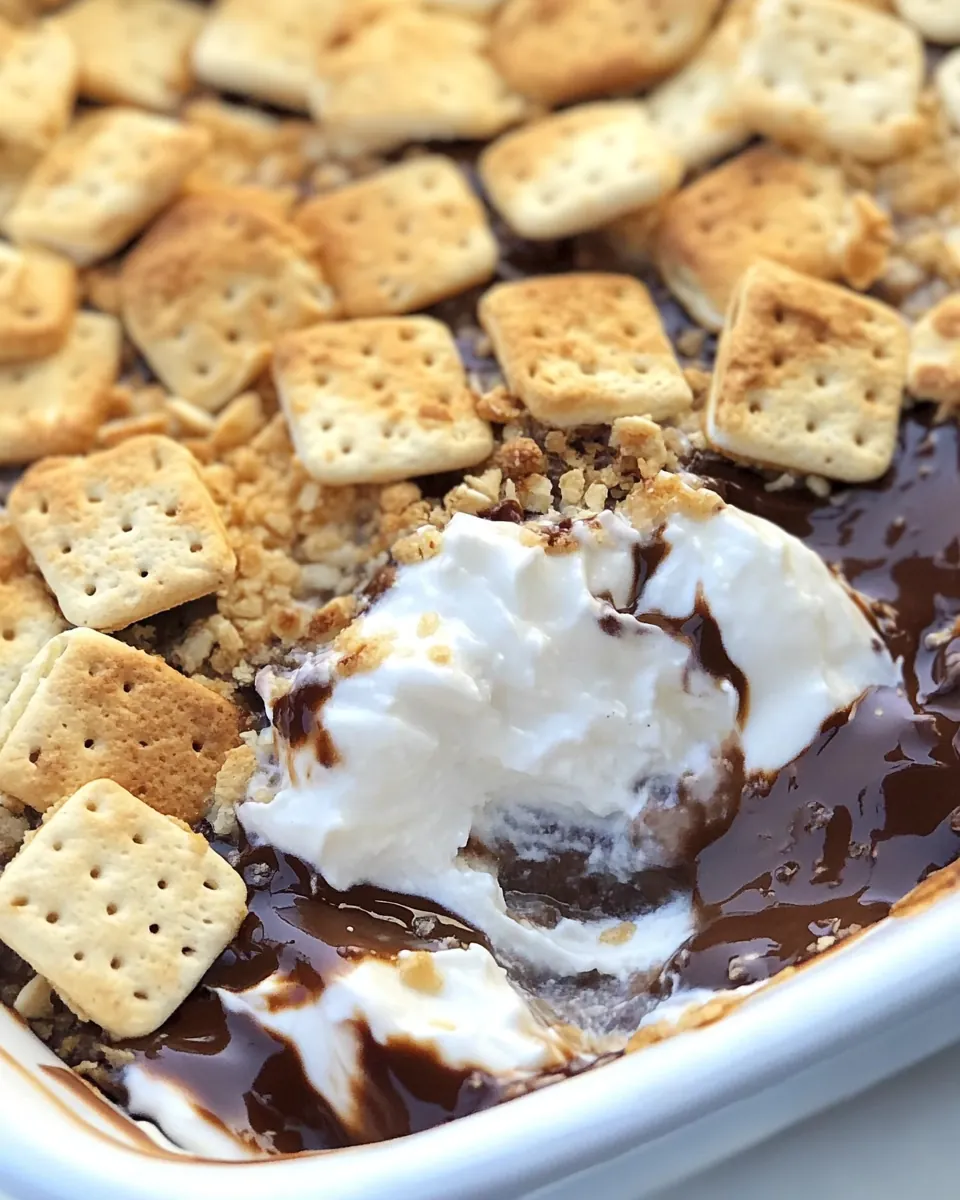
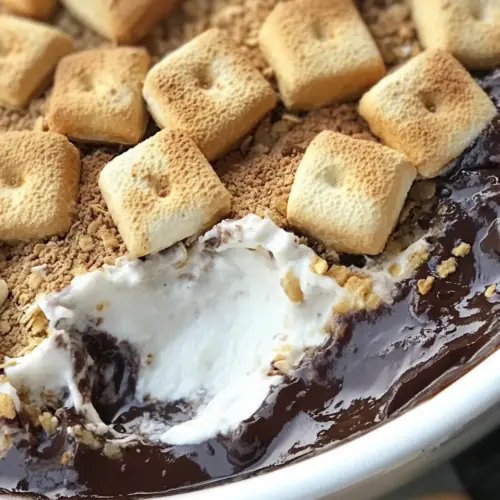
- 10 ounces marshmallows, 10-ounce package of mini marshmallows or regular marshmallows: Provides the classic gooey, toasted topping and sticky pull that defines s'mores flavor, melting into a browned, marshmallowy layer over the chocolate base. Mini marshmallows melt more quickly and evenly, while regular marshmallows can be torn or halved to achieve similar coverage. Toasting under a broiler or with a torch creates caramelized edges and a smoky note.
- Graham Crackers, for dipping: Serves as the crunchy vehicle for scooping and enjoying the dip, contributing the signature graham cracker flavor that complements chocolate and marshmallow. Break into pieces for easy dipping and provide a sturdy, slightly sweet contrast in texture. Offer a variety of shapes for dipping ease and presentation.
The Method for S’mores Dip
This recipe is straightforward but rewards attention to sensory cues. Work steadily through the ganache, top thoughtfully with marshmallows, and watch the oven closely while the top transforms. Below I expand each direction into detailed, experience driven steps so you can reproduce that perfect gooey pull.
- Prep. Preheat the oven to 400º F.: When you preheat, you will notice the kitchen air shift and the oven light cycle as it reaches 400º F . Preheating ensures the marshmallows puff immediately and brown evenly, rather than slowly melting and collapsing, which preserves that toasted exterior. A common mistake is skipping preheat, which leads to uneven puffing. To check readiness, feel a steady warm flow when you briefly open the oven door, and allow the temperature to stabilize for a few minutes before inserting the dish.
- Make the ganache. Add the chocolate chips to a 9×9 baking dish or equivalent-sized dish. Pour the heavy cream over the chips and top with butter and a sprinkle of salt. Place into the microwave for 30 seconds. Remove and stir to combine. Return to the microwave for 30 seconds and stir until smooth. Spread into an even layer in the baking dish. Stovetop Option: Set a skillet over medium-low heat and warm the chocolate chips, heavy cream, and butter until there is a slight bubble along the edges of the pan. Remove from the heat and stir until smooth and well combined. Pour into 9×9 baking dish and spread into an even layer in the dish.: Set a skillet over medium-low heat and warm the chocolate chips, heavy cream, and butter until there is a slight bubble along the edges of the pan. Remove from the heat and stir until smooth and well combined. Pour into 9×9 baking dish and spread into an even layer in the dish. : As the chocolate meets warm heavy cream you'll see glossy ribbons forming while a rich cocoa aroma fills the room, signaling proper emulsification. Stirring encourages the residual heat to finish melting any stray bits, resulting in a silky ganache that should coat a spoon when ready. If using the stovetop, maintain medium low heat so the mixture does not scorch, which would create a bitter note. A common pitfall is overheating, which can separate the ganache. If you notice a grainy texture, persistent stirring off the heat usually brings it back together. Once smooth, spread it evenly so every dipper gets a uniform chocolate layer, about a quarter inch thick, which ensures balanced spoonfuls of chocolate and marshmallow .
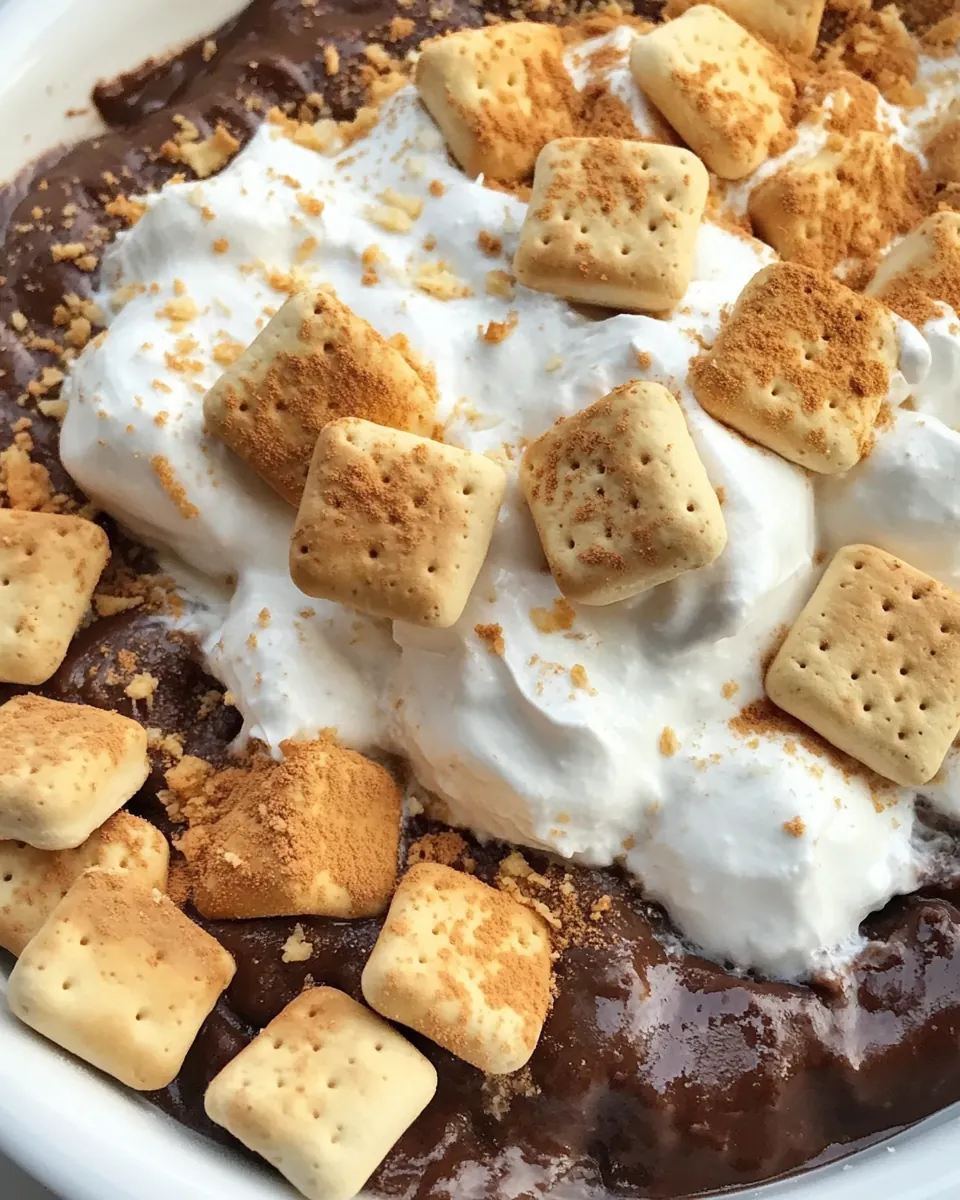
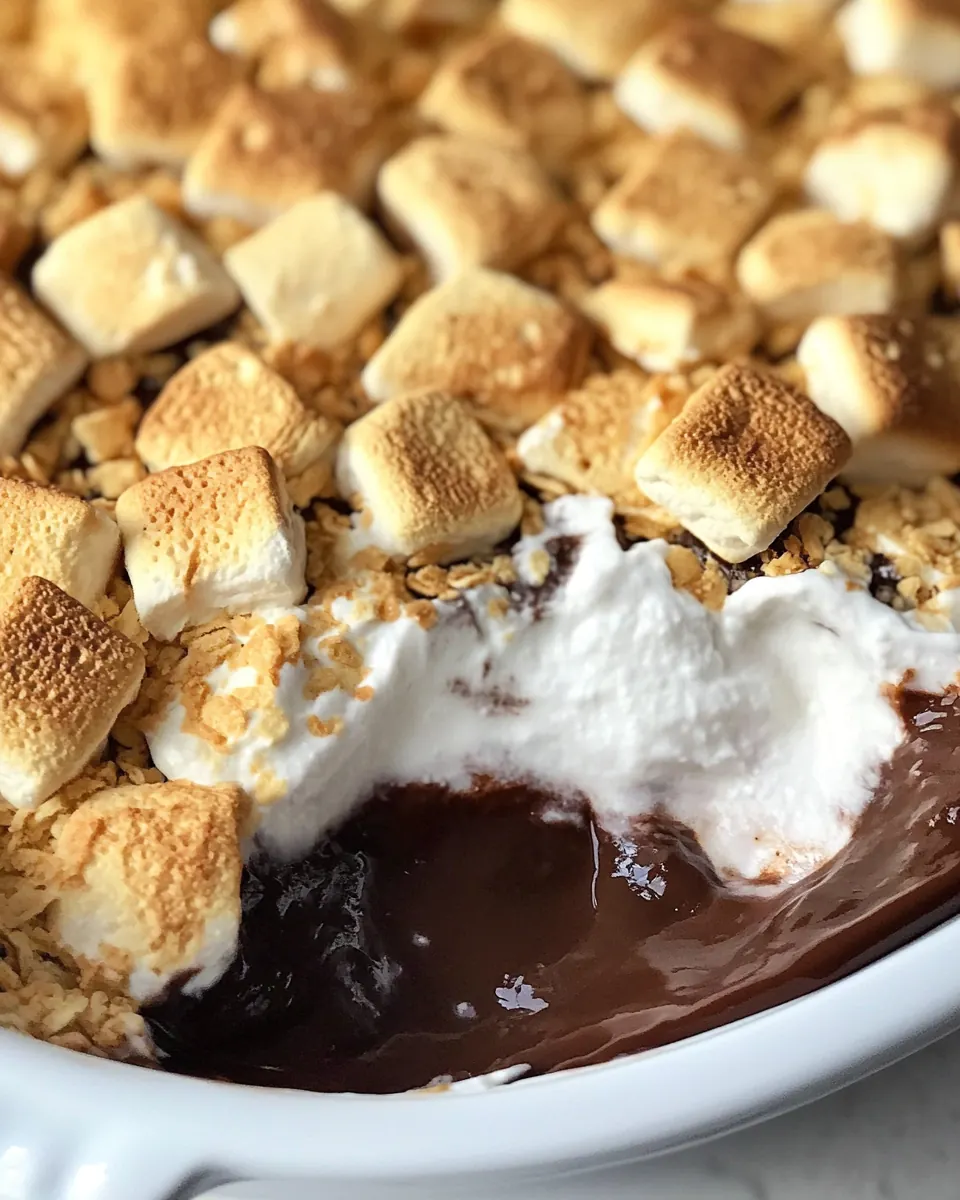
- Top with Marshmallows. Spread marshmallows to cover the ganache completely.: As you arrange the marshmallows watch the surface transform from glossy chocolate into a dotted field of ivory pillows. Arrange them snugly but without crushing so they all puff and brown at similar rates. The visual cue you want is a level, fully covered surface so every scoop pulls a mix of toasted top and molten base. Avoid leaving gaps, which lead to overbrowned spots and inconsistent texture. If you press they may sink into the ganache, so place gently. For an even browning, I like to nudge mini marshmallows into a tight, cohesive layer so they fuse into one cloud as they bake.
- Bake the dip. Place the baking dish into the preheated oven and bake until the marshmallows puff and are lightly golden brown. Remove from the oven and allow to cool slightly before serving. For mini marshmallows, this will take 3 to 5 minutes; for regular marshmallows, about 10 minutes. Watch to make sure that the marshmallows do not become overly brown.: While baking you'll see the marshmallows swell and the edges take on a pale caramel hue, releasing a warm, sweet toast scent. Mini marshmallows will develop this faster, so vigilant watching matters to avoid an acrid, burnt finish. The ideal moment to pull the dish is when the tops are puffed and dotted with golden brown, not deep mahogany. Once out, the bubbling chocolate will glisten and the surface will settle slightly, signaling it's ready for dipping. A common mistake is leaving the dish in too long, which dries the marshmallows and toughens them. Let it rest just enough to stop the chocolate from running too freely but remain molten, about a few minutes depending on your pan retention.
- Serve. Serve with your favorite dippers: graham crackers, pretzels, fruit, or cookies.: graham crackers, pretzels, fruit, or cookies. : As you bring the dish to the table the steam rising from the center carries the invite to dig in, and the sound of crisp Graham Crackers meeting gooey top is satisfying. Encourage guests to use sturdy dippers so they can scoop without breaking, and expect sticky fingers as part of the fun. If left too long the ganache firms, so serve warm for the signature pull. One common misstep is overcrowding the plate with soft dippers that become soggy; instead opt for crisp textures that contrast with the lush chocolate and marshmallows .
Customization Ideas
This recipe welcomes small adjustments that shift texture or flavor without sacrificing the essence of S’mores Dip. Below are practical ways to customize your batch for different preferences and occasions.
- Swap chocolate type by using milk, semi sweet, or dark to alter sweetness and depth, which changes the overall balance with the marshmallows.
- Adjust cream ratio to control the ganache thickness, adding a little more heavy cream for a looser, silkier dip and less for a firmer set as it cools.
- Use chopped chocolate bars instead of chips for a faster, smoother melt because bars often contain fewer stabilizers and melt into a silkier texture.
- Opt for mini or regular marshmallows depending on desired top texture; minis brown quicker and create a more unified crust, while regular marshmallows give a thicker, chewier layer.
- Toast under the broiler carefully for an even char, watching closely and keeping the dish a couple of inches from the heat source to avoid burning.
- Try alternative dippers such as crisp cookies or sliced fruit to add contrasting textures and a brighter flavor to each bite.
Accompaniments for S’mores Dip
I like to offer a variety of dippers and serving suggestions to complement the warm, sticky center of S’mores Dip. Think about texture contrast, seasonal pairings, and the occasion when planning the spread.
- Classic pairing set out Graham Crackers broken into squares for traditional s’more flavor and reliable scooping surface.
- Salty contrast include pretzels or potato chips to cut through the richness and offer a crunchy counterpoint to the gooey top.
- Fruit options fresh apple or pear slices add bright acidity and freshness, perfect when you want a lighter bite alongside the decadent dip.
- Cookie variety provide an assortment of crisp cookies or biscotti to accommodate guests who prefer a sturdier scoop and a different flavor profile.
- Serving occasions bring this to casual gatherings, movie nights, or after dinner as a shareable dessert; it is also an easy sweet to include for holiday gatherings because it travels the nostalgic route.
- Storage tips cover leftovers with plastic wrap and refrigerate for up to 2 days, then rewarm gently in the microwave or oven to regain that gooey texture.
- Seasonal pairing in cooler months, serve with spiced cider for warmth; in summer pair with berries for a fresher contrast that still keeps the s’more spirit.
FAQ
Conclusion
What makes this recipe special is how it transforms a handful of pantry staples into a warm, communal dessert with minimal fuss. Try the recipe when you want a nostalgic crowd pleaser that still feels effortlessly modern. I hope you give it a spin, share it with friends, and enjoy those gooey, toasted bites that always bring people together.
S'mores Dip
Equipment
- Baking Pan (9×9) or equivalent sized pan (holds 6 cups)
- Microwave and oven safe dish
- Rubber Scraper (Rubber Spatula)
Ingredients
- 2 cups chocolate chips, milk, semi-sweet, or dark chocolate or chopped chocolate bars Melted and glossy, provides the primary sweet, rich chocolate base that becomes the dip’s creamy foundation when combined with cream and butter. Offers depth of flavor and structure; choose milk, semi-sweet, or dark to adjust sweetness and intensity. Chopped chocolate bars melt smoothly and can create a silkier texture compared with chips.
- 1/2 cup heavy cream Adds silkiness and helps create a luscious, pourable ganache by loosening the melted chocolate and improving mouthfeel. Contributes a subtle richness that balances the sweetness of the chocolate and marshmallows; full-fat cream yields the creamiest dip. Warm the cream slightly before combining to ensure smooth incorporation.
- 1 tablespoon butter Enriches flavor and contributes to a glossy, smooth texture when stirred into melted chocolate and cream. Helps stabilize the ganache, adds a hint of savory butteriness, and can prevent the chocolate from becoming grainy as it cools. Use unsalted butter unless offsetting with a pinch of salt.
- 1 pinch salt, optional Enhances and balances sweetness by adding a faint savory contrast that brightens chocolate and marshmallow flavors when desired. A small pinch will round flavors without tasting salty; optional depending on personal preference or if using salted butter. Dissolve it into the warm mixture for even distribution.
- 10 ounces marshmallows, 10-ounce package of mini marshmallows or regular marshmallows Provides the classic gooey, toasted topping and sticky pull that defines s'mores flavor, melting into a browned, marshmallowy layer over the chocolate base. Mini marshmallows melt more quickly and evenly, while regular marshmallows can be torn or halved to achieve similar coverage. Toasting under a broiler or with a torch creates caramelized edges and a smoky note.
- Graham Crackers, for dipping Serves as the crunchy vehicle for scooping and enjoying the dip, contributing the signature graham cracker flavor that complements chocolate and marshmallow. Break into pieces for easy dipping and provide a sturdy, slightly sweet contrast in texture. Offer a variety of shapes for dipping ease and presentation.
Instructions
- Prep. Preheat the oven to 400º F.: When you preheat, you will notice the kitchen air shift and the oven light cycle as it reaches 400º F . Preheating ensures the marshmallows puff immediately and brown evenly, rather than slowly melting and collapsing, which preserves that toasted exterior. A common mistake is skipping preheat, which leads to uneven puffing. To check readiness, feel a steady warm flow when you briefly open the oven door, and allow the temperature to stabilize for a few minutes before inserting the dish.
- Make the ganache. Add the chocolate chips to a 9×9 baking dish or equivalent-sized dish. Pour the heavy cream over the chips and top with butter and a sprinkle of salt. Place into the microwave for 30 seconds. Remove and stir to combine. Return to the microwave for 30 seconds and stir until smooth. Spread into an even layer in the baking dish. Stovetop Option: Set a skillet over medium-low heat and warm the chocolate chips, heavy cream, and butter until there is a slight bubble along the edges of the pan. Remove from the heat and stir until smooth and well combined. Pour into 9×9 baking dish and spread into an even layer in the dish.: Set a skillet over medium-low heat and warm the chocolate chips, heavy cream, and butter until there is a slight bubble along the edges of the pan. Remove from the heat and stir until smooth and well combined. Pour into 9×9 baking dish and spread into an even layer in the dish. : As the chocolate meets warm heavy cream you'll see glossy ribbons forming while a rich cocoa aroma fills the room, signaling proper emulsification. Stirring encourages the residual heat to finish melting any stray bits, resulting in a silky ganache that should coat a spoon when ready. If using the stovetop, maintain medium low heat so the mixture does not scorch, which would create a bitter note. A common pitfall is overheating, which can separate the ganache. If you notice a grainy texture, persistent stirring off the heat usually brings it back together. Once smooth, spread it evenly so every dipper gets a uniform chocolate layer, about a quarter inch thick, which ensures balanced spoonfuls of chocolate and marshmallow .
- Top with Marshmallows. Spread marshmallows to cover the ganache completely.: As you arrange the marshmallows watch the surface transform from glossy chocolate into a dotted field of ivory pillows. Arrange them snugly but without crushing so they all puff and brown at similar rates. The visual cue you want is a level, fully covered surface so every scoop pulls a mix of toasted top and molten base. Avoid leaving gaps, which lead to overbrowned spots and inconsistent texture. If you press they may sink into the ganache, so place gently. For an even browning, I like to nudge mini marshmallows into a tight, cohesive layer so they fuse into one cloud as they bake.
- Bake the dip. Place the baking dish into the preheated oven and bake until the marshmallows puff and are lightly golden brown. Remove from the oven and allow to cool slightly before serving. For mini marshmallows, this will take 3 to 5 minutes; for regular marshmallows, about 10 minutes. Watch to make sure that the marshmallows do not become overly brown.: While baking you'll see the marshmallows swell and the edges take on a pale caramel hue, releasing a warm, sweet toast scent. Mini marshmallows will develop this faster, so vigilant watching matters to avoid an acrid, burnt finish. The ideal moment to pull the dish is when the tops are puffed and dotted with golden brown, not deep mahogany. Once out, the bubbling chocolate will glisten and the surface will settle slightly, signaling it's ready for dipping. A common mistake is leaving the dish in too long, which dries the marshmallows and toughens them. Let it rest just enough to stop the chocolate from running too freely but remain molten, about a few minutes depending on your pan retention.
- Serve. Serve with your favorite dippers: graham crackers, pretzels, fruit, or cookies.: graham crackers, pretzels, fruit, or cookies. : As you bring the dish to the table the steam rising from the center carries the invite to dig in, and the sound of crisp Graham Crackers meeting gooey top is satisfying. Encourage guests to use sturdy dippers so they can scoop without breaking, and expect sticky fingers as part of the fun. If left too long the ganache firms, so serve warm for the signature pull. One common misstep is overcrowding the plate with soft dippers that become soggy; instead opt for crisp textures that contrast with the lush chocolate and marshmallows .
Notes
- Swap chocolate type by using milk, semi sweet, or dark to alter sweetness and depth, which changes the overall balance with the marshmallows.
- Adjust cream ratio to control the ganache thickness, adding a little more heavy cream for a looser, silkier dip and less for a firmer set as it cools.
- Use chopped chocolate bars instead of chips for a faster, smoother melt because bars often contain fewer stabilizers and melt into a silkier texture.
- Opt for mini or regular marshmallows depending on desired top texture; minis brown quicker and create a more unified crust, while regular marshmallows give a thicker, chewier layer.
- Toast under the broiler carefully for an even char, watching closely and keeping the dish a couple of inches from the heat source to avoid burning.
- Try alternative dippers such as crisp cookies or sliced fruit to add contrasting textures and a brighter flavor to each bite.