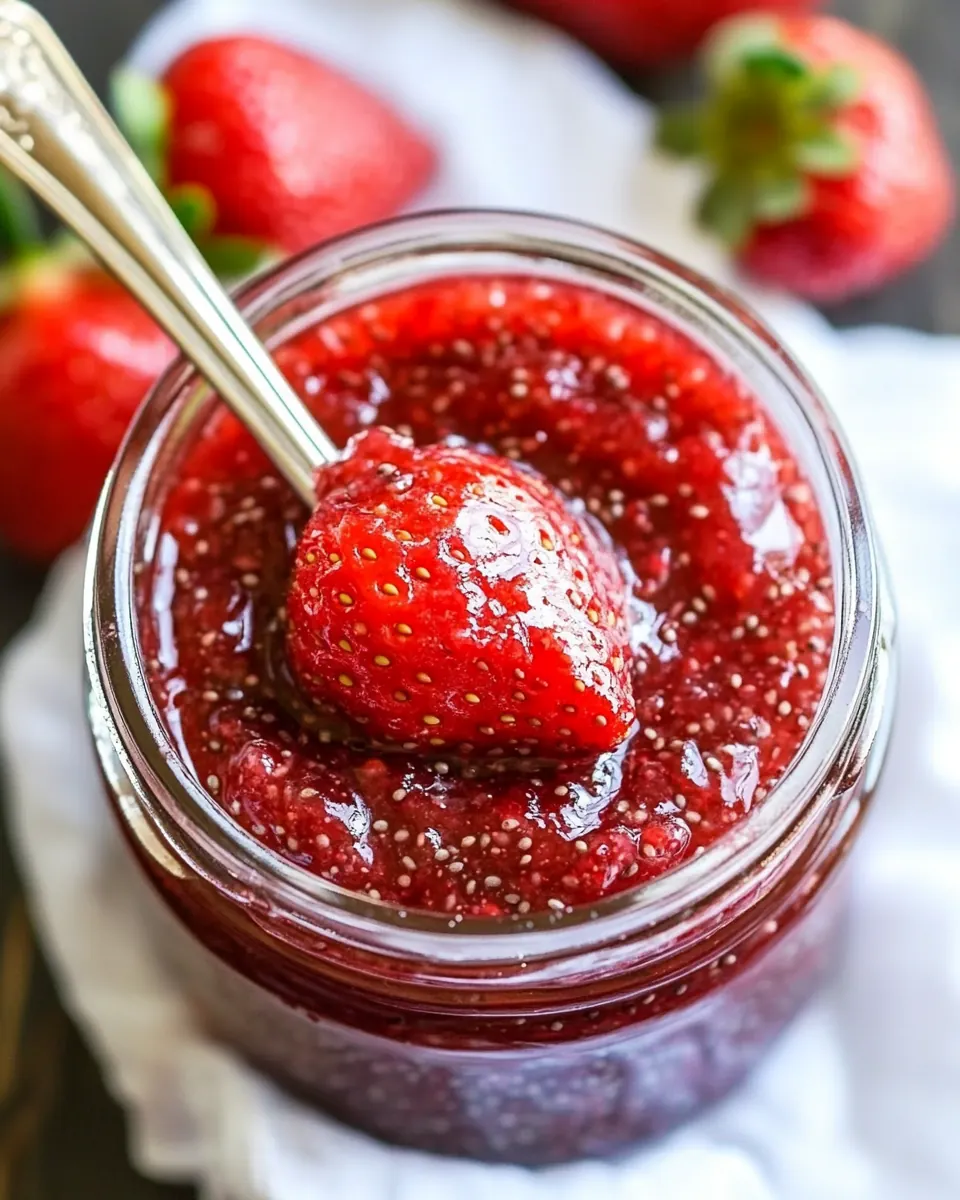
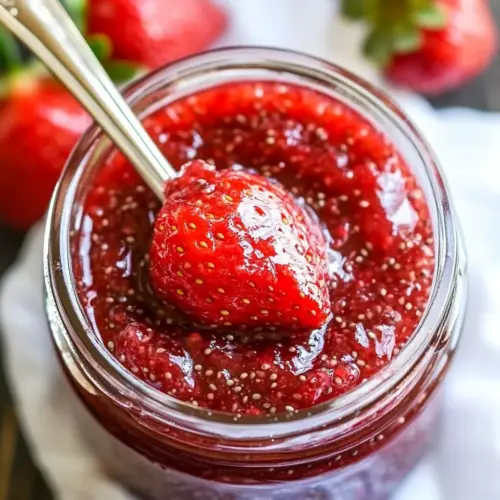
Strawberry Chia Seed Jam
Strawberry Chia Seed Jam is the kind of small kitchen victory I love to tuck into weekday mornings and slow weekend breakfasts alike.
I first learned to make this jam on a bright spring afternoon when my neighbor handed over a basket of overripe strawberries from her garden, insisting I could transform them into something useful. The scent of those berries, warm and sun kissed, pulled me into the kitchen. As I chopped and simmered, the kitchen filled with a bright, fruity perfume that instantly felt like home. I remember stirring in a little pure maple syrup because I did not want to overwhelm the fruit with sugar, and the result was a jam that tasted like a more concentrated, slower fruit season.
What I love most about Strawberry Chia Seed Jam is how forgiving it is. If the berries are juicy, the jam sets beautifully with a handful of chia seeds, and if you like it chunkier, a quick mash is all it takes. I often spread it on warm toast, spoon it over yogurt, or fold it into a jar of ricotta for a simple dessert. The jam keeps me rooted in the season, and it makes a thoughtful homemade gift when sealed in a pretty jar.
Recipe Snapshot
25 mins
5 mins
20 mins
Easy
80 kcal
American
Paleo, Vegan
Desserts
Saucepan, Fork or potato masher, Spoon, Bowl, Sanitized jar
The Magic of This Strawberry Chia Seed Jam
Bright seasonal flavor
I love how the flavor of this jam is pure and immediate. Using ripe strawberries brings a brightness you cannot recreate with extracts, and the small amount of pure maple syrup enhances that sweetness without masking the fruit.
Simple, pantry friendly technique
This recipe does not require special equipment. I like that you can make a batch on the stovetop with common tools, and the thickening comes from chia seeds rather than pectin, which makes the process feel more natural and accessible.
Customizable texture
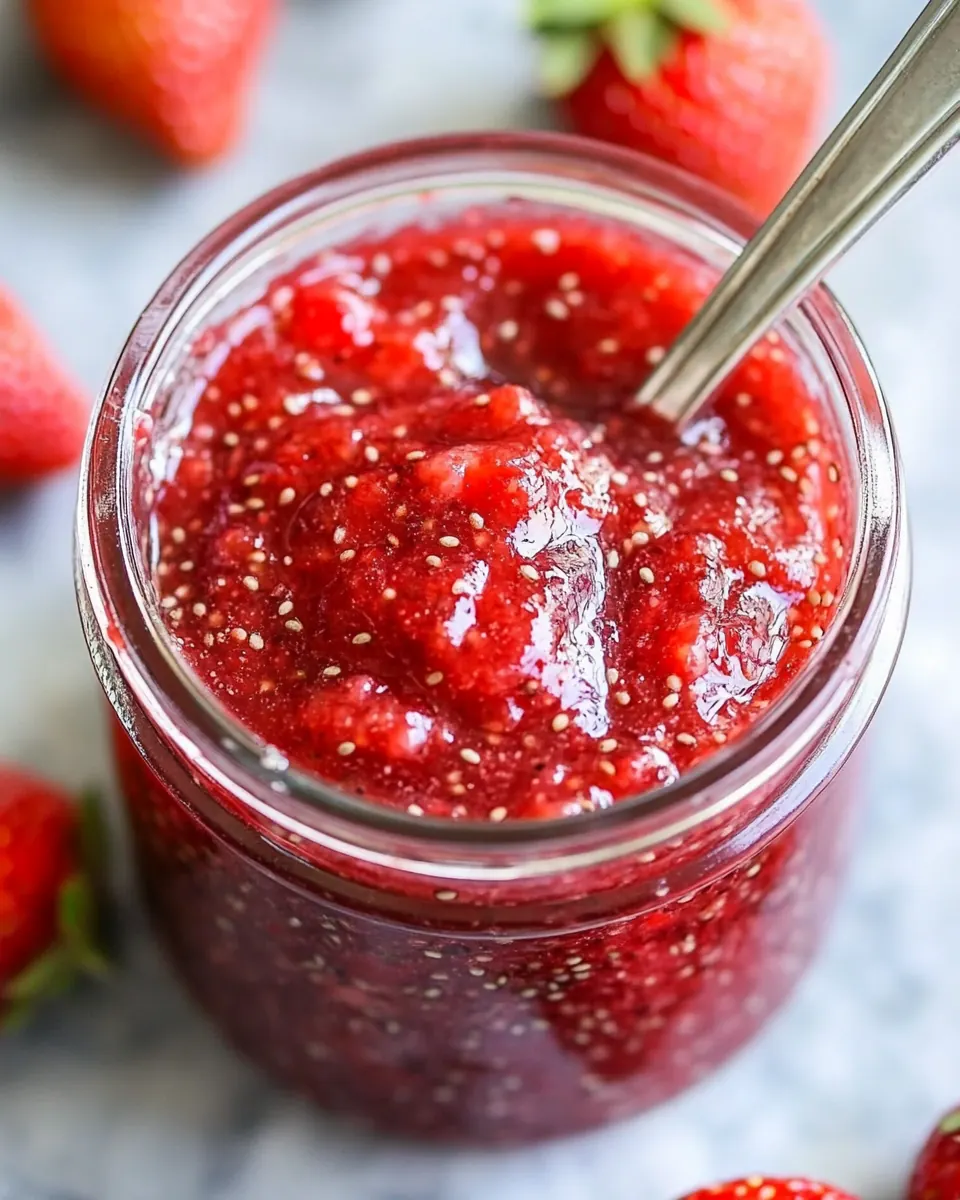
We can easily control the jam’s texture. If you prefer a rustic, chunky spread, I usually mash gently with a fork. For a smoother jam, a quick blitz with an immersion blender does the trick. Either way, the jam retains a lovely fruit-forward profile.
Clean ingredient list
For me, the appeal of Strawberry Chia Seed Jam is how few ingredients do so much. Chia seeds add body and a boost of fiber, while a pinch of sea salt and a splash of pure vanilla extract round out the flavor. The simplicity is intentional, and it keeps the jam wholesome.
Versatile uses
I use this jam for breakfast, as a quick dessert topper, or even folded into dressings for a fruit glaze. Its versatility in both sweet and slightly savory contexts is one of the reasons I make it again and again.
Ingredients You’ll Need for Strawberry Chia Seed Jam
These ingredients are about balance and clarity. Ripe strawberries supply natural sweetness and bright acid, while chia seeds act as the gentle thickener. The pure maple syrup offers a complementary, warm sweetness, and small accents like lemon juice, ground cinnamon, and sea salt sharpen and deepen the overall flavor.
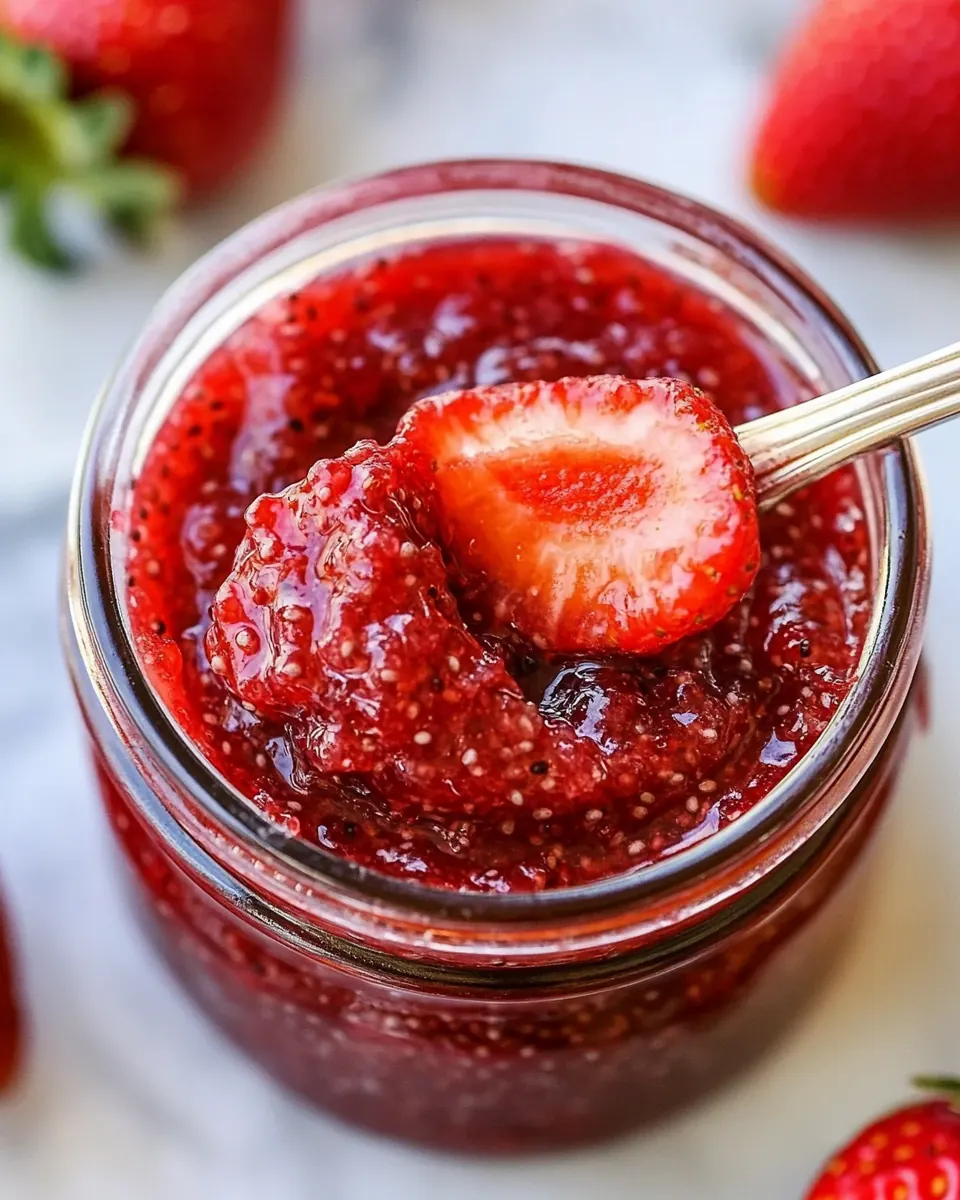
- 4 cups fresh strawberries chopped: Provide natural sweetness and body while adding fresh berry flavor and texture; chop into uniform pieces to help them break down evenly during cooking. Cook until softened to release juices that form the jam base and contribute to a bright color and fragrant aroma.
- 1/4 cup pure maple syrup to taste: Balance sweetness while allowing control over total sugar content; add gradually and taste to reach desired sweetness without overpowering the fruit. Use maple syrup for a subtle caramel note and smooth mouthfeel that complements strawberries.
- 1 tablespoon fresh lemon juice: Add bright acidity to enhance and balance the jam's sweetness while bringing out the strawberries' natural flavors. Squeeze fresh and stir in near the end of cooking to preserve its lively citrus lift.
- 1 pinch ground cinnamon: Introduce a warm, aromatic undertone that complements the fruit without dominating; use sparingly to avoid masking the berry flavor. Sprinkle in during simmering to allow the spice to meld subtly into the jam.
- 1 pinch sea salt: Enhance overall flavor by sharpening and balancing sweetness; a small pinch intensifies fruitiness and reduces flatness. Dissolve into the mixture so the seasoning distributes evenly throughout the jam.
- 2 tablespoons chia seeds: Thicken the jam naturally by absorbing liquid and creating a gel-like texture as the mixture cools; stir in and allow time for chia to expand. Provide a boost of fiber and omega-3s while replacing the need for pectin or long cooking times.
- 1/2 teaspoon pure vanilla extract: Lift and round out the flavor profile with a warm, sweet aroma that enhances the fruitiness without adding extra sweetness. Stir in off heat or at the very end to preserve its delicate fragrance.
Step by Step Instructions for Strawberry Chia Seed Jam
These steps walk you through making jam that captures the fresh essence of the fruit while setting naturally with chia seeds. Read each one slowly, watch your pan, and trust your senses.
- Heat the strawberries, pure maple syrup, and lemon juice in a saucepan over medium-high heat, covered. Allow the mixture to come to a full boil then reduce the heat to a controlled boil and continue cooking until strawberries have softened, about 10 to 15 minutes. Mash the strawberries using a fork or a potato masher, until your desired consistency is reached (I like to leave mine fairly chunky).: The first aromas you notice will be bright and fruity, the saucepan starting to steam gently under the lid, signaling that juices are being released. Listen for a soft simmer and watch for bubbles collecting at the edges, which shows the mixture is coming together. I like to use a heavy bottom saucepan so heat distributes evenly, preventing hot spots that can scorch the fruit. A common mistake is using too high heat, which can cause the fruit to burn rather than simmer; keep the flame controlled so the sugars melt into the fruit slowly.
- Add the ground cinnamon, sea salt, and chia seeds and stir well. Continue cooking, uncovered, until the mixture thickens, about 8 minutes. Remove from the heat and allow the jam to cool for 10 minutes. Add the pure vanilla extract and stir well.: As the mixture reaches a vigorous boil, the scent becomes intensely strawberry and sweet, and the bubbling will be steady but not violent. Reducing to a controlled boil ensures the fruit breaks down without sticking. You'll see the berries collapse and turn syrupy, with their color deepening to a glossy red. If you rush this stage you might end up with undercooked, tart pieces, so be patient and stir occasionally to prevent sticking to the pan.
- Transfer the jam to a bowl and refrigerate until chilled (note: you can also put the bowl in the freezer for about 40 minutes and stir periodically to speed up the process). Once cool, transfer the jam to a sanitized jar and seal it well. Jam keeps in the refrigerator for up to 2 weeks.: When you start mashing, the sound is soft and pulpy, and the texture goes from whole fruit to a blend of chunks and syrup. The mashed pieces release more juice, which helps the jam thicken evenly. Leave it chunkier if you prefer visible fruit, or mash more thoroughly for a smoother spread. A pitfall here is overmashing which can make the jam too uniform and less interesting texturally, so stop when it feels right to you.
- Add the ground cinnamon, sea salt, and chia seeds and stir well.: At this point the aroma changes subtly as the warm note of ground cinnamon rises and the sea salt sharpens the fruit. Stirring in the chia seeds distributes them so they can hydrate evenly, and the mixture will begin to look thicker and slightly grainy as the seeds absorb liquid. If the seeds clump, stir more vigorously to separate them. A common error is adding the chia too early; they can swell excessively if left to sit too long while still cold.
- Continue cooking, uncovered, until the mixture thickens, about 8 minutes.: Cooking uncovered allows steam to escape and the jam to concentrate, producing a deeper smell and glossy sheen. Watch for the mixture to reduce and for bubbles to become larger and slower, which indicates thickening. The surface will look syrupy and coat the spoon. Avoid walking away during this time because the jam can quickly go from perfect to over reduced and sticky if it reduces too much.
- Remove from the heat and allow the jam to cool for 10 minutes.: Off the stove the jam will relax and the intense boiling scent softens into a warm, comforting aroma. Cooling allows the texture to stabilize as the chia seeds finish absorbing liquid. Resist the urge to taste immediately if it is very hot, and avoid sealing while still warm as condensation can form in the jar and affect shelf life.
- Add the pure vanilla extract and stir well.: Adding pure vanilla extract off the heat preserves its delicate fragrance, which melds with the fruity notes into a rounded finish. Stirring disperses the extract evenly so every spoonful benefits from the slight sweet perfume. A mistake is heating vanilla directly which can cause the flavor to fade, so always add it at the end.
- Transfer the jam to a bowl and refrigerate until chilled: The jam will give off a heady, sweet steam as you transfer it, and chilling firms the set as the chia seeds complete their swelling. I sometimes put the bowl in the freezer for 40 minutes, stirring periodically to cool faster and test consistency. Avoid overcrowding the fridge with warm containers because that can raise internal temperatures and affect other foods.
- Once cool, transfer the jam to a sanitized jar and seal it well.: When the jar is sealed, the jam's scent is preserved and the surface will look glossy and even. Sanitizing prevents spoilage and helps the jam keep well; I like to pour while warm into preheated jars so lids seal properly. A common oversight is skipping sanitation which can shorten the jam's refrigerated life.
- Jam keeps in the refrigerator for up to 2 weeks.: Stored cold, the jam remains vibrant and spreads easily. During storage the texture may continue to firm slightly as the chia seeds fully hydrate. Always use a clean spoon to avoid introducing contaminants, and check for off smells or mold before using if stored for longer than suggested.
Recipe Tips about Strawberry Chia Seed Jam
This jam is forgiving, but a few tips will help you achieve consistent results. Read these before you start so you know how to handle texture, sweetness, and storage.
- Pick the ripest berries Choose strawberries that are fragrant and fully colored, they will break down easily and provide superior flavor.
- Control the heat Keep the stovetop at medium to medium high so the mixture simmers rather than smokes, which ensures even cooking without burning.
- Taste as you go Adjust the pure maple syrup and lemon juice gradually to balance sweetness and acidity to your preference.
- Prevent chia clumps Stir the chia seeds in gradually and keep stirring so they hydrate evenly and do not form pockets.
- Cool before sealing Let the jam come close to room temperature before transferring to jars to minimize condensation inside the lid.
Side Dish Ideas for Strawberry Chia Seed Jam
Strawberry Chia Seed Jam is a remarkably flexible condiment that can elevate breakfasts, snacks, and light desserts. Use it as a spread, a topping, or a flavor boost in both casual and slightly dressier settings.
- Toast and nut butter Spread a thin layer of Strawberry Chia Seed Jam over warm toast with your favorite nut butter for a balanced breakfast.
- Yogurt parfait Layer the jam with plain yogurt and granola for a bright, textured parfait suitable for brunch.
- Pancake or waffle topping Spoon the jam warm over pancakes or waffles, adding a fresh, seasonal fruit note to weekend breakfasts.
- Cheese board accent Serve a small bowl of jam with a cheese platter, using it as a sweet counterpoint to mild cheeses; it adds color and freshness.
- Gift jars Fill sanitized jars with jam, add a simple ribbon, and give them as seasonal gifts for neighbors or hosts during spring gatherings.
- Storage tips Keep jars refrigerated and use within two weeks; freeze portions for longer storage and thaw in the fridge before using.
FAQ
Conclusion
This jam stands out because it captures pure strawberry flavor with a clean ingredient list and a naturally thickened texture courtesy of chia seeds. I encourage you to give it a try, especially when strawberries are at their peak, because the process is simple and the results are instantly rewarding. Whether you spread it on morning toast or gift a jar to a friend, it brings a little seasonal brightness to everyday meals.
Strawberry Chia Seed Jam
Equipment
- Saucepan
- Fork or Potato Masher
- Spoon
- Bowl
- Sanitized jar
Ingredients
- 4 cups fresh strawberries chopped Provide natural sweetness and body while adding fresh berry flavor and texture; chop into uniform pieces to help them break down evenly during cooking. Cook until softened to release juices that form the jam base and contribute to a bright color and fragrant aroma.
- 1/4 cup pure maple syrup to taste Balance sweetness while allowing control over total sugar content; add gradually and taste to reach desired sweetness without overpowering the fruit. Use maple syrup for a subtle caramel note and smooth mouthfeel that complements strawberries.
- 1 tablespoon fresh lemon juice Add bright acidity to enhance and balance the jam's sweetness while bringing out the strawberries' natural flavors. Squeeze fresh and stir in near the end of cooking to preserve its lively citrus lift.
- 1 pinch ground cinnamon Introduce a warm, aromatic undertone that complements the fruit without dominating; use sparingly to avoid masking the berry flavor. Sprinkle in during simmering to allow the spice to meld subtly into the jam.
- 1 pinch sea salt Enhance overall flavor by sharpening and balancing sweetness; a small pinch intensifies fruitiness and reduces flatness. Dissolve into the mixture so the seasoning distributes evenly throughout the jam.
- 2 tablespoons chia seeds Thicken the jam naturally by absorbing liquid and creating a gel-like texture as the mixture cools; stir in and allow time for chia to expand. Provide a boost of fiber and omega-3s while replacing the need for pectin or long cooking times.
- 1/2 teaspoon pure vanilla extract Lift and round out the flavor profile with a warm, sweet aroma that enhances the fruitiness without adding extra sweetness. Stir in off heat or at the very end to preserve its delicate fragrance.
Instructions
- Heat the strawberries, pure maple syrup, and lemon juice in a saucepan over medium-high heat, covered. Allow the mixture to come to a full boil then reduce the heat to a controlled boil and continue cooking until strawberries have softened, about 10 to 15 minutes. Mash the strawberries using a fork or a potato masher, until your desired consistency is reached (I like to leave mine fairly chunky).: The first aromas you notice will be bright and fruity, the saucepan starting to steam gently under the lid, signaling that juices are being released. Listen for a soft simmer and watch for bubbles collecting at the edges, which shows the mixture is coming together. I like to use a heavy bottom saucepan so heat distributes evenly, preventing hot spots that can scorch the fruit. A common mistake is using too high heat, which can cause the fruit to burn rather than simmer; keep the flame controlled so the sugars melt into the fruit slowly.
- Add the ground cinnamon, sea salt, and chia seeds and stir well. Continue cooking, uncovered, until the mixture thickens, about 8 minutes. Remove from the heat and allow the jam to cool for 10 minutes. Add the pure vanilla extract and stir well.: As the mixture reaches a vigorous boil, the scent becomes intensely strawberry and sweet, and the bubbling will be steady but not violent. Reducing to a controlled boil ensures the fruit breaks down without sticking. You'll see the berries collapse and turn syrupy, with their color deepening to a glossy red. If you rush this stage you might end up with undercooked, tart pieces, so be patient and stir occasionally to prevent sticking to the pan.
- Transfer the jam to a bowl and refrigerate until chilled (note: you can also put the bowl in the freezer for about 40 minutes and stir periodically to speed up the process). Once cool, transfer the jam to a sanitized jar and seal it well. Jam keeps in the refrigerator for up to 2 weeks.: When you start mashing, the sound is soft and pulpy, and the texture goes from whole fruit to a blend of chunks and syrup. The mashed pieces release more juice, which helps the jam thicken evenly. Leave it chunkier if you prefer visible fruit, or mash more thoroughly for a smoother spread. A pitfall here is overmashing which can make the jam too uniform and less interesting texturally, so stop when it feels right to you.
- Add the ground cinnamon, sea salt, and chia seeds and stir well.: At this point the aroma changes subtly as the warm note of ground cinnamon rises and the sea salt sharpens the fruit. Stirring in the chia seeds distributes them so they can hydrate evenly, and the mixture will begin to look thicker and slightly grainy as the seeds absorb liquid. If the seeds clump, stir more vigorously to separate them. A common error is adding the chia too early; they can swell excessively if left to sit too long while still cold.
- Continue cooking, uncovered, until the mixture thickens, about 8 minutes.: Cooking uncovered allows steam to escape and the jam to concentrate, producing a deeper smell and glossy sheen. Watch for the mixture to reduce and for bubbles to become larger and slower, which indicates thickening. The surface will look syrupy and coat the spoon. Avoid walking away during this time because the jam can quickly go from perfect to over reduced and sticky if it reduces too much.
- Remove from the heat and allow the jam to cool for 10 minutes.: Off the stove the jam will relax and the intense boiling scent softens into a warm, comforting aroma. Cooling allows the texture to stabilize as the chia seeds finish absorbing liquid. Resist the urge to taste immediately if it is very hot, and avoid sealing while still warm as condensation can form in the jar and affect shelf life.
- Add the pure vanilla extract and stir well.: Adding pure vanilla extract off the heat preserves its delicate fragrance, which melds with the fruity notes into a rounded finish. Stirring disperses the extract evenly so every spoonful benefits from the slight sweet perfume. A mistake is heating vanilla directly which can cause the flavor to fade, so always add it at the end.
- Transfer the jam to a bowl and refrigerate until chilled: The jam will give off a heady, sweet steam as you transfer it, and chilling firms the set as the chia seeds complete their swelling. I sometimes put the bowl in the freezer for 40 minutes, stirring periodically to cool faster and test consistency. Avoid overcrowding the fridge with warm containers because that can raise internal temperatures and affect other foods.
- Once cool, transfer the jam to a sanitized jar and seal it well.: When the jar is sealed, the jam's scent is preserved and the surface will look glossy and even. Sanitizing prevents spoilage and helps the jam keep well; I like to pour while warm into preheated jars so lids seal properly. A common oversight is skipping sanitation which can shorten the jam's refrigerated life.
- Jam keeps in the refrigerator for up to 2 weeks.: Stored cold, the jam remains vibrant and spreads easily. During storage the texture may continue to firm slightly as the chia seeds fully hydrate. Always use a clean spoon to avoid introducing contaminants, and check for off smells or mold before using if stored for longer than suggested.
Notes
- Pick the ripest berries Choose strawberries that are fragrant and fully colored, they will break down easily and provide superior flavor.
- Control the heat Keep the stovetop at medium to medium high so the mixture simmers rather than smokes, which ensures even cooking without burning.
- Taste as you go Adjust the pure maple syrup and lemon juice gradually to balance sweetness and acidity to your preference.
- Prevent chia clumps Stir the chia seeds in gradually and keep stirring so they hydrate evenly and do not form pockets.
- Cool before sealing Let the jam come close to room temperature before transferring to jars to minimize condensation inside the lid.