Dairy Free Hamantaschen
Dairy Free Hamantaschen have been a staple in my kitchen for years, a cookie that brings back loud family laughter and quiet afternoons of rolling dough at the kitchen table. The first time I made these, I remember balancing a toddler on my hip while coaxing a stubborn piece of dough into a circle, and that imperfect batch became the one everyone asked for. Over time I refined the texture so they are crisp at the edges and tender in the center, a contrast that always wins people over.
There is something comforting about the ritual of making Dairy Free Hamantaschen, from sifting the dry ingredients to the gentle way the triangular corners fold over the filling. I like to work in short bursts, keeping a damp towel handy to stop the dough from drying out. Friends who taste them often comment on the bright hint of orange, which cuts through the sweetness and makes the cookies feel more grown up. Every holiday, I set aside time to make a batch and bring them to gatherings, watching them disappear faster than I can count.
Recipe Snapshot
1 hr 25 mins
60 mins
25 mins
Medium
150 kcal
American
Gluten-Free, Whole30
Desserts
Mixing bowl, Sifter, Wooden spoon, Rolling pin, 3 inch cookie cutter, Pastry scraper, Baking sheet, Wire rack
Why We Love This Dairy Free Hamantaschen
Light and crisp texture
I love how these Dairy Free Hamantaschen manage to be crisp on the edges and tender inside. The balance comes from rolling the dough thin when you want delicate cookies, or leaving it slightly thicker for a chewier bite. When I bite into one, the tiny crackle and the soft center tell me the dough was treated gently and not overworked.
Bright citrus note
The touch of orange zest in the dough lifts the flavor in a way that feels sophisticated. I find that the fragrance of the zest hits immediately as the cookies bake, filling the kitchen with a fresh, citrusy aroma that pairs beautifully with the chosen filling. This bright note keeps the cookies from tasting one dimensional.
Simple pantry ingredients
What I appreciate most is how these cookies come together with basic pantry staples like flour, sugar, and canola oil. I can usually pull everything together without a special trip to the store. That simplicity makes these cookies approachable for busy afternoons when I want something homemade without fuss.
Foolproof folding technique
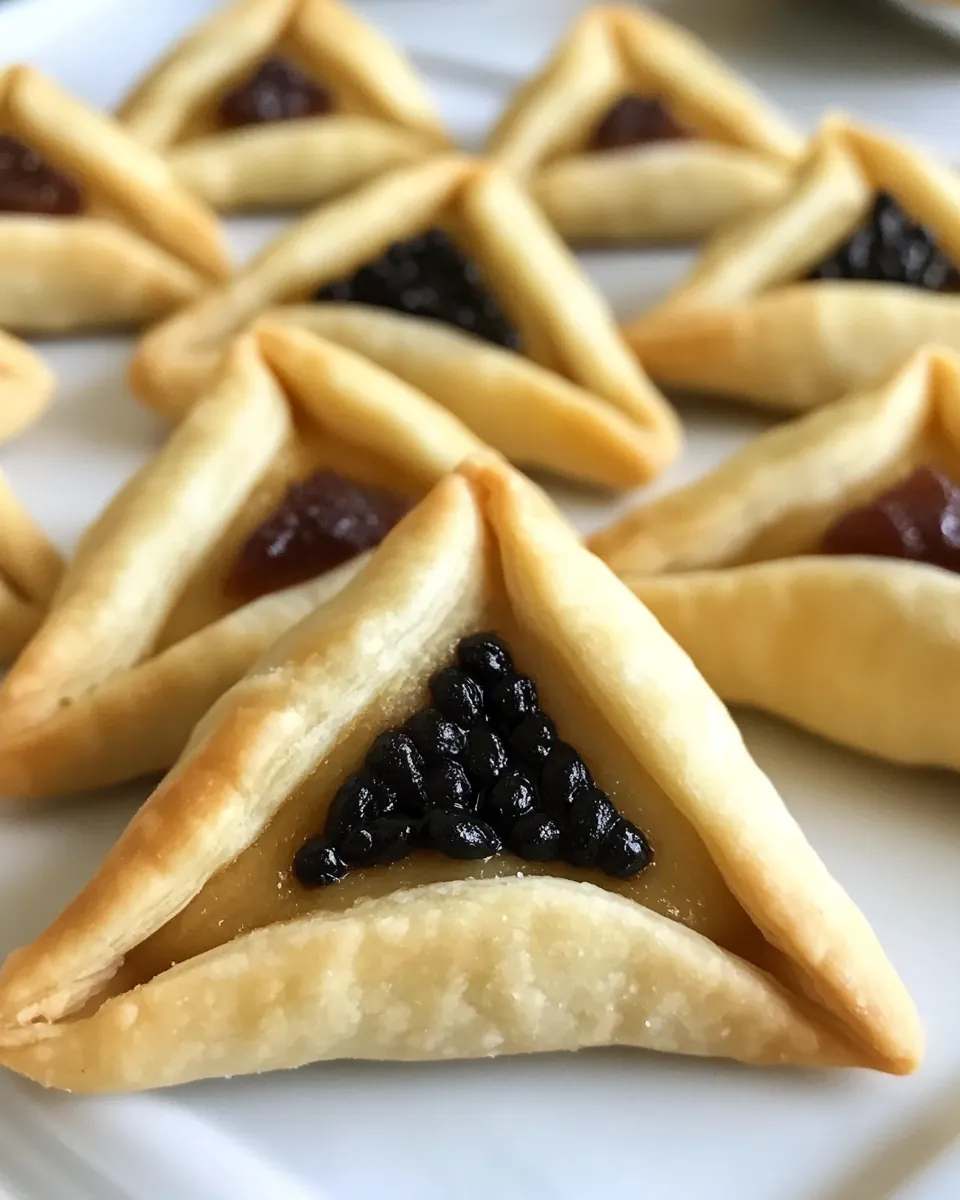
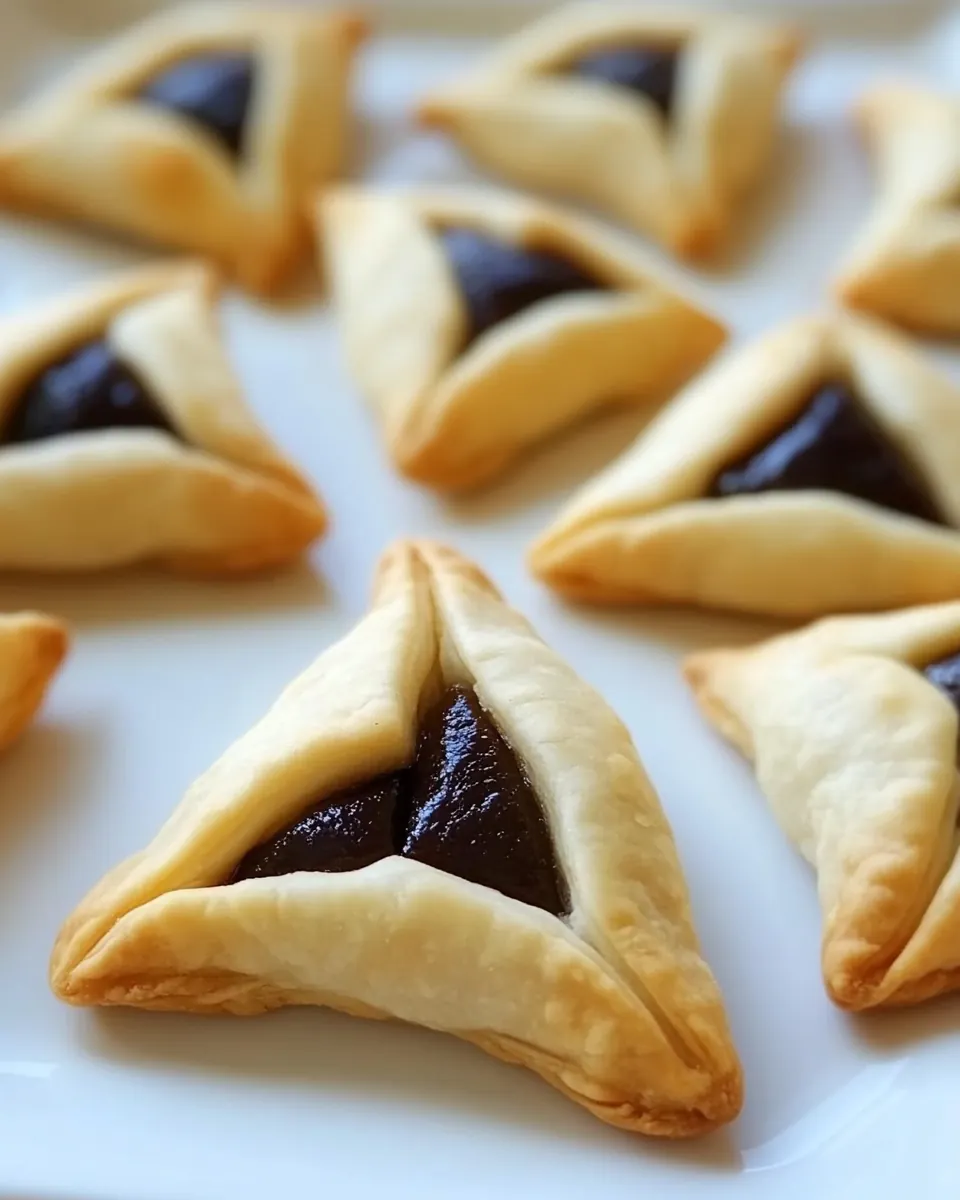
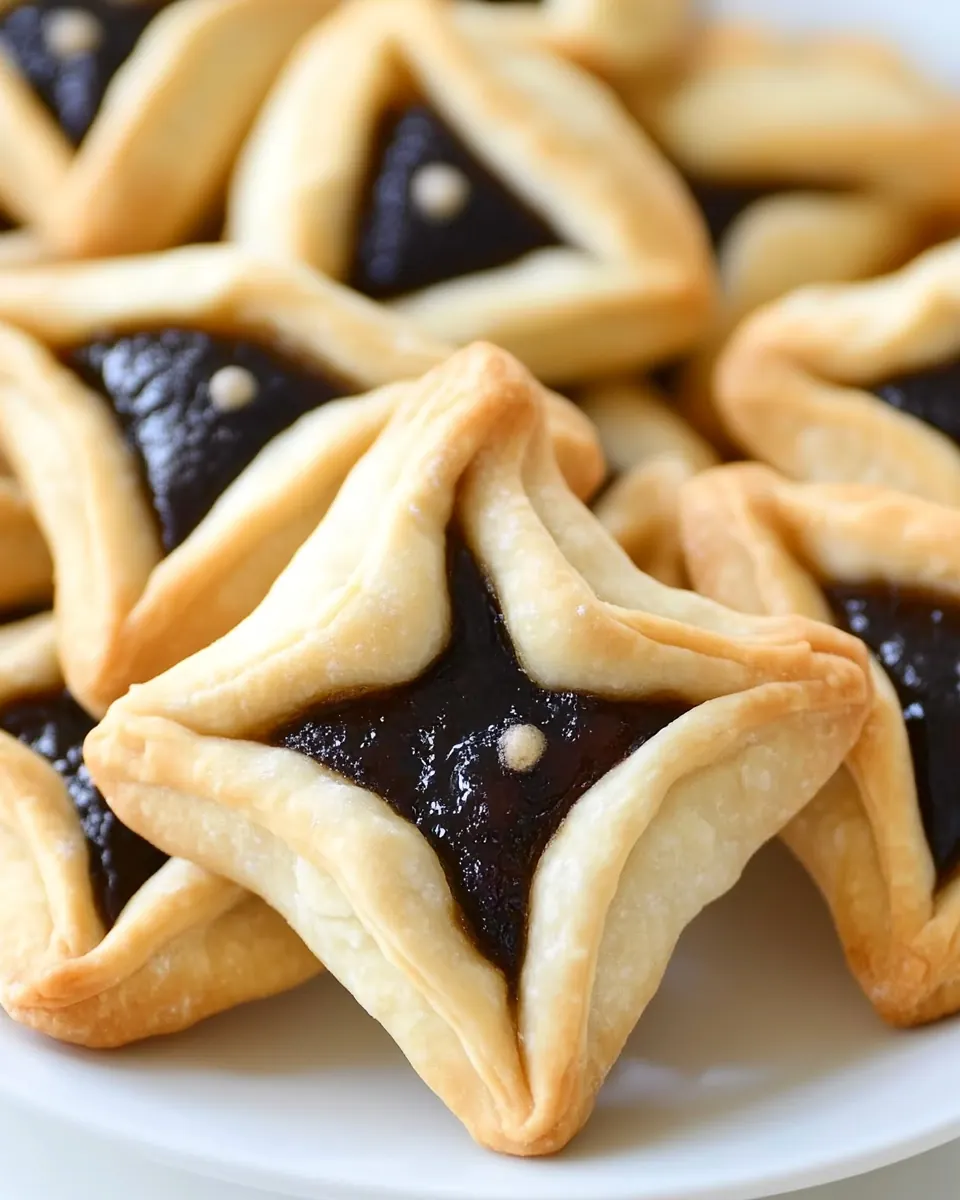
The triangle fold taught here is both pretty and practical. I always walk guests through the method, and they are surprised how much the folding affects the final bake. The pinwheel effect not only looks charming, it helps the cookies stay sealed so the filling does not leak while baking.
Great for gatherings
These Dairy Free Hamantaschen are inherently shareable, and I love that they travel well. They keep their texture when packed, so they are perfect for potlucks and holiday cookie swaps. I often make a few different fillings and watch people sample them all, comparing favorites and trading bites like little culinary badges of honor.
Dairy Free Hamantaschen Shopping List

These ingredients come together to create a cookie that is airy yet sturdy, with a tender crumb that holds a small dollop of filling without collapsing. The key players are the flour for structure, the oil for richness without dairy, a modest amount of sugar for sweetness, and the eggs to bind everything together. The little pinch of salt and the lift from baking powder balance the flavor and texture, while the zest brings brightness.
- 2 large eggs: Beat vigorously to provide structure and richness to the dough; eggs help bind the ingredients and create tenderness. Use large eggs at room temperature so they incorporate evenly and contribute to leavening during baking.
- 2/3 cups sugar: Sweeten and add moisture balance while enhancing browning; sugar also tenderizes the dough by weakening gluten formation. Measure carefully to maintain proper texture and avoid an overly sticky or dense pastry.
- 1/4 cup canola oil: Provide neutral fat for tenderness and a dairy-free option; canola oil keeps the dough soft and pliable for shaping. Use measured amount to ensure the dough holds together without becoming greasy.
- 1 teaspoon orange zest: Contribute bright citrus aroma and subtle flavor lift to complement the filling; orange zest infuses natural citrus oils. Zest finely to avoid bitter pith and distribute flavor evenly through the dough.
- 1 teaspoon vanilla: Add warm, familiar fragrance and enhance overall flavor depth; vanilla rounds out the citrus notes and accentuates sweetness. Use pure vanilla for best flavor and measure to avoid overpowering the other ingredients.
- 2 1/4 cups flour: Create the dough’s structure and bulk; flour provides the starches and proteins that form the pastry framework. Sift or spoon into the measuring cup for accuracy and mix just until combined to prevent toughness.
- 1 teaspoon baking powder: Lightly leaven and lighten crumb texture while stabilizing the dough; baking powder helps produce a tender, slightly airy pastry. Make sure it is fresh for optimal rising power and to avoid flat cookies.
- 1/4 teaspoons salt: Season and balance sweetness while strengthening gluten slightly; salt enhances flavor and rounds out the overall taste profile. Use the small measured amount to avoid detectable saltiness in the delicate pastry.
- 1 5 teaspoons water (if needed): Adjust dough consistency to reach a workable, pliable texture when needed; a small amount of water can help when the dough feels dry. Add teaspoons gradually to avoid over-hydrating and making the dough sticky.
- Nonstick cooking oil spray: Prevent sticking and ensure clean release when baking or shaping; nonstick cooking oil spray helps maintain the cookie’s surface and pan cleanliness. Lightly coat pans or hands to keep dough pieces from adhering during assembly.
How to Assemble Dairy Free Hamantaschen
These instructions will guide you through each stage of working the dough, cutting circles, filling, and folding into the classic triangular shapes. I like to keep everything organized in stations so the dough does not dry out, and I talk through sensory cues to help you know when each step is done right.
- Before you begin making the hamantaschen, choose and make your filling and have it on hand to work with. This dough will dry out quickly if left to rest too long, so it's best to have everything ready to assemble when you start. Preheat your oven to 350 degrees F. In a mixing bowl, whisk together the eggs, sugar, canola oil, orange zest and vanilla.: The kitchen will fill with the scent of whatever filling you select as soon as it heats slightly while you work, and having the filling ready prevents the dough from drying. I always set up a small bowl with teaspoon measurements so each cookie gets the same amount. A common misstep is making the filling too runny, which leads to leaks during baking. Keep the filling thick and cool for easy handling.
- In another bowl, sift together the flour, baking powder, and salt.: The oven's steady heat ensures even baking and a light golden color. You should hear a faint hum as the oven cycles, and it will smell faintly warm when ready, a cue the bake environment is stable. Starting with a cold oven can cause uneven coloring and longer bake times, so wait until it reaches the correct temperature before placing trays inside.
- Slowly stir the dry ingredients into the wet, using a large wooden spoon and using circular motions until a crumbly dough begins to form.: Whisking aerates the mixture slightly and distributes the sugar and zest so every bite carries flavor. The mixture should become glossy and scented, with the orange perfume rising as you stir. Overbeating can incorporate too much air, changing the dough's texture, so whisk only until combined and fragrant.
- Knead until smooth and slightly tacky to the touch. Try not to overwork the dough, only knead till the dough is the right consistency. If the crumbles are too dry to form a smooth dough, add water slowly, 1 teaspoon at a time, using your hands to knead the liquid into the dough. Knead and add liquid until the dough is smooth and slightly tacky to the touch (not sticky), with a consistency that is right for rolling out. It can easily go from the right consistency to too wet/sticky, so add water very slowly. If the dough seems too wet, knead in a little flour until it reaches the right texture.: Sifting removes lumps and ensures the baking powder is evenly dispersed for consistent lift. The sifted flour should feel light and pour smoothly when mixed. Skipping sifting can leave pockets of leavener that create uneven texture in the cookies.
- Lightly flour a smooth, clean surface. Use a rolling pin to roll the dough out to 1/4 inch thick. Scrape the dough up with a pastry scraper, lightly reflour the surface, and flip the dough over. Continue rolling the dough out very thin (less than 1/8 of an inch thick). The thinner you roll the dough, the more delicate and crisp the cookies will turn out– just make sure that the dough is still thick enough to hold the filling and its shape! If you prefer a thicker, more doughy texture to your cookies (less delicate), keep the dough closer to 1/4 inch thick. Lightly flour the rolling pin occasionally to prevent sticking, if you need to.: Listen for a gentle scraping sound as the flour incorporates, and watch the mixture change from glossy to coarse crumbs, which signals the right moment to switch to hands. Stirring slowly prevents flour clouds and helps you control hydration. Rushing this step can produce an uneven dough that is difficult to knead.
- Use a 3-inch cookie cutter (not smaller) or the 3-inch rim of a glass to cut circles out of the dough, cutting as many as you can from the dough. Gather the scraps and roll them out again. Cut circles. Repeat process again if needed until you've cut as many circles as you can from the dough. You should end up with around 35 circles.: As you knead, the dough will smooth and warm, losing its crumbly texture and becoming cohesive. The tactile cue of slight tackiness tells you the hydration is right; it should not stick to your fingers. Knead too long and the cookie can become tough from overworked gluten, so stop once smoothness is achieved.
- Place a teaspoon of filling (whichever filling you choose) into the center of each circle. Do not use more than a teaspoon of filling, or you run the risk of your hamantaschen opening and filling spilling out during baking. Cover unused circles with a lightly damp towel to prevent them from drying out while you are filling.: The sound of water absorbing and the dough becoming pliable is subtle but clear, and a tactile check will show whether it is ready to roll. Add water incrementally to avoid a sticky mess. Adding too much water forces you to rescue the dough with extra flour which alters the intended texture.
- Assemble the hamantaschen in three steps. First, grasp the left side of the circle and fold it towards the center to make a flap that covers the left third of the circle.: Rolling transforms the dough into a sheet, and the friction between the pin and dough tells you when to pause and flour. Thin rolling produces a crisp edge, while leaving it slightly thicker yields a chewier bite. Overflouring can dry the dough and make it crack, so use flour sparingly and keep scraps covered.
- Grasp the right side of the circle and fold it towards the center, overlapping the upper part of the left side flap to create a triangular tip at the top of the circle. A small triangle of filling should still be visible in the center.: Cutting should produce clean edges and minimal sticking, signaled by a clear separation from the sheet. Work quickly so the dough does not dry on the edges. A common mistake is using a smaller cutter which creates undersized cookies that do not hold enough filling; stick with the 3 inch size for best results.
- Grasp the bottom part of the circle and fold it upward to create a third flap and complete the triangle. When you fold this flap up, be sure to tuck the left side of this new flap underneath the left side of the triangle, while letting the right side of this new flap overlap the right side of the triangle. This way, each side of your triangle has a corner that folds over and a corner that folds under– it creates a "pinwheel" effect. This method of folding is not only pretty– it will help to keep the cookies from opening while they bake.: The teaspoon of filling should sit slightly proud but not bulging, and the contrast of the filling against the dough makes assembly easier. Damp towel coverings maintain pliability. Using too much filling is the most common reason cookies burst open, so measure carefully.
- Pinch each corner of the triangle gently but firmly to secure the shape. Repeat this process for the remaining circles.: The first fold creates a firm edge to anchor the rest of the triangle, and you will feel the dough give slightly as it tucks. The visual cue is a clean left crease that frames the filling. Folding too aggressively can tear the thin dough, so be gentle and precise.
- When all of your hamantaschen have been filled, place them on a lightly greased baking sheet, evenly spaced. You can fit about 20 on one sheet… they don't need to be very spaced out because they shouldn't expand much during baking. Place them in the oven and let them bake at 350 degrees F for 20-25 minutes, until the cookies are cooked through and lightly golden.: This overlap forms the top corner and should leave a small triangle of filling visible. A neat overlap helps the cookie hold shape while baking. If the overlap is sloppy the cookie may open, so align edges carefully as you fold.
- Cool the cookies on a wire rack. Store them in a tightly sealed plastic bag or Tupperware.: This pinwheel style tuck secures each corner by alternating fold directions, creating structural stability. The finished triangle should sit flat and symmetrical. Rushing the tuck can create uneven corners that open in the oven.
- Pinch each corner of the triangle gently but firmly to secure the shape: The pinch will make a faint impression and the corners will feel sealed, which prevents filling from escaping. A careful pinch also produces that classic hamantaschen silhouette. Pinching too hard can flatten the cookie and squeeze out filling, so apply steady, even pressure.
- When all of your hamantaschen have been filled place them on a lightly greased baking sheet evenly spaced place them in the oven and let them bake at 350 degrees F for 20 to 25 minutes until the cookies are cooked through and lightly golden: As they bake you will see the edges deepen to a light golden tone and the filling will settle slightly, and the kitchen will be fragrant with citrus and baked sugar. Rotate sheets if you notice uneven browning, and remove when the bottoms are lightly colored. Overbaking will dry them out, so watch carefully near the end of the time range.
- Cool the cookies on a wire rack store them in a tightly sealed plastic bag or Tupperware: Cooling allows the interior to set and the edges to crisp fully, and the cookies will firm up as they reach room temperature. Storing them sealed preserves texture and keeps them fresh for several days. Packing them while warm traps steam and softens the cookies, so always wait until fully cooled.
Customization Ideas
These ideas will help you personalize Dairy Free Hamantaschen while keeping the core dough intact. I like to experiment with different fillings and slight textural tweaks to suit the occasion.
- Swap fillings Try small amounts of fruit preserves or nut butter style fillings that are thick so they do not leak during baking, and always cool fillings before assembly.
- Adjust thickness Roll the dough to less than 1/8 of an inch for delicate crisp cookies, or keep closer to 1/4 inch for a chewier bite and heartier texture.
- Flavor lifts Increase the orange zest slightly for a brighter citrus perfume, but avoid the bitter pith when zesting to keep flavors clean.
- Make ahead You can refrigerate shaped but unbaked cookies briefly if the dough firms, then bake within a few hours, ensuring even texture.
- Bake in batches Use two baking sheets and rotate racks between batches for uniform browning and consistent results.
Pairing Suggestions for Dairy Free Hamantaschen
These cookies pair wonderfully with light beverages and other small sweet bites. I like to serve them on dessert platters for gatherings, alternating fillings to create variety. They work well for afternoon tea, holiday cookie exchanges, or as a thoughtful homemade gift when boxed neatly.
- Serve with tea Choose a mild black tea or herbal infusion that complements the citrus notes, placing cookies on a platter with a few of each filling for balance.
- Party platters Arrange alongside other small cookies and dried fruits for a diverse dessert spread that invites sampling and conversation.
- Occasions These are ideal for holiday gatherings, springtime celebrations, and cookie swaps where portability and shelf life matter.
- Storage Keep in a sealed container at room temperature for up to five days, separating layers with parchment to prevent sticking and preserve crispness.
- Seasonal pairing Highlight the citrus by serving during spring or warm weather months when fresh flavors feel most appropriate, and consider mixing fillings to reflect seasonal produce.
FAQ
Conclusion
These Dairy Free Hamantaschen stand out because they pair simple pantry ingredients with a thoughtful technique to create crisp edged, tender centered cookies. I hope the detailed assembly notes and sensory cues encourage you to give them a try, whether for a holiday table or a casual afternoon treat. Making them is a satisfying ritual, and sharing a plate of freshly baked cookies is a small, rewarding way to connect with friends and family.

Dairy Free Hamantaschen
Equipment
- Mixing Bowl
- Sifter
- Wooden Spoon
- Rolling Pin
- 3 inch Cookie Cutter
- Pastry scraper
- Baking Sheet
- Wire Rack
Ingredients
- 2 large eggs Beat vigorously to provide structure and richness to the dough; eggs help bind the ingredients and create tenderness. Use large eggs at room temperature so they incorporate evenly and contribute to leavening during baking.
- 2/3 cups sugar Sweeten and add moisture balance while enhancing browning; sugar also tenderizes the dough by weakening gluten formation. Measure carefully to maintain proper texture and avoid an overly sticky or dense pastry.
- 1/4 cup canola oil Provide neutral fat for tenderness and a dairy-free option; canola oil keeps the dough soft and pliable for shaping. Use measured amount to ensure the dough holds together without becoming greasy.
- 1 teaspoon orange zest Contribute bright citrus aroma and subtle flavor lift to complement the filling; orange zest infuses natural citrus oils. Zest finely to avoid bitter pith and distribute flavor evenly through the dough.
- 1 teaspoon vanilla Add warm, familiar fragrance and enhance overall flavor depth; vanilla rounds out the citrus notes and accentuates sweetness. Use pure vanilla for best flavor and measure to avoid overpowering the other ingredients.
- 2 1/4 cups flour Create the dough’s structure and bulk; flour provides the starches and proteins that form the pastry framework. Sift or spoon into the measuring cup for accuracy and mix just until combined to prevent toughness.
- 1 teaspoon baking powder Lightly leaven and lighten crumb texture while stabilizing the dough; baking powder helps produce a tender, slightly airy pastry. Make sure it is fresh for optimal rising power and to avoid flat cookies.
- 1/4 teaspoons salt Season and balance sweetness while strengthening gluten slightly; salt enhances flavor and rounds out the overall taste profile. Use the small measured amount to avoid detectable saltiness in the delicate pastry.
- 1 -5 teaspoons water (if needed) Adjust dough consistency to reach a workable, pliable texture when needed; a small amount of water can help when the dough feels dry. Add teaspoons gradually to avoid over-hydrating and making the dough sticky.
- Nonstick cooking oil spray Prevent sticking and ensure clean release when baking or shaping; nonstick cooking oil spray helps maintain the cookie’s surface and pan cleanliness. Lightly coat pans or hands to keep dough pieces from adhering during assembly.
Instructions
- Before you begin making the hamantaschen, choose and make your filling and have it on hand to work with. This dough will dry out quickly if left to rest too long, so it's best to have everything ready to assemble when you start. Preheat your oven to 350 degrees F. In a mixing bowl, whisk together the eggs, sugar, canola oil, orange zest and vanilla.: The kitchen will fill with the scent of whatever filling you select as soon as it heats slightly while you work, and having the filling ready prevents the dough from drying. I always set up a small bowl with teaspoon measurements so each cookie gets the same amount. A common misstep is making the filling too runny, which leads to leaks during baking. Keep the filling thick and cool for easy handling.
- In another bowl, sift together the flour, baking powder, and salt.: The oven's steady heat ensures even baking and a light golden color. You should hear a faint hum as the oven cycles, and it will smell faintly warm when ready, a cue the bake environment is stable. Starting with a cold oven can cause uneven coloring and longer bake times, so wait until it reaches the correct temperature before placing trays inside.
- Slowly stir the dry ingredients into the wet, using a large wooden spoon and using circular motions until a crumbly dough begins to form.: Whisking aerates the mixture slightly and distributes the sugar and zest so every bite carries flavor. The mixture should become glossy and scented, with the orange perfume rising as you stir. Overbeating can incorporate too much air, changing the dough's texture, so whisk only until combined and fragrant.
- Knead until smooth and slightly tacky to the touch. Try not to overwork the dough, only knead till the dough is the right consistency. If the crumbles are too dry to form a smooth dough, add water slowly, 1 teaspoon at a time, using your hands to knead the liquid into the dough. Knead and add liquid until the dough is smooth and slightly tacky to the touch (not sticky), with a consistency that is right for rolling out. It can easily go from the right consistency to too wet/sticky, so add water very slowly. If the dough seems too wet, knead in a little flour until it reaches the right texture.: Sifting removes lumps and ensures the baking powder is evenly dispersed for consistent lift. The sifted flour should feel light and pour smoothly when mixed. Skipping sifting can leave pockets of leavener that create uneven texture in the cookies.
- Lightly flour a smooth, clean surface. Use a rolling pin to roll the dough out to 1/4 inch thick. Scrape the dough up with a pastry scraper, lightly reflour the surface, and flip the dough over. Continue rolling the dough out very thin (less than 1/8 of an inch thick). The thinner you roll the dough, the more delicate and crisp the cookies will turn out-- just make sure that the dough is still thick enough to hold the filling and its shape! If you prefer a thicker, more doughy texture to your cookies (less delicate), keep the dough closer to 1/4 inch thick. Lightly flour the rolling pin occasionally to prevent sticking, if you need to.: Listen for a gentle scraping sound as the flour incorporates, and watch the mixture change from glossy to coarse crumbs, which signals the right moment to switch to hands. Stirring slowly prevents flour clouds and helps you control hydration. Rushing this step can produce an uneven dough that is difficult to knead.
- Use a 3-inch cookie cutter (not smaller) or the 3-inch rim of a glass to cut circles out of the dough, cutting as many as you can from the dough. Gather the scraps and roll them out again. Cut circles. Repeat process again if needed until you've cut as many circles as you can from the dough. You should end up with around 35 circles.: As you knead, the dough will smooth and warm, losing its crumbly texture and becoming cohesive. The tactile cue of slight tackiness tells you the hydration is right; it should not stick to your fingers. Knead too long and the cookie can become tough from overworked gluten, so stop once smoothness is achieved.
- Place a teaspoon of filling (whichever filling you choose) into the center of each circle. Do not use more than a teaspoon of filling, or you run the risk of your hamantaschen opening and filling spilling out during baking. Cover unused circles with a lightly damp towel to prevent them from drying out while you are filling.: The sound of water absorbing and the dough becoming pliable is subtle but clear, and a tactile check will show whether it is ready to roll. Add water incrementally to avoid a sticky mess. Adding too much water forces you to rescue the dough with extra flour which alters the intended texture.
- Assemble the hamantaschen in three steps. First, grasp the left side of the circle and fold it towards the center to make a flap that covers the left third of the circle.: Rolling transforms the dough into a sheet, and the friction between the pin and dough tells you when to pause and flour. Thin rolling produces a crisp edge, while leaving it slightly thicker yields a chewier bite. Overflouring can dry the dough and make it crack, so use flour sparingly and keep scraps covered.
- Grasp the right side of the circle and fold it towards the center, overlapping the upper part of the left side flap to create a triangular tip at the top of the circle. A small triangle of filling should still be visible in the center.: Cutting should produce clean edges and minimal sticking, signaled by a clear separation from the sheet. Work quickly so the dough does not dry on the edges. A common mistake is using a smaller cutter which creates undersized cookies that do not hold enough filling; stick with the 3 inch size for best results.
- Grasp the bottom part of the circle and fold it upward to create a third flap and complete the triangle. When you fold this flap up, be sure to tuck the left side of this new flap underneath the left side of the triangle, while letting the right side of this new flap overlap the right side of the triangle. This way, each side of your triangle has a corner that folds over and a corner that folds under-- it creates a "pinwheel" effect. This method of folding is not only pretty-- it will help to keep the cookies from opening while they bake.: The teaspoon of filling should sit slightly proud but not bulging, and the contrast of the filling against the dough makes assembly easier. Damp towel coverings maintain pliability. Using too much filling is the most common reason cookies burst open, so measure carefully.
- Pinch each corner of the triangle gently but firmly to secure the shape. Repeat this process for the remaining circles.: The first fold creates a firm edge to anchor the rest of the triangle, and you will feel the dough give slightly as it tucks. The visual cue is a clean left crease that frames the filling. Folding too aggressively can tear the thin dough, so be gentle and precise.
- When all of your hamantaschen have been filled, place them on a lightly greased baking sheet, evenly spaced. You can fit about 20 on one sheet... they don't need to be very spaced out because they shouldn't expand much during baking. Place them in the oven and let them bake at 350 degrees F for 20-25 minutes, until the cookies are cooked through and lightly golden.: This overlap forms the top corner and should leave a small triangle of filling visible. A neat overlap helps the cookie hold shape while baking. If the overlap is sloppy the cookie may open, so align edges carefully as you fold.
- Cool the cookies on a wire rack. Store them in a tightly sealed plastic bag or Tupperware.: This pinwheel style tuck secures each corner by alternating fold directions, creating structural stability. The finished triangle should sit flat and symmetrical. Rushing the tuck can create uneven corners that open in the oven.
- Pinch each corner of the triangle gently but firmly to secure the shape: The pinch will make a faint impression and the corners will feel sealed, which prevents filling from escaping. A careful pinch also produces that classic hamantaschen silhouette. Pinching too hard can flatten the cookie and squeeze out filling, so apply steady, even pressure.
- When all of your hamantaschen have been filled place them on a lightly greased baking sheet evenly spaced place them in the oven and let them bake at 350 degrees F for 20 to 25 minutes until the cookies are cooked through and lightly golden: As they bake you will see the edges deepen to a light golden tone and the filling will settle slightly, and the kitchen will be fragrant with citrus and baked sugar. Rotate sheets if you notice uneven browning, and remove when the bottoms are lightly colored. Overbaking will dry them out, so watch carefully near the end of the time range.
- Cool the cookies on a wire rack store them in a tightly sealed plastic bag or Tupperware: Cooling allows the interior to set and the edges to crisp fully, and the cookies will firm up as they reach room temperature. Storing them sealed preserves texture and keeps them fresh for several days. Packing them while warm traps steam and softens the cookies, so always wait until fully cooled.
Notes
- Swap fillings Try small amounts of fruit preserves or nut butter style fillings that are thick so they do not leak during baking, and always cool fillings before assembly.
- Adjust thickness Roll the dough to less than 1/8 of an inch for delicate crisp cookies, or keep closer to 1/4 inch for a chewier bite and heartier texture.
- Flavor lifts Increase the orange zest slightly for a brighter citrus perfume, but avoid the bitter pith when zesting to keep flavors clean.
- Make ahead You can refrigerate shaped but unbaked cookies briefly if the dough firms, then bake within a few hours, ensuring even texture.
- Bake in batches Use two baking sheets and rotate racks between batches for uniform browning and consistent results.