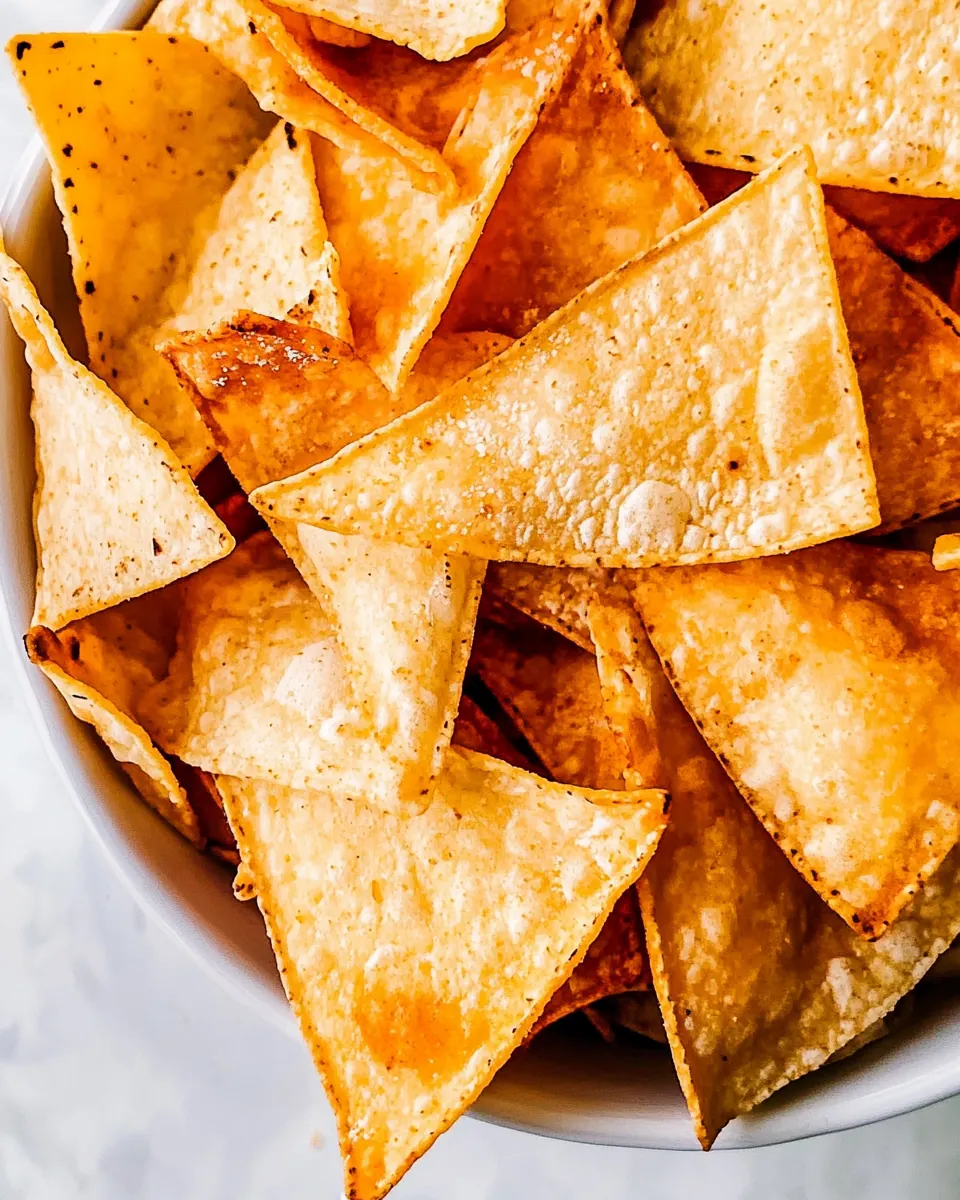
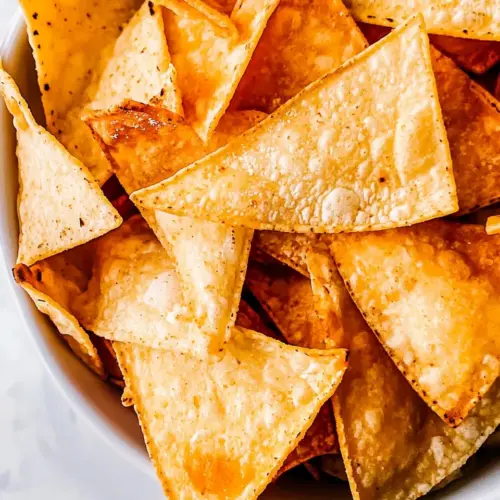
Homemade Tortilla Chips
Homemade Tortilla Chips have been my go to crunchy snack since I first learned how simple deep frying can transform humble corn tortillas into something addictive and golden.
I remember a humid summer evening when I was craving a snack that felt fresh and unapologetically crunchy. I tore a stack of corn tortillas into wedges, heated up a skillet, and before long the house smelled like warm, toasted corn and hot oil. Friends arrived and the plate emptied faster than I expected. Ever since, I keep the pantry stocked with corn tortillas and a bottle of neutral oil, because nothing beats the texture of a crisp, freshly fried chip straight from the pan.
Recipe Snapshot
10 mins
5 mins
5 mins
Easy
150 kcal
Mexican
Vegan, Gluten-Free
Appetizers
Cast Iron Skillet
The Beauty of This Homemade Tortilla Chips
Real, simple ingredients
I love that Homemade Tortilla Chips need only a few pantry staples. Using plain corn tortillas and a neutral frying oil keeps the flavor clean, so the toasty corn shines through. No preservatives, no mystery additives, just straightforward ingredients you recognize.
Fast and satisfying
What sold me was how quickly these chips come together. From slice to crunch, it takes minutes, which makes them perfect when guests drop by unexpectedly. The short time in hot canola oil produces that coveted snap without leaving the chips greasy.
Customizable crispness
These chips let you decide whether you want a delicate snap or a hearty crunch. A quick shallow fry yields a tender crisp, while a slightly longer fry gives a stronger crunch. I like being able to tune the texture depending on whether I am pairing them with a silky dip or a chunky salsa.
Textural contrast with dips
I always think about what I am serving with chips. The sturdy crunch of Homemade Tortilla Chips stands up to chunky salsas and creamy guacamole, and that contrast heightens every bite. That reliability is why I reach for them when I want a real dipping vehicle.
Economical and wholesome
Making chips at home is kinder to the wallet and, honestly, to the palate. You control the salt, the oil, and the level of toasting. I appreciate being able to make a batch that tastes fresher and cleaner than many store bought options.
Homemade Tortilla Chips Shopping List
These ingredients are intentionally minimal. The philosophy here is purity and balance, where each item plays a clear role: the corn tortillas provide structure and the distinctive corn flavor, the canola oil is the neutral heat carrier that crisps without overpowering, and Kosher salt finishes the chips and enhances the corn notes.
- 14 corn tortillas: Provide pliable, freshly made or store-bought corn tortillas as the base for homemade chips; they determine texture and authenticity with their corn flavor and flexibility. Cut into wedges and fry or bake until crisp to achieve the characteristic crunch and slightly toasted edges. Store in an airtight container after cooling to maintain crispness and prevent staling.
- 1 1/4 cups canola oil: Coat the tortillas evenly in hot canola oil to fry or shallow-fry until golden brown and crisp; oil temperature control prevents sogginess and reduces oil absorption. Offer a neutral flavor and high smoke point that yields a clean, non-greasy finish and consistent frying results. Reuse or strain leftover oil cautiously and store properly if planning to fry again.
- Kosher salt: Season to taste with kosher salt immediately after cooking to enhance the corn flavor and provide balanced savory notes; coarse crystals deliver a pleasant crunch and more even distribution when sprinkled while chips are hot. Adjust quantity based on preference and serve alongside dips for complementary seasoning.
The Method for Homemade Tortilla Chips

I like to walk through this method like I am standing next to you at the stove. The process is short but sensory rich, so pay attention to the sound of sizzling, the color changes, and how the oil behaves. These cues tell you when you are nailing the desired crispness.
- Slice each tortilla to make 6 wedges.: Right away you will notice the clean paper like sound as a knife or pizza cutter slices through each corn tortilla . The thin, triangular wedges allow hot oil to reach every surface quickly, which is why we cut them this way. Aim for consistent wedges so they fry evenly, and be careful to avoid uneven thickness which can cause some pieces to burn while others stay soft. A common slip here is cutting unevenly, so take a steady hand and a sharp knife.
- Heat the canola oil in a large cast-iron skillet set over medium-high heat.: As the canola oil warms, you will see a slight shimmer on the surface and the aroma will be almost neutral, with a faint sweet note as it reaches frying temperature. Using a large cast iron skillet gives you consistent heat distribution which helps each wedge brown uniformly. Don t let the oil smoke, that means it is overly hot and will give a bitter flavor. The trouble to avoid is overcrowding the pan too soon, which drags the temperature down and produces greasy chips.
- Test the oil by dipping a tortilla wedge in the oil. If it sizzles, the tortillas are ready for frying.: The test reveals everything, because a clear sizzling means the oil is hot enough to create an instant crust. When you dip a corner, you should hear a lively sizzle and see tiny bubbles form around the wedge, indicating proper frying action. If the oil only gently bubbles or the wedge sinks and becomes saturated, the temperature is too low. A common mistake is skipping this test and ending up with soggy chips, so always listen for that lively sizzle.
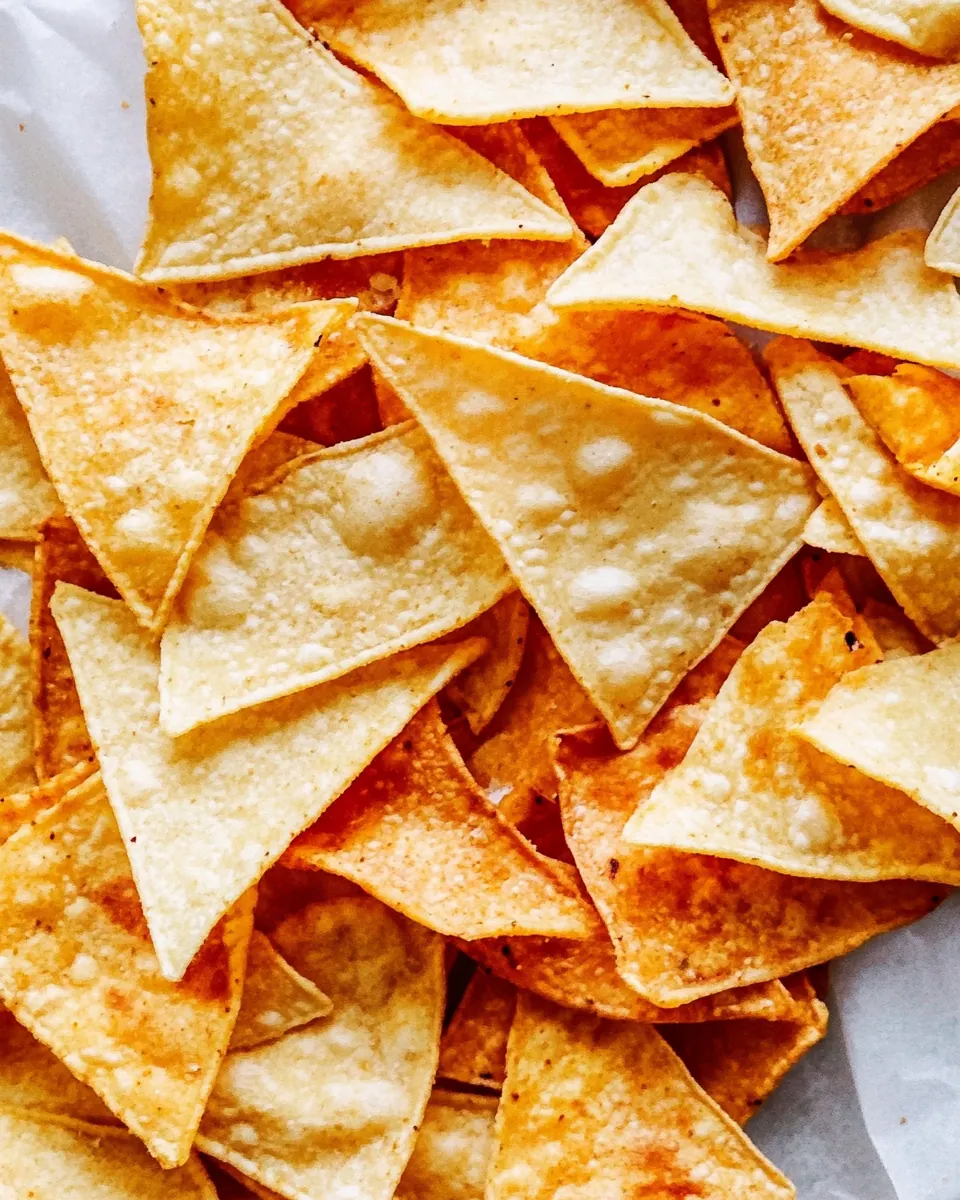
- Place about 10 tortilla wedges at a time into the hot oil, fry the tortillas, flipping once, until golden brown on both sides and crispy. This will go fast!: You will hear a chorus of brisk sizzling as the wedges hit the pan and edges curl slightly. Look for tiny golden flecks and a uniform change from pale to a warm, golden tan; that visual cue is the sign of Maillard browning where the flavor deepens. Use tongs to flip gently once, catching any pieces that try to fold. Avoid leaving them unattended, because they can go from golden to burnt in seconds. If they seem limp after frying, your oil was likely too cool or you crowded the pan, so fry smaller batches next time.
- Transfer the chips to a plate or sheet pan lined with paper towel and immediately sprinkle with salt.: As you lift each batch out, the hot oil will still glisten on the chips, and the residual heat helps the Kosher salt dissolve and stick. The aroma at this point is warm toasted corn with a whisper of oil, and the crunch will be audible when you test one. Place them in a single layer so steam does not build and soften the chips. A frequent misstep is piling hot chips on top of each other which traps steam and ruins the crispness, so spread them out and salt immediately.
Recipe Variations about Homemade Tortilla Chips
There are a few smart ways to change texture and technique while keeping the spirit of Homemade Tortilla Chips. Below are practical tips and alternatives that I use depending on time and equipment.
- Baked option: Arrange wedges in a single layer on a lined sheet, brush lightly with oil, and bake to crisp for a lower oil profile while still achieving a satisfying crunch.
- Air fryer approach: Toss wedges with a touch of oil, place in a single layer, and air fry for a quick, hands off method that yields a similar snap with less oil.
- Seasoning after fry: Salt immediately, and for variation add a dusting of smoked paprika or ground cumin to introduce a subtle smoky or earthy note.
- Oil control: Use a shallow pool of oil in a heavy skillet rather than deep frying to reduce oil use while still getting full coverage and an even crisp.
- Storage tip: Once cooled completely, store chips in an airtight container for up to two days to maintain crunch, but avoid sealing while warm to prevent condensation.
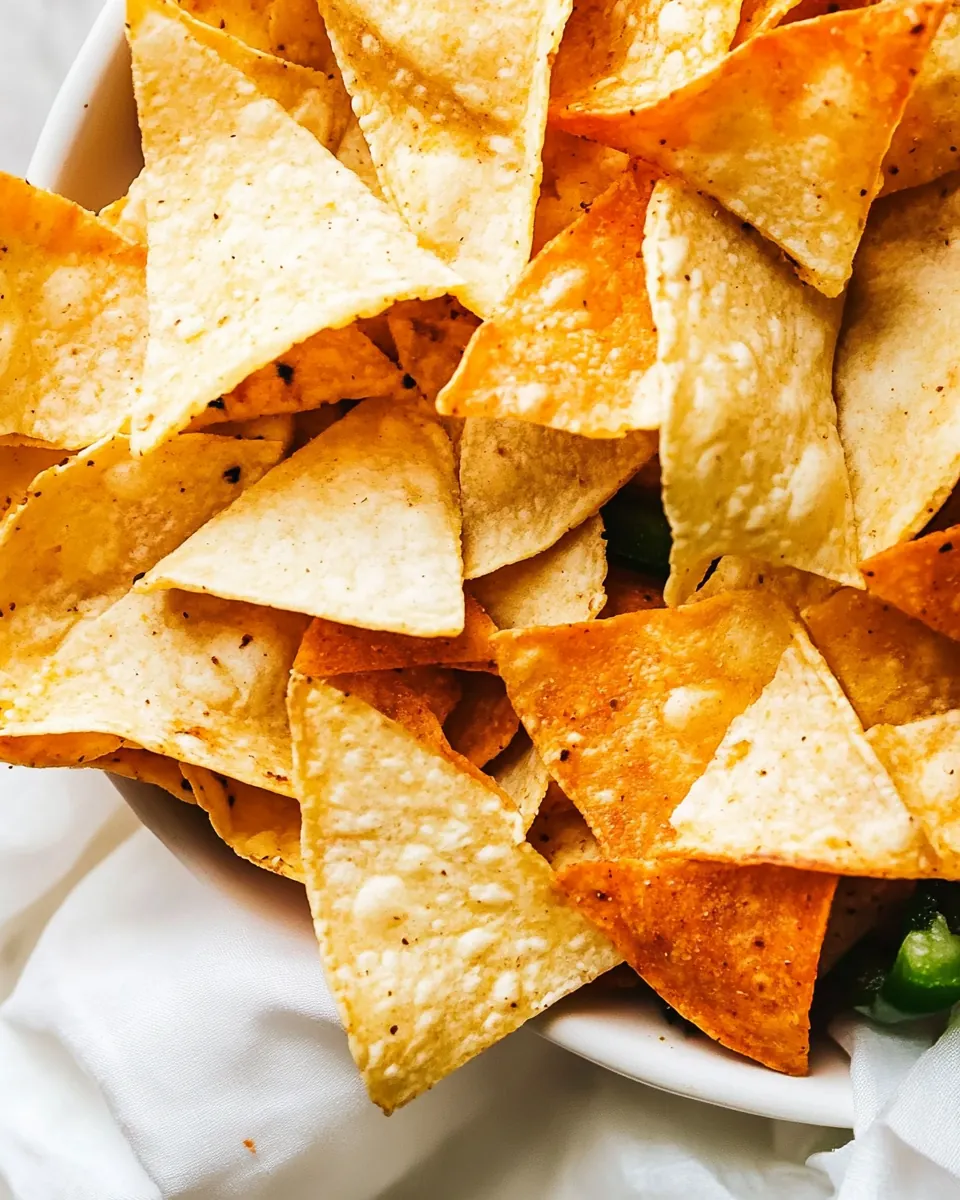
What to Serve With Homemade Tortilla Chips
These chips are flexible, so think about contrast in texture and temperature when planning pairings. They are great for gatherings, casual snacking, or as an accompaniment to a simple weeknight meal. Below I share serving ideas that highlight the chips in various contexts.
- Classic salsa: Serve with a bright, fresh Salsa made from chopped tomatoes, onion, cilantro, and lime for a zesty counterpoint to the warm corn flavor.
- Guacamole pairing: A creamy guacamole adds richness and cooling texture, creating a perfect contrast with the chips crispness.
- Cheese dip: Warm, melty cheese dips are ideal because the sturdy chips can scoop up the gooey sauce without breaking.
- Appetizer boards: Include the chips on a snack board with sliced vegetables and small bowls of condiments to let guests mix and match flavors.
- Party occasions: They work well for casual gatherings, game day, or Ramadan if you want a simple crunchy snack to break a fast with dips that are easy to share.
- Storage and leftover use: Keep chips in an airtight container at room temperature for up to two days, or crush and use as a crunchy topping for salads or baked casseroles to add texture.
FAQ
Conclusion
What makes this recipe special is its simplicity and the immediate reward of crisp, toasty chips made from everyday corn tortillas. A few minutes at the stove delivers a snack with terrific texture and pure corn flavor, perfect for gathering or just a solo treat. Try this recipe when you want a quick, satisfying crunch that beats store bought chips in freshness and flavor. You ll likely find yourself making them often because they re fast, economical, and genuinely delicious.
Homemade Tortilla Chips
Equipment
- Cast-Iron Skillet
Ingredients
- 14 corn tortillas Provide pliable, freshly made or store-bought corn tortillas as the base for homemade chips; they determine texture and authenticity with their corn flavor and flexibility. Cut into wedges and fry or bake until crisp to achieve the characteristic crunch and slightly toasted edges. Store in an airtight container after cooling to maintain crispness and prevent staling.
- 1 1/4 cups canola oil Coat the tortillas evenly in hot canola oil to fry or shallow-fry until golden brown and crisp; oil temperature control prevents sogginess and reduces oil absorption. Offer a neutral flavor and high smoke point that yields a clean, non-greasy finish and consistent frying results. Reuse or strain leftover oil cautiously and store properly if planning to fry again.
- Kosher salt Season to taste with kosher salt immediately after cooking to enhance the corn flavor and provide balanced savory notes; coarse crystals deliver a pleasant crunch and more even distribution when sprinkled while chips are hot. Adjust quantity based on preference and serve alongside dips for complementary seasoning.
Instructions
- Slice each tortilla to make 6 wedges.: Right away you will notice the clean paper like sound as a knife or pizza cutter slices through each corn tortilla . The thin, triangular wedges allow hot oil to reach every surface quickly, which is why we cut them this way. Aim for consistent wedges so they fry evenly, and be careful to avoid uneven thickness which can cause some pieces to burn while others stay soft. A common slip here is cutting unevenly, so take a steady hand and a sharp knife.
- Heat the canola oil in a large cast-iron skillet set over medium-high heat.: As the canola oil warms, you will see a slight shimmer on the surface and the aroma will be almost neutral, with a faint sweet note as it reaches frying temperature. Using a large cast iron skillet gives you consistent heat distribution which helps each wedge brown uniformly. Don t let the oil smoke, that means it is overly hot and will give a bitter flavor. The trouble to avoid is overcrowding the pan too soon, which drags the temperature down and produces greasy chips.
- Test the oil by dipping a tortilla wedge in the oil. If it sizzles, the tortillas are ready for frying.: The test reveals everything, because a clear sizzling means the oil is hot enough to create an instant crust. When you dip a corner, you should hear a lively sizzle and see tiny bubbles form around the wedge, indicating proper frying action. If the oil only gently bubbles or the wedge sinks and becomes saturated, the temperature is too low. A common mistake is skipping this test and ending up with soggy chips, so always listen for that lively sizzle.
- Place about 10 tortilla wedges at a time into the hot oil, fry the tortillas, flipping once, until golden brown on both sides and crispy. This will go fast!: You will hear a chorus of brisk sizzling as the wedges hit the pan and edges curl slightly. Look for tiny golden flecks and a uniform change from pale to a warm, golden tan; that visual cue is the sign of Maillard browning where the flavor deepens. Use tongs to flip gently once, catching any pieces that try to fold. Avoid leaving them unattended, because they can go from golden to burnt in seconds. If they seem limp after frying, your oil was likely too cool or you crowded the pan, so fry smaller batches next time.
- Transfer the chips to a plate or sheet pan lined with paper towel and immediately sprinkle with salt.: As you lift each batch out, the hot oil will still glisten on the chips, and the residual heat helps the Kosher salt dissolve and stick. The aroma at this point is warm toasted corn with a whisper of oil, and the crunch will be audible when you test one. Place them in a single layer so steam does not build and soften the chips. A frequent misstep is piling hot chips on top of each other which traps steam and ruins the crispness, so spread them out and salt immediately.
Notes
- Baked option: Arrange wedges in a single layer on a lined sheet, brush lightly with oil, and bake to crisp for a lower oil profile while still achieving a satisfying crunch.
- Air fryer approach: Toss wedges with a touch of oil, place in a single layer, and air fry for a quick, hands off method that yields a similar snap with less oil.
- Seasoning after fry: Salt immediately, and for variation add a dusting of smoked paprika or ground cumin to introduce a subtle smoky or earthy note.
- Oil control: Use a shallow pool of oil in a heavy skillet rather than deep frying to reduce oil use while still getting full coverage and an even crisp.
- Storage tip: Once cooled completely, store chips in an airtight container for up to two days to maintain crunch, but avoid sealing while warm to prevent condensation.