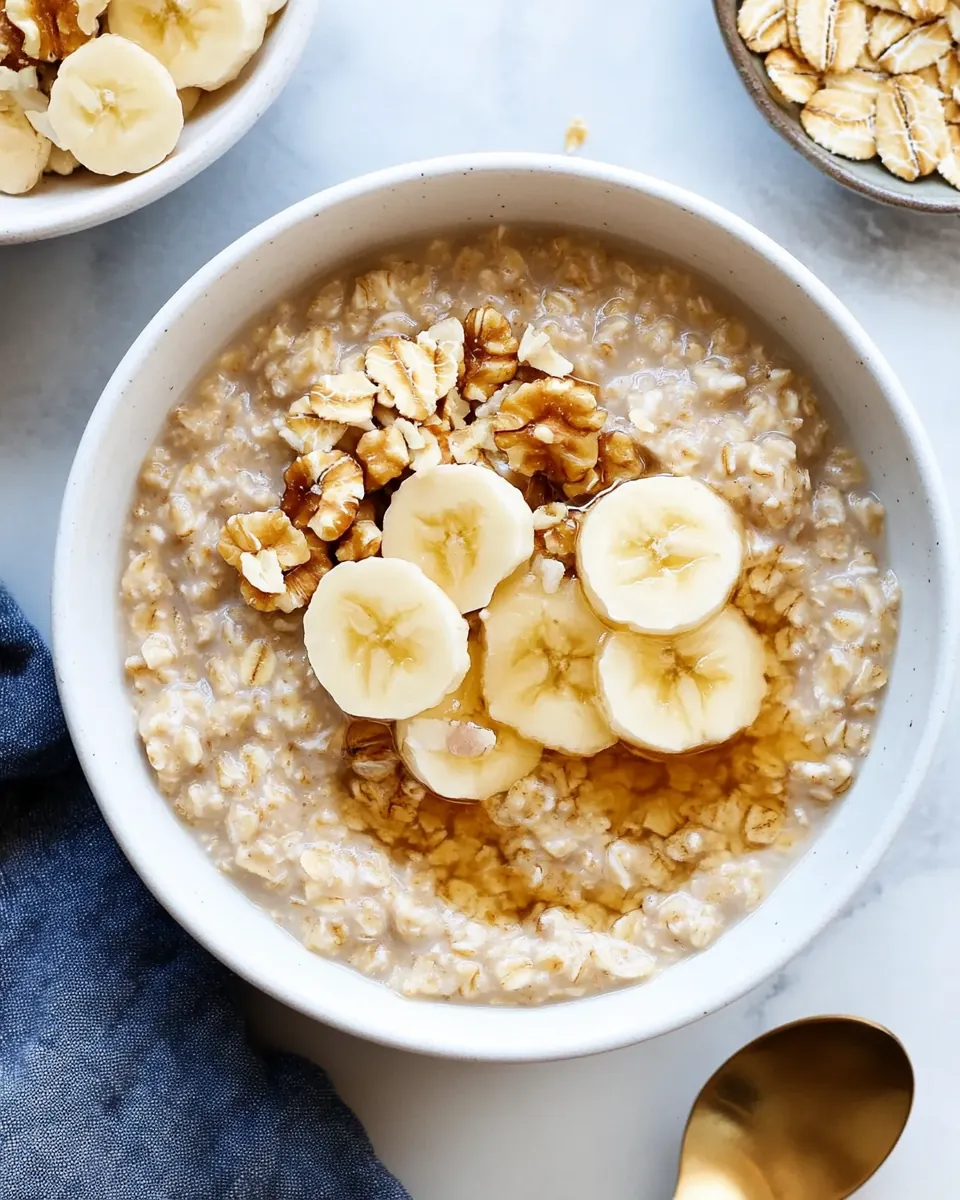
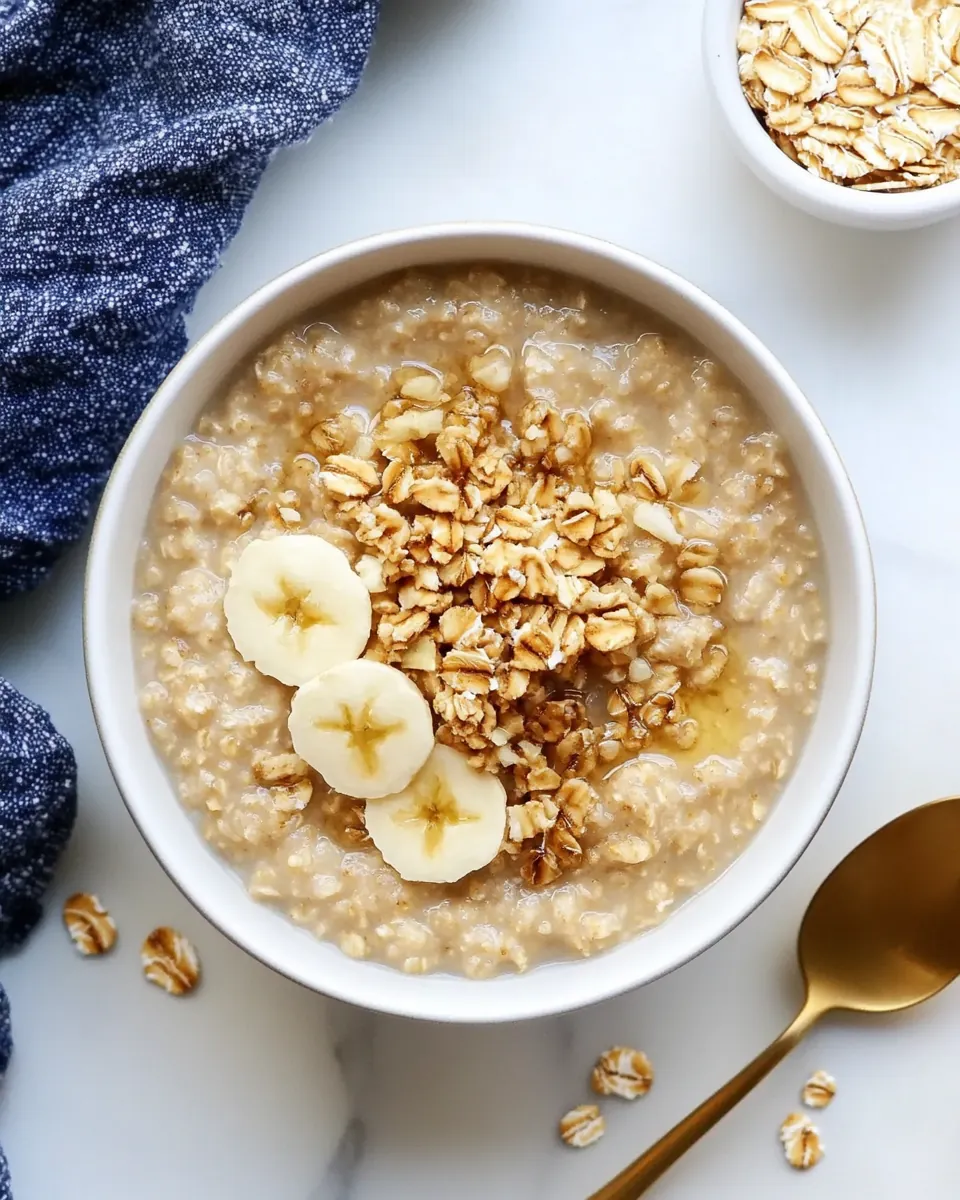
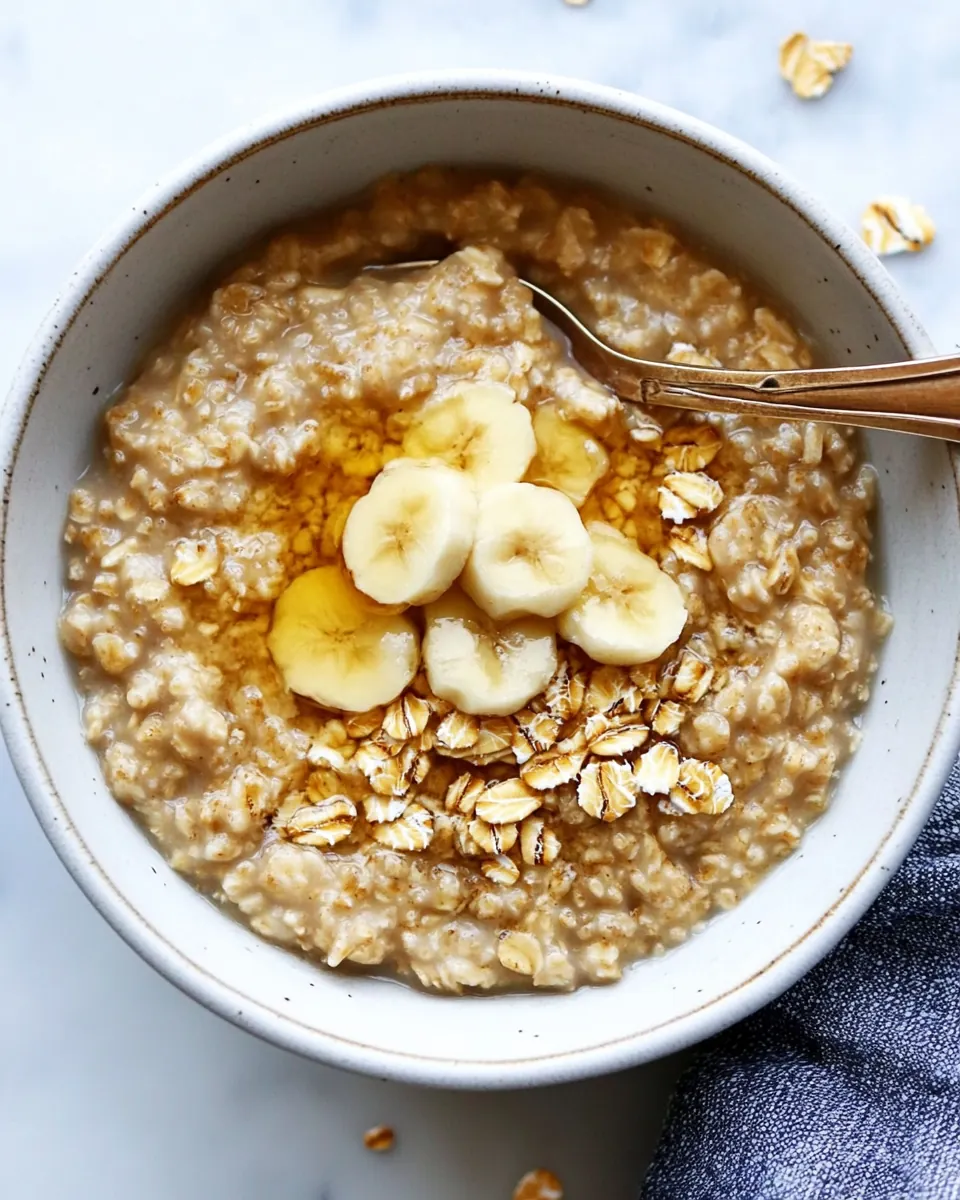
Instant Pot Steel Cut Oats
Instant Pot Steel Cut Oats became my go to slow morning ritual long before dawn felt polite, and I still remember the first time I tasted the creamy bowl that convinced me steel cut oats could be both hearty and comforting. I started making it on bleak weekday mornings when I needed something that felt homemade, but required almost no babysitting. Over time I adjusted liquid ratios and pressure timing until the texture hit that sweet spot, firm enough to hold a spoonful, yet gentle enough to melt on the tongue.
There is a small, quiet joy in hearing the Instant Pot sigh as it releases, and stirring a pot that smells faintly of toasted grain brings back lazy weekend breakfasts with family. Whenever I serve Instant Pot Steel Cut Oats I like to think of it as a warm hug in a bowl, something that turns hurried mornings into moments. It’s uncomplicated, forgiving, and endlessly adaptable, which is why I reach for this method when I want something nourishing without drama.
Recipe Snapshot
35 mins
5 mins
30 mins
Easy
250 kcal
American
Gluten-Free, Low FODMAP
Breakfast
Instant Pot
Why You’ll Love This Instant Pot Steel Cut Oats
Reliable, effortless texture
I love that Instant Pot Steel Cut Oats produces a consistent texture every time. With the pressure setting, you avoid the unpredictable chewing that sometimes comes from stovetop cooking. The oats come out tender with a pleasant tooth, not mushy, and you can count on the same result even on rushed mornings.
Hands off convenience
One of the biggest reasons I make this recipe is convenience. I can set the pot, walk away, and do other things. The hands off nature is a lifesaver on busy mornings and makes this method ideal when I want to prep other breakfast elements while the oats cook.
Simple, pantry friendly ingredients
The ingredient list is short, and that’s powerful. With just steel cut oats, milk, and water, you get a nourishing bowl without hunting through the pantry. I appreciate recipes that rely on pantry staples, because I can always pull this together even if I haven’t planned ahead.
Flexible for diets and tastes
This recipe is inherently adaptable. I often switch between more or less liquid depending on whether I want a creamier porridge or a chewier finish. The base is neutral enough to carry sweet spices, fruits, or a simple swipe of nut butter, so you can tailor it to your mood or dietary needs.
Great for batch cooking
I also love making a double batch and refrigerating leftovers. The texture stands up to reheating, and the oats are forgiving, so you can adjust thickness with a splash of milk or water. It’s dependable for meal prepping, and it saves me precious time on weekday mornings.
Key Ingredients for Instant Pot Steel Cut Oats
These few ingredients form the backbone of a comforting cereal bowl that is both simple and dependable. I treat the combination as a harmony of grain to liquid. The proportions control texture, while the mildness of the liquids lets the oat flavor shine. When I balance the three key players, the result is creamy, warm, and very satisfying.
- 2 cups steel cut oats: Provide a hearty, chewy base that defines the texture and nutty flavor of the finished porridge; steel cut oats absorb liquid and swell slowly during pressure cooking, creating a creamy yet toothsome result. Encourage a rustic mouthfeel and wholesome whole-grain character while also contributing fiber and sustained energy to the dish.
- 2 cups milk: Add a rich, creamy element that enhances flavor and lends a smooth, velvety mouthfeel; milk contributes natural sweetness, fat, and protein which balance the oats and produce a luxurious texture when combined under pressure. Support overall tenderness and deepen the taste profile, while allowing optional adjustment for creaminess by choosing dairy or plant-based alternatives.
- 2 cups water: Provide necessary hydration to rehydrate and cook the oats, enabling proper gelatinization of starches for a porridge-like consistency; water dilutes the mixture and prevents scorching while pressure cooking. Serve as the neutral liquid component that, together with milk, controls the final thickness and cooking time.
Instant Pot Steel Cut Oats Instructions
I find the method relaxing because it takes care of the tricky timing for you. Below is a step by step retelling of the directions, written so you can sense what each stage should look and feel like. These instructions will help you avoid common pitfalls and get reliably creamy oats every time.
- Add 2 cups of steel cut oats, 2 cups of milk and 2 cups of water to the instant pot, stir to combine.: The moment you add the ingredients you will notice a gentle, slightly sweet dairy scent mixing with the toasted grain aroma. Stirring helps distribute the liquids around each grain, ensuring even hydration under pressure, which matters because uneven distribution can lead to some clumps cooking faster than others. A common slip is not scraping the bottom well enough, which can cause the pot to think something is stuck and delay pressure. Look for a uniform slurry where the surface looks smooth and the oats are submerged, that indicates good contact for even cooking.
- Cover and set to high pressure for four minutes. The instant pot will come to pressure then cook for four minutes.: As the pot seals you may hear a faint humming, and then the steady tick of the build up toward pressure. High pressure drives steam into the groats, breaking down the tough structure that makes steel cut oats chewy. This short intense burst of heat is why the texture transforms so well. Avoid the temptation to open the valve while it is pressurizing, as sudden venting can disrupt the cooking. You should notice the float valve rise and the display change when the pot has reached pressure, which is your signal that the timed cooking has begun.
- After the four minute cooking time, allow the instant pot to naturally release pressure for 15 minutes.: During these four minutes there is an almost inaudible symphony of bubbles and soft convection inside the sealed pot, and the oats absorb liquid quickly at this high temperature. This stage sets the internal softness, so the grain edges soften while the centers remain slightly chewy. Do not shorten this period, otherwise the oats will be undercooked and gritty. If you smell anything scorched at this point it likely means the liquid ratio or placement was off, so cancel when safe and check the bottom before retrying.
- Remove lid and stir. Oats will appear watery at first, but as you stir will absorb the excess liquid.: The natural release is where the oats finish gently as the temperature falls, absorbing any lingering liquid and mellowing the starches. You may hear occasional hisses as pressure equalizes slowly, and this calm cooldown prevents over agitation that can turn oats gluey. One mistake is quick releasing too early, which tends to leave the liquid separated and the oats underdeveloped. Wait for the float valve to drop back down completely before lifting the lid, that ensures the internal environment has settled.
- Remove lid and stir. Oats will appear watery at first, but as you stir will absorb the excess liquid: When you lift the lid a warm, grain forward aroma will greet you, and the surface can look loose. Vigorous stirring helps the hot steam and starches meld, turning the mixture creamy. This is also the time to check texture and adjust thickness with a splash of milk or water if needed. A common error is to judge doneness before stirring, which can make you think the oats are too thin; give them a few stirs to witness the transformation into a cohesive, silky bowl.
How to Switch It Up
Once you have the base method down, there are many small swaps that keep the core intact while changing the final bowl. These ideas are designed to be easy, practical, and grounded in real pantry choices so you can experiment with confidence.
- Use all water if you want a lighter finish, which reduces richness and highlights the nutty oat flavor without altering the cook time.
- Try a different milk from your usual to subtly change creaminess, noting that thicker milks will make a silkier porridge.
- Double the batch and refrigerate portions for quick reheating, adding a splash of liquid when warming to refresh the texture.
- Adjust liquid ratio to make a firmer or looser porridge, increasing water for a chewier result or milk for creamier oats.
- Warm the liquids first before adding to the pot to reduce time to pressure slightly and produce a smoother integration with the grains.
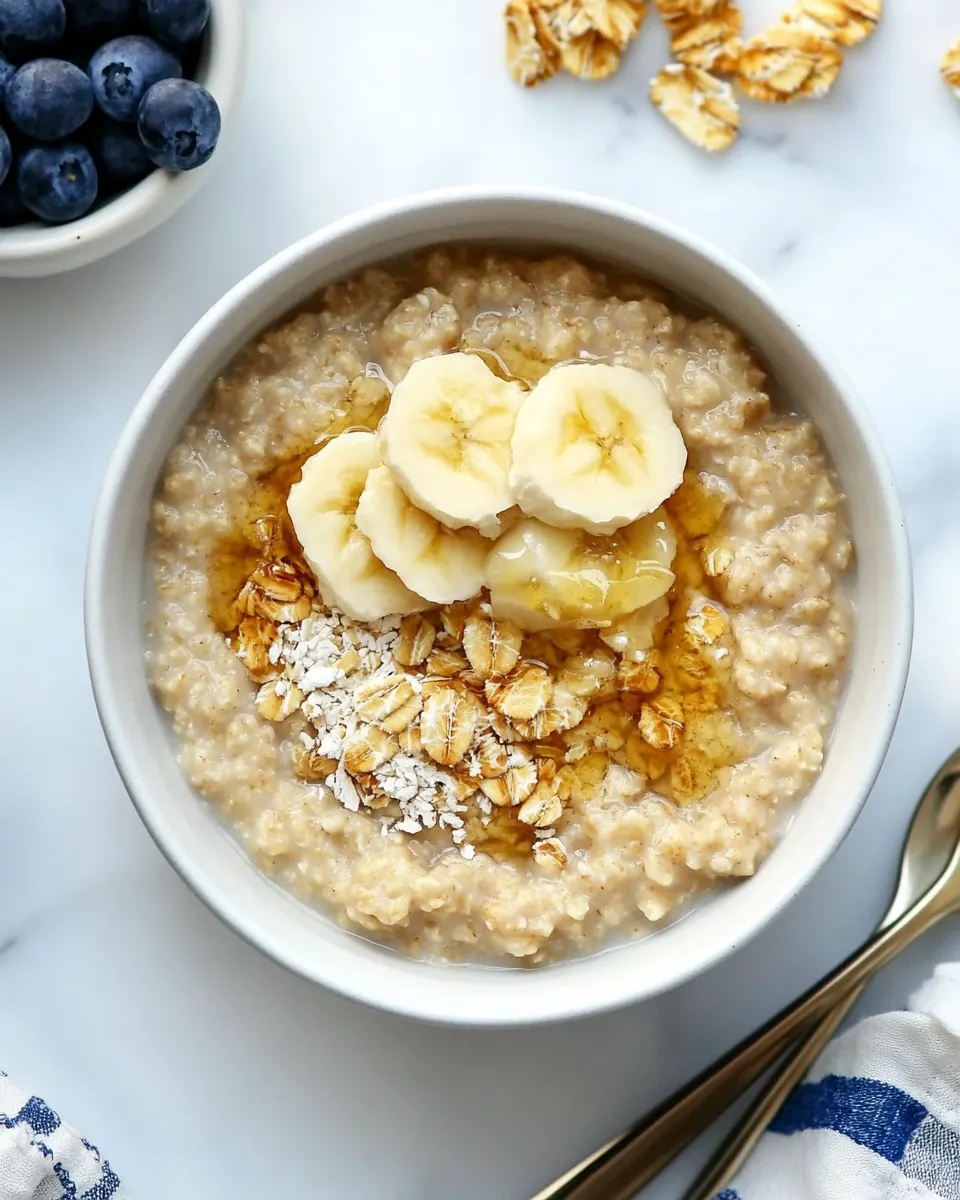
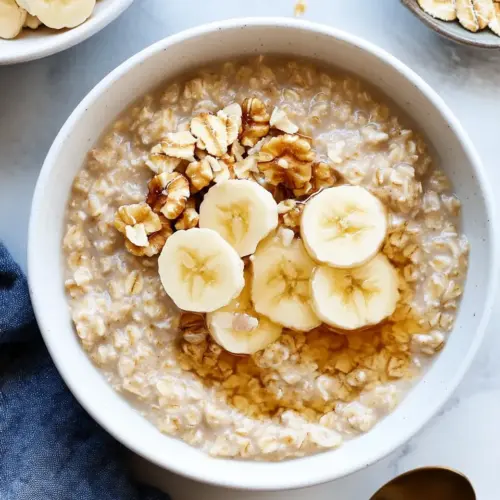
What Goes Well With This Instant Pot Steel Cut Oats
This porridge is a versatile morning anchor that pairs well with many accompaniments. For everyday breakfasts I reach for fresh fruit and a spoonful of something rich. For special occasions I pick more elaborate toppings and a carefully chosen side. Below I outline ways to serve, storage ideas, and occasions where this bowl shines.
- Fruit toppings: Fresh or stewed fruit adds brightness and a natural sweetness that complements the oat base, perfect for a weekday boost.
- Nut butter or seeds: A spoonful of nut butter or sprinkle of seeds brings healthy fats and a satisfying mouthfeel, good for a more filling meal.
- Make ahead: Store in a sealed container in the fridge for up to three days and loosen with milk when reheating to revive creaminess.
- Occasions: Ideal for cozy winter breakfasts, quick family mornings, or a simple Suhoor during Ramadan when you need sustained energy.
- Portioning: Serve in warmed bowls to keep the porridge hot longer, and present with small bowls of add ins so everyone can customize.
FAQ
Conclusion
This recipe shines because it turns humble ingredients into a reliably creamy, textured bowl with almost no babysitting required. Try making it on a busy morning, and you will appreciate how dependable and comforting the results are. I hope this method becomes a staple in your breakfast rotation and gives you one less thing to worry about before starting the day.
Instant Pot Steel Cut Oats
Equipment
- Instant Pot
Ingredients
- 2 cups steel cut oats Provide a hearty, chewy base that defines the texture and nutty flavor of the finished porridge; steel cut oats absorb liquid and swell slowly during pressure cooking, creating a creamy yet toothsome result. Encourage a rustic mouthfeel and wholesome whole-grain character while also contributing fiber and sustained energy to the dish.
- 2 cups milk Add a rich, creamy element that enhances flavor and lends a smooth, velvety mouthfeel; milk contributes natural sweetness, fat, and protein which balance the oats and produce a luxurious texture when combined under pressure. Support overall tenderness and deepen the taste profile, while allowing optional adjustment for creaminess by choosing dairy or plant-based alternatives.
- 2 cups water Provide necessary hydration to rehydrate and cook the oats, enabling proper gelatinization of starches for a porridge-like consistency; water dilutes the mixture and prevents scorching while pressure cooking. Serve as the neutral liquid component that, together with milk, controls the final thickness and cooking time.
Instructions
- Add 2 cups of steel cut oats, 2 cups of milk and 2 cups of water to the instant pot, stir to combine.: The moment you add the ingredients you will notice a gentle, slightly sweet dairy scent mixing with the toasted grain aroma. Stirring helps distribute the liquids around each grain, ensuring even hydration under pressure, which matters because uneven distribution can lead to some clumps cooking faster than others. A common slip is not scraping the bottom well enough, which can cause the pot to think something is stuck and delay pressure. Look for a uniform slurry where the surface looks smooth and the oats are submerged, that indicates good contact for even cooking.
- Cover and set to high pressure for four minutes. The instant pot will come to pressure then cook for four minutes.: As the pot seals you may hear a faint humming, and then the steady tick of the build up toward pressure. High pressure drives steam into the groats, breaking down the tough structure that makes steel cut oats chewy. This short intense burst of heat is why the texture transforms so well. Avoid the temptation to open the valve while it is pressurizing, as sudden venting can disrupt the cooking. You should notice the float valve rise and the display change when the pot has reached pressure, which is your signal that the timed cooking has begun.
- After the four minute cooking time, allow the instant pot to naturally release pressure for 15 minutes.: During these four minutes there is an almost inaudible symphony of bubbles and soft convection inside the sealed pot, and the oats absorb liquid quickly at this high temperature. This stage sets the internal softness, so the grain edges soften while the centers remain slightly chewy. Do not shorten this period, otherwise the oats will be undercooked and gritty. If you smell anything scorched at this point it likely means the liquid ratio or placement was off, so cancel when safe and check the bottom before retrying.
- Remove lid and stir. Oats will appear watery at first, but as you stir will absorb the excess liquid.: The natural release is where the oats finish gently as the temperature falls, absorbing any lingering liquid and mellowing the starches. You may hear occasional hisses as pressure equalizes slowly, and this calm cooldown prevents over agitation that can turn oats gluey. One mistake is quick releasing too early, which tends to leave the liquid separated and the oats underdeveloped. Wait for the float valve to drop back down completely before lifting the lid, that ensures the internal environment has settled.
- Remove lid and stir. Oats will appear watery at first, but as you stir will absorb the excess liquid: When you lift the lid a warm, grain forward aroma will greet you, and the surface can look loose. Vigorous stirring helps the hot steam and starches meld, turning the mixture creamy. This is also the time to check texture and adjust thickness with a splash of milk or water if needed. A common error is to judge doneness before stirring, which can make you think the oats are too thin; give them a few stirs to witness the transformation into a cohesive, silky bowl.
Notes
- Use all water if you want a lighter finish, which reduces richness and highlights the nutty oat flavor without altering the cook time.
- Try a different milk from your usual to subtly change creaminess, noting that thicker milks will make a silkier porridge.
- Double the batch and refrigerate portions for quick reheating, adding a splash of liquid when warming to refresh the texture.
- Adjust liquid ratio to make a firmer or looser porridge, increasing water for a chewier result or milk for creamier oats.
- Warm the liquids first before adding to the pot to reduce time to pressure slightly and produce a smoother integration with the grains.