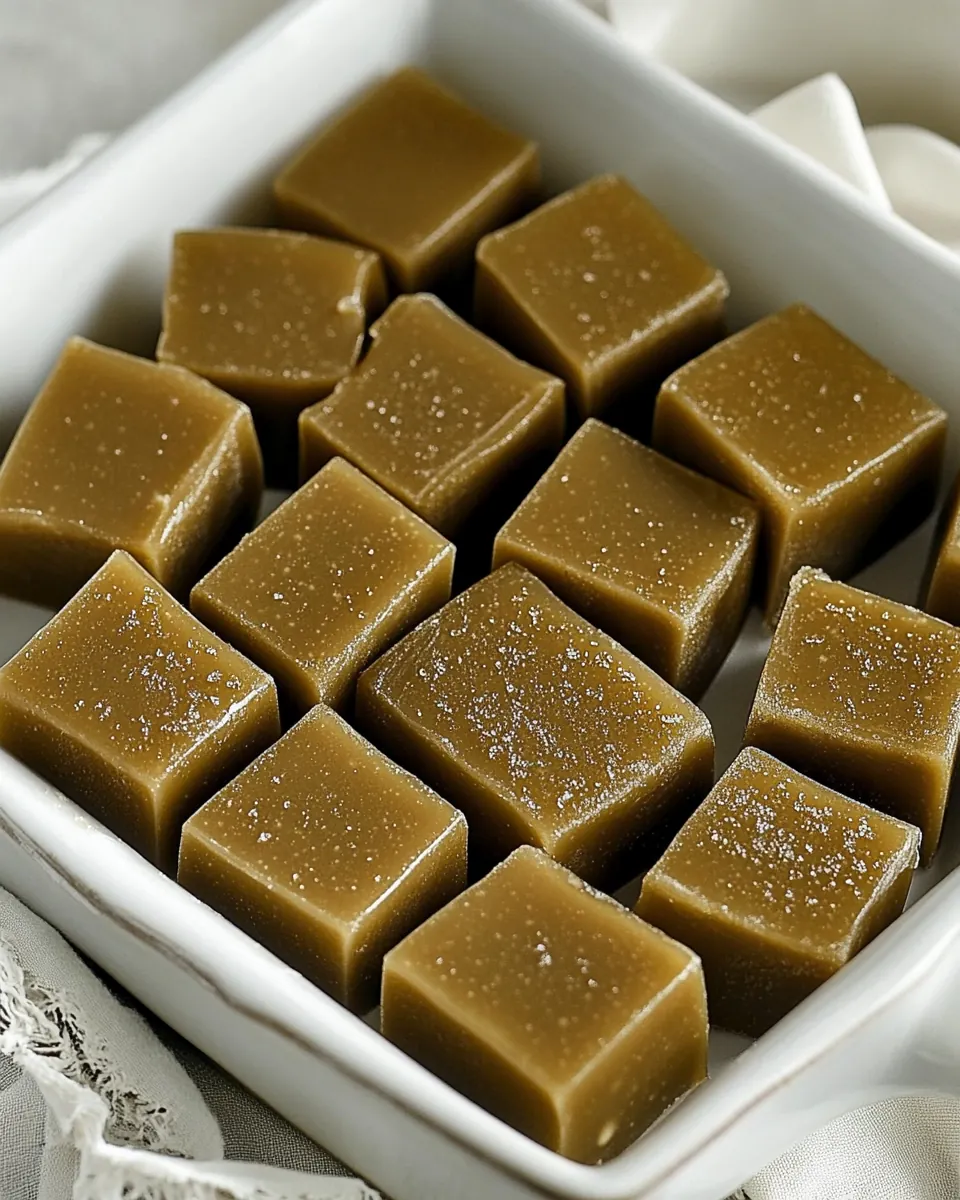
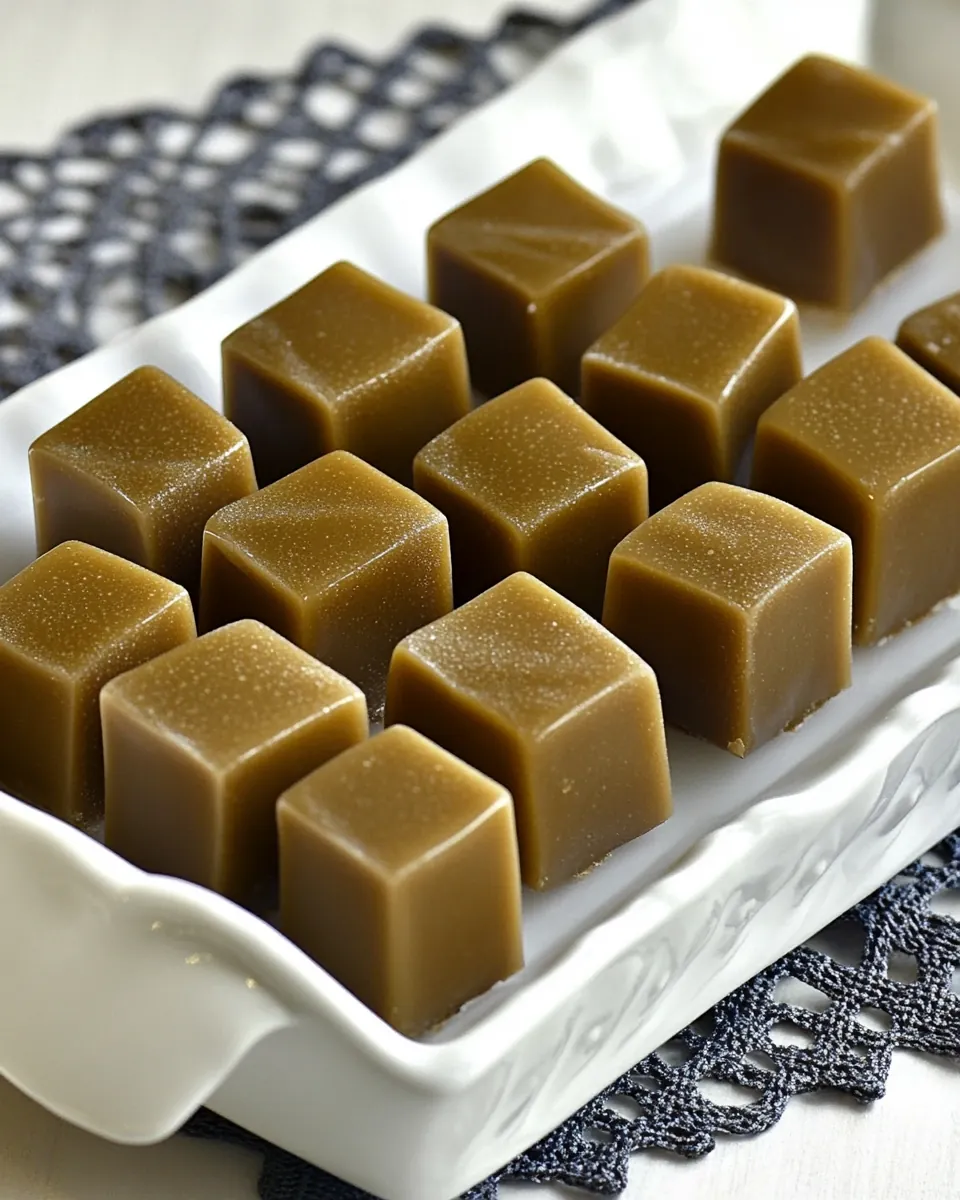
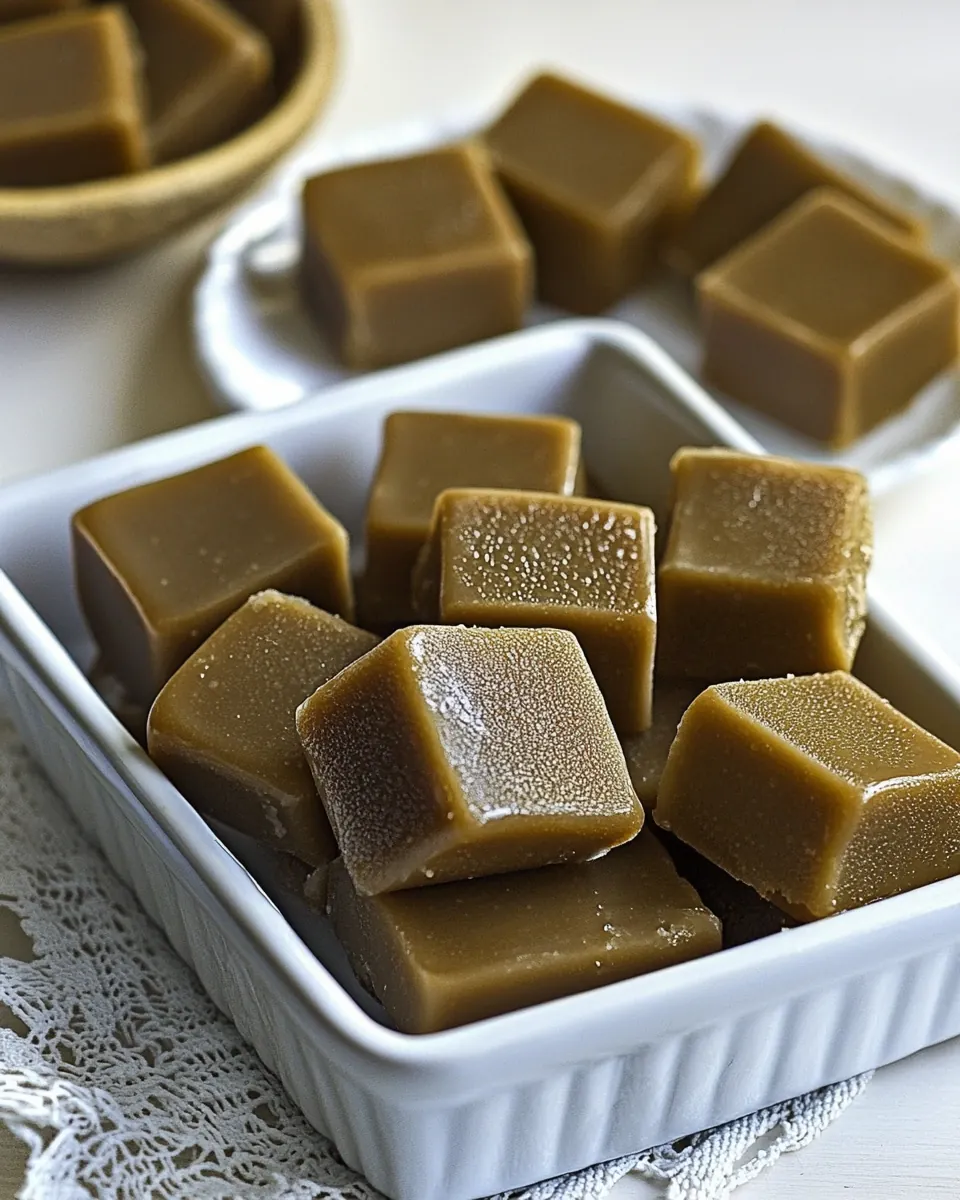
Homemade Fannie Mae Caramels
Homemade Fannie Mae Caramels always bring me back to a cramped kitchen that smelled of butter and warm sugar, a place where patience felt like the most important ingredient. The first time I made these I learned quickly that candy making demands attention and calm, and that the payoff, those creamy, chewy squares, is worth every stirred minute.
I remember standing at the stove, a heavy pot humming gently as the mixture slowly changed, the kitchen windows beaded with steam. I talked to myself as I stirred, testing the texture with a wooden spoon, listening for the subtle thickening as the mixture moved more slowly. There is a humble joy in wrapping each piece in wax paper and stacking them in a tin to share.
Recipe Snapshot
40 mins
10 mins
30 mins
Easy
150 kcal
American
Gluten-Free, Low FODMAP
Desserts
Candy Thermometer
What Makes This Homemade Fannie Mae Caramels Special
Classic, comforting flavor
These caramels capture a familiar flavor that I grew up with, rich from butter and cream, and rounded by the sweetness of sugar and sweetened condensed milk. I find that this balance makes the candies nostalgic and approachable, not overly saccharine, but warmly indulgent.
Simple pantry ingredients
I love that the ingredient list is straightforward. With staples like milk, corn syrup, and vanilla you can make something special without exotic supplies. That low barrier to entry means you can pull these together on a weekday evening or for a holiday gift.
Technique teaches patience
Working with a candy thermometer taught me to respect timing and temperature. When you watch the mixture progress to the soft ball stage, you develop a sense for texture that translates to other confections. I enjoy that practicing this recipe improves your kitchen intuition.
Customizable finishing touches
Whether you stir in chopped nuts or dip the finished pieces in tempered chocolate, these caramels adapt well. I often vary the toppings depending on who I am gifting to, and it is satisfying to see a single base transform into several distinct treats.
Great for gifting and gatherings
Because these make a large batch, they are perfect for sharing. I like assembling little boxes and watching people savor them slowly. The candies hold up well in cool storage, so you can make them ahead of time and relax when guests arrive.
Essential Ingredients for Homemade Fannie Mae Caramels
These ingredients form a simple, focused roster that works through chemistry and fat-sugar interactions to create that creamy, chewy texture we love. The key players are the dairy components that lend richness, the sugar and corn syrup that control crystallization, and the butter that adds silkiness and mouthfeel.
- 2 cups light corn syrup: Provide sweetness and prevent large sugar crystallization while contributing to chewy texture; helps control moisture and sets the caramel base when heated to the correct temperature.
- 14 ounces sweetened condensed milk: Add rich, concentrated dairy sweetness and creaminess while intensifying caramel flavor; supplies lactose and milk solids that promote browning and smooth, fudgy structure.
- 1 1/2 cups milk: Contribute additional liquid dairy to balance viscosity and aid in even heating; supply lactose and proteins that help develop flavor and tender chew.
- 1 cup whipping cream: Deliver extra fat and richness to create a luxurious, smooth mouthfeel; increase creaminess and help produce a soft, pliable caramel once cooled.
- 1 cup butter: Introduce fat that enriches flavor, increases tenderness, and aids in smooth texture; helps prevent graininess and supports a glossy finish when incorporated.
- 4 cups sugar: Provide bulk sweetening that caramelizes during cooking to develop color, flavor, and structure; contributes to firmness and chew when heated to the appropriate stage.
- 2 teaspoons vanilla: Impart aromatic sweetness and round out flavors with warm vanilla notes; enhances overall depth and masks any cooked dairy edge.
- 2 cups chopped nuts if desired: Offer optional textural contrast and nutty flavor when stirred into or sprinkled atop caramels; add crunch and visual interest to each bite.
- Tempered dipping chocolate if preferred or wax paper cut into rectangles: Serve as an optional coating for a glossy finish or as a nonstick surface for cooling and storing; protect caramels and make handling or presentation easier.
Making This Homemade Fannie Mae Caramels
These directions are a guided conversation with your stove. Take your time, and tune into the aroma and texture as the mixture transforms. Keep your tools ready, because once it thickens you will need to move confidently.
- Butter a 9 X 13 baking pan. In heavy 6 quart Dutch oven, combine sugar, corn syrup, condensed milk, milk, cream and butter. Place over medium heat and stir occasionally with wooden spoon until comes to boil. Clip on candy thermometer.: The smell of melted butter against a warm pan is comforting, and prepping the pan first prevents frantic scraping later. Greasing thoroughly ensures the caramel releases cleanly, and it protects edges that might otherwise stick. A common mistake is under-greasing which makes cutting a chore; be generous but avoid pooling fat that could seep into the finished candy.
- Please note it can take the sugar a long time to reach the proper temperature, be patient.: As you add the ingredients to a heavy pot, notice the cool, dense texture of the mix before heat. The corn syrup and sugar start to glisten, and the dairy components temper the mixture. Using a heavy Dutch oven helps distribute heat evenly, which is crucial to prevent scorching. Avoid using a thin pot, which can cause hot spots and burnt flavor.
- Cook stirring constantly until reaches 240 degrees or soft ball stage. Remove from heat. Stir in vanilla and nuts. Pour without scraping into pan. Allow to stand overnight. Cut into 1-inch rectangles or squares. Wrap in wax paper or dip in chocolate.: You will hear the first soft bubbling and smell a sweet steam rising as the mixture warms. Stirring gently distributes heat and dissolves the sugar into the dairy base. If you stir too vigorously, you may introduce air bubbles, but not stirring at all risks local burning. Balance a steady, patient stir with occasional pauses to let the surface warm evenly.
- Clip on candy thermometer: When the mixture has reached a rolling boil, attach your candy thermometer so the bulb sits in the syrup but not touching the pot bottom, which could read falsely high. A reliable temperature reading is the single best predictor of success, so make sure the thermometer is secure. A common error is placing the thermometer against the pan, which will overstate the temperature and lead to an undercooked batch.
- Please note it can take the sugar a long time to reach the proper temperature, be patient: The slow ascent to the soft ball stage requires calm, because the mixture will thicken gradually and the bubbling will become more vigorous. You might be tempted to raise the heat, but that can cause uneven cooking and scorching; maintain medium heat and accept the wait. If the mixture begins to brown too quickly, reduce heat and adjust your stirring pace.
- Cook stirring constantly until reaches 240 degrees or soft ball stage: As you stir constantly, the mixture will become thicker and move more slowly, producing a deeper, toasted aroma. At around 240 degrees you can drop a small amount into cold water to confirm that it forms a soft ball, which signals the right firmness. A frequent slip is stopping stirring too soon, which invites grainy texture; keep the spoon moving and listen for a change in the sound of the bubbling.
- Remove from heat: When the target temperature is reached, taking the pot off the heat immediately halts further cooking and prevents overshoot. You will feel the weight of the pot as the mixture settles, and the residual heat will continue to carry it a bit higher if left on the burner. A top error here is lingering on heat, which hardens caramels more than desired, so transfer quickly to a safe spot.
- Stir in vanilla and nuts: Adding vanilla at this cooler stage preserves its aroma, while folding in the chopped nuts distributes textural contrast. The steam will carry the vanilla scent and the nuts will hiss subtly as they meet the hot caramel. If you add vanilla too early the volatile flavors will evaporate, and if you overmix you may crush nuts into powder instead of retaining bite.
- Pour without scraping into pan: Pour the hot caramel into the prepared pan, allowing it to level naturally. Avoid scraping the pot sides, which often hold slightly thicker, cooked sugar that can create hard spots. The surface will settle with a glossy sheen, and you will notice steam easing off. A typical misstep is scraping and transferring hardened fragments into the pan, causing uneven texture.
- Allow to stand overnight: Let the pan rest at room temperature so the caramels set slowly, developing chewiness and flavor. Overnight chilling is gentle and prevents condensation that could soften the candies. Do not refrigerate aggressively, which can change texture and make them too firm. Resist the temptation to cut early, as under-set caramels will smear rather than slice neatly.
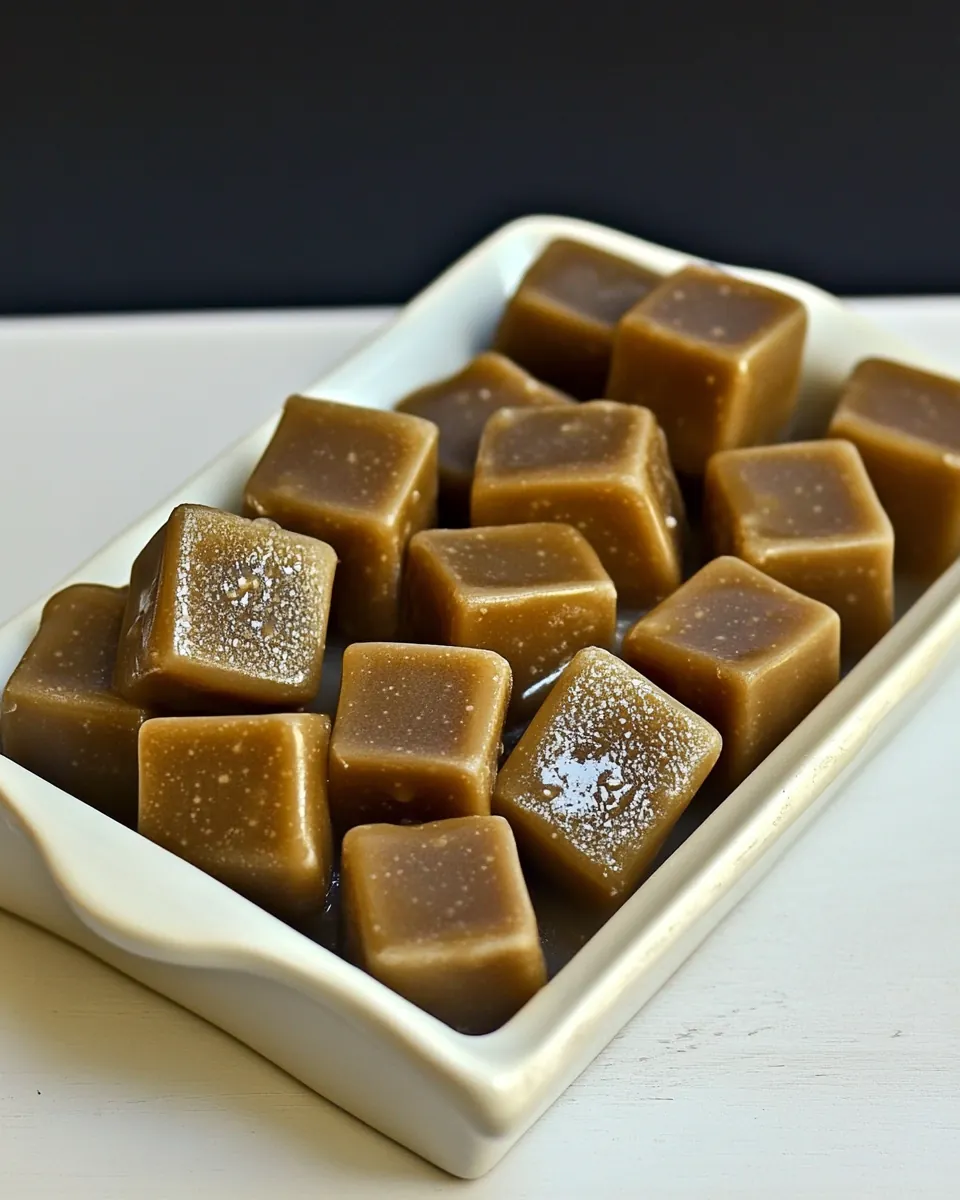
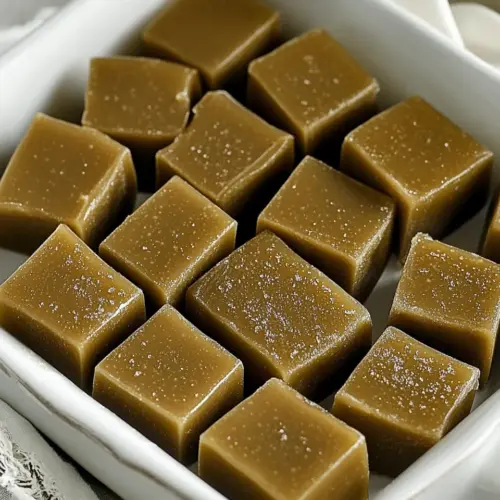
- Cut into 1-inch rectangles or squares: Cutting reveals the interior color and guarantees uniform serving size. Use a sharp knife and a decisive motion to create clean edges, wiping the blade between passes if the candy sticks. If you cut too soon the pieces will stick and deform; wait until firm but still slightly yielding for best shape.
- Wrap in wax paper or dip in chocolate: Wrapping each piece in wax paper keeps them fresh and prevents sticking, and dipping in tempered chocolate provides a glossy, contrasting shell if desired. The act of wrapping also lets you inspect texture and symmetry. A common mistake is skipping wrappers, which leads to clumped pieces and messy storage; take the time to individually wrap or coat for polished presentation.
Variations to Try
There are a few playful directions to take these caramels. You can fold in textures, coat in chocolate, or alter the final cut to suit gifting. Below are detailed ideas to experiment with, each aiming to respect the original balance while adding a unique twist.
- Nutty twist Fold in roasted and cooled chopped nuts for crunchy contrast, making sure to fold gently to keep pieces intact; toast the nuts first to amplify flavor and avoid adding them early which could soften their crunch.
- Chocolate dipped Dip cooled squares in tempered dipping chocolate for a glossy shell, letting excess drip off before setting on parchment; tempering is key for snap and shine so avoid melting chocolate too hot.
- Smaller batch idea Cut the recipe into half if you want fewer pieces, but maintain ratios exactly, and monitor temperature as smaller volumes can heat faster than expected.
- Gift presentation Wrap each square in wax paper rectangles and box them with tissue, labeling varieties if you added nuts or chocolate; presentation extends the joy of the gift.
- Extra creamy Slightly increase the proportion of whipping cream for a silkier mouthfeel, but note this may require a longer cook to reach the same firmness and you should watch temperature closely.
What Goes Well With This Homemade Fannie Mae Caramels
These caramels pair beautifully with simple beverages and make excellent holiday gifts or snack table additions. Think of them as a sweet component that complements coffee breaks, dessert boards, and cozy gatherings.
- Serve with coffee The slight bitterness of brewed coffee balances the sweetness, and the butter and cream in the caramel emphasize a rich mouthfeel alongside each sip.
- Include on dessert boards Offer the caramels alongside dried fruits and nuts, placing wrapped squares next to small bowls of extras for textural variety and easy grazing.
- Holiday gifting Pack into tins or boxes for thoughtful presents; these hold up well when stored in a cool place, making them ideal for Thanksgiving and fall gatherings.
- Storage tips Keep wrapped pieces in an airtight container at cool room temperature to maintain chewiness, and avoid refrigeration which can make them too firm.
- Seasonal pairing These are especially fitting for fall, matching warm spices and autumnal gatherings where rich sweets are welcome.
FAQ
Conclusion
These caramels stand out for their rich, buttery flavor and satisfyingly chewy texture that reward patience and careful cooking. Try the recipe to experience how simple ingredients combine into a polished, nostalgic treat, perfect for sharing or gifting. You will likely find that mastering the soft ball stage builds confidence for more candy projects, and that the joy of wrapping tiny parcels of sweetness makes the effort worthwhile. Enjoy the process and the smiles these caramels will bring to anyone who tastes them.
Homemade Fannie Mae Caramels
Equipment
- Candy thermometer
Ingredients
- 2 cups light corn syrup Provide sweetness and prevent large sugar crystallization while contributing to chewy texture; helps control moisture and sets the caramel base when heated to the correct temperature.
- 14 ounces sweetened condensed milk Add rich, concentrated dairy sweetness and creaminess while intensifying caramel flavor; supplies lactose and milk solids that promote browning and smooth, fudgy structure.
- 1 1/2 cups milk Contribute additional liquid dairy to balance viscosity and aid in even heating; supply lactose and proteins that help develop flavor and tender chew.
- 1 cup whipping cream Deliver extra fat and richness to create a luxurious, smooth mouthfeel; increase creaminess and help produce a soft, pliable caramel once cooled.
- 1 cup butter Introduce fat that enriches flavor, increases tenderness, and aids in smooth texture; helps prevent graininess and supports a glossy finish when incorporated.
- 4 cups sugar Provide bulk sweetening that caramelizes during cooking to develop color, flavor, and structure; contributes to firmness and chew when heated to the appropriate stage.
- 2 teaspoons vanilla Impart aromatic sweetness and round out flavors with warm vanilla notes; enhances overall depth and masks any cooked dairy edge.
- 2 cups chopped nuts if desired Offer optional textural contrast and nutty flavor when stirred into or sprinkled atop caramels; add crunch and visual interest to each bite.
- Tempered dipping chocolate if preferred or wax paper cut into rectangles Serve as an optional coating for a glossy finish or as a nonstick surface for cooling and storing; protect caramels and make handling or presentation easier.
Instructions
- Butter a 9 X 13 baking pan. In heavy 6 quart Dutch oven, combine sugar, corn syrup, condensed milk, milk, cream and butter. Place over medium heat and stir occasionally with wooden spoon until comes to boil. Clip on candy thermometer.: The smell of melted butter against a warm pan is comforting, and prepping the pan first prevents frantic scraping later. Greasing thoroughly ensures the caramel releases cleanly, and it protects edges that might otherwise stick. A common mistake is under-greasing which makes cutting a chore; be generous but avoid pooling fat that could seep into the finished candy.
- Please note it can take the sugar a long time to reach the proper temperature, be patient.: As you add the ingredients to a heavy pot, notice the cool, dense texture of the mix before heat. The corn syrup and sugar start to glisten, and the dairy components temper the mixture. Using a heavy Dutch oven helps distribute heat evenly, which is crucial to prevent scorching. Avoid using a thin pot, which can cause hot spots and burnt flavor.
- Cook stirring constantly until reaches 240 degrees or soft ball stage. Remove from heat. Stir in vanilla and nuts. Pour without scraping into pan. Allow to stand overnight. Cut into 1-inch rectangles or squares. Wrap in wax paper or dip in chocolate.: You will hear the first soft bubbling and smell a sweet steam rising as the mixture warms. Stirring gently distributes heat and dissolves the sugar into the dairy base. If you stir too vigorously, you may introduce air bubbles, but not stirring at all risks local burning. Balance a steady, patient stir with occasional pauses to let the surface warm evenly.
- Clip on candy thermometer: When the mixture has reached a rolling boil, attach your candy thermometer so the bulb sits in the syrup but not touching the pot bottom, which could read falsely high. A reliable temperature reading is the single best predictor of success, so make sure the thermometer is secure. A common error is placing the thermometer against the pan, which will overstate the temperature and lead to an undercooked batch.
- Please note it can take the sugar a long time to reach the proper temperature, be patient: The slow ascent to the soft ball stage requires calm, because the mixture will thicken gradually and the bubbling will become more vigorous. You might be tempted to raise the heat, but that can cause uneven cooking and scorching; maintain medium heat and accept the wait. If the mixture begins to brown too quickly, reduce heat and adjust your stirring pace.
- Cook stirring constantly until reaches 240 degrees or soft ball stage: As you stir constantly, the mixture will become thicker and move more slowly, producing a deeper, toasted aroma. At around 240 degrees you can drop a small amount into cold water to confirm that it forms a soft ball, which signals the right firmness. A frequent slip is stopping stirring too soon, which invites grainy texture; keep the spoon moving and listen for a change in the sound of the bubbling.
- Remove from heat: When the target temperature is reached, taking the pot off the heat immediately halts further cooking and prevents overshoot. You will feel the weight of the pot as the mixture settles, and the residual heat will continue to carry it a bit higher if left on the burner. A top error here is lingering on heat, which hardens caramels more than desired, so transfer quickly to a safe spot.
- Stir in vanilla and nuts: Adding vanilla at this cooler stage preserves its aroma, while folding in the chopped nuts distributes textural contrast. The steam will carry the vanilla scent and the nuts will hiss subtly as they meet the hot caramel. If you add vanilla too early the volatile flavors will evaporate, and if you overmix you may crush nuts into powder instead of retaining bite.
- Pour without scraping into pan: Pour the hot caramel into the prepared pan, allowing it to level naturally. Avoid scraping the pot sides, which often hold slightly thicker, cooked sugar that can create hard spots. The surface will settle with a glossy sheen, and you will notice steam easing off. A typical misstep is scraping and transferring hardened fragments into the pan, causing uneven texture.
- Allow to stand overnight: Let the pan rest at room temperature so the caramels set slowly, developing chewiness and flavor. Overnight chilling is gentle and prevents condensation that could soften the candies. Do not refrigerate aggressively, which can change texture and make them too firm. Resist the temptation to cut early, as under-set caramels will smear rather than slice neatly.
- Cut into 1-inch rectangles or squares: Cutting reveals the interior color and guarantees uniform serving size. Use a sharp knife and a decisive motion to create clean edges, wiping the blade between passes if the candy sticks. If you cut too soon the pieces will stick and deform; wait until firm but still slightly yielding for best shape.
- Wrap in wax paper or dip in chocolate: Wrapping each piece in wax paper keeps them fresh and prevents sticking, and dipping in tempered chocolate provides a glossy, contrasting shell if desired. The act of wrapping also lets you inspect texture and symmetry. A common mistake is skipping wrappers, which leads to clumped pieces and messy storage; take the time to individually wrap or coat for polished presentation.
Notes
- Nutty twist Fold in roasted and cooled chopped nuts for crunchy contrast, making sure to fold gently to keep pieces intact; toast the nuts first to amplify flavor and avoid adding them early which could soften their crunch.
- Chocolate dipped Dip cooled squares in tempered dipping chocolate for a glossy shell, letting excess drip off before setting on parchment; tempering is key for snap and shine so avoid melting chocolate too hot.
- Smaller batch idea Cut the recipe into half if you want fewer pieces, but maintain ratios exactly, and monitor temperature as smaller volumes can heat faster than expected.
- Gift presentation Wrap each square in wax paper rectangles and box them with tissue, labeling varieties if you added nuts or chocolate; presentation extends the joy of the gift.
- Extra creamy Slightly increase the proportion of whipping cream for a silkier mouthfeel, but note this may require a longer cook to reach the same firmness and you should watch temperature closely.