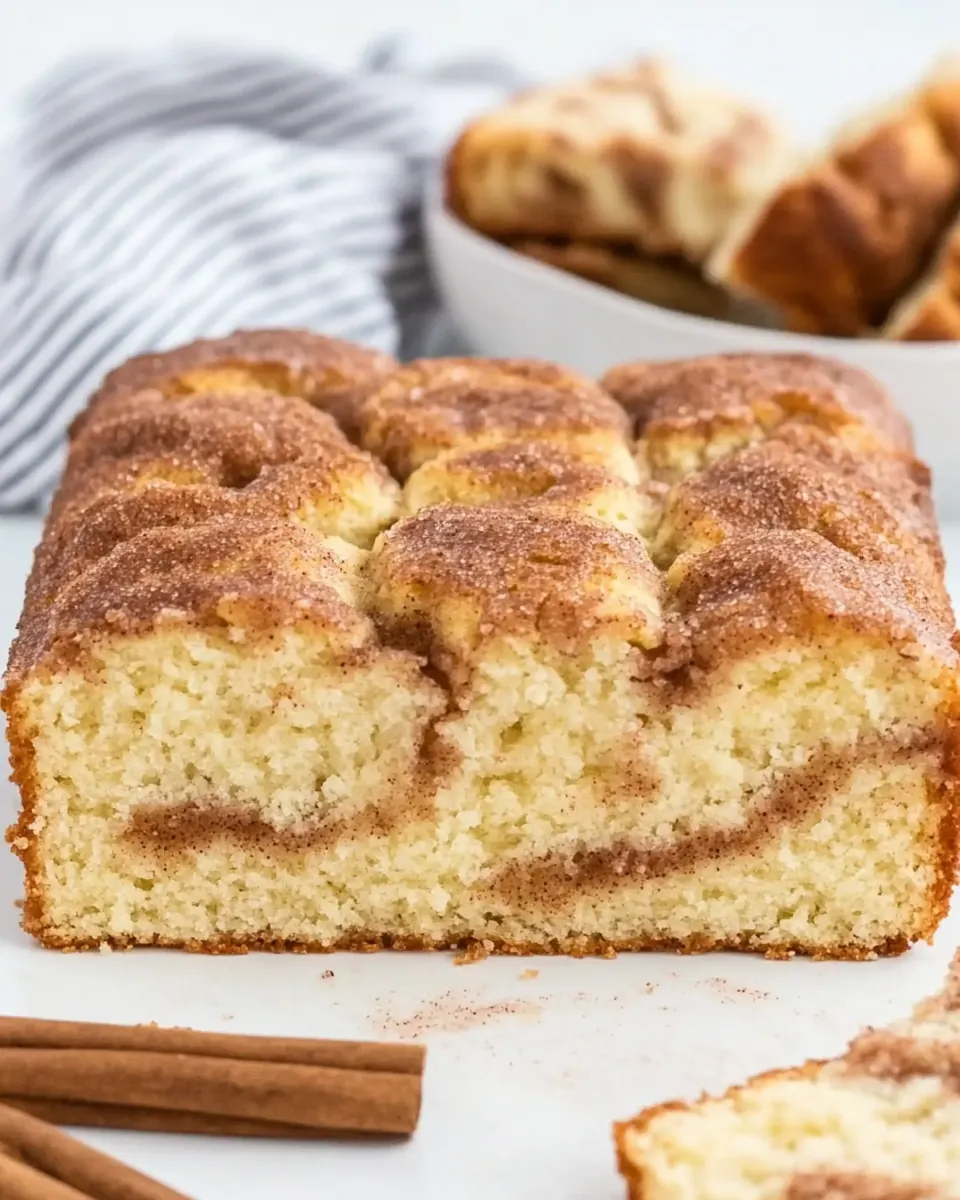
Snickerdoodle Bread
Snickerdoodle Bread is one of those nostalgic loaves I reach for when I want something warmly spiced and reliably comforting. The first time I baked this loaf I remember the kitchen filling with the scent of cinnamon and butter, and how everyone in the house seemed to pause in the hallway as if pulled by a friendly magnet. I kept sneaking small slices while the rest cooled, each bite a soft, slightly tangy, and sugar kissed slice that made the morning feel cozier than usual.
Over the years I have tweaked how I layer the batter and the swirl so each slice shows a pretty ribbon of cinnamon sugar. I love how the crumb stays tender thanks to a little sour cream and the way the top caramelizes into a lightly crisp crust. When I want a quick celebration or a thoughtful neighbor gift, I slice a loaf, wrap it in parchment, and feel silly proud handing it over like a little edible hug.
Recipe Snapshot
1 hr 25 mins
25 mins
60 mins
Medium
250 kcal
American
Gluten-Free, Low FODMAP
Desserts
1 loaf pan 8 1/2″ x 4 1/2″ or 9″ x 12″
Why We Love This Snickerdoodle Bread
Comforting, familiar flavor
I adore this recipe because the flavor profile is instantly recognizable. The combination of cinnamon and sugar brings that classic snickerdoodle character into a tender loaf. Each bite brings a comforting warmth that makes it perfect for quieter mornings or a mid afternoon treat with tea.
Simple, pantry friendly ingredients
This loaf shines because it relies on ingredients most home cooks keep on hand. With basics like all purpose flour, butter, and a touch of vanilla, you can pull this together without a special trip to the store. I love that accessibility, it makes it a go to for last minute baking urges.
Great texture balance
The tender crumb created by the addition of sour cream and milk keeps the bread moist while the cinnamon sugar swirl adds pockets of slightly crunchy, sweet contrast. I value that juxtaposition, it keeps each slice interesting rather than one note all the way through.
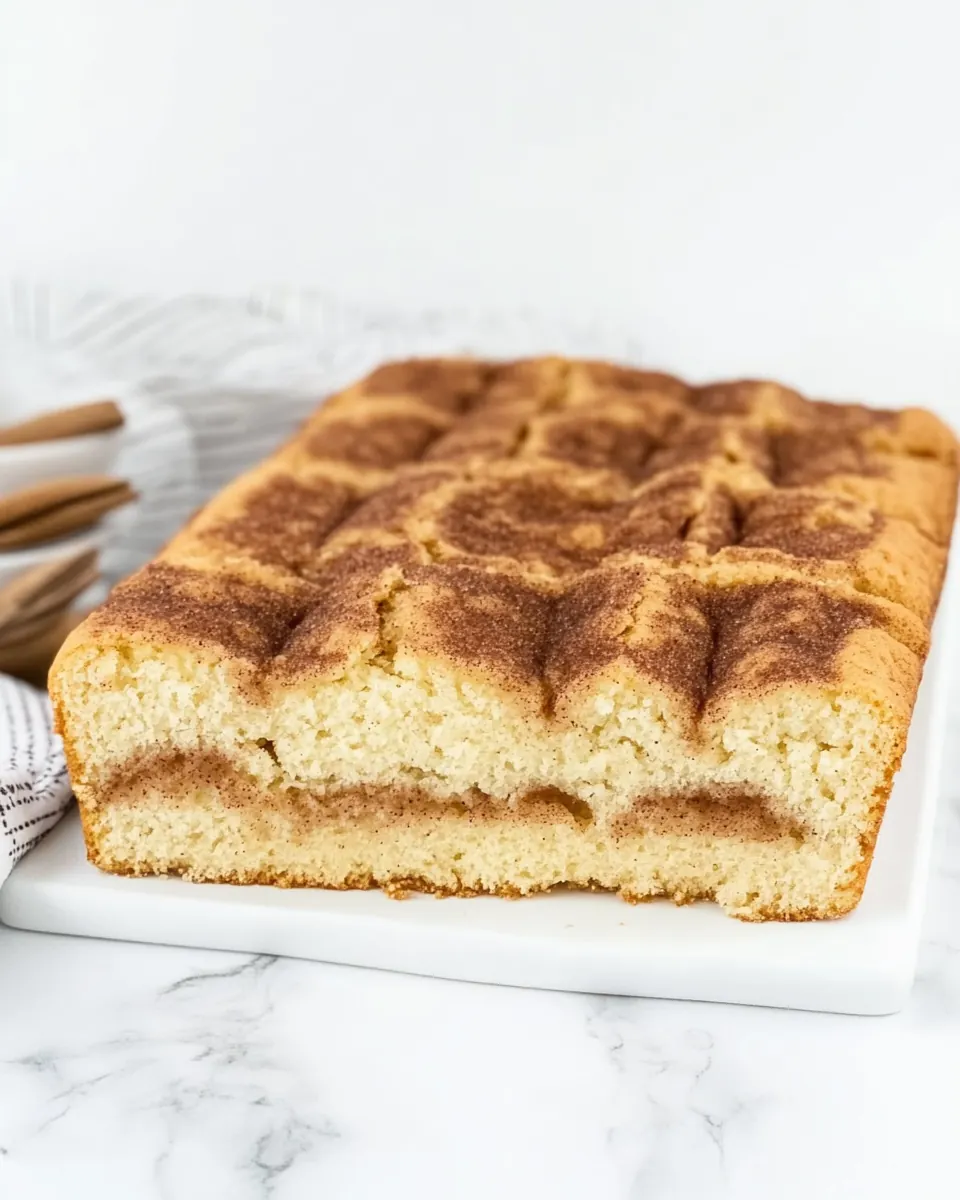
Visually appealing swirl
I find the marbled interior really pleasing to slice into, especially when you get that generous ribbon of cinnamon sugar in every piece. It feels a bit celebratory even for an ordinary day, and I often get compliments about how pretty the loaf looks when served.
Flexible for gifting or gatherings
This recipe scales well and travels nicely, which is why I bring it to potlucks and give it as a small gift. It stays fresh for a couple of days at room temperature, and it reheats beautifully if you want to refresh that just baked warmth.
Main Ingredients for Snickerdoodle Bread

These ingredients form a straightforward but balanced lineup, where each player has a clear job. The dairy keeps the loaf tender and moist, the all purpose flour and baking powder give structure and lift, and the cinnamon layered with sugar provides that classic snickerdoodle personality. Together they create a loaf that is soft, slightly tangy, and warmly spiced.
- 6 tablespoons butter unsalted, softened: Soften to room temperature and cream with sugars to create a light, aerated base; imparts richness and moisture to the loaf while helping incorporate air for tender crumb. Use unsalted to better control overall salt level in the batter.
- 1/2 cup white sugar: Cream together with butter to help dissolve and aerate the mixture; contributes sweetness and helps caramelize the crust during baking. Opt for granulated white sugar to achieve a clean, neutral sweetness that balances brown sugar’s molasses notes.
- 1/2 cup brown sugar: Provide deep, molasses-like sweetness and extra moisture; helps keep the bread soft and adds complex flavor and slight chewiness. Incorporate early with butter to create a uniformly sweetened batter and contribute to browning.
- 2 large eggs: Beat in to bind ingredients, incorporate air, and add structure through protein coagulation during baking; eggs also help emulsify fat and liquids for a smooth batter. Use large eggs for consistent volume and texture in quick breads.
- 1/2 cup milk: Add as a thinning liquid to adjust batter consistency and contribute a mild dairy richness; helps solubilize sugar and distribute flavors evenly. Use whole milk for balanced fat content and tenderness.
- 1/2 cup sour cream: Fold in to add tangy moisture and tenderize the crumb through acidity; sour cream enriches flavor and contributes to a moist, tender texture. Its acid reacts with leaveners for subtle lift and improved crumb structure.
- 2 teaspoons vanilla extract: Flavor the batter with warm, aromatic notes and enhance overall sweetness perception; vanilla harmonizes other flavors and rounds out the cinnamon. Use pure extract for the best, natural flavor.
- 2 cups all purpose flour: Provide the primary dry structure and bulk for the bread; flour’s proteins form gluten that gives the loaf body and crumb. Measure accurately and sift if needed to avoid dense results.
- 1 tablespoon baking powder: Leaven the batter by releasing gases and promoting rise when baked; baking powder produces lift for a light, tender crumb. Use fresh baking powder for reliable rising power.
- 1/2 teaspoon salt: Season the batter to balance and enhance sweetness while strengthening gluten slightly; salt brightens flavors and prevents the loaf from tasting flat. Use fine salt to ensure even distribution.
- 1/3 cup brown sugar: Create a cinnamon–sugar swirl or topping, adding concentrated sweet and molasses notes; brown sugar binds well with cinnamon for a moist, flavorful layer. Sprinkle or layer to achieve pockets of caramelized sweetness.
- 1/3 cup granulated sugar: Provide a crisp, sugary contrast when combined with cinnamon for a topping or swirl; granulated sugar contributes crunch and extra sweetness. Use fine granulated sugar to dissolve partially and create a pleasant texture.
- 1 tablespoon cinnamon: Season the brown–sugar mixture with warm, aromatic spice to create the signature snickerdoodle flavor; cinnamon adds depth and a comforting aroma. Adjust amount to preference but maintain balance with sugar for a classic taste.
Cooking Instructions for Snickerdoodle Bread

I find this recipe forgiving, and the techniques are straightforward if you pay attention to a few small details. Below I expand each direction into detailed, sensory rich guidance so you can follow along like I am standing beside you. Read each step slowly and trust your senses as you bake.
- Preheat the oven to 350 degrees. Cut a piece of parchment paper the size of the loaf pan (8 1/2 inches x 4 1/2 inches, a standard bread pan) so it lays over the wider part of the pan from right to left. Lightly oil the other two sides of the pan not covered in parchment.: When you preheat, notice the faint warm, dry smell that fills the kitchen as the oven comes to temperature, it signals the start of the transformation. A fully preheated oven ensures even rise and reliable browning, which is why I always set the timer early and wait the extra few minutes. A common mistake is placing the loaf in an oven that is not hot enough, which will cause it to bake slowly and potentially sink in the center. If your oven runs hot or cold, use an oven thermometer to confirm accuracy so the loaf bakes evenly.
- Cream together butter, 1/2 cup white sugar and 1/2 cup brown sugar with an electric mixer.: The tactile action of trimming parchment gives a clean fit and prevents sticking, making removal effortless. I look for a snug sheet that covers the base and sides it will help lift the loaf out later. If the parchment is too short the bread may stick to the pan edges when cooling, so err on the side of a slightly larger piece and fold down any excess. Avoid getting oil or batter on the exposed edges of the parchment or the loaf may brown unevenly.
- Add eggs, milk, sour cream and vanilla to the bowl and mix well until combined.: Rubbing a thin film of oil over the uncovered interior surfaces ensures the loaf releases cleanly and encourages an even golden crust. I use a pastry brush or paper towel to spread the oil and check for glossy coverage. Too much oil pools and can make the bottom greasy, while too little can cause sticking, so aim for a light, even coat.
- In a medium bowl mix together flour, baking powder and salt.: As you whip the butter and sugars, listen for the quietening of the mixer and watch the color shift to a paler, fluffier texture, that is the air being incorporated. This aeration helps the loaf achieve a tender lift and contributes to a delicate crumb. A common error is using cold butter, which will not cream properly and yields a dense batter; let butter soften until it yields gently to your finger.
- Add the flour mixture to the wet ingredients and stir until just combined.: Once these wet ingredients are folded in the batter will become silkier and the aroma will deepen with the vanilla . The sour cream adds tang and moisture, producing a more tender interior. Overmixing after adding eggs can break down the incorporated air, so mix until just uniform and stop when the batter looks cohesive and slightly glossy.
- In a third bowl mix together the cinnamon, topping ingredients, brown sugar, white sugar and cinnamon in a small bowl. A fork works well for this.: Combining the dry components ensures the baking powder and salt distribute evenly, preventing pockets of leavener or an overly salty bite. Whisk until homogenous and sift if clumpy, especially in humid conditions. A frequent mistake is adding the flour mixture too quickly to the wet ingredients, which can cause lumps; measure carefully and stir to break any small clumps before combining.
- Layer the batter and swirl mixture, starting with 1/3 of the batter in the bottom of the prepared pan. Add 1/3 of the cinnamon mixture to the batter, enough to cover the batter. Pour another 1/3 of the batter into the pan carefully smoothing it out, then layer 1/3 of the swirl mixture on top. Add the remaining batter smoothing it out carefully, then top with the remaining cinnamon mixture.: You will feel the batter thicken and see from glossy to slightly matte as gluten starts to form, but stop mixing as soon as streaks disappear to keep the loaf tender. The batter should be pourable yet hold a little shape when scooped. Overworking at this stage develops gluten and makes the final crumb chewy, so fold gently and with purpose.
- Place the snickerdoodle bread in the oven and bake for 55-60 minutes. Check doneness with a toothpick by inserting it into your loaf. The loaf is finished baking when the toothpick comes out clean with no batter clinging to the toothpick.: The swirl mixture should smell intoxicatingly warm and sweet once mixed, with a deep cinnamon aroma. I use a fork to break up any lumps and ensure the sugars are evenly moistened by the spice oils, which encourages small caramel pockets when baked. A common pitfall is making the swirl too dry, which won t meld into ribbons; if that happens, press the mixture slightly with a spoon to encourage cohesion.
- Let the bread cool for 10-15 minutes, then carefully remove from the pan. Cool the bread completely on a wire rack before slicing, then enjoy!: As you layer, notice how the batter spreads glossy and thick, and how the cinnamon sugar sits like a velvet blanket on top. The layering creates those signature ribbons, giving visual appeal and texture contrast. Press gently to level each layer but avoid compacting the batter which inhibits rise. A mistake here is mixing layers together inadvertently; take your time and smooth each layer separately for the best marbling.
- Add 1/3 of the cinnamon mixture to the batter, enough to cover the batter.: Sprinkling the swirl evenly is key, you want a generous but not overwhelming coating so each slice has a visible stripe. The sugar will begin to sink slightly as the batter settles, forming little sweet pockets. If you heap the mixture too heavily in one spot it may create a dense, overly sweet area in the finished loaf, so distribute it evenly by tapping the pan lightly after sprinkling.
- Pour another 1/3 of the batter into the pan carefully smoothing it out, then layer 1/3 of the swirl mixture on top.: The second layer should sit cleanly atop the first swirl, and when you smooth it, the surface will show a few soft ripples. These ripples help the next swirl penetrate slightly and create a natural marbled pattern. If your batter is too thick to pour, loosen with a tablespoon of milk; too thin and the swirl will sink, so adjust sparingly.
- Add the remaining batter smoothing it out carefully, then top with the remaining cinnamon mixture.: The final smoothing should leave a level surface with that cinnamon sugar perched on top, ready to caramelize in the oven. That top sugar will crisp and form a delicate crust as it bakes, adding textural contrast. Avoid pressing the top swirl into the batter or you may lose the layered look, instead let it rest and bake as is.
- Place the snickerdoodle bread in the oven and bake for 55 to 60 minutes.: During baking the kitchen will fill with the scent of cinnamon and browned sugar, and you may hear a soft crack as the crust sets. The loaf should develop a golden brown top and pull slightly away from the pan edges. A common problem is underbaking, which leaves a gummy center; test with a toothpick inserted into the loaf center and check for crumbs rather than wet batter to confirm doneness.
- Check doneness with a toothpick by inserting it into your loaf.: When the toothpick comes out clean with no batter clinging, the interior is set and the texture will be tender but not wet. If crumbs cling, give it a few more minutes and recheck; ovens vary and a little extra time can make the difference. Resist opening the oven repeatedly in the final minutes as it lowers temperature and may extend baking time unnecessarily.
- Let the bread cool for 10 to 15 minutes, then carefully remove from the pan.: The brief cooling lets the crumb settle so the loaf holds together when lifted, and the residual steam makes pulling it from the parchment easier. Use the parchment to gently lift the loaf and set it on a wire rack. Trying to slice too soon is a common error, which can result in a gummy texture and messy slices, so be patient.
- Cool the bread completely on a wire rack before slicing, then enjoy!: As the loaf cools the crust firms slightly and slices cleanly without crumbling, releasing that final warm aroma when you cut into it. Serving at room temperature preserves the delicate crumb and accentuates the cinnamon ribbons. If you must slice warm, use a serrated knife and a gentle sawing motion to maintain structure.
Recipe Notes about Snickerdoodle Bread
This loaf benefits from simple, practical notes that make baking smoother and results more consistent. Below you will find expanded tips that build on the recipe and help with common questions and adjustments.
- Pan size matters Use a standard 8 1/2 inch by 4 1/2 inch loaf pan for the intended rise and texture, or a 9 inch loaf pan for a slightly thinner loaf. The pan dimension impacts baking time and the height of the loaf, so expect minor differences when substituting sizes.
- Softened butter for proper creaming Aim for butter that yields to a gentle press but is not greasy, this helps trap air when creaming with the sugars and creates a lighter crumb. If butter is too warm it will not produce the same structure.
- Room temperature eggs and dairy Using ingredients at room temperature helps them emulsify easily into the batter and reduces the chance of breaking the mixture. Cold ingredients can cause curdling or uneven texture.
- Even swirl distribution Divide the batter and cinnamon sugar into thirds as directed and spread each layer evenly for a consistent ribbon in every slice. Pressing too hard will blend the layers and reduce the marbling effect.
- Toothpick test is king Insert into the center to check for doneness; the toothpick should come out clean or with a few moist crumbs. If wet batter clings, continue baking and check again in five minute increments.
- Storage suggestions Wrap cooled slices in parchment or store in an airtight container at room temperature for up to two days, or freeze individual slices for longer keeping. Thaw at room temperature and warm gently if desired.
What to Serve Alongside Snickerdoodle Bread
This bread pairs wonderfully with simple touches and can be adapted for many occasions. Below are ideas for serving, occasions, storage, and seasonal pairings to make the most of each loaf.
- Morning coffee pairing Serve slices with a steaming cup of coffee or tea for a cozy breakfast, the warm cinnamon notes complement roast coffee especially well.
- Afternoon tea plate Arrange thin slices with a smear of softened butter on a small plate for an elegant afternoon offering at a casual tea or book club.
- Holiday brunch Present the loaf on a platter with fresh fruit and yogurt for a fall brunch spread, the spiced flavors pair nicely with crisp seasonal apples.
- Gift giving Wrap a cooled loaf in parchment and tie with twine for a thoughtful neighbor or hostess gift, it transports well and feels homemade and special.
- Storage tips For short term keeping store at room temperature in an airtight container up to two days, for longer storage freeze wrapped slices for up to two months and thaw as needed.
- Seasonal pairing In the fall this loaf shines with warm beverages and spiced ciders, while in milder months it works as a sweet snack with fresh berries for contrast.
FAQ
Conclusion
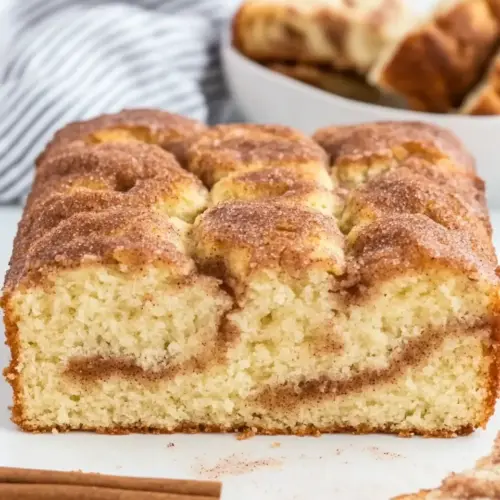
This Snickerdoodle Bread captures the best parts of a classic cookie translated into a tender, sliceable loaf, with warm cinnamon ribbons and a moist crumb that feels like comfort in every bite. Give it a try on a quiet morning or bake an extra loaf to share with friends, you ll love how the aromas fill your kitchen and how quickly a slice disappears. I hope this recipe becomes one of your go to bakes for cozy breakfasts and small celebrations.
Snickerdoodle Bread
Equipment
- 1 loaf pan 8 1/2" x 4 1/2" or 9" x 12"
Ingredients
- 6 tablespoons butter unsalted, softened Soften to room temperature and cream with sugars to create a light, aerated base; imparts richness and moisture to the loaf while helping incorporate air for tender crumb. Use unsalted to better control overall salt level in the batter.
- 1/2 cup white sugar Cream together with butter to help dissolve and aerate the mixture; contributes sweetness and helps caramelize the crust during baking. Opt for granulated white sugar to achieve a clean, neutral sweetness that balances brown sugar’s molasses notes.
- 1/2 cup brown sugar Provide deep, molasses-like sweetness and extra moisture; helps keep the bread soft and adds complex flavor and slight chewiness. Incorporate early with butter to create a uniformly sweetened batter and contribute to browning.
- 2 large eggs Beat in to bind ingredients, incorporate air, and add structure through protein coagulation during baking; eggs also help emulsify fat and liquids for a smooth batter. Use large eggs for consistent volume and texture in quick breads.
- 1/2 cup milk Add as a thinning liquid to adjust batter consistency and contribute a mild dairy richness; helps solubilize sugar and distribute flavors evenly. Use whole milk for balanced fat content and tenderness.
- 1/2 cup sour cream Fold in to add tangy moisture and tenderize the crumb through acidity; sour cream enriches flavor and contributes to a moist, tender texture. Its acid reacts with leaveners for subtle lift and improved crumb structure.
- 2 teaspoons vanilla extract Flavor the batter with warm, aromatic notes and enhance overall sweetness perception; vanilla harmonizes other flavors and rounds out the cinnamon. Use pure extract for the best, natural flavor.
- 2 cups all purpose flour Provide the primary dry structure and bulk for the bread; flour’s proteins form gluten that gives the loaf body and crumb. Measure accurately and sift if needed to avoid dense results.
- 1 tablespoon baking powder Leaven the batter by releasing gases and promoting rise when baked; baking powder produces lift for a light, tender crumb. Use fresh baking powder for reliable rising power.
- 1/2 teaspoon salt Season the batter to balance and enhance sweetness while strengthening gluten slightly; salt brightens flavors and prevents the loaf from tasting flat. Use fine salt to ensure even distribution.
- 1/3 cup brown sugar Create a cinnamon-sugar swirl or topping, adding concentrated sweet and molasses notes; brown sugar binds well with cinnamon for a moist, flavorful layer. Sprinkle or layer to achieve pockets of caramelized sweetness.
- 1/3 cup granulated sugar Provide a crisp, sugary contrast when combined with cinnamon for a topping or swirl; granulated sugar contributes crunch and extra sweetness. Use fine granulated sugar to dissolve partially and create a pleasant texture.
- 1 tablespoon cinnamon Season the brown-sugar mixture with warm, aromatic spice to create the signature snickerdoodle flavor; cinnamon adds depth and a comforting aroma. Adjust amount to preference but maintain balance with sugar for a classic taste.
Instructions
- Preheat the oven to 350 degrees. Cut a piece of parchment paper the size of the loaf pan (8 1/2 inches x 4 1/2 inches, a standard bread pan) so it lays over the wider part of the pan from right to left. Lightly oil the other two sides of the pan not covered in parchment.: When you preheat, notice the faint warm, dry smell that fills the kitchen as the oven comes to temperature, it signals the start of the transformation. A fully preheated oven ensures even rise and reliable browning, which is why I always set the timer early and wait the extra few minutes. A common mistake is placing the loaf in an oven that is not hot enough, which will cause it to bake slowly and potentially sink in the center. If your oven runs hot or cold, use an oven thermometer to confirm accuracy so the loaf bakes evenly.
- Cream together butter, 1/2 cup white sugar and 1/2 cup brown sugar with an electric mixer.: The tactile action of trimming parchment gives a clean fit and prevents sticking, making removal effortless. I look for a snug sheet that covers the base and sides it will help lift the loaf out later. If the parchment is too short the bread may stick to the pan edges when cooling, so err on the side of a slightly larger piece and fold down any excess. Avoid getting oil or batter on the exposed edges of the parchment or the loaf may brown unevenly.
- Add eggs, milk, sour cream and vanilla to the bowl and mix well until combined.: Rubbing a thin film of oil over the uncovered interior surfaces ensures the loaf releases cleanly and encourages an even golden crust. I use a pastry brush or paper towel to spread the oil and check for glossy coverage. Too much oil pools and can make the bottom greasy, while too little can cause sticking, so aim for a light, even coat.
- In a medium bowl mix together flour, baking powder and salt.: As you whip the butter and sugars, listen for the quietening of the mixer and watch the color shift to a paler, fluffier texture, that is the air being incorporated. This aeration helps the loaf achieve a tender lift and contributes to a delicate crumb. A common error is using cold butter, which will not cream properly and yields a dense batter; let butter soften until it yields gently to your finger.
- Add the flour mixture to the wet ingredients and stir until just combined.: Once these wet ingredients are folded in the batter will become silkier and the aroma will deepen with the vanilla . The sour cream adds tang and moisture, producing a more tender interior. Overmixing after adding eggs can break down the incorporated air, so mix until just uniform and stop when the batter looks cohesive and slightly glossy.
- In a third bowl mix together the cinnamon, topping ingredients, brown sugar, white sugar and cinnamon in a small bowl. A fork works well for this.: Combining the dry components ensures the baking powder and salt distribute evenly, preventing pockets of leavener or an overly salty bite. Whisk until homogenous and sift if clumpy, especially in humid conditions. A frequent mistake is adding the flour mixture too quickly to the wet ingredients, which can cause lumps; measure carefully and stir to break any small clumps before combining.
- Layer the batter and swirl mixture, starting with 1/3 of the batter in the bottom of the prepared pan. Add 1/3 of the cinnamon mixture to the batter, enough to cover the batter. Pour another 1/3 of the batter into the pan carefully smoothing it out, then layer 1/3 of the swirl mixture on top. Add the remaining batter smoothing it out carefully, then top with the remaining cinnamon mixture.: You will feel the batter thicken and see from glossy to slightly matte as gluten starts to form, but stop mixing as soon as streaks disappear to keep the loaf tender. The batter should be pourable yet hold a little shape when scooped. Overworking at this stage develops gluten and makes the final crumb chewy, so fold gently and with purpose.
- Place the snickerdoodle bread in the oven and bake for 55-60 minutes. Check doneness with a toothpick by inserting it into your loaf. The loaf is finished baking when the toothpick comes out clean with no batter clinging to the toothpick.: The swirl mixture should smell intoxicatingly warm and sweet once mixed, with a deep cinnamon aroma. I use a fork to break up any lumps and ensure the sugars are evenly moistened by the spice oils, which encourages small caramel pockets when baked. A common pitfall is making the swirl too dry, which won t meld into ribbons; if that happens, press the mixture slightly with a spoon to encourage cohesion.
- Let the bread cool for 10-15 minutes, then carefully remove from the pan. Cool the bread completely on a wire rack before slicing, then enjoy!: As you layer, notice how the batter spreads glossy and thick, and how the cinnamon sugar sits like a velvet blanket on top. The layering creates those signature ribbons, giving visual appeal and texture contrast. Press gently to level each layer but avoid compacting the batter which inhibits rise. A mistake here is mixing layers together inadvertently; take your time and smooth each layer separately for the best marbling.
- Add 1/3 of the cinnamon mixture to the batter, enough to cover the batter.: Sprinkling the swirl evenly is key, you want a generous but not overwhelming coating so each slice has a visible stripe. The sugar will begin to sink slightly as the batter settles, forming little sweet pockets. If you heap the mixture too heavily in one spot it may create a dense, overly sweet area in the finished loaf, so distribute it evenly by tapping the pan lightly after sprinkling.
- Pour another 1/3 of the batter into the pan carefully smoothing it out, then layer 1/3 of the swirl mixture on top.: The second layer should sit cleanly atop the first swirl, and when you smooth it, the surface will show a few soft ripples. These ripples help the next swirl penetrate slightly and create a natural marbled pattern. If your batter is too thick to pour, loosen with a tablespoon of milk; too thin and the swirl will sink, so adjust sparingly.
- Add the remaining batter smoothing it out carefully, then top with the remaining cinnamon mixture.: The final smoothing should leave a level surface with that cinnamon sugar perched on top, ready to caramelize in the oven. That top sugar will crisp and form a delicate crust as it bakes, adding textural contrast. Avoid pressing the top swirl into the batter or you may lose the layered look, instead let it rest and bake as is.
- Place the snickerdoodle bread in the oven and bake for 55 to 60 minutes.: During baking the kitchen will fill with the scent of cinnamon and browned sugar, and you may hear a soft crack as the crust sets. The loaf should develop a golden brown top and pull slightly away from the pan edges. A common problem is underbaking, which leaves a gummy center; test with a toothpick inserted into the loaf center and check for crumbs rather than wet batter to confirm doneness.
- Check doneness with a toothpick by inserting it into your loaf.: When the toothpick comes out clean with no batter clinging, the interior is set and the texture will be tender but not wet. If crumbs cling, give it a few more minutes and recheck; ovens vary and a little extra time can make the difference. Resist opening the oven repeatedly in the final minutes as it lowers temperature and may extend baking time unnecessarily.
- Let the bread cool for 10 to 15 minutes, then carefully remove from the pan.: The brief cooling lets the crumb settle so the loaf holds together when lifted, and the residual steam makes pulling it from the parchment easier. Use the parchment to gently lift the loaf and set it on a wire rack. Trying to slice too soon is a common error, which can result in a gummy texture and messy slices, so be patient.
- Cool the bread completely on a wire rack before slicing, then enjoy!: As the loaf cools the crust firms slightly and slices cleanly without crumbling, releasing that final warm aroma when you cut into it. Serving at room temperature preserves the delicate crumb and accentuates the cinnamon ribbons. If you must slice warm, use a serrated knife and a gentle sawing motion to maintain structure.
Notes
- Pan size matters Use a standard 8 1/2 inch by 4 1/2 inch loaf pan for the intended rise and texture, or a 9 inch loaf pan for a slightly thinner loaf. The pan dimension impacts baking time and the height of the loaf, so expect minor differences when substituting sizes.
- Softened butter for proper creaming Aim for butter that yields to a gentle press but is not greasy, this helps trap air when creaming with the sugars and creates a lighter crumb. If butter is too warm it will not produce the same structure.
- Room temperature eggs and dairy Using ingredients at room temperature helps them emulsify easily into the batter and reduces the chance of breaking the mixture. Cold ingredients can cause curdling or uneven texture.
- Even swirl distribution Divide the batter and cinnamon sugar into thirds as directed and spread each layer evenly for a consistent ribbon in every slice. Pressing too hard will blend the layers and reduce the marbling effect.
- Toothpick test is king Insert into the center to check for doneness; the toothpick should come out clean or with a few moist crumbs. If wet batter clings, continue baking and check again in five minute increments.
- Storage suggestions Wrap cooled slices in parchment or store in an airtight container at room temperature for up to two days, or freeze individual slices for longer keeping. Thaw at room temperature and warm gently if desired.