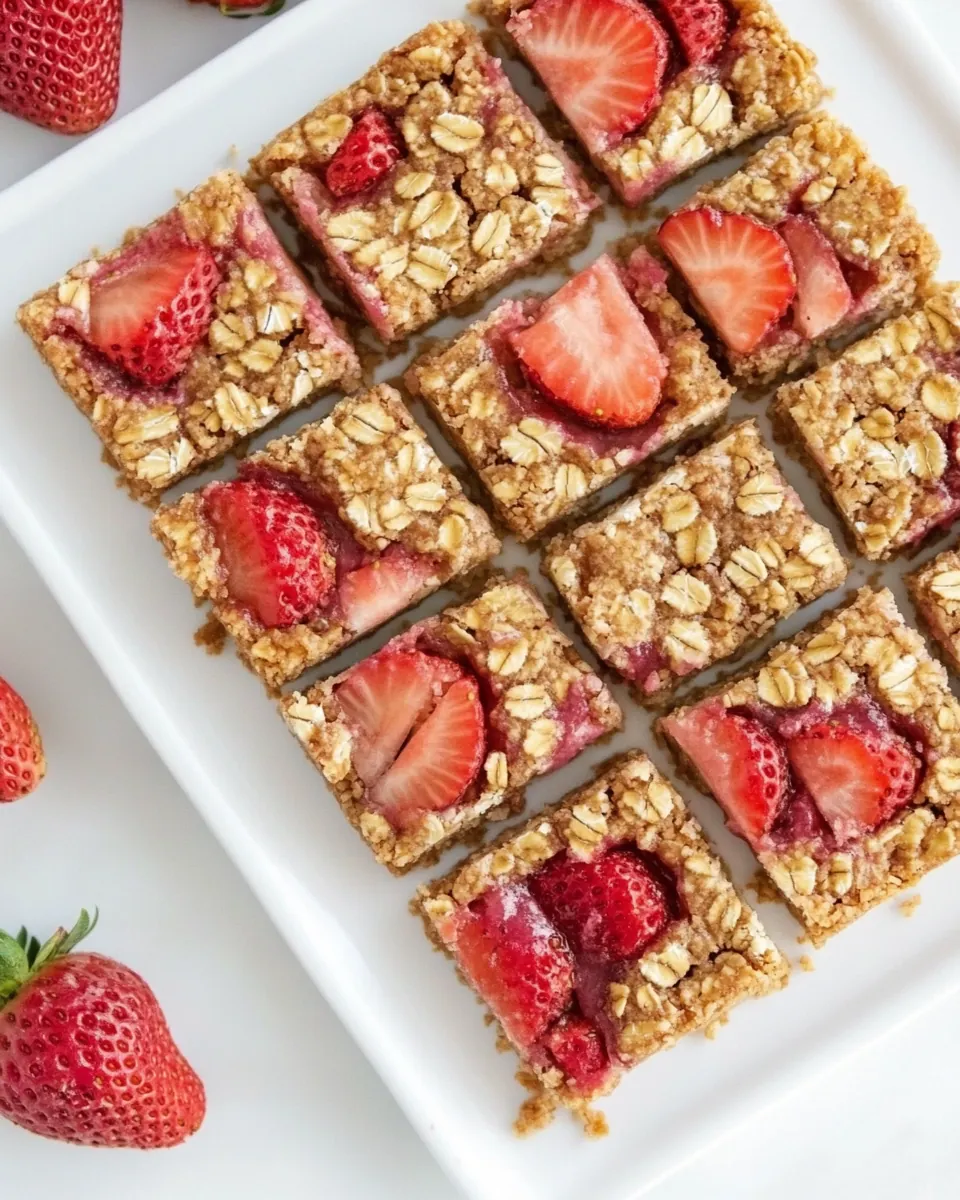
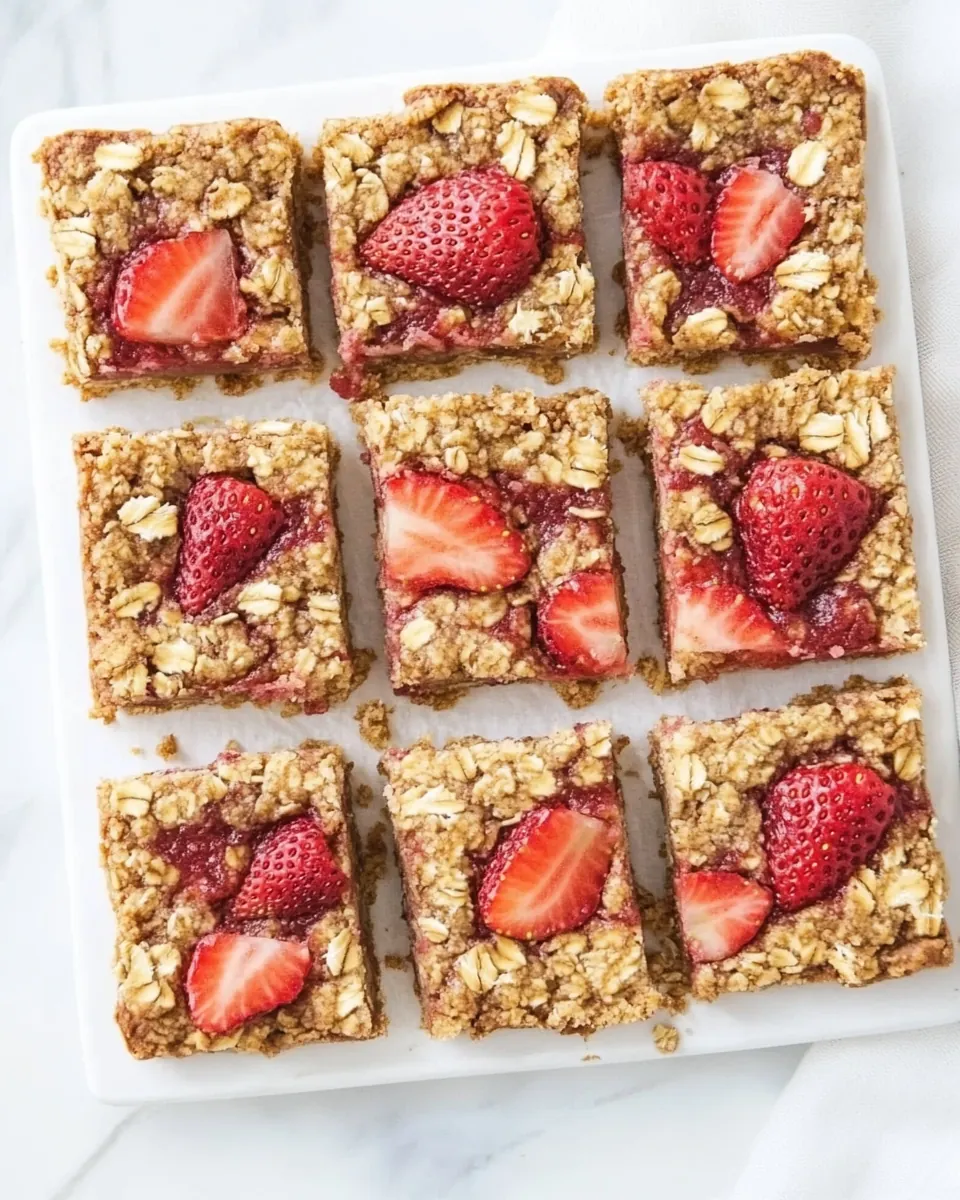
Strawberry Oatmeal Bars
Strawberry Oatmeal Bars began as one of those recipes I make when I want something homey, simple, and reliably comforting. The first time I baked these I was short on time but not on craving, and the mix of rolled oats, all purpose flour, and bright strawberry preserves felt like the perfect quick fix to soothe a hectic afternoon. I still remember the warm, fruity steam that filled the kitchen as they cooled on the rack, and how the top crumble held tiny flecks of lemon zest that made every bite sing.
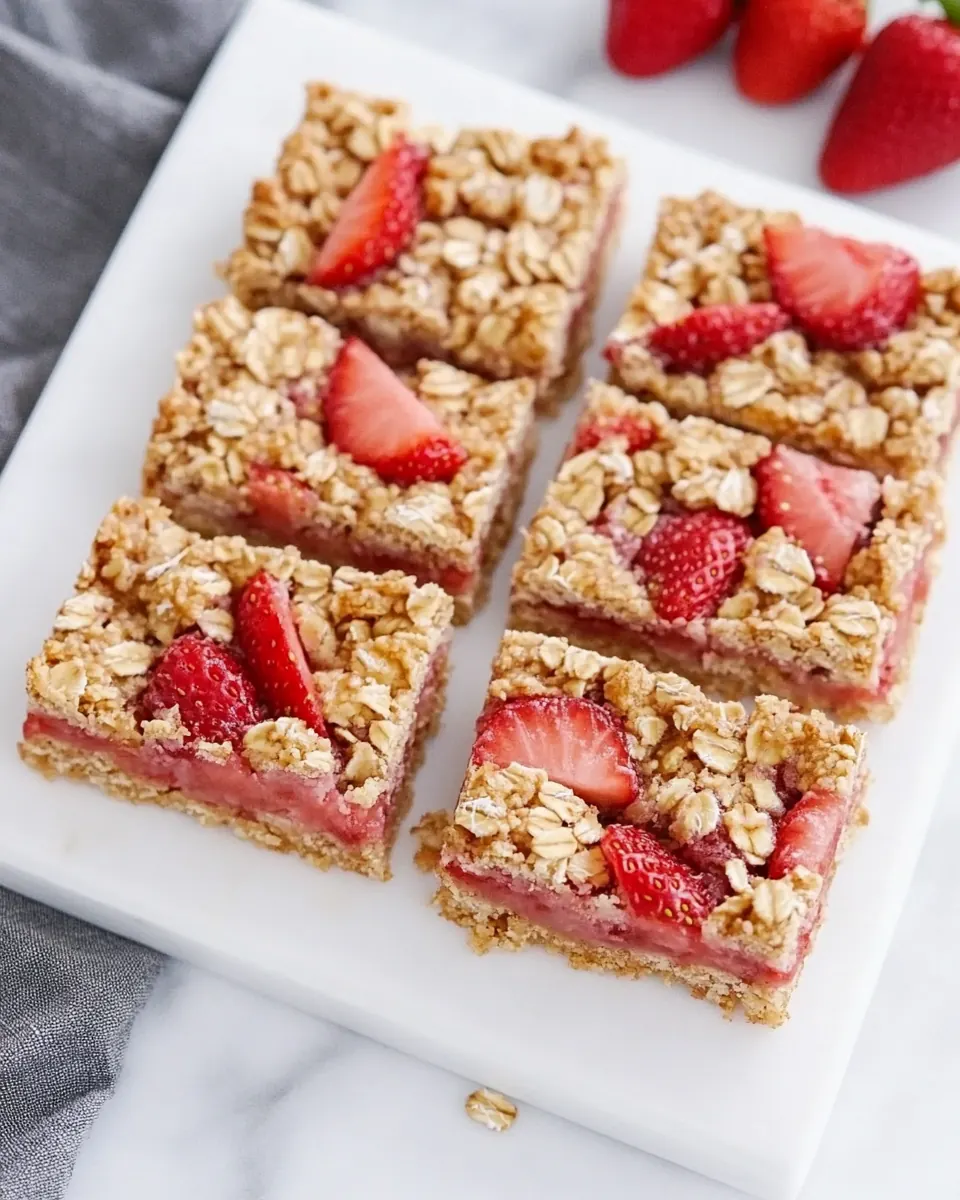
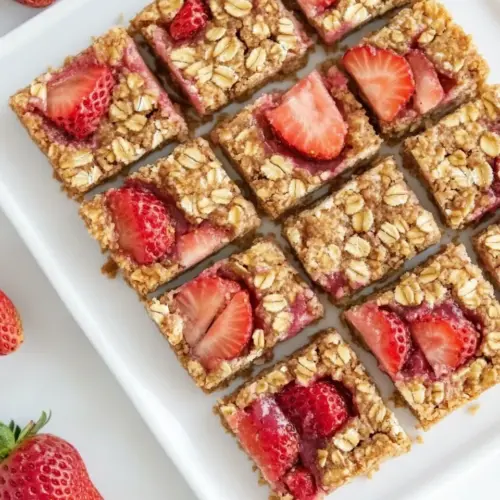
Over the years I have tweaked the balance of sweet and tart until the bars hit that sweet spot, where the crumb is tender yet holds together, and the fresh strawberries add bursts of juice against a toasted oat backdrop. I love bringing a pan of these to casual gatherings because they travel well and they vanish fast. My kids ask for them with a cup of tea, neighbors ask for the recipe, and I keep a container in the fridge for emergency snacks. If you enjoy modest fuss with wonderfully reliable results, you will find these bars a go to.
Recipe Snapshot
45 mins
10 mins
35 mins
Medium
150 kcal
American
Gluten-Free, Low FODMAP
Desserts
8×8 inch Baking Pan, parchment paper, Rolled Oats
What We Adore About This Strawberry Oatmeal Bars
Comforting texture that still feels wholesome
I adore how the combination of rolled oats and all purpose flour creates a crumb that is both tender and slightly chewy. The oats give a rustic mouthfeel that contrasts with the smoothness of the jam layer, so every bite feels balanced and satisfying.
Bright, fresh strawberry flavor
Using both strawberry preserves and finely diced strawberries gives a dual layer of fruit intensity. The jam creates a jammy, concentrated flavor, while the fresh pieces bring brightness and a little pop, which keeps the bars from tasting flat.
Easy to make, easy to share
This recipe is straightforward enough for a weeknight bake, yet scale friendly for a crowd. I can press the base into an 8×8 inch baking pan quickly, and the bars store well, which makes them a reliable choice for potlucks or lunchboxes.
Flexible for tweaks
There are a few small ways to change texture and flavor without changing the recipe soul. A touch of lemon zest brings brightness, while using a jam you love ensures the fruit note shines through. These tweaks let me tailor the bars to seasons and tastes.
Snackable, not too sweet
The balance of sugar with the oats and flour stops the bars from being cloying. They come together as a snack that feels indulgent but still friendly for everyday eating, which is why I keep this recipe in my regular rotation.
Essential Ingredients for Strawberry Oatmeal Bars
These ingredients work together with a clear purpose. The base relies on sturdy grains for structure, a bit of fat for tenderness, and a touch of sugar to balance fruit acidity. The preserves and fresh strawberries are the key players for flavor, while small additions like milk and vanilla knit the crumb into a cohesive bar. Together they produce bars that are sturdy enough to hold, yet soft and flavorful.
- 1 1/2 cup rolled oats: Provide hearty texture and fiber, creating the chewy base and topping for the bars; helps bind with melted butter and flour while offering a nutty flavor when baked.
- 1 cup all-purpose flour: Contribute structure and lightness to the bars, forming the dry framework that combines with oats and butter to hold the bars together when sliced.
- 1/2 cup unsalted butter (melted): Add rich flavor and moisture while helping bind the oat and flour mixture; melted form ensures even distribution and a tender, slightly crisp crumb when baked.
- 1 cup sugar: Supply sweetness and help with browning, softening the oat flour mixture and balancing the tartness of strawberries; dissolves into the batter to create a uniform sweet profile.
- 1/4 cup milk: Provide a bit of liquid to loosen the mixture and aid in cohesion, preventing dryness; helps dissolve sugar and evenly distribute flavor throughout the dough.
- 1 teaspoon vanilla extract: Impart fragrant aroma and a warm, sweet vanilla note that enhances the overall flavor; a small amount elevates sweetness perception and balances fruit flavors.
- 1/4 teaspoon salt: Enhance flavor by balancing sweetness with a touch of savory contrast; small quantity also strengthens gluten slightly and highlights other ingredients.
- 1/2 cup natural strawberry preserves: Contribute concentrated strawberry flavor and jammy sweetness that acts as the filling, adding moisture and a spreadable fruit layer that pairs with fresh diced strawberries.
- 1 cup finely diced strawberries: Bring fresh, juicy strawberry bursts and texture contrast to the bars, adding bright fruit flavor and small pockets of moisture that lighten the overall profile.
- 1 tablespoon fresh lemon zest () (optional): Provide bright citrus aroma and a zesty lift that accentuates the strawberry flavors; optional addition adds complexity and a fresh finish to each bite.
Putting Together Strawberry Oatmeal Bars
These directions are approachable, and with a little attention you can produce reliably beautiful bars. I walk through each stage slowly because small sensory cues tell you when you are on track. Have your 8×8 inch baking pan and parchment paper ready before you begin for a smooth flow.
- Preheat the oven to 350 degrees F and line an 8×8-inch baking pan with parchment paper, leaving a few inches overhang on two sides so you can easily lift the bars out when they're cooled.: As the oven warms you will notice a faint heat wave from the open door, and the air in your kitchen begins to feel cozy. This preheating step ensures even baking so the base cooks through while the top browns just right. If you skip this and place the pan in a cold oven you risk uneven texture, with an underbaked center. Keep the pan in the center rack for balanced airflow. When lining the pan, press the parchment into the corners so the dough sits flat. A common slip is cutting the parchment too short, which makes removing the bars difficult.
- To a medium bowl, add the oats, flour, sugar, melted butter, milk, vanilla, and salt. Stir well to combine into a uniform mixture. It will be thick and it should hold together easily when pressed between your fingers.: As you stir, the aroma of butter and vanilla will bloom, and the mixture will transform from dusty dry bits to a cohesive dough. The tactile check by pressing a bit between your fingers lets you judge moisture; it should hold without being sticky. This combination of textures is essential, because it determines how well the base will compress and bake. If the mixture seems too crumbly, your butter may be too cool or you might need a touch more milk. Overmixing can toughen the crumb, so fold gently until uniform.
- Set aside 1 cup of the batter to use as the topping.: Separating the topping gives you the crumble layer that puffs and browns attractively. The reserved dough will be slightly looser from the mixing, and when crumbled on top it creates the classic streusel look. Keep it chilled briefly if your kitchen is warm so it does not become greasy. A common mistake is forgetting to reserve this portion, which leaves you without a distinctive top texture.
- Add the remaining batter mixture to the bottom of the prepared pan, pressing evenly to cover completely.: Pressing the dough into the pan causes it to compact and form a stable base. Use even pressure and check the edges for complete coverage, because thin spots will brown faster. The visual cue to look for is a smooth, packed surface with no loose crumbs. If you press too hard you can compress all the air out and end up with a dense bar; press firmly but with a light, consistent touch across the whole pan.
- Evenly spread the strawberry preserves over the batter. Then, sprinkle on the strawberries and press them down very slightly. Sprinkle with lemon zest, if using to add more bright flavor.: As you spoon the preserves, you will see a glossy red layer forming, and spreading gently ensures the jam does not sink into the base. Add the diced strawberries in an even layer so each bar gets fruit. Pressing them down slightly helps them adhere without bruising. The lemon zest will glint in the jam, offering aromatic lift during baking. Avoid overloading with preserves, since excess jam can make the bars soggy in the middle.
- Crumble the remaining dough mixture over top to cover evenly and press it down slightly.: The topping will scatter into a textured blanket that bakes to a golden, slightly crunchy crust. When crumbling, aim for an even distribution so that large gaps do not expose too much jam. Pressing gently sets the crumbs so they bake as one cohesive layer without flattening them entirely. If you press too hard the topping will lose its crumble and become a compressed crust.
- Bake for 35-40 minutes or until lightly browned. Remove pan from the oven and let cool on a wire rack until room temperature.: During baking you will notice the kitchen filling with a warm, fruity aroma and the top turning a pale golden brown. The sound is quiet, but visually the edges will pull away slightly from the pan, and the center should look set not jiggly. Cooling on a wire rack prevents steam from condensing under the bars, which would make them soggy. A typical error is cutting into the bars while they are still hot, which causes them to fall apart; patience here rewards you with clean slices.
- Use the parchment paper to lift the cooled bars out of the pan. Slice into bars carefully using a serrated knife.: When fully cooled the bars will have a firm yet tender crumb, and the jam layer will be set. Lifting with the parchment gives a clean release. A serrated knife saws through the top crumble without crushing it, and wiping the blade between cuts prevents dragging jam across the next slice. Pressing down slowly but steadily as you cut helps maintain neat edges. Rushing this step can compress the bars and smear the jam.
Pro Tips and Tweaks

I like to keep a few small practices in mind that make these bars reliably great. The tips below expand on handling, storage, and flavor adjustments so you can adapt the recipe to your kitchen. Each tip starts with a short, bold phrase to highlight the main idea.
- Measure accurately: Use the spoon and level method for both all purpose flour and rolled oats to maintain texture. Too much flour dries the bars, while too little makes them fragile. A small kitchen scale takes the guesswork out of measuring and is worth the cost if you bake often.
- Pick the right jam: Choose a strawberry preserves you enjoy because it is a dominant flavor. If your jam is very runny, strain some liquid or choose a thicker preserve to avoid sogginess in the center. Homemade or jarred, the taste of the jam defines the bars.
- Chill if warm: If your kitchen or butter is warm, chill the mixed dough briefly before pressing for a better crumble texture. Cold dough holds its shape and develops a nice topping during baking. Avoid letting it get too firm, which makes pressing difficult.
- Use parchment with overhang: Lining the pan with parchment that overhangs makes removal effortless and prevents tearing. This small step yields clean slices and makes cleanup simpler. Be sure the paper sits flat so the bars bake evenly.
- Serrated knife for slicing: Cut with a serrated knife and wipe the blade between cuts to keep the crumble intact. Letting the bars cool completely is crucial for neat slices; warm bars will compress and become messy when cut.
- Store properly: Keep bars in an airtight container at room temperature for a few days or refrigerate for longer storage. Layer with parchment between rows to prevent sticking and preserve texture.
Accompaniments for Strawberry Oatmeal Bars
These bars partner beautifully with simple beverages and casual meals. Below are thoughtful serving ideas and storage guidance to help you present them for different occasions. Each list item highlights a practical approach or pairing.
- Casual coffee or tea service: Serve bars at breakfast or brunch with a pot of strong coffee or a bright tea. The bars are satisfying alongside a warm drink and work well for slow mornings when you want something comforting.
- Lunchbox treat: Pack a single bar with a sandwich for a midday sweet that is not overpowering. Wrap individually in parchment so they stay tidy and are easy to grab on the way out the door.
- Potluck offering: Bring a whole pan to a casual gathering. Cut into small squares for easy sharing. The bars travel well and require no assembly at the host site, which makes them a low stress option.
- Seasonal pairing: In spring, highlight the fresh strawberries with a light salad or fruit plate for a bright spread. The bars bridge dessert and snack, making them versatile for daytime celebrations.
- Storage tips: Keep bars in an airtight container at room temperature for up to three days, or refrigerate up to a week. For longer storage, freeze individual bars wrapped tightly and thaw at room temperature when ready to eat.
FAQ
Conclusion
These Strawberry Oatmeal Bars combine a tender, oat forward crumb with a jammy, fruit forward center to create a snack that is both familiar and satisfying. Give them a try when you want an easy bake that travels well and pleases a crowd, because they are forgiving and versatile. Make them for brunch, pack them for a picnic, or keep a pan on hand for an afternoon pick me up. I hope they become a go to in your kitchen the way they have in mine.
Strawberry Oatmeal Bars
Equipment
- 8x8-inch Baking Pan
- Parchment Paper
- Rolled Oats
Ingredients
- 1 1/2 cup rolled oats Provide hearty texture and fiber, creating the chewy base and topping for the bars; helps bind with melted butter and flour while offering a nutty flavor when baked.
- 1 cup all-purpose flour Contribute structure and lightness to the bars, forming the dry framework that combines with oats and butter to hold the bars together when sliced.
- 1/2 cup unsalted butter (melted) Add rich flavor and moisture while helping bind the oat and flour mixture; melted form ensures even distribution and a tender, slightly crisp crumb when baked.
- 1 cup sugar Supply sweetness and help with browning, softening the oat flour mixture and balancing the tartness of strawberries; dissolves into the batter to create a uniform sweet profile.
- 1/4 cup milk Provide a bit of liquid to loosen the mixture and aid in cohesion, preventing dryness; helps dissolve sugar and evenly distribute flavor throughout the dough.
- 1 teaspoon vanilla extract Impart fragrant aroma and a warm, sweet vanilla note that enhances the overall flavor; a small amount elevates sweetness perception and balances fruit flavors.
- 1/4 teaspoon salt Enhance flavor by balancing sweetness with a touch of savory contrast; small quantity also strengthens gluten slightly and highlights other ingredients.
- 1/2 cup natural strawberry preserves Contribute concentrated strawberry flavor and jammy sweetness that acts as the filling, adding moisture and a spreadable fruit layer that pairs with fresh diced strawberries.
- 1 cup finely diced strawberries Bring fresh, juicy strawberry bursts and texture contrast to the bars, adding bright fruit flavor and small pockets of moisture that lighten the overall profile.
- 1 tablespoon fresh lemon zest (optional) Provide bright citrus aroma and a zesty lift that accentuates the strawberry flavors; optional addition adds complexity and a fresh finish to each bite.
Instructions
- Preheat the oven to 350 degrees F and line an 8×8-inch baking pan with parchment paper, leaving a few inches overhang on two sides so you can easily lift the bars out when they're cooled.: As the oven warms you will notice a faint heat wave from the open door, and the air in your kitchen begins to feel cozy. This preheating step ensures even baking so the base cooks through while the top browns just right. If you skip this and place the pan in a cold oven you risk uneven texture, with an underbaked center. Keep the pan in the center rack for balanced airflow. When lining the pan, press the parchment into the corners so the dough sits flat. A common slip is cutting the parchment too short, which makes removing the bars difficult.
- To a medium bowl, add the oats, flour, sugar, melted butter, milk, vanilla, and salt. Stir well to combine into a uniform mixture. It will be thick and it should hold together easily when pressed between your fingers.: As you stir, the aroma of butter and vanilla will bloom, and the mixture will transform from dusty dry bits to a cohesive dough. The tactile check by pressing a bit between your fingers lets you judge moisture; it should hold without being sticky. This combination of textures is essential, because it determines how well the base will compress and bake. If the mixture seems too crumbly, your butter may be too cool or you might need a touch more milk. Overmixing can toughen the crumb, so fold gently until uniform.
- Set aside 1 cup of the batter to use as the topping.: Separating the topping gives you the crumble layer that puffs and browns attractively. The reserved dough will be slightly looser from the mixing, and when crumbled on top it creates the classic streusel look. Keep it chilled briefly if your kitchen is warm so it does not become greasy. A common mistake is forgetting to reserve this portion, which leaves you without a distinctive top texture.
- Add the remaining batter mixture to the bottom of the prepared pan, pressing evenly to cover completely.: Pressing the dough into the pan causes it to compact and form a stable base. Use even pressure and check the edges for complete coverage, because thin spots will brown faster. The visual cue to look for is a smooth, packed surface with no loose crumbs. If you press too hard you can compress all the air out and end up with a dense bar; press firmly but with a light, consistent touch across the whole pan.
- Evenly spread the strawberry preserves over the batter. Then, sprinkle on the strawberries and press them down very slightly. Sprinkle with lemon zest, if using to add more bright flavor.: As you spoon the preserves, you will see a glossy red layer forming, and spreading gently ensures the jam does not sink into the base. Add the diced strawberries in an even layer so each bar gets fruit. Pressing them down slightly helps them adhere without bruising. The lemon zest will glint in the jam, offering aromatic lift during baking. Avoid overloading with preserves, since excess jam can make the bars soggy in the middle.
- Crumble the remaining dough mixture over top to cover evenly and press it down slightly.: The topping will scatter into a textured blanket that bakes to a golden, slightly crunchy crust. When crumbling, aim for an even distribution so that large gaps do not expose too much jam. Pressing gently sets the crumbs so they bake as one cohesive layer without flattening them entirely. If you press too hard the topping will lose its crumble and become a compressed crust.
- Bake for 35-40 minutes or until lightly browned. Remove pan from the oven and let cool on a wire rack until room temperature.: During baking you will notice the kitchen filling with a warm, fruity aroma and the top turning a pale golden brown. The sound is quiet, but visually the edges will pull away slightly from the pan, and the center should look set not jiggly. Cooling on a wire rack prevents steam from condensing under the bars, which would make them soggy. A typical error is cutting into the bars while they are still hot, which causes them to fall apart; patience here rewards you with clean slices.
- Use the parchment paper to lift the cooled bars out of the pan. Slice into bars carefully using a serrated knife.: When fully cooled the bars will have a firm yet tender crumb, and the jam layer will be set. Lifting with the parchment gives a clean release. A serrated knife saws through the top crumble without crushing it, and wiping the blade between cuts prevents dragging jam across the next slice. Pressing down slowly but steadily as you cut helps maintain neat edges. Rushing this step can compress the bars and smear the jam.
Notes
- Measure accurately: Use the spoon and level method for both all purpose flour and rolled oats to maintain texture. Too much flour dries the bars, while too little makes them fragile. A small kitchen scale takes the guesswork out of measuring and is worth the cost if you bake often.
- Pick the right jam: Choose a strawberry preserves you enjoy because it is a dominant flavor. If your jam is very runny, strain some liquid or choose a thicker preserve to avoid sogginess in the center. Homemade or jarred, the taste of the jam defines the bars.
- Chill if warm: If your kitchen or butter is warm, chill the mixed dough briefly before pressing for a better crumble texture. Cold dough holds its shape and develops a nice topping during baking. Avoid letting it get too firm, which makes pressing difficult.
- Use parchment with overhang: Lining the pan with parchment that overhangs makes removal effortless and prevents tearing. This small step yields clean slices and makes cleanup simpler. Be sure the paper sits flat so the bars bake evenly.
- Serrated knife for slicing: Cut with a serrated knife and wipe the blade between cuts to keep the crumble intact. Letting the bars cool completely is crucial for neat slices; warm bars will compress and become messy when cut.
- Store properly: Keep bars in an airtight container at room temperature for a few days or refrigerate for longer storage. Layer with parchment between rows to prevent sticking and preserve texture.