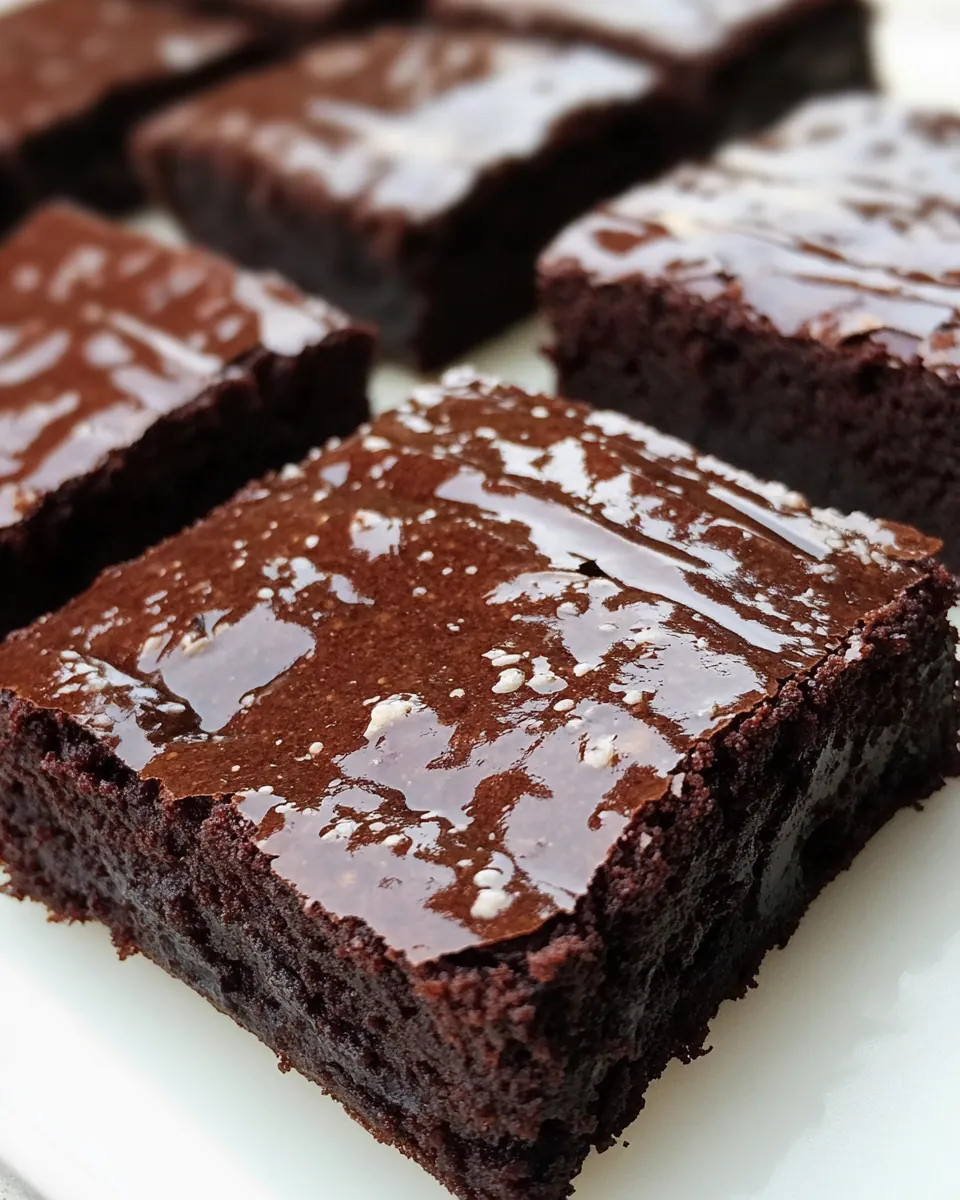
Fudgy Paleo Brownies
Fudgy Paleo Brownies came into my life on a rainy afternoon when I wanted something deeply chocolatey yet conscientious, and these brownies delivered exactly that comfort without compromise.
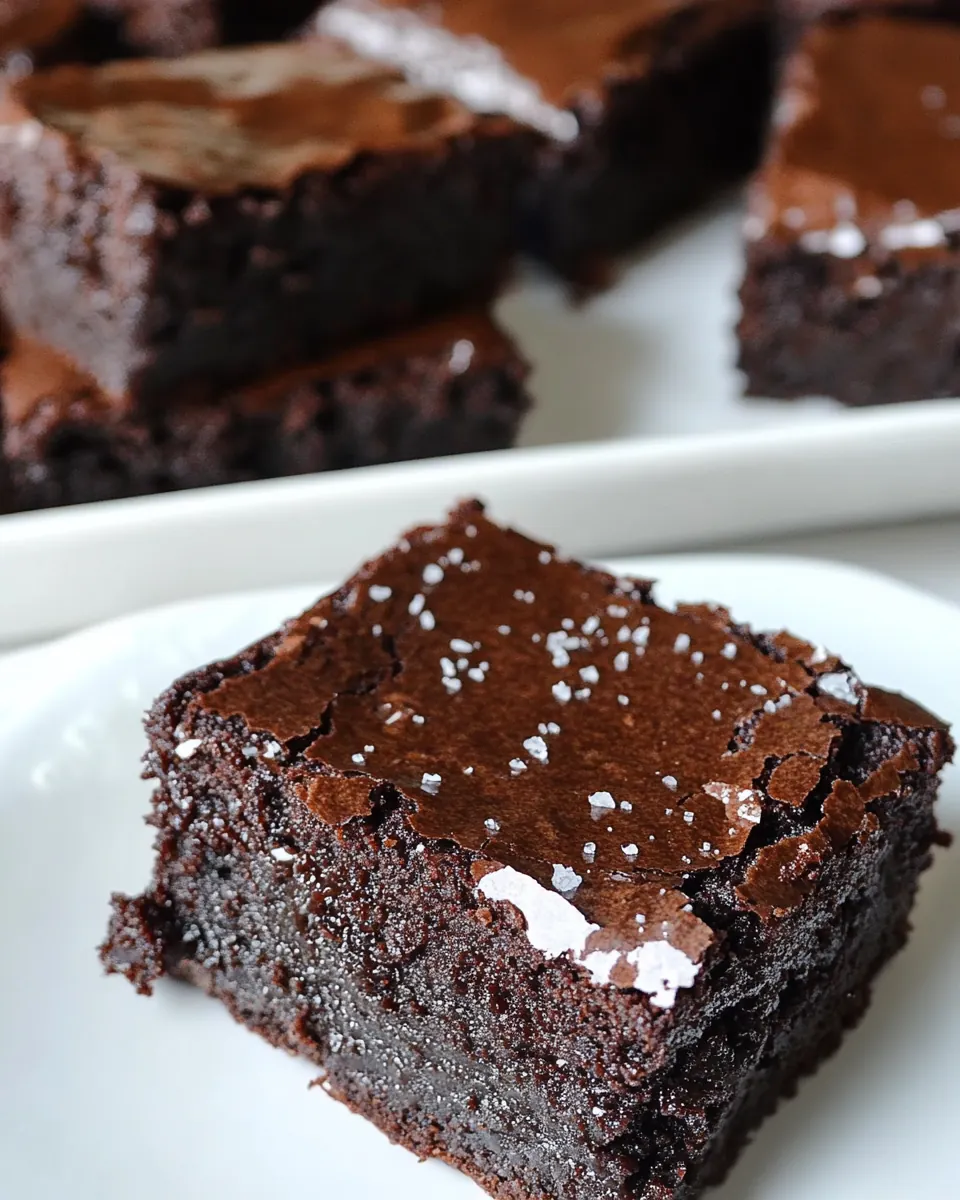
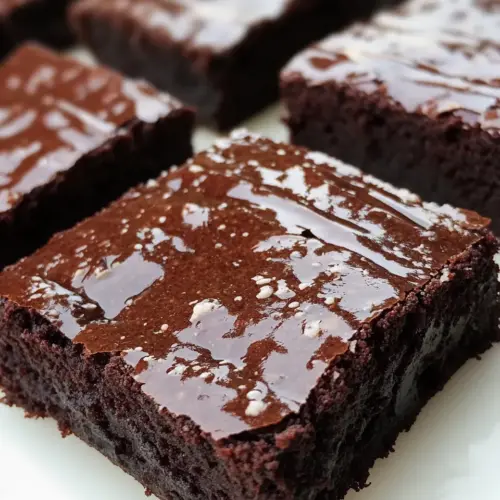
I remember standing at my counter with a mug of tea, listening to the rain patter, while the aroma of melting dark chocolate began to fill the kitchen. I was drawn to the simple, earthy ingredients, and the way the batter shimmered before it went into the oven felt like culinary alchemy. Every time I make Fudgy Paleo Brownies, I think about that calm pause in the day when baking becomes meditation. The texture is what keeps me coming back, dense and slightly chewy, with a shiny crackly top that snaps when you press it. Friends always ask how something so indulgent can feel so light, and I tell them it is the careful balance of rich cocoa powder, nutty almond flour, and just enough coconut sugar to give lift without overpowering the chocolate.
The first bite always sparks a small celebration, especially when the brownies are still slightly warm and the chocolate notes bloom across the palate. I often bring a pan to gatherings, and they disappear faster than I expect. Making these feels like sending a warm, homey postcard to anyone who tries them. Over time I learned small tweaks that make the brownie reliably fudgy every time, and I love sharing those little insights with you. Whether you keep them for yourself or gift them, Fudgy Paleo Brownies hold a quiet promise of comfort in every square.
Recipe Snapshot
35 mins
5 mins
30 mins
Medium
150 kcal
American
Gluten-Free, Paleo
Desserts
Stand mixer, Whisk attachment, 8 x 8-inch metal baking pan, Parchment paper, Microwave safe bowl, Sifter, Spatula, Instant read thermometer
What’s Great About This Fudgy Paleo Brownies
1. Truly Fudgy Texture
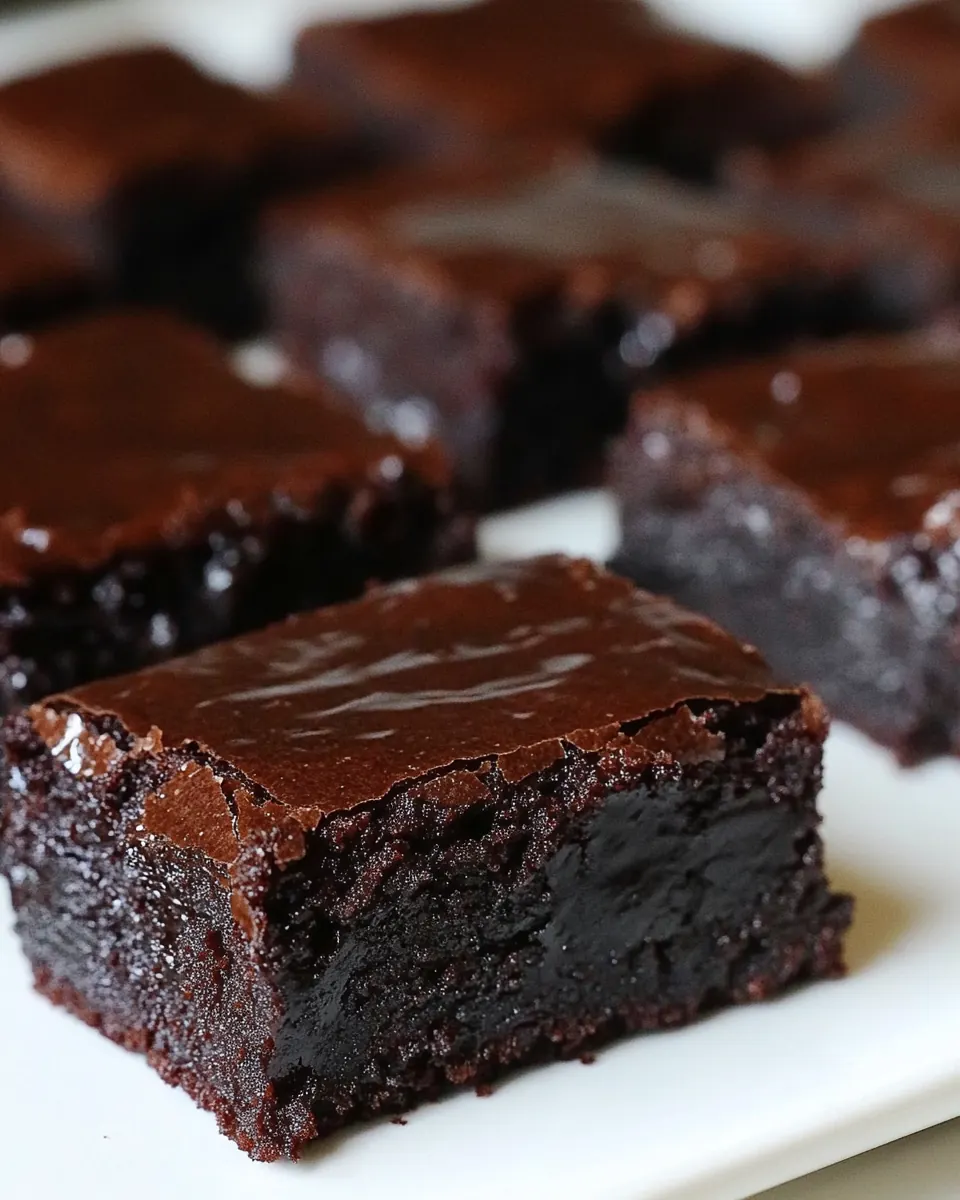
I adore how these brownies achieve that dense, gooey center without relying on traditional wheat or refined sugar. Using almond flour and unsweetened cocoa powder creates a velvet mouthfeel that feels indulgent yet grounded. When you bite in, you notice a satisfying chew and a moist crumb, which to me is the essence of a good brownie.
2. Deep Chocolate Flavor
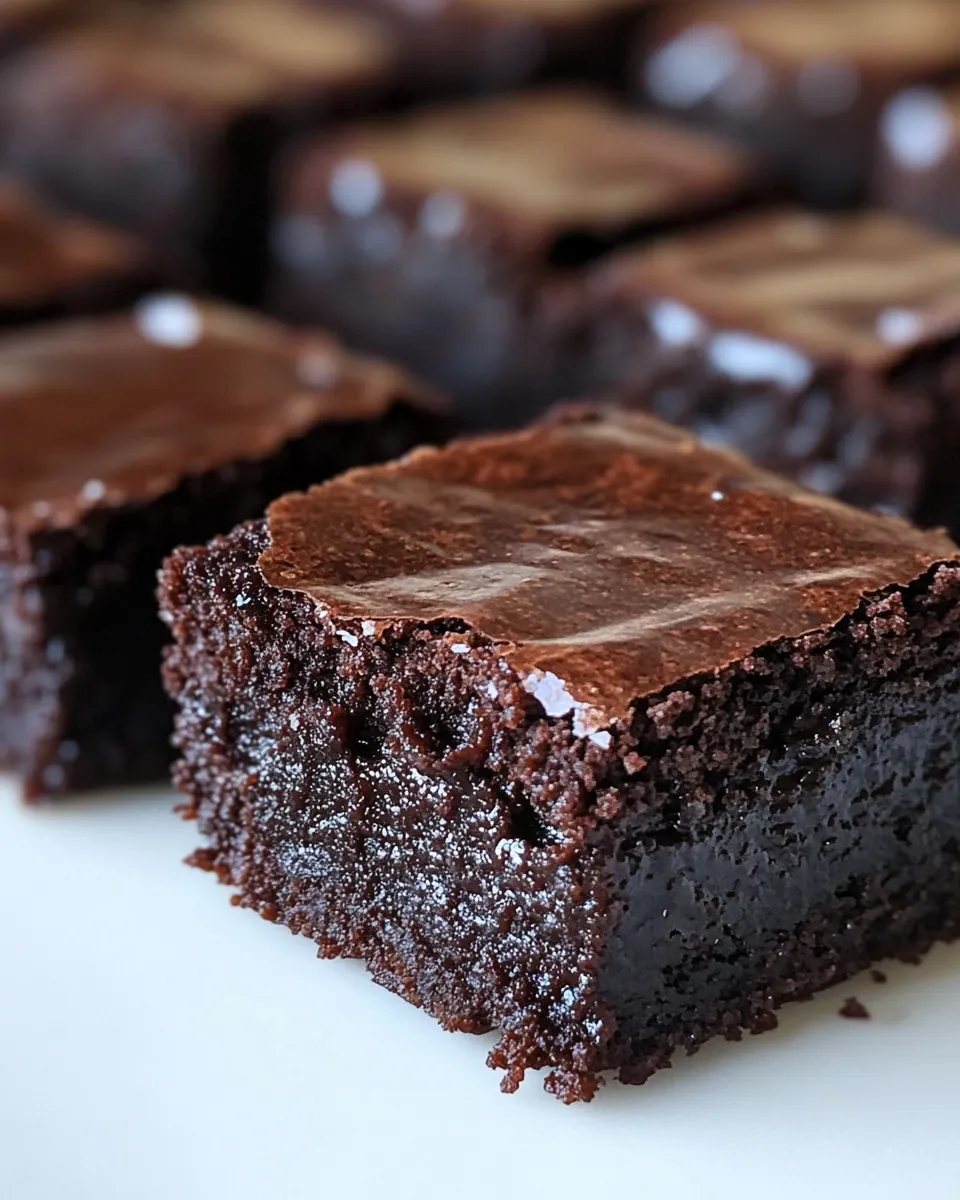
Because the recipe includes dark chocolate chips and high quality cocoa powder, the chocolate notes are complex and layered. I like that the chocolate taste is bold rather than cloying, with roasted, slightly bitter tones that balance the coconut sugar. This depth keeps people coming back for another square.
3. Simple, Thoughtful Ingredients
There is something honest about the ingredient list. It reads like a pantry I trust, with avocado oil providing silky richness and whole eggs adding structure. I appreciate that each component has a purpose, and the overall list is approachable enough for weekday baking or last minute treats.
4. Reliable Technique
The mixing method separates whipping the eggs and sugar from folding in the dry elements, and that technique is what gives the brownies their crackly top and tender center. I value methods that are forgiving yet precise, and this one hits that sweet spot. You get repeatable results without needing fancy equipment.
5. Crowd Pleaser That Feels Better
These brownies travel well and hold up at parties. I often bring a pan to gatherings and love watching people enjoy a dessert that feels a bit lighter but still utterly satisfying. For those who follow paleo habits, or for anyone cutting back on certain pantry items, this is a dessert that invites everyone to the table.
What to Buy for Fudgy Paleo Brownies
These ingredients are chosen to create fudgy, chocolate forward squares with a tender crumb. The key players are the high cacao dark chocolate chips and the nutty almond flour, which together give structure and rich flavor. The avocado oil adds moisture without a strong flavor, while coconut sugar provides caramel like notes. Each item supports texture, taste, or the glossy top that makes brownies feel special.
- 1 1/4 cups coconut sugar: Sweetens and provides bulk while contributing a deep caramel-like flavor and moisture to the batter; dissolves into the wet ingredients to create a smooth texture. Works with cocoa and chocolate to balance bitterness and help produce a fudgy crumb once baked.
- 3/4 teaspoon Diamond Crystal kosher salt: Enhances overall flavor by adding a clean saline contrast that intensifies chocolate notes and balances sweetness; helps control fermentation and protein interactions in the eggs. Use sparingly for even seasoning throughout the batter to prevent flat flavor.
- 2 large eggs: Adds richness and structure by coagulating when heated, which helps set the brownies and contribute to their dense, fudgy texture. Also contributes moisture and emulsifying proteins that improve mouthfeel and help bind the other ingredients.
- 1 large egg yolk: Increases fat and richness while contributing additional binding and a silkier, more tender crumb; the extra yolk helps create a denser, fudgy interior. Provides emulsification and flavor concentration that complements the dark chocolate and cocoa.
- 2 tablespoons coffee at room temperature: Imparts a subtle depth and complexity by enhancing chocolate flavors and rounding bitterness; the liquid helps thin the batter for even mixing. When cooled to room temperature, it prevents seizing of chocolate and maintains batter consistency.
- 1 teaspoon vanilla extract: Adds aromatic sweetness and rounds the overall flavor profile with warm vanilla notes that complement chocolate; enhances perceived sweetness without adding sugar. Blends into the batter to contribute to the finished aroma and flavor complexity.
- 3/4 cup avocado oil: Contributes fat for moistness and a tender crumb while remaining neutral in flavor so chocolate remains the star; helps create a glossy, dense texture. Provides the necessary fat content to bind dry ingredients and ensures fudgy bite without dairy.
- 1/2 cup dark chocolate chips ~70% cacao: Melts into the batter to intensify chocolate flavor and contribute to a smooth, cohesive texture; provides concentrated cocoa solids and fat that deepen richness. When melted and incorporated, helps produce fudgy pockets and a glossy top after baking.
- 1/2 cup unsweetened cocoa powder: Adds concentrated cocoa flavor, deep color, and dry structure while absorbing some moisture to help set the brownies; contributes to the chocolatey, slightly bitter backbone of the recipe. Sifts or mixes well to avoid lumps and ensure an even, rich batter.
- 1/2 cup finely ground almond flour: Provides a tender, slightly nutty crumb and gluten-free structure by contributing fine oil and protein; helps add density and chewiness without gluten. Finely ground texture blends smoothly into the batter to support the fudgy consistency.
Step by Step Instructions for Fudgy Paleo Brownies
These steps guide you from mixing to baking with sensory cues and troubleshooting notes so you can expect consistent, fudgy results. Read through once, then follow along as you work, paying attention to the textures and aromas at each stage.
- Heat the oven to 350°F with the rack in the middle. Line an 8 x 8-inch metal square baking pan with parchment paper and set aside.: You will notice the kitchen warming and a faint toasty scent from the preheating oven, which primes the pan for even baking. Positioning the rack in the middle ensures steady air flow so the brownies bake uniformly, avoiding burned edges or underdone centers. Lining the pan with parchment creates a sling that makes removal effortless, preventing tearing that can ruin the glossy top. A typical error is using a nonmetal pan which may alter bake time, so if you switch pans, watch for color changes and test early.
- In the bowl of a stand mixer fitted with a whisk attachment, combine the coconut sugar, salt, eggs, egg yolk, coffee, and vanilla. Whip on high speed until lighter in color and thickened, about 8 minutes.: As you whip, the mixture transforms from glossy and dense to pale and voluminous, and you will hear a steady whipping sound as air is incorporated. This aeration gives the brownie its crackly surface and a delicate lift, so patience matters. The mixture should form ribbons when the whisk is lifted, and the sugar should feel dissolved rather than grainy. A common slip is under-whipping, which leads to a denser top and less pronounced shine, so aim for the visual cues more than the clock.
- While the batter is mixing, combine the avocado oil and chocolate chips in a microwave safe bowl or measuring cup. Microwave the chocolate chips and oil on high for 1 minute and whisk well until smooth. Set aside.: The sound of chocolate melting is silent but the transformation is dramatic visually, from chips to glossy molten chocolate. Whisking until completely smooth ensures there are no streaks of unmelted chips that could create odd textures. Using gently heated chocolate preserves the chocolate's sheen and flavor, while overheating can make it grainy. If you notice any grit, rewarm gently and whisk; avoid boiling.
- Next, sift together the cocoa powder and almond flour. Set aside.: Sifting yields a fine, even texture that blends seamlessly into the batter, preventing lumps and pockets of dry powder. The aroma of cacao will become more pronounced as you sift, hinting at the final intensity. Almond flour benefits from a light aeration, which helps maintain the brownie’s tender crumb. Skipping this step risks uneven distribution and a slightly gritty mouthfeel, so take the extra minute to sift.
- When the egg and sugar mixture is finished mixing, reduce the mixer speed to low and pour in the melted chocolate and avocado oil mixture. Increase the speed to medium low and mix until combined.: As the warm chocolate melds into the whipped eggs, watch the batter darken and take on a silky sheen, and you may catch the deep scent of cocoa brightening. Mixing at low speed prevents deflating the aerated eggs while ensuring a homogeneous emulsion, which is crucial for texture. If you pour too quickly or mix too vigorously, you can lose volume or create a split emulsion, producing a greasy feel. If that happens, pause and gently fold to reincorporate rather than whipping harder.
- Turn off the mixer and pour in the sifted cocoa and almond flour. Mix on medium low until incorporated.: When the dry ingredients join the batter, the mixture thickens noticeably and the scent of toasted almond and cocoa deepens. The goal here is even distribution without overmixing, which would develop too much structure and dry out the final brownie. Mixing just until no streaks remain keeps the texture tender. Overworking at this stage is a common mistake that yields cakier results, so stop as soon as the dough looks uniform.
- Remove the bowl from the mixer stand and use a spatula to stir everything together to ensure the batter is uniform.: The tactile action of folding with a spatula lets you catch any residual pockets of dry ingredients and feel the batter’s density. You should sense a glossy, thick batter that falls slowly off the spatula, with an even dark color. This is also the moment to scrape the bowl sides, preventing little clumps that would bake into dry spots. Rushing this step can leave uneven texture; take your time to make sure it’s cohesive.
- Pour the batter into the prepared pan and bake for about 27 to 30 minutes or until the tops are shiny and crackly and a toothpick inserted into the batter comes out with a few crumbs on it. You can also check that the internal temperature is 205°F on an instant read thermometer.: The oven will amplify chocolate aromas and you may notice steam escaping lightly as the surface sets. The shiny, crackled top is your visual cue that the exterior has formed while the center remains tender. A few moist crumbs on a toothpick indicate fudginess, whereas a clean toothpick signals overbaking. If you find the center too wet after time is up, tent the pan with foil to allow slower carryover cooking; avoid lengthening bake time too far or the edges will dry.
- Cool the brownie in the pan until room temperature. Once cooled, use the parchment paper on the sides of the pan to remove the brownies onto a cutting board. Cut the brownies into 16 even squares and serve!: Cooling lets the internal crumb set, and the aroma mellows into a rich, balanced chocolate note. Use the parchment sling to lift the slab gently so the glossy top stays intact, then slice with a sharp knife for clean edges. Warm brownies will crumble under the knife, while cooled brownies cut neatly and present beautifully. If you slice too soon, you risk a gooey mess, so exercise patience for the best texture and appearance.
How to Switch It Up
These small variations let you adapt the brownies for different palates and occasions without changing the core technique. Each tip preserves the fudgy integrity while offering a fresh twist.
- Add texture: Fold in a handful of finely chopped toasted nuts or extra dark chocolate chips just before baking to introduce a crunchy contrast without altering the batter balance.
- Slightly more chew: Swap 1 tablespoon of avocado oil for melted coconut oil to change the mouthfeel while keeping them paleo friendly.
- Deeper cocoa: Use a mix of natural and Dutch process cocoa powder to layer acidity and roundness for a more complex chocolate profile.
- Stronger aroma: Increase the vanilla to 1 1/2 teaspoons for a more fragrant edge that enhances the chocolate without tasting vanilla forward.
- Richer top: After baking, sprinkle a few extra dark chocolate chips on the hot surface and press lightly so they melt and create a glossy finishing layer.
Serve This Fudgy Paleo Brownies With
These brownies pair wonderfully with simple accompaniments that highlight their chocolate depth and fudgy texture. Consider how you want to present them for casual snacking, a special dessert, or sharing during gatherings.
- Simple tea or coffee: Serve a warm mug alongside to complement the chocolate and make a cozy treat for afternoon breaks.
- Special occasions: Present squares on a platter for parties or potlucks where they will travel well and appeal to many diets.
- Storage tips: Keep in an airtight container at room temperature for up to a week, placing parchment paper between layers to prevent sticking.
- Seasonal pairings: These brownies work well year round, but they are especially welcome in cooler months when chocolate desserts feel extra comforting.
- Serving style: Cut into 16 even squares for gifting or portion control, and use a sharp knife warmed under hot water for clean slices.
FAQ
Conclusion
What makes these brownies special is their ability to deliver intense chocolate satisfaction while using paleo friendly ingredients that keep the texture luxuriously fudgy. Give them a try and you may find they become your go to treat when you want something both comforting and thoughtful. The method is forgiving but precise enough to produce consistent results, so enjoy the process and share the results with people you love.
Fudgy Paleo Brownies
Equipment
- Stand mixer
- Whisk attachment
- 8 x 8-inch metal baking pan
- Parchment Paper
- Microwave-safe Bowl
- Sifter
- Spatula
- Instant read thermometer
Ingredients
- 1 1/4 cups coconut sugar Sweetens and provides bulk while contributing a deep caramel-like flavor and moisture to the batter; dissolves into the wet ingredients to create a smooth texture. Works with cocoa and chocolate to balance bitterness and help produce a fudgy crumb once baked.
- 3/4 teaspoon Diamond Crystal kosher salt Enhances overall flavor by adding a clean saline contrast that intensifies chocolate notes and balances sweetness; helps control fermentation and protein interactions in the eggs. Use sparingly for even seasoning throughout the batter to prevent flat flavor.
- 2 large eggs Adds richness and structure by coagulating when heated, which helps set the brownies and contribute to their dense, fudgy texture. Also contributes moisture and emulsifying proteins that improve mouthfeel and help bind the other ingredients.
- 1 large egg yolk Increases fat and richness while contributing additional binding and a silkier, more tender crumb; the extra yolk helps create a denser, fudgy interior. Provides emulsification and flavor concentration that complements the dark chocolate and cocoa.
- 2 tablespoons coffee at room temperature Imparts a subtle depth and complexity by enhancing chocolate flavors and rounding bitterness; the liquid helps thin the batter for even mixing. When cooled to room temperature, it prevents seizing of chocolate and maintains batter consistency.
- 1 teaspoon vanilla extract Adds aromatic sweetness and rounds the overall flavor profile with warm vanilla notes that complement chocolate; enhances perceived sweetness without adding sugar. Blends into the batter to contribute to the finished aroma and flavor complexity.
- 3/4 cup avocado oil Contributes fat for moistness and a tender crumb while remaining neutral in flavor so chocolate remains the star; helps create a glossy, dense texture. Provides the necessary fat content to bind dry ingredients and ensures fudgy bite without dairy.
- 1/2 cup dark chocolate chips ~70% cacao Melts into the batter to intensify chocolate flavor and contribute to a smooth, cohesive texture; provides concentrated cocoa solids and fat that deepen richness. When melted and incorporated, helps produce fudgy pockets and a glossy top after baking.
- 1/2 cup unsweetened cocoa powder Adds concentrated cocoa flavor, deep color, and dry structure while absorbing some moisture to help set the brownies; contributes to the chocolatey, slightly bitter backbone of the recipe. Sifts or mixes well to avoid lumps and ensure an even, rich batter.
- 1/2 cup finely ground almond flour Provides a tender, slightly nutty crumb and gluten-free structure by contributing fine oil and protein; helps add density and chewiness without gluten. Finely ground texture blends smoothly into the batter to support the fudgy consistency.
Instructions
- Heat the oven to 350°F with the rack in the middle. Line an 8 x 8-inch metal square baking pan with parchment paper and set aside.: You will notice the kitchen warming and a faint toasty scent from the preheating oven, which primes the pan for even baking. Positioning the rack in the middle ensures steady air flow so the brownies bake uniformly, avoiding burned edges or underdone centers. Lining the pan with parchment creates a sling that makes removal effortless, preventing tearing that can ruin the glossy top. A typical error is using a nonmetal pan which may alter bake time, so if you switch pans, watch for color changes and test early.
- In the bowl of a stand mixer fitted with a whisk attachment, combine the coconut sugar, salt, eggs, egg yolk, coffee, and vanilla. Whip on high speed until lighter in color and thickened, about 8 minutes.: As you whip, the mixture transforms from glossy and dense to pale and voluminous, and you will hear a steady whipping sound as air is incorporated. This aeration gives the brownie its crackly surface and a delicate lift, so patience matters. The mixture should form ribbons when the whisk is lifted, and the sugar should feel dissolved rather than grainy. A common slip is under-whipping, which leads to a denser top and less pronounced shine, so aim for the visual cues more than the clock.
- While the batter is mixing, combine the avocado oil and chocolate chips in a microwave safe bowl or measuring cup. Microwave the chocolate chips and oil on high for 1 minute and whisk well until smooth. Set aside.: The sound of chocolate melting is silent but the transformation is dramatic visually, from chips to glossy molten chocolate. Whisking until completely smooth ensures there are no streaks of unmelted chips that could create odd textures. Using gently heated chocolate preserves the chocolate's sheen and flavor, while overheating can make it grainy. If you notice any grit, rewarm gently and whisk; avoid boiling.
- Next, sift together the cocoa powder and almond flour. Set aside.: Sifting yields a fine, even texture that blends seamlessly into the batter, preventing lumps and pockets of dry powder. The aroma of cacao will become more pronounced as you sift, hinting at the final intensity. Almond flour benefits from a light aeration, which helps maintain the brownie’s tender crumb. Skipping this step risks uneven distribution and a slightly gritty mouthfeel, so take the extra minute to sift.
- When the egg and sugar mixture is finished mixing, reduce the mixer speed to low and pour in the melted chocolate and avocado oil mixture. Increase the speed to medium low and mix until combined.: As the warm chocolate melds into the whipped eggs, watch the batter darken and take on a silky sheen, and you may catch the deep scent of cocoa brightening. Mixing at low speed prevents deflating the aerated eggs while ensuring a homogeneous emulsion, which is crucial for texture. If you pour too quickly or mix too vigorously, you can lose volume or create a split emulsion, producing a greasy feel. If that happens, pause and gently fold to reincorporate rather than whipping harder.
- Turn off the mixer and pour in the sifted cocoa and almond flour. Mix on medium low until incorporated.: When the dry ingredients join the batter, the mixture thickens noticeably and the scent of toasted almond and cocoa deepens. The goal here is even distribution without overmixing, which would develop too much structure and dry out the final brownie. Mixing just until no streaks remain keeps the texture tender. Overworking at this stage is a common mistake that yields cakier results, so stop as soon as the dough looks uniform.
- Remove the bowl from the mixer stand and use a spatula to stir everything together to ensure the batter is uniform.: The tactile action of folding with a spatula lets you catch any residual pockets of dry ingredients and feel the batter’s density. You should sense a glossy, thick batter that falls slowly off the spatula, with an even dark color. This is also the moment to scrape the bowl sides, preventing little clumps that would bake into dry spots. Rushing this step can leave uneven texture; take your time to make sure it’s cohesive.
- Pour the batter into the prepared pan and bake for about 27 to 30 minutes or until the tops are shiny and crackly and a toothpick inserted into the batter comes out with a few crumbs on it. You can also check that the internal temperature is 205°F on an instant read thermometer.: The oven will amplify chocolate aromas and you may notice steam escaping lightly as the surface sets. The shiny, crackled top is your visual cue that the exterior has formed while the center remains tender. A few moist crumbs on a toothpick indicate fudginess, whereas a clean toothpick signals overbaking. If you find the center too wet after time is up, tent the pan with foil to allow slower carryover cooking; avoid lengthening bake time too far or the edges will dry.
- Cool the brownie in the pan until room temperature. Once cooled, use the parchment paper on the sides of the pan to remove the brownies onto a cutting board. Cut the brownies into 16 even squares and serve!: Cooling lets the internal crumb set, and the aroma mellows into a rich, balanced chocolate note. Use the parchment sling to lift the slab gently so the glossy top stays intact, then slice with a sharp knife for clean edges. Warm brownies will crumble under the knife, while cooled brownies cut neatly and present beautifully. If you slice too soon, you risk a gooey mess, so exercise patience for the best texture and appearance.
Notes
- Add texture: Fold in a handful of finely chopped toasted nuts or extra dark chocolate chips just before baking to introduce a crunchy contrast without altering the batter balance.
- Slightly more chew: Swap 1 tablespoon of avocado oil for melted coconut oil to change the mouthfeel while keeping them paleo friendly.
- Deeper cocoa: Use a mix of natural and Dutch process cocoa powder to layer acidity and roundness for a more complex chocolate profile.
- Stronger aroma: Increase the vanilla to 1 1/2 teaspoons for a more fragrant edge that enhances the chocolate without tasting vanilla forward.
- Richer top: After baking, sprinkle a few extra dark chocolate chips on the hot surface and press lightly so they melt and create a glossy finishing layer.