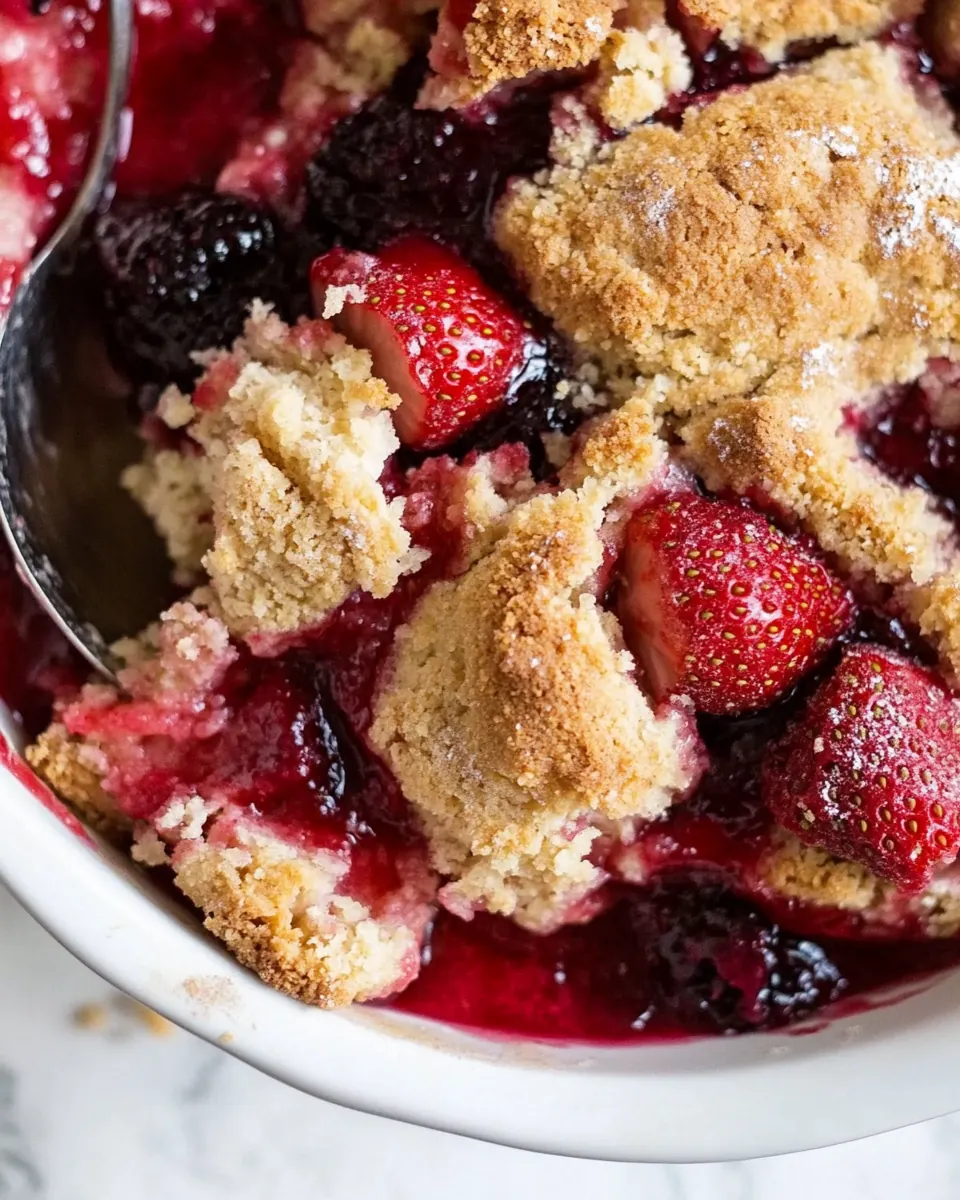
Gluten Free Strawberry Cobbler
Gluten Free Strawberry Cobbler has been a weekend ritual in my kitchen since the first bright spring berries arrived at the farmer’s market. The first time I made it I was chasing a simple goal, a dessert that felt cozy without weighing heavy, and the result surprised me with its crisp topping and jammy, scented filling. I remember carrying the warm pan to the table, the aroma of strawberries and vanilla drifting through the house, and everyone pausing their conversation to take that first forkful. It felt like a small celebration of the season.
Over time I played with textures, swapping traditional shortening for melted coconut oil and finding that the cobbler topping stayed tender while crisping beautifully on the outside. I love how the recipe balances a rustic look with surprisingly refined flavors, and how easily it adapts to whatever berries are best that week. You can form biscuit shapes, dollop the dough, or simply spread it; each method gives a slightly different crunch and mouthfeel, and I still enjoy experimenting.
Recipe Snapshot
45 mins
15 mins
30 mins
Medium
180 kcal
American
Vegan, Gluten-Free
Desserts
Oven, Mixing bowl, 10 inch cast iron skillet
Why This Gluten Free Strawberry Cobbler Hits Different
It highlights fresh seasonal fruit
I absolutely love how Gluten Free Strawberry Cobbler puts strawberries center stage, letting their bright sweetness shine through. When the berries are ripe, the filling becomes naturally syrupy, and you do not need a lot of sweetener to coax out their flavor. The short ingredient list keeps the fruit as the hero, and that simplicity is one of the reasons I return to this recipe again and again.
Texture contrasts that feel intentional
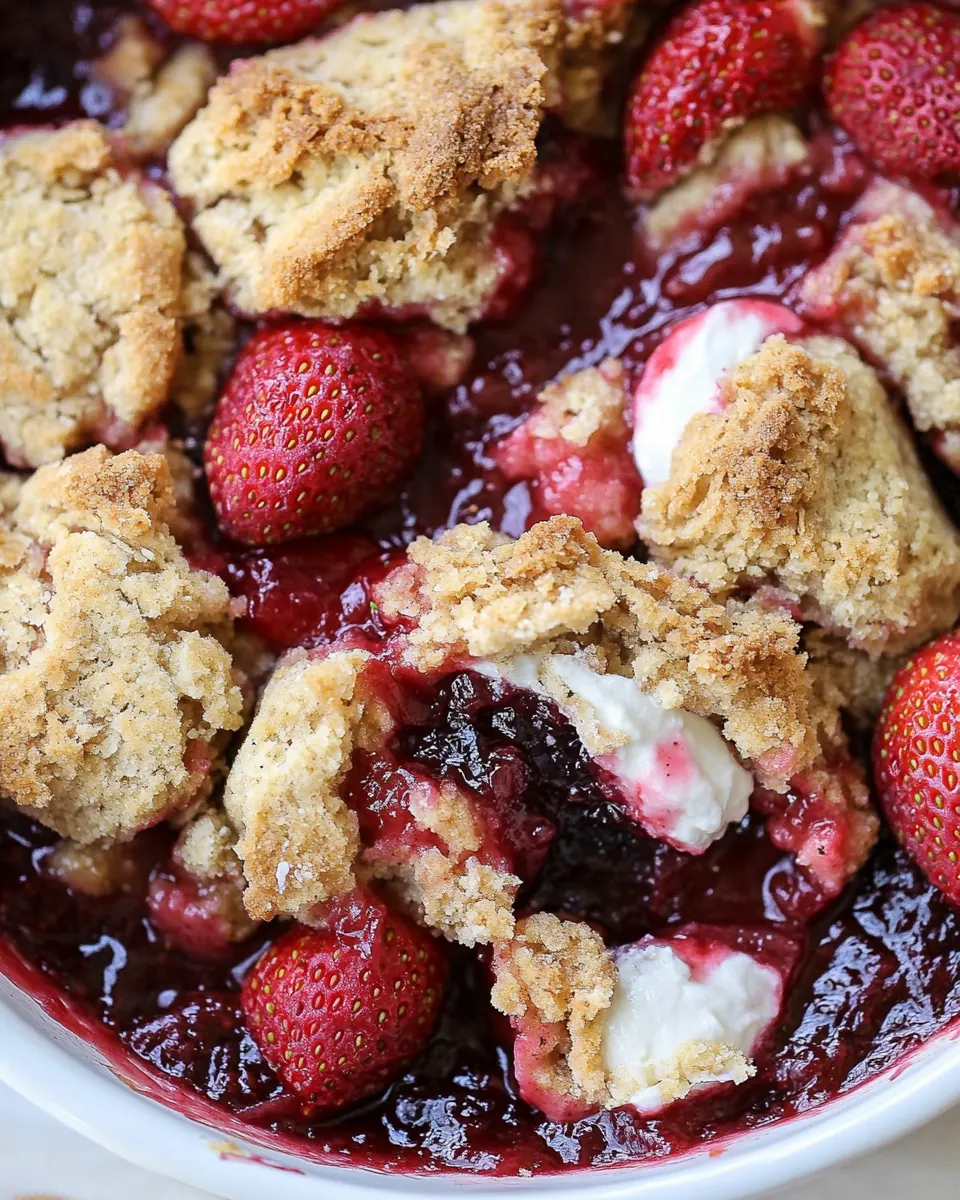
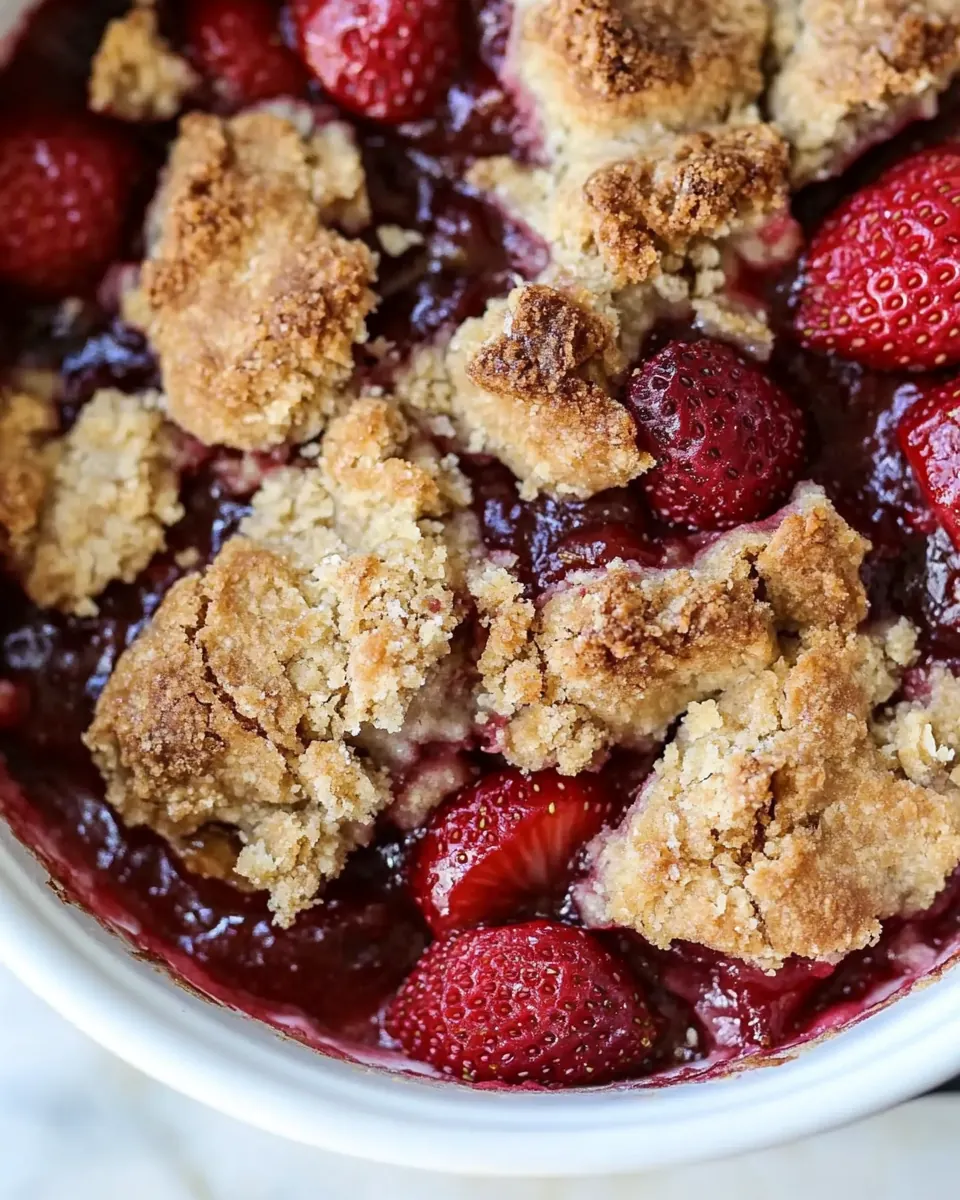
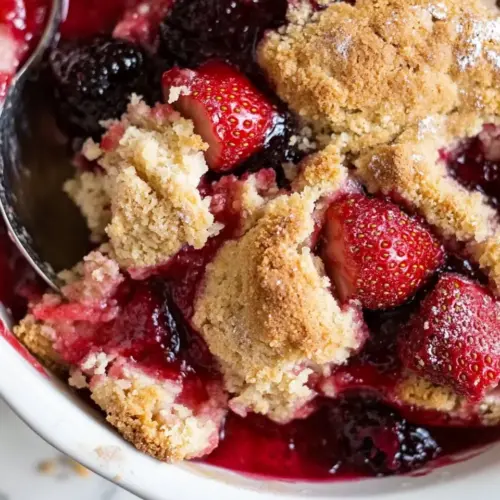
The combination of a slightly greasy, tender cobbler topping and a bubbling, jammy filling gives a satisfying contrast. I enjoy the way the edges get golden and crisp while the interior remains soft and yielding. Each bite moves from a crisp exterior to a fragrant, lush inside, and that layering makes the dessert feel both rustic and thoughtfully composed.
Friendly for many diets without sacrificing taste
Making this as a gluten free and vegan treat was important to me, because I wanted something inclusive for gatherings. Swapping all purpose flour for a gluten free blend and using coconut oil keeps the texture pleasant while ensuring that more people at the table can enjoy it. I have served it to skeptical guests who ended up asking for seconds, which is the highest compliment.
Flexible and forgiving
I appreciate recipes that forgive small errors, and this one does. Whether your topping is shaped into biscuits or spread across the fruit, it bakes into a satisfying crust. If the berries are extra juicy, you may need a few extra minutes of bake time, and if your dough seems wetter one day, a little extra flour or a brief chill fixes it. That reliability makes it an easy go-to when I want a comforting finish to a meal.
Comforting, homey presentation
Serving this straight from an ovenproof dish gives a warm, family style presentation I adore. There is something inviting about passing a skillet or pan around the table, spoons scraping up warm fruit and crisp topping. That informal service makes it great for casual dinners, celebrations, and impromptu gatherings.
What You Need for Gluten Free Strawberry Cobbler
These pantry friendly ingredients are chosen for balance. The gluten free flour and a touch of baking soda give structure to the topping, while melted coconut oil lends tenderness and crispness when baked. Pure maple syrup provides nuanced sweetness that complements the natural sugars of the strawberries, and a little sea salt brightens every flavor. Together they create a topping that crisps without becoming tough, and a filling that becomes glossy and saucy.
- 1 cup gluten-free all-purpose flour: Provide structure and bulk while keeping the cobbler gluten–free; blends with liquids to form the batter and creates a tender crumb when combined with fat and leavening agents. Use a certified gluten–free mix to ensure proper texture and avoid cross-contamination.
- 1/4 tsp sea salt: Enhance overall flavor by balancing sweetness and highlighting fruit brightness; helps activate leavening agents and rounds out the batter’s taste. Measure precisely to avoid overly salty results in the finished cobbler.
- 1/4 tsp baking soda: Lighten texture and help the batter rise slightly; reacts with acidic components to create gentle lift and a tender crumb. Use the small measured amount to prevent metallic or soapy flavors from developing.
- 1/3 cup coconut oil melted: Moisten and tenderize the batter while contributing a mild, slightly tropical flavor; when melted, it incorporates smoothly to create a rich mouthfeel. Use refined or unrefined coconut oil depending on desired coconut aroma.
- 1/4 cup pure maple syrup: Sweeten naturally while adding depth and a hint of caramel character; integrates easily into the batter to provide uniform sweetness. Pour gradually to achieve balanced sweetness without making the dough too wet.
- 1 tsp pure vanilla extract: Add warm, aromatic flavor that complements the strawberries and maple; enhances the overall aroma and elevates the dessert’s complexity. Use pure vanilla extract for the most authentic, concentrated flavor.
- 4 cups fresh strawberries stems removed and halved: Offer fresh, juicy body and vibrant strawberry flavor that forms the cobbler’s filling; halving and removing stems promotes even cooking and sauciness. Toss with sugar and thickener so fruit releases juices and creates a luscious topping.
- 2 tbsp gluten-free all-purpose flour: Thicken the fruit juices and help coat the strawberries to prevent a runny filling; blends into the berries to absorb excess liquid as it cooks. Use gluten–free flour to maintain the recipe’s gluten–free status while achieving proper consistency.
- 1/4 cup pure maple syrup: Introduce additional natural sweetness to the fruit filling and balance tartness; dissolves into berry juices to create a glossy, flavorful syrup. Adjust slightly to taste depending on strawberry ripeness and personal preference.
- pinch sea salt: Accentuate the fruit’s natural flavors and provide subtle contrast to the sweet elements; a small pinch lifts and rounds the filling’s overall taste. Use sparingly to avoid overpowering the delicate strawberry profile.
Making This Gluten Free Strawberry Cobbler
I find the steps simple and comforting, and I like to talk through what to watch for so you can achieve a beautiful texture. Follow the flow from preparing the oven and topping, to tossing the filling, assembling, and baking, and you will end up with a cobbler that is golden on top and glossy beneath. Take your time with tactile cues, and the rewards are worth it.
- Preheat the oven to 350 degrees F.: The warm, dry air from a properly heated oven is what encourages the topping to brown while the filling bubbles, so preheating matters. You should feel the kitchen slowly warm and notice a faint dry heat after a few minutes. If you skip preheating, the topping can absorb more moisture before it sets, leading to a denser crust. A common mistake is assuming an oven reaches temperature instantly, so wait until your oven indicates it is ready.
- Add all ingredients for the topping to a mixing bowl and stir to combine. A thick, greasy dough should form. The greasiness is normal!: When you stir the gluten free all purpose flour , sea salt , baking soda , melted coconut oil , pure maple syrup , and pure vanilla extract you will feel a sticky, slightly oily dough come together. The texture should be cohesive but not dry, and the smell of vanilla and maple will be noticeable. This greasiness helps create a tender, flaky top as it bakes, and it is normal not to see a dry, crumbly biscuit dough. Avoid overmixing which can make the topping tough, and if the dough seems too loose, a quick chill will firm it up for easier handling.
- Toss the ingredients for the strawberry filling in a mixing bowl and stir until well-combined (make sure the flour has dissolved).: As you combine the strawberries , the 2 tablespoons of gluten free all purpose flour , the 1/4 cup of pure maple syrup , and a pinch of sea salt , you will notice the berries start to glisten as they become evenly coated. The flour should look evenly distributed and not form dry clumps, which ensures it will thicken the juices as the fruit bakes. You can smell the bright berry scent become sweeter as the syrup disperses. A typical pitfall is failing to toss thoroughly which leaves flour pockets that will gasp and bake oddly, so make sure everything is well integrated.
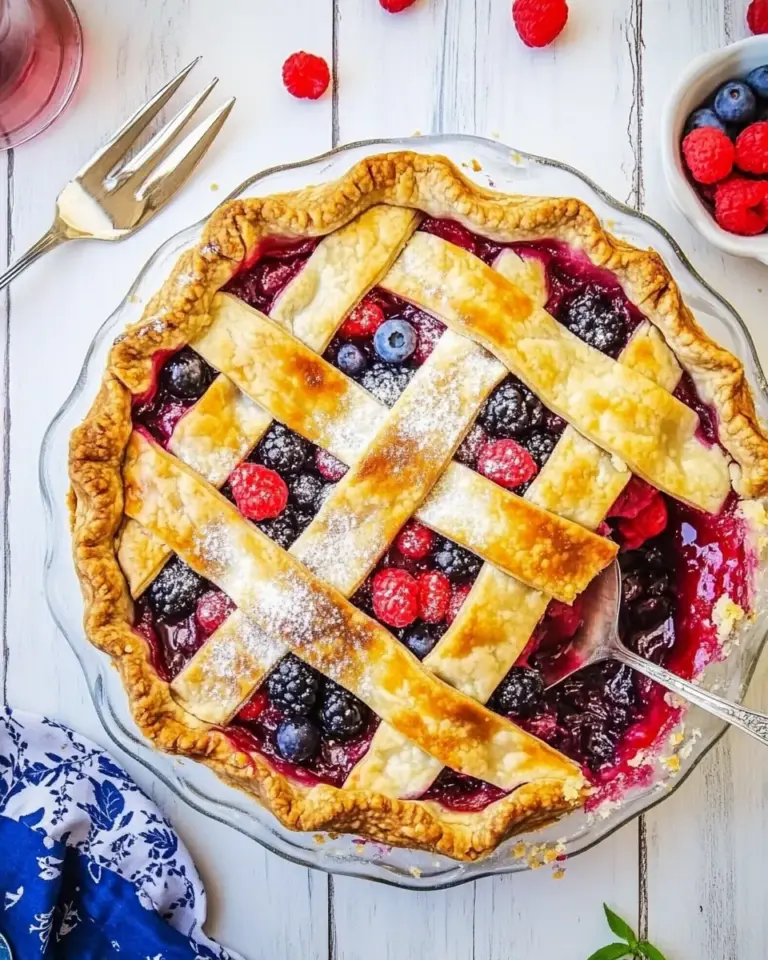
- Transfer the strawberry filling mixture to an oven-safe dish (I use a 10-inch cast iron skillet. You can also use an 8” x 8” or 9” x 9” baking pan).: The filling should sit in a shallow, even layer so the fruit cooks consistently and the juices bubble up around the edges. Using a cast iron skillet promotes even heat and a slightly caramelized edge, while a square pan offers a more uniform shape. You will see the berries release a little liquid when they settle into the dish and the aroma will become fruitier. Avoid deep vessels that inhibit bubbling, or the center may remain undercooked.
- Top the strawberry filling using the cobbler dough. You can form biscuit shapes if you’d like, or simply spread the topping all over.: Placing the greasy, tender dough atop the filling in dabs or as a spread changes the finished texture, so choose based on preference. Dollops will create distinct pockets of biscuit, while spreading yields a more continuous crust with crisp edges. Press gently if you spread, and leave small gaps for steam to escape which helps the filling bubble. A common error is flattening the topping too thin which causes it to crisp overly fast and dry out before the inside is done.
- Bake in the preheated oven 30 to 40 minutes, until the topping is golden-brown and crispy.: During baking you will notice steam escaping and the topping turning from pale to golden. The scent of baked strawberries and maple will grow stronger, and you may hear the faint bubbling of juices. The topping should be crisp to the touch and a deep golden brown at the peaks when ready. If the center looks unset, tent with foil and give it additional minutes rather than increasing oven temperature, which can burn the top. A typical misstep is removing it too soon, leaving the filling gooey rather than beautifully syrupy.
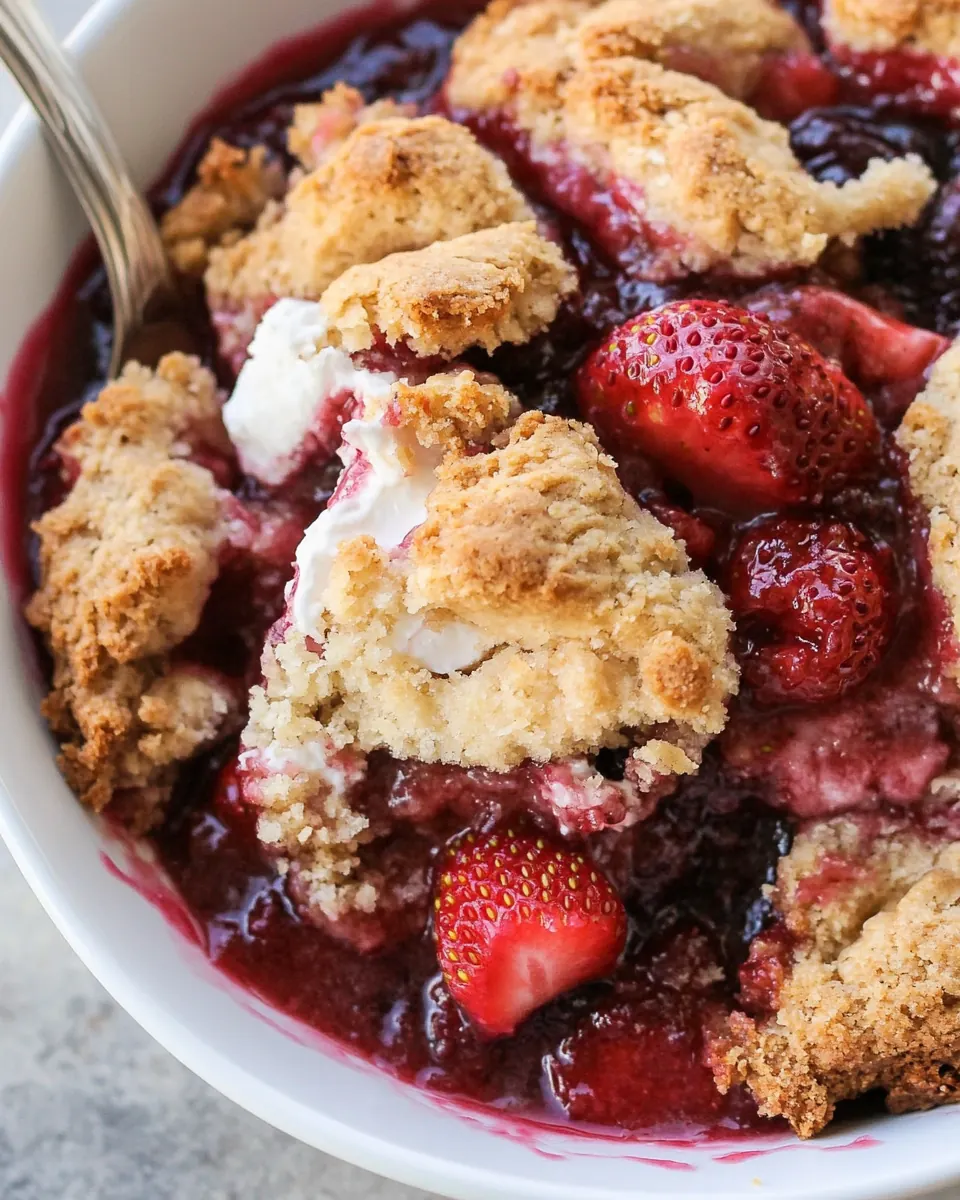
- Serve fresh out of the oven with your choice of dairy-free ice cream or coconut whipped cream and enjoy!: Fresh from the oven, the cobbler will steam and smell wonderfully fruity; spoon portions while warm so you get the contrast of hot filling and cool topping from a dairy free scoop. The texture is at its peak in the first hour when the crust retains some crispness while the filling is glossy and slightly syrupy. If you wait too long to serve, the topping will soften as it absorbs juices, so plan to enjoy it soon after baking. A common slip is serving it stone cold which flattens the lively contrasts that make it so comforting.
Change It Up
Small swaps and serving ideas can make Gluten Free Strawberry Cobbler feel new each time you make it. Below are practical ways to tailor texture, sweetness, and presentation without changing the heart of the recipe. I like to test one change at a time so I can track what I prefer.
- Make the topping more biscuit like: Chill the dough for 20 to 30 minutes and then form individual biscuits to get taller, layered pieces that break apart nicely.
- Brush with extra maple syrup: Lightly brush the baked topping with a little more pure maple syrup for a glossy, extra sweet finish that pairs well with a scoop of dairy free ice cream.
- Use mixed berries: Substitute half the strawberries with raspberries or blueberries for a more complex berry flavor profile that adds color and varied sweetness.
- Adjust sweetness to taste: If your strawberries are very sweet, reduce the 1/4 cup of maple in the filling to 2 tablespoons to avoid an overly sugary result.
- Serve family style: Bake in a cast iron skillet and bring it to the table for a cozy, rustic presentation that invites everyone to dig in.
What Goes Well With This Gluten Free Strawberry Cobbler
Serving this cobbler provides many delicious pairings and occasions. It is naturally suited for spring gatherings, casual dinners, and celebratory brunches. Below are thoughtful serving suggestions that enhance the dessert and fit different settings or seasons.
- With dairy free ice cream: A scoop of vanilla coconut ice cream is a classic match, offering a cool, creamy contrast to the warm, syrupy strawberries.
- For brunch or afternoon tea: Serve smaller portions alongside light sandwiches and fruit, creating a sweet focal point that does not overwhelm the meal.
- Seasonal gatherings: This cobbler shines in spring when strawberries are at their best and works well for Mother s Day brunches or garden lunches where fresh fruit is featured.
- Storage tips: Keep leftovers covered in the refrigerator for up to three days, and reheat gently in a low oven to revive crispness. Avoid microwaving if you want to preserve texture.
- Occasion friendly: It is informal enough for potlucks and family dinners, yet pretty enough for small celebrations; bake it in a skillet for a rustic centerpiece or a square pan for easy slicing.
- Make ahead notes: You can prepare the filling a day ahead and refrigerate, then top and bake when ready to serve, which shortens the last minute prep and keeps the topping fresher.
FAQ
Conclusion
This Gluten Free Strawberry Cobbler is special because it balances a tender, crisp topping with a glossy, juicy strawberry filling that celebrates seasonal fruit. If you love warm, fruity desserts that feel both rustic and polished, this recipe is worth trying. Bake it when strawberries are at their peak, serve it warm with a scoop of dairy free ice cream, and enjoy the comforting contrast of textures and bright, maple kissed flavor.
Gluten Free Strawberry Cobbler
Equipment
- Oven
- Mixing Bowl
- 10-inch cast iron skillet
Ingredients
- 1 cup gluten-free all-purpose flour Provide structure and bulk while keeping the cobbler gluten-free; blends with liquids to form the batter and creates a tender crumb when combined with fat and leavening agents. Use a certified gluten-free mix to ensure proper texture and avoid cross-contamination.
- 1/4 tsp sea salt Enhance overall flavor by balancing sweetness and highlighting fruit brightness; helps activate leavening agents and rounds out the batter’s taste. Measure precisely to avoid overly salty results in the finished cobbler.
- 1/4 tsp baking soda Lighten texture and help the batter rise slightly; reacts with acidic components to create gentle lift and a tender crumb. Use the small measured amount to prevent metallic or soapy flavors from developing.
- 1/3 cup coconut oil melted Moisten and tenderize the batter while contributing a mild, slightly tropical flavor; when melted, it incorporates smoothly to create a rich mouthfeel. Use refined or unrefined coconut oil depending on desired coconut aroma.
- 1/4 cup pure maple syrup Sweeten naturally while adding depth and a hint of caramel character; integrates easily into the batter to provide uniform sweetness. Pour gradually to achieve balanced sweetness without making the dough too wet.
- 1 tsp pure vanilla extract Add warm, aromatic flavor that complements the strawberries and maple; enhances the overall aroma and elevates the dessert’s complexity. Use pure vanilla extract for the most authentic, concentrated flavor.
- 4 cups fresh strawberries stems removed and halved Offer fresh, juicy body and vibrant strawberry flavor that forms the cobbler’s filling; halving and removing stems promotes even cooking and sauciness. Toss with sugar and thickener so fruit releases juices and creates a luscious topping.
- 2 tbsp gluten-free all-purpose flour Thicken the fruit juices and help coat the strawberries to prevent a runny filling; blends into the berries to absorb excess liquid as it cooks. Use gluten-free flour to maintain the recipe’s gluten-free status while achieving proper consistency.
- 1/4 cup pure maple syrup Introduce additional natural sweetness to the fruit filling and balance tartness; dissolves into berry juices to create a glossy, flavorful syrup. Adjust slightly to taste depending on strawberry ripeness and personal preference.
- pinch sea salt Accentuate the fruit’s natural flavors and provide subtle contrast to the sweet elements; a small pinch lifts and rounds the filling’s overall taste. Use sparingly to avoid overpowering the delicate strawberry profile.
Instructions
- Preheat the oven to 350 degrees F.: The warm, dry air from a properly heated oven is what encourages the topping to brown while the filling bubbles, so preheating matters. You should feel the kitchen slowly warm and notice a faint dry heat after a few minutes. If you skip preheating, the topping can absorb more moisture before it sets, leading to a denser crust. A common mistake is assuming an oven reaches temperature instantly, so wait until your oven indicates it is ready.
- Add all ingredients for the topping to a mixing bowl and stir to combine. A thick, greasy dough should form. The greasiness is normal!: When you stir the gluten free all purpose flour , sea salt , baking soda , melted coconut oil , pure maple syrup , and pure vanilla extract you will feel a sticky, slightly oily dough come together. The texture should be cohesive but not dry, and the smell of vanilla and maple will be noticeable. This greasiness helps create a tender, flaky top as it bakes, and it is normal not to see a dry, crumbly biscuit dough. Avoid overmixing which can make the topping tough, and if the dough seems too loose, a quick chill will firm it up for easier handling.
- Toss the ingredients for the strawberry filling in a mixing bowl and stir until well-combined (make sure the flour has dissolved).: As you combine the strawberries , the 2 tablespoons of gluten free all purpose flour , the 1/4 cup of pure maple syrup , and a pinch of sea salt , you will notice the berries start to glisten as they become evenly coated. The flour should look evenly distributed and not form dry clumps, which ensures it will thicken the juices as the fruit bakes. You can smell the bright berry scent become sweeter as the syrup disperses. A typical pitfall is failing to toss thoroughly which leaves flour pockets that will gasp and bake oddly, so make sure everything is well integrated.
- Transfer the strawberry filling mixture to an oven-safe dish (I use a 10-inch cast iron skillet. You can also use an 8” x 8” or 9” x 9” baking pan).: The filling should sit in a shallow, even layer so the fruit cooks consistently and the juices bubble up around the edges. Using a cast iron skillet promotes even heat and a slightly caramelized edge, while a square pan offers a more uniform shape. You will see the berries release a little liquid when they settle into the dish and the aroma will become fruitier. Avoid deep vessels that inhibit bubbling, or the center may remain undercooked.
- Top the strawberry filling using the cobbler dough. You can form biscuit shapes if you’d like, or simply spread the topping all over.: Placing the greasy, tender dough atop the filling in dabs or as a spread changes the finished texture, so choose based on preference. Dollops will create distinct pockets of biscuit, while spreading yields a more continuous crust with crisp edges. Press gently if you spread, and leave small gaps for steam to escape which helps the filling bubble. A common error is flattening the topping too thin which causes it to crisp overly fast and dry out before the inside is done.
- Bake in the preheated oven 30 to 40 minutes, until the topping is golden-brown and crispy.: During baking you will notice steam escaping and the topping turning from pale to golden. The scent of baked strawberries and maple will grow stronger, and you may hear the faint bubbling of juices. The topping should be crisp to the touch and a deep golden brown at the peaks when ready. If the center looks unset, tent with foil and give it additional minutes rather than increasing oven temperature, which can burn the top. A typical misstep is removing it too soon, leaving the filling gooey rather than beautifully syrupy.
- Serve fresh out of the oven with your choice of dairy-free ice cream or coconut whipped cream and enjoy!: Fresh from the oven, the cobbler will steam and smell wonderfully fruity; spoon portions while warm so you get the contrast of hot filling and cool topping from a dairy free scoop. The texture is at its peak in the first hour when the crust retains some crispness while the filling is glossy and slightly syrupy. If you wait too long to serve, the topping will soften as it absorbs juices, so plan to enjoy it soon after baking. A common slip is serving it stone cold which flattens the lively contrasts that make it so comforting.
Notes
- Make the topping more biscuit like: Chill the dough for 20 to 30 minutes and then form individual biscuits to get taller, layered pieces that break apart nicely.
- Brush with extra maple syrup: Lightly brush the baked topping with a little more pure maple syrup for a glossy, extra sweet finish that pairs well with a scoop of dairy free ice cream.
- Use mixed berries: Substitute half the strawberries with raspberries or blueberries for a more complex berry flavor profile that adds color and varied sweetness.
- Adjust sweetness to taste: If your strawberries are very sweet, reduce the 1/4 cup of maple in the filling to 2 tablespoons to avoid an overly sugary result.
- Serve family style: Bake in a cast iron skillet and bring it to the table for a cozy, rustic presentation that invites everyone to dig in.