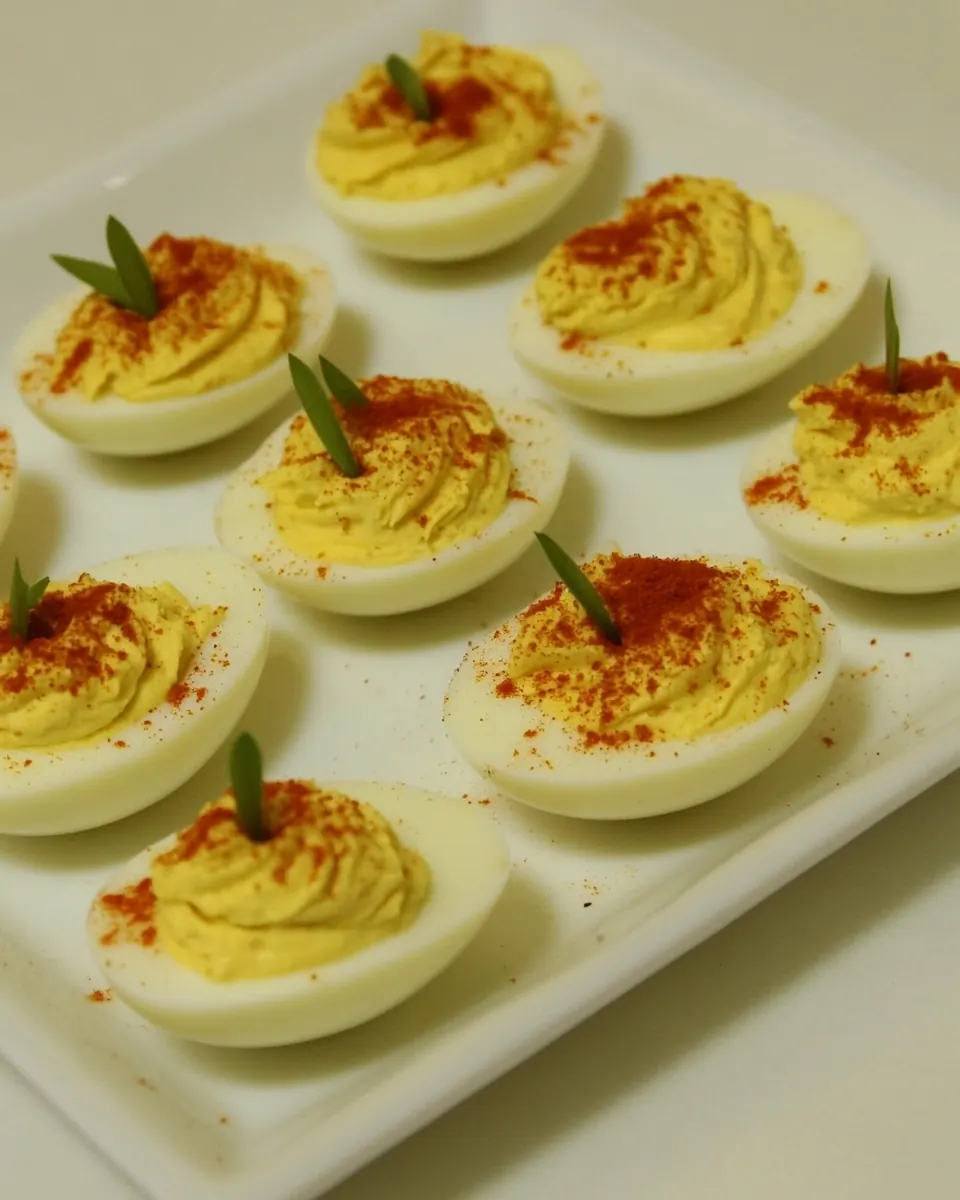
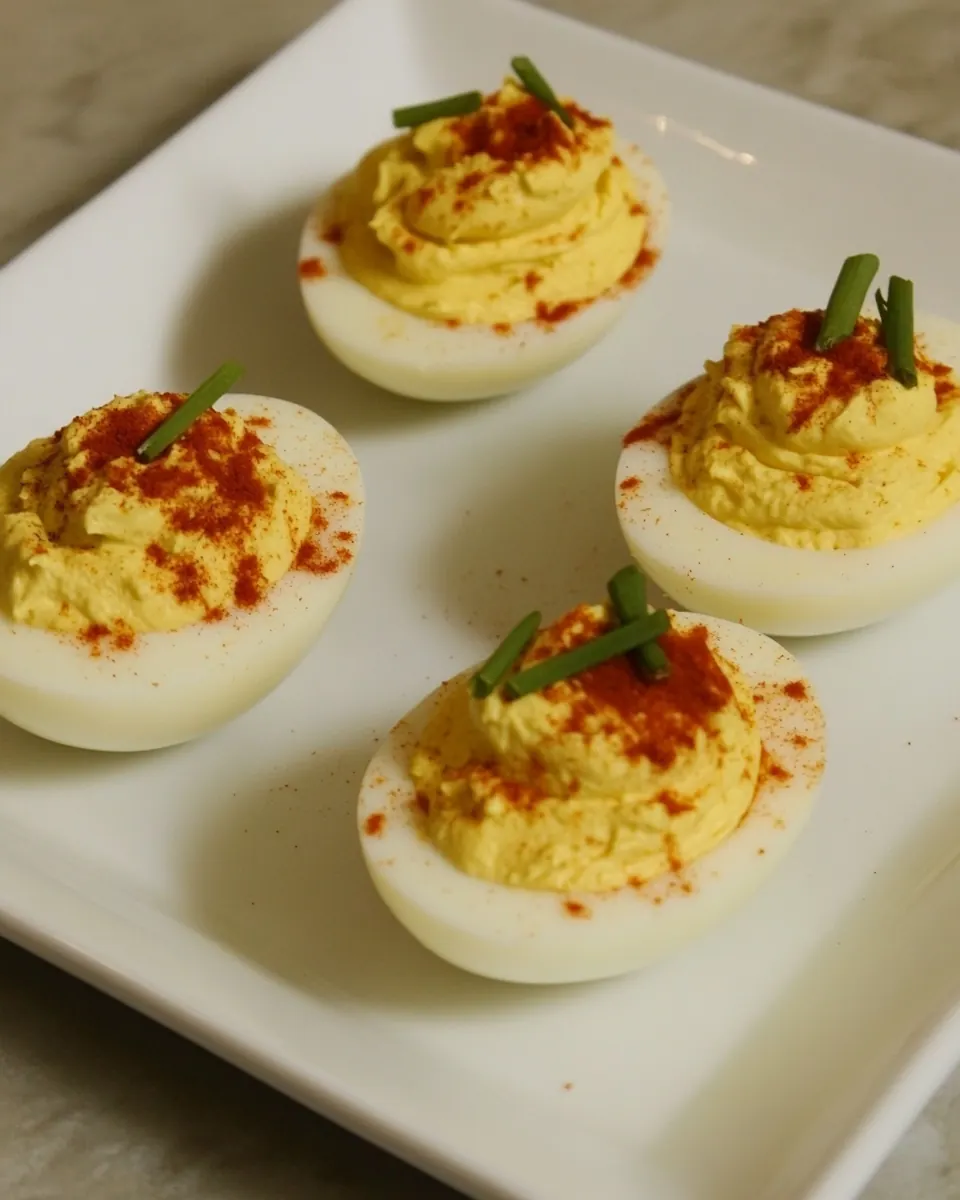
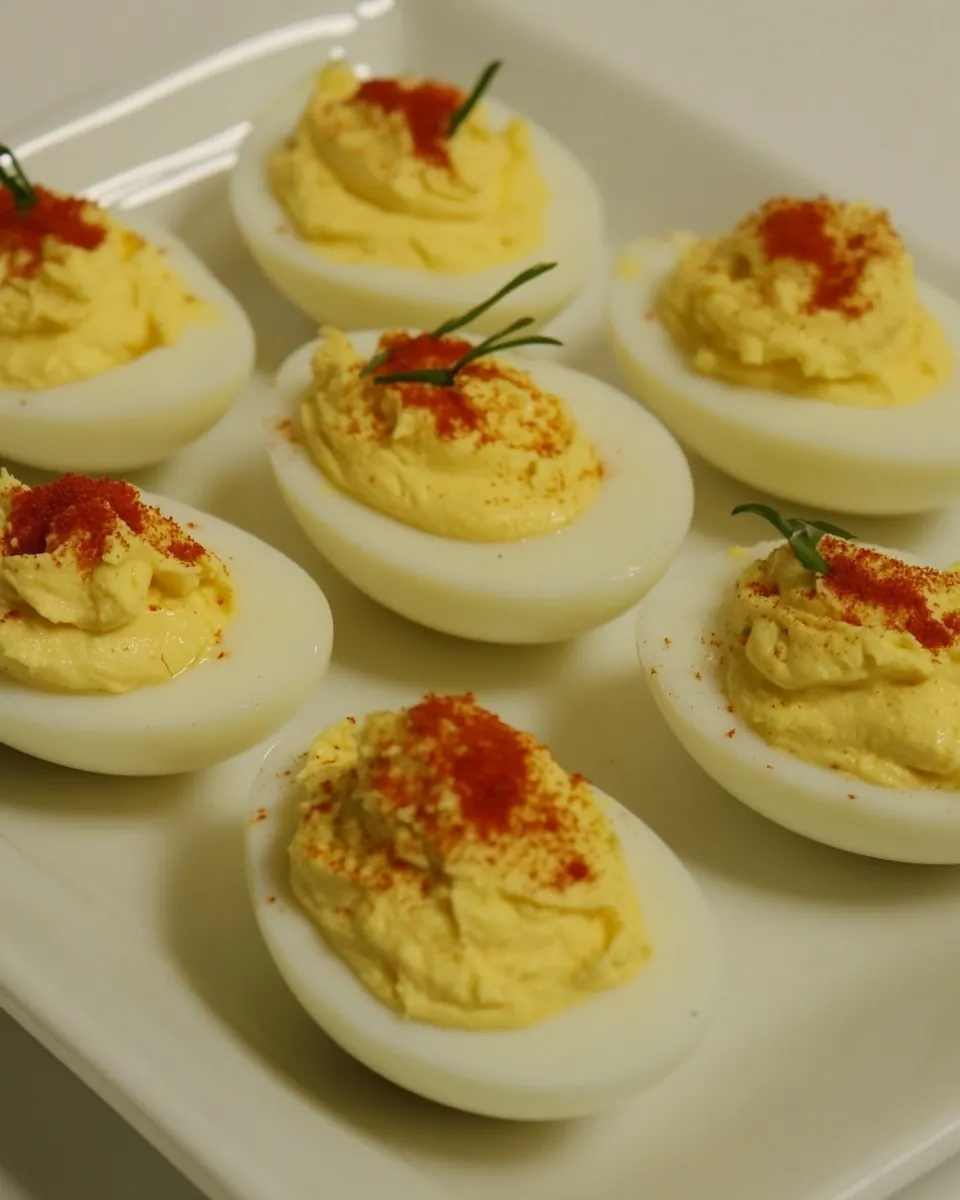
Easy Deviled Eggs Recipe
Easy Deviled Eggs Recipe has been my go to when I need a reliable, crowd pleasing snack that comes together with very little fuss.
One humid summer afternoon years ago I brought a tray of these to a block party and watched them disappear before I could refill my own plate. I remember the mix of creamy yolk and tangy mustard, the slight bite from fresh cracked pepper blend, and how the little dusting of paprika turned them into tiny edible sunbursts. That day I learned how variations make the recipe feel new each time, whether I add a squeeze of lemon juice or a whisper of hot sauce.
On quiet Sundays I like to make a batch and nibble slowly while I read, and when guests arrive I dress them up with chopped herbs or a wedge of tomato from the garden to brighten the plate. Over the years I have refined the technique so the yolks are silken, never chalky, and the filling holds shape when piped into the whites. These small rituals elevate a humble dish into something you make with intention.
Recipe Snapshot
30 mins
10 mins
20 mins
Medium
210 kcal
American
Keto, Paleo
Appetizers
Saucepan, Mixing bowl, Fork, Knife, Ice bath bowl, Spoon or piping bag
Why This Easy Deviled Eggs Recipe Is So Good
Comforting and familiar
I love that Easy Deviled Eggs Recipe taps into nostalgia, the kind that brings people together. The combination of creamy mayonnaise and tender eggs evokes picnics, holiday trays, and potluck tables, making it a recipe you’ll return to again and again.
Quick and reliable
From my experience, this recipe is forgiving, which is why I rely on it when time is short. The straightforward technique lets you focus on small flavor boosts like a dash of Dijon mustard or a squeeze of lemon juice, and it rarely fails even when you are juggling other dishes.
Endlessly adaptable
I appreciate how the base filling welcomes creativity. You can keep things classic with salt and pepper blend, or take a turn toward spicy, smoky, or herbal finishes without changing the core method. That flexibility means one recipe serves many tastes.
Textural contrast
The structure of a smooth yolk filling set inside a tender white delivers a pleasing mouthfeel. When made correctly, the eggs provide a creamy center and a clean, delicate outer bite, which is satisfying and simple to execute.
Great for gatherings
I’ve found that a platter of Easy Deviled Eggs Recipe is a reliable party starter. It travels well, plates beautifully, and is easy to scale, which makes hosting less stressful and more enjoyable.
Shopping List for Easy Deviled Eggs Recipe
These ingredients are the backbone of a classic deviled egg. They work together to balance creaminess, acidity, and seasoning so every bite pleases the palate. The star is the eggs, which provide structure, while the mayonnaise adds silkiness, and the Dijon mustard and lemon juice bring bright, savory notes. Salt and pepper blend finish the dish and let you tailor the flavor to your liking.
- 10 eggs hard boiled: Provide firm, fully cooked yolks that create a creamy filling when mashed; ensure eggs are cooled and peeled before halving to maintain smooth texture. Offer protein and substance to each deviled egg, absorbing seasonings for balanced flavor.
- 1/2 cup mayonnaise: Add rich, silky creaminess that binds the yolk mixture and gives a luscious mouthfeel; use measured amount to avoid overly greasy filling. Contribute mild tang and fat that carry other flavors and improve spreadability.
- 1 tablespoon Dijon mustard: Introduce tangy, sharp mustard flavor that brightens the filling and cuts through the richness; whisk into the yolks for even distribution. Supply a bit of emulsifying power to keep the mixture smooth and cohesive.
- 1 teaspoon lemon juice: Provide bright, acidic lift to balance the richness and add freshness to the filling; stir in small amounts and adjust to taste. Help awaken other flavors and prevent the mixture from tasting flat or overly heavy.
- sea salt to taste: Season to personal preference to enhance and balance overall flavor; sprinkle lightly and taste as you go to avoid over-salting. Work with other seasonings to bring out natural savory notes without overpowering the filling.
- pepper blend ground, fresh, to taste: Season with a freshly ground pepper blend to add subtle heat and complexity; grind or shake a small amount over the filling for finishing aroma. Complement salt and acid while contributing a lively seasoning contrast to creamy yolk mixture.
Preparation Steps for Easy Deviled Eggs Recipe
I like to walk into the kitchen confident, with a clear workflow so the process feels calm. These steps are straightforward but benefit from attention to timing and texture. Read through once, gather your tools, and then proceed deliberately.
- Hard boil the eggs by covering them with cold water and bringing to a boil. Once at a boil, add a generous amount of salt, and then lower the heat to simmer, set the timer for 12 minutes, and then shock in ice water immediately.: The kitchen fills with a gentle, mineral steam as cold water warms and then rises into a steady boil, signaling the start of transformation from fragile liquid to proud solid. Doing this from cold helps the whites set evenly around the yolk, preventing hollow pockets that lead to fragile halves. A common mistake is dropping eggs into already boiling water which can cause cracking and uneven cooking, so I always start from cold and bring to a simmer gradually to protect the shell integrity and ensure uniform doneness. You'll hear a soft rolling boil and later notice the water surface shimmering, both signs it's reached the right stage.
- If this step is done correctly you will have beautiful yellow yolks without the graying rings which indicate overcooked hard boiled eggs: The added salt subtly seasons the shells and helps prevent pitting while the simmer softens the agitation so the eggs cook evenly. Lowering to a simmer removes violent bubbling that can jostle the contents and crack the shell, which you want to avoid for neat halves. Timing is crucial here; twelve minutes yields fully set yolks without the green ring. Immediately plunging into an ice bath stops residual cooking, locking in that perfect tender texture. A frequent error is skipping the ice bath, which leads to overcooked yolks and dull color.
- Split the eggs in half with a knife and carefully remove the yolks, mashing them with a fork: When you crack a perfectly cooked egg , the shell comes away clean and the yolk gleams a warm, even yellow, not gray at the edge. This visual cue reassures you that the timing and shock were successful. If you see a gray ring, it means the yolk was overcooked and underwent a chemical reaction with iron and sulfur, which affects both color and taste. To avoid this, adhere closely to the cooling step and do not let the eggs sit long in hot water after the timer goes off.
- Add enough mayonnaise to make a smooth consistency. Monitor as you go, and remember that the mayonnaise will be the moisture, so balance it carefully, since the tendency to make it moist can end up making it runny: The act of halving produces a satisfying sound as the knife glides through the tender white, revealing the sunny center. Scoop the yolks gently so the white cups remain intact, and mash the yolks until they are crumb free and powdery before adding wet ingredients. Smooth yolks ensure an even emulsification with the mayonnaise . One misstep is being too rough with the whites, tearing them and creating misshapen halves that do not present well on a platter.
- Season as you like. Salt and pepper are the old standbys, and relish can be used as well. I don’t prefer relish, but it is a popular additive.: As you fold in the mayonnaise , the mixture turns from dry and granular to glossy and supple; stop when it holds its shape but still feels silky. The mayonnaise is the moisture and binder, so balance is everything, or you risk a filling that oozes out of the whites. Stir slowly and taste, because texture and seasoning evolve as you incorporate the fat. A common issue is adding too much at once which yields a thin, unstable filling, so I always add in small increments.
- Stuff the cavity in the egg half, and top with paprika or cayenne as desired.: Pay attention to how the filling clings to the fork and how it feels between your fingers if you test a tiny bit; you want a paste that is firm enough to pipe but soft enough to melt on the palate. The nose will pick up the bright tang of Dijon mustard and lemon juice as they blend, signaling harmony. If the filling becomes too loose, chill it briefly to firm up. Avoid overmixing which can make the texture overly smooth and lifeless.
- I often find myself preaching about Sriracha sauce from Vietnam, which really is incredible. Simply add some of this to the yolk stuffing, and you are in business. Using harissa is also a great alternative for a spicy and devilish egg, as well as in other mayo sauces.: Aromatic hits of sea salt and freshly ground pepper blend lift the filling, so taste at intervals and adjust. Seasoning during assembly lets you control the intensity so the delicate egg flavor isn't drowned out. Keep measurements modest at first, then refine until the filling sings. A typical misstep is oversalting early without tasting after adding acidic components like lemon juice , which can make the seasoning seem sharp later.
- Fresh crab meat and seafood seasoning (popular on Maryland’s Eastern Shore in the forms of Old Bay and JO’s Spice, both available readily online) make for the perfect seaside picnic.: As you spoon or pipe the filling, you'll feel the satisfying resistance as the cavity is filled, and the visual contrast of creamy yellow against white is always pleasing. A light dusting of paprika adds color and a hint of smoky sweetness, while cayenne provides a bright snap of heat. Presentation matters, so pipe for neat peaks or spoon for a rustic look. Avoid overfilling which causes the topping to fall off when plated.
- We are lucky in that we have a kitchen garden, so I often cut a vine-ripened fresh tomato into small wedges, and top the normal garden-variety stuffed egg with this and some fresh chive. The acidity of the tomato livens everything up perfectly.: The heady aroma of hot sauce blends with the buttery yolk, giving a sharp, vinegary lift and a gentle heat that spreads across the palate. Incorporating a touch of Sriracha or another chili condiment changes the flavor profile quickly, so add sparingly and taste as you go. This addition is perfect when you want a lively contrast to the creamy base. One pitfall is adding too much hot sauce at once, which can mask the other flavors.
- For a phenomenal variation, use duck eggs, keeping the recipe quantities the same, or quail eggs, obviously using less of the particulates as indicated above.: When you fold in a little heat, the mixture emits a bright, piquant scent, and the taste becomes more memorable. The texture remains the same but the complexity increases, making each bite more interesting. If you plan to transport the eggs, keep the spicy version separate until plating to avoid sweating and flavor bleed.
- Note: Adding the salt to the pot after it boils protects your cookware, as the concentration of nitrates in the salt solids can pit your pans. And yes, this even applies to your high-end hoity-toity professional stainless set.: Combining delicate eggs with tender seafood creates a luxurious bite where the sweetness of crab complements the tangy filling. The seasoning blend adds savory layers that evoke coastal scenes and picnic blankets. When adding seafood, ensure it is well drained and cold to prevent excess moisture from diluting the filling. A typical error is adding wet seafood which can make the stuffing soggy, so pat dry thoroughly.
- We are lucky in that we have a kitchen garden, so I often cut a vine-ripened fresh tomato into small wedges, and top the normal garden-variety stuffed egg with this and some fresh chive: The bright acid and juiciness of a fresh tomato contrast beautifully with the dense yolk filling, and a snip of chive adds an oniony, herbal lift. The textures and colors make the dish sing on the plate and in the mouth. Be mindful that tomato juice can run, so add just before serving to preserve the look and texture.
- The acidity of the tomato livens everything up perfectly: That fleeting burst of tomato juice wakes up every other flavor and cleanses the palate between bites, making the overall experience less heavy. It is an effortless way to add brightness without changing the base ingredients. Avoid using overly ripe, watery tomatoes which will overwhelm the egg halves and make them slippery on the plate.
- For a phenomenal variation, use duck eggs, keeping the recipe quantities the same, or quail eggs, obviously using less of the particulates as indicated above: Duck and quail eggs offer different textures and sizes that alter the eating experience while keeping the method intact. Duck eggs have richer yolks that yield an especially luxurious filling, while quail eggs are petite and delicate, ideal for bite sized hors d oeuvres. When switching sizes, be mindful of proportions and presentation, and remember that cooking times can vary, so test one first to ensure perfect doneness.
- Note: Adding the salt to the pot after it boils protects your cookware, as the concentration of nitrates in the salt solids can pit your pans : This small action preserves your tools while still allowing the water to season the eggs . The kitchen chemistry here is subtle but meaningful, preventing long term damage to stainless or copper surfaces. A practical tip is to dissolve salt in the water before heavy use, and avoid abrasive cleaners on pitted areas. Many overlook this preventative step and later regret the cosmetic damage to beloved pans.
Helpful Hints
I like to collect a few reliable tricks that raise the bar without adding complexity. These hints come from repeated cooking, small experiments, and lessons learned from kitchen mishaps. Use them to make your process smoother and results more consistent.
- Chilling matters: After boiling, plunge eggs into an ice bath for at least 10 minutes to halt cooking and make peeling effortless.
- Peeling trick: Crack the shell gently all over and roll the egg on the counter to loosen the membrane, then peel under running water to help separate the shell cleanly from the white.
- Start with less mayo: Add mayonnaise gradually to the mashed yolks until you reach a creamy, pipeable texture so you do not overdo the moisture.
- Season in stages: Add a little sea salt and pepper blend while mixing, then taste and adjust after adding lemon juice and Dijon mustard.
- Use a piping bag for presentation: For neatness and visual appeal, pipe the filling into the whites using a star tip, which also gives texture that holds toppings in place.
What Complements This Easy Deviled Eggs Recipe
These eggs pair wonderfully with simple, fresh sides and suit many occasions from casual lunches to holiday spreads. Think about textural contrast and flavor balance when planning a plate. They work especially well with crisp greens or crunchy pickles that cut the richness.
- Picnic pairings: Bring along a bowl of crisp vegetable sticks, a loaf of crusty bread, and chilled lemonade for an effortless outdoor meal featuring eggs.
- Party platter: Arrange the eggs on a large tray surrounded by sliced cucumbers and cherry tomatoes for a bright, shareable appetizer.
- Occasion ideas: These are perfect for brunches, baby showers, and Ramadan iftar spreads where finger foods are welcome and easy to serve.
- Storage tips: Store filled eggs in an airtight container in the refrigerator for up to two days; for longer storage, keep whites and filling separate and assemble before serving.
- Seasonal notes: During summer, top with fresh garden tomato wedges and chives; in cooler months, a light dusting of smoked paprika or a tiny dollop of relish provides warmth and depth.
FAQ
Conclusion
What makes this recipe special is how a few simple ingredients transform into a lusciously creamy, flavor packed bite that fits any gathering. Try this version of deviled eggs to enjoy the satisfying contrast of tender whites and silky, seasoned yolk filling that you can tweak to match your mood. Whether you keep things classic or explore spicy or seafood variations, these eggs are approachable and rewarding to make, and they consistently earn compliments at the table. Go ahead, give them a whirl and watch how quickly they become a staple in your recipe rotation.
Easy Deviled Eggs Recipe
Equipment
- Saucepan
- Mixing Bowl
- Fork
- Knife
- Ice Bath Bowl
- Spoon or piping bag
Ingredients
- 10 eggs hard boiled Provide firm, fully cooked yolks that create a creamy filling when mashed; ensure eggs are cooled and peeled before halving to maintain smooth texture. Offer protein and substance to each deviled egg, absorbing seasonings for balanced flavor.
- 1/2 cup mayonnaise Add rich, silky creaminess that binds the yolk mixture and gives a luscious mouthfeel; use measured amount to avoid overly greasy filling. Contribute mild tang and fat that carry other flavors and improve spreadability.
- 1 tablespoon Dijon mustard Introduce tangy, sharp mustard flavor that brightens the filling and cuts through the richness; whisk into the yolks for even distribution. Supply a bit of emulsifying power to keep the mixture smooth and cohesive.
- 1 teaspoon lemon juice Provide bright, acidic lift to balance the richness and add freshness to the filling; stir in small amounts and adjust to taste. Help awaken other flavors and prevent the mixture from tasting flat or overly heavy.
- sea salt to taste Season to personal preference to enhance and balance overall flavor; sprinkle lightly and taste as you go to avoid over-salting. Work with other seasonings to bring out natural savory notes without overpowering the filling.
- pepper blend ground, fresh, to taste Season with a freshly ground pepper blend to add subtle heat and complexity; grind or shake a small amount over the filling for finishing aroma. Complement salt and acid while contributing a lively seasoning contrast to creamy yolk mixture.
Instructions
- Hard boil the eggs by covering them with cold water and bringing to a boil. Once at a boil, add a generous amount of salt, and then lower the heat to simmer, set the timer for 12 minutes, and then shock in ice water immediately.: The kitchen fills with a gentle, mineral steam as cold water warms and then rises into a steady boil, signaling the start of transformation from fragile liquid to proud solid. Doing this from cold helps the whites set evenly around the yolk, preventing hollow pockets that lead to fragile halves. A common mistake is dropping eggs into already boiling water which can cause cracking and uneven cooking, so I always start from cold and bring to a simmer gradually to protect the shell integrity and ensure uniform doneness. You'll hear a soft rolling boil and later notice the water surface shimmering, both signs it's reached the right stage.
- If this step is done correctly you will have beautiful yellow yolks without the graying rings which indicate overcooked hard boiled eggs: The added salt subtly seasons the shells and helps prevent pitting while the simmer softens the agitation so the eggs cook evenly. Lowering to a simmer removes violent bubbling that can jostle the contents and crack the shell, which you want to avoid for neat halves. Timing is crucial here; twelve minutes yields fully set yolks without the green ring. Immediately plunging into an ice bath stops residual cooking, locking in that perfect tender texture. A frequent error is skipping the ice bath, which leads to overcooked yolks and dull color.
- Split the eggs in half with a knife and carefully remove the yolks, mashing them with a fork: When you crack a perfectly cooked egg , the shell comes away clean and the yolk gleams a warm, even yellow, not gray at the edge. This visual cue reassures you that the timing and shock were successful. If you see a gray ring, it means the yolk was overcooked and underwent a chemical reaction with iron and sulfur, which affects both color and taste. To avoid this, adhere closely to the cooling step and do not let the eggs sit long in hot water after the timer goes off.
- Add enough mayonnaise to make a smooth consistency. Monitor as you go, and remember that the mayonnaise will be the moisture, so balance it carefully, since the tendency to make it moist can end up making it runny: The act of halving produces a satisfying sound as the knife glides through the tender white, revealing the sunny center. Scoop the yolks gently so the white cups remain intact, and mash the yolks until they are crumb free and powdery before adding wet ingredients. Smooth yolks ensure an even emulsification with the mayonnaise . One misstep is being too rough with the whites, tearing them and creating misshapen halves that do not present well on a platter.
- Season as you like. Salt and pepper are the old standbys, and relish can be used as well. I don’t prefer relish, but it is a popular additive.: As you fold in the mayonnaise , the mixture turns from dry and granular to glossy and supple; stop when it holds its shape but still feels silky. The mayonnaise is the moisture and binder, so balance is everything, or you risk a filling that oozes out of the whites. Stir slowly and taste, because texture and seasoning evolve as you incorporate the fat. A common issue is adding too much at once which yields a thin, unstable filling, so I always add in small increments.
- Stuff the cavity in the egg half, and top with paprika or cayenne as desired.: Pay attention to how the filling clings to the fork and how it feels between your fingers if you test a tiny bit; you want a paste that is firm enough to pipe but soft enough to melt on the palate. The nose will pick up the bright tang of Dijon mustard and lemon juice as they blend, signaling harmony. If the filling becomes too loose, chill it briefly to firm up. Avoid overmixing which can make the texture overly smooth and lifeless.
- I often find myself preaching about Sriracha sauce from Vietnam, which really is incredible. Simply add some of this to the yolk stuffing, and you are in business. Using harissa is also a great alternative for a spicy and devilish egg, as well as in other mayo sauces.: Aromatic hits of sea salt and freshly ground pepper blend lift the filling, so taste at intervals and adjust. Seasoning during assembly lets you control the intensity so the delicate egg flavor isn't drowned out. Keep measurements modest at first, then refine until the filling sings. A typical misstep is oversalting early without tasting after adding acidic components like lemon juice , which can make the seasoning seem sharp later.
- Fresh crab meat and seafood seasoning (popular on Maryland’s Eastern Shore in the forms of Old Bay and JO’s Spice, both available readily online) make for the perfect seaside picnic.: As you spoon or pipe the filling, you'll feel the satisfying resistance as the cavity is filled, and the visual contrast of creamy yellow against white is always pleasing. A light dusting of paprika adds color and a hint of smoky sweetness, while cayenne provides a bright snap of heat. Presentation matters, so pipe for neat peaks or spoon for a rustic look. Avoid overfilling which causes the topping to fall off when plated.
- We are lucky in that we have a kitchen garden, so I often cut a vine-ripened fresh tomato into small wedges, and top the normal garden-variety stuffed egg with this and some fresh chive. The acidity of the tomato livens everything up perfectly.: The heady aroma of hot sauce blends with the buttery yolk, giving a sharp, vinegary lift and a gentle heat that spreads across the palate. Incorporating a touch of Sriracha or another chili condiment changes the flavor profile quickly, so add sparingly and taste as you go. This addition is perfect when you want a lively contrast to the creamy base. One pitfall is adding too much hot sauce at once, which can mask the other flavors.
- For a phenomenal variation, use duck eggs, keeping the recipe quantities the same, or quail eggs, obviously using less of the particulates as indicated above.: When you fold in a little heat, the mixture emits a bright, piquant scent, and the taste becomes more memorable. The texture remains the same but the complexity increases, making each bite more interesting. If you plan to transport the eggs, keep the spicy version separate until plating to avoid sweating and flavor bleed.
- Note: Adding the salt to the pot after it boils protects your cookware, as the concentration of nitrates in the salt solids can pit your pans. And yes, this even applies to your high-end hoity-toity professional stainless set.: Combining delicate eggs with tender seafood creates a luxurious bite where the sweetness of crab complements the tangy filling. The seasoning blend adds savory layers that evoke coastal scenes and picnic blankets. When adding seafood, ensure it is well drained and cold to prevent excess moisture from diluting the filling. A typical error is adding wet seafood which can make the stuffing soggy, so pat dry thoroughly.
- We are lucky in that we have a kitchen garden, so I often cut a vine-ripened fresh tomato into small wedges, and top the normal garden-variety stuffed egg with this and some fresh chive: The bright acid and juiciness of a fresh tomato contrast beautifully with the dense yolk filling, and a snip of chive adds an oniony, herbal lift. The textures and colors make the dish sing on the plate and in the mouth. Be mindful that tomato juice can run, so add just before serving to preserve the look and texture.
- The acidity of the tomato livens everything up perfectly: That fleeting burst of tomato juice wakes up every other flavor and cleanses the palate between bites, making the overall experience less heavy. It is an effortless way to add brightness without changing the base ingredients. Avoid using overly ripe, watery tomatoes which will overwhelm the egg halves and make them slippery on the plate.
- For a phenomenal variation, use duck eggs, keeping the recipe quantities the same, or quail eggs, obviously using less of the particulates as indicated above: Duck and quail eggs offer different textures and sizes that alter the eating experience while keeping the method intact. Duck eggs have richer yolks that yield an especially luxurious filling, while quail eggs are petite and delicate, ideal for bite sized hors d oeuvres. When switching sizes, be mindful of proportions and presentation, and remember that cooking times can vary, so test one first to ensure perfect doneness.
- Note: Adding the salt to the pot after it boils protects your cookware, as the concentration of nitrates in the salt solids can pit your pans : This small action preserves your tools while still allowing the water to season the eggs . The kitchen chemistry here is subtle but meaningful, preventing long term damage to stainless or copper surfaces. A practical tip is to dissolve salt in the water before heavy use, and avoid abrasive cleaners on pitted areas. Many overlook this preventative step and later regret the cosmetic damage to beloved pans.
Notes
- Chilling matters: After boiling, plunge eggs into an ice bath for at least 10 minutes to halt cooking and make peeling effortless.
- Peeling trick: Crack the shell gently all over and roll the egg on the counter to loosen the membrane, then peel under running water to help separate the shell cleanly from the white.
- Start with less mayo: Add mayonnaise gradually to the mashed yolks until you reach a creamy, pipeable texture so you do not overdo the moisture.
- Season in stages: Add a little sea salt and pepper blend while mixing, then taste and adjust after adding lemon juice and Dijon mustard.
- Use a piping bag for presentation: For neatness and visual appeal, pipe the filling into the whites using a star tip, which also gives texture that holds toppings in place.