Chocolate Chip Skillet Cookie
Chocolate Chip Skillet Cookie is the kind of dessert that feels like a warm hug on a weeknight and a celebration on a weekend.
I first met this skillet cookie on a rainy evening when I wanted something quick, comforting, and just a little dramatic. I had a craving for something gooey and chocolatey, and the idea of serving a warm cookie straight from a skillet felt like a small performance for my roommates. I remember pressing the dough into the sizzling pan, the kitchen filling with a buttery aroma that made everyone drift in curious. We all gathered around, spoons at the ready, and that first crack as the spoon hit the soft middle was pure joy.
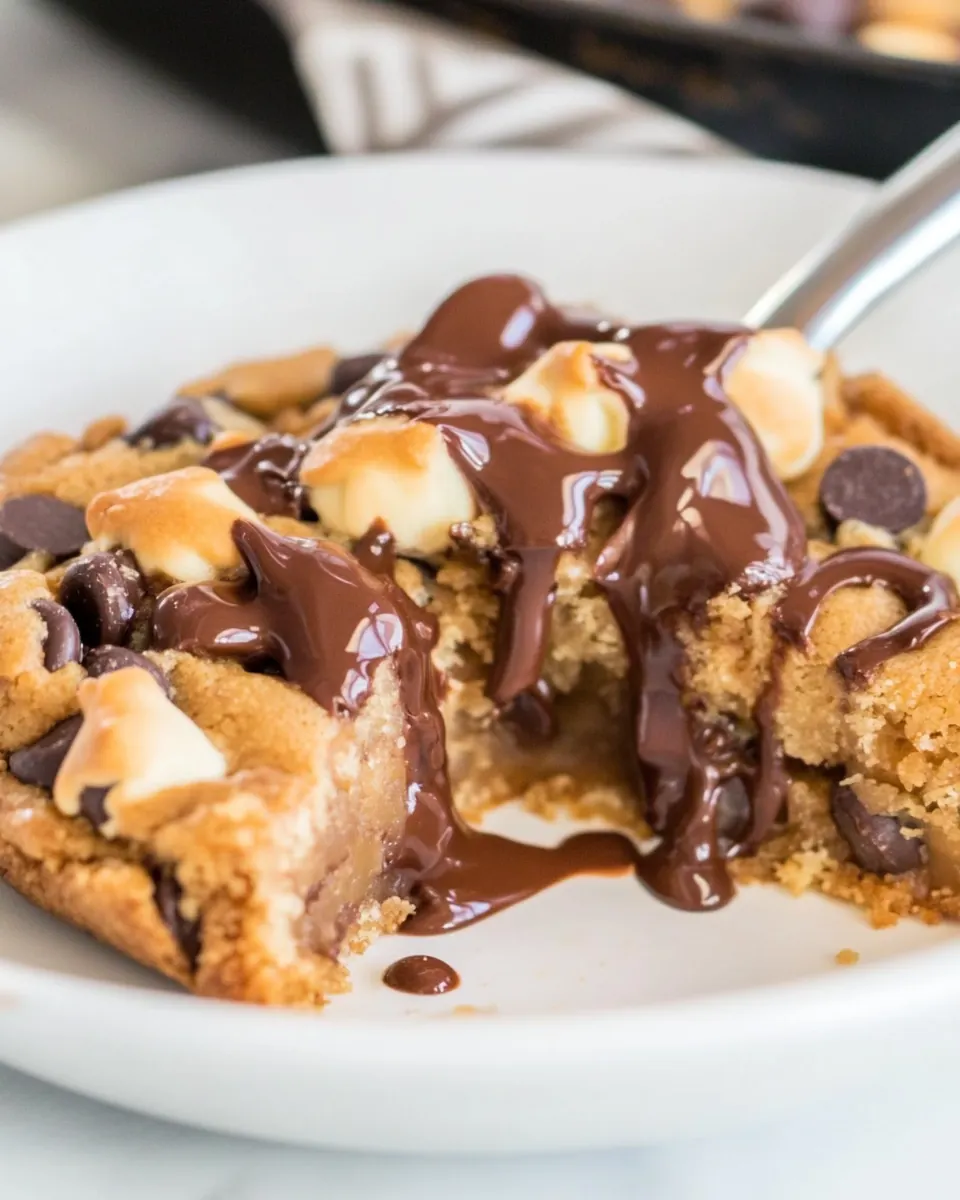
Over time I refined how I finish the cookie, adding a ribbon of hot fudge and a scoop of melting ice cream to create contrast between warm and cold, soft and creamy. This version is forgiving, fast, and crowd friendly, which is why it has become my go-to when friends pop over unannounced. You do not need fancy tools or hours of planning, just a skillet, a packet of cookie mix, and a little patience while it cools enough to slice.
Recipe Snapshot
28 mins
5 mins
23 mins
Medium
250 kcal
American
Keto, Gluten-Free
Desserts
10-inch skillet, Mixing bowl, Spatula, Oven
The Appeal of This Chocolate Chip Skillet Cookie
One pan wow factor
I love that the Chocolate Chip Skillet Cookie delivers an impressive presentation with minimal fuss. Placing a warm, golden cookie in the center of the table turns dessert into an event, and you get the satisfying contrast of a crispy edge and a gooey center every time.
Speed without sacrifice
For busy evenings I appreciate how fast this comes together. The ingredient list is short, and the prep is nearly effortless, so you can go from craving to spoon in less than an hour. I often rely on this when I want something indulgent but do not want to spend all night baking.
Texture playground
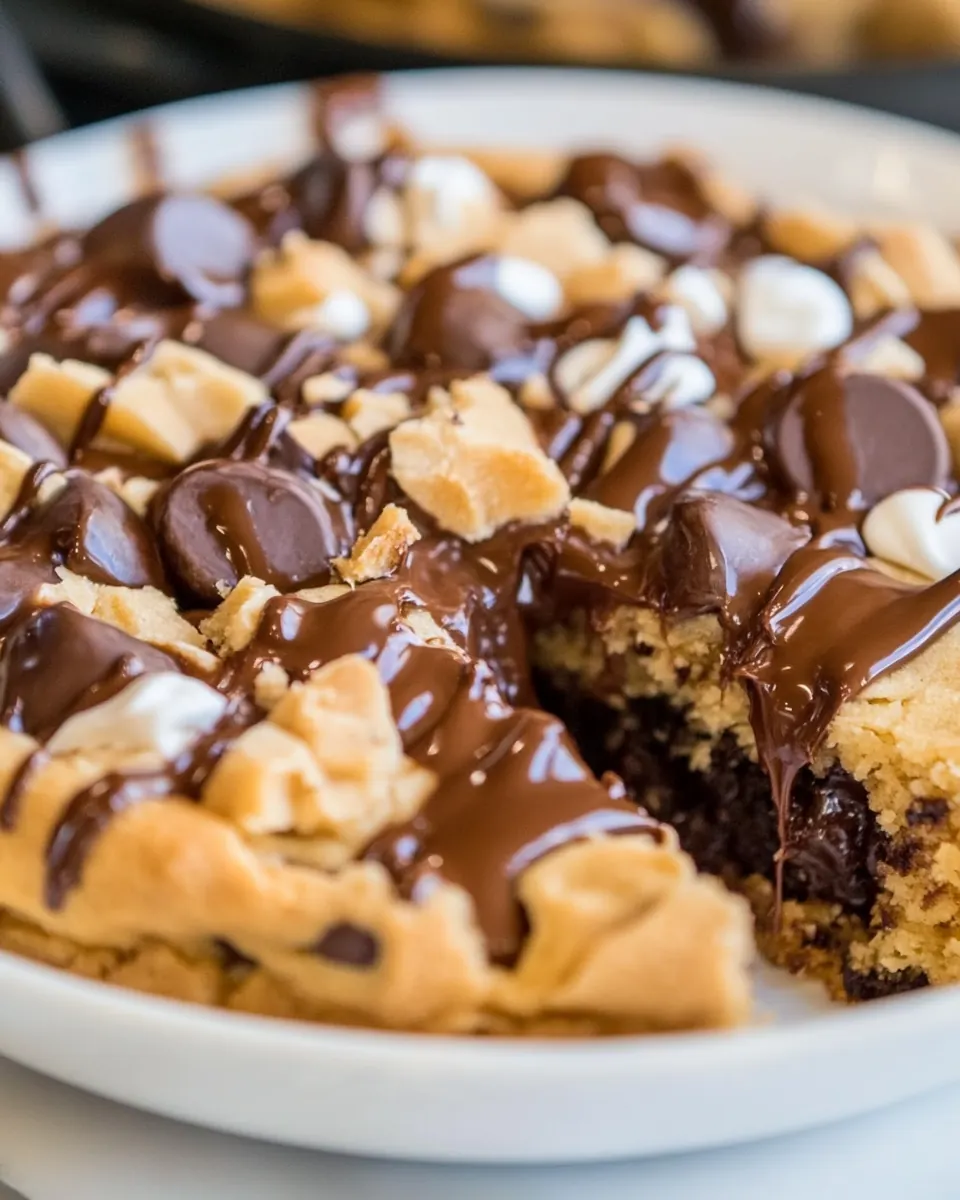
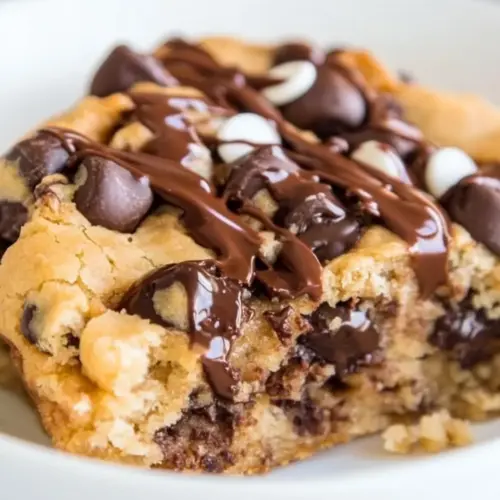
The combination of a slightly crisp rim and a molten middle makes every bite interesting. I like to press extra chocolate chips on top so each slice has pockets of melting chocolate, and the hot fudge adds another layer of decadence that plays beautifully with the warm cookie.
Flexible serving styles
You can dress this up or keep it humble. I serve it simply with a scoop of cold ice cream for contrast, but it is equally happy with a drizzle of warm sauce. This adaptability means it works for casual movie nights or when you need a last minute showstopper.
Comfort food confidence
There is something reassuring about a dessert that consistently delivers comfort. I rely on this recipe when I want to share warmth and nostalgia with friends, and it rarely disappoints. The hands on, immediate nature of serving a skillet cookie fosters connection and shared indulgence.
Chocolate Chip Skillet Cookie Shopping List

These ingredients are chosen to create a simple, crowd pleasing skillet dessert. The mix does a lot of heavy lifting so the key players are the mix itself, fat from the butter, and the egg that binds everything. The finishing elements like chocolate chips, hot fudge, and ice cream add contrast and elevate the experience from good to unforgettable.
- one 17.5-ounce pouch Betty Crocker™ Chocolate Chip Cookie Mix: Provide structure and convenience by using a pre-mixed cookie mix pouch formulated specifically for chocolate chip cookies; it contains flour, sugar, leavening, and flavoring to ensure consistent texture and taste. Follow the package instructions for measurements and any mix-ins, as the mix determines baking time and moisture balance in the skillet cookie. Using the specified 17.5-ounce size yields the correct dough volume for an even, single-skillet bake and helps achieve a golden edge with a soft center.
- 1/2 cup unsalted butter, softened (as called for on cookie mix pouch): Cream butter until smooth and pliable to incorporate fat and moisture that melts during baking, producing tender, rich cookies with a slightly crisp edge. Softened unsalted butter lets you control the salt level in the cookie and blends evenly into the pouch mix for uniform texture. Measure a half cup precisely to maintain the balance of fat to dry ingredients as intended by the mix directions.
- 1 large egg, as called for on cookie mix pouch: Add an egg to bind the dough, provide moisture, and contribute to the cookie’s rise and chewiness when heated in a skillet. Using one large egg supplies the right amount of protein and water to set the structure while helping achieve a cohesive dough that spreads predictably. Beat lightly before combining if the mix instructions recommend it to ensure even incorporation.
- 1/3 cups semi-sweet chocolate chips, for sprinkling: Scatter semi–sweet chocolate chips over the dough to provide pockets of melted chocolate and bursts of sweetness in each bite; choose the amount called for to balance chocolate intensity. Semi–sweet chips add a pleasant contrast to the dough without overpowering it, and sprinkling them on top encourages an appealing melted-top appearance. Use chip size consistent with the mix’s recommended distribution for even melting and texture.
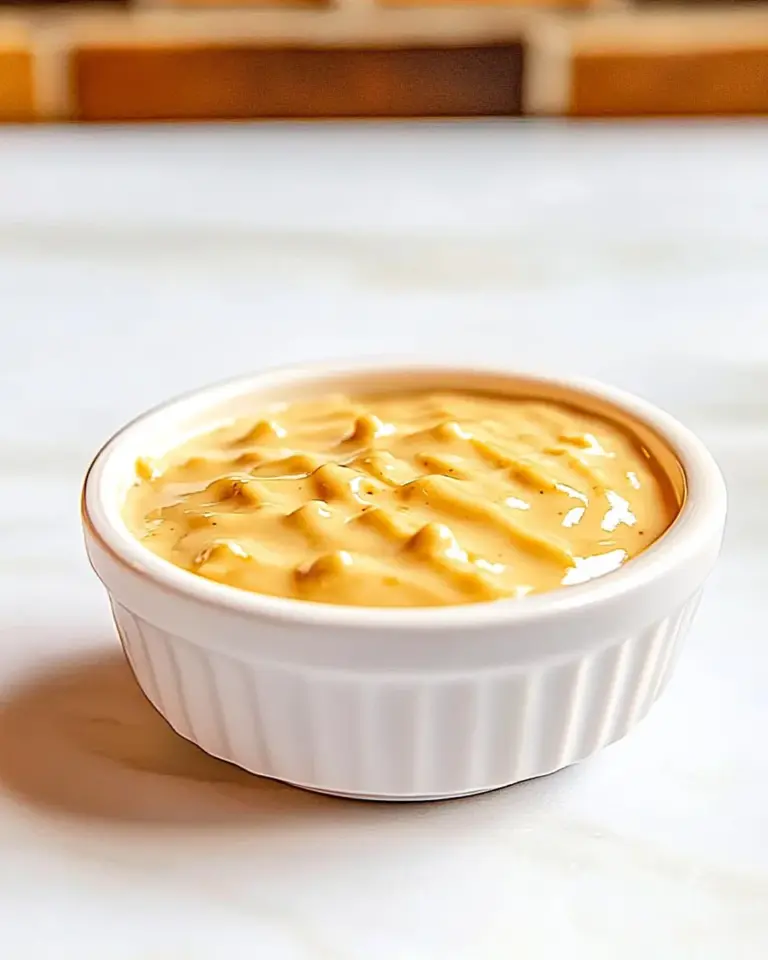
- hot fudge, for drizzling (homemade): Drizzle hot fudge over the finished skillet cookie to add a glossy, decadent layer of rich chocolate and additional moisture that elevates the dessert’s flavor profile. Homemade hot fudge contributes depth from cooked sugar and cocoa, allowing control over sweetness and thickness for optimal drizzling. Warm slightly before serving so it pours smoothly and melds with the warm cookie for an indulgent presentation.
- ice cream for serving (optional): Serve with ice cream to introduce a cold, creamy contrast that balances the warm, gooey skillet cookie and intensifies the dessert’s richness; include it as optional to accommodate preferences. Choose a flavor that complements chocolate, such as vanilla, to highlight the cookie’s flavors while adding texture and temperature contrast. Scoop onto individual portions just before serving so the ice cream softens slightly against the warm cookie.
Step by Step Instructions for Chocolate Chip Skillet Cookie
This cookie is straightforward to make, but the difference is in the details. Below I rework each instruction so you have tactile cues and troubleshooting tips to nail the perfect crisp edge and gooey center.
- Preheat oven to 350 F and spray a 10-inch overproof skillet with cooking spray; set aside.: As you begin, breathe in the faint, clean scent of a properly preheated oven warming the room, it primes the pan so the edges set quickly and develop that coveted crisp ring. Using a well seasoned or ovenproof skillet helps transfer heat evenly, ensuring the bottom browns without burning. A common error is placing a cold pan in a hot oven, which can cause uneven baking, so make sure your skillet is ready and the oven is fully up to 350 F before you start; if the oven underperforms, your edges may stay pale while the center cooks through.
- To a medium bowl, add the cookie mix, butter, egg, and stir until a soft dough forms.: You will notice the dough change from powdery to lumpy then smooth, with a soft, tacky texture that holds shape when pressed. The aroma becomes buttery and faintly sweet as the butter and egg bind the mix. Mixing thoroughly ensures even hydration so no dry pockets remain, which affects both texture and flavor. If you overmix, the dough can become dense, so stop as soon as it is homogeneous. If the mixture seems too dry, a small splash of milk helps, but follow the pouch directions closely to avoid a runny batter.
- Spread dough evenly in skillet, smoothing with a spatula or pressing with fingertips to flatten and cover bottom.: As you work the dough into the skillet , feel for an even thickness across the pan, fingertip dimples will smooth out as the surface becomes taut and glossy. Even spreading guarantees consistent baking, so that edges crisp at the same rate as the center softens. A common mistake is leaving the center thicker than the edges, which leads to an underbaked middle; use a spatula to level and check visually for uniform coverage.
- Evenly sprinkle with the chocolate chips, pressing them down lightly with your fingertips.: When you scatter the chocolate chips , watch them sink slightly as you press, creating molten pockets during baking that glisten once warmed. This pressing helps the chips adhere so they do not simply bake on top and fall off when you slice. Uneven distribution can leave bites without chocolate, so take a moment to space them evenly; if you add too many at once, the cookie surface may not brown evenly, so balance quantity for melt and structure.
- Bake about 20 to 23 minutes or until edges are light golden brown. Do not overbake; cookie will continue to cook once out of oven due to carryover cooking and is meant to be gooey. If you prefer more well-done cookies, bake a few minutes longer.: The oven will sing a low hum, and you should see the edges transform to a warm, light golden color while the center remains slightly glossy and jiggly. This visual cue is key because the residual heat will finish the center as it rests, preserving gooeyness. A common pitfall is leaving it in too long which results in a uniformly firm cookie; if you like more structure, add small increments of time and watch closely to avoid dryness.
- Place skillet on top of a cooling rack and allow to cool for about 5 minutes before drizzling with hot fudge and optionally serving with ice cream. Cookie is best warm and fresh but will keep airtight for up to 4 days. I wrap leftovers in plastic wrap in individually-portioned pieces and heat for 5 to 10 seconds in the microwave before serving for that just-baked taste.: As the skillet rests, the smell deepens into a caramelized sweetness and the edges set while the center relaxes into a luscious, spoonable texture; this waiting period is your reward. Drizzling warm hot fudge will create a glossy top that melds into the cookie's surface, and adding a scoop of cold ice cream creates an irresistible warm cold contrast. Avoid slicing immediately from a piping hot skillet, as the center may collapse and be overly runny; waiting the suggested minutes preserves structure while keeping the interior soft.
- Adapted from Betty Crocker: The recipe's roots explain its reliability and consistent behavior across kitchens, which is why I trust the mix for dependable results. This source also means measurements and techniques are optimized for home cooks, offering a helpful safety net if you are new to skillet desserts. If you deviate from the pouch instructions, you might alter texture or bake time, so treat adaptations as experiments and note outcomes for future tweaks.
Tips and Variations
This cookie is flexible and forgiving. Below are practical tips and simple variations to help you personalize the experience while keeping the outcome reliably delicious.
- Use softened butter: Softened butter blends quickly into the mix for even texture, helping the dough come together without overworking.
- Space the chips: Pressing the chocolate chips evenly across the surface ensures each serving has melty pockets of chocolate.
- Control gooeyness: Pull the skillet when the edges are light golden and the center is slightly jiggly to preserve a soft, molten middle.
- Warm the hot fudge: Slightly dilute thick hot fudge with a few seconds in the microwave so it drizzles smoothly over the cookie.
- Serve with cold contrast: A scoop of cold ice cream beside warm cookie creates a pleasing temperature and texture interplay.
- Leftover reheating: Reheat individual portions for 5 to 10 seconds in the microwave to recapture the just baked feel without drying the cookie out.
Perfect Pairings for Chocolate Chip Skillet Cookie
This warm skillet cookie pairs beautifully with simple accompaniments and fits many occasions, from casual hangouts to cozy celebrations. Here are practical serving ideas and storage notes to help you present it with confidence.
- Classic scoop and drizzle: Serve each slice with a generous scoop of cold ice cream and a warm drizzle of hot fudge for a timeless contrast of warm and cold.
- Family style dessert: Place the entire skillet in the center of the table and let guests spoon their portions directly from the pan for a communal experience.
- After dinner treat: Present it following a casual dinner for a comforting finale that does not require fancy plating or extensive prep.
- Movie night sweet: Keep napkins near and serve slices straight from the pan so everyone can enjoy the gooey center while it is still warm.
- Storage tip: Wrap leftover pieces airtight and refrigerate for up to four days, reheating briefly for that freshly baked sensation.
- Occasion fit: This is an excellent dessert for birthdays, small gatherings, or anytime you want a quick, celebratory treat without advanced planning.
FAQ
Conclusion
What makes this Chocolate Chip Skillet Cookie special is its perfect marriage of a crisp, golden edge and an irresistibly gooey, chocolate studded center that brings people together. Give it a try the next time you want a fast, shareable dessert with dramatic presentation and minimal fuss. Serve it warm, add a scoop of ice cream, and enjoy the smiles and spoonfuls that follow, knowing you created a simple but memorable treat.
Chocolate Chip Skillet Cookie
Equipment
- 10-inch Skillet
- Mixing Bowl
- Spatula
- Oven
Ingredients
- one 17.5-ounce pouch Betty Crocker™ Chocolate Chip Cookie Mix Provide structure and convenience by using a pre-mixed cookie mix pouch formulated specifically for chocolate chip cookies; it contains flour, sugar, leavening, and flavoring to ensure consistent texture and taste. Follow the package instructions for measurements and any mix-ins, as the mix determines baking time and moisture balance in the skillet cookie. Using the specified 17.5-ounce size yields the correct dough volume for an even, single-skillet bake and helps achieve a golden edge with a soft center.
- 1/2 cup unsalted butter, softened (as called for on cookie mix pouch) Cream butter until smooth and pliable to incorporate fat and moisture that melts during baking, producing tender, rich cookies with a slightly crisp edge. Softened unsalted butter lets you control the salt level in the cookie and blends evenly into the pouch mix for uniform texture. Measure a half cup precisely to maintain the balance of fat to dry ingredients as intended by the mix directions.
- 1 large egg, as called for on cookie mix pouch Add an egg to bind the dough, provide moisture, and contribute to the cookie’s rise and chewiness when heated in a skillet. Using one large egg supplies the right amount of protein and water to set the structure while helping achieve a cohesive dough that spreads predictably. Beat lightly before combining if the mix instructions recommend it to ensure even incorporation.
- 1/3 cups semi-sweet chocolate chips, for sprinkling Scatter semi-sweet chocolate chips over the dough to provide pockets of melted chocolate and bursts of sweetness in each bite; choose the amount called for to balance chocolate intensity. Semi-sweet chips add a pleasant contrast to the dough without overpowering it, and sprinkling them on top encourages an appealing melted-top appearance. Use chip size consistent with the mix’s recommended distribution for even melting and texture.
- hot fudge, for drizzling (homemade) Drizzle hot fudge over the finished skillet cookie to add a glossy, decadent layer of rich chocolate and additional moisture that elevates the dessert’s flavor profile. Homemade hot fudge contributes depth from cooked sugar and cocoa, allowing control over sweetness and thickness for optimal drizzling. Warm slightly before serving so it pours smoothly and melds with the warm cookie for an indulgent presentation.
- ice cream for serving, optional Serve with ice cream to introduce a cold, creamy contrast that balances the warm, gooey skillet cookie and intensifies the dessert’s richness; include it as optional to accommodate preferences. Choose a flavor that complements chocolate, such as vanilla, to highlight the cookie’s flavors while adding texture and temperature contrast. Scoop onto individual portions just before serving so the ice cream softens slightly against the warm cookie.
Instructions
- Preheat oven to 350 F and spray a 10-inch overproof skillet with cooking spray; set aside.: As you begin, breathe in the faint, clean scent of a properly preheated oven warming the room, it primes the pan so the edges set quickly and develop that coveted crisp ring. Using a well seasoned or ovenproof skillet helps transfer heat evenly, ensuring the bottom browns without burning. A common error is placing a cold pan in a hot oven, which can cause uneven baking, so make sure your skillet is ready and the oven is fully up to 350 F before you start; if the oven underperforms, your edges may stay pale while the center cooks through.
- To a medium bowl, add the cookie mix, butter, egg, and stir until a soft dough forms.: You will notice the dough change from powdery to lumpy then smooth, with a soft, tacky texture that holds shape when pressed. The aroma becomes buttery and faintly sweet as the butter and egg bind the mix. Mixing thoroughly ensures even hydration so no dry pockets remain, which affects both texture and flavor. If you overmix, the dough can become dense, so stop as soon as it is homogeneous. If the mixture seems too dry, a small splash of milk helps, but follow the pouch directions closely to avoid a runny batter.
- Spread dough evenly in skillet, smoothing with a spatula or pressing with fingertips to flatten and cover bottom.: As you work the dough into the skillet , feel for an even thickness across the pan, fingertip dimples will smooth out as the surface becomes taut and glossy. Even spreading guarantees consistent baking, so that edges crisp at the same rate as the center softens. A common mistake is leaving the center thicker than the edges, which leads to an underbaked middle; use a spatula to level and check visually for uniform coverage.
- Evenly sprinkle with the chocolate chips, pressing them down lightly with your fingertips.: When you scatter the chocolate chips , watch them sink slightly as you press, creating molten pockets during baking that glisten once warmed. This pressing helps the chips adhere so they do not simply bake on top and fall off when you slice. Uneven distribution can leave bites without chocolate, so take a moment to space them evenly; if you add too many at once, the cookie surface may not brown evenly, so balance quantity for melt and structure.
- Bake about 20 to 23 minutes or until edges are light golden brown. Do not overbake; cookie will continue to cook once out of oven due to carryover cooking and is meant to be gooey. If you prefer more well-done cookies, bake a few minutes longer.: The oven will sing a low hum, and you should see the edges transform to a warm, light golden color while the center remains slightly glossy and jiggly. This visual cue is key because the residual heat will finish the center as it rests, preserving gooeyness. A common pitfall is leaving it in too long which results in a uniformly firm cookie; if you like more structure, add small increments of time and watch closely to avoid dryness.
- Place skillet on top of a cooling rack and allow to cool for about 5 minutes before drizzling with hot fudge and optionally serving with ice cream. Cookie is best warm and fresh but will keep airtight for up to 4 days. I wrap leftovers in plastic wrap in individually-portioned pieces and heat for 5 to 10 seconds in the microwave before serving for that just-baked taste.: As the skillet rests, the smell deepens into a caramelized sweetness and the edges set while the center relaxes into a luscious, spoonable texture; this waiting period is your reward. Drizzling warm hot fudge will create a glossy top that melds into the cookie's surface, and adding a scoop of cold ice cream creates an irresistible warm cold contrast. Avoid slicing immediately from a piping hot skillet, as the center may collapse and be overly runny; waiting the suggested minutes preserves structure while keeping the interior soft.
- Adapted from Betty Crocker: The recipe's roots explain its reliability and consistent behavior across kitchens, which is why I trust the mix for dependable results. This source also means measurements and techniques are optimized for home cooks, offering a helpful safety net if you are new to skillet desserts. If you deviate from the pouch instructions, you might alter texture or bake time, so treat adaptations as experiments and note outcomes for future tweaks.
Notes
- Use softened butter: Softened butter blends quickly into the mix for even texture, helping the dough come together without overworking.
- Space the chips: Pressing the chocolate chips evenly across the surface ensures each serving has melty pockets of chocolate.
- Control gooeyness: Pull the skillet when the edges are light golden and the center is slightly jiggly to preserve a soft, molten middle.
- Warm the hot fudge: Slightly dilute thick hot fudge with a few seconds in the microwave so it drizzles smoothly over the cookie.
- Serve with cold contrast: A scoop of cold ice cream beside warm cookie creates a pleasing temperature and texture interplay.
- Leftover reheating: Reheat individual portions for 5 to 10 seconds in the microwave to recapture the just baked feel without drying the cookie out.