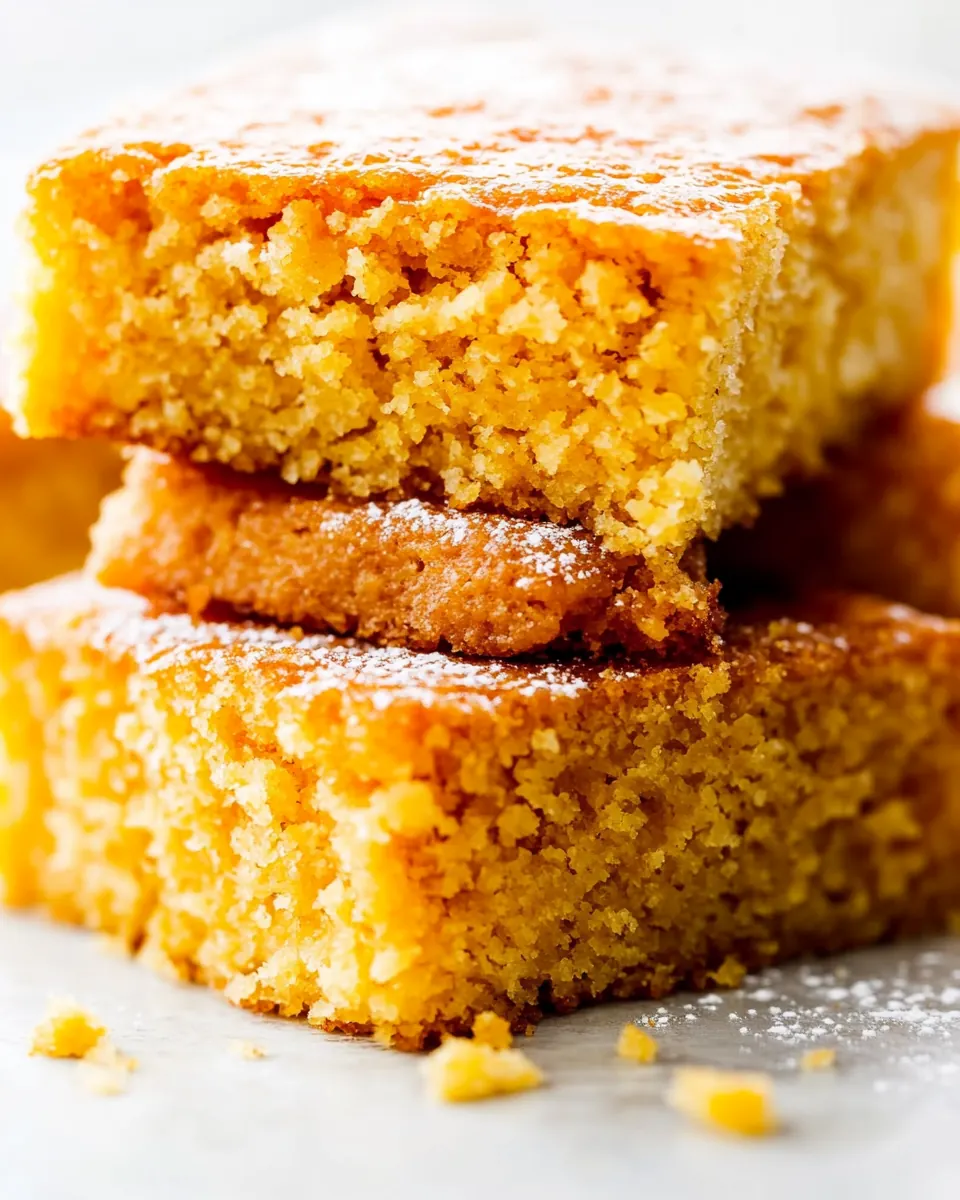
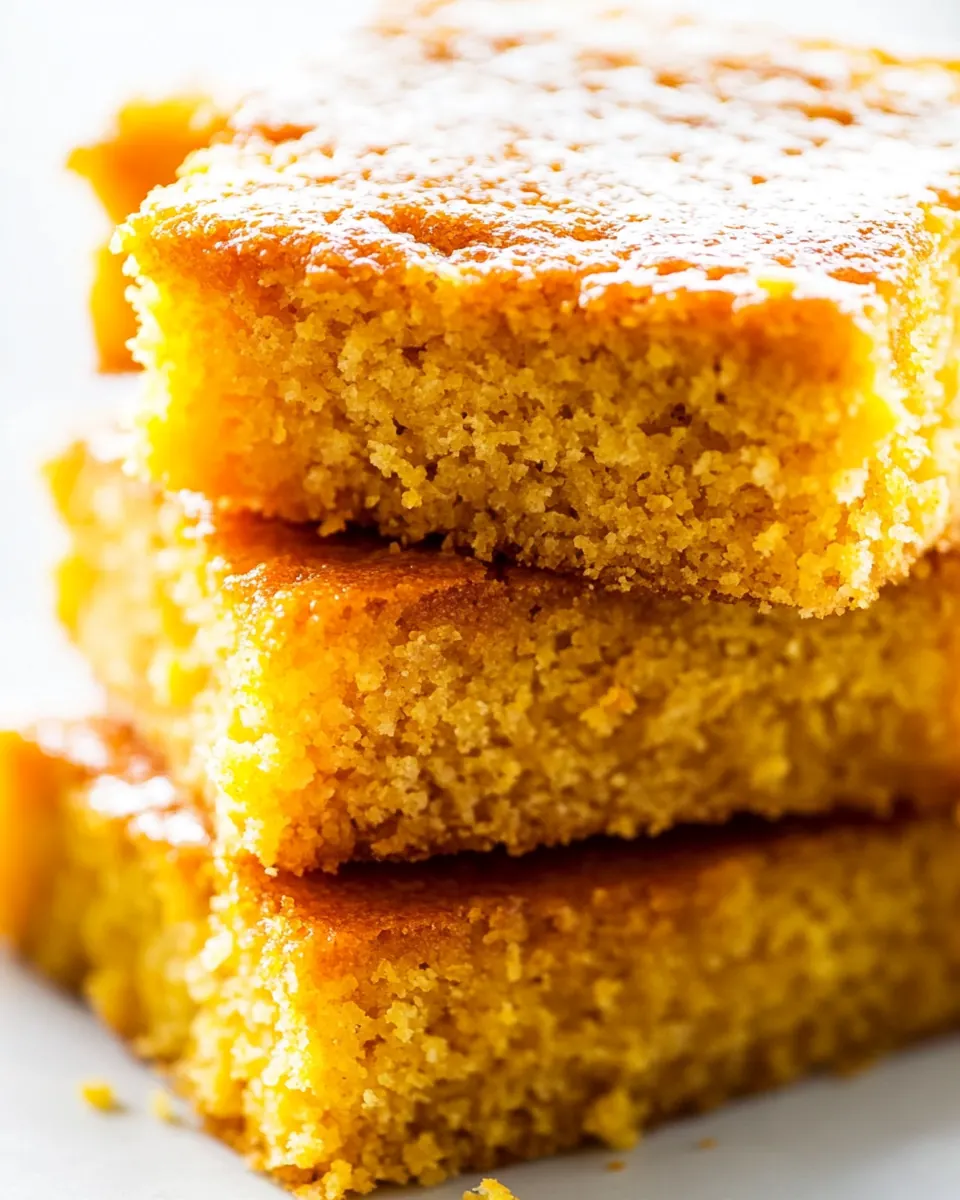
Easy Buttermilk Cornbread
Easy Buttermilk Cornbread is the sort of warm, homey loaf I reach for when I want something comforting that doubles as both a side and a centerpiece. I first learned to make this while helping a friend prepare a holiday table, and the memory of the kitchen filling with butter and honey aromas has stayed with me ever since.
There is a simplicity to this recipe that feels reassuring. The first time I poured the batter into a screaming hot skillet I remember the pan answering with a satisfying sizzle, and that sound has become a reliable sign that dinner will be special. Over the years I have tweaked nothing major, only small habits like letting the melted butter cool a touch so it does not scramble the eggs.
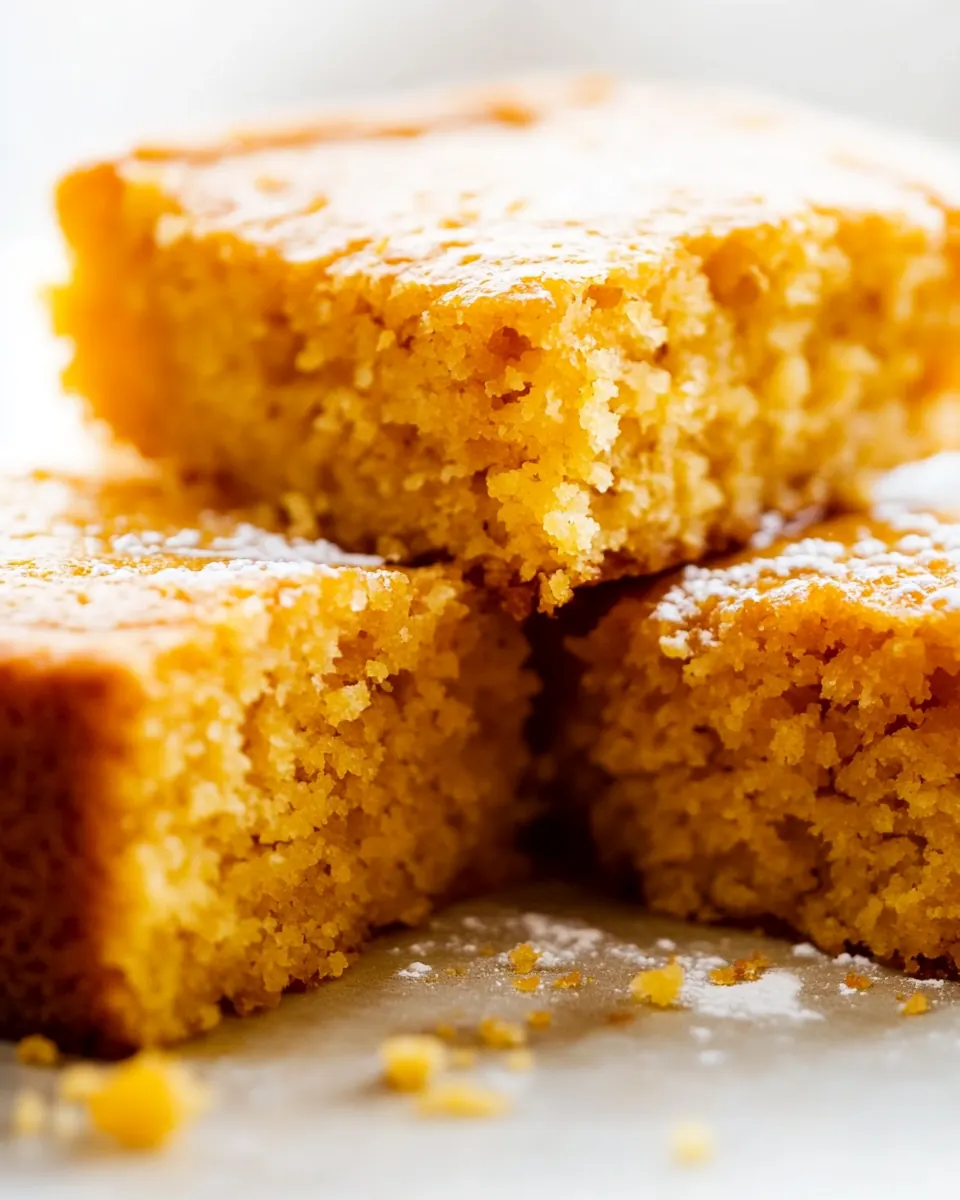
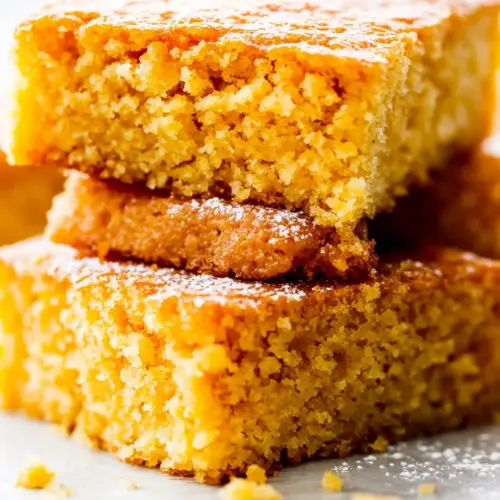
When family drop by unexpectedly I often slice a wedge, smear it with extra honey, and hand it over with a smile. The crumb is tender, slightly sweet, and golden, and it stands up to soups, stews, and bright salads equally well. I love how a simple spoon of honey or a smear of butter transforms this into something celebratory.
Recipe Snapshot
30 mins
10 mins
20 mins
Easy
200 kcal
American
Gluten-Free, Low FODMAP
Side Dishes
9 inch cast iron skillet or 9 inch square baking dish, Oven, Large bowl, Whisk
Why This Easy Buttermilk Cornbread Is So Good
It’s comfort food with purpose
I adore how Easy Buttermilk Cornbread manages to feel both rustic and refined. The balance of cornmeal and all purpose flour gives a tender interior with the satisfying graininess you expect from cornbread. I always come back to it when I want a dish that makes people feel cozy without complicated steps.
Reliable technique yields consistent results
One thing I appreciate is how forgiving the method is. The batter comes together in minutes, and using a hot skillet locks in a crisp, buttery crust that contrasts the soft center. I’ve taught this to friends with mixed kitchen experience and it turns out beautifully for nearly everyone, which makes me trust it for guests.
Versatile for many occasions
I use this cornbread for weeknight dinners, picnic baskets, and festive spreads. It plays well alongside soups or barbecue, and because it is slightly sweet it also pairs nicely with sharp cheeses or tangy relishes. I like that it adapts to the season, yet never feels out of place on a holiday table.
Little adjustments make a big difference
Over time I found that small details matter. Letting the melted butter cool a little keeps the batter smooth, and shaking the buttermilk before measuring gives a more consistent acidity. These are the sorts of tips that turn a good loaf into one you reach for again and again.
Fast and satisfying
From whisking the dry ingredients to hearing that satisfying oven sizzle, the whole process is quick and rewarding. If you want a dependable side that still feels like a treat, Easy Buttermilk Cornbread is a go to in my kitchen.
What You Need for Easy Buttermilk Cornbread
These ingredients are chosen for harmony and simplicity. The backbone of this recipe is cornmeal and all purpose flour which together create a tender crumb with a pleasant bite. The buttermilk brings acidity for lift, while eggs and butter add richness and structure. A touch of honey and sugar round out the flavor profile so the cornbread tastes bright and balanced.
- 1/2 cup unsalted butter melted and cooled slightly: Melted and cooled slightly to add rich fat and moisture while ensuring even mixing without cooking the eggs; helps create a tender crumb and golden crust by coating flour proteins and preventing toughness.
- 1 cup all-purpose flour: Provides structure and gluten development when combined with liquids and fat; contributes to a soft interior and slight chewiness that balances the cornmeal’s texture.
- 1 cup yellow cornmeal or polenta: Adds characteristic corn flavor and coarse texture, giving the cornbread its signature grainy bite; works with flour to create a pleasing contrast between tender crumb and slightly gritty mouthfeel.
- 1/4 cup brown sugar or white granulated sugar: Sweetens the batter and aids in browning for a deeper crust color; can be adjusted for sweetness level and helps balance savory notes from salt and buttermilk.
- 1 teaspoon baking powder : yields a fluffier cornbread (optional): Acts as a leavening booster when used, producing additional lift and a lighter, airier cornbread; optional inclusion creates a fluffier texture and slightly taller rise.
- 1/2 teaspoon baking soda: Releases carbon dioxide when reacting with acidic buttermilk, contributing to tender lift and a soft, open crumb; calibrated to avoid off-flavors from excess alkaline.
- 1/4 teaspoons salt: Enhances overall flavor by balancing sweetness and highlighting savory notes; small amount prevents the bread from tasting flat and improves depth of flavor.
- 1 cup buttermilk shake before measuring: Provides acidity and moisture while reacting with baking soda for leavening; contributes tanginess that brightens flavors and yields a tender, moist crumb.
- 1/4 cup honey: Adds natural sweetness and a floral note while contributing to moisture and chewiness; pairs well with corn and butter to create a richer flavor profile.
- 2 large eggs: Binds ingredients together and incorporates air when beaten, creating structure and a light, tender texture; yolks add richness while whites help with leavening when mixed properly.
The Process for Making Easy Buttermilk Cornbread

This is a straightforward method built to coax the best texture and flavor from simple pantry ingredients. The steps are quick, and paying attention to warmth and timing will reward you with a cornbread that has a crisp, buttery edge and a tender center.
- Preheat the oven to 200 C | 400 F and position a rack in the middle. Lightly grease a 9-inch cast iron skillet or 9-inch square baking dish with butter and place skillet/dish into the oven to heat up. (Alternatively for cast iron skillets: heat 1/2 cup of unmelted butter in your cast iron over stove top on medium heat until melted, turn heat off then allow the butter to cool slightly before adding to the batter.): The oven should be fully hot so the pan and batter get an immediate burst of heat, which creates a crisp, browned surface. You will notice a warm, dry oven smell as it reaches temperature, and inserting the pan later helps form that coveted crust. A common mistake is underheating the oven, which yields a pale top and denser crumb, so give the oven time to reach the full temperature.
- In a large bowl, whisk together the flour, cornmeal, sugar, baking powder (if using), baking soda and salt.: Heating the greased pan creates a sizzling contact that sets the bottom and edges quickly, producing a pleasing crunch. When you take the hot dish out briefly, the butter may bubble and smell toasty, signaling readiness. Avoid placing a cold pan in a hot oven as it delays browning and can produce a soggy base.
- Make a well in the centre and add the buttermilk, honey and eggs. Mix together well to combine, then add in the slightly cooled melted butter. Mix again until ‘just’ combined (don’t over mix).: Using the skillet on the stovetop gives the butter a nutty aroma and ensures an evenly melted pool that will coat the pan. You will hear a soft sizzle as the butter melts, and allowing it to cool slightly keeps it from scrambling the eggs when mixed. A frequent error is adding piping hot butter to the batter, which can curdle the mixture and affect texture.
- Carefully remove your ‘hot’ pan or dish from the oven with oven mitts, and pour the batter into the hot skillet or dish. Listen to that sizzle! That’s what you want.: The dry mix should smell faintly of toasted grain, and whisking aerates it so the final loaf is lighter. Proper mixing distributes the leavening agents for even rise, and you can run your fingertips through the mixture to check for uniformity. Do not over whisk to the point of compressing the mix, which can lead to tougher bread.
- Bake until the cornbread begins to brown on top and a toothpick inserted in the centre comes out clean (about 20-23 minutes). Allow to cool for about 10 minutes before slicing and serving.: Pouring wet ingredients into a well helps combine them gradually with the dry, reducing over mixing. You will see bubbles appear as the buttermilk meets the leaveners, and the aroma of honey will become more noticeable. A common slip is dumping everything at once and vigorously stirring, which can overdevelop the gluten and make the crumb chewy.
- Mix together well to combine then add in the slightly cooled melted butter: Adding the butter last allows it to coat the batter gently and create pockets of richness that bake into a tender crumb. The batter should look glossy and homogenous, with no streaks of fat. If you see separated pools, your butter was likely too hot or the batter too cold, which can affect texture.
- Mix again until just combined don’t over mix: At this stage the batter should be moistened with few dry streaks remaining; it will be slightly lumpy and that is okay. Over mixing will activate the flour and lead to a dense loaf, so stop when the ingredients are incorporated. A frequent mistake is chasing perfect smoothness, which robs the bread of tenderness.
- Carefully remove your hot pan or dish from the oven with oven mitts and pour the batter into the hot skillet or dish: Pouring into a screaming hot vessel causes an immediate sizzle that caramelizes the butter and sugar at the edges, creating a crisp, flavorful crust. You will hear that comforting hiss and see the batter start to set at the contact points. Be careful not to spill since the pan is very hot, and protect your wrists when handling the skillet.
- Listen to that sizzle That’s what you want: The sizzle indicates the right thermal shock is happening, which helps the loaf rise and form a golden exterior. You may catch the faint smell of browned butter and toasted corn as the top begins to firm. If you don’t hear a sizzle, the pan likely was not hot enough so the crust will be paler and less texturally interesting.
- Bake until the cornbread begins to brown on top and a toothpick inserted in the centre comes out clean about 20 to 23 minutes: As it bakes you will see edges turn a deeper gold and the top develop gentle cracks, and the kitchen fills with a warm, sweet aroma. The toothpick test ensures the interior is set while preserving moistness; a few moist crumbs are fine, but wet batter means it needs more time. Opening the oven frequently is a common mistake because it lowers temperature and can disrupt even baking.
- Allow to cool for about 10 minutes before slicing and serving: Cooling lets the crumb finish setting, so slices hold together and the texture stabilizes. You may notice steam gently rising when you first cut into it, and waiting yields cleaner slices and better mouthfeel. Cutting too soon causes a gummy interior and crumbly slices, so patience here pays off.
Helpful Hints
I like to keep a few reliable tricks in my back pocket when making Easy Buttermilk Cornbread. These ideas come from repeated practice and small adjustments that make the final loaf more consistent. Below I expand the single line in the original notes into practical, hands on tips you can use at home.
- Make a quick buttermilk: If you do not have cultured buttermilk, stir 1 tablespoon white vinegar or lemon juice into 1 cup room temperature milk and let sit for 5 minutes; the mixture will thicken slightly and provide the acidity your leaveners need.
- Warm the honey: If your honey is very thick, warm it briefly to make it easier to stir into the batter, ensuring even sweetness and a smoother mix.
- Cool melted butter: Allow the melted butter to cool a little before adding so it does not scramble the eggs or create greasy pockets in the batter.
- Preheat the skillet: Putting your greased 9 inch skillet into the oven while it heats gives you a dramatic sizzle and a golden bottom crust that improves texture and flavor.
- Measure precisely: Spoon the flour into the measuring cup and level it off rather than scooping, which prevents a dry, dense loaf caused by too much flour.
- Optional baking powder: Use the 1 teaspoon of baking powder if you want a taller, airier crumb; omit it for a slightly denser, more rustic loaf.
- Rest before slicing: Allow the cornbread to cool for about 10 minutes so it firms up and slices cleanly without crumbling.
Perfect Matches for Easy Buttermilk Cornbread
Easy Buttermilk Cornbread pairs wonderfully with hearty mains and bright sides, and it is versatile across seasons and meals. Below I outline serving ideas, storage tips, and occasion pairings so you can make the most of each loaf.
- Serve with soups and stews: A warm wedge alongside a bowl of stew or chili is classic; the cornbread soaks up juices while offering a slightly sweet counterpoint.
- Holiday side: Bring this to Thanksgiving or family gatherings as a simple, crowd pleasing bread that complements roasts and vegetable dishes nicely.
- Picnic and lunch: Cut into squares and pack with cold salads for a portable, satisfying side that travels well.
- Toppings and spreads: Offer small bowls of honey, softened butter, or a tart jam so guests can customize each slice to their liking.
- Storage: Keep leftover cornbread wrapped at room temperature for 2 days or refrigerate up to 5 days; to refresh, warm slices briefly in a skillet or oven.
- Seasonal pairings: In fall serve with roasted squash and warming spices, while in spring and summer it shines with grilled vegetables and chilled salads.
FAQ
Conclusion
This Easy Buttermilk Cornbread stands out for its straightforward method and comforting flavor, making it a dependable choice for weeknights and holiday tables alike. Give it a try the next time you want a warm, slightly sweet bread that complements soups, BBQ, or roasted vegetables. It bakes quickly, uses pantry staples, and rewards a little patience at the end with a perfect slice that tastes like home.
Easy Buttermilk Cornbread
Equipment
- 9 inch cast iron skillet or 9 inch square baking dish
- Oven
- Large Bowl
- Whisk
Ingredients
- 1/2 cup unsalted butter melted and cooled slightly Melted and cooled slightly to add rich fat and moisture while ensuring even mixing without cooking the eggs; helps create a tender crumb and golden crust by coating flour proteins and preventing toughness.
- 1 cup all-purpose flour Provides structure and gluten development when combined with liquids and fat; contributes to a soft interior and slight chewiness that balances the cornmeal’s texture.
- 1 cup yellow cornmeal or polenta Adds characteristic corn flavor and coarse texture, giving the cornbread its signature grainy bite; works with flour to create a pleasing contrast between tender crumb and slightly gritty mouthfeel.
- 1/4 cup brown sugar or white granulated sugar Sweetens the batter and aids in browning for a deeper crust color; can be adjusted for sweetness level and helps balance savory notes from salt and buttermilk.
- 1 teaspoon baking powder optional: yields a fluffier cornbread Acts as a leavening booster when used, producing additional lift and a lighter, airier cornbread; optional inclusion creates a fluffier texture and slightly taller rise.
- 1/2 teaspoon baking soda Releases carbon dioxide when reacting with acidic buttermilk, contributing to tender lift and a soft, open crumb; calibrated to avoid off-flavors from excess alkaline.
- 1/4 teaspoons salt Enhances overall flavor by balancing sweetness and highlighting savory notes; small amount prevents the bread from tasting flat and improves depth of flavor.
- 1 cup buttermilk shake before measuring Provides acidity and moisture while reacting with baking soda for leavening; contributes tanginess that brightens flavors and yields a tender, moist crumb.
- 1/4 cup honey Adds natural sweetness and a floral note while contributing to moisture and chewiness; pairs well with corn and butter to create a richer flavor profile.
- 2 large eggs Binds ingredients together and incorporates air when beaten, creating structure and a light, tender texture; yolks add richness while whites help with leavening when mixed properly.
Instructions
- Preheat the oven to 200 C | 400 F and position a rack in the middle. Lightly grease a 9-inch cast iron skillet or 9-inch square baking dish with butter and place skillet/dish into the oven to heat up. (Alternatively for cast iron skillets: heat 1/2 cup of unmelted butter in your cast iron over stove top on medium heat until melted, turn heat off then allow the butter to cool slightly before adding to the batter.): The oven should be fully hot so the pan and batter get an immediate burst of heat, which creates a crisp, browned surface. You will notice a warm, dry oven smell as it reaches temperature, and inserting the pan later helps form that coveted crust. A common mistake is underheating the oven, which yields a pale top and denser crumb, so give the oven time to reach the full temperature.
- In a large bowl, whisk together the flour, cornmeal, sugar, baking powder (if using), baking soda and salt.: Heating the greased pan creates a sizzling contact that sets the bottom and edges quickly, producing a pleasing crunch. When you take the hot dish out briefly, the butter may bubble and smell toasty, signaling readiness. Avoid placing a cold pan in a hot oven as it delays browning and can produce a soggy base.
- Make a well in the centre and add the buttermilk, honey and eggs. Mix together well to combine, then add in the slightly cooled melted butter. Mix again until ‘just’ combined (don’t over mix).: Using the skillet on the stovetop gives the butter a nutty aroma and ensures an evenly melted pool that will coat the pan. You will hear a soft sizzle as the butter melts, and allowing it to cool slightly keeps it from scrambling the eggs when mixed. A frequent error is adding piping hot butter to the batter, which can curdle the mixture and affect texture.
- Carefully remove your ‘hot’ pan or dish from the oven with oven mitts, and pour the batter into the hot skillet or dish. Listen to that sizzle! That’s what you want.: The dry mix should smell faintly of toasted grain, and whisking aerates it so the final loaf is lighter. Proper mixing distributes the leavening agents for even rise, and you can run your fingertips through the mixture to check for uniformity. Do not over whisk to the point of compressing the mix, which can lead to tougher bread.
- Bake until the cornbread begins to brown on top and a toothpick inserted in the centre comes out clean (about 20-23 minutes). Allow to cool for about 10 minutes before slicing and serving.: Pouring wet ingredients into a well helps combine them gradually with the dry, reducing over mixing. You will see bubbles appear as the buttermilk meets the leaveners, and the aroma of honey will become more noticeable. A common slip is dumping everything at once and vigorously stirring, which can overdevelop the gluten and make the crumb chewy.
- Mix together well to combine then add in the slightly cooled melted butter: Adding the butter last allows it to coat the batter gently and create pockets of richness that bake into a tender crumb. The batter should look glossy and homogenous, with no streaks of fat. If you see separated pools, your butter was likely too hot or the batter too cold, which can affect texture.
- Mix again until just combined don’t over mix: At this stage the batter should be moistened with few dry streaks remaining; it will be slightly lumpy and that is okay. Over mixing will activate the flour and lead to a dense loaf, so stop when the ingredients are incorporated. A frequent mistake is chasing perfect smoothness, which robs the bread of tenderness.
- Carefully remove your hot pan or dish from the oven with oven mitts and pour the batter into the hot skillet or dish: Pouring into a screaming hot vessel causes an immediate sizzle that caramelizes the butter and sugar at the edges, creating a crisp, flavorful crust. You will hear that comforting hiss and see the batter start to set at the contact points. Be careful not to spill since the pan is very hot, and protect your wrists when handling the skillet.
- Listen to that sizzle That’s what you want: The sizzle indicates the right thermal shock is happening, which helps the loaf rise and form a golden exterior. You may catch the faint smell of browned butter and toasted corn as the top begins to firm. If you don’t hear a sizzle, the pan likely was not hot enough so the crust will be paler and less texturally interesting.
- Bake until the cornbread begins to brown on top and a toothpick inserted in the centre comes out clean about 20 to 23 minutes: As it bakes you will see edges turn a deeper gold and the top develop gentle cracks, and the kitchen fills with a warm, sweet aroma. The toothpick test ensures the interior is set while preserving moistness; a few moist crumbs are fine, but wet batter means it needs more time. Opening the oven frequently is a common mistake because it lowers temperature and can disrupt even baking.
- Allow to cool for about 10 minutes before slicing and serving: Cooling lets the crumb finish setting, so slices hold together and the texture stabilizes. You may notice steam gently rising when you first cut into it, and waiting yields cleaner slices and better mouthfeel. Cutting too soon causes a gummy interior and crumbly slices, so patience here pays off.
Notes
- Make a quick buttermilk: If you do not have cultured buttermilk, stir 1 tablespoon white vinegar or lemon juice into 1 cup room temperature milk and let sit for 5 minutes; the mixture will thicken slightly and provide the acidity your leaveners need.
- Warm the honey: If your honey is very thick, warm it briefly to make it easier to stir into the batter, ensuring even sweetness and a smoother mix.
- Cool melted butter: Allow the melted butter to cool a little before adding so it does not scramble the eggs or create greasy pockets in the batter.
- Preheat the skillet: Putting your greased 9 inch skillet into the oven while it heats gives you a dramatic sizzle and a golden bottom crust that improves texture and flavor.
- Measure precisely: Spoon the flour into the measuring cup and level it off rather than scooping, which prevents a dry, dense loaf caused by too much flour.
- Optional baking powder: Use the 1 teaspoon of baking powder if you want a taller, airier crumb; omit it for a slightly denser, more rustic loaf.
- Rest before slicing: Allow the cornbread to cool for about 10 minutes so it firms up and slices cleanly without crumbling.