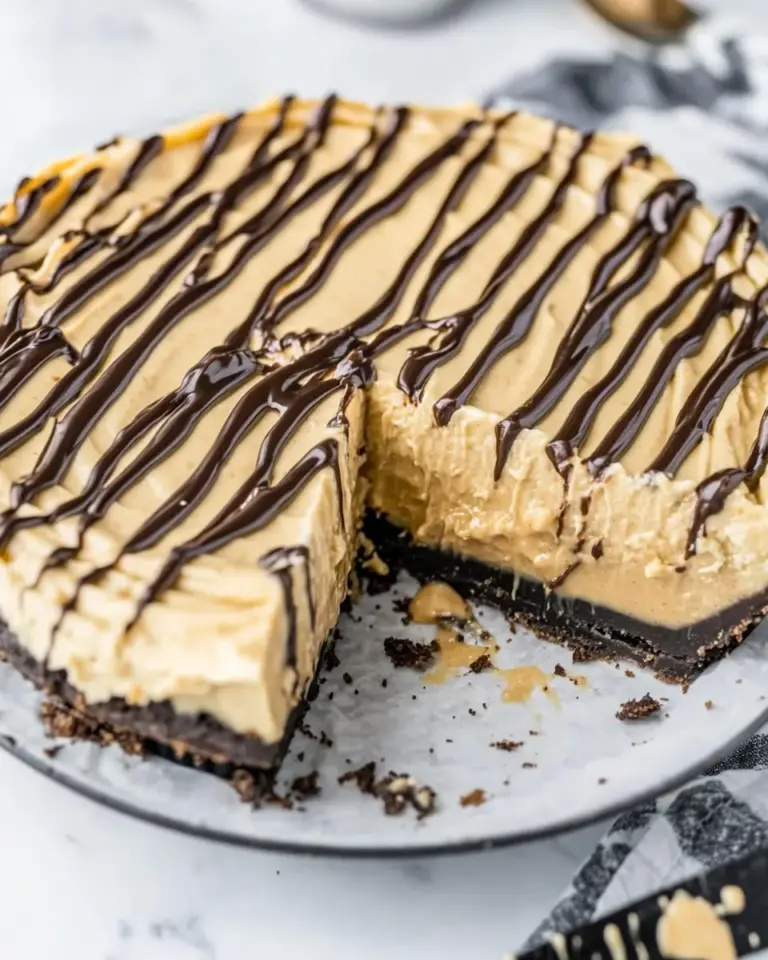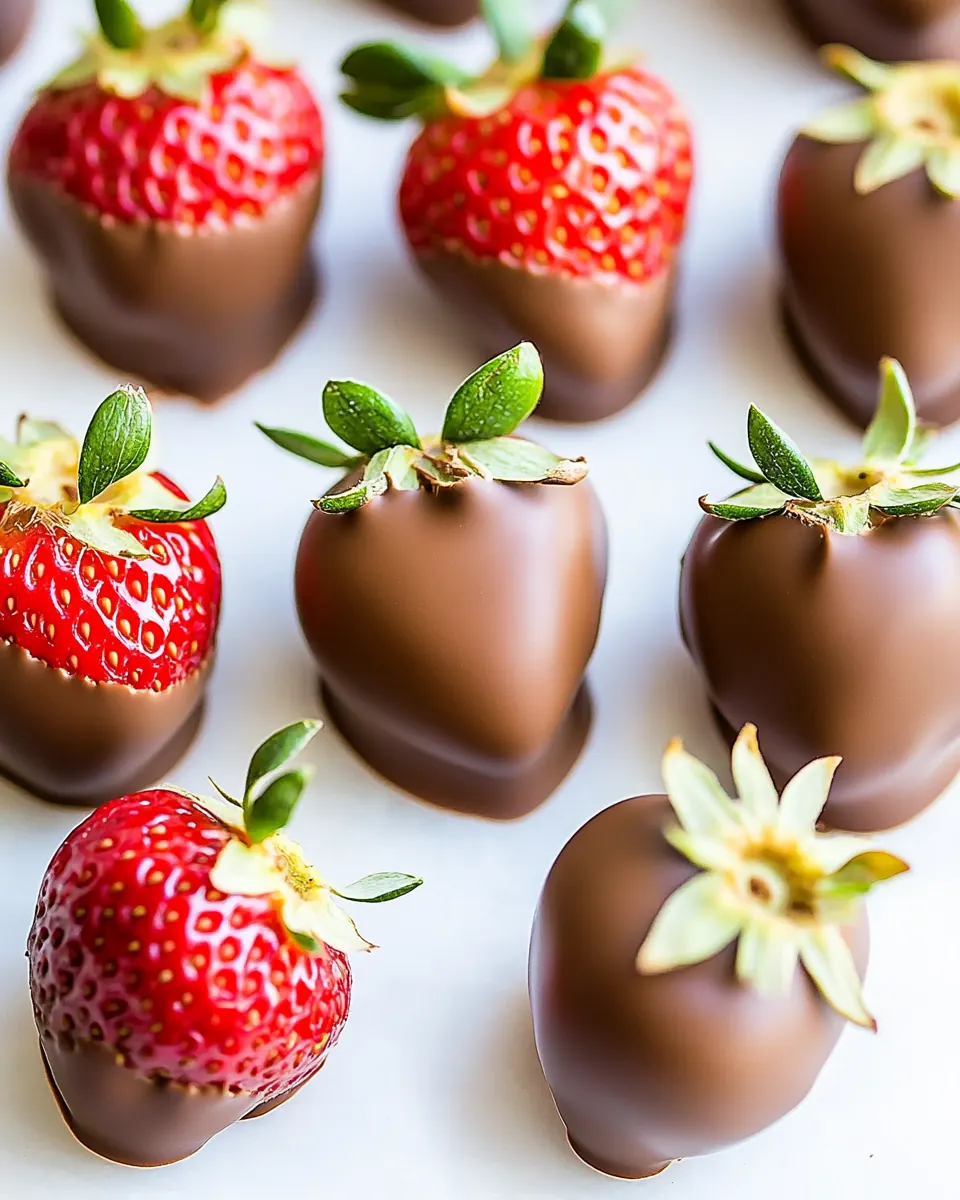
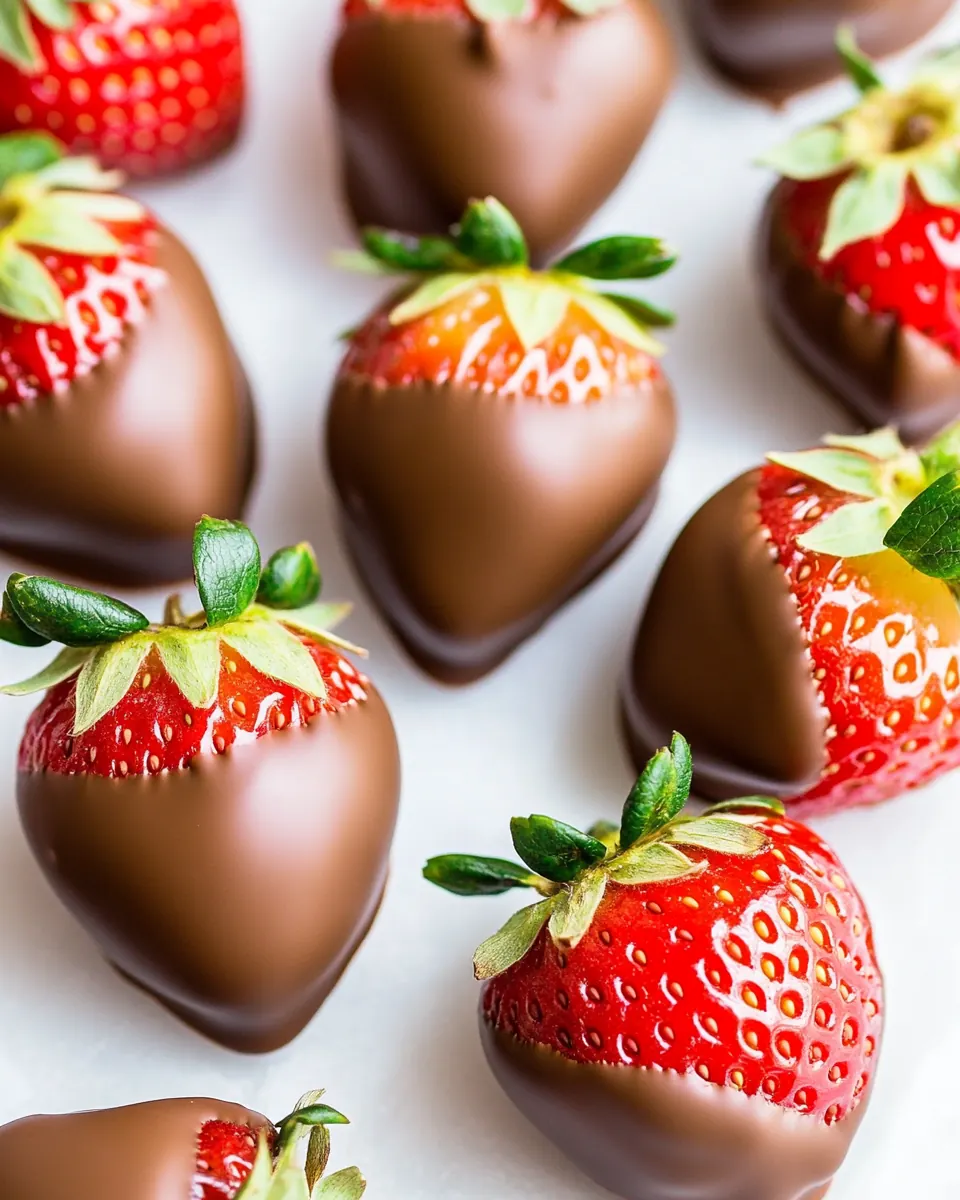
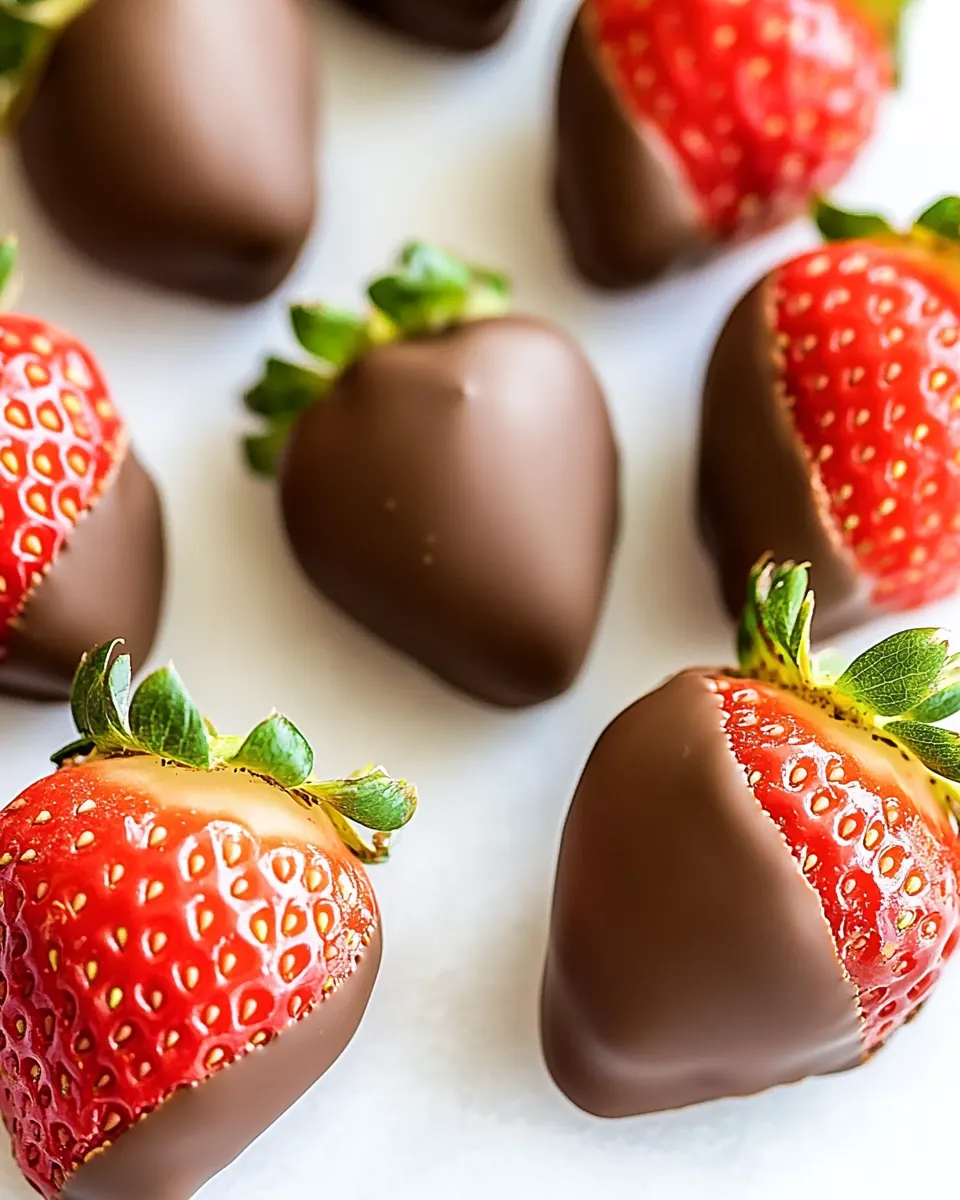
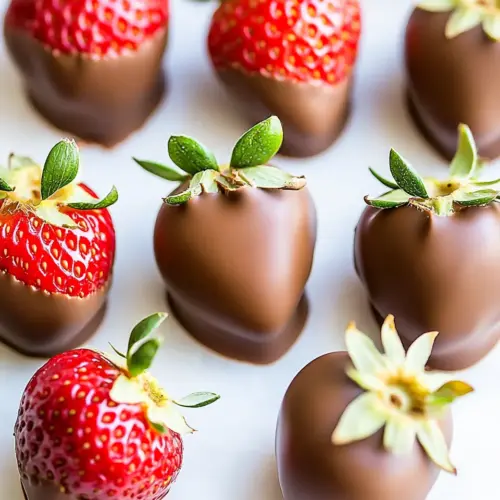
Chocolate Covered Strawberries
Chocolate Covered Strawberries are one of those simple treats that somehow feel indulgent and thoughtful at once, and the first time I made them I felt like I was crafting tiny edible gifts.
I remember standing at my kitchen counter listening to soft music, my hands sticky with melted chocolate as I held each bright red strawberry by the stem, feeling a small rush of joy when I set the glossy fruit down onto parchment and watched the chocolate settle. That evening became a habit, a way to celebrate small wins or to brighten a quiet night at home. Over time I learned which strawberry shapes and sizes look best when dipped, and which melting tricks keep the temper smooth without fuss.
Guests always ask how I get such a clean finish, and the secret is in the slow, patient melting and in making sure every strawberry is completely dry before it touches chocolate. I also began experimenting with different chocolate types, from semi sweet to milk, each offering a slightly different mouthfeel and snap. The ritual of dipping turned into a social activity too, with friends gathered around a fondue pot, laughter, and a pile of perfectly imperfect dipped fruits. That little scene is evergreen in my mind.
Recipe Snapshot
7 mins
5 mins
2 mins
Easy
200 kcal
American
Keto, Gluten-Free
Desserts
Microwave safe bowl, Wire rack, Rimmed baking sheet, Parchment paper
Why This Chocolate Covered Strawberries Is a Winner
They are effortlessly elegant
I love how Chocolate Covered Strawberries transform two modest ingredients into a dessert that looks refined. When I bring a tray to someone, the presentation does half the work, and people immediately respond to the visual contrast between glossy chocolate and bright strawberry. You do not need fancy plating skills to impress, just a steady hand and a little patience.
Fast to make, rich in impact
One of the reasons I reach for this recipe is speed, it is remarkably quick from start to finish. When I am short on time but want to make something special, I can have a beautiful dessert ready in under an hour, depending on how much time the chocolate needs to set. It is perfect when you want an easy yet luxurious finishing touch for a meal.
Versatile and playful
I enjoy that this recipe invites creativity, whether you use milk, semi sweet, or white chocolate, or sprinkle on crushed nuts or colorful toppings. I often switch types of chocolate mid batch to create a mix of looks and flavors on the same platter, and it always feels fresh. The flexibility makes it a favorite for different occasions.
Kid friendly but grown up enough for guests
I often involve my nieces and nephews when I make these, they love dipping and decorating. At the same time the final result reads sophisticated, so these work equally well for a cozy family gathering and for more formal celebrations. The process is safe and fun, and the outcomes always bring smiles.
Great for gifting and sharing
Over the years I’ve wrapped small boxes of these for friends, and they are always warmly received. They travel well if packed carefully in a single layer, and they make a personal, thoughtful edible present that people remember. For me, that combination of personal touch and delicious flavor is what keeps bringing me back to this recipe.
Recipe Ingredients for Chocolate Covered Strawberries
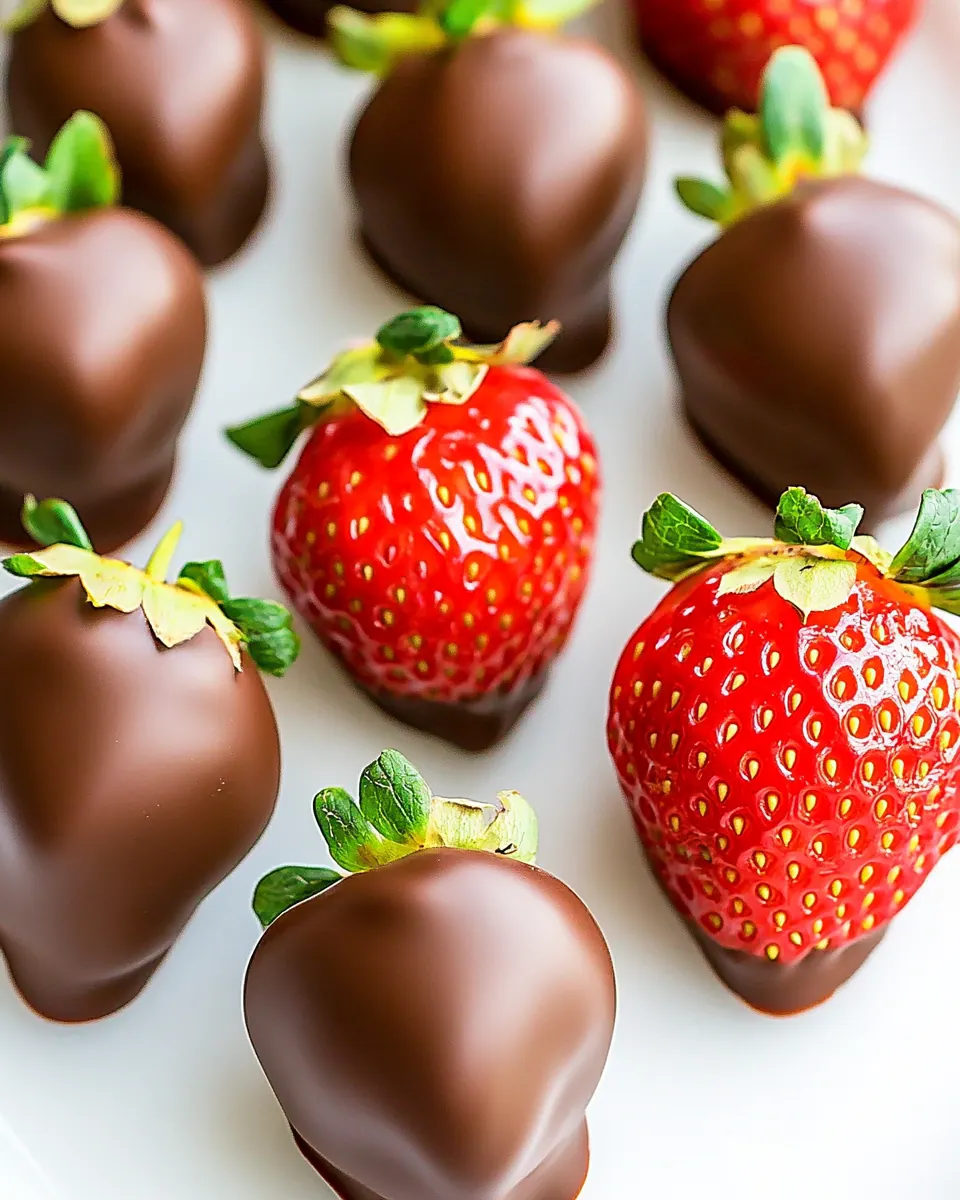
These few ingredients work together with elegant simplicity. The strawberry provides bright acidity and juicy texture, while the melted chocolate offers sweetness and a smooth coating that sets into a satisfying snap. A tiny bit of optional coconut oil helps the chocolate flow and sheen, creating an attractive finish that adheres to the fruit. Together they make a dessert that looks and tastes greater than the sum of its parts.
- 1 pint (357 g) fresh strawberries: Rinse and dry thoroughly to remove dirt and excess moisture; hold by the stem when dipping to prevent bruising and maintain shape. Provide fresh, juicy flavor and natural sweetness that pairs with chocolate, and serve chilled for best texture contrast. Select uniform-sized berries for even coating and attractive presentation.
- 1 (10-ounce) package (283 g) Chocolate Chips, semi-sweet, milk, or white chocolate (use a high-quality chip): Melt gently to create a smooth, glossy coating that hardens around the fruit; choose semi–sweet, milk, or white to control overall sweetness and flavor profile. Use a high–quality chip for better melting behavior and taste, stirring frequently to avoid scorching. Temper if needed for extra shine and snap in the finished chocolate shell.
- 1 teaspoon (5 g) coconut oil (optional): Add sparingly to improve chocolate’s viscosity and glossy finish when melted, helping it flow smoothly for an even dip. Use coconut oil only if needed to thin the chocolate slightly and speed setting time, keeping in mind it may soften the final snap. Measure carefully to avoid overly runny coating.
Making Chocolate Covered Strawberries
I enjoy the ritual of dipping berries as much as the result, and this method emphasizes patience and sensory cues. Below I expand each direction into guidance that helps you get a glossy, well set coating every time.
- Prep. Line a rimmed baking sheet with parchment paper, top with a wire rack and set aside. Line another baking sheet with parchment paper to use for cooling the dipped strawberries. If using any optional toppings, place those onto individual small plates.: The first thing I notice is the clean, crisp sound of parchment being smoothed out, and having two baking sheets ready keeps the workflow organized. Use a rimmed sheet to catch any drips, and place a wire rack on top of the lined sheet so excess chocolate can drip back and not pool around the berry base. If you plan to add toppings such as chopped nuts or sprinkles, set them in shallow plates so you can quickly roll the freshly dipped fruit. A common mistake is skipping the second sheet, which can lead to sticky counters or uneven cooling. Prepare everything in advance so dipping becomes a smooth, rhythmic motion.
- Wash and Dry Strawberries. Wash strawberries and then pat dry with paper towels and arrange on the wire rack to completely air dry to make sure chocolate adheres perfectly.: The sound of paper towels blotting and the sight of beads of water disappearing tells you the berries are ready. Moisture is the enemy of proper adhesion, so I always allow the strawberry to sit on a wire rack for several minutes after patting, so air circulates and the surface fully dries. If you rush this step the chocolate may slide off or not set smoothly. Watch for any damp spots, and use extra towels to blot stems gently. A frequent oversight is dipping partially wet fruit which can cause seizing of the melted chocolate .
- Melt Chocolate. Add chocolate to medium microwave-safe bowl. Heat at 50% power in 30-second intervals, stirring after each interval. Repeat until the chocolate is all melted and smooth. Repeat with additional types of chocolate if making different types – white, dark chocolate, milk, etc.: You will hear quiet pops as the chocolate warms, and stirring reveals when it becomes glossy and fluid. Using 50 percent power prevents scorching, and short intervals give you a chance to incorporate any unmelted bits into a silky emulsion. If you add the optional coconut oil , stir it in at the very end to further loosen the texture and enhance sheen. If the chocolate becomes grainy, stop heating and whisk vigorously over a warm water bath to smooth it out. One common trap is overheating which causes the fat to separate, so always heat gently and stir frequently.
- Dip Strawberries. Hold each strawberry by the stem and dip into the melted chocolate. Lift the strawberry out of the chocolate and slightly twist to allow any additional chocolate to run off back into the bowl of chocolate. If you are adding any optional toppings, dip the chocolate covered strawberry into the topping and then place onto the parchment-lined baking sheet to cool and for the chocolate to harden.: When you dip, the sound is quiet, but the sight of chocolate cascading off the berry and forming a neat, even coat is satisfying. Twist gently as you lift to encourage excess to drip back into the bowl, ensuring a thin, even layer. If you want a thicker shell, allow the first coat to set slightly and dip again for depth. For decorative toppings, roll or sprinkle immediately so they adhere before the surface sets. A pitfall here is overloading the berry with chocolate, which creates drips and a clumsy look. Work steadily, and rotate perspectives to catch any missed spots.
- Serve or store. Serve once the chocolate has hardened or store in the refrigerator. Best enjoyed within 48 hours.: The moment the chocolate sets it goes from glossy to slightly firmer, and you can hear a faint click when you touch a well tempered area. Store them in a single layer to avoid smudging, and keep them cool to preserve texture. Refrigeration helps speed setting, but excessive condensation can make the shell dull, so bring them to a cool room temperature before serving for best flavor. Avoid freezing as it alters texture and can separate the chocolate coating. A frequent mistake is stacking berries which causes smudging, so give them space to chill and harden properly.
Recipe Notes about Chocolate Covered Strawberries
These notes expand on the practical side of making Chocolate Covered Strawberries, offering storage, scaling, and presentation guidance that I use often. They reflect real handling tips that prevent common problems and improve results.
- Use quality chocolate: Higher quality chocolate melts smoother and tastes cleaner, which improves both texture and flavor of your finished berries.
- Optional coconut oil tip: Adding a teaspoon of coconut oil can make the chocolate shinier and easier to dip, but do not add more than recommended to avoid thinning the coating.
- Fondue pot for large batches: For big gatherings, keep the melted chocolate warm in a fondue pot to maintain a consistent dipping temperature and to speed the process.
- Single layer refrigeration: Store dipped berries in a single layer to prevent smudging, placing parchment between layers if stacking is unavoidable for transport.
- Avoid freezing: Freezing changes the texture of both the strawberry and the chocolate, leading to a less pleasant mouthfeel, so do not freeze these.
- Timing for serving: Bring refrigerated berries to a cool room temperature before serving to return the chocolate to a pleasant bite and reveal the full aroma of the fruit.
What to Serve Alongside Chocolate Covered Strawberries
These are lovely on their own, but pairing suggestions help you craft an entire experience. Below are serving ideas, occasions, and storage notes delivered as practical pairings and scenarios.
- Cheese board complement: Arrange Chocolate Covered Strawberries on the same platter as mild cheeses and crackers to offer a sweet contrast to savory bites for a casual gathering.
- Romantic dessert tray: Present them on a small, decorative plate with napkins for occasions like Valentine’s Day or intimate dinners to create a simple, elegant finish.
- Party platter: Mix different chocolate types and arrange in rows with labels so guests can sample milk, semi sweet, or white options at a party.
- Gift boxes: Pack in single layers with parchment and tissue paper for a thoughtful edible gift that travels well for short durations.
- Seasonal pairings: In spring when strawberry season peaks, highlight freshness by serving with lightly whipped cream or a small bowl of extra melted chocolate for dipping.
- Storage suggestion: Keep refrigerated in a single layer and consume within 1 to 2 days for optimal texture and flavor retention.
FAQ
Conclusion
What makes this recipe special is its elegant simplicity, combining bright fresh fruit with glossy melted chocolate for a classic treat that feels both indulgent and approachable. I hope you feel inspired to dip a few berries and share them with someone you care about, because this recipe rewards patience with beautiful results. Try it as a small celebration or a thoughtful homemade gift, and enjoy the simple joy of creating something lovely from only a few quality ingredients.
Chocolate Covered Strawberries
Equipment
- Microwave-safe Bowl
- Wire Rack
- Rimmed Baking Sheet
- Parchment Paper
Ingredients
- 1 pint (357 g) fresh strawberries Rinse and dry thoroughly to remove dirt and excess moisture; hold by the stem when dipping to prevent bruising and maintain shape. Provide fresh, juicy flavor and natural sweetness that pairs with chocolate, and serve chilled for best texture contrast. Select uniform-sized berries for even coating and attractive presentation.
- 1 (10-ounce) package (283 g) Chocolate Chips, semi-sweet, milk, or white chocolate (use a high-quality chip) Melt gently to create a smooth, glossy coating that hardens around the fruit; choose semi-sweet, milk, or white to control overall sweetness and flavor profile. Use a high-quality chip for better melting behavior and taste, stirring frequently to avoid scorching. Temper if needed for extra shine and snap in the finished chocolate shell.
- 1 teaspoon (5 g) coconut oil, optional Add sparingly to improve chocolate’s viscosity and glossy finish when melted, helping it flow smoothly for an even dip. Use coconut oil only if needed to thin the chocolate slightly and speed setting time, keeping in mind it may soften the final snap. Measure carefully to avoid overly runny coating.
Instructions
- Prep. Line a rimmed baking sheet with parchment paper, top with a wire rack and set aside. Line another baking sheet with parchment paper to use for cooling the dipped strawberries. If using any optional toppings, place those onto individual small plates.: The first thing I notice is the clean, crisp sound of parchment being smoothed out, and having two baking sheets ready keeps the workflow organized. Use a rimmed sheet to catch any drips, and place a wire rack on top of the lined sheet so excess chocolate can drip back and not pool around the berry base. If you plan to add toppings such as chopped nuts or sprinkles, set them in shallow plates so you can quickly roll the freshly dipped fruit. A common mistake is skipping the second sheet, which can lead to sticky counters or uneven cooling. Prepare everything in advance so dipping becomes a smooth, rhythmic motion.
- Wash and Dry Strawberries. Wash strawberries and then pat dry with paper towels and arrange on the wire rack to completely air dry to make sure chocolate adheres perfectly.: The sound of paper towels blotting and the sight of beads of water disappearing tells you the berries are ready. Moisture is the enemy of proper adhesion, so I always allow the strawberry to sit on a wire rack for several minutes after patting, so air circulates and the surface fully dries. If you rush this step the chocolate may slide off or not set smoothly. Watch for any damp spots, and use extra towels to blot stems gently. A frequent oversight is dipping partially wet fruit which can cause seizing of the melted chocolate .
- Melt Chocolate. Add chocolate to medium microwave-safe bowl. Heat at 50% power in 30-second intervals, stirring after each interval. Repeat until the chocolate is all melted and smooth. Repeat with additional types of chocolate if making different types – white, dark chocolate, milk, etc.: You will hear quiet pops as the chocolate warms, and stirring reveals when it becomes glossy and fluid. Using 50 percent power prevents scorching, and short intervals give you a chance to incorporate any unmelted bits into a silky emulsion. If you add the optional coconut oil , stir it in at the very end to further loosen the texture and enhance sheen. If the chocolate becomes grainy, stop heating and whisk vigorously over a warm water bath to smooth it out. One common trap is overheating which causes the fat to separate, so always heat gently and stir frequently.
- Dip Strawberries. Hold each strawberry by the stem and dip into the melted chocolate. Lift the strawberry out of the chocolate and slightly twist to allow any additional chocolate to run off back into the bowl of chocolate. If you are adding any optional toppings, dip the chocolate covered strawberry into the topping and then place onto the parchment-lined baking sheet to cool and for the chocolate to harden.: When you dip, the sound is quiet, but the sight of chocolate cascading off the berry and forming a neat, even coat is satisfying. Twist gently as you lift to encourage excess to drip back into the bowl, ensuring a thin, even layer. If you want a thicker shell, allow the first coat to set slightly and dip again for depth. For decorative toppings, roll or sprinkle immediately so they adhere before the surface sets. A pitfall here is overloading the berry with chocolate, which creates drips and a clumsy look. Work steadily, and rotate perspectives to catch any missed spots.
- Serve or store. Serve once the chocolate has hardened or store in the refrigerator. Best enjoyed within 48 hours.: The moment the chocolate sets it goes from glossy to slightly firmer, and you can hear a faint click when you touch a well tempered area. Store them in a single layer to avoid smudging, and keep them cool to preserve texture. Refrigeration helps speed setting, but excessive condensation can make the shell dull, so bring them to a cool room temperature before serving for best flavor. Avoid freezing as it alters texture and can separate the chocolate coating. A frequent mistake is stacking berries which causes smudging, so give them space to chill and harden properly.
Notes
- Use quality chocolate: Higher quality chocolate melts smoother and tastes cleaner, which improves both texture and flavor of your finished berries.
- Optional coconut oil tip: Adding a teaspoon of coconut oil can make the chocolate shinier and easier to dip, but do not add more than recommended to avoid thinning the coating.
- Fondue pot for large batches: For big gatherings, keep the melted chocolate warm in a fondue pot to maintain a consistent dipping temperature and to speed the process.
- Single layer refrigeration: Store dipped berries in a single layer to prevent smudging, placing parchment between layers if stacking is unavoidable for transport.
- Avoid freezing: Freezing changes the texture of both the strawberry and the chocolate, leading to a less pleasant mouthfeel, so do not freeze these.
- Timing for serving: Bring refrigerated berries to a cool room temperature before serving to return the chocolate to a pleasant bite and reveal the full aroma of the fruit.