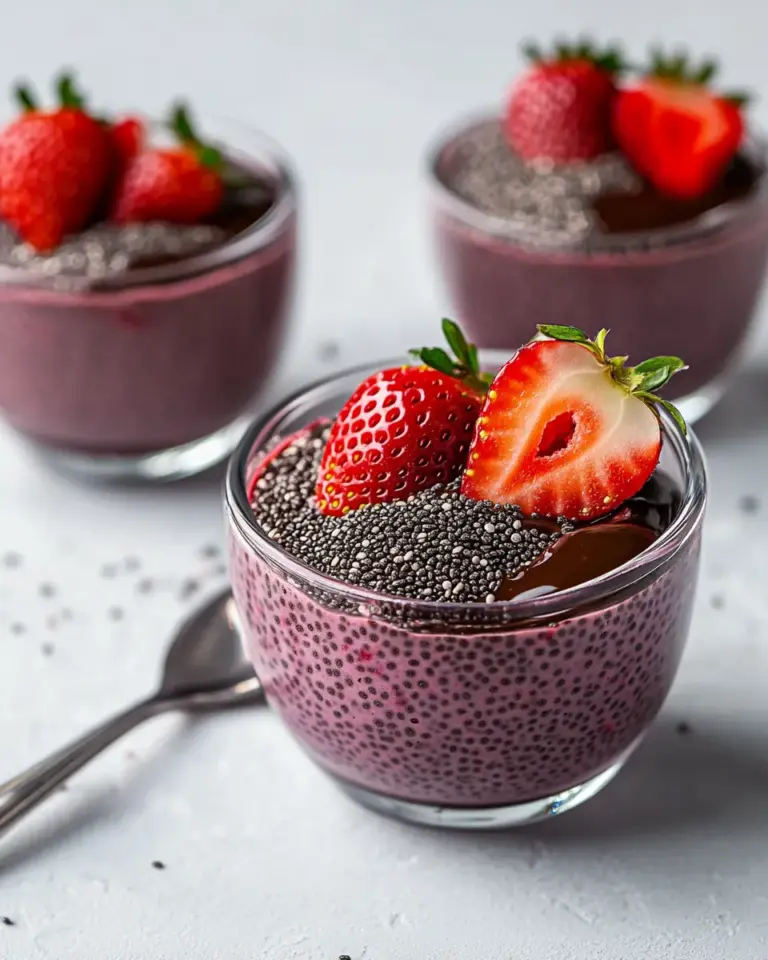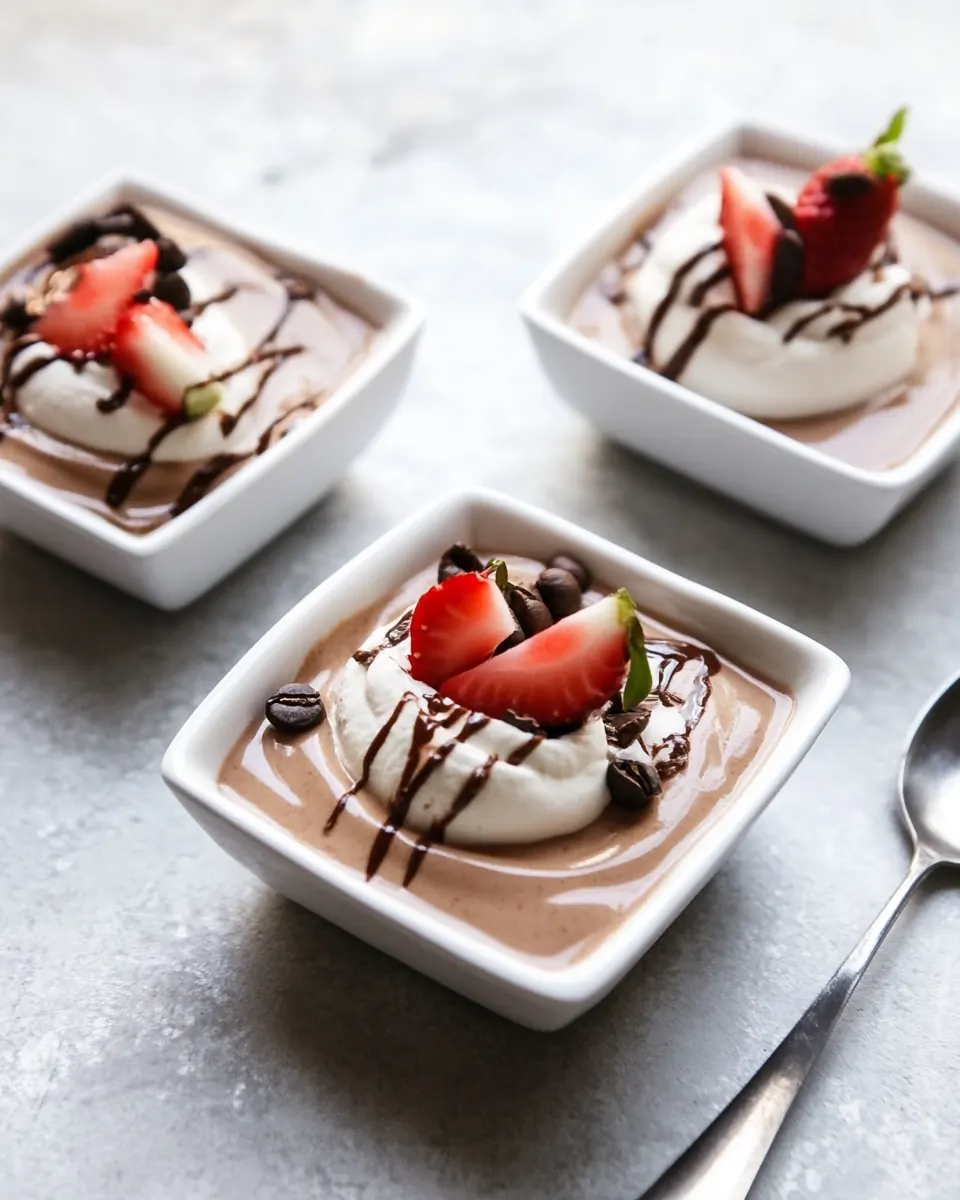
Creamy Mocha Custard
Creamy Mocha Custard is one of those desserts that feels like a warm memory tucked into a glass, and the first time I tasted it I remember standing at my kitchen counter with a wooden spoon, utterly convinced I had discovered something small and celebratory. The blend of rich heavy cream and glossy chocolate folded with bright, brewed black coffee made every spoonful feel both indulgent and balanced, like dessert that understands restraint. I like to think of it as comfort dressed up for company.
Over the years I’ve tinkered with textures and temperatures. I learned to coax the custard until it just clings to the back of a spoon, and to rescue it when it threatens to jump the pot. This recipe for Creamy Mocha Custard came from those late night experiments, and it always reminds me of quiet evenings when a small, elegant treat was all we needed. I often serve a portion chilled for a softer, silkier mouthfeel, and freeze another so guests can choose how intense they want their cocoa moment.
Recipe Snapshot
20 mins
10 mins
10 mins
Easy
300 kcal
American
Gluten-Free, Keto
Desserts
Large pot, Wooden spoon, Whisk, Measuring cup, Serving glasses
What Makes This Creamy Mocha Custard Special
Velvety Texture That Feels Luxurious
I love how Creamy Mocha Custard achieves a silky mouthfeel without relying on heavy tricks. With a foundation of egg yolks and the full fat of heavy cream, the texture becomes lusciously smooth when cooked gently. I find that the technique of stirring constantly and watching for the custard to coat a spoon is everything, because that tactile cue tells you the proteins and fats have harmonized. That sensation is why I keep coming back to this recipe.
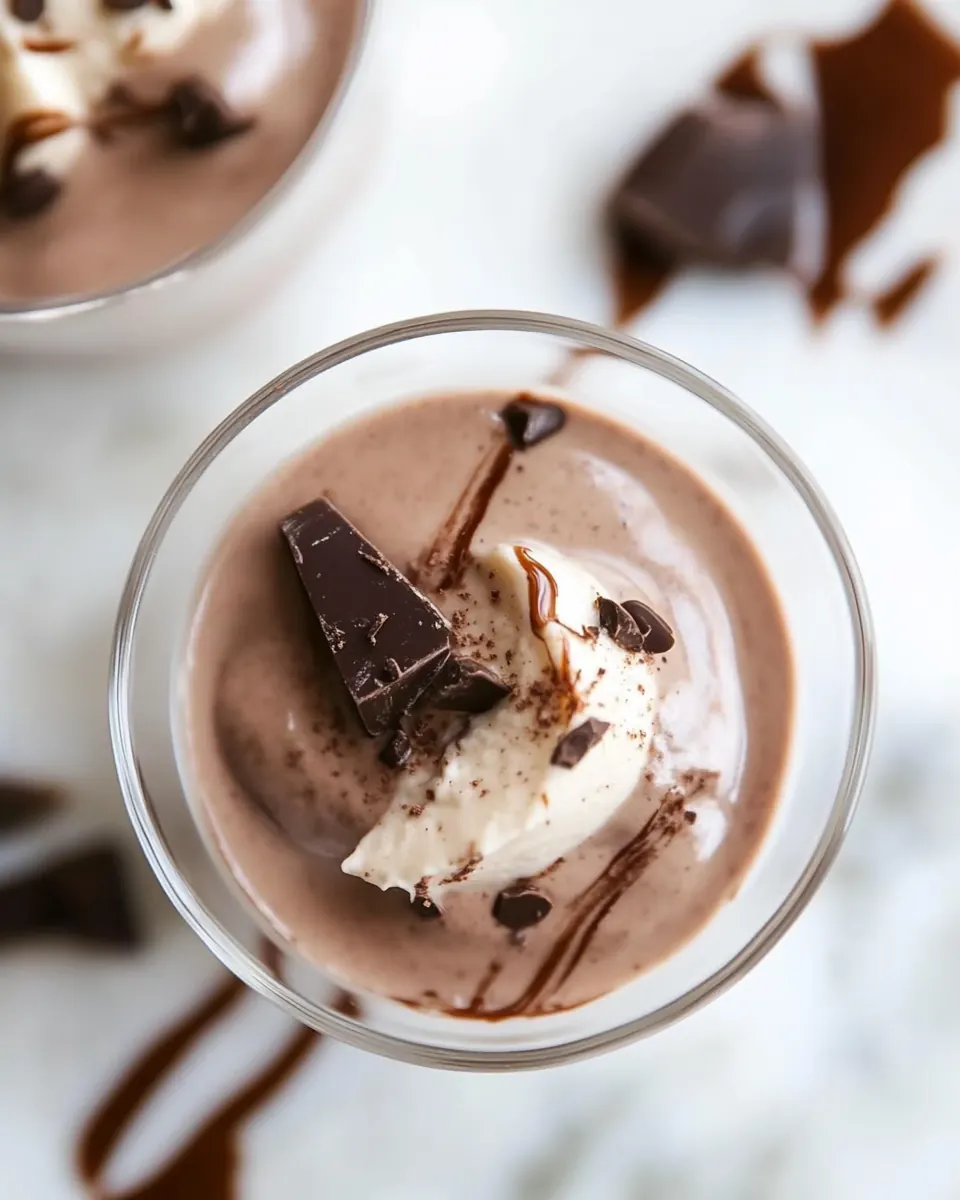
Balanced Bitterness and Sweetness
The addition of brewed black coffee introduces a roasted depth that prevents the dessert from feeling cloying. I prefer semi sweet or dark chocolate because its cocoa intensity partners with the coffee and honey, creating layered flavors. When I taste a spoonful, I notice chocolate notes first, then a warming coffee echo, and finally the gentle floral sweetness from the honey. This interplay keeps the custard interesting across every bite.
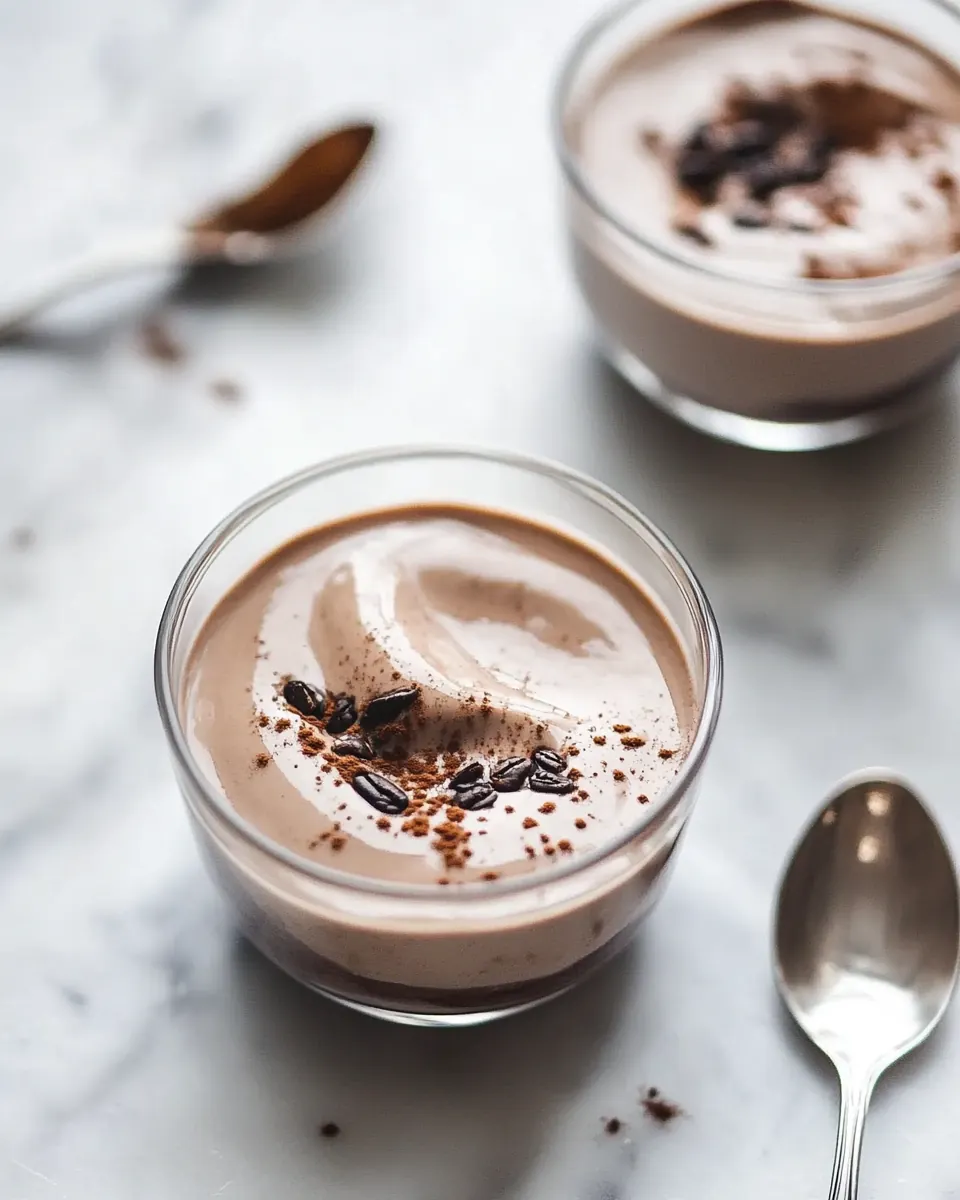
Flexible Serving Options
I appreciate versatility, and Creamy Mocha Custard delivers. You can serve it slightly chilled for a soft, pudding like experience, or frozen for a richer, almost ice cream like bite. In my home, we alternate between fridge and freezer depending on the season, and both ways get satisfied murmur approvals. The reserved vanilla layer offers contrast in both color and flavor, making presentation as pleasing as the taste.
Simple Ingredients, Big Impact
There is something honest about a recipe that relies on a handful of quality elements. With egg yolks, heavy cream, chocolate, and brewed black coffee, you cover fat, richness, sweetness, and an aromatic lift. I often tell friends that a small upgrade in the chocolate and coffee makes the whole dessert feel upscale. It is proof that technique and ingredient respect trump long shopping lists.
Accessible Yet Impressive
I enjoy watching how guests react when I set down a glass of Creamy Mocha Custard. It reads fancy, but the steps are approachable, which makes it a great recipe to bring out for gatherings when you want to impress without stress. From the first spoonful to the last, it has that comforting, refined quality that people ask about later, and that makes me proud every time.
What You’ll Need for Creamy Mocha Custard
These ingredients are simple but intentional. They work together to build richness, structure, and flavor. The egg yolks provide body and silk, the heavy cream brings luxurious mouthfeel, and the chocolate with brewed black coffee creates the mocha identity. A touch of honey sweetens without flattening, and a pinch of sea salt sharpens the overall profile.
- 3 egg yolks: Whisk gently to incorporate fat and richness, providing structure and a silky texture to the custard; heat carefully to avoid curdling while combining with other ingredients.
- 1/2 cup honey: Sweeten naturally while contributing a floral complexity; dissolve fully into warm cream to balance bitterness from chocolate and coffee, and help create a smooth mouthfeel.
- 3 1/2 cups heavy cream: Heat slowly to infuse creaminess and body, serving as the custard’s liquid base; warm enough to melt chocolate and temper egg yolks without boiling.
- pinch of sea salt: Season lightly to enhance and balance flavors, sharpening the chocolate and coffee notes without overpowering; distribute evenly to avoid concentrated salty pockets.
- 1/4 cup brewed black coffee: Introduce brewed coffee to contribute deep, roasted bitterness and subtle acidity that complements chocolate; add a restrained amount to avoid overwhelming the custard’s sweetness.
- 1 tablespoon vanilla extract: Provide aromatic warmth and enhance overall flavor complexity; stir into the custard mix to lift and round the chocolate and coffee tones.
- 10 ounces semi-sweet or dark chocolate, chopped: Melt into the warm cream to supply intense chocolate flavor, texture, and structure; choose semi–sweet or dark to balance sweetness and achieve a rich, velvety finish.
Making Creamy Mocha Custard
These instructions walk you through the gentle, attentive process that yields a smooth, layered custard. Read through then move at a calm pace, because temperature control and steady stirring are key to success. Keep a wooden spoon or spatula handy, and clear space in the fridge or freezer for chilling time.
- In a large pot, whisk together the egg yolks and honey. Add the cream and sea salt. Set the pot over medium-high heat and bring the mixture to a boil. Cook, stirring continuously, until the mixture thickens and easily coats the back of a wooden spoon, 5-8 minutes. Watch close, milk tends to boil over. Remove from the heat. Stir in the coffee and vanilla. Remove 3/4 cup of the vanilla custard and set aside. Add the chocolate to the remaining custard and stir until melted and smooth. Divide the chocolate custard among six glasses. Freeze 1 hour and then evenly pour over the reserved vanilla custard. Freeze until set, about 2 hours. Keep in the fridge or freezer. If frozen, let sit at room temp for 10 minutes before serving. If kept in the fridge the vanilla custard will be runny.: The bowl will feel cool and slightly viscous as you combine the egg yolks with the honey , and the whisk motion will produce a pale, glossy ribbon when lifted. This initial emulsion helps the yolks incorporate evenly with the warm heavy cream later, preventing lumps. If the yolks and honey are not well whisked, the mixture can separate when heat is applied, creating an uneven texture. Keep your whisking steady until the color lightens, that indicates proper integration.
- Add the cream and sea salt: When you pour in the chilled or room temperature heavy cream , you will notice the blend becomes fluid and slightly heavy, and the tiny salt crystals dissolve almost immediately, brightening the mixture. The cream softens the sweetness and ensures the custard will finish silky. A common slip is adding very hot cream which can shock the yolks, so bring cream to warm rather than boiling before combining when possible.
- Set the pot over medium-high heat and bring the mixture to a boil: As the pot heats, you will hear a faint simmer that escalates into gentle bubbling, and steam will begin to rise. Lift the spoon occasionally to see when the mixture begins to steam and bubble around the edges, signaling a near boil. It is crucial to watch because dairy can rapidly expand and spill, and that mess is avoidable with attention. When small bubbles gather at the edge, reduce or adjust heat accordingly to keep control.
- Cook, stirring continuously, until the mixture thickens and easily coats the back of a wooden spoon, 5 to 8 minutes: You will feel the mixture gain body under your spoon as the proteins in the egg yolks set, transforming from liquid to custard. Texturally, it moves from runny to noticeably clingy, leaving a clear track when you run your finger across the back of the spoon. This sensory cue confirms proper thickening and prevents under or over cooking. Overcook and you risk curdling, so maintain even stirring and moderate heat.
- Watch close, milk tends to boil over: The surface will start forming tiny, rapid bubbles and steam, and you may notice the pot climbing toward a boil; that is when scalding or overflow can happen. I keep a hand near the heat control to lower it instantly if the mixture leaps. Letting it boil uncontrolled will create a burnt dairy film and uneven texture, so staying present here prevents disaster.
- Remove from the heat: Once the custard reaches the spoon coating stage, the kitchen fills with a warm, sweet aroma and the surface appears glossy and slightly thickened. Pull the pot away from the burner to halt further cooking immediately, or residual heat will continue to set the eggs. A frequent error is leaving it on the heat, which causes curdling or a grainy finish; removing promptly preserves silkiness.
- Stir in the coffee and vanilla: Adding the cooled brewed black coffee and the vanilla extract off the heat integrates aromatic notes without evaporating volatile flavors. As you stir, watch the custard take on a deeper hue and inhale a layered scent of coffee, vanilla, and dairy. If the coffee is too hot it can thin the custard, so ensure it is warm or at room temperature before combining to keep the texture stable.
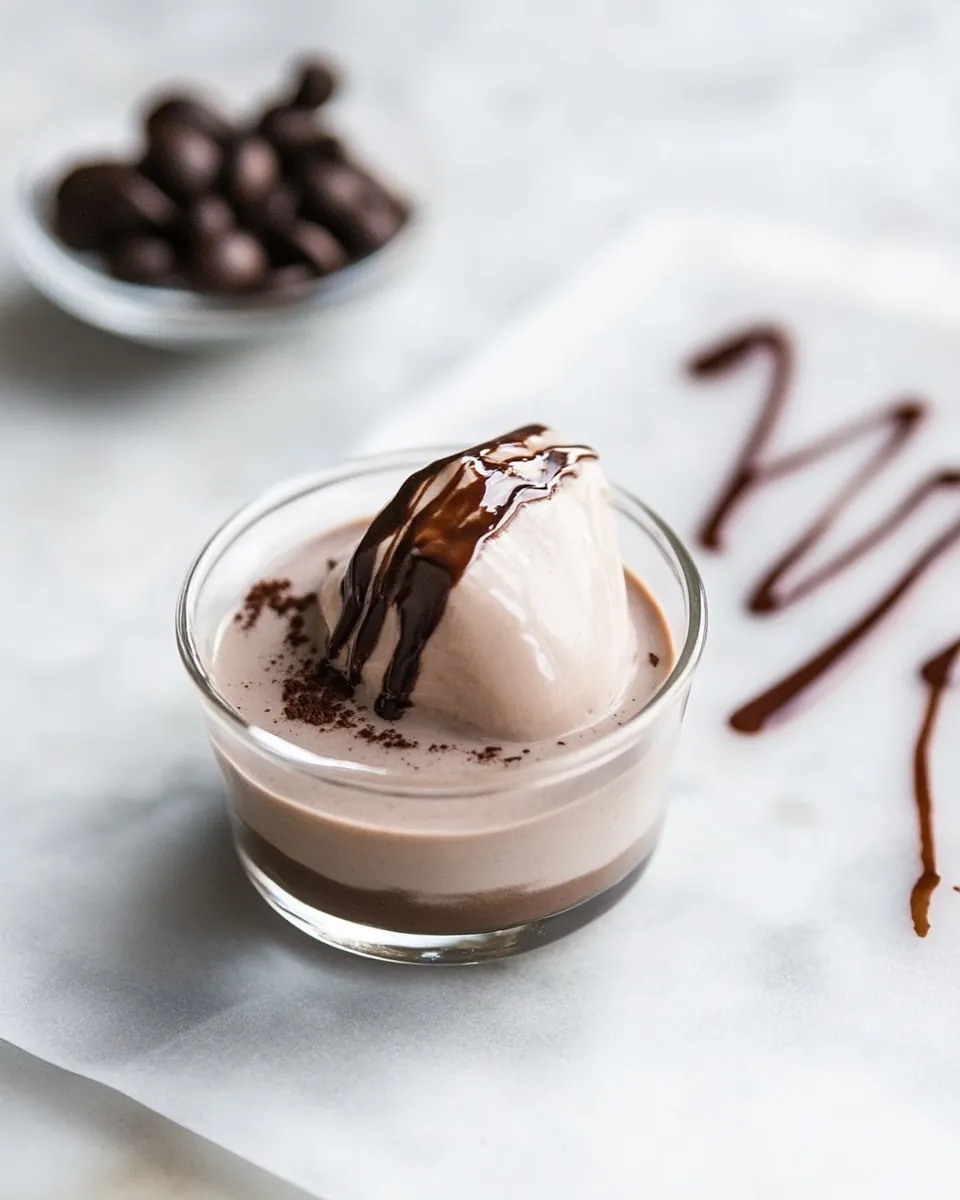
- Remove 3/4 cup of the vanilla custard and set aside: The reserved portion will remain a lighter, vanilla layer that contrasts visually and flavor wise with the chocolate. Use a small measuring cup or bowl and note the custard's silky viscosity as you spoon it out. If you forget to set aside this portion first, you lose the layered effect and the dessert becomes uniform, which may be fine but less dramatic.
- Add the chocolate to the remaining custard and stir until melted and smooth: As you fold the finely chopped chocolate into the hot custard, it will begin to soften, bloom, and eventually melt into a shiny, thick sauce. The sound is quiet, the texture velvety, and the aroma deepens to chocolate forward. If the chocolate does not melt evenly, warming the pot gently over low heat while stirring will help, but avoid high heat which can seize the chocolate and make it grainy.
- Divide the chocolate custard among six glasses: Spoon or pour the warm chocolate custard evenly into serving glasses, watching as each portion gleams dark and rich. Even distribution ensures consistent portions and aesthetics. If you pour while the custard is too hot it may shift the glass temperature; allow it to cool slightly for safer handling and cleaner layers when you add the reserved vanilla.
- Freeze 1 hour and then evenly pour over the reserved vanilla custard: After a brief freeze the chocolate layer firms enough to accept a contrasting pour without immediate mixing, so when you add the reserved vanilla custard it will form a clear top layer. The frozen chocolate will produce a satisfying textural contrast with the softer vanilla. If you skip the short freeze the layers may merge, losing the visual separation that makes this dessert special.
- Freeze until set, about 2 hours: During this period the dessert solidifies and chills through, and the aromas settle into a cohesive profile. When fully set the surface will feel firm to the touch and the color will be uniform across layers. Leaving it shorter than recommended can result in a runny center, while freezing too long makes the custard quite hard; plan serving time accordingly.
- Keep in the fridge or freezer: Storage choice affects final texture, with the fridge keeping the vanilla custard softer and the freezer yielding a firmer, spoonable treat. Always cover the glasses to prevent absorption of fridge odors. A common mistake is storing uncovered which leads to a skin forming on the custard surface.
- If frozen, let sit at room temp for 10 minutes before serving: Allowing a brief rest softens the frozen custard just enough to release flavors and reach an ideal scoopable consistency. You will notice the edges relax slightly and the aroma becomes more apparent. Cutting this rest short yields a too hard texture, while leaving it too long melts the structure and diminishes the intended contrast.
- If kept in the fridge the vanilla custard will be runny: Chilled but unfrozen custard remains soft and spoonable, offering a pudding like texture that highlights the vanilla profile. This variation is lovely when you want a creamier mouthfeel, but anticipate a looser presentation. If you need firmer layers, opt to freeze the dessert instead of refrigerating exclusively.
Recipe Tips about Creamy Mocha Custard
I like to think of these tips as the small decisions that make a big difference. They help you manage temperature, timing, and texture so the final dessert feels professional even if you are a home cook.
- Whisk first: Whisking the egg yolks and honey until pale ensures a stable base that blends smoothly with the heavy cream, cutting down on the risk of lumps when heat is applied.
- Monitor heat: Bring the custard to a gentle boil cautiously, because dairy can foam and boil over quickly, and steady heat preserves a silky texture.
- Test the coat: Use the spoon test to check for proper thickness, since visual cues alone can be misleading and the spoon is a reliable sensory check.
- Cool coffee: Add brewed black coffee once the pot is off the heat to keep the aroma bright and to avoid thinning the custard with excess heat.
- Short freeze for layers: Freeze the chocolate layer briefly before adding the reserved vanilla to maintain clear, distinct strata that are pleasing to the eye and palate.
How to Serve Creamy Mocha Custard
Serving this custard is an opportunity to match texture with occasion, and the presentation can be as simple or dressed up as you like. Whether you choose chilled or frozen, use clean glasses and consider temperature and timing so each guest experiences the intended texture.
- Individual portions: Serve in small glasses for intimate dinners, letting each guest appreciate the layered contrast between chocolate and vanilla.
- Dessert course: Present as a finale to a cozy winter meal, where the mocha notes complement warm spices on the table and offer a refined finish.
- Casual gatherings: Keep extras in the freezer and thaw a portion for guests who prefer a softer, creamier bite, making it easy to cater to varied tastes.
- Storage: Store covered in the fridge for up to two days or in the freezer for longer, and remind guests to let frozen portions rest at room temperature for about 10 minutes so the texture relaxes.
- Pairings: Offer light fruit or citrus segments on the side to cut through richness, or present a small biscuit for crunch contrast when serving chilled.
FAQ
Conclusion
What makes this recipe special is the marriage of smooth, custardy texture with bold mocha flavor, creating layers that feel both indulgent and thoughtful. Give it a try for a dinner where you want a memorable finish without overcomplicating the process, and enjoy how a few quality ingredients transform into something elegant. Share the results with friends or keep it as your personal dessert stash; either way, it rewards patience and gentle technique.
Creamy Mocha Custard
Equipment
- Large Pot
- Wooden Spoon
- Whisk
- Measuring Cup
- Serving glasses
Ingredients
- 3 egg yolks Whisk gently to incorporate fat and richness, providing structure and a silky texture to the custard; heat carefully to avoid curdling while combining with other ingredients.
- 1/2 cup honey Sweeten naturally while contributing a floral complexity; dissolve fully into warm cream to balance bitterness from chocolate and coffee, and help create a smooth mouthfeel.
- 3 1/2 cups heavy cream Heat slowly to infuse creaminess and body, serving as the custard’s liquid base; warm enough to melt chocolate and temper egg yolks without boiling.
- pinch of sea salt Season lightly to enhance and balance flavors, sharpening the chocolate and coffee notes without overpowering; distribute evenly to avoid concentrated salty pockets.
- 1/4 cup brewed black coffee Introduce brewed coffee to contribute deep, roasted bitterness and subtle acidity that complements chocolate; add a restrained amount to avoid overwhelming the custard’s sweetness.
- 1 tablespoon vanilla extract Provide aromatic warmth and enhance overall flavor complexity; stir into the custard mix to lift and round the chocolate and coffee tones.
- 10 ounces semi-sweet or dark chocolate, chopped Melt into the warm cream to supply intense chocolate flavor, texture, and structure; choose semi-sweet or dark to balance sweetness and achieve a rich, velvety finish.
Instructions
- In a large pot, whisk together the egg yolks and honey. Add the cream and sea salt. Set the pot over medium-high heat and bring the mixture to a boil. Cook, stirring continuously, until the mixture thickens and easily coats the back of a wooden spoon, 5-8 minutes. Watch close, milk tends to boil over. Remove from the heat. Stir in the coffee and vanilla. Remove 3/4 cup of the vanilla custard and set aside. Add the chocolate to the remaining custard and stir until melted and smooth. Divide the chocolate custard among six glasses. Freeze 1 hour and then evenly pour over the reserved vanilla custard. Freeze until set, about 2 hours. Keep in the fridge or freezer. If frozen, let sit at room temp for 10 minutes before serving. If kept in the fridge the vanilla custard will be runny.: The bowl will feel cool and slightly viscous as you combine the egg yolks with the honey , and the whisk motion will produce a pale, glossy ribbon when lifted. This initial emulsion helps the yolks incorporate evenly with the warm heavy cream later, preventing lumps. If the yolks and honey are not well whisked, the mixture can separate when heat is applied, creating an uneven texture. Keep your whisking steady until the color lightens, that indicates proper integration.
- Add the cream and sea salt: When you pour in the chilled or room temperature heavy cream , you will notice the blend becomes fluid and slightly heavy, and the tiny salt crystals dissolve almost immediately, brightening the mixture. The cream softens the sweetness and ensures the custard will finish silky. A common slip is adding very hot cream which can shock the yolks, so bring cream to warm rather than boiling before combining when possible.
- Set the pot over medium-high heat and bring the mixture to a boil: As the pot heats, you will hear a faint simmer that escalates into gentle bubbling, and steam will begin to rise. Lift the spoon occasionally to see when the mixture begins to steam and bubble around the edges, signaling a near boil. It is crucial to watch because dairy can rapidly expand and spill, and that mess is avoidable with attention. When small bubbles gather at the edge, reduce or adjust heat accordingly to keep control.
- Cook, stirring continuously, until the mixture thickens and easily coats the back of a wooden spoon, 5 to 8 minutes: You will feel the mixture gain body under your spoon as the proteins in the egg yolks set, transforming from liquid to custard. Texturally, it moves from runny to noticeably clingy, leaving a clear track when you run your finger across the back of the spoon. This sensory cue confirms proper thickening and prevents under or over cooking. Overcook and you risk curdling, so maintain even stirring and moderate heat.
- Watch close, milk tends to boil over: The surface will start forming tiny, rapid bubbles and steam, and you may notice the pot climbing toward a boil; that is when scalding or overflow can happen. I keep a hand near the heat control to lower it instantly if the mixture leaps. Letting it boil uncontrolled will create a burnt dairy film and uneven texture, so staying present here prevents disaster.
- Remove from the heat: Once the custard reaches the spoon coating stage, the kitchen fills with a warm, sweet aroma and the surface appears glossy and slightly thickened. Pull the pot away from the burner to halt further cooking immediately, or residual heat will continue to set the eggs. A frequent error is leaving it on the heat, which causes curdling or a grainy finish; removing promptly preserves silkiness.
- Stir in the coffee and vanilla: Adding the cooled brewed black coffee and the vanilla extract off the heat integrates aromatic notes without evaporating volatile flavors. As you stir, watch the custard take on a deeper hue and inhale a layered scent of coffee, vanilla, and dairy. If the coffee is too hot it can thin the custard, so ensure it is warm or at room temperature before combining to keep the texture stable.
- Remove 3/4 cup of the vanilla custard and set aside: The reserved portion will remain a lighter, vanilla layer that contrasts visually and flavor wise with the chocolate. Use a small measuring cup or bowl and note the custard's silky viscosity as you spoon it out. If you forget to set aside this portion first, you lose the layered effect and the dessert becomes uniform, which may be fine but less dramatic.
- Add the chocolate to the remaining custard and stir until melted and smooth: As you fold the finely chopped chocolate into the hot custard, it will begin to soften, bloom, and eventually melt into a shiny, thick sauce. The sound is quiet, the texture velvety, and the aroma deepens to chocolate forward. If the chocolate does not melt evenly, warming the pot gently over low heat while stirring will help, but avoid high heat which can seize the chocolate and make it grainy.
- Divide the chocolate custard among six glasses: Spoon or pour the warm chocolate custard evenly into serving glasses, watching as each portion gleams dark and rich. Even distribution ensures consistent portions and aesthetics. If you pour while the custard is too hot it may shift the glass temperature; allow it to cool slightly for safer handling and cleaner layers when you add the reserved vanilla.
- Freeze 1 hour and then evenly pour over the reserved vanilla custard: After a brief freeze the chocolate layer firms enough to accept a contrasting pour without immediate mixing, so when you add the reserved vanilla custard it will form a clear top layer. The frozen chocolate will produce a satisfying textural contrast with the softer vanilla. If you skip the short freeze the layers may merge, losing the visual separation that makes this dessert special.
- Freeze until set, about 2 hours: During this period the dessert solidifies and chills through, and the aromas settle into a cohesive profile. When fully set the surface will feel firm to the touch and the color will be uniform across layers. Leaving it shorter than recommended can result in a runny center, while freezing too long makes the custard quite hard; plan serving time accordingly.
- Keep in the fridge or freezer: Storage choice affects final texture, with the fridge keeping the vanilla custard softer and the freezer yielding a firmer, spoonable treat. Always cover the glasses to prevent absorption of fridge odors. A common mistake is storing uncovered which leads to a skin forming on the custard surface.
- If frozen, let sit at room temp for 10 minutes before serving: Allowing a brief rest softens the frozen custard just enough to release flavors and reach an ideal scoopable consistency. You will notice the edges relax slightly and the aroma becomes more apparent. Cutting this rest short yields a too hard texture, while leaving it too long melts the structure and diminishes the intended contrast.
- If kept in the fridge the vanilla custard will be runny: Chilled but unfrozen custard remains soft and spoonable, offering a pudding like texture that highlights the vanilla profile. This variation is lovely when you want a creamier mouthfeel, but anticipate a looser presentation. If you need firmer layers, opt to freeze the dessert instead of refrigerating exclusively.
Notes
- Whisk first: Whisking the egg yolks and honey until pale ensures a stable base that blends smoothly with the heavy cream, cutting down on the risk of lumps when heat is applied.
- Monitor heat: Bring the custard to a gentle boil cautiously, because dairy can foam and boil over quickly, and steady heat preserves a silky texture.
- Test the coat: Use the spoon test to check for proper thickness, since visual cues alone can be misleading and the spoon is a reliable sensory check.
- Cool coffee: Add brewed black coffee once the pot is off the heat to keep the aroma bright and to avoid thinning the custard with excess heat.
- Short freeze for layers: Freeze the chocolate layer briefly before adding the reserved vanilla to maintain clear, distinct strata that are pleasing to the eye and palate.