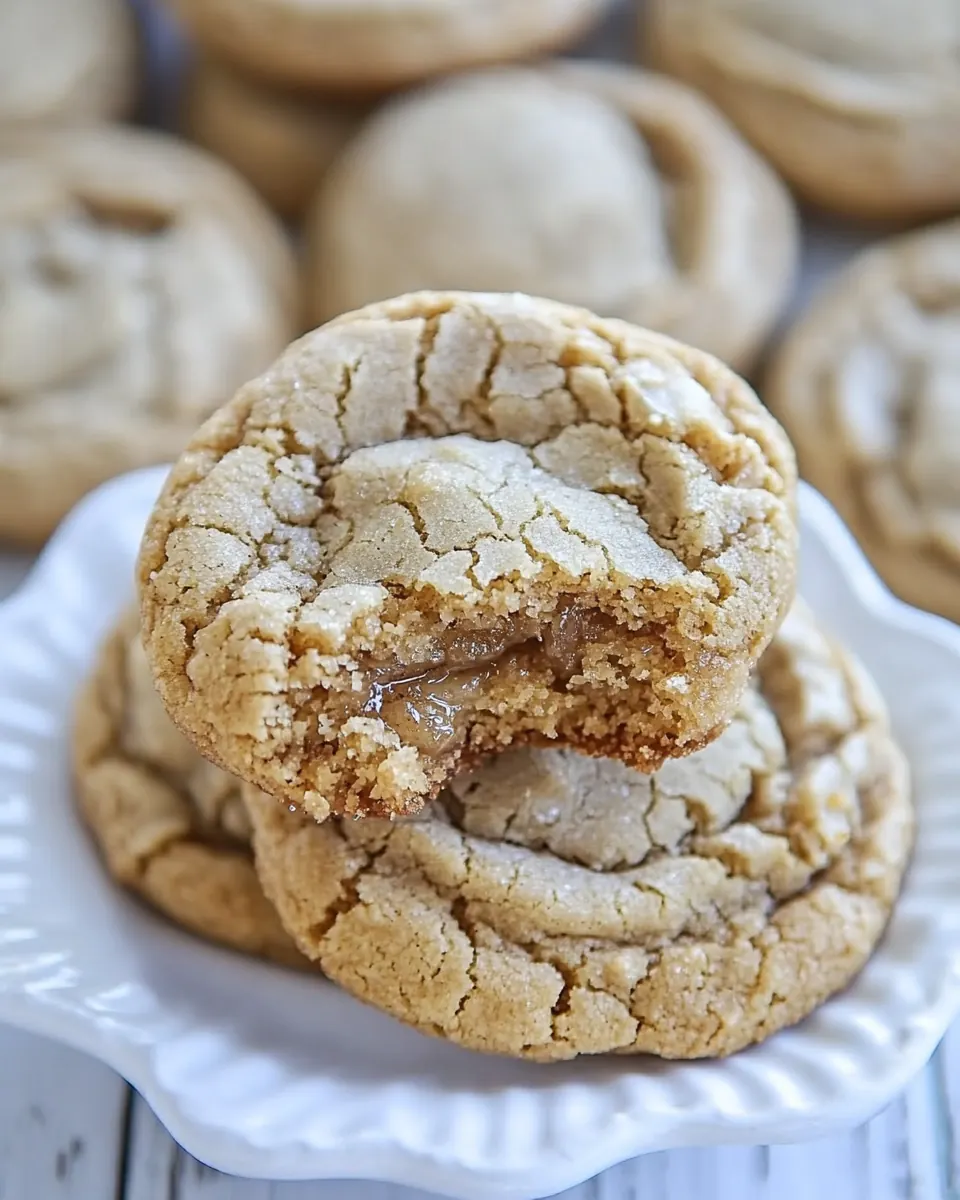
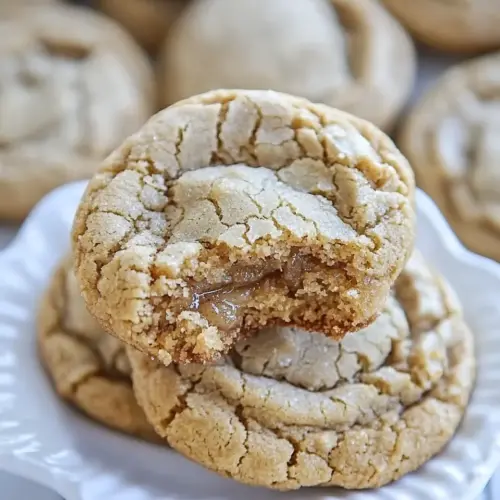
Soft and Chewy Brown Sugar Maple Cookies
Soft and Chewy Brown Sugar Maple Cookies have been my go to when I want a tender, nostalgic cookie that still feels a little special.
I remember the afternoon I first tested this recipe, sunlight slanting through the kitchen window while the house smelled of browned butter and toasted sugar, and each warm cookie felt like a tiny, tender celebration. I was tinkering to get that balance of chew and lightness, and once the center stayed soft while the edges turned a whisper golden, I knew I had something worth keeping. These cookies are the kind I pack into a tin for neighbors, or bake in a small batch when a rainy afternoon calls for comfort baking. The maple note is subtle at first, then blooms, and the brown sugar gives a deep caramel backbone that keeps them chewy.
What I love most about the Soft and Chewy Brown Sugar Maple Cookies is how forgiving the dough feels. I found myself adjusting the maple amounts, chilling times, and oven placement during testing, and every small change taught me something useful. Sometimes I make a slightly larger scoop for a thicker cookie, other times I aim for a thinner one that crisps more at the edge. Each batch tells me a little about my oven, my chill time discipline, and what my family prefers that week. I can’t wait to share the tricks that make these cookies reliably soft, with a chewy crumb and a crackled top when you tap them right after baking. Try them and let them become one of your simple, treasured sweets.
Recipe Snapshot
32 mins
20 mins
12 mins
Medium
150 kcal
American
Gluten-Free, Low FODMAP
Desserts
Stand mixer, Paddle attachment, Cookie scoop, Baking sheet, Parchment or silicone baking mat, Cooling rack
Why This Soft and Chewy Brown Sugar Maple Cookies Stands Out
Flavor That Feels Familiar
I fell in love with these cookies because the flavor is instantly comforting, yet refined. The use of both brown sugar and a touch of maple extract creates a deep, caramel like sweetness with a bright maple lift, so every bite feels layered. I often choose this cookie when I want something that tastes nostalgic without being predictable.
Texture That Lasts
One major reason I reach for this recipe is the chew. The combination of bread flour, all purpose flour, and a bit of cornstarch helps the cookies stay soft in the center while developing slightly firmer edges. I’ve tested variations, and the dough reliably gives you that soft and chewy center you crave, rather than a flat, crunchy cookie.
Simple Process With Forgiving Steps
I appreciate recipes that are forgiving when life gets hectic. Chilling the dough for at least two hours not only deepens flavor, it makes the dough manageable and reduces spreading. I’ve pulled trays from the fridge, let kids shape dough, and still ended up with great results. This method won’t punish you for small timing slips.
Customizable Maple Intensity
Because the recipe calls for adding maple extract slowly and to taste, you have full control over how pronounced the maple flavor is. I often start with the lower amount to let others taste the caramel from the sugars, then add more for maple lovers. That flexibility makes these cookies perfect for varying tastes and occasions.
Great for Gifting and Storing
These cookies keep well at room temperature for days, and the dough stores beautifully in the fridge or freezer. I like making a double batch and freezing extra dough balls, so warm, just baked cookies are always within reach. The resilience and portability make them ideal for gifting, bake sales, or slow holiday mornings.
Recipe Ingredients for Soft and Chewy Brown Sugar Maple Cookies
The philosophy here is simple, choose ingredients that build deep, balanced sweetness and a chewy structure. The two sugars create caramel notes, the flours and cornstarch control texture and rise, and the small amount of maple extract provides a distinct high note. Each component plays a role, whether it is structure, moisture, or flavor lift.
- 3/4 cup unsalted butter, softened: Creamed and softened to provide moisture and a tender crumb while helping to bind the dough; unsalted butter lets precise control of overall saltiness and enhances the brown sugar and maple flavors when creamed with sugar.
- 3/4 cup dark brown sugar, packed: Packed to contribute deep molasses notes, sweetness, and moisture while assisting with chewiness; dark brown sugar also helps create a rich caramelized flavor and slightly denser texture in the cookies.
- 1/4 cup light brown sugar, packed: Packed to add a milder, buttery sweetness and additional moisture that balances the intensity of dark brown sugar; light brown sugar contributes subtle caramel notes and helps maintain a soft texture.
- 1 large egg: Beaten to add structure, moisture, and emulsification; the egg helps bind ingredients, contributes to leavening and tenderness, and improves the cookie's richness and color.
- 2 teaspoons vanilla extract: Added to impart aromatic vanilla flavor and round out sweetness; vanilla extract enhances the perception of other flavors and deepens the cookie's overall flavor profile.
- 3/4 + teaspoon maple extract, added slowly in 1/2 teaspoon increments and to taste: Measured and added slowly to control flavor intensity; maple extract provides concentrated maple aroma and sweetness so the maple note can be customized to taste.
- 1 cup bread flour, all-purpose flour may be substituted and used exclusively in place of bread flour: Used to increase gluten development and provide a chewier texture; bread flour contributes higher protein for structure while allowing substitution with all-purpose flour if a slightly less chewy cookie is desired.
- 1 cup all-purpose flour: Combined with bread flour to balance protein content and create a tender, stable dough; all-purpose flour contributes structure without making cookies overly dense and can be used alone if preferred.
- 2 teaspoons cornstarch: Incorporated to slightly thicken the dough and create a softer, tender bite by reducing toughness; cornstarch also helps produce a delicate, melt-in-the-mouth texture.
- 1 teaspoon baking soda: Mixed in to provide leavening and controlled spread by producing carbon dioxide when activated; baking soda helps cookies rise slightly and develop a light, airy interior.
- 1/2 teaspoon salt, or to taste: Adjusted to season and enhance flavors while controlling overall saltiness; salt balances sweetness and strengthens gluten slightly, improving texture and flavor clarity.
The Method for Soft and Chewy Brown Sugar Maple Cookies
I like to walk through these steps slowly so you can read the dough and the cookies as they respond. The method is straightforward, but each phase gives you a chance to tune for thickness, chew, and maple intensity. Keep your senses active as you go, the smell and look will tell you a lot.
- To the bowl of a stand mixer fitted with the paddle attachment, beat the butter on low speed until smooth, 1 to 2 minutes.: The first sensory cue is the texture change of the butter , it should shift from firm to creamy and slightly glossy, and you may hear a soft, rhythmic scrape as the paddle moves; this indicates proper consistency. This step incorporates air which helps the cookies rise, so don’t rush it. If the butter seems greasy or too soft, pop the bowl in the fridge for a few minutes to firm up, because overheated butter will cause a greasy dough and flat cookies. A common mistake is starting with butter that is room temperature to the point of being melty; aim for cool and soft.
- Add the sugars and beat on medium-high speed until creamed and well-combined, about 3 minutes.: You will notice the mixture lighten in color and become fluffy as the dark brown sugar and light brown sugar meld with the butter , releasing molasses aromas that smell warm and toasty. Creaming properly traps air which helps create lift and a tender crumb, so be patient and scrape the bowl once or twice to ensure even mixing. If the sugars clump or don’t integrate, check that your butter was soft enough; lumpy sugar pockets indicate inadequate creaming.
- Stop, scrape down the sides of the bowl, and add the egg, vanilla extract, maple extract to taste (start with 3/4 teaspoon and add more to taste; I used nearly 1 1/2 teaspoons and cookies are prominently maple-flavored) and beat on medium-high speed until light and fluffy, about 3 minutes.: As you add the egg and extracts, the aroma will shift to a sweet, complex perfume of vanilla and maple, and the batter should feel lighter. Room temperature egg blends more smoothly and helps produce an even texture, so avoid using a cold egg . Overmixing after the egg can incorporate too much air and lead to collapsing cookies, so stop once the mixture is uniformly pale and slightly billowy.
- Stop, scrape down the sides of the bowl, and add the flours (solely using all-purpose flour will work, but the cookies will not be as chewy or rise as well because bread flour creates chewier results and gives greater rise), cornstarch, baking soda, salt, and mix until just combined, about 1 minute.: At this stage you will see the dough thicken and the scent will turn from wet batter to a more dough like aroma with that brown sugar nuttiness. Mixing just until combined prevents overdeveloping the gluten, which preserves chew rather than toughness. If the dough seems dry, check your measuring technique; too much flour will yield crumbly cookies, while too little will make them spread excessively. A common slip is overmixing, which produces a dense, less tender cookie.
- Using a 2-ounce cookie scoop, form heaping mounds weighing 2 1/4-ounces each (weighed on a scale, which is approximately a scant 1/4-cup measure); or divide dough into 13 to 15 pieces (made 13 cookies).: When portioning, you should see thick, shaggy mounds that hold their shape, with a sticky sheen from the sugars. Weighing ensures consistent bake times and even texture across the batch. If the dough sticks excessively to the scoop, chill the scoop or lightly oil it, but avoid adding flour which changes the balance. Creating uneven sizes is the usual mistake that causes some cookies to overbake while others remain underdone.
- Place dough mounds on a large plate, cover with plastic wrap, and refrigerate for at least 2 hours; up to 5 days. Do not bake these cookies with dough that has not been properly chilled because they will spread and they won't stay thick and puffy.: Chilling transforms texture and flavor, the cold dough firms so the cookies bake up tall and puffy, and resting allows the sugars to meld for a deeper taste. You may notice the dough becomes less tacky and easier to handle after chilling. Do not skip chilling because unchilled dough will spread too much and won’t stay thick and puffy. A frequent error is underchilling, which produces thin, crispy cookies instead of soft ones.
- Preheat oven to 350 F, line a baking sheet with a Silpat Non-Stick Baking Mat, parchment, or spray with cooking spray. Place dough on the baking sheet, spaced at least 2 inches apart; I bake 6 or 7 cookies per sheet.: The oven aromatics begin immediately as the tray goes in, with warm caramel notes rising. Spacing is important so cookies have room to spread and achieve even browning on the edges. Using a lined or nonstick surface prevents sticking and promotes even color. Crowding the pan causes uneven baking and stickiness between cookies.
- Bake for 10 to 12 minutes, or until just barely golden brown around the edges, even if slightly undercooked in the center, noting the tops will not be as browned and will be paler. The cookies in the photos were baked for 10 1/2 minutes, with one tray in the oven at a time, and rotated halfway through baking.: Watch for a subtle edge color change and a pale top, these visual cues tell you the interior remains soft while the edges set. The smell will intensify to a toasty, buttery caramel when they are nearly done. If you overbake until the centers are firm, the cookies will lose their chewy interior, so err on the side of slightly underdone if unsure. A common mistake is following time blindly instead of checking for these cues.
- Upon removing trays from oven, if cookies stayed very domed while baking (likely they will if dough was well-chilled) immediately give cookies a firm yet gentle tap or two with the back of a spoon to flatten them. This creates a crackled top appearance.: This creates that charming crackled top and evens the texture, and you will feel a slight give under the spoon as steam releases. The sound is soft, and the visual transformation is immediate as the tops crack. Don’t press too hard or you will deflate the cookie completely, and avoid tapping if the cookies are already flat, which will only make them messy.
- Allow cookies to cool on baking sheets for about 10 minutes before moving them to a rack to finish cooling.: During this rest the cookies set and continue to bake gently from residual heat, and you will notice the centers firm slightly while remaining tender. Cooling on the sheet prevents tearing when transferring, and the texture finishes as they come to room temperature. Rushing this step by moving cookies too soon can cause them to fall apart, and leaving them too long on a hot pan may overcook the bottoms.
Tips for Success
I like to think of these tips as small habits that add up to consistently great cookies. Below are practical, tested pointers that will help you adapt the recipe to your kitchen and taste. Apply them as needed, and you’ll see steadier results.
- Chill Thoroughly Chill the dough for at least two hours, and up to five days, to firm it and develop flavor. This prevents excessive spreading and helps the cookies bake up tall and chewy. If you are short on time, a 30 to 45 minute chill will help, but results will be less dramatic.
- Measure Precisely Spoon and level your flours or use a scale for best results. Bread flour gives better chew, while all purpose will still work but yield a slightly softer result. Inconsistent measuring is the most common source of texture variation.
- Start Small with Maple Add the maple extract in small increments, tasting as you go. Extracts can be potent and may overwhelm if added all at once, so build the flavor gradually for a nuanced result.
- Use a Consistent Scoop Portion with a 2 ounce scoop or weigh portions so cookies bake evenly. Uniform sizing prevents some cookies from overbaking while others remain underdone, which is especially important when sharing or gifting.
- Line Your Pans Use parchment, a silicone mat, or nonstick spray to ensure even baking and easy removal. Different surfaces brown differently, so adjust bake time slightly if switching between them.
- Mind Your Oven Ovens vary so watch the cookies in the last few minutes; look for barely golden edges and pale tops. If you tend to run hot, reduce time and check early to keep centers soft and chewy.
Serving This Soft and Chewy Brown Sugar Maple Cookies
These cookies are wonderfully versatile, and how you serve them can elevate the experience. Whether for a snack, a casual gathering, or a holiday tin, small presentation choices make a difference. Here are thoughtful ways I like to serve them.
- Casual Snack Serve warm with a simple cloth napkin, letting the residual heat emphasize the soft center; they pair nicely with coffee or tea for an afternoon pick me up.
- Gift Box Layer cookies in a small tin with parchment between them, and include a note about reheating briefly for that just baked feeling; these travel well and hold up for gifting.
- Party Platter Arrange alongside other small sweets and label the flavor, highlighting the maple note so guests can sample intentionally; the chewy texture stands out next to crisp cookies.
- Storage Tips Store in an airtight container at room temperature for up to five days, or freeze baked cookies for up to three months. For the freshest experience, warm frozen cookies briefly in a low oven before serving.
- Occasion Pairings These cookies suit cozy occasions like afternoon tea, fall gatherings, or anytime you want a comforting homemade treat; they are especially lovely during cooler months when maple notes feel seasonal.
FAQ
Conclusion
These Soft and Chewy Brown Sugar Maple Cookies excel because they pair deep brown sugar caramel notes with a gentle maple lift, delivering a tender, chewy center and lightly crisp edges. Give them a try to experience how a few thoughtful techniques, like chilling and careful portioning, transform a simple dough into consistently cozy, bakery style cookies. I hope you find them as comforting and reliable as I do, and that they become one of your go to recipes for gifting, snacking, or cheering up a busy afternoon.
Soft and Chewy Brown Sugar Maple Cookies
Equipment
- Stand mixer
- Paddle attachment
- Cookie Scoop
- Baking Sheet
- Parchment or silicone baking mat
- Cooling rack
Ingredients
- 3/4 cup unsalted butter, softened Creamed and softened to provide moisture and a tender crumb while helping to bind the dough; unsalted butter lets precise control of overall saltiness and enhances the brown sugar and maple flavors when creamed with sugar.
- 3/4 cup dark brown sugar, packed Packed to contribute deep molasses notes, sweetness, and moisture while assisting with chewiness; dark brown sugar also helps create a rich caramelized flavor and slightly denser texture in the cookies.
- 1/4 cup light brown sugar, packed Packed to add a milder, buttery sweetness and additional moisture that balances the intensity of dark brown sugar; light brown sugar contributes subtle caramel notes and helps maintain a soft texture.
- 1 large egg Beaten to add structure, moisture, and emulsification; the egg helps bind ingredients, contributes to leavening and tenderness, and improves the cookie's richness and color.
- 2 teaspoons vanilla extract Added to impart aromatic vanilla flavor and round out sweetness; vanilla extract enhances the perception of other flavors and deepens the cookie's overall flavor profile.
- 3/4 + teaspoon maple extract, added slowly in 1/2 teaspoon increments and to taste Measured and added slowly to control flavor intensity; maple extract provides concentrated maple aroma and sweetness so the maple note can be customized to taste.
- 1 cup bread flour, all-purpose flour may be substituted and used exclusively in place of bread flour Used to increase gluten development and provide a chewier texture; bread flour contributes higher protein for structure while allowing substitution with all-purpose flour if a slightly less chewy cookie is desired.
- 1 cup all-purpose flour Combined with bread flour to balance protein content and create a tender, stable dough; all-purpose flour contributes structure without making cookies overly dense and can be used alone if preferred.
- 2 teaspoons cornstarch Incorporated to slightly thicken the dough and create a softer, tender bite by reducing toughness; cornstarch also helps produce a delicate, melt-in-the-mouth texture.
- 1 teaspoon baking soda Mixed in to provide leavening and controlled spread by producing carbon dioxide when activated; baking soda helps cookies rise slightly and develop a light, airy interior.
- 1/2 teaspoon salt, or to taste Adjusted to season and enhance flavors while controlling overall saltiness; salt balances sweetness and strengthens gluten slightly, improving texture and flavor clarity.
Instructions
- To the bowl of a stand mixer fitted with the paddle attachment, beat the butter on low speed until smooth, 1 to 2 minutes.: The first sensory cue is the texture change of the butter , it should shift from firm to creamy and slightly glossy, and you may hear a soft, rhythmic scrape as the paddle moves; this indicates proper consistency. This step incorporates air which helps the cookies rise, so don’t rush it. If the butter seems greasy or too soft, pop the bowl in the fridge for a few minutes to firm up, because overheated butter will cause a greasy dough and flat cookies. A common mistake is starting with butter that is room temperature to the point of being melty; aim for cool and soft.
- Add the sugars and beat on medium-high speed until creamed and well-combined, about 3 minutes.: You will notice the mixture lighten in color and become fluffy as the dark brown sugar and light brown sugar meld with the butter , releasing molasses aromas that smell warm and toasty. Creaming properly traps air which helps create lift and a tender crumb, so be patient and scrape the bowl once or twice to ensure even mixing. If the sugars clump or don’t integrate, check that your butter was soft enough; lumpy sugar pockets indicate inadequate creaming.
- Stop, scrape down the sides of the bowl, and add the egg, vanilla extract, maple extract to taste (start with 3/4 teaspoon and add more to taste; I used nearly 1 1/2 teaspoons and cookies are prominently maple-flavored) and beat on medium-high speed until light and fluffy, about 3 minutes.: As you add the egg and extracts, the aroma will shift to a sweet, complex perfume of vanilla and maple, and the batter should feel lighter. Room temperature egg blends more smoothly and helps produce an even texture, so avoid using a cold egg . Overmixing after the egg can incorporate too much air and lead to collapsing cookies, so stop once the mixture is uniformly pale and slightly billowy.
- Stop, scrape down the sides of the bowl, and add the flours (solely using all-purpose flour will work, but the cookies will not be as chewy or rise as well because bread flour creates chewier results and gives greater rise), cornstarch, baking soda, salt, and mix until just combined, about 1 minute.: At this stage you will see the dough thicken and the scent will turn from wet batter to a more dough like aroma with that brown sugar nuttiness. Mixing just until combined prevents overdeveloping the gluten, which preserves chew rather than toughness. If the dough seems dry, check your measuring technique; too much flour will yield crumbly cookies, while too little will make them spread excessively. A common slip is overmixing, which produces a dense, less tender cookie.
- Using a 2-ounce cookie scoop, form heaping mounds weighing 2 1/4-ounces each (weighed on a scale, which is approximately a scant 1/4-cup measure); or divide dough into 13 to 15 pieces (made 13 cookies).: When portioning, you should see thick, shaggy mounds that hold their shape, with a sticky sheen from the sugars. Weighing ensures consistent bake times and even texture across the batch. If the dough sticks excessively to the scoop, chill the scoop or lightly oil it, but avoid adding flour which changes the balance. Creating uneven sizes is the usual mistake that causes some cookies to overbake while others remain underdone.
- Place dough mounds on a large plate, cover with plastic wrap, and refrigerate for at least 2 hours; up to 5 days. Do not bake these cookies with dough that has not been properly chilled because they will spread and they won't stay thick and puffy.: Chilling transforms texture and flavor, the cold dough firms so the cookies bake up tall and puffy, and resting allows the sugars to meld for a deeper taste. You may notice the dough becomes less tacky and easier to handle after chilling. Do not skip chilling because unchilled dough will spread too much and won’t stay thick and puffy. A frequent error is underchilling, which produces thin, crispy cookies instead of soft ones.
- Preheat oven to 350 F, line a baking sheet with a Silpat Non-Stick Baking Mat, parchment, or spray with cooking spray. Place dough on the baking sheet, spaced at least 2 inches apart; I bake 6 or 7 cookies per sheet.: The oven aromatics begin immediately as the tray goes in, with warm caramel notes rising. Spacing is important so cookies have room to spread and achieve even browning on the edges. Using a lined or nonstick surface prevents sticking and promotes even color. Crowding the pan causes uneven baking and stickiness between cookies.
- Bake for 10 to 12 minutes, or until just barely golden brown around the edges, even if slightly undercooked in the center, noting the tops will not be as browned and will be paler. The cookies in the photos were baked for 10 1/2 minutes, with one tray in the oven at a time, and rotated halfway through baking.: Watch for a subtle edge color change and a pale top, these visual cues tell you the interior remains soft while the edges set. The smell will intensify to a toasty, buttery caramel when they are nearly done. If you overbake until the centers are firm, the cookies will lose their chewy interior, so err on the side of slightly underdone if unsure. A common mistake is following time blindly instead of checking for these cues.
- Upon removing trays from oven, if cookies stayed very domed while baking (likely they will if dough was well-chilled) immediately give cookies a firm yet gentle tap or two with the back of a spoon to flatten them. This creates a crackled top appearance.: This creates that charming crackled top and evens the texture, and you will feel a slight give under the spoon as steam releases. The sound is soft, and the visual transformation is immediate as the tops crack. Don’t press too hard or you will deflate the cookie completely, and avoid tapping if the cookies are already flat, which will only make them messy.
- Allow cookies to cool on baking sheets for about 10 minutes before moving them to a rack to finish cooling.: During this rest the cookies set and continue to bake gently from residual heat, and you will notice the centers firm slightly while remaining tender. Cooling on the sheet prevents tearing when transferring, and the texture finishes as they come to room temperature. Rushing this step by moving cookies too soon can cause them to fall apart, and leaving them too long on a hot pan may overcook the bottoms.
Notes
- Chill Thoroughly Chill the dough for at least two hours, and up to five days, to firm it and develop flavor. This prevents excessive spreading and helps the cookies bake up tall and chewy. If you are short on time, a 30 to 45 minute chill will help, but results will be less dramatic.
- Measure Precisely Spoon and level your flours or use a scale for best results. Bread flour gives better chew, while all purpose will still work but yield a slightly softer result. Inconsistent measuring is the most common source of texture variation.
- Start Small with Maple Add the maple extract in small increments, tasting as you go. Extracts can be potent and may overwhelm if added all at once, so build the flavor gradually for a nuanced result.
- Use a Consistent Scoop Portion with a 2 ounce scoop or weigh portions so cookies bake evenly. Uniform sizing prevents some cookies from overbaking while others remain underdone, which is especially important when sharing or gifting.
- Line Your Pans Use parchment, a silicone mat, or nonstick spray to ensure even baking and easy removal. Different surfaces brown differently, so adjust bake time slightly if switching between them.
- Mind Your Oven Ovens vary so watch the cookies in the last few minutes; look for barely golden edges and pale tops. If you tend to run hot, reduce time and check early to keep centers soft and chewy.