Creamy Mocha Custard
Creamy Mocha Custard is a silky layered dessert combining rich heavy cream, glossy chocolate, and bright black coffee for a decadent yet balanced finish. This easy and indulgent treat delivers creamy texture and mocha depth, perfect for a cozy night or an elegant dinner ending, and it rewards simple technique with big flavor.
Equipment
- Large Pot
- Wooden Spoon
- Whisk
- Measuring Cup
- Serving glasses
Ingredients
- 3 egg yolks Whisk gently to incorporate fat and richness, providing structure and a silky texture to the custard; heat carefully to avoid curdling while combining with other ingredients.
- 1/2 cup honey Sweeten naturally while contributing a floral complexity; dissolve fully into warm cream to balance bitterness from chocolate and coffee, and help create a smooth mouthfeel.
- 3 1/2 cups heavy cream Heat slowly to infuse creaminess and body, serving as the custard’s liquid base; warm enough to melt chocolate and temper egg yolks without boiling.
- pinch of sea salt Season lightly to enhance and balance flavors, sharpening the chocolate and coffee notes without overpowering; distribute evenly to avoid concentrated salty pockets.
- 1/4 cup brewed black coffee Introduce brewed coffee to contribute deep, roasted bitterness and subtle acidity that complements chocolate; add a restrained amount to avoid overwhelming the custard’s sweetness.
- 1 tablespoon vanilla extract Provide aromatic warmth and enhance overall flavor complexity; stir into the custard mix to lift and round the chocolate and coffee tones.
- 10 ounces semi-sweet or dark chocolate, chopped Melt into the warm cream to supply intense chocolate flavor, texture, and structure; choose semi-sweet or dark to balance sweetness and achieve a rich, velvety finish.
Instructions
- In a large pot, whisk together the egg yolks and honey. Add the cream and sea salt. Set the pot over medium-high heat and bring the mixture to a boil. Cook, stirring continuously, until the mixture thickens and easily coats the back of a wooden spoon, 5-8 minutes. Watch close, milk tends to boil over. Remove from the heat. Stir in the coffee and vanilla. Remove 3/4 cup of the vanilla custard and set aside. Add the chocolate to the remaining custard and stir until melted and smooth. Divide the chocolate custard among six glasses. Freeze 1 hour and then evenly pour over the reserved vanilla custard. Freeze until set, about 2 hours. Keep in the fridge or freezer. If frozen, let sit at room temp for 10 minutes before serving. If kept in the fridge the vanilla custard will be runny.: The bowl will feel cool and slightly viscous as you combine the egg yolks with the honey , and the whisk motion will produce a pale, glossy ribbon when lifted. This initial emulsion helps the yolks incorporate evenly with the warm heavy cream later, preventing lumps. If the yolks and honey are not well whisked, the mixture can separate when heat is applied, creating an uneven texture. Keep your whisking steady until the color lightens, that indicates proper integration.
- Add the cream and sea salt: When you pour in the chilled or room temperature heavy cream , you will notice the blend becomes fluid and slightly heavy, and the tiny salt crystals dissolve almost immediately, brightening the mixture. The cream softens the sweetness and ensures the custard will finish silky. A common slip is adding very hot cream which can shock the yolks, so bring cream to warm rather than boiling before combining when possible.
- Set the pot over medium-high heat and bring the mixture to a boil: As the pot heats, you will hear a faint simmer that escalates into gentle bubbling, and steam will begin to rise. Lift the spoon occasionally to see when the mixture begins to steam and bubble around the edges, signaling a near boil. It is crucial to watch because dairy can rapidly expand and spill, and that mess is avoidable with attention. When small bubbles gather at the edge, reduce or adjust heat accordingly to keep control.
- Cook, stirring continuously, until the mixture thickens and easily coats the back of a wooden spoon, 5 to 8 minutes: You will feel the mixture gain body under your spoon as the proteins in the egg yolks set, transforming from liquid to custard. Texturally, it moves from runny to noticeably clingy, leaving a clear track when you run your finger across the back of the spoon. This sensory cue confirms proper thickening and prevents under or over cooking. Overcook and you risk curdling, so maintain even stirring and moderate heat.
- Watch close, milk tends to boil over: The surface will start forming tiny, rapid bubbles and steam, and you may notice the pot climbing toward a boil; that is when scalding or overflow can happen. I keep a hand near the heat control to lower it instantly if the mixture leaps. Letting it boil uncontrolled will create a burnt dairy film and uneven texture, so staying present here prevents disaster.
- Remove from the heat: Once the custard reaches the spoon coating stage, the kitchen fills with a warm, sweet aroma and the surface appears glossy and slightly thickened. Pull the pot away from the burner to halt further cooking immediately, or residual heat will continue to set the eggs. A frequent error is leaving it on the heat, which causes curdling or a grainy finish; removing promptly preserves silkiness.
- Stir in the coffee and vanilla: Adding the cooled brewed black coffee and the vanilla extract off the heat integrates aromatic notes without evaporating volatile flavors. As you stir, watch the custard take on a deeper hue and inhale a layered scent of coffee, vanilla, and dairy. If the coffee is too hot it can thin the custard, so ensure it is warm or at room temperature before combining to keep the texture stable.
- Remove 3/4 cup of the vanilla custard and set aside: The reserved portion will remain a lighter, vanilla layer that contrasts visually and flavor wise with the chocolate. Use a small measuring cup or bowl and note the custard's silky viscosity as you spoon it out. If you forget to set aside this portion first, you lose the layered effect and the dessert becomes uniform, which may be fine but less dramatic.
- Add the chocolate to the remaining custard and stir until melted and smooth: As you fold the finely chopped chocolate into the hot custard, it will begin to soften, bloom, and eventually melt into a shiny, thick sauce. The sound is quiet, the texture velvety, and the aroma deepens to chocolate forward. If the chocolate does not melt evenly, warming the pot gently over low heat while stirring will help, but avoid high heat which can seize the chocolate and make it grainy.
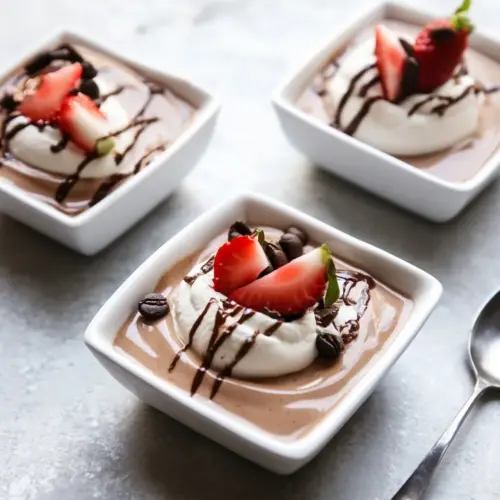
- Divide the chocolate custard among six glasses: Spoon or pour the warm chocolate custard evenly into serving glasses, watching as each portion gleams dark and rich. Even distribution ensures consistent portions and aesthetics. If you pour while the custard is too hot it may shift the glass temperature; allow it to cool slightly for safer handling and cleaner layers when you add the reserved vanilla.
- Freeze 1 hour and then evenly pour over the reserved vanilla custard: After a brief freeze the chocolate layer firms enough to accept a contrasting pour without immediate mixing, so when you add the reserved vanilla custard it will form a clear top layer. The frozen chocolate will produce a satisfying textural contrast with the softer vanilla. If you skip the short freeze the layers may merge, losing the visual separation that makes this dessert special.
- Freeze until set, about 2 hours: During this period the dessert solidifies and chills through, and the aromas settle into a cohesive profile. When fully set the surface will feel firm to the touch and the color will be uniform across layers. Leaving it shorter than recommended can result in a runny center, while freezing too long makes the custard quite hard; plan serving time accordingly.
- Keep in the fridge or freezer: Storage choice affects final texture, with the fridge keeping the vanilla custard softer and the freezer yielding a firmer, spoonable treat. Always cover the glasses to prevent absorption of fridge odors. A common mistake is storing uncovered which leads to a skin forming on the custard surface.
- If frozen, let sit at room temp for 10 minutes before serving: Allowing a brief rest softens the frozen custard just enough to release flavors and reach an ideal scoopable consistency. You will notice the edges relax slightly and the aroma becomes more apparent. Cutting this rest short yields a too hard texture, while leaving it too long melts the structure and diminishes the intended contrast.
- If kept in the fridge the vanilla custard will be runny: Chilled but unfrozen custard remains soft and spoonable, offering a pudding like texture that highlights the vanilla profile. This variation is lovely when you want a creamier mouthfeel, but anticipate a looser presentation. If you need firmer layers, opt to freeze the dessert instead of refrigerating exclusively.
Notes
- Whisk first: Whisking the egg yolks and honey until pale ensures a stable base that blends smoothly with the heavy cream, cutting down on the risk of lumps when heat is applied.
- Monitor heat: Bring the custard to a gentle boil cautiously, because dairy can foam and boil over quickly, and steady heat preserves a silky texture.
- Test the coat: Use the spoon test to check for proper thickness, since visual cues alone can be misleading and the spoon is a reliable sensory check.
- Cool coffee: Add brewed black coffee once the pot is off the heat to keep the aroma bright and to avoid thinning the custard with excess heat.
- Short freeze for layers: Freeze the chocolate layer briefly before adding the reserved vanilla to maintain clear, distinct strata that are pleasing to the eye and palate.