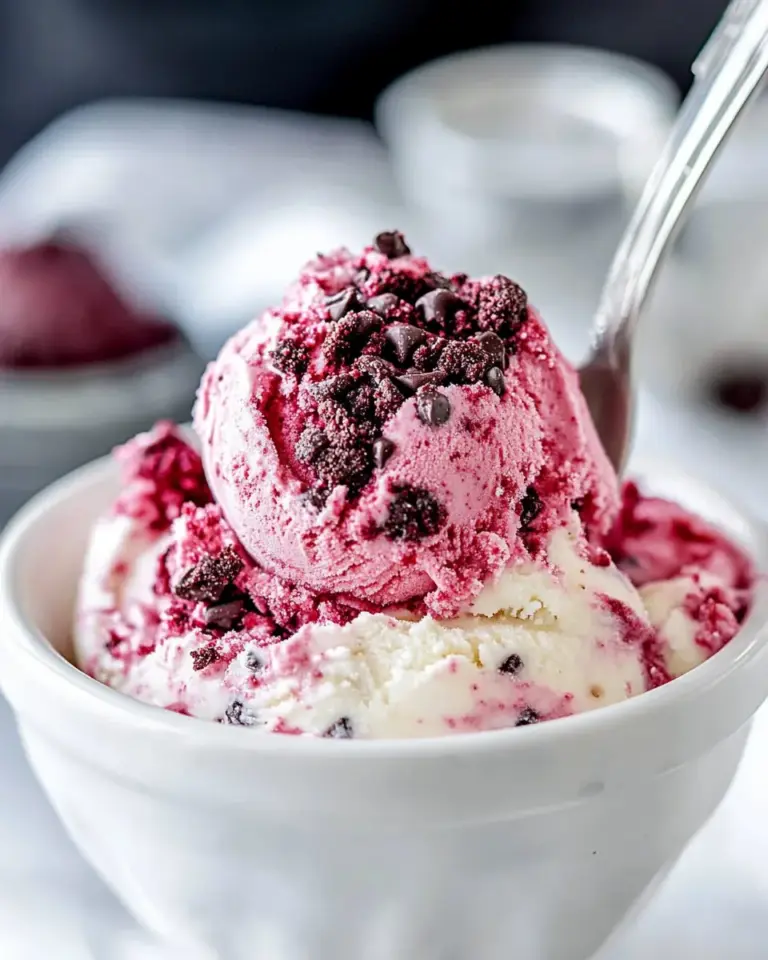
Chocolate Covered Strawberry Chia Pudding
Chocolate Covered Strawberry Chia Pudding is one of those treats I reach for when I want something impressive, yet totally approachable.
I still remember the first time I layered this pudding for guests, watching the glossy chocolate top crack in a satisfying way as spoons plunged through to the creamy, strawberry flecked chia below. I felt proud and slightly smug, because the end result looked like a fancy dessert but came together with a blender, a whisk, and a little patience. I love that this recipe feels indulgent but leans bright and fresh thanks to the strawberries. It’s perfect when you want to celebrate a small moment, or when you need a dessert that can chill quietly in the fridge while you wrap up dinner. I’ll often swap the milk type depending on what I have on hand, and that small change adjusts the texture and mouthfeel in delightful ways.
Over the years, I’ve learned a few tiny tricks that make the difference between a lumpy pudding and a silky one, and I’ll walk you through them. You’ll also find that the chocolate top adds both contrast and a bit of drama, making a simple pudding feel special. Whether you’re serving this for a cozy date night, a summer gathering, or a thoughtful finish to a family meal, the balance of creamy chia seeds, bright strawberries, and rich chocolate makes it memorable without being fussy.
Recipe Snapshot
22 mins
20 mins
2 mins
Easy
180 kcal
American
Gluten-Free, Low FODMAP
Desserts
57 or 8-ounce glasses
Why This Chocolate Covered Strawberry Chia Pudding Is a Winner
Layered Contrast That Feels Luxurious
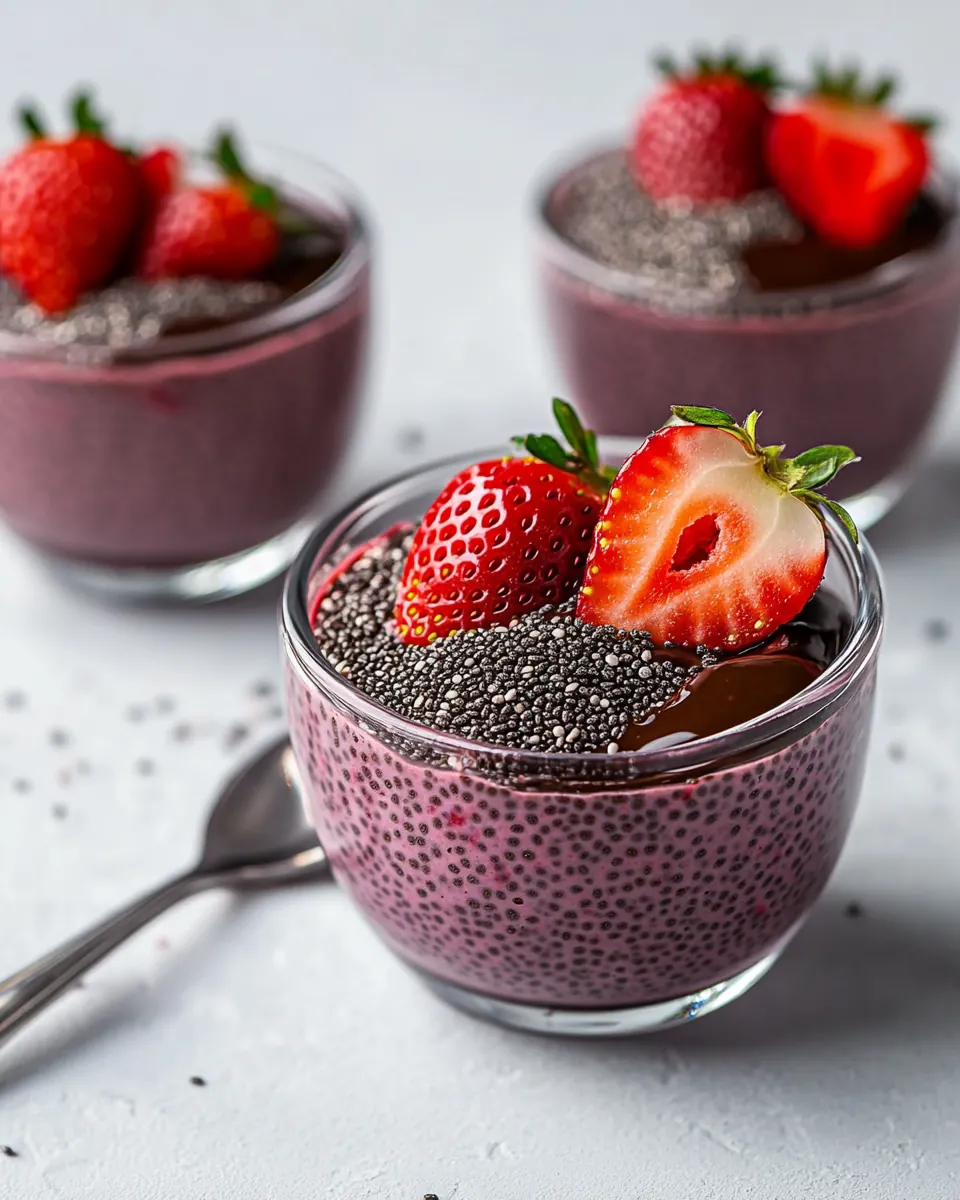
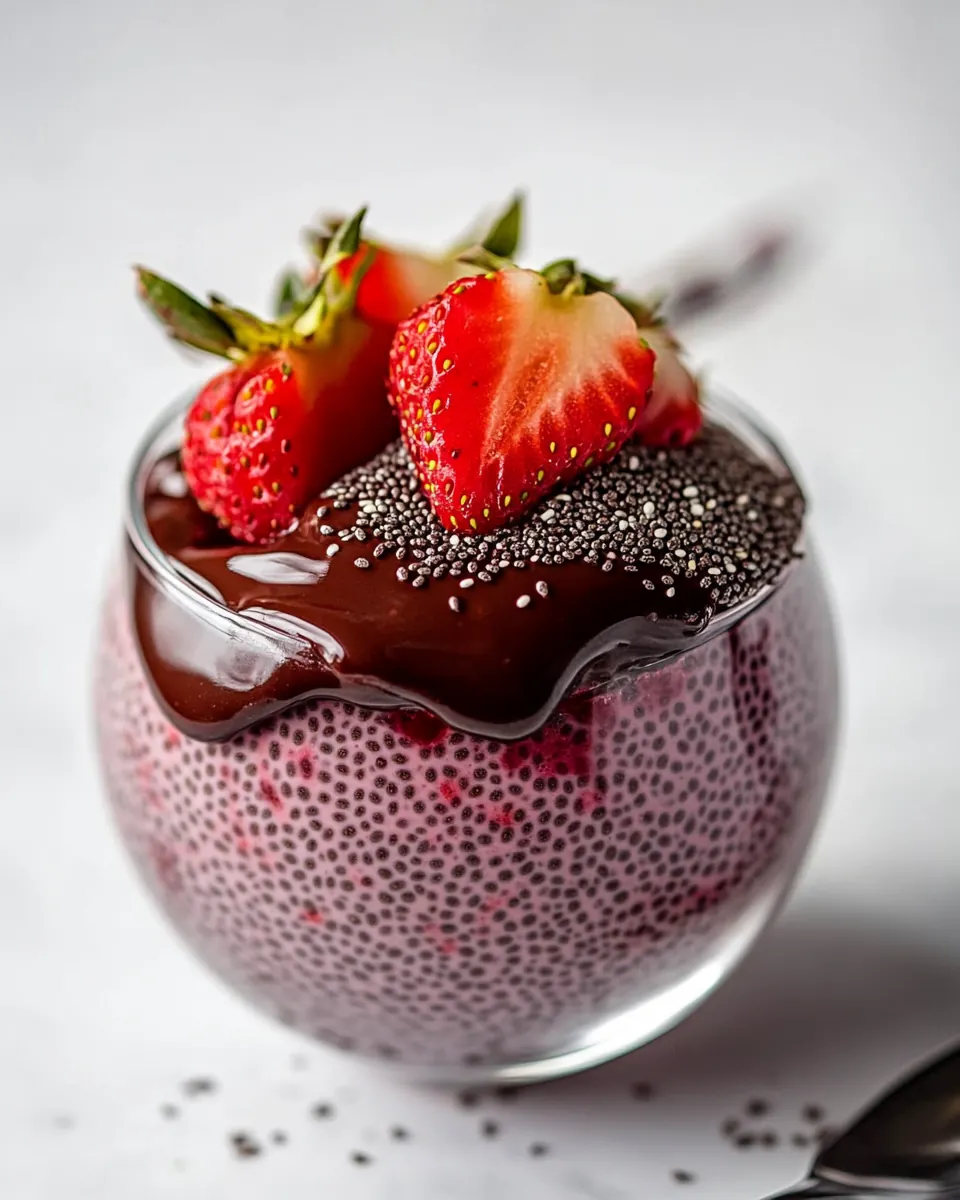
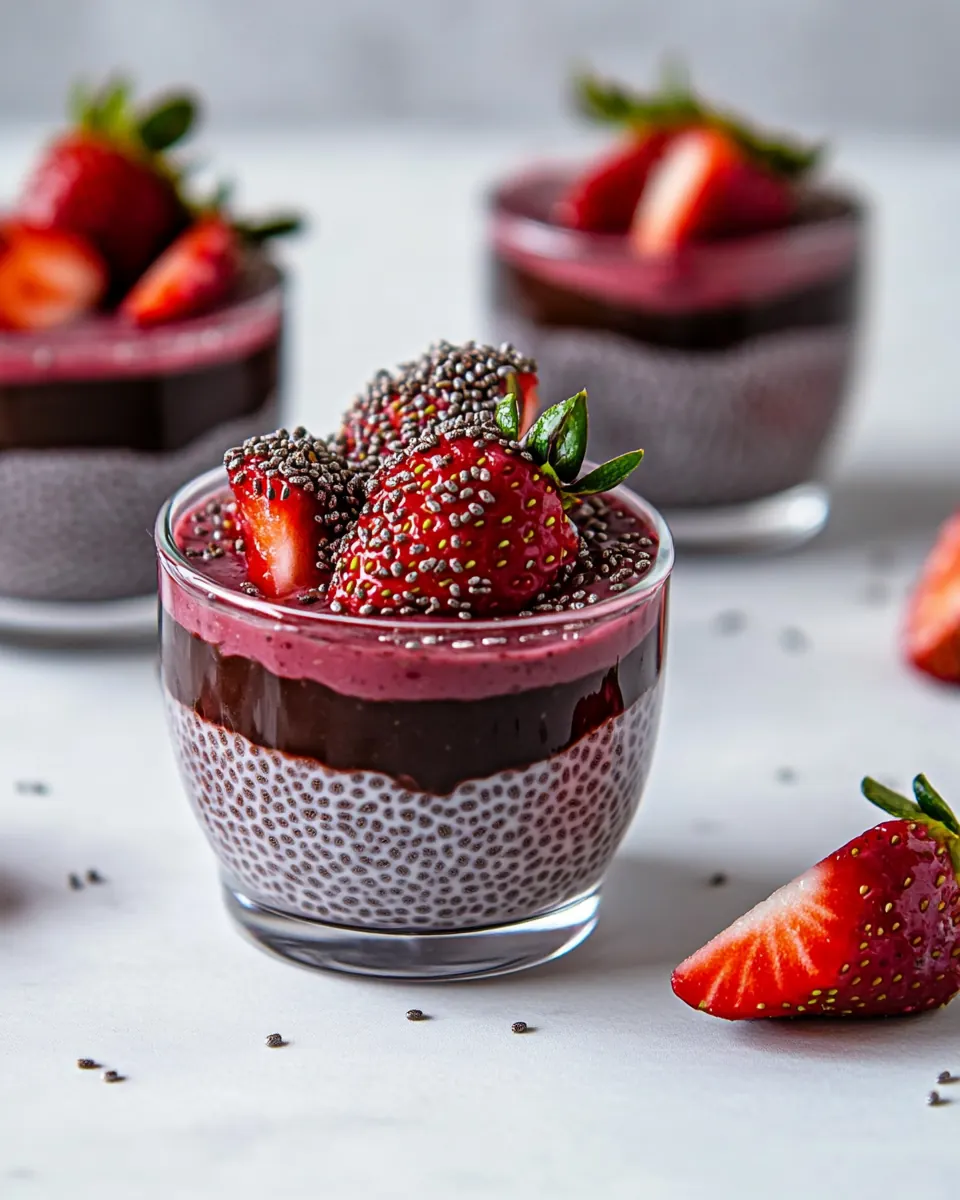
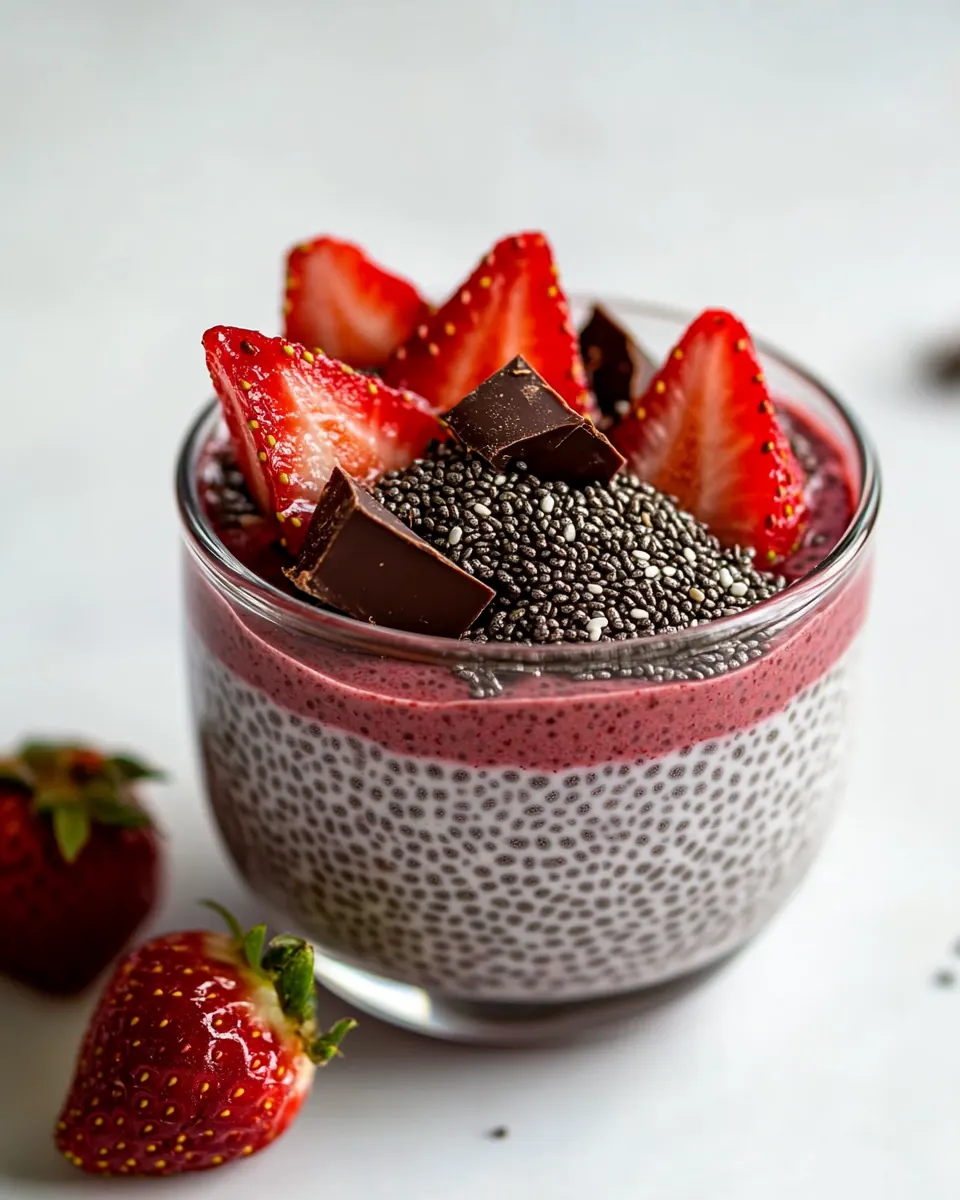
I adore how Chocolate Covered Strawberry Chia Pudding combines textures. The silky, slightly thickened pudding under a crisp chocolate shard creates a sensory moment, where the spoon first meets a cool, firm top then sinks into a creamy, fruity base. I think that contrast elevates a humble pudding into something you want to linger over.
Simple Ingredients, Big Impact
The ingredient list is short and approachable, yet every element pulls its weight. Chia seeds provide body and subtle nuttiness, while the choice of milk governs creaminess. Freeze dried strawberries boost the concentrated flavor without extra water, so you keep a thick, spoonable texture. I love recipes that feel intentional without demanding specialty items.
Make-Ahead Friendly
I often prepare components ahead. The pudding sets quietly in the fridge, so I can build it hours earlier. The gentle chill also helps the chocolate set cleanly, which is great when serving to company. If you like stress free hosting, this recipe is a small miracle.
Flexible and Seasonal
You can adapt this to what’s in your pantry. Use almond or coconut based milk to nudge the flavor, and always top with extra fresh strawberries when they’re at their best. I particularly turn to this in warm months, when bright fruit feels right, but it’s comforting any time you want a lighter sweet.
Healthful Without Being Boring
Because the base is built on chia seeds and fruit, it feels nourishing. The chocolate is a tiny flourish that makes this dessert feel indulgent without overwhelming the dish. I like that it can satisfy a sweet tooth while still feeling moderately wholesome.
Chocolate Covered Strawberry Chia Pudding Ingredients
These ingredients play off each other to create a balanced, spoonable pudding. The milk provides the liquid base, the freeze dried strawberries add concentrated berry flavor, and chia seeds are the thickening star. The fresh strawberries bring brightness and texture, while maple syrup and chocolate chips deliver the sweet and rich notes that make this feel like dessert.
- 2 1/2 cups milk of your choice: Provide creamy liquid base and help hydrate chia seeds while adding richness; choose dairy or plant milk depending on desired flavor and texture, and warm slightly for faster thickening.
- 2 1/4 cups chopped strawberries, plus more for garnish: Add juicy sweetness and fresh berry flavor while contributing texture; chop into small pieces so they distribute evenly and offer pops of strawberry throughout the pudding.
- 1 1/4 cup freeze dried strawberries: Deliver concentrated intense strawberry flavor and natural color while adding a powdery texture; crush or pulse if needed to incorporate fully without clumps.
- 2 tablespoon maple syrup, I used sugar-free by Wholesome Yum: Sweeten naturally and balance tartness while enhancing overall flavor profile; adjust quantity to taste and dissolve into the milk before combining with chia for even sweetness.
- 1 cup chia seeds: Create gel-like structure by absorbing liquid and thickening the mixture; stir thoroughly to prevent clumping and refrigerate to allow full pudding set.
- 1/2 cup sugar free dark or semi-sweet chocolate chips: Provide a chocolatey coating or mix-in element that melts smoothly for drizzling or layering; gently melt with coconut oil for glossy, pourable chocolate topping.
- 1 teaspoon coconut oil: Improve chocolate melting and sheen while adding a mild coconut aroma; combine with chocolate chips over low heat to create a smooth ganache-like drizzle.
How to Prepare Chocolate Covered Strawberry Chia Pudding
I like to walk you through the technique with clear, sensory cues so you know you are on track. The pudding comes together quickly in a blender then needs a short set in the fridge, after that the fun part is melting and setting the chocolate top so it cracks satisfyingly when served.
- Blend milk, 1 cup fresh strawberries, freeze-dried strawberries and maple syrup in a blender until smooth and transfer to a large bowl. Stir in chia seeds. Whisk so there are no clumps of chia seeds and wait until they expand, about 15 minutes.: As the blender whirs you will notice the aroma shift, with bright berry notes surfacing and the liquid taking on a pale pink hue. The smoothness at this stage is crucial, because any unmixed freeze dried strawberries can rehydrate unevenly and create gritty pockets. The sound should be a steady hum, not a clunky chop, meaning the solids have fully pureed. A common mistake here is underblending, which leaves gritty particles; if you see tiny bits that do not disappear after 20 to 30 seconds, pulse another 10 to 15 seconds and scrape the jar sides. Transfer immediately to a wide bowl to speed cooling and allow even chia distribution.
- Transfer remaining strawberries into the bottom of 5 glass cups or 8 oz ramekins in 1/4 cup increments. Pour about 3/4 cup of chia pudding on top. Refrigerate for at least 1 hour, or up to overnight. Only do the next step if the pudding is firm.: When you add the chia seeds , they will initially float and glint against the liquid. Use a whisk to beat them in so they are suspended and not forming clumps. After the first stir, the mixture should look uniformly speckled. This step matters because chia seeds hydrate from the outside in, so clumps lead to gummy centers. A common pitfall is stirring too little, which produces uneven hydration; if you spot clumps after a few minutes, whisk vigorously until they disperse.
- Once the chia pudding is ready, melt the chocolate and coconut oil together in the microwave in 30 second increments (about 1 1/2 minutes total) stirring, or using a double boiler. Pour about 1 tablespoon of melted chocolate onto the top of each portion, gently smoothing it out over top and garnish with extra strawberries.: As the pudding rests, the texture will transform from watery to softly set, and you can notice the liquid thicken and cling to your spoon. Smell the berry sweetness becoming rounder, and the sound is silence as the pudding chills and quiets. The why here is simple, the chia seeds need time to absorb liquid and form the gel that gives body. Avoid moving it too often during this period, which can disturb uniform setting; if after 15 minutes it still seems loose, give it another 5 to 10 minutes rather than adding more seeds.
- Allow the chocolate to harden in the refrigerator 1 to 2 hours before serving.: Placing the chopped strawberries evenly creates a fresh fruit base for each portion, and they should sit glossy and bright at the bottom. I press them gently so they nestle in place, which prevents the pudding from forcing them aside later. Visual balance matters, so aim for similar amounts in each glass. A frequent error is uneven distribution, which leads to some servings lacking fruit; measure with a small scoop or a 1/4 cup measure for consistency.
- Pour about 3/4 cup of chia pudding on top: Pour slowly so the pudding layers without disturbing the fruit base, letting the pale pink mixture cascade and settle. You want the surface to be relatively smooth and level, since the chocolate will sit on top and a level surface yields the best visual contrast. If the pudding is too loose and shifts the fruit, chill the assembled cups briefly to firm them before continuing. One mistake is overfilling, which makes the chocolate layer too thin, so leave a small gap for the topping.
- Refrigerate for at least 1 hour, or up to overnight: Chilling lets the chia seeds finish setting, creating a creamy, spoonable texture and ensuring the pudding is firm enough to support the chocolate cap. The fridge quiets the flavors and firms the surface so the melted chocolate sets cleanly. If you skip adequate chilling, the chocolate may sink or crack incorrectly; be patient and give it the time it needs.
- Only do the next step if the pudding is firm: A firm surface will resist a gentle poke and return slightly, indicating the chia seeds have gelled fully. This firmness prevents the chocolate from melting into the pudding and losing its crispness. If the pudding remains soft, extend chilling in 30 minute increments, as rushing this step is the most common cause of a soggy chocolate layer.
- Once the chia pudding is ready, melt the chocolate and coconut oil together in the microwave in 30 second increments about 1 1/2 minutes total stirring, or using a double boiler: As the chocolate begins to melt you will see glossy ribbons form, and when stirred they should combine with the coconut oil into a smooth, shiny lacquer. Use gentle heat to avoid scorching, and the aroma will shift to deep cocoa notes. If using a microwave, stir between bursts to distribute heat evenly. Overheating will seize the chocolate into grainy clumps, so stop as soon as the mixture is smooth.
- Pour about 1 tablespoon of melted chocolate onto the top of each portion, gently smoothing it out over top and garnish with extra strawberries: The melted chocolate should pour in a slow ribbon and spread into a thin, even layer. Use the back of a spoon to coax it to the edges, aiming for a glossy, uniform cap. Top with a small slice of fresh strawberry while the chocolate is still liquid for a pretty finish. Avoid pouring too much chocolate which will make the top overly thick and hard to break; a thin shard is more elegant and easier to spoon through.
- Allow the chocolate to harden in the refrigerator 1 to 2 hours before serving: The chill will turn the chocolate glossy and firm so it snaps under a spoon, creating that satisfying tactile contrast. As it sets you will notice the chocolate lose any tacky sheen and become crisp. Patience here rewards you with a clean break and an appealing look. A common error is serving immediately, which results in a messy, sticky topping rather than a crisp shell.
Customization Ideas
This recipe is adaptable, and small swaps change texture and flavor without complicating the method. Below are practical ideas to tailor the dish to your taste and pantry.
- Swap the milk — Use almond or coconut based milk to alter the creaminess and flavor profile, keeping the same liquid volume so the chia seeds set consistently.
- Adjust sweetness — Increase or reduce the amount of maple syrup based on how sweet your strawberries are, tasting the blended mixture before adding the chia seeds.
- Control the chocolate top — Reduce the coconut oil for a firmer chocolate shell, or omit it for a very crisp cap, knowing the chocolate will set harder.
- Use different chocolate — Choose dark or semi sweet chocolate chips depending on your desired bitterness versus sweetness balance.
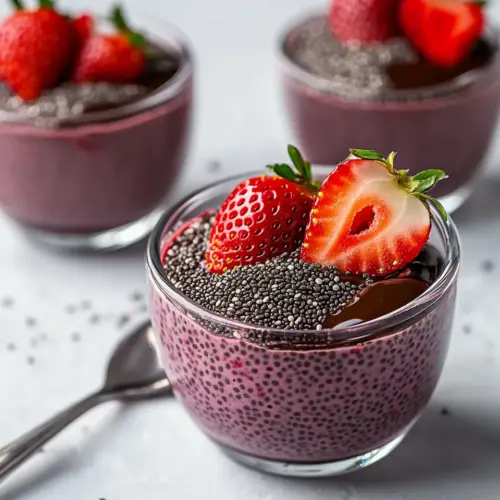
- Make single serve — Assemble in small glasses or ramekins so each portion looks polished and is easy to transport if you are bringing them to a gathering.
Perfect Pairings for Chocolate Covered Strawberry Chia Pudding
This pudding works beautifully as a light dessert or a sweet finish to a special meal. Its fresh berry notes and creamy base pair well with bright, simple accompaniments and seasonal menus.
- Serve with fresh fruit — A small plate of extra sliced strawberries and berries complements the dessert and reinforces the fruity theme.
- Great for small celebrations — Present these at intimate dinners or for a Valentine style treat, where each glass feels like a personal indulgence.
- Storage tips — Keep assembled puddings refrigerated and add the chocolate top within a day for best texture, storing in an airtight container for up to 3 days.
- Seasonal pairing — In summer, serve slightly chilled on warm evenings; in cooler months, present as a bright counterpoint to richer mains.
- Portion idea — These are excellent for a make ahead dessert for dinner parties, freeing you to focus on the main course while the pudding firms in the fridge.
FAQ
Conclusion
This Chocolate Covered Strawberry Chia Pudding stands out because it balances creamy, fruity, and crisp elements in a simple, make ahead dessert. It’s a dessert that feels special yet is forgiving, so you can customize it to your pantry and guests with ease. Give it a try the next time you want something pretty for company or a lovely solo treat, and enjoy the satisfying contrast when the spoon cracks through the chocolate into that bright, creamy pudding.
Chocolate Covered Strawberry Chia Pudding
Equipment
- 57 or 8-ounce glasses
Ingredients
- 2 1/2 cups milk of your choice Provide creamy liquid base and help hydrate chia seeds while adding richness; choose dairy or plant milk depending on desired flavor and texture, and warm slightly for faster thickening.
- 2 1/4 cups chopped strawberries, plus more for garnish Add juicy sweetness and fresh berry flavor while contributing texture; chop into small pieces so they distribute evenly and offer pops of strawberry throughout the pudding.
- 1 1/4 cup freeze dried strawberries Deliver concentrated intense strawberry flavor and natural color while adding a powdery texture; crush or pulse if needed to incorporate fully without clumps.
- 2 tablespoon maple syrup, I used sugar-free by Wholesome Yum Sweeten naturally and balance tartness while enhancing overall flavor profile; adjust quantity to taste and dissolve into the milk before combining with chia for even sweetness.
- 1 cup chia seeds Create gel-like structure by absorbing liquid and thickening the mixture; stir thoroughly to prevent clumping and refrigerate to allow full pudding set.
- 1/2 cup sugar free dark or semi-sweet chocolate chips Provide a chocolatey coating or mix-in element that melts smoothly for drizzling or layering; gently melt with coconut oil for glossy, pourable chocolate topping.
- 1 teaspoon coconut oil Improve chocolate melting and sheen while adding a mild coconut aroma; combine with chocolate chips over low heat to create a smooth ganache-like drizzle.
Instructions
- Blend milk, 1 cup fresh strawberries, freeze-dried strawberries and maple syrup in a blender until smooth and transfer to a large bowl. Stir in chia seeds. Whisk so there are no clumps of chia seeds and wait until they expand, about 15 minutes.: As the blender whirs you will notice the aroma shift, with bright berry notes surfacing and the liquid taking on a pale pink hue. The smoothness at this stage is crucial, because any unmixed freeze dried strawberries can rehydrate unevenly and create gritty pockets. The sound should be a steady hum, not a clunky chop, meaning the solids have fully pureed. A common mistake here is underblending, which leaves gritty particles; if you see tiny bits that do not disappear after 20 to 30 seconds, pulse another 10 to 15 seconds and scrape the jar sides. Transfer immediately to a wide bowl to speed cooling and allow even chia distribution.
- Transfer remaining strawberries into the bottom of 5 glass cups or 8 oz ramekins in 1/4 cup increments. Pour about 3/4 cup of chia pudding on top. Refrigerate for at least 1 hour, or up to overnight. Only do the next step if the pudding is firm.: When you add the chia seeds , they will initially float and glint against the liquid. Use a whisk to beat them in so they are suspended and not forming clumps. After the first stir, the mixture should look uniformly speckled. This step matters because chia seeds hydrate from the outside in, so clumps lead to gummy centers. A common pitfall is stirring too little, which produces uneven hydration; if you spot clumps after a few minutes, whisk vigorously until they disperse.
- Once the chia pudding is ready, melt the chocolate and coconut oil together in the microwave in 30 second increments (about 1 1/2 minutes total) stirring, or using a double boiler. Pour about 1 tablespoon of melted chocolate onto the top of each portion, gently smoothing it out over top and garnish with extra strawberries.: As the pudding rests, the texture will transform from watery to softly set, and you can notice the liquid thicken and cling to your spoon. Smell the berry sweetness becoming rounder, and the sound is silence as the pudding chills and quiets. The why here is simple, the chia seeds need time to absorb liquid and form the gel that gives body. Avoid moving it too often during this period, which can disturb uniform setting; if after 15 minutes it still seems loose, give it another 5 to 10 minutes rather than adding more seeds.
- Allow the chocolate to harden in the refrigerator 1 to 2 hours before serving.: Placing the chopped strawberries evenly creates a fresh fruit base for each portion, and they should sit glossy and bright at the bottom. I press them gently so they nestle in place, which prevents the pudding from forcing them aside later. Visual balance matters, so aim for similar amounts in each glass. A frequent error is uneven distribution, which leads to some servings lacking fruit; measure with a small scoop or a 1/4 cup measure for consistency.
- Pour about 3/4 cup of chia pudding on top: Pour slowly so the pudding layers without disturbing the fruit base, letting the pale pink mixture cascade and settle. You want the surface to be relatively smooth and level, since the chocolate will sit on top and a level surface yields the best visual contrast. If the pudding is too loose and shifts the fruit, chill the assembled cups briefly to firm them before continuing. One mistake is overfilling, which makes the chocolate layer too thin, so leave a small gap for the topping.
- Refrigerate for at least 1 hour, or up to overnight: Chilling lets the chia seeds finish setting, creating a creamy, spoonable texture and ensuring the pudding is firm enough to support the chocolate cap. The fridge quiets the flavors and firms the surface so the melted chocolate sets cleanly. If you skip adequate chilling, the chocolate may sink or crack incorrectly; be patient and give it the time it needs.
- Only do the next step if the pudding is firm: A firm surface will resist a gentle poke and return slightly, indicating the chia seeds have gelled fully. This firmness prevents the chocolate from melting into the pudding and losing its crispness. If the pudding remains soft, extend chilling in 30 minute increments, as rushing this step is the most common cause of a soggy chocolate layer.
- Once the chia pudding is ready, melt the chocolate and coconut oil together in the microwave in 30 second increments about 1 1/2 minutes total stirring, or using a double boiler: As the chocolate begins to melt you will see glossy ribbons form, and when stirred they should combine with the coconut oil into a smooth, shiny lacquer. Use gentle heat to avoid scorching, and the aroma will shift to deep cocoa notes. If using a microwave, stir between bursts to distribute heat evenly. Overheating will seize the chocolate into grainy clumps, so stop as soon as the mixture is smooth.
- Pour about 1 tablespoon of melted chocolate onto the top of each portion, gently smoothing it out over top and garnish with extra strawberries: The melted chocolate should pour in a slow ribbon and spread into a thin, even layer. Use the back of a spoon to coax it to the edges, aiming for a glossy, uniform cap. Top with a small slice of fresh strawberry while the chocolate is still liquid for a pretty finish. Avoid pouring too much chocolate which will make the top overly thick and hard to break; a thin shard is more elegant and easier to spoon through.
- Allow the chocolate to harden in the refrigerator 1 to 2 hours before serving: The chill will turn the chocolate glossy and firm so it snaps under a spoon, creating that satisfying tactile contrast. As it sets you will notice the chocolate lose any tacky sheen and become crisp. Patience here rewards you with a clean break and an appealing look. A common error is serving immediately, which results in a messy, sticky topping rather than a crisp shell.
Notes
- Swap the milk — Use almond or coconut based milk to alter the creaminess and flavor profile, keeping the same liquid volume so the chia seeds set consistently.
- Adjust sweetness — Increase or reduce the amount of maple syrup based on how sweet your strawberries are, tasting the blended mixture before adding the chia seeds.
- Control the chocolate top — Reduce the coconut oil for a firmer chocolate shell, or omit it for a very crisp cap, knowing the chocolate will set harder.
- Use different chocolate — Choose dark or semi sweet chocolate chips depending on your desired bitterness versus sweetness balance.
- Make single serve — Assemble in small glasses or ramekins so each portion looks polished and is easy to transport if you are bringing them to a gathering.