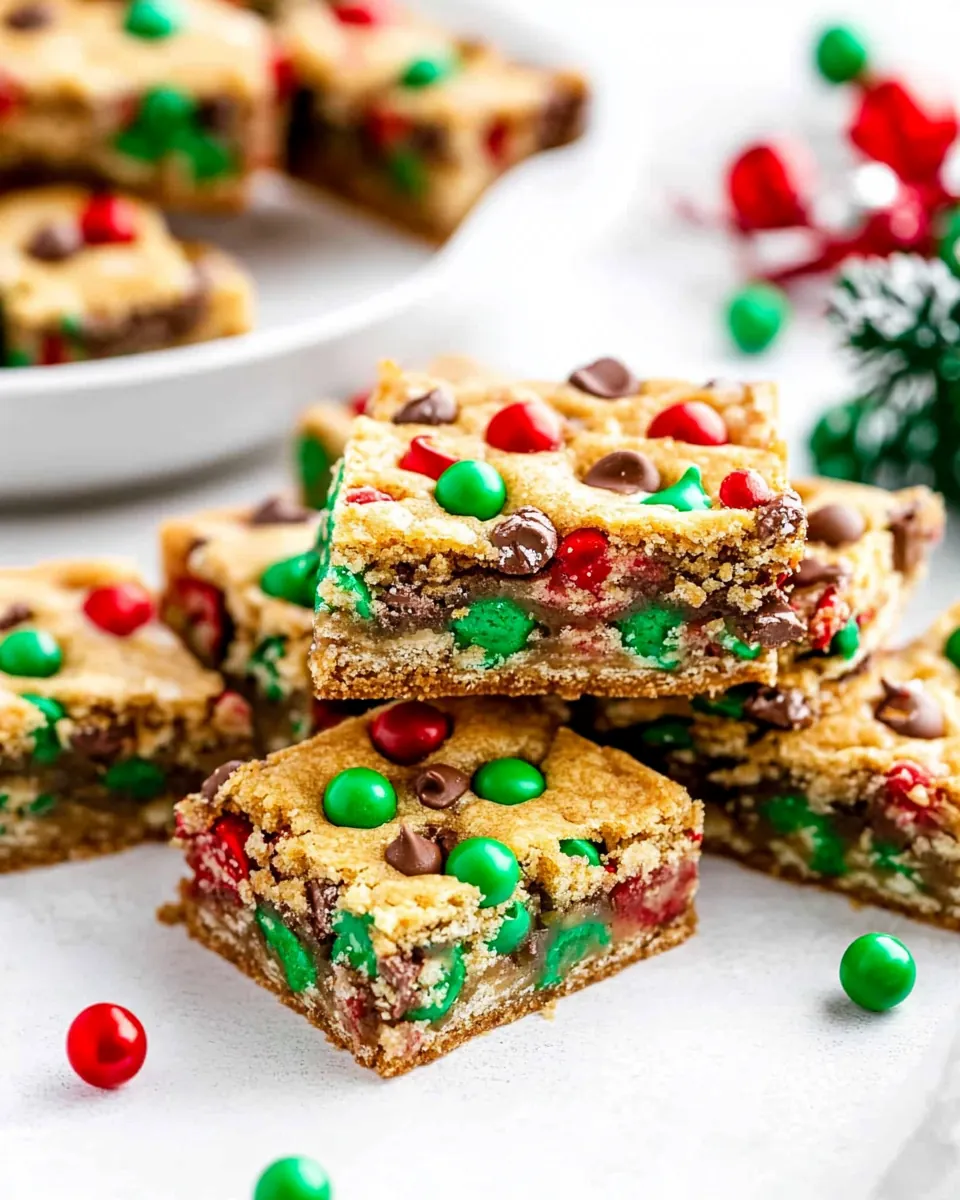
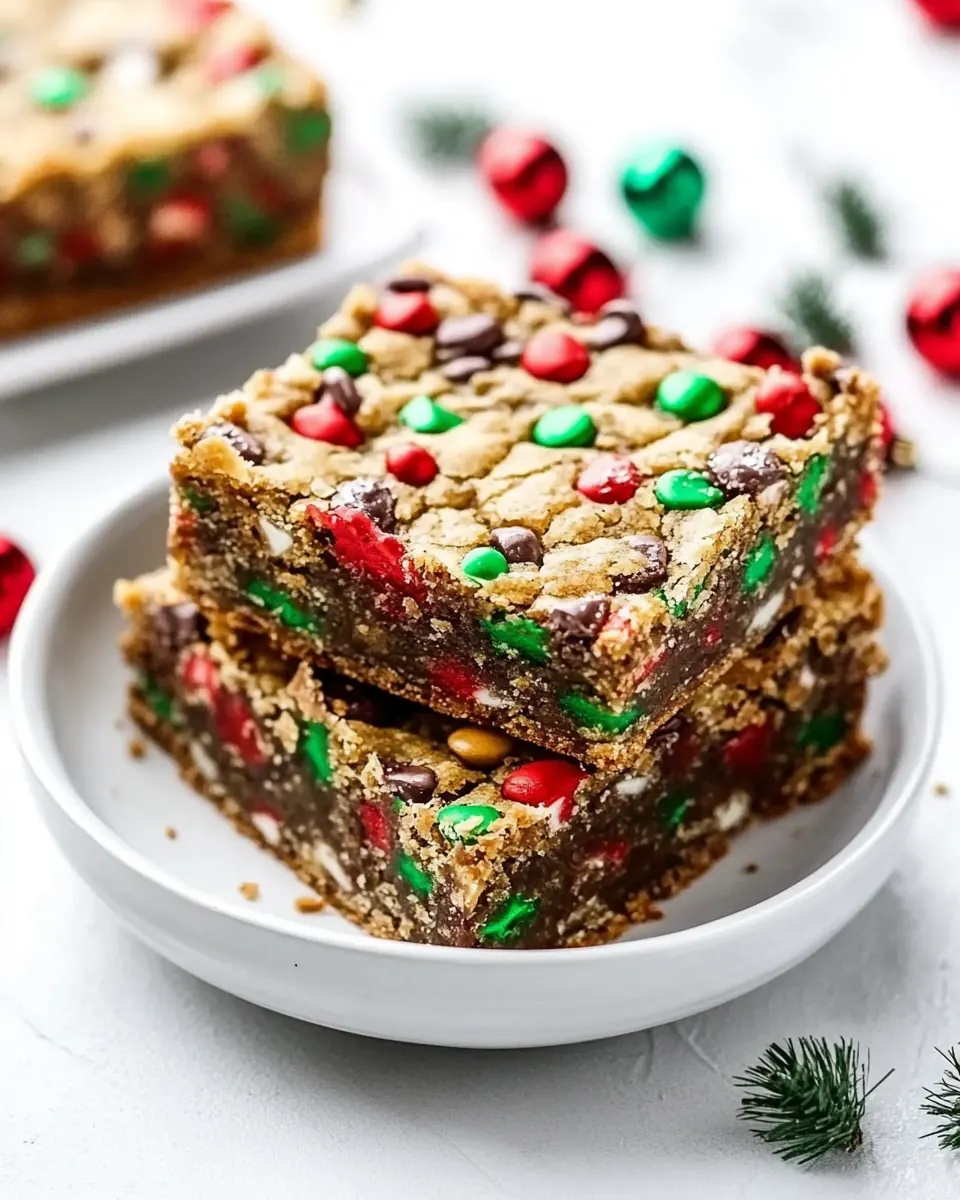
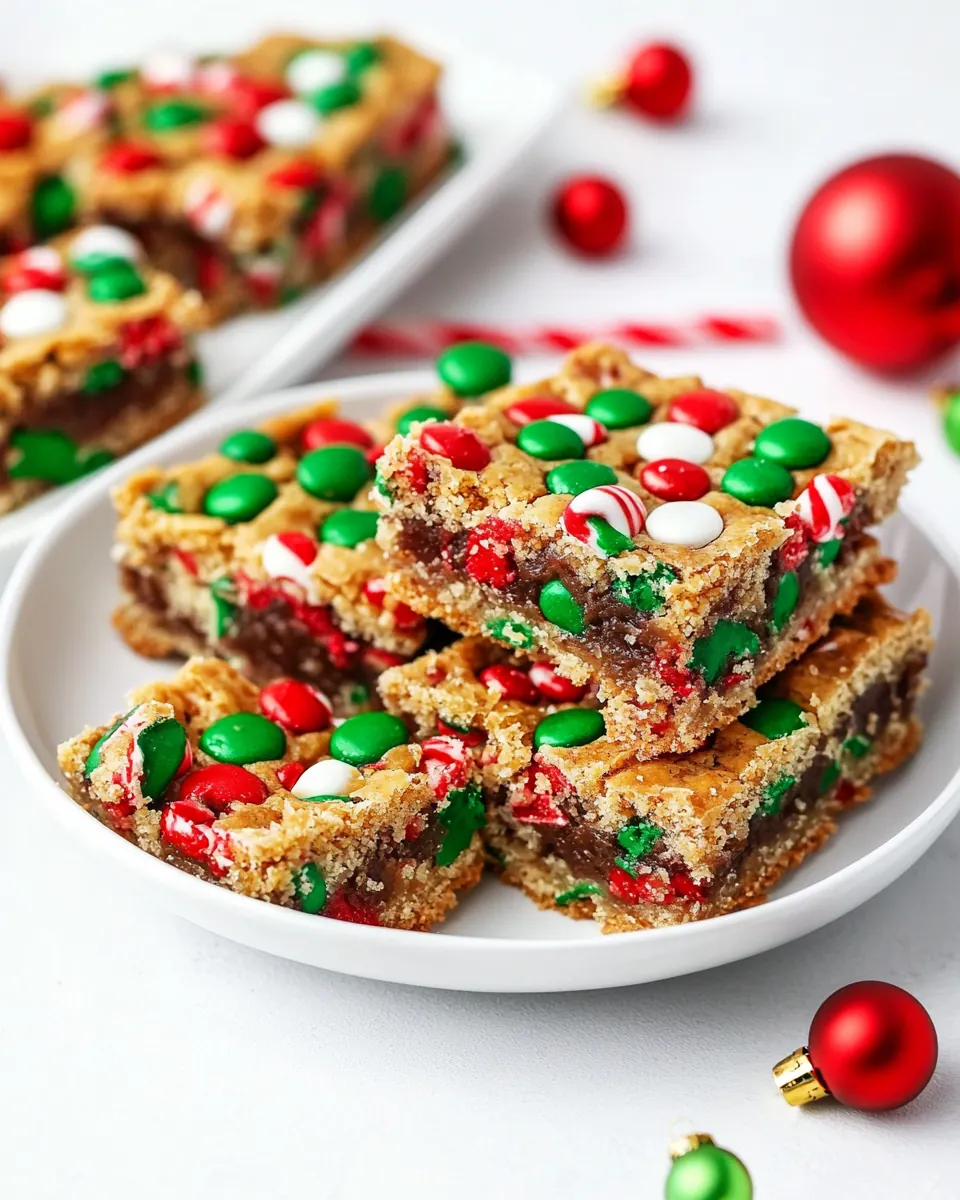
Christmas Cookie Bars
Christmas Cookie Bars have been my cozy go to when I need a quick tray of festive treats that everyone raves about. The scent of warm butter and baking flour drifting through the house brings back holiday mornings at my grandmother’s kitchen, where we argued over who got the corner pieces and who got the biggest sprinkle decorated square. I still remember the way the chocolate chips melted into glossy pockets, and how the bright M&Ms and Christmas sprinkles made even skeptical guests smile.
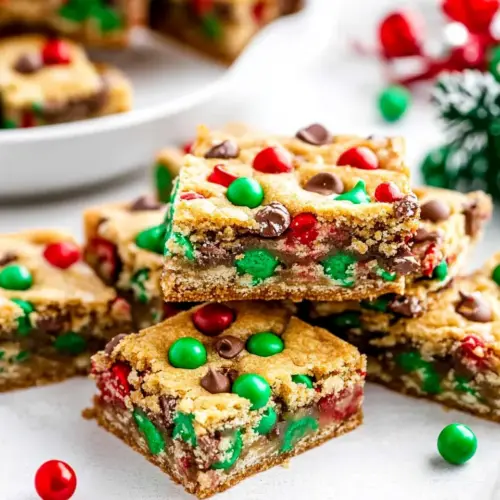
Over the years I simplified the process so these bars fit right into a busy week of cookie swaps and last minute parties. I love that you can mix the batter in one bowl, press it into an 8 by 8 pan, and walk away while the oven does the rest. The texture sits somewhere between a chewy cookie and a tender blondie, and that balance is what keeps me coming back when I want something festive without fuss. When I bring a tray to gatherings, folks always ask for the recipe. I tell them its part memory, part simple pantry staples, and part holiday magic. Every bite has that familiar buttery note, a little crunch from the M&Ms, and a pop of chocolate that feels like celebration.
Recipe Snapshot
30 mins
10 mins
20 mins
Medium
200 kcal
American
Gluten-Free, Low FODMAP
Desserts
8×8 inch baking pan, Parchment paper, Large bowl, Rubber spatula, Wire rack
What Sets This Christmas Cookie Bars Apart
They are effortless to make
I love how Christmas Cookie Bars turn good ingredients into something impressive with very little hands on time. Mixing in one bowl, pressing into a pan, and popping it in the oven is the kind of approach I reach for when my calendar fills up but I still want homemade treats. The streamlined method saves time while preserving a homemade character.
Festive and customizable
These bars are cheerfully adaptable. I enjoy swapping the colorful candies to suit themes or to match someones favorite color palette. The bright M&Ms and Christmas sprinkles deliver visual joy, which matters a lot to me when sharing at parties.
Balanced flavor and texture
The combination of melted butter, both brown and granulated sugar, and a single egg creates a tender, slightly chewy crumb. The pockets of melted chocolate chips and the candy crunch add contrast, so each bite feels layered and satisfying rather than one note.
Reliable for gifting and potlucks
I routinely make a double batch because these bars travel well and keep their shape. They slice into neat squares that stack in a tin, which is perfect when I want to bring something pretty and portable. Theyre also easy to scale up when Im baking for a crowd.
Kid friendly and nostalgic
Hands down, these bars bring out the inner kid in everyone. The colorful candies and sprinkles spark nostalgia, and the simple, sweet flavor profile is widely loved. I often recruit little helpers to press the batter into the pan and sprinkle the topping, and that shared ritual becomes part of the memory.
What You Need for Christmas Cookie Bars
These ingredients come together to create a classic, tender cookie bar with a celebratory finish. I think of the cast as key players: the butter supplies richness and moisture, the sugars give both sweetness and chew, flour forms the structure, and candies add color and texture. Each item plays a clear role in balancing taste and mouthfeel.
- 1/2 cup unsalted butter melted: Melted to provide rich fat and a tender crumb, contributes moistness and helps bind the dough together when mixed with sugars and egg. Adds a subtle buttery flavor that enhances the overall cookie bar profile and aids in even browning during baking.
- 1/2 cup packed light brown sugar: Packed to introduce deep, caramel-like sweetness and moisture, helps create a chewy texture and contributes to the bars' tender structure. Balances the granulated sugar and works with butter to form a flavorful sugar base that caramelizes slightly in the oven.
- 1/3 cup granulated sugar: Granulated to supply clean, bright sweetness and assist with structure, helping to aerate slightly when creamed with butter and brown sugar. Supports crisp edges while contrasting the chewiness provided by brown sugar for balanced texture.
- 1 large egg (room temperature): Beaten to incorporate moisture and act as a primary binder, providing structure through coagulated proteins when baked. Adds richness and helps emulsify the wet and dry ingredients for a cohesive dough and tender crumb.
- 1 teaspoon vanilla extract: Added to impart aromatic flavor and depth, enhancing the overall sweetness with warm vanilla notes. Helps round out the taste profile and complements the chocolate and festive candies.
- 1 cup all-purpose flour: Sifted or measured to provide the structural base for the bars, supplying gluten for chew and stability while interacting with the leavening and wet ingredients. Determines the final texture and density of the cookie bars when mixed to the proper consistency.
- 1/4 teaspoons salt: Measured to control seasoning and balance sweetness, enhancing the flavors and strengthening gluten slightly to improve structure. Prevents the bars from tasting flat by highlighting other ingredient nuances.
- 1/2 cup semi-sweet chocolate chips: Folded in to contribute pockets of melted chocolate throughout, offering rich, semi–sweet contrast to the sweet dough. Creates textural interest and flavor bursts that elevate each bite of the cookie bars.
- 1/2 cup red and green M&M’s: Stirred in to add colorful, crunchy candy pieces that deliver sweetness and a festive appearance while providing occasional chocolate pockets. Helps make the bars visually seasonal and adds a pleasant contrast in texture.
- 1/4 cup Christmas jimmies: Sprinkled to provide tiny, crunchy sugar decorations with bright colors and shapes that enhance the holiday presentation. Offers subtle additional sweetness and decorative detail on top of the baked bars.
- Christmas sprinkles (for sprinkling over the baked cookie bars if desired): Scattered for final decoration to amplify visual appeal and festive flair, giving a delicate, sugary crunch and brightness to the finished bars. Can be applied sparingly or liberally to achieve the desired holiday look without altering core texture too much.
How to Prepare Christmas Cookie Bars

These directions are straightforward and forgiving, which is why I rely on them every season. I like to move methodically, focusing on sensory cues like batter consistency and the smell as the pan browns. Below youll find each cleaned direction line rewritten into a detailed, personal step with cues and troubleshooting notes.
- Preheat the oven to 350°F. Brush an 8×8-inch square baking pan with a bit of the melted butter and line the pan with parchment paper, leaving a 2-inch overhang on two sides.: When the kitchen warms with the gentle hum of the oven reaching 350 F , you ll notice a clean warm scent that signals the start of baking. This temperature encourages even browning across the surface of the bars while allowing the center to set without drying out. I always give the oven at least five minutes to stabilize before I slide the pan in, because putting batter into a fluctuating oven can lead to uneven rise and patchy browning. A common mistake here is not verifying the actual temperature; if your oven runs hot or cool, use an oven thermometer to avoid over baking or under baking the bars.
- In a large bowl, whisk the remaining butter and sugars until smooth. Whisk in egg and vanilla until fully incorporated.: The act of brushing the pan with a little of the melted butter ensures the parchment stays put and helps with releasing the bars cleanly. Lifting the baked slab using a two side overhang of parchment makes for neat removal and effortless slicing. I always press the parchment into the corners so the batter fills the pan evenly and does not pool unevenly. Watch out for tearing the parchment when you press it into the pan, as a ripped lining can allow batter to seep under and stick.
- Add flour and salt and mix just until moistened (do not over-mix).: As you whisk the remaining melted butter , light brown sugar , and granulated sugar , you ll feel the mixture become glossy and slightly thickened. The aroma will deepen as the molasses from the brown sugar melds with the butter. This step helps distribute sweetness consistently, and whisking until smooth prevents grainy pockets in the final texture. A common misstep is under mixing, which can leave gritty sugar; whisk until the sugars dissolve into the butter.
- Fold in 1/2 cup chocolate chips, 1/3 cup of the M&Ms, and jimmies.: When you add the room temperature egg and vanilla extract , whisk vigorously until the mixture becomes uniform and slightly silky. The batter will lighten a touch and smell fragrant. Ensuring the egg is at room temperature helps it emulsify smoothly with the melted butter ; a cold egg can cause the fat to seize or create lumps. If you notice small curdled bits, whisk a bit longer to bring the mixture together.
- Transfer batter to prepared pan and smooth the top with a rubber spatula. Sprinkle the top with the remaining M&M’s.: As you add the all purpose flour and salt , fold gently until you no longer see dry streaks. The texture should be soft and slightly thick, not stiff. Over mixing develops gluten, which can yield a tougher bar, so stop as soon as the dry ingredients are incorporated. A tell tale sign of over mixing is a glossy, elastic batter that resists spreading, so mix minimally to preserve tenderness.
- Bake for 20 minutes or until the top is golden brown and a toothpick inserted into the center comes out clean.: Folding in the chocolate chips , a portion of the M&M s , and the Christmas jimmies adds pockets of texture. Use a spatula to gently fold so the mix stays light, and you can see ribbons of batter wrap around the mix ins. The chips will sink a touch as the batter relaxes, which is fine because they continue to melt in the oven. Avoid aggressive stirring, which can crush the candies or overwork the batter.
- Set the pan on a wire rack and sprinkle with additional sprinkles, as desired. Cool completely. Using the parchment overhang, lift the blondies from the pan and transfer them to a cutting board. Cut into squares.: Press the batter evenly into the prepared pan with a lightly oiled spatula so the surface is flat and cohesive. A smooth top ensures uniform baking and neat squares when cutting. I run my spatula in one direction then the other to level the batter without compacting it. If you press too hard you may compress air pockets and create a denser result, so use gentle, even pressure.
- Sprinkle the top with the remaining M&Ms: Scattering the remaining M&M s across the top creates a festive finish and gives each slice a colorful face. Press them in lightly so they adhere but still show on the crust. This visual topping will set into the surface as the batter bakes and prevents the candies from falling to the base. A common oversight is piling too many on top which can melt and bleed color across the surface; space them evenly for an attractive presentation.
- Bake for 20 minutes or until the top is golden brown and a toothpick inserted into the center comes out clean: As the bars bake, the kitchen will fill with a warm scent of butter and caramelizing sugar, and the edges will take on a light golden tone. Check at about 18 to 20 minutes; the toothpick should emerge clean or with a few moist crumbs for a tender center. If you leave them too long they will dry out and lose chew, while under baking will make the center too soft to slice. Rotate the pan halfway through if your oven has hot spots to ensure even color.
- Set the pan on a wire rack and sprinkle with additional sprinkles as desired Cool completely: After baking, the residual heat continues to set the bars so place the pan on a wire rack for even cooling. The top will firm and the melted chocolate chips will stabilize. Sprinkling additional Christmas sprinkles while still warm helps them adhere, but wait to cut until the slab is cool to avoid crumbling. Cutting warm bars often yields ragged edges, so patience here improves presentation.
- Using the parchment overhang lift the blondies from the pan and transfer them to a cutting board Cut into squares: Grasp the parchment overhang to lift the baked slab cleanly out of the pan, then use a sharp knife to slice into even squares. I like to chill the slab briefly for cleaner cuts, especially if the center feels very soft. Wiping the knife between cuts prevents dragging crumbs across the surface. A dull knife will tear the bars instead of slicing them neatly, so use a sharp blade and steady pressure.
Pro Tips and Tweaks
I like to keep a few go to tricks that make these bars foolproof and flexible for gifts or parties. Below are practical tips I rely on every season to get consistent results and to adapt the recipe for different occasions.
- Room temperature egg Makes whisking smoother and creates a uniform batter, helping the butter and egg combine without seizing.
- Dont over mix Keeps the bars tender, because excessive stirring develops gluten in the flour and yields a tougher texture.
- Evenly space candies Prevents color bleeding and ensures each square has a decorative top, press candies lightly into the batter rather than piling them on.
- Chill before slicing If you want very neat squares, pop the baked slab into the fridge for 20 to 30 minutes to firm up before cutting.
- Use a sharp knife For clean cuts, wipe the blade between slices to avoid dragging crumbs and to keep the edges tidy.
Accompaniments for Christmas Cookie Bars
These bars pair well with seasonal beverages and make an excellent addition to dessert spreads. Consider how you present and store them so they stay fresh and celebratory during gatherings. Below are serving ideas and practical storage suggestions to make the most of a batch.
- Tea or coffee pairing Serve the bars alongside hot brewed coffee or a cozy tea to balance the sweetness with a warm beverage.
- Party platter Arrange squares on a decorative platter with a few festive garnishes to create an inviting dessert centerpiece.
- Gift packaging Stack cooled squares in a tin lined with parchment for gifting; they travel well and look charming.
- Occasion flexibility These bars suit casual cookie swaps, school parties, and holiday potlucks, making them a versatile festive treat.
- Storage tips Store in an airtight container at room temperature for up to three days, or freeze individual squares for longer keeping.
FAQ
Conclusion
Christmas Cookie Bars stand out because they deliver big holiday flavor with minimal fuss. Theyre colorful, tender, and travel well, making them ideal for gifting or gathering. I encourage you to give this recipe a try the next time you need a simple festive dessert that feels homemade and special. Once you make a pan, youll find them to be a reliable go to for celebrations and quick sweet fixes.
Christmas Cookie Bars
Equipment
- 8x8-inch Baking Pan
- Parchment Paper
- Large Bowl
- Rubber spatula
- Wire Rack
Ingredients
- 1/2 cup unsalted butter melted Melted to provide rich fat and a tender crumb, contributes moistness and helps bind the dough together when mixed with sugars and egg. Adds a subtle buttery flavor that enhances the overall cookie bar profile and aids in even browning during baking.
- 1/2 cup packed light brown sugar Packed to introduce deep, caramel-like sweetness and moisture, helps create a chewy texture and contributes to the bars' tender structure. Balances the granulated sugar and works with butter to form a flavorful sugar base that caramelizes slightly in the oven.
- 1/3 cup granulated sugar Granulated to supply clean, bright sweetness and assist with structure, helping to aerate slightly when creamed with butter and brown sugar. Supports crisp edges while contrasting the chewiness provided by brown sugar for balanced texture.
- 1 large egg (room temperature) Beaten to incorporate moisture and act as a primary binder, providing structure through coagulated proteins when baked. Adds richness and helps emulsify the wet and dry ingredients for a cohesive dough and tender crumb.
- 1 teaspoon vanilla extract Added to impart aromatic flavor and depth, enhancing the overall sweetness with warm vanilla notes. Helps round out the taste profile and complements the chocolate and festive candies.
- 1 cup all-purpose flour Sifted or measured to provide the structural base for the bars, supplying gluten for chew and stability while interacting with the leavening and wet ingredients. Determines the final texture and density of the cookie bars when mixed to the proper consistency.
- 1/4 teaspoons salt Measured to control seasoning and balance sweetness, enhancing the flavors and strengthening gluten slightly to improve structure. Prevents the bars from tasting flat by highlighting other ingredient nuances.
- 1/2 cup semi-sweet chocolate chips Folded in to contribute pockets of melted chocolate throughout, offering rich, semi-sweet contrast to the sweet dough. Creates textural interest and flavor bursts that elevate each bite of the cookie bars.
- 1/2 cup red and green M&M’s Stirred in to add colorful, crunchy candy pieces that deliver sweetness and a festive appearance while providing occasional chocolate pockets. Helps make the bars visually seasonal and adds a pleasant contrast in texture.
- 1/4 cup Christmas jimmies Sprinkled to provide tiny, crunchy sugar decorations with bright colors and shapes that enhance the holiday presentation. Offers subtle additional sweetness and decorative detail on top of the baked bars.
- Christmas sprinkles (for sprinkling over the baked cookie bars if desired) Scattered for final decoration to amplify visual appeal and festive flair, giving a delicate, sugary crunch and brightness to the finished bars. Can be applied sparingly or liberally to achieve the desired holiday look without altering core texture too much.
Instructions
- Preheat the oven to 350°F. Brush an 8×8-inch square baking pan with a bit of the melted butter and line the pan with parchment paper, leaving a 2-inch overhang on two sides.: When the kitchen warms with the gentle hum of the oven reaching 350 F , you ll notice a clean warm scent that signals the start of baking. This temperature encourages even browning across the surface of the bars while allowing the center to set without drying out. I always give the oven at least five minutes to stabilize before I slide the pan in, because putting batter into a fluctuating oven can lead to uneven rise and patchy browning. A common mistake here is not verifying the actual temperature; if your oven runs hot or cool, use an oven thermometer to avoid over baking or under baking the bars.
- In a large bowl, whisk the remaining butter and sugars until smooth. Whisk in egg and vanilla until fully incorporated.: The act of brushing the pan with a little of the melted butter ensures the parchment stays put and helps with releasing the bars cleanly. Lifting the baked slab using a two side overhang of parchment makes for neat removal and effortless slicing. I always press the parchment into the corners so the batter fills the pan evenly and does not pool unevenly. Watch out for tearing the parchment when you press it into the pan, as a ripped lining can allow batter to seep under and stick.
- Add flour and salt and mix just until moistened (do not over-mix).: As you whisk the remaining melted butter , light brown sugar , and granulated sugar , you ll feel the mixture become glossy and slightly thickened. The aroma will deepen as the molasses from the brown sugar melds with the butter. This step helps distribute sweetness consistently, and whisking until smooth prevents grainy pockets in the final texture. A common misstep is under mixing, which can leave gritty sugar; whisk until the sugars dissolve into the butter.
- Fold in 1/2 cup chocolate chips, 1/3 cup of the M&Ms, and jimmies.: When you add the room temperature egg and vanilla extract , whisk vigorously until the mixture becomes uniform and slightly silky. The batter will lighten a touch and smell fragrant. Ensuring the egg is at room temperature helps it emulsify smoothly with the melted butter ; a cold egg can cause the fat to seize or create lumps. If you notice small curdled bits, whisk a bit longer to bring the mixture together.
- Transfer batter to prepared pan and smooth the top with a rubber spatula. Sprinkle the top with the remaining M&M’s.: As you add the all purpose flour and salt , fold gently until you no longer see dry streaks. The texture should be soft and slightly thick, not stiff. Over mixing develops gluten, which can yield a tougher bar, so stop as soon as the dry ingredients are incorporated. A tell tale sign of over mixing is a glossy, elastic batter that resists spreading, so mix minimally to preserve tenderness.
- Bake for 20 minutes or until the top is golden brown and a toothpick inserted into the center comes out clean.: Folding in the chocolate chips , a portion of the M&M s , and the Christmas jimmies adds pockets of texture. Use a spatula to gently fold so the mix stays light, and you can see ribbons of batter wrap around the mix ins. The chips will sink a touch as the batter relaxes, which is fine because they continue to melt in the oven. Avoid aggressive stirring, which can crush the candies or overwork the batter.
- Set the pan on a wire rack and sprinkle with additional sprinkles, as desired. Cool completely. Using the parchment overhang, lift the blondies from the pan and transfer them to a cutting board. Cut into squares.: Press the batter evenly into the prepared pan with a lightly oiled spatula so the surface is flat and cohesive. A smooth top ensures uniform baking and neat squares when cutting. I run my spatula in one direction then the other to level the batter without compacting it. If you press too hard you may compress air pockets and create a denser result, so use gentle, even pressure.
- Sprinkle the top with the remaining M&Ms: Scattering the remaining M&M s across the top creates a festive finish and gives each slice a colorful face. Press them in lightly so they adhere but still show on the crust. This visual topping will set into the surface as the batter bakes and prevents the candies from falling to the base. A common oversight is piling too many on top which can melt and bleed color across the surface; space them evenly for an attractive presentation.
- Bake for 20 minutes or until the top is golden brown and a toothpick inserted into the center comes out clean: As the bars bake, the kitchen will fill with a warm scent of butter and caramelizing sugar, and the edges will take on a light golden tone. Check at about 18 to 20 minutes; the toothpick should emerge clean or with a few moist crumbs for a tender center. If you leave them too long they will dry out and lose chew, while under baking will make the center too soft to slice. Rotate the pan halfway through if your oven has hot spots to ensure even color.
- Set the pan on a wire rack and sprinkle with additional sprinkles as desired Cool completely: After baking, the residual heat continues to set the bars so place the pan on a wire rack for even cooling. The top will firm and the melted chocolate chips will stabilize. Sprinkling additional Christmas sprinkles while still warm helps them adhere, but wait to cut until the slab is cool to avoid crumbling. Cutting warm bars often yields ragged edges, so patience here improves presentation.
- Using the parchment overhang lift the blondies from the pan and transfer them to a cutting board Cut into squares: Grasp the parchment overhang to lift the baked slab cleanly out of the pan, then use a sharp knife to slice into even squares. I like to chill the slab briefly for cleaner cuts, especially if the center feels very soft. Wiping the knife between cuts prevents dragging crumbs across the surface. A dull knife will tear the bars instead of slicing them neatly, so use a sharp blade and steady pressure.
Notes
- Room temperature egg Makes whisking smoother and creates a uniform batter, helping the butter and egg combine without seizing.
- Dont over mix Keeps the bars tender, because excessive stirring develops gluten in the flour and yields a tougher texture.
- Evenly space candies Prevents color bleeding and ensures each square has a decorative top, press candies lightly into the batter rather than piling them on.
- Chill before slicing If you want very neat squares, pop the baked slab into the fridge for 20 to 30 minutes to firm up before cutting.
- Use a sharp knife For clean cuts, wipe the blade between slices to avoid dragging crumbs and to keep the edges tidy.