Best Homemade Cornbread
Best Homemade Cornbread has always been my go to when I want something warm, simple, and honest on the table. The first time I baked it for friends, I remember the kitchen filling with a buttery, slightly sweet aroma that made everyone pause conversation and hover near the oven. I felt proud and a little relieved that a few humble pantry staples could create that kind of comfort.
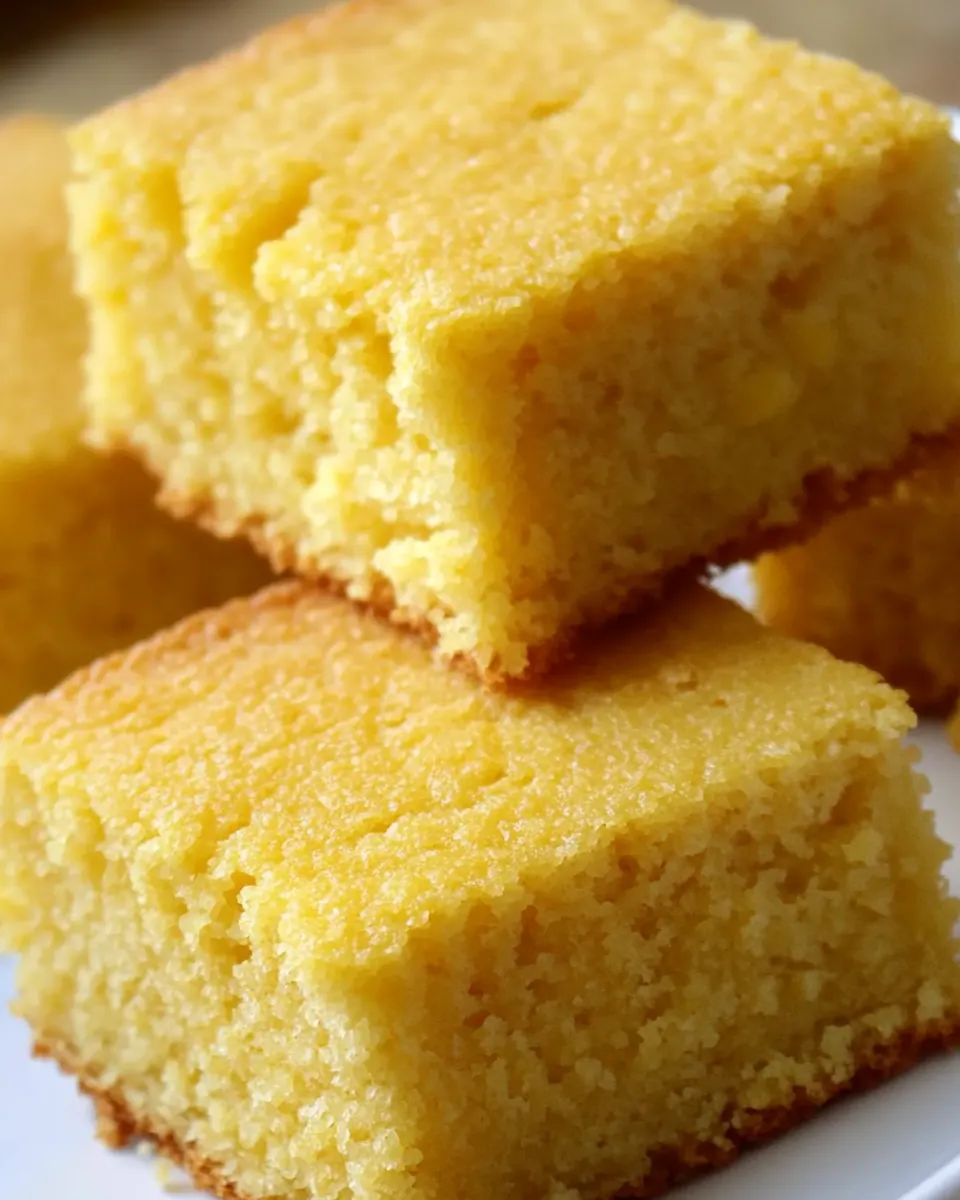
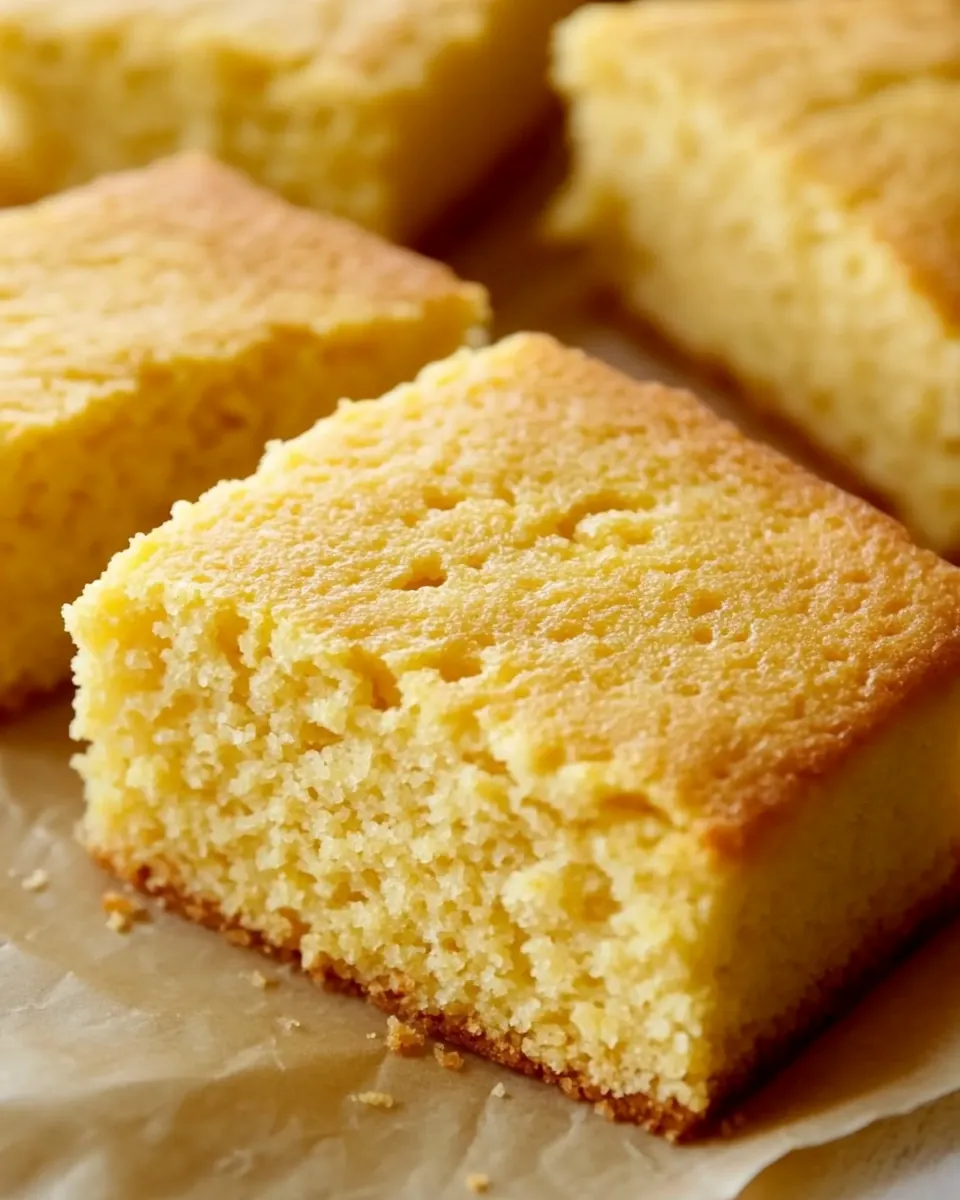
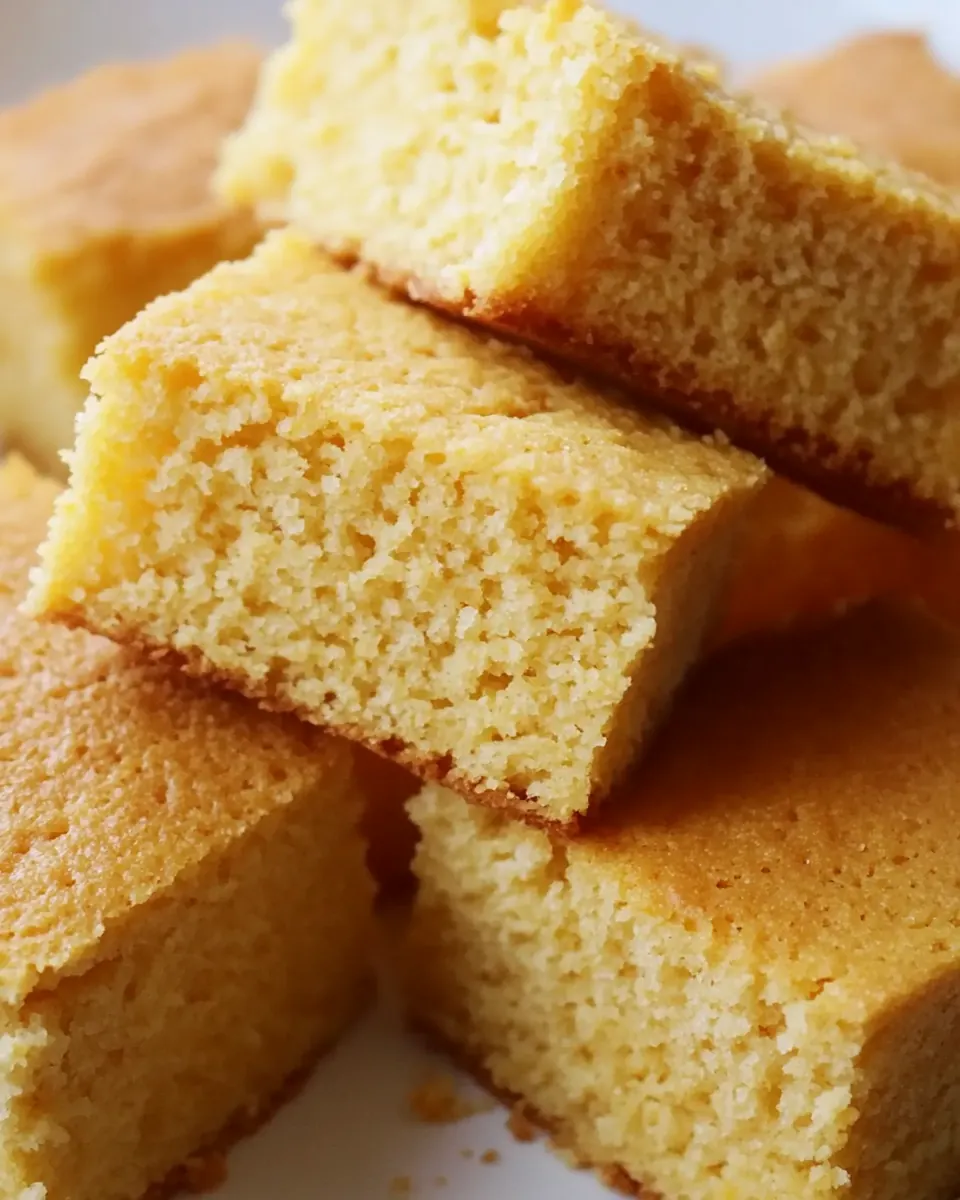
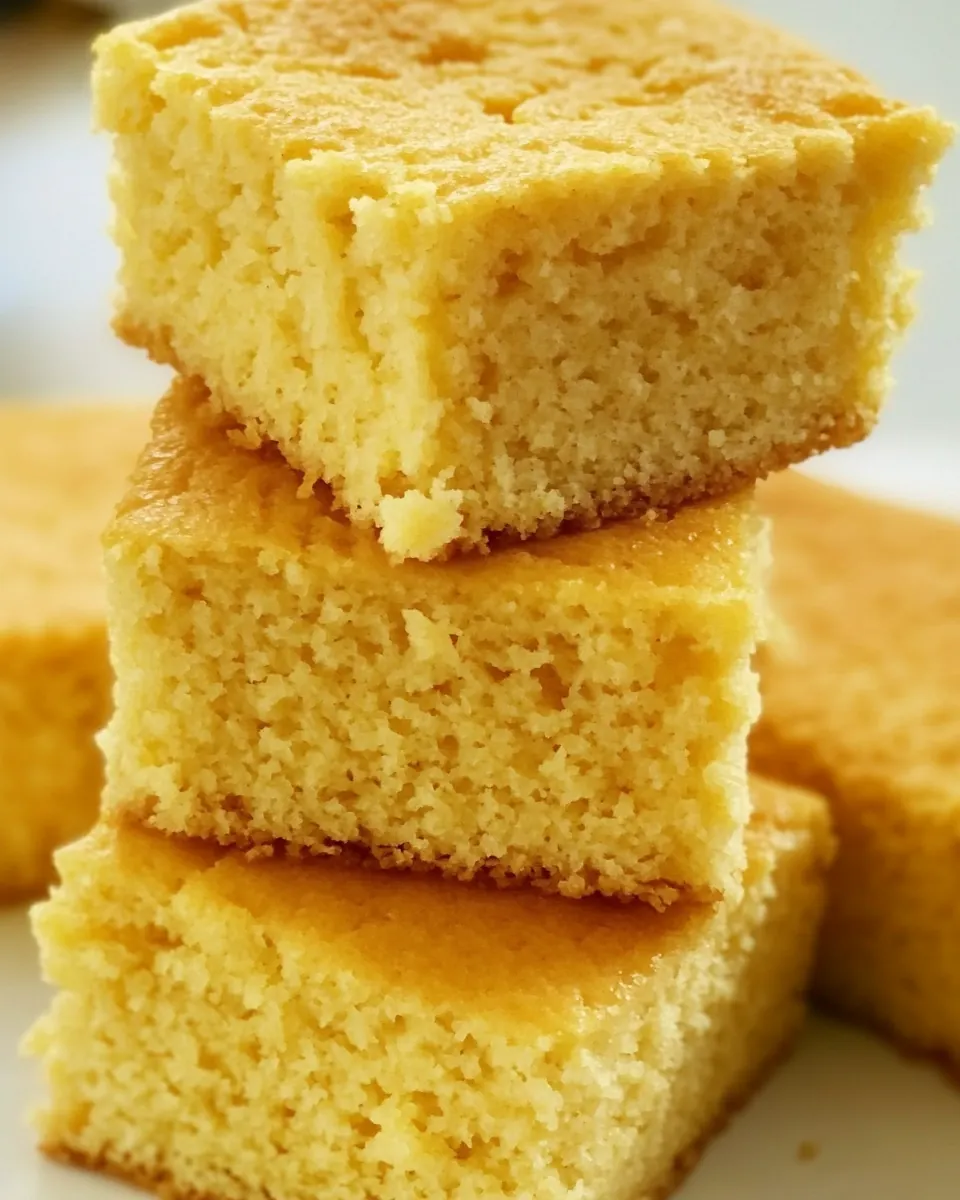
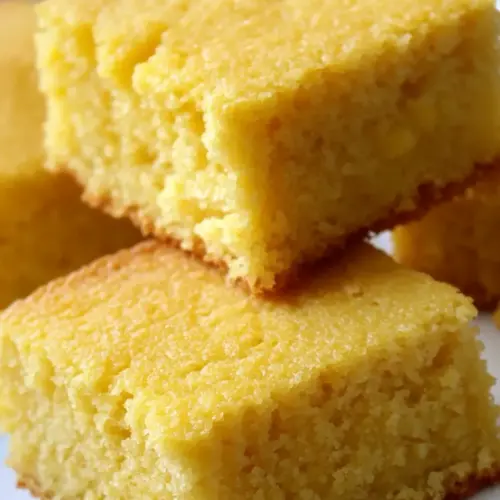
Over the years I have tweaked the batter until it felt just right for my family, keeping the texture tender but with a faint crumbly edge that soaks up butter beautifully. I love how a slice served warm can anchor a casual weeknight meal, yet also slip seamlessly onto a holiday spread. Each time I pull a square from the pan, the top yielding a golden crust, it feels like a small success worth celebrating.
I’ve learned little rituals that make a difference, like letting the melted butter cool before mixing, and not overwhisking once the dry and wet ingredients meet. These small choices keep the crumb light and the center moist. If you bake with children or friends, the act of stirring and pouring becomes an easy way to include them in a comforting kitchen moment. This recipe is approachable, forgiving, and reliably satisfying.
Recipe Snapshot
35 mins
10 mins
25 mins
Easy
200 kcal
American
Gluten-Free, Low FODMAP
Side Dishes
8 inch 20 cm square baking dish, Mixing bowls, Whisk, Measuring cups and spoons, Spatula
Why You Need This Best Homemade Cornbread
Simple, Honest Ingredients
I adore that Best Homemade Cornbread relies on straightforward pantry items. There is no need for exotic pantry runs, and the integrity of the flavors comes through because each ingredient plays a clear role. The balance of all purpose flour and yellow cornmeal creates a tender crumb with that classic cornmeal texture you want in every bite.
Quick and Reliable
One reason I keep returning to this version is how fast it is to pull together. From whisk to oven in minutes, the dish fits into busy evenings without drama. The streamlined method means fewer steps to mess up, and yet the results feel like you spent so much more time on care and craft.
Versatile Serving Options
Best Homemade Cornbread pairs beautifully with soups, braises, and roasted vegetables, making it adaptable across meals. I often serve it warm with a pat of unsalted butter or a drizzle of honey for a breakfast treat, or alongside a robust stew for dinner. That flexibility keeps it in rotation throughout the season.
Family Friendly and Crowd Pleasing
When I bring this pan to gatherings, it disappears fast. The texture, sweetness level, and golden top hit a comforting nostalgia that appeals to both kids and adults. Because it is easy to scale and dependable to slice, it is my fallback for potlucks where I want something people will actually eat and ask about later.
Room for Personal Touches
Finally, while this recipe shines as written, it invites little modifications. I like small, deliberate tweaks to suit the meal, but the core technique gives you a sturdy foundation. That reliability lets you experiment without risking the whole bake, which is liberating for a home cook.
What You’ll Need for Best Homemade Cornbread
This ingredient list is built around a few dependable players that work in concert. The texture comes from the interplay of all purpose flour and yellow cornmeal, while eggs and milk provide structure and moisture. Unsalted butter brings richness and helps the top brown, and a touch of sugar and honey lifts the corn flavor and balances the savory notes. Baking powder and salt are the quiet professionals that ensure rise and seasoning.
- 2 large eggs: Beat vigorously to incorporate air and provide structure; eggs bind the batter and help cornbread rise for a tender crumb. Use large eggs at room temperature for best emulsification and even baking. When properly beaten, eggs contribute moisture and a golden color to the finished cornbread.
- 2 tablespoons honey: Add sweetness and subtle floral notes while keeping the crumb moist; honey also helps with browning and tenderizing. Measure by spooning or using a liquid measuring spoon for accuracy. Warm slightly if too thick so it blends evenly into the batter.
- 3/4 cup milk (preferably whole but low-fat works too): Provide moisture and dissolve dry ingredients while contributing to a tender texture; milk also reacts with leavening to boost rise. Prefer whole milk for richer flavor, but lower-fat milk will still hydrate and thin the batter appropriately. Bring to room temperature for smoother mixing and better emulsification with melted butter.
- 1 1/4 cups all-purpose flour, spooned into measuring cup and leveled-off: Supply the primary structure and gluten necessary to hold the bread together; flour creates the framework for the crumb. Spoon into the measuring cup and level off to avoid packing and ensure correct proportion. Sift or whisk with other dry ingredients for even distribution if desired.
- 3/4 cup yellow cornmeal: Offer the characteristic corn flavor, texture, and slight grittiness unique to cornbread; cornmeal also contributes to the overall bulk and crumb. Choose yellow cornmeal for a classic flavor and color. Coarser grinds yield more texture while finer grinds produce a smoother crumb.
- 1/4 cup plus 2 tablespoons sugar: Contribute sweetness and help balance savory notes while enhancing browning and flavor complexity in the crust. Measure carefully since sugar affects both taste and caramelization. Dissolve into wet ingredients to prevent graininess in the batter.
- 1 tablespoon baking powder: Provide chemical leavening to create lift and a light, tender crumb by releasing carbon dioxide when mixed and heated. Ensure freshness because expired baking powder yields poor rise. Combine with dry ingredients to distribute evenly before adding liquids.
- 1 teaspoon salt: Enhance overall flavor by balancing sweetness and accentuating other ingredients; salt also strengthens gluten structure slightly. Measure precisely to avoid over-salting, which can mask the delicate corn flavor. Mix with dry ingredients to ensure even seasoning throughout the batter.
- 1/2 cup (1 stick) unsalted butter, melted and cooled: Add richness, tenderness, and flavor while contributing moisture and an appealing golden crust when melted into the batter. Use unsalted butter to control sodium levels, melting and cooling it to blend smoothly without cooking the eggs. Incorporate gradually for an even, glossy batter.
Making This Best Homemade Cornbread
This recipe is pleasantly straightforward, and I like to walk you through each moment so you know what to expect. The steps move from oven set up to batter mixing to a confident bake, and I find a relaxed pace keeps the texture just right. Read each step for sensory cues so you can tell when things are proceeding properly.
- Preheat the oven to 350°F (175°C). Spray an 8-inch (20-cm) square baking dish with nonstick cooking spray.: Warmth radiating from the oven creates the environment the batter needs to rise and set evenly, and the preheated metal will help the bottom brown slightly as it bakes. You should feel the oven steady at temperature and notice a faint heat when you open the door, not a blast of uneven warmth. If you skip preheating, the batter will start cooking too slowly and may produce a gummy center. A common error is setting the temperature wrong, so double check the dials or digital readout before you begin.
- In a medium bowl, break up the eggs with a whisk. Whisk in the honey, and then the milk. Set aside.: As you whisk, the eggs take on a glossy sheen and the honey dissolves, creating a unified, slightly viscous liquid that smells sweet and warm. The milk smooths the mixture and tempers the honey so it blends uniformly into the batter. This wet mix should look homogenous without bubbles from vigorous whipping. Overbeating here can add unnecessary air that deflates later, so mix until just combined. If the honey resists blending, a brief scraping of the bowl with the whisk helps integrate it fully.
- In a large bowl, whisk together the flour, cornmeal, sugar, baking powder, and salt. Add the milk mixture and the melted butter to the dry ingredients. Whisk until just blended. Do not overmix; it’s okay if there are a few lumps. Spoon the batter into the prepared pan. Bake for 25 to 30 minutes, or until the top is set and golden. Cool the cornbread for 10 to 15 minutes in the pan, then cut into squares and serve warm.: Dry ingredients combine into a uniform pale mixture, with the cornmeal lending a subtle grainy texture you can see at close range. Whisking distributes the leavening and salt so each spoonful performs consistently during baking. You may notice light dust clouds as you whisk, and the scent will be mostly neutral, edged with corn aroma from the cornmeal. A common mistake is adding wet ingredients before the dry is evenly mixed, which can cause uneven pockets of leavener and lead to inconsistent rise.
- Add the milk mixture and the melted butter to the dry ingredients.: When these liquids meet the dry mix, the batter transforms into a thick, velvety mass with tiny suspended cornmeal granules. The melted butter enriches the batter, carrying a warm, buttery aroma that promises a browned top. Combine gently so the wet ingredients are integrated without developing gluten from overworking the flour. If you stir vigorously, the texture becomes tight and chewier, robbing the bread of tenderness. If the butter is too hot you will cook the eggs, so ensure it has cooled slightly before adding.
- Whisk until just blended.: The batter should still show a few small lumps and not be perfectly smooth; this is a good sign because it means you have avoided overmixing which would toughen the crumb. At this stage the batter has a glossy appearance and a pourable thickness that falls slowly from the whisk. Overblending here is the most frequent misstep, producing a dense result, so stop when the streaks of flour have vanished and a few lumps remain.
- Do not overmix it’s okay if there are a few lumps.: Those harmless lumps keep the texture tender and prevent gluten overdevelopment, yielding a softer center. You may feel resistance while stirring, but that is normal; the batter should be cohesive and not dry or crumbly. If you find dry pockets, fold gently rather than whisking to maintain lightness. Heavy mixing will make the cornbread firm and less pleasant to bite into.
- Spoon the batter into the prepared pan.: As you transfer the batter, it should spread into the corners without being watery, and the surface will look slightly textured from the cornmeal. Use a spatula to scrape every last bit from the bowl so you do not waste any batter, and smooth the top lightly for even browning. If you overfill the pan, the center may take longer to set, so keep to the recommended pan size for predictable results.
- Bake for 25 to 30 minutes, or until the top is set and golden.: During baking you will notice the kitchen fill with a rich, toasty butter and corn scent, and the top will progress to an even golden brown with slight crackling edges. The internal structure will firm up and a toothpick inserted into the center should come out with a few moist crumbs, not wet batter. Avoid opening the oven frequently, as heat loss can cause uneven rise and longer baking times. A common issue is underbaking, which leaves the center gummy, so rely on both color and the toothpick test.
- Cool the cornbread for 10 to 15 minutes in the pan, then cut into squares and serve warm.: Cooling allows the crumb to set so slices hold together while still warm and inviting, and the aroma will mellow into a rich, comforting note. When you cut it, the edges will offer a slight crispness while the interior remains soft and slightly tender to the touch. Cutting too soon can lead to a crumbly result that falls apart, so patience for those 10 minutes pays off. Serve while still slightly warm to enjoy the best texture and flavor.
Ways to Customize
This cornbread is a flexible canvas. Below are thoughtful ways to tailor texture, sweetness, and serving temperature without changing the core approach. Each tip starts with a bold phrase to guide your choice and then explains the impact so you can make a deliberate tweak.
- Adjust the sweetness Reduce or increase the sugar and honey to match your preference, keeping in mind that lowering sweetness will emphasize the natural corn flavor while increasing it will make the top brown more and create a more dessert like bite.
- Milk selection matters Using whole milk delivers more richness and a silkier mouthfeel, while low fat milk produces a slightly lighter crumb; choose based on how indulgent you want the result to feel.
- Pan options Bake in a cast iron skillet for a crisper edge and deeper golden crust, or use the square baking dish for more even, tender pieces; the vessel affects texture significantly.
- Butter finish Brush warm slices with additional melted unsalted butter just after cutting to enhance aroma and mouthfeel, which also helps keep the squares moist during serving.
- Make ahead and reheat Freeze cooled squares in an airtight container for up to three months, and reheat wrapped in foil in a 350°F 175°C oven until warm, preserving texture better than microwaving.
Pairing Suggestions for Best Homemade Cornbread
Best Homemade Cornbread is an incredibly versatile companion on the table, working with rustic mains and simple weekday meals alike. I like to think about contrasts in texture and temperature when pairing, and the list below shows options for casual dinners, holiday spreads, and leftover friendly meals. Each suggestion highlights why the match works and how to present it.
- Serve with hearty stews Cornbread’s slightly sweet, buttery nature complements a robust stew by soaking up the savory sauce and providing textural contrast, making it ideal for fall or winter dinners.
- Offer alongside roasted vegetables The tender crumb and golden crust pair well with caramelized root vegetables, balancing earthy flavors for a comforting vegetarian main.
- Bring to potlucks and gatherings Cut into squares and serve warm for sharing, as the simple flavors appeal broadly and the bread travels well when wrapped in foil to retain heat.
- Breakfast or brunch addition Serve warm with butter and a drizzle of honey for a morning treat, or alongside eggs and fruit for a simple, satisfying spread.
- Storage tips Keep leftover cornbread wrapped tightly at room temperature for up to two days, or freeze cooled squares in an airtight container for up to three months; thaw on the counter and warm in the oven for best texture.
- Seasonal pairings In fall, pair with spiced squash or braised greens, while spring and summer meals can feature lighter, herb driven sides to contrast the bread’s richness.
FAQ
Conclusion
This recipe’s charm lies in its simplicity and dependable texture, which together make it an everyday classic you will turn to again and again. Give Best Homemade Cornbread a try the next time you want something warm, comforting, and unfussy on the table. With a few pantry staples and straightforward steps, you will end up with golden squares that comfort and satisfy, perfect for cozy dinners or sharing at gatherings.
Best Homemade Cornbread
Equipment
- 8 inch 20 cm square baking dish
- Mixing Bowls
- Whisk
- Measuring Cups and Spoons
- Spatula
Ingredients
- 2 large eggs Beat vigorously to incorporate air and provide structure; eggs bind the batter and help cornbread rise for a tender crumb. Use large eggs at room temperature for best emulsification and even baking. When properly beaten, eggs contribute moisture and a golden color to the finished cornbread.
- 2 tablespoons honey Add sweetness and subtle floral notes while keeping the crumb moist; honey also helps with browning and tenderizing. Measure by spooning or using a liquid measuring spoon for accuracy. Warm slightly if too thick so it blends evenly into the batter.
- 3/4 cup milk (preferably whole but low-fat works too) Provide moisture and dissolve dry ingredients while contributing to a tender texture; milk also reacts with leavening to boost rise. Prefer whole milk for richer flavor, but lower-fat milk will still hydrate and thin the batter appropriately. Bring to room temperature for smoother mixing and better emulsification with melted butter.
- 1 1/4 cups all-purpose flour, spooned into measuring cup and leveled-off Supply the primary structure and gluten necessary to hold the bread together; flour creates the framework for the crumb. Spoon into the measuring cup and level off to avoid packing and ensure correct proportion. Sift or whisk with other dry ingredients for even distribution if desired.
- 3/4 cup yellow cornmeal Offer the characteristic corn flavor, texture, and slight grittiness unique to cornbread; cornmeal also contributes to the overall bulk and crumb. Choose yellow cornmeal for a classic flavor and color. Coarser grinds yield more texture while finer grinds produce a smoother crumb.
- 1/4 cup plus 2 tablespoons sugar Contribute sweetness and help balance savory notes while enhancing browning and flavor complexity in the crust. Measure carefully since sugar affects both taste and caramelization. Dissolve into wet ingredients to prevent graininess in the batter.
- 1 tablespoon baking powder Provide chemical leavening to create lift and a light, tender crumb by releasing carbon dioxide when mixed and heated. Ensure freshness because expired baking powder yields poor rise. Combine with dry ingredients to distribute evenly before adding liquids.
- 1 teaspoon salt Enhance overall flavor by balancing sweetness and accentuating other ingredients; salt also strengthens gluten structure slightly. Measure precisely to avoid over-salting, which can mask the delicate corn flavor. Mix with dry ingredients to ensure even seasoning throughout the batter.
- 1/2 cup (1 stick) unsalted butter, melted and cooled Add richness, tenderness, and flavor while contributing moisture and an appealing golden crust when melted into the batter. Use unsalted butter to control sodium levels, melting and cooling it to blend smoothly without cooking the eggs. Incorporate gradually for an even, glossy batter.
Instructions
- Preheat the oven to 350°F (175°C). Spray an 8-inch (20-cm) square baking dish with nonstick cooking spray.: Warmth radiating from the oven creates the environment the batter needs to rise and set evenly, and the preheated metal will help the bottom brown slightly as it bakes. You should feel the oven steady at temperature and notice a faint heat when you open the door, not a blast of uneven warmth. If you skip preheating, the batter will start cooking too slowly and may produce a gummy center. A common error is setting the temperature wrong, so double check the dials or digital readout before you begin.
- In a medium bowl, break up the eggs with a whisk. Whisk in the honey, and then the milk. Set aside.: As you whisk, the eggs take on a glossy sheen and the honey dissolves, creating a unified, slightly viscous liquid that smells sweet and warm. The milk smooths the mixture and tempers the honey so it blends uniformly into the batter. This wet mix should look homogenous without bubbles from vigorous whipping. Overbeating here can add unnecessary air that deflates later, so mix until just combined. If the honey resists blending, a brief scraping of the bowl with the whisk helps integrate it fully.
- In a large bowl, whisk together the flour, cornmeal, sugar, baking powder, and salt. Add the milk mixture and the melted butter to the dry ingredients. Whisk until just blended. Do not overmix; it’s okay if there are a few lumps. Spoon the batter into the prepared pan. Bake for 25 to 30 minutes, or until the top is set and golden. Cool the cornbread for 10 to 15 minutes in the pan, then cut into squares and serve warm.: Dry ingredients combine into a uniform pale mixture, with the cornmeal lending a subtle grainy texture you can see at close range. Whisking distributes the leavening and salt so each spoonful performs consistently during baking. You may notice light dust clouds as you whisk, and the scent will be mostly neutral, edged with corn aroma from the cornmeal. A common mistake is adding wet ingredients before the dry is evenly mixed, which can cause uneven pockets of leavener and lead to inconsistent rise.
- Add the milk mixture and the melted butter to the dry ingredients.: When these liquids meet the dry mix, the batter transforms into a thick, velvety mass with tiny suspended cornmeal granules. The melted butter enriches the batter, carrying a warm, buttery aroma that promises a browned top. Combine gently so the wet ingredients are integrated without developing gluten from overworking the flour. If you stir vigorously, the texture becomes tight and chewier, robbing the bread of tenderness. If the butter is too hot you will cook the eggs, so ensure it has cooled slightly before adding.
- Whisk until just blended.: The batter should still show a few small lumps and not be perfectly smooth; this is a good sign because it means you have avoided overmixing which would toughen the crumb. At this stage the batter has a glossy appearance and a pourable thickness that falls slowly from the whisk. Overblending here is the most frequent misstep, producing a dense result, so stop when the streaks of flour have vanished and a few lumps remain.
- Do not overmix it’s okay if there are a few lumps.: Those harmless lumps keep the texture tender and prevent gluten overdevelopment, yielding a softer center. You may feel resistance while stirring, but that is normal; the batter should be cohesive and not dry or crumbly. If you find dry pockets, fold gently rather than whisking to maintain lightness. Heavy mixing will make the cornbread firm and less pleasant to bite into.
- Spoon the batter into the prepared pan.: As you transfer the batter, it should spread into the corners without being watery, and the surface will look slightly textured from the cornmeal. Use a spatula to scrape every last bit from the bowl so you do not waste any batter, and smooth the top lightly for even browning. If you overfill the pan, the center may take longer to set, so keep to the recommended pan size for predictable results.
- Bake for 25 to 30 minutes, or until the top is set and golden.: During baking you will notice the kitchen fill with a rich, toasty butter and corn scent, and the top will progress to an even golden brown with slight crackling edges. The internal structure will firm up and a toothpick inserted into the center should come out with a few moist crumbs, not wet batter. Avoid opening the oven frequently, as heat loss can cause uneven rise and longer baking times. A common issue is underbaking, which leaves the center gummy, so rely on both color and the toothpick test.
- Cool the cornbread for 10 to 15 minutes in the pan, then cut into squares and serve warm.: Cooling allows the crumb to set so slices hold together while still warm and inviting, and the aroma will mellow into a rich, comforting note. When you cut it, the edges will offer a slight crispness while the interior remains soft and slightly tender to the touch. Cutting too soon can lead to a crumbly result that falls apart, so patience for those 10 minutes pays off. Serve while still slightly warm to enjoy the best texture and flavor.
Notes
- Adjust the sweetness Reduce or increase the sugar and honey to match your preference, keeping in mind that lowering sweetness will emphasize the natural corn flavor while increasing it will make the top brown more and create a more dessert like bite.
- Milk selection matters Using whole milk delivers more richness and a silkier mouthfeel, while low fat milk produces a slightly lighter crumb; choose based on how indulgent you want the result to feel.
- Pan options Bake in a cast iron skillet for a crisper edge and deeper golden crust, or use the square baking dish for more even, tender pieces; the vessel affects texture significantly.
- Butter finish Brush warm slices with additional melted unsalted butter just after cutting to enhance aroma and mouthfeel, which also helps keep the squares moist during serving.
- Make ahead and reheat Freeze cooled squares in an airtight container for up to three months, and reheat wrapped in foil in a 350°F 175°C oven until warm, preserving texture better than microwaving.