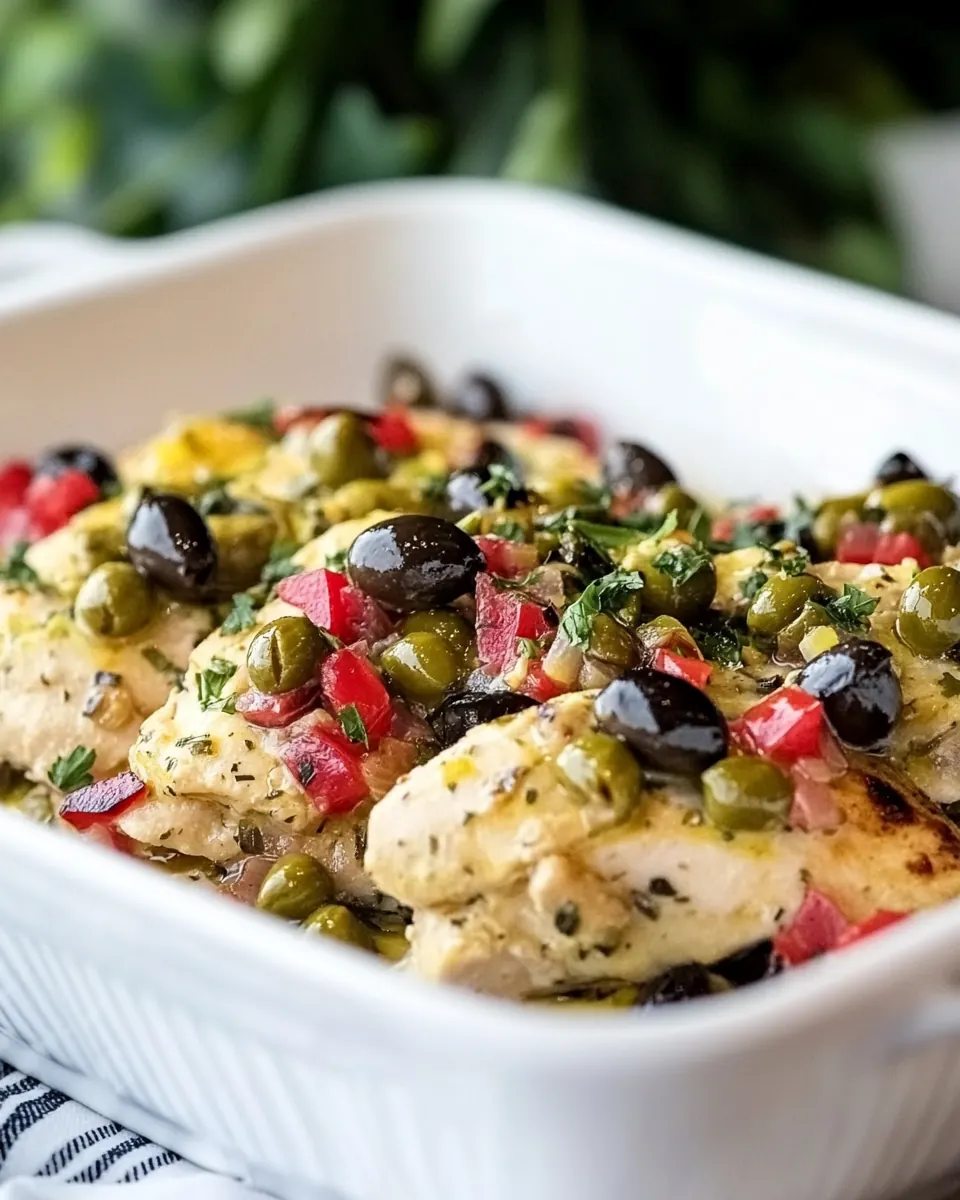
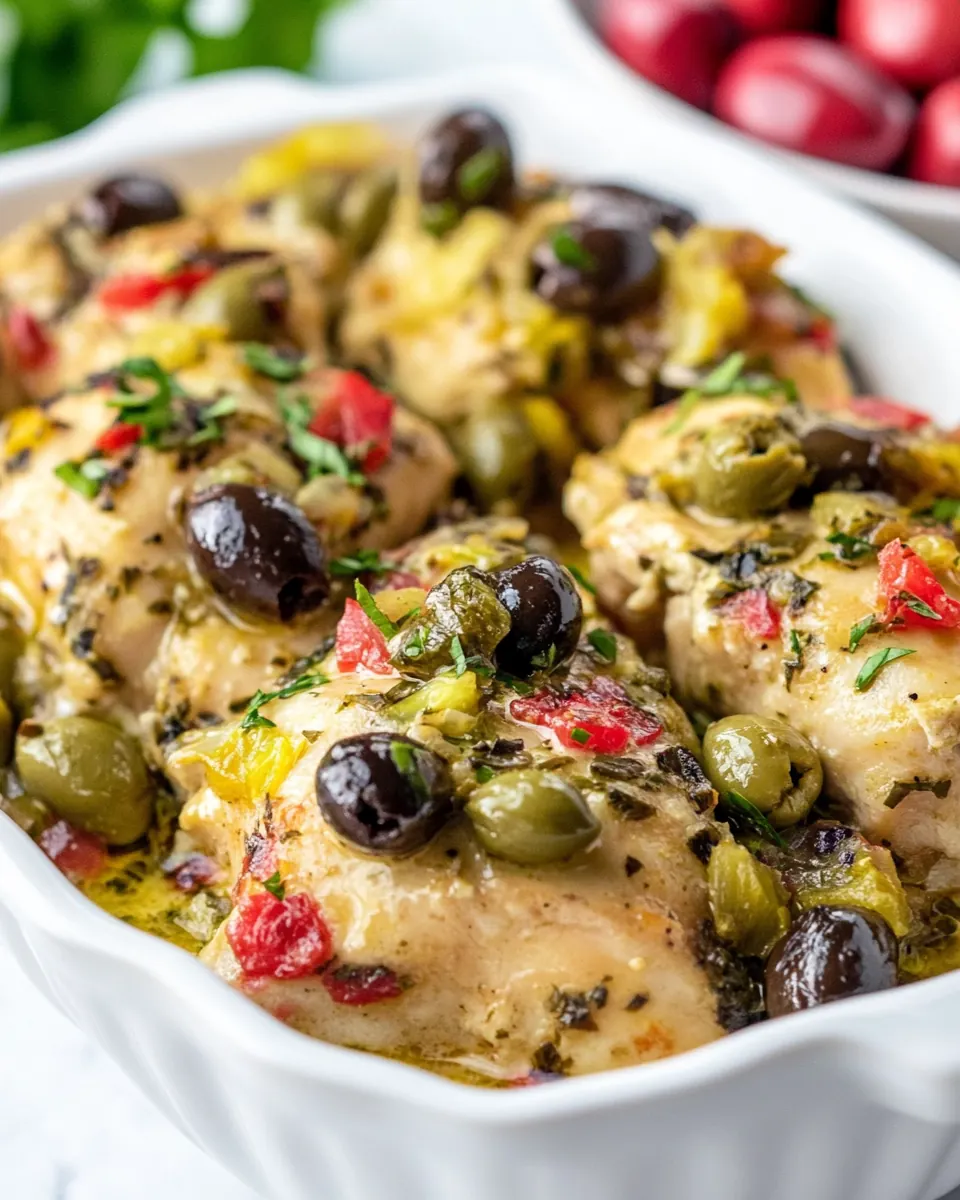
Chicken with Olives and Capers
Chicken with Olives and Capers is one of those recipes I reach for when I want something bold, simple, and a little bit classy without fuss.
Years ago I first made this dish on a weekday evening after a long shift, using pantry staples and whatever was left in the fridge. I remember the sizzling as the chicken hit the pan, that sharp bright snap of lemon, and the savory tang of chopped olives and capers coming together. It felt like a small, elegant celebration at the kitchen counter. The family gathered around the table, and we all kept stealing spoonfuls of the sauce.
Since then I’ve adapted the technique to be forgiving, so you can pull it off whether you are cooking for company or making a quiet solo supper. The mix of briny toppings punches through the richness of the browned chicken, and you end up with a dish that tastes like more effort than it actually requires. Every time I make it I find a slightly new way to plate it, sometimes over a grain, sometimes with roasted vegetables. It always brings the same satisfying, savory notes, and I love how versatile it is.
Recipe Snapshot
40 mins
15 mins
25 mins
Medium
350 kcal
Mediterranean
Keto, Paleo
Dinner
Large frying pan, Baking dish, Knife, Cutting board, Instant read thermometer
What We Adore About This Chicken with Olives and Capers
Bold, briny flavor that transforms simple chicken
I love how the combination of chopped black olives, green olives, and capers gives the dish an immediate punch. Those salty, slightly fruity flavors cut through the richness of the browned chicken and deliver a bright counterpoint. When I want bold flavor without many steps, this is my go to.
Quick and weeknight friendly
Because you brown the chicken first and finish it in the oven, the timing is reliable and compact. You can get dinner on the table in about 40 minutes, which makes this dish perfect for busy evenings. I often start prepping while a podcast plays, and before I know it, the house smells like a well loved bistro.
Pantry friendly and economical
This recipe leans on shelf stable ingredients like canned black olives and jarred capers, so it’s an excellent rescue meal when fresh produce is scarce. I appreciate recipes that feel a little luxurious without needing exotic groceries or a last minute store run.
Flexible to serve many ways
One of my favorite things is how adaptable this recipe is. I serve the saucy chicken over rice, with a crisp salad, or with simple roasted vegetables. It fits casual lunches and relaxed dinners alike, and it even shines for small dinner parties when you want something impressive but not fussy.
Reliable techniques for consistent results
I like that the method focuses on browning and finishing, which gives consistent texture and flavor. Browning locks in savory notes while the finishing bake ensures an even internal temperature. If you follow those core moves, the result is tender, flavorful chicken every time.
Ingredients You’ll Need for Chicken with Olives and Capers
These ingredients work together to create a balance of savory, salty, and bright flavors. The chicken provides a neutral, meaty canvas, while the various olives and capers add briny complexity. A touch of lemon juice and Dijon mustard lifts the mix, and aromatic elements like garlic and red onion round everything out. The key players are the protein and the briny topping, which mingle during baking to create juicy, saucy bites.
- 4 large boneless, skinless chicken breasts: Season and tenderize protein by rubbing onto chicken breasts before cooking; provides aroma and a baseline savory profile. Combine with other spices for balanced depth and to help form a flavorful crust during searing or roasting.
- 3 T olive oil, divided: Moisten and facilitate frying by dividing between pan and finishing; adds richness and helps brown the chicken evenly. Use remaining oil to loosen pan bits and marry sauce components for a cohesive finish.
- 2 tsp . Poultry Seasoning (see notes): Flavor and season poultry with warm, herbaceous notes; sprinkle or rub onto meat to impart subtle savory complexity. Use modest amounts to complement other seasonings without overpowering the dish.
- salt and fresh-ground black pepper to taste: Season food to taste and enhance all other flavors during preparation and at the table. Use carefully to balance the dish; black pepper adds mild heat and a fresh bite when freshly ground.
- 6 oz . can black olives, drained: Add briny, savory umami and a tender texture when stirred into the sauce; drain to control liquid contribution. Provide a mellow olive flavor that pairs with capers and mustard to build a Mediterranean profile.
- 1/4 cup chopped green olives: Impart bright, herbal brine and a firmer texture when chopped and mixed into the sauce; balances richness with a slightly tangy olive character. Use alongside black olives and capers to create layered olive flavors.
- 1/4 cup chopped capers: Deliver concentrated salty, tangy bursts that lift the sauce and cut through richness; chop and scatter so each bite has occasional piquant pops. Complement mustard and lemon for a lively, briny contrast.
- 2 T chopped red onion: Add sharp, sweet, and slightly pungent aromatic notes when finely chopped; sweats quickly to release flavor into the pan. Provides a mild crunch and color contrast while supporting the overall savory profile.
- 1 tsp . minced garlic: Provide pungent, savory aromatics when minced and sautéed briefly to awaken oils; builds foundational flavor early in cooking. Use sparingly to avoid overwhelming other delicate components like lemon and olives.
- 2 T Dijon mustard: Bind and emulsify sauce components while contributing tangy, slightly spicy depth; whisk with oil and lemon to create a cohesive dressing for the chicken. Balances briny ingredients and helps the sauce cling to the meat.
- 2 T fresh-squeezed lemon juice (see notes): Brighten and balance the dish with fresh citrus acidity; squeeze and add near the end to preserve brightness. Cuts through the richness of oil and olives, lending a clean finish and enhancing other flavors.
Cooking Instructions for Chicken with Olives and Capers
This method is straightforward but rewards attention to detail. You will brown the chicken for flavor, assemble a bright olive and caper topping, then finish everything in the oven so the flavors mingle. Read each step before you begin to keep the flow smooth.
- Take chicken breasts out of the fridge and let them come to room temperature.: You'll notice the chill leave the surface and the meat relaxes, which helps it cook evenly and prevents a band of overcooked outside with a cool center. The texture becomes juicier when the internal temperature is closer to room temperature before cooking. If you skip this, the exterior may brown too quickly while the center remains underdone. A common mistake is leaving meat out too long, so aim for about 15 to 20 minutes to avoid food safety concerns.
- Preheat oven to 375 F/190 C and spray baking dish with non-stick spray. (I used a dish that was 8" x 11" but something close to that will work fine.): You'll feel the kitchen warm and watch the oven dial or display reach temperature, ensuring consistent baking. Preheating ensures the dish begins cooking immediately and helps the topping bubble properly. Not preheating can extend bake time and produce uneven doneness. Avoid using an incorrectly sized pan that crowds the chicken , which can trap steam and prevent browning.
- Drain can and chop the black olives, chop green olives, chop red onion, and chop capers.: As you chop, you'll see contrasting colors and smell the briny notes of the olives and capers . Uniform chopping helps the flavors distribute evenly over each bite. If pieces are uneven, some bites will be overly salty or too mild. Rinse capers only if you need to reduce sodium, but pat everything dry to avoid diluting the topping.
- Mix chopped black olives, green olives, red onion, and capers with Dijon mustard, garlic, lemon juice, and 2 T olive oil to make the topping.: Once combined, the topping should look cohesive and glossy, with tiny flecks of garlic and onion. The mustard and oil emulsify the mixture so it clings to the chicken while baking, and the lemon lifts the whole profile. If the mixture seems watery, a bit more mustard or oil helps bind it. A frequent error is under mixing, which leaves the mustard and oil separated, reducing adhesion to the meat.
- Trim chicken as needed and season with Poultry Seasoning (affiliate link) and a little salt and pepper.: Trimming creates even surfaces and removes excess fat, producing a cleaner sear. You should see the seasoning adhere visibly to the surface. Season evenly so every strip gets flavor. Beware of over salting since the topping adds saltiness as it bakes.
- Heat other 1 T olive oil in a large frying pan and brown the chicken about 5 minutes per side, or just until it's nicely browned. (It will not be fully cooked at this point.): The pan will sizzle and aromas of caramelized meat will develop, creating that desirable golden crust. Browning builds flavor through the Maillard reaction and helps seal juices. If the oil smokes, lower the heat to avoid bitter flavors. A common slip is moving the chicken too soon, which prevents proper crust formation.
- Cut chicken into 3 or 4 lengthwise strips (Make 4 strips for large chicken breasts or 3 for smaller ones. You want the strips to be about the same thickness.): Notice the firm texture and the clean edges as you slice, which makes the portioning consistent for even baking. Similar thickness ensures uniform cooking times and an attractive final presentation. If strips vary widely, some pieces can overcook while others stay underdone. Use a sharp knife for clean cuts and safety.
- Arrange chicken strips in a baking dish. (I used a dish that was 8" x 11" but any size close to that will work.: Lay the strips so they sit comfortably without overlapping, which lets heat circulate and the topping contact the surface. You'll see the browned sides facing up and the pieces leveling in the dish. Crowding leads to steaming, which prevents the topping from crisping slightly. If you notice overlapping, use a larger dish or two smaller dishes.
- Spoon the olive and caper sauce over the chicken, trying to get all the pieces of chicken covered with sauce.: The topping should glisten as you spread it, coating each strip so every bite delivers briny flavor. Press gently to help the sauce adhere and to nestle small pieces into crevices. If you heap it all in one spot, coverage becomes uneven and some bites lack balance. A frequent misstep is skimping on distribution, leaving parts of the chicken bare.
- Bake 20 -25 minutes, or until the chicken is cooked through and the whole dish is bubbling hot.: During baking you will hear gentle bubbling and see the topping thicken and the pan juices shimmer. This stage melds flavors and finishes cooking the meat. If it bakes too long, the chicken can dry out, so check early. Underbaking is a safety concern, so ensure it reaches the right internal temperature.
- I would use an Instant Read Meat Thermometer (affiliate link) if you have one to check that chicken has reached a temperature of 165 F/75 C after 20 minutes, and cook it a few minutes longer if needed.: The thermometer gives an exact reading, removing guesswork, and a quick probe tells you when the chicken is safely done. Insert into the thickest part without touching bone to get an accurate result. A misread can occur if probe touches the pan, so avoid that mistake.
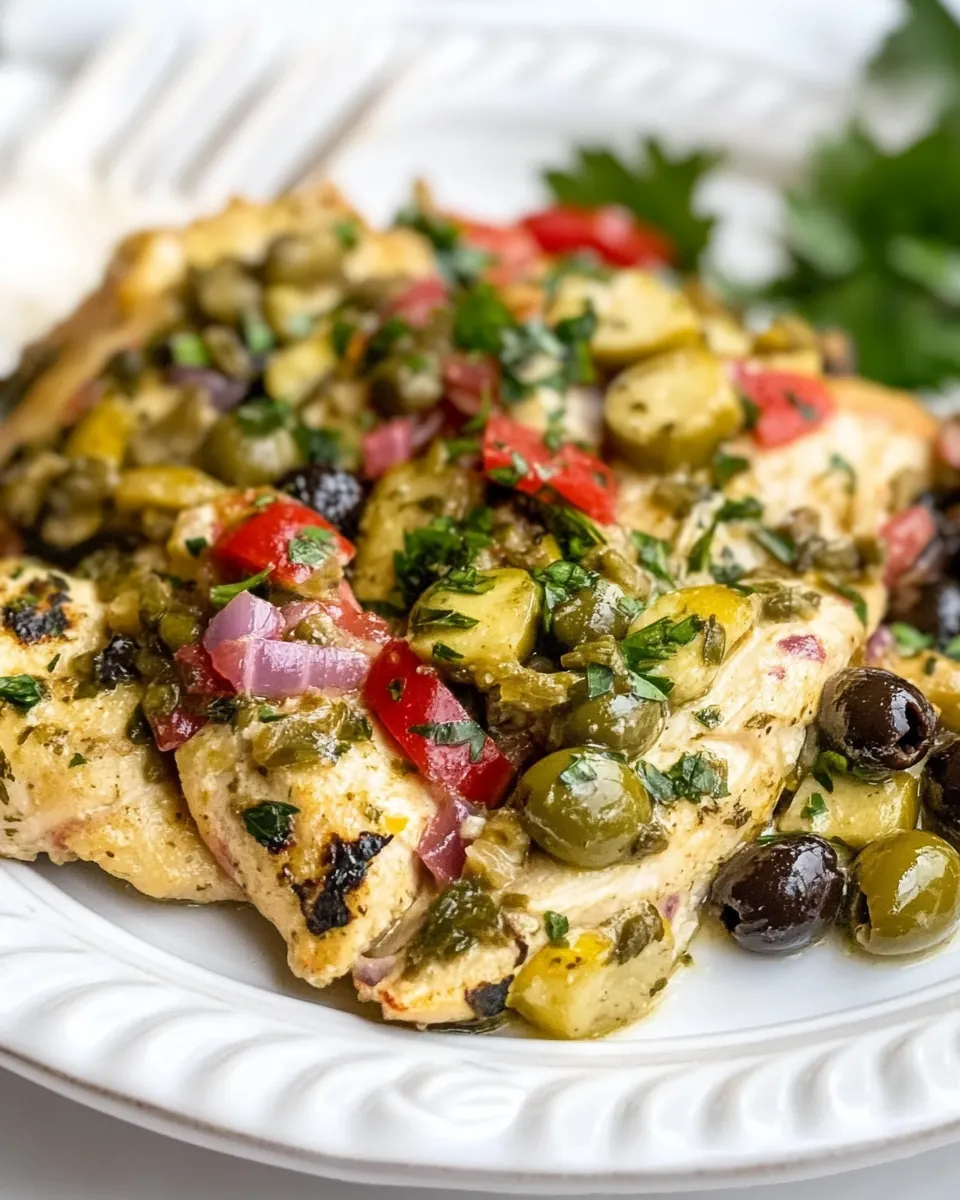
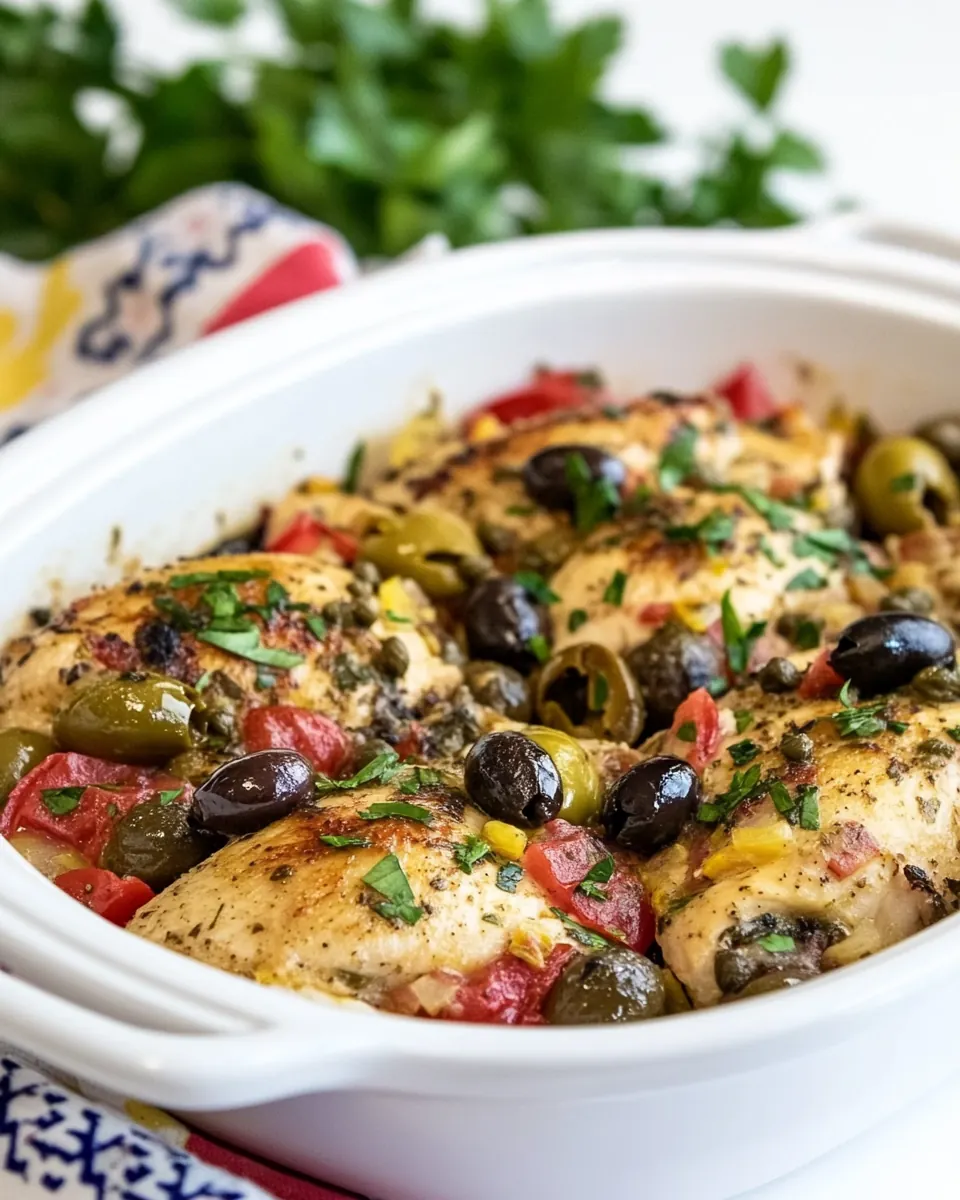
- Serve hot, with the sauce and pan juices spooned over the chicken strips when you plate it.: You will notice steam rising and the sauce coating the chicken , creating glossy, appetizing servings. Spoon the pan juices over each piece so every bite is moist and flavorful. Letting it sit too long before serving cools the sauce and dulls flavors, so plate promptly.
Tips for Success
This recipe rewards small details from timing to chopping. Below are focused, practical tips to help you execute the dish with confidence and consistent results.
- Room temperature matters, bring the chicken out 15 to 20 minutes before cooking so it cooks evenly and stays juicy.
- Pat dry, dry the chicken with paper towels before seasoning to help the surface brown properly.
- Even pieces, slice the chicken into similar sized strips so every piece finishes at the same time in the oven.
- Balance the salt, taste the topping if needed and remember the olives and capers add salt, so adjust added salt lightly.
- Use a thermometer, an instant read thermometer takes the guesswork out of doneness and prevents drying the chicken.
- Rest briefly, let the plated chicken sit for a couple of minutes to allow juices to settle for a juicier bite.
Pairing Suggestions for Chicken with Olives and Capers
This dish pairs well with simple, textural sides and suits varied occasions from weeknight dinners to more formal gatherings. Below are thoughtful serving ideas, storage notes, and occasions where the recipe shines. Use these pairings to build a complete plate that highlights the briny, savory topping.
- Serve over rice or couscous, a neutral grain soaks up the saucy pan juices and creates a comforting base for the bright olive and caper topping.
- Roasted vegetables, such as carrots, asparagus, or green beans, add color and a roasted note that complements the briny sauce, making the plate more balanced for dinner.
- Light salad, a crisp green salad with a citrusy vinaigrette contrasts the savory chicken and keeps the meal fresh for lunch or lighter dinner occasions.
- Occasions, this works for casual weeknight dinners, small dinner parties, and family lunches. It is also suitable for Ramadan if served for iftar because it is filling and flavorful without being heavy.
- Storage, refrigerate leftovers in an airtight container for up to three days. Reheat gently in a low oven so the sauce loosens without drying the chicken.
- Seasonal pairings, in spring and summer pair with fresh lemon and crisp sides, while in colder months serve alongside warm grains and roasted roots for comfort.
FAQ
Conclusion
This Chicken with Olives and Capers stands out because of its bold briny topping and simple, reliable technique that yields juicy, flavorful results. Give it a try when you want an impressive meal with minimal fuss, and trust the browning plus finishing method to deliver consistent texture and taste. I hope this becomes one of your go to recipes for weeknight dinners or casual entertaining, a dish that is easy to pull together yet feels special.
Chicken with Olives and Capers
Equipment
- Large Frying Pan
- Baking Dish
- Knife
- Cutting Board
- Instant read thermometer
Ingredients
- 4 large boneless, skinless chicken breasts Season and tenderize protein by rubbing onto chicken breasts before cooking; provides aroma and a baseline savory profile. Combine with other spices for balanced depth and to help form a flavorful crust during searing or roasting.
- 3 T olive oil, divided Moisten and facilitate frying by dividing between pan and finishing; adds richness and helps brown the chicken evenly. Use remaining oil to loosen pan bits and marry sauce components for a cohesive finish.
- 2 tsp . Poultry Seasoning (see notes) Flavor and season poultry with warm, herbaceous notes; sprinkle or rub onto meat to impart subtle savory complexity. Use modest amounts to complement other seasonings without overpowering the dish.
- salt and fresh-ground black pepper to taste Season food to taste and enhance all other flavors during preparation and at the table. Use carefully to balance the dish; black pepper adds mild heat and a fresh bite when freshly ground.
- 6 oz . can black olives, drained Add briny, savory umami and a tender texture when stirred into the sauce; drain to control liquid contribution. Provide a mellow olive flavor that pairs with capers and mustard to build a Mediterranean profile.
- 1/4 cup chopped green olives Impart bright, herbal brine and a firmer texture when chopped and mixed into the sauce; balances richness with a slightly tangy olive character. Use alongside black olives and capers to create layered olive flavors.
- 1/4 cup chopped capers Deliver concentrated salty, tangy bursts that lift the sauce and cut through richness; chop and scatter so each bite has occasional piquant pops. Complement mustard and lemon for a lively, briny contrast.
- 2 T chopped red onion Add sharp, sweet, and slightly pungent aromatic notes when finely chopped; sweats quickly to release flavor into the pan. Provides a mild crunch and color contrast while supporting the overall savory profile.
- 1 tsp . minced garlic Provide pungent, savory aromatics when minced and sautéed briefly to awaken oils; builds foundational flavor early in cooking. Use sparingly to avoid overwhelming other delicate components like lemon and olives.
- 2 T Dijon mustard Bind and emulsify sauce components while contributing tangy, slightly spicy depth; whisk with oil and lemon to create a cohesive dressing for the chicken. Balances briny ingredients and helps the sauce cling to the meat.
- 2 T fresh-squeezed lemon juice (see notes) Brighten and balance the dish with fresh citrus acidity; squeeze and add near the end to preserve brightness. Cuts through the richness of oil and olives, lending a clean finish and enhancing other flavors.
Instructions
- Take chicken breasts out of the fridge and let them come to room temperature.: You'll notice the chill leave the surface and the meat relaxes, which helps it cook evenly and prevents a band of overcooked outside with a cool center. The texture becomes juicier when the internal temperature is closer to room temperature before cooking. If you skip this, the exterior may brown too quickly while the center remains underdone. A common mistake is leaving meat out too long, so aim for about 15 to 20 minutes to avoid food safety concerns.
- Preheat oven to 375 F/190 C and spray baking dish with non-stick spray. (I used a dish that was 8" x 11" but something close to that will work fine.): You'll feel the kitchen warm and watch the oven dial or display reach temperature, ensuring consistent baking. Preheating ensures the dish begins cooking immediately and helps the topping bubble properly. Not preheating can extend bake time and produce uneven doneness. Avoid using an incorrectly sized pan that crowds the chicken , which can trap steam and prevent browning.
- Drain can and chop the black olives, chop green olives, chop red onion, and chop capers.: As you chop, you'll see contrasting colors and smell the briny notes of the olives and capers . Uniform chopping helps the flavors distribute evenly over each bite. If pieces are uneven, some bites will be overly salty or too mild. Rinse capers only if you need to reduce sodium, but pat everything dry to avoid diluting the topping.
- Mix chopped black olives, green olives, red onion, and capers with Dijon mustard, garlic, lemon juice, and 2 T olive oil to make the topping.: Once combined, the topping should look cohesive and glossy, with tiny flecks of garlic and onion. The mustard and oil emulsify the mixture so it clings to the chicken while baking, and the lemon lifts the whole profile. If the mixture seems watery, a bit more mustard or oil helps bind it. A frequent error is under mixing, which leaves the mustard and oil separated, reducing adhesion to the meat.
- Trim chicken as needed and season with Poultry Seasoning (affiliate link) and a little salt and pepper.: Trimming creates even surfaces and removes excess fat, producing a cleaner sear. You should see the seasoning adhere visibly to the surface. Season evenly so every strip gets flavor. Beware of over salting since the topping adds saltiness as it bakes.
- Heat other 1 T olive oil in a large frying pan and brown the chicken about 5 minutes per side, or just until it's nicely browned. (It will not be fully cooked at this point.): The pan will sizzle and aromas of caramelized meat will develop, creating that desirable golden crust. Browning builds flavor through the Maillard reaction and helps seal juices. If the oil smokes, lower the heat to avoid bitter flavors. A common slip is moving the chicken too soon, which prevents proper crust formation.
- Cut chicken into 3 or 4 lengthwise strips (Make 4 strips for large chicken breasts or 3 for smaller ones. You want the strips to be about the same thickness.): Notice the firm texture and the clean edges as you slice, which makes the portioning consistent for even baking. Similar thickness ensures uniform cooking times and an attractive final presentation. If strips vary widely, some pieces can overcook while others stay underdone. Use a sharp knife for clean cuts and safety.
- Arrange chicken strips in a baking dish. (I used a dish that was 8" x 11" but any size close to that will work.: Lay the strips so they sit comfortably without overlapping, which lets heat circulate and the topping contact the surface. You'll see the browned sides facing up and the pieces leveling in the dish. Crowding leads to steaming, which prevents the topping from crisping slightly. If you notice overlapping, use a larger dish or two smaller dishes.
- Spoon the olive and caper sauce over the chicken, trying to get all the pieces of chicken covered with sauce.: The topping should glisten as you spread it, coating each strip so every bite delivers briny flavor. Press gently to help the sauce adhere and to nestle small pieces into crevices. If you heap it all in one spot, coverage becomes uneven and some bites lack balance. A frequent misstep is skimping on distribution, leaving parts of the chicken bare.
- Bake 20 -25 minutes, or until the chicken is cooked through and the whole dish is bubbling hot.: During baking you will hear gentle bubbling and see the topping thicken and the pan juices shimmer. This stage melds flavors and finishes cooking the meat. If it bakes too long, the chicken can dry out, so check early. Underbaking is a safety concern, so ensure it reaches the right internal temperature.
- I would use an Instant Read Meat Thermometer (affiliate link) if you have one to check that chicken has reached a temperature of 165 F/75 C after 20 minutes, and cook it a few minutes longer if needed.: The thermometer gives an exact reading, removing guesswork, and a quick probe tells you when the chicken is safely done. Insert into the thickest part without touching bone to get an accurate result. A misread can occur if probe touches the pan, so avoid that mistake.
- Serve hot, with the sauce and pan juices spooned over the chicken strips when you plate it.: You will notice steam rising and the sauce coating the chicken , creating glossy, appetizing servings. Spoon the pan juices over each piece so every bite is moist and flavorful. Letting it sit too long before serving cools the sauce and dulls flavors, so plate promptly.
Notes
- Room temperature matters, bring the chicken out 15 to 20 minutes before cooking so it cooks evenly and stays juicy.
- Pat dry, dry the chicken with paper towels before seasoning to help the surface brown properly.
- Even pieces, slice the chicken into similar sized strips so every piece finishes at the same time in the oven.
- Balance the salt, taste the topping if needed and remember the olives and capers add salt, so adjust added salt lightly.
- Use a thermometer, an instant read thermometer takes the guesswork out of doneness and prevents drying the chicken.
- Rest briefly, let the plated chicken sit for a couple of minutes to allow juices to settle for a juicier bite.