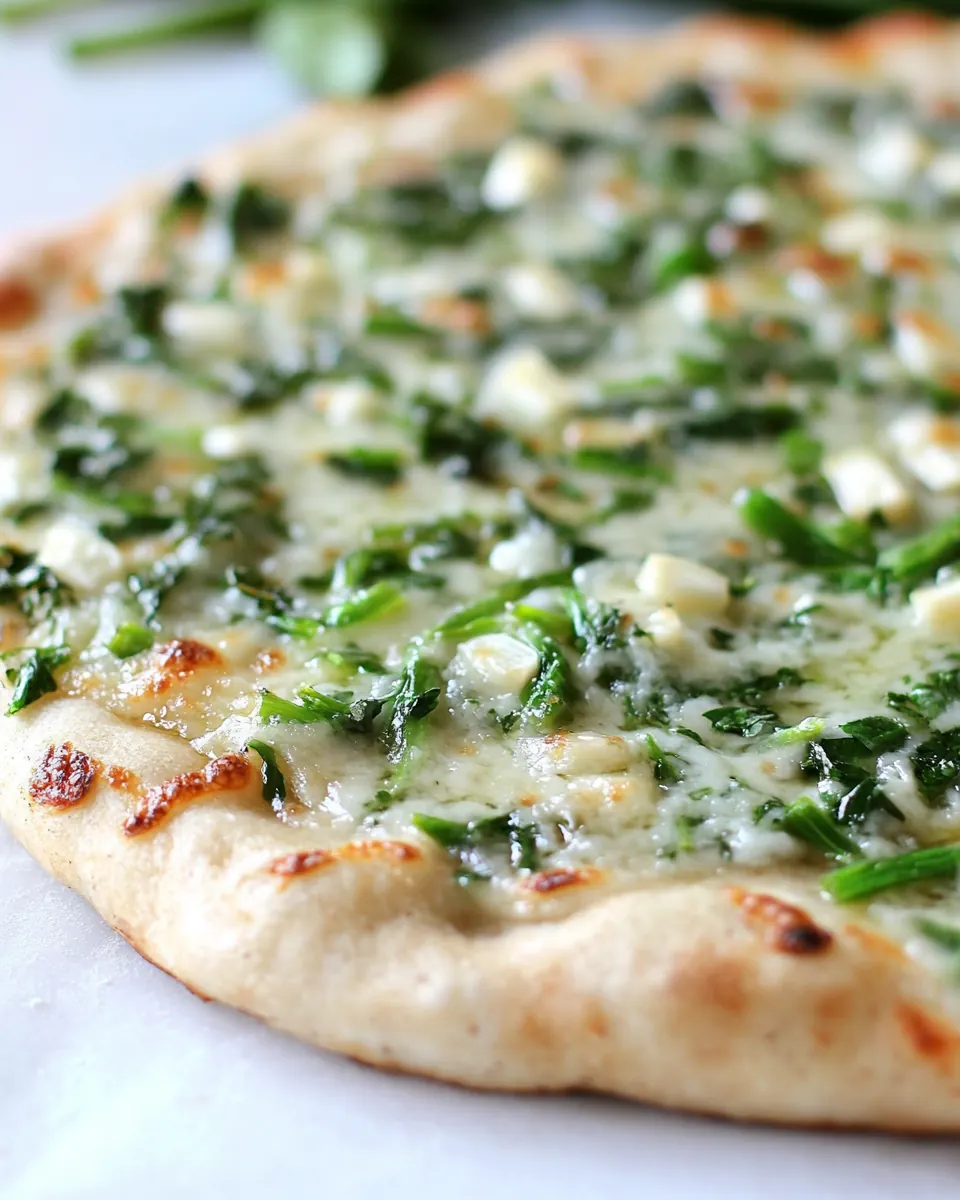
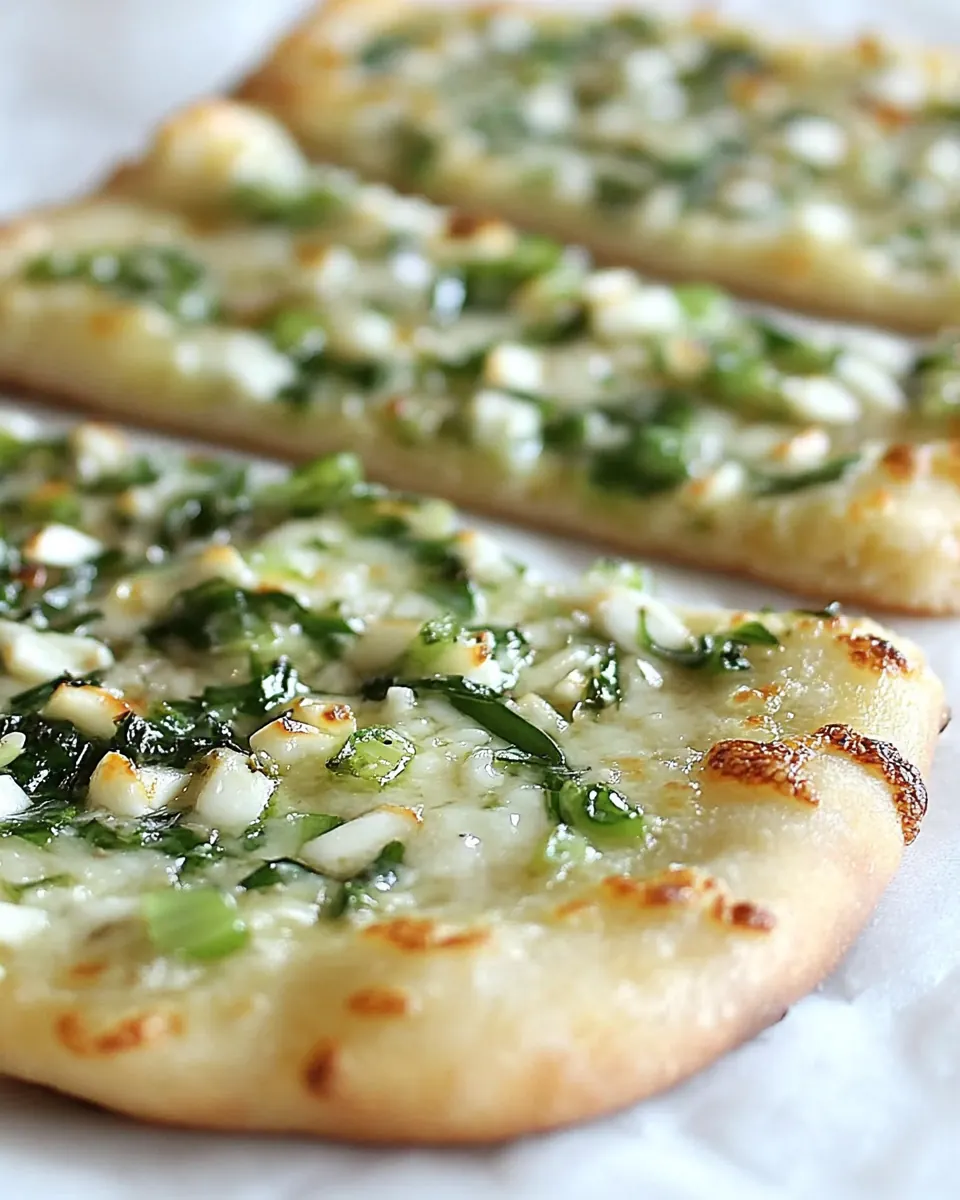
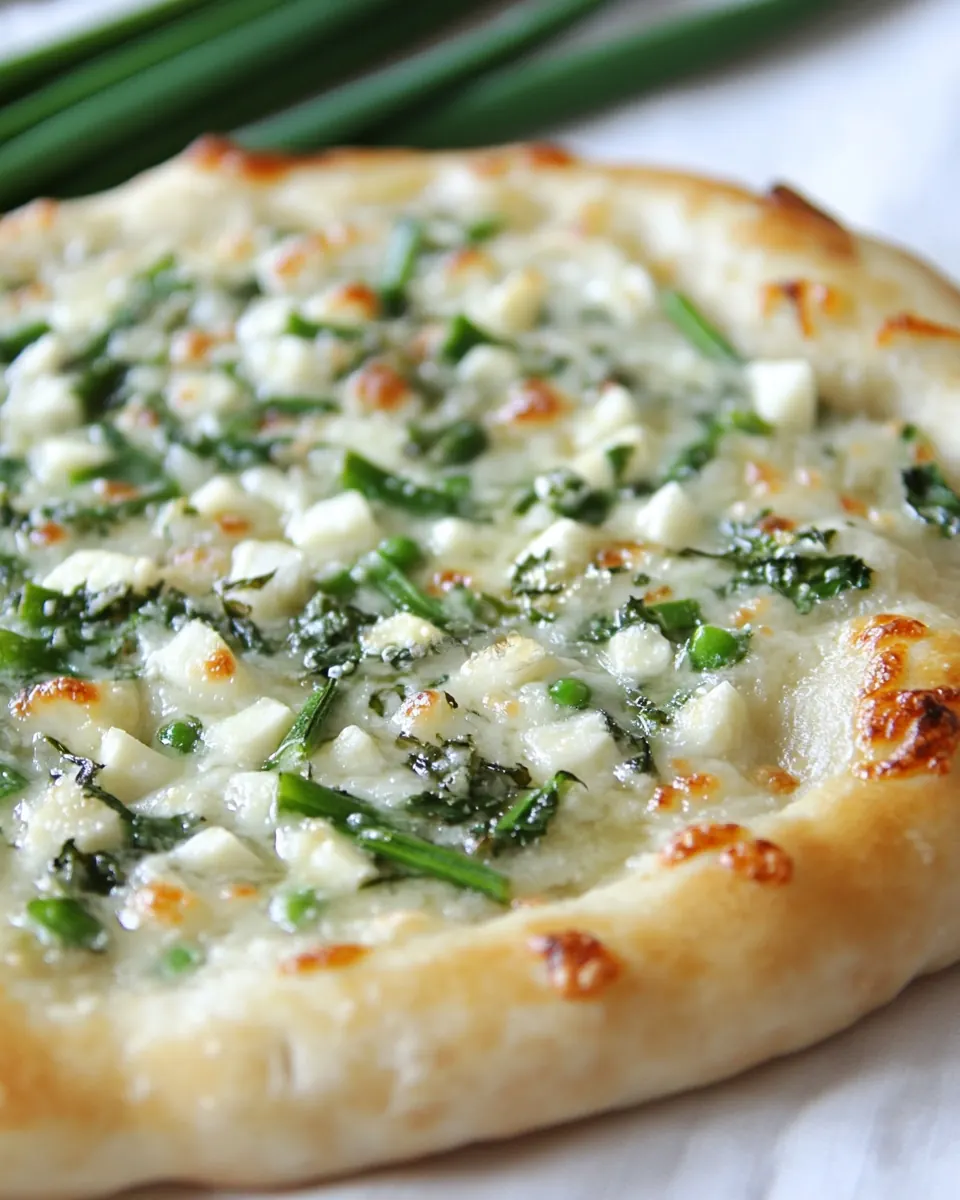
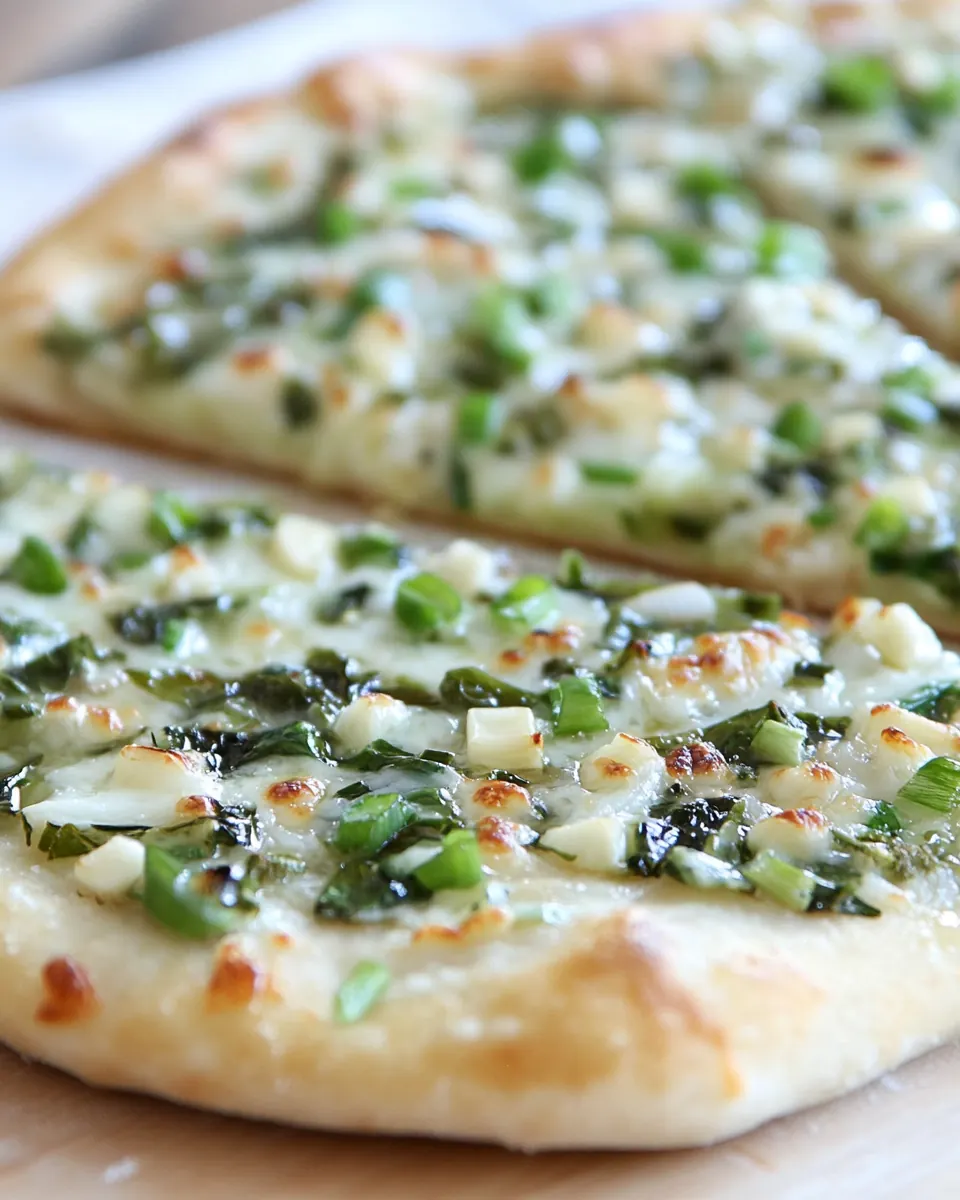
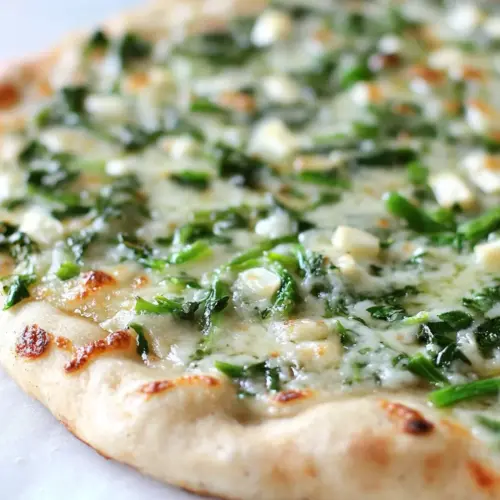
Brie and Garlic Scape Pizza
Brie and Garlic Scape Pizza is the kind of simple, seasonal dish that sneaks up on you with its perfume, then wins over everyone at the table with creamy texture and bright green bite.
I first made Brie and Garlic Scape Pizza on a humid summer afternoon when the farmer market stalls were heavy with long, twisting green scapes. I was in a playful mood, wanting something that felt indulgent but was actually easy to put together. The dough had been resting in the fridge overnight, and pulling it out the next day felt like unwrapping a little present. That cool, tacky dough gave off a faint yeasty aroma as I stretched it, and when the oven heat hit the topping the air filled with an herbaceous, garlicky perfume that made neighbors lean toward the door.
Serving this pizza felt informal and generous. We ate right off a cutting board, passing slices around, praising the way the creamy brie melted into glossy puddles and the sliced garlic scapes softened but still held their bright snap. I loved how a handful of simple ingredients combined into something that looked and tasted like a small celebration. Over the years this pizza has become my favorite way to show guests that a few thoughtful pantry items and a little time with the dough can produce something worth lingering over.
Recipe Snapshot
2 hr 20 mins
120 mins
20 mins
Hard
320 kcal
American
Gluten-Free, Vegan
Dinner
Electric mixer, Dough hook, Baking stone, Peel or sheet pan, Bench scraper
The Appeal of This Brie and Garlic Scape Pizza
Bright seasonal flavor
I adore how garlic scapes bring a soft, floral garlic note that feels fresh and not overpowering. They lend a green, almost onionlike bite that pairs perfectly with the lush, buttery creaminess of brie. When you taste a slice you get that pleasing contrast between mellow melted cheese and the lively scapes.
Elegant simplicity
This recipe proves that elegance does not need fuss. With straightforward dough and a handful of toppings you get something that looks special. I often serve it when I want an easy crowd pleaser, because it feels thoughtful without requiring a long ingredient list.
Textural harmony
The combination of a slightly chewy crust dusted with semolina flour or cornmeal, glossy melted brie, and tender, snappy garlic scapes creates satisfying variety in every bite. The crust gives structure while the cheese and scapes provide the standouts in texture and flavor.
Flexible timing
I love that the dough can rest overnight or be frozen, which makes planning effortless. That fridge time deepens flavor and gives you freedom to bake when it suits you. This flexibility is a big reason I return to the recipe again and again.
Shareable and seasonal
Because the topping is light and bright, this pizza shines in summer gatherings. It pairs beautifully with simple salads and chilled drinks, and it travels well to picnics or potlucks. I find it invites conversation, which is the highest compliment for any shared dish.
What to Buy for Brie and Garlic Scape Pizza
The philosophy behind these ingredients is restraint and quality. A few well chosen components let each one sing. The dough gives structure and chew, the brie brings rich, creamy notes, and the garlic scapes provide a fresh, allium character that feels seasonal. A little olive oil and a sprinkle of sea salt and freshly cracked black pepper tie everything together, while semolina flour or cornmeal under the crust keeps the bottom crisp and easy to slide.
- Crust: 2 1/4 cups unbleached bread flour 3/4 teaspoon salt 1/2 teaspoon instant yeast 2 tablespoons olive oil 7/8 cup (7 ounces) water, ice cold (40°F) Semolina flour OR cornmeal for dusting: Provide structure and chewiness to the pizza by combining unbleached bread flour with salt and instant yeast; olive oil and cold water help hydrate and tenderize the dough while semolina flour or cornmeal prevent sticking during baking.
- Topping: 8 oz. soft brie cheese 8-10 garlic scapes, thinly sliced on the bias (about 2 cups) olive oil sea salt freshly cracked black pepper: Contribute creamy, savory, and aromatic topping elements with soft brie offering a rich, meltable base and thinly sliced garlic scapes imparting a bright, garlicky-onion flavor; a drizzle of olive oil plus sea salt and freshly cracked black pepper finish and balance the flavors.
Directions for Brie and Garlic Scape Pizza
These directions guide you from dough to golden finished pizza in a sequence that honors fermentation, gentle handling, and high heat finishing. Read each step before you begin so you can anticipate rests and oven timing. Trust the sensory cues described below, and remember that patience at key moments rewards you with texture and flavor.
- Stir together the flour, salt, and instant yeast in the bowl of an electric mixer. Add the oil and the cold water and stir on low speed until the flour is all absorbed. Switch to the dough hook and mix on medium speed for 5 to 7 minutes, or as long as it takes to create a smooth, sticky dough. The dough should clear the sides of the bowl but stick to the bottom of the bowl. The finished dough will be springy, elastic, and sticky, not just tacky.: You will immediately notice the dry mixture has a faint, nutty aroma from the bread flour , and mixing them first ensures even distribution of the salt and instant yeast . As the dry ingredients break apart and mingle, you are setting the stage for uniform fermentation. Use the paddle or whisk to combine briefly so there are no pockets of yeast or salt that can create uneven rise. A common error is adding salt directly onto yeast, which can slow its action; mixing dry ingredients first prevents that. When finished, the bowl should look homogenous and light in texture.
- Transfer the dough to floured work surface. Prepare a baking dish by lining it with lightly oiled parchment paper. Cut the dough into 4 equal pieces. Sprinkle flour over the dough. Gently round each piece into a ball. If the dough sticks to your hands, lightly dip your hands in flour. Transfer the dough balls to the prepared dish, mist the dough generously with spray oil and slip the pan into a food-grade plastic bag or cover with plastic wrap.: At this stage the mixture takes on a shaggy, slightly wet look as the olive oil and ice cold water are drawn into the flour. The cold temperature of the water slows the yeast and helps maintain a long ferment window, which deepens flavor. Listen for the subtle change in sound as the mixer moves from dry scraping to soft clumps forming. If the dough seems too dry, add a teaspoon of water at a time; if too wet, a sprinkle of flour on your hands will help. Avoid overworking here, because you want the gluten to develop gently in the next step.
- Refrigerate overnight (or up to 3 days). At this point the dough can also be frozen; simply wrap each ball individually in plastic wrap and place inside a zippered freezer bag. Transfer to the refrigerator the day before you plan on baking them.: As you transition to the dough hook you will hear a change to a more elastic, cohesive sound. The dough should clear the sides of the bowl but stick to the bottom, a sign of proper hydration. Expect a springy, elastic, and sticky texture when you pull a bit between your fingers, and you may see faint strands forming when you stretch the dough. This gluten development is what gives the crust chew and structure. If the dough is not coming together after the time, give it another minute, but do not add much extra flour, which will make the final crust heavy. A common problem is overmixing, which can tighten the dough; stop when the dough shows elasticity and softness.
- Remove dough from refrigerator and rest at room temperature for 2 hours. On a lightly floured work surface, gently press the dough into flat disks about 1/2 inch thick and 5 inches in diameter.: The moment you set the dough down you will sense its coolness and tacky surface. Flour the surface lightly to prevent sticking, then prepare a baking dish lined with lightly oiled parchment. Cut the dough into 4 equal pieces using a bench scraper; you will hear a soft, muffled sound as you divide the dough. Gently round each piece into a ball, creating surface tension by tucking the edges underneath. This rounding helps with uniform proofing. If the dough sticks to your hands, a light dust of flour will help, but avoid smothering the dough with extra flour which can dry the surface. The balls should sit comfortably in the dish before the rest period.
- At least 45 minutes before making the pizza, place a baking stone either on the floor of the oven (for gas ovens), or on a rack in the lower third of the oven. Heat the oven as hot as possible, 500 to 550 degrees F. If you do not have a baking stone, you can use the back of a sheet pan, but do not preheat the pan.: As the dough chills the yeast works slowly, creating flavor without aggressive rise. You will notice the dough relax and flatten slightly as gases form. Covering the dough traps humidity, preventing a hard skin. Refrigeration for up to three days deepens complexity, and freezing is an option if you want longer storage. A typical mistake is leaving dough uncovered, which can form a tough, dry skin; always cover snugly before chilling.
- Generously dust a peel or the back of a sheet pan with semolina flour or cornmeal. Make the pizzas one at a time. Dip your hands, including the backs of your hands and knuckles, in flour and lift a piece of dough by getting under it with a pastry scraper. Very gently lay the dough across your fists and carefully stretch it by bouncing the dough in a circular motion on your hands, carefully giving it a little stretch with each bounce, and continue to stretch/toss until the dough is approximately 7" across and uniformly thin. If you have trouble tossing the dough, or if the dough keeps springing back, let it rest for 5 to 20 minutes so the gluten can relax, and try again.: Bringing the dough back to room temperature allows the gluten and yeast to awaken. You will feel the dough warm and slightly more pliable as it rests. Press each piece into a disk about 1/2 inch thick and 5 inches in diameter; this pre shaping loosens the dough and makes final stretching easier. If you skip the rest, the dough may snap back when you try to stretch it, because the gluten will still be tight. A mindful rest helps achieve a thinner, more even crust.
- Lay the stretched dough on the peel or pan, making sure there is enough semolina flour or cornmeal to allow it to slide. Lightly brush with olive oil, and poke it a few times with a fork so it doesn’t bubble.: At least 45 minutes before baking, place a baking stone on the oven floor for gas ovens or on a lower rack for electric ovens, and heat to as hot as possible, 500 to 550 degrees F. The stone absorbs intense heat which quickly crisp the bottom of the crust, producing that desirable leopard spotting and a snappy bite. If you are using a sheet pan instead, do not preheat it; the dough will cook differently and needs gentler heat from the air. A common pitfall is not preheating long enough, which yields a limp base rather than a crisp one.
- Spread 2 oz of brie cheese on each crust. You can also use slices if your brie is too firm to spread. Sprinkle evenly with 1/4 of garlic scapes. Season with sea salt and pepper.: The semolina or cornmeal creates a dry barrier so the dough will slide effortlessly onto the stone. As you lift and stretch the dough you will feel tension release and a soft popping sound when tiny air pockets give way. If the dough resists and springs back keep it resting for 5 to 20 minutes to relax the gluten. This patience prevents tearing and ensures an even, thin crust. Avoid pressing out all the air, you want bubbles to form while baking for texture.
- Gently slide the topped pizza onto the stone (or bake directly on the sheet pan) and close the door. Bake (two at a time) until the bottoms are lightly golden and the cheese is bubbly and just barely browned. Remove from the oven and transfer to a cutting board. Repeat with remaining pizzas. Let rest for 3 to 5 minutes before slicing and serving.: The brushing of olive oil gives a glossy base that helps the brie slide and melt without soaking the dough. Poking with a fork keeps large bubbles from forming and allows steam to escape, which helps the pizza remain flat and evenly baked. Visually you will see a faint sheen from the oil and a few fork marks that tell you the base is primed. A typical mistake is over poking and deflating too many pockets; a few pricks are enough.
- Spread 2 oz of brie cheese on each crust and sprinkle with 1/4 of garlic scapes, season with sea salt and pepper: When you place the brie it will begin to soften and glisten from the oven heat. Use a spoon to dollop soft cheese or thin slices if it is firmer. Scatter the thinly sliced garlic scapes so they nestle into the cheese without overcrowding. Add a light sprinkle of sea salt and a few twists of freshly cracked black pepper to balance the richness. Overloading with cheese or scapes can prevent proper bubbling and lead to a greasy top, so keep quantities as directed.
- Bake until the bottoms are lightly golden and the cheese is bubbly and just barely browned: Sliding the pizza onto the hot stone you will hear a satisfying sizzle. Watch for the bottom to develop golden brown spots and for the brie to bubble into glossy pools with tiny browned edges. The aroma should be intoxicatingly garlicky and toasty. Remove when the crust is crisp and the cheese shows gentle browning. A common error is leaving the pizza too long, which can dry out the delicate brie .
- Remove from oven, transfer to a cutting board, let rest for 3 to 5 minutes before slicing and serving: Resting gives the melted brie time to settle so slices hold together cleanly. You will notice the cheese thicken slightly and the crust cool just enough to handle. Cutting too soon causes the cheese to run and makes messy slices. Let the pizza rest briefly, then slice and enjoy the balanced textures and scents that make this recipe so memorable.
How to Switch It Up
There are a few small variations that keep the heart of the recipe intact while letting you play with texture and presentation. Below are practical, tested options that I often use depending on what is in the pantry or how many people I am feeding.
- Use thin slices of brie: If your brie is firmer, slice it thinly so it melts evenly into glossy puddles rather than clumping into large chunks.
- Adjust garlic scape quantity: For a milder garlic note use fewer garlic scapes, for a greener punch add an extra handful, but avoid overcrowding the pizza surface.
- Dust with semolina or cornmeal: Both work well under the dough, semolina gives a slightly grittier crunch while cornmeal offers a familiar, toasty note.
- Shape as a single large pizza: Instead of individual rounds, you can stretch into one larger pie; baking time may vary so watch for browning and bubbling.
- Freeze dough balls for later: Freeze individual dough portions wrapped tightly, then thaw in the fridge the day before you plan to bake for convenience without losing flavor.
Great Combinations for Brie and Garlic Scape Pizza
This pizza pairs beautifully with light sides and suits casual gatherings or relaxed weeknight meals. Below are thoughtful serving suggestions, seasonal pairings, and storage ideas to help you plan an occasion around this dish.
- Fresh green salad: A simple salad dressed with a light vinaigrette complements the creamy brie and bright garlic scapes, cutting through richness on the plate.
- Light vegetable sides: Grilled or roasted summer vegetables make an excellent accompaniment, staying in tune with the seasonal character of the scapes.
- Occasion ideas: Serve this pizza at an informal summer dinner, a weekend lunch, or a casual gathering where guests can share slices straight from a cutting board.
- Storage tips: Refrigerate leftover pizza in an airtight container for up to two days; reheat briefly in a hot oven to revive crispness rather than microwaving, which makes the crust chewy.
- Seasonal pairing: Because garlic scapes are a spring to early summer item, this pizza feels especially at home for late spring meals and light summer evenings.
- Serving style: Present the pizzas on a wooden board and let guests tear or slice as they like, encouraging casual sharing and conversation around the table.
FAQ
Conclusion
This recipe stands out because it turns a handful of fresh, seasonal ingredients into a memorable, shareable pizza that feels both simple and sophisticated. Try it when garlic scapes are in season and you want a dish that highlights bright vegetal notes against melting creamy brie. Make the dough ahead to free your time on the day of baking, and enjoy the ritual of stretching, topping, and sliding each pie onto a hot stone. It is forgiving, elegant, and a pleasure to serve to friends and family.
Brie and Garlic Scape Pizza
Equipment
- Electric Mixer
- Dough Hook
- Baking stone
- Peel or sheet pan
- Bench scraper
Ingredients
- Crust: 2 1/4 cups unbleached bread flour 3/4 teaspoon salt 1/2 teaspoon instant yeast 2 tablespoons olive oil 7/8 cup (7 ounces) water, ice cold (40°F) Semolina flour OR cornmeal for dusting Provide structure and chewiness to the pizza by combining unbleached bread flour with salt and instant yeast; olive oil and cold water help hydrate and tenderize the dough while semolina flour or cornmeal prevent sticking during baking.
- Topping: 8 oz. soft brie cheese 8-10 garlic scapes, thinly sliced on the bias (about 2 cups) olive oil sea salt freshly cracked black pepper Contribute creamy, savory, and aromatic topping elements with soft brie offering a rich, meltable base and thinly sliced garlic scapes imparting a bright, garlicky-onion flavor; a drizzle of olive oil plus sea salt and freshly cracked black pepper finish and balance the flavors.
Instructions
- Stir together the flour, salt, and instant yeast in the bowl of an electric mixer. Add the oil and the cold water and stir on low speed until the flour is all absorbed. Switch to the dough hook and mix on medium speed for 5 to 7 minutes, or as long as it takes to create a smooth, sticky dough. The dough should clear the sides of the bowl but stick to the bottom of the bowl. The finished dough will be springy, elastic, and sticky, not just tacky.: You will immediately notice the dry mixture has a faint, nutty aroma from the bread flour , and mixing them first ensures even distribution of the salt and instant yeast . As the dry ingredients break apart and mingle, you are setting the stage for uniform fermentation. Use the paddle or whisk to combine briefly so there are no pockets of yeast or salt that can create uneven rise. A common error is adding salt directly onto yeast, which can slow its action; mixing dry ingredients first prevents that. When finished, the bowl should look homogenous and light in texture.
- Transfer the dough to floured work surface. Prepare a baking dish by lining it with lightly oiled parchment paper. Cut the dough into 4 equal pieces. Sprinkle flour over the dough. Gently round each piece into a ball. If the dough sticks to your hands, lightly dip your hands in flour. Transfer the dough balls to the prepared dish, mist the dough generously with spray oil and slip the pan into a food-grade plastic bag or cover with plastic wrap.: At this stage the mixture takes on a shaggy, slightly wet look as the olive oil and ice cold water are drawn into the flour. The cold temperature of the water slows the yeast and helps maintain a long ferment window, which deepens flavor. Listen for the subtle change in sound as the mixer moves from dry scraping to soft clumps forming. If the dough seems too dry, add a teaspoon of water at a time; if too wet, a sprinkle of flour on your hands will help. Avoid overworking here, because you want the gluten to develop gently in the next step.
- Refrigerate overnight (or up to 3 days). At this point the dough can also be frozen; simply wrap each ball individually in plastic wrap and place inside a zippered freezer bag. Transfer to the refrigerator the day before you plan on baking them.: As you transition to the dough hook you will hear a change to a more elastic, cohesive sound. The dough should clear the sides of the bowl but stick to the bottom, a sign of proper hydration. Expect a springy, elastic, and sticky texture when you pull a bit between your fingers, and you may see faint strands forming when you stretch the dough. This gluten development is what gives the crust chew and structure. If the dough is not coming together after the time, give it another minute, but do not add much extra flour, which will make the final crust heavy. A common problem is overmixing, which can tighten the dough; stop when the dough shows elasticity and softness.
- Remove dough from refrigerator and rest at room temperature for 2 hours. On a lightly floured work surface, gently press the dough into flat disks about 1/2 inch thick and 5 inches in diameter.: The moment you set the dough down you will sense its coolness and tacky surface. Flour the surface lightly to prevent sticking, then prepare a baking dish lined with lightly oiled parchment. Cut the dough into 4 equal pieces using a bench scraper; you will hear a soft, muffled sound as you divide the dough. Gently round each piece into a ball, creating surface tension by tucking the edges underneath. This rounding helps with uniform proofing. If the dough sticks to your hands, a light dust of flour will help, but avoid smothering the dough with extra flour which can dry the surface. The balls should sit comfortably in the dish before the rest period.
- At least 45 minutes before making the pizza, place a baking stone either on the floor of the oven (for gas ovens), or on a rack in the lower third of the oven. Heat the oven as hot as possible, 500 to 550 degrees F. If you do not have a baking stone, you can use the back of a sheet pan, but do not preheat the pan.: As the dough chills the yeast works slowly, creating flavor without aggressive rise. You will notice the dough relax and flatten slightly as gases form. Covering the dough traps humidity, preventing a hard skin. Refrigeration for up to three days deepens complexity, and freezing is an option if you want longer storage. A typical mistake is leaving dough uncovered, which can form a tough, dry skin; always cover snugly before chilling.
- Generously dust a peel or the back of a sheet pan with semolina flour or cornmeal. Make the pizzas one at a time. Dip your hands, including the backs of your hands and knuckles, in flour and lift a piece of dough by getting under it with a pastry scraper. Very gently lay the dough across your fists and carefully stretch it by bouncing the dough in a circular motion on your hands, carefully giving it a little stretch with each bounce, and continue to stretch/toss until the dough is approximately 7" across and uniformly thin. If you have trouble tossing the dough, or if the dough keeps springing back, let it rest for 5 to 20 minutes so the gluten can relax, and try again.: Bringing the dough back to room temperature allows the gluten and yeast to awaken. You will feel the dough warm and slightly more pliable as it rests. Press each piece into a disk about 1/2 inch thick and 5 inches in diameter; this pre shaping loosens the dough and makes final stretching easier. If you skip the rest, the dough may snap back when you try to stretch it, because the gluten will still be tight. A mindful rest helps achieve a thinner, more even crust.
- Lay the stretched dough on the peel or pan, making sure there is enough semolina flour or cornmeal to allow it to slide. Lightly brush with olive oil, and poke it a few times with a fork so it doesn’t bubble.: At least 45 minutes before baking, place a baking stone on the oven floor for gas ovens or on a lower rack for electric ovens, and heat to as hot as possible, 500 to 550 degrees F. The stone absorbs intense heat which quickly crisp the bottom of the crust, producing that desirable leopard spotting and a snappy bite. If you are using a sheet pan instead, do not preheat it; the dough will cook differently and needs gentler heat from the air. A common pitfall is not preheating long enough, which yields a limp base rather than a crisp one.
- Spread 2 oz of brie cheese on each crust. You can also use slices if your brie is too firm to spread. Sprinkle evenly with 1/4 of garlic scapes. Season with sea salt and pepper.: The semolina or cornmeal creates a dry barrier so the dough will slide effortlessly onto the stone. As you lift and stretch the dough you will feel tension release and a soft popping sound when tiny air pockets give way. If the dough resists and springs back keep it resting for 5 to 20 minutes to relax the gluten. This patience prevents tearing and ensures an even, thin crust. Avoid pressing out all the air, you want bubbles to form while baking for texture.
- Gently slide the topped pizza onto the stone (or bake directly on the sheet pan) and close the door. Bake (two at a time) until the bottoms are lightly golden and the cheese is bubbly and just barely browned. Remove from the oven and transfer to a cutting board. Repeat with remaining pizzas. Let rest for 3 to 5 minutes before slicing and serving.: The brushing of olive oil gives a glossy base that helps the brie slide and melt without soaking the dough. Poking with a fork keeps large bubbles from forming and allows steam to escape, which helps the pizza remain flat and evenly baked. Visually you will see a faint sheen from the oil and a few fork marks that tell you the base is primed. A typical mistake is over poking and deflating too many pockets; a few pricks are enough.
- Spread 2 oz of brie cheese on each crust and sprinkle with 1/4 of garlic scapes, season with sea salt and pepper: When you place the brie it will begin to soften and glisten from the oven heat. Use a spoon to dollop soft cheese or thin slices if it is firmer. Scatter the thinly sliced garlic scapes so they nestle into the cheese without overcrowding. Add a light sprinkle of sea salt and a few twists of freshly cracked black pepper to balance the richness. Overloading with cheese or scapes can prevent proper bubbling and lead to a greasy top, so keep quantities as directed.
- Bake until the bottoms are lightly golden and the cheese is bubbly and just barely browned: Sliding the pizza onto the hot stone you will hear a satisfying sizzle. Watch for the bottom to develop golden brown spots and for the brie to bubble into glossy pools with tiny browned edges. The aroma should be intoxicatingly garlicky and toasty. Remove when the crust is crisp and the cheese shows gentle browning. A common error is leaving the pizza too long, which can dry out the delicate brie .
- Remove from oven, transfer to a cutting board, let rest for 3 to 5 minutes before slicing and serving: Resting gives the melted brie time to settle so slices hold together cleanly. You will notice the cheese thicken slightly and the crust cool just enough to handle. Cutting too soon causes the cheese to run and makes messy slices. Let the pizza rest briefly, then slice and enjoy the balanced textures and scents that make this recipe so memorable.
Notes
- Use thin slices of brie: If your brie is firmer, slice it thinly so it melts evenly into glossy puddles rather than clumping into large chunks.
- Adjust garlic scape quantity: For a milder garlic note use fewer garlic scapes, for a greener punch add an extra handful, but avoid overcrowding the pizza surface.
- Dust with semolina or cornmeal: Both work well under the dough, semolina gives a slightly grittier crunch while cornmeal offers a familiar, toasty note.
- Shape as a single large pizza: Instead of individual rounds, you can stretch into one larger pie; baking time may vary so watch for browning and bubbling.
- Freeze dough balls for later: Freeze individual dough portions wrapped tightly, then thaw in the fridge the day before you plan to bake for convenience without losing flavor.