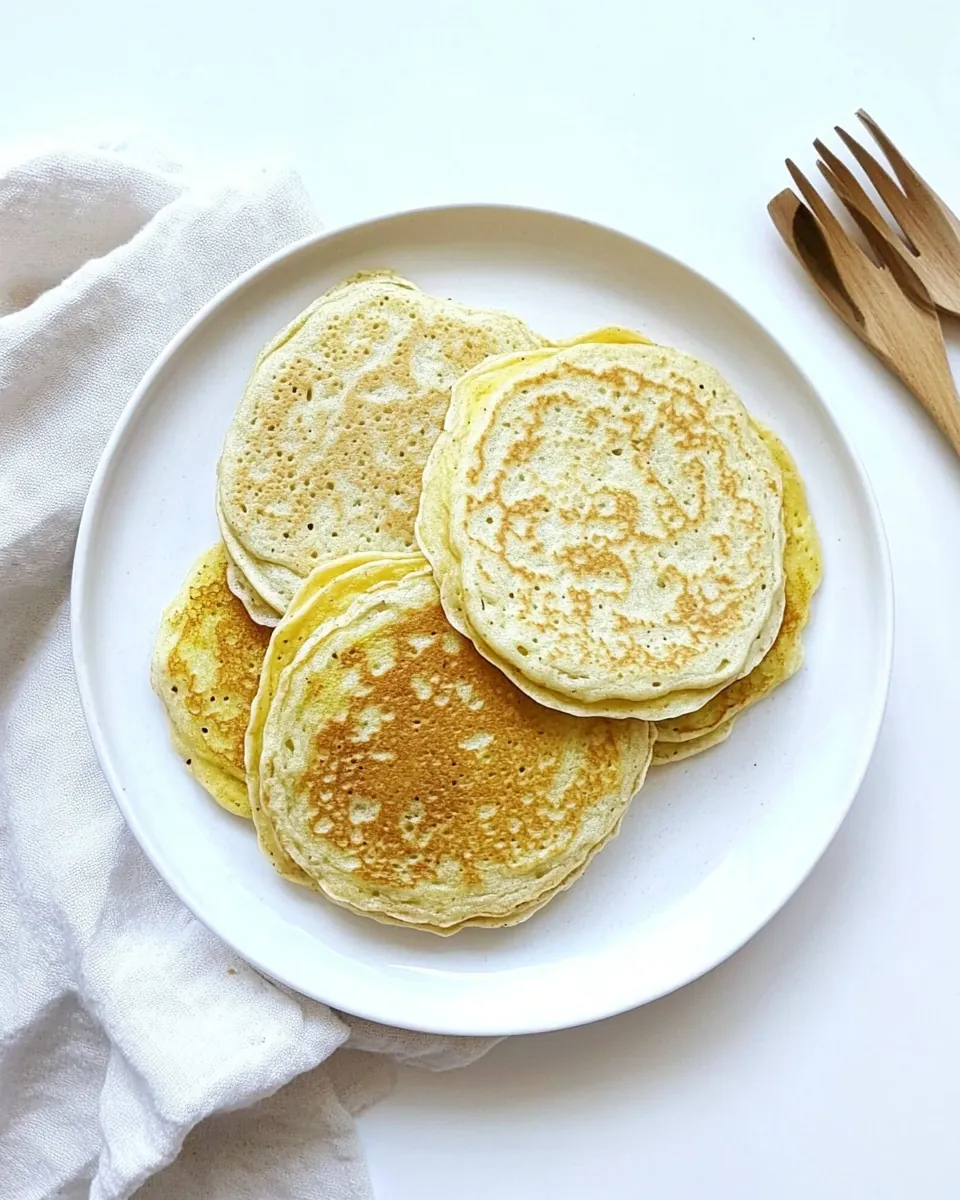
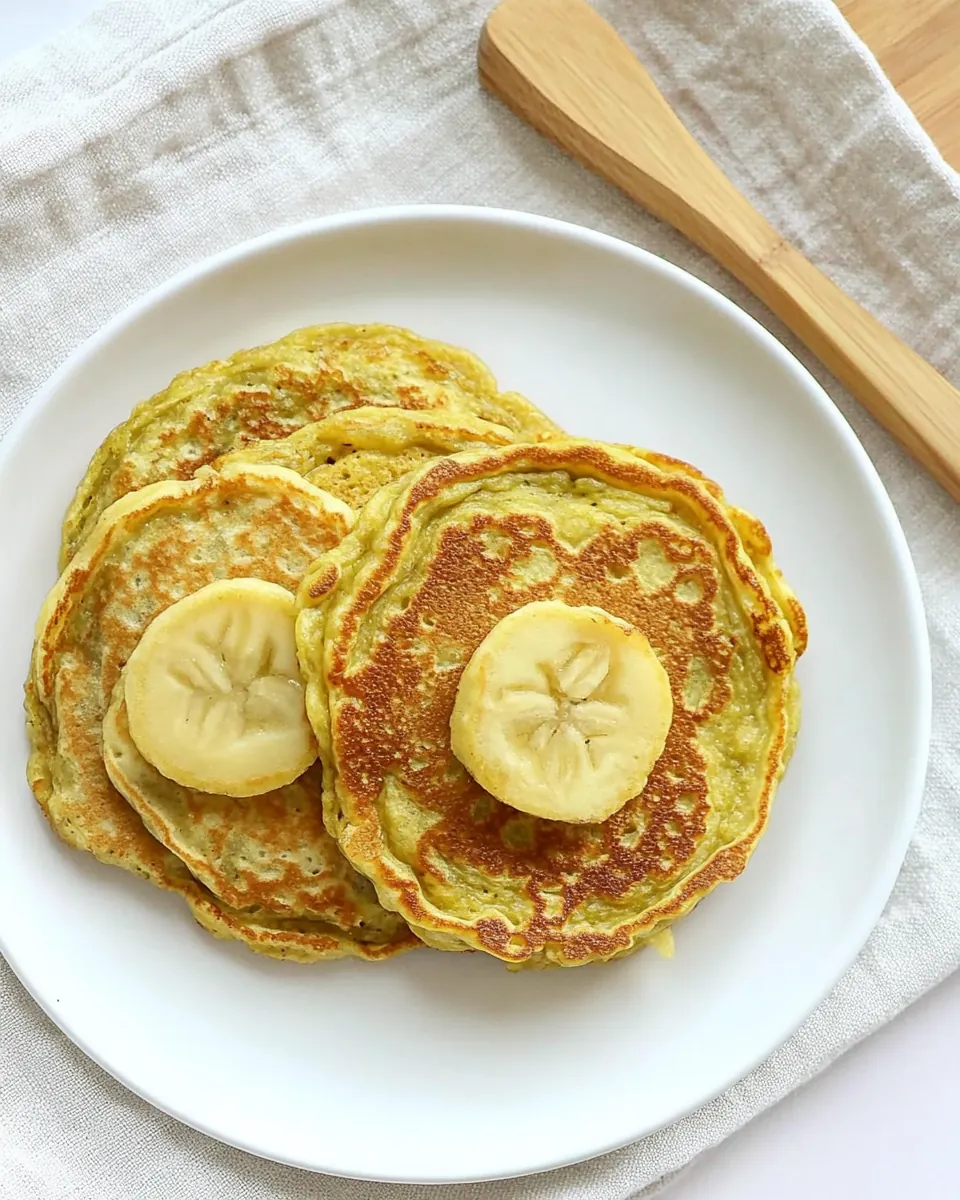
2 Ingredient Baby Pancakes
2 Ingredient Baby Pancakes began as one of those tiny kitchen victories that I still brag about to friends with littles in tow. The first time I made them, I had a sleepy toddler strapped to my hip and one very ripe banana sulking on the counter, and I needed breakfast that was quick, wholesome, and forgiving. I remember the batter being laughably thin, and the first pancake folding under my spatula like a soft little pillow, but the taste was pure success, and my kiddo gobbled them up with applesauce like they were a treat.
I have a soft spot for recipes that turn a few humble ingredients into something that feels intentional, and 2 Ingredient Baby Pancakes fits that bill. Over the years I’ve tweaked the technique, learning how to coax a gentle golden color, when to flip, and how to store the extras so they are just as tender the next day. I tell stories about the time I attempted to double the batch at midnight and ended up with twelve tiny pancakes and a very satisfied neighbor. These pancakes have become my go to for busy mornings, quick snacks, and for teaching little hands how to help with simple cooking tasks. They are forgiving, quick, and somehow comfortingly nostalgic despite being so modern in their simplicity.
Recipe Snapshot
13 mins
5 mins
8 mins
Easy
150 kcal
American
Gluten-Free, Paleo
Breakfast
Vitamix Blender, Green Pan Non Stick Pan, Storage Containers
What Makes This 2 Ingredient Baby Pancakes Special
They are ridiculously simple
I love how 2 Ingredient Baby Pancakes strips breakfast back to essentials. With just banana and egg, you can make something wholesome in minutes. When time is scarce I turn to this recipe because the ingredient list is short and the process is nearly foolproof, so you can focus on feeding little hands without fuss.
Texture that surprises
The texture of these pancakes is tender and custardy, not cakey. I appreciate the contrast between the soft interior and the lightly browned exterior. When you cook them on a well seasoned pan they develop a gentle caramelization that adds a hint of sweetness and depth, which makes them feel special even though they are made from just two primary ingredients.
Highly adaptable
I often swap in mashed roasted sweet potato or a spoonful of pumpkin puree for variety, and I’ve blended in a handful of baby spinach for a green boost. Each variation keeps the same easy spirit while adding nutrients and color. This flexibility is why I keep it in my rotation when planning meals for toddlers and older kids alike.
Great for learning and portion control
Because the batter is very runny, spooning out tablespoon sized pancakes yields perfectly portioned mini servings. I use these pancakes to teach my kiddo about sizes and counting. They are ideal for little mouths and for trying new toppings without committing to a full sized pancake.
Storage and make ahead friendly
I often make a batch and refrigerate or freeze extras. Reheating briefly keeps them tender, and they make busy mornings far less stressful. Knowing I can rely on this recipe means one less thing to think about when planning a day with a small child.
What Goes Into 2 Ingredient Baby Pancakes
These ingredients are intentionally minimal, each playing a clear role. The banana brings natural sweetness, moisture, and structure when mashed, while the egg binds and gives the pancakes their custardy texture. Optional additions and cooking fat are there to tweak texture and prevent sticking. Together they produce a tender, easy to eat pancake perfect for tiny appetites.
- 1/4 cup mashed very ripe banana (about 1 small): Mashed very ripe banana provides natural sweetness and moisture, helping bind the batter while adding gentle flavor and nutrients; its soft texture makes it easy to mash smooth for even pancake consistency. Use about a quarter cup from one small banana to keep pancakes tender without needing added sugar.
- 1 egg: Whisked egg contributes structure, protein, and lift by helping the batter set and hold together during cooking; it also adds richness and helps achieve a light, fluffy interior. Beaten thoroughly before combining for an even texture throughout the pancakes.
- 1 teaspoon baking soda () (optional): Leavening from baking soda (optional) produces carbon dioxide when activated, creating tiny bubbles that lighten the pancakes and improve rise; use sparingly to avoid an overly alkaline taste. Add only if additional fluffiness is desired, and ensure some acidity is present to fully activate it.
- Butter or oil, for cooking: Butter or oil for cooking prevents sticking, promotes even browning, and adds a subtle richness or neutral fat depending on choice; apply a thin layer to the pan to control surface heat and texture. Replenish between batches as needed to maintain consistent cooking and color.
- Toppings including applesauce, yogurt, and/or diced fruit: Toppings including applesauce, yogurt, and/or diced fruit add flavor variation, moisture, and nutritional value while making pancakes more appealing and palatable for babies; choose soft textures and mild flavors to suit developmental stage. Serve in small portions and cut fruits finely to reduce choking risk.
Step by Step Guide for 2 Ingredient Baby Pancakes
These pancakes come together quickly, and the steps are straightforward. Take your time with the pan temperature and flipping technique because the pancakes are delicate. Below I expand each instruction with sensory cues, reasoning, and common pitfalls so you know exactly what to watch for.
- Place a nonstick or cast iron skillet or griddle over medium heat. (I prefer nonstick.) Add a small slice of butter or oil.: You will hear the faint hiss as the pan warms, and a tiny shimmer appears on the surface when it is ready, which tells you it can brown the pancakes gently. I prefer a nonstick pan because these pancakes are fragile and the nonstick surface makes flipping easier, but a well seasoned cast iron also works and gives excellent color. If the pan is too cool the batter will spread too thin without browning, while too hot will char the edges before the center sets. Avoid crowding the pan so each pancake has room and cooks evenly.
- Mash the banana with a fork in a medium bowl. Crack the eggs into the same bowl and stir together. The batter will be very runny.: The fat will sizzle softly when it hits a hot pan, releasing a comforting scent that signals the pan is ready for batter. Use just enough to coat the surface, spreading it with a spatula so there is a thin, even sheen, which helps create a golden rim on the pancakes. Too much fat results in greasy pancakes, while too little can make them stick and tear when you flip. If you notice the fat smoking, lower the heat slightly and wipe excess away.
- Spread the butter or oil with a spatula to coat the bottom of the pan. Place 1 tablespoon batter into the pan to make small pancakes. Cook until the edges start to set and the bottoms are lightly browned, about 1 minute.: As you mash the banana , its aroma will grow sweeter and the texture will turn silky; aim for very few lumps for the smoothest batter. The mashed fruit provides both flavor and moisture, so mash thoroughly until it reaches a spreadable consistency. A common misstep is leaving large chunks, which can cause uneven cooking and dense spots. If your fruit is overly soft and watery, drain briefly on a paper towel to avoid a batter that is too loose.
- Flip carefully and cook for an additional minute. (These are delicate so try to get your spatula halfway under the pancake, then carefully turn over.): When you introduce the egg to the mashed fruit, you will see the mixture become more uniform and slightly glossy, which signals cohesion. Stir until blended; the batter will be very runny, but that is expected. This viscosity helps create the custardy interior. Overmixing is not a concern here, but under mixing can leave streaks of uncooked egg. If the batter separates, whisk vigorously to recombine before cooking.
- Remove from pan—the pancakes will be very soft and tender—and serve with any desired toppings.: Running a thin layer across the surface creates a uniform contact point so each pancake browns evenly. The fat should gleam without pooling. If you see pooled fat, tilt the pan and blot the excess with a paper towel. Uneven coating can cause some pancakes to brown too quickly while others remain pale, so take a few seconds to ensure an even film.
- Place 1 tablespoon batter into the pan to make small pancakes: The spooned batter will spread slightly and settle, forming small round disks that cook quickly. Look for tiny bubbles at the edges and a change in surface from glossy to more matte, these cues tell you the bottom is setting. Using a tablespoon ensures uniform sizes that fit small hands. Pouring too much batter makes them harder to flip and more likely to break, while too little may result in pancakes that overcook before the center is cooked through.
- Cook until the edges start to set and the bottoms are lightly browned, about 1 minute: Watch the edges for a subtle firming and the bottom for a gentle golden color, these signs indicate the pancake is ready to flip. You will hear a faint quiet as steam escapes, and the surface will shift from glossy to more textured. If you wait too long you risk overly browned bottoms and a center that becomes dry, while flipping too soon leaves the pancake undercooked. Mistaking color under bright lights can happen, so gently lift an edge to peek at the bottom.
- Flip carefully and cook for an additional minute: A soft sound and a slight puff when you flip indicate the interior is set but tender. Slide your spatula about halfway under the pancake so you support it while turning, this reduces tearing. After flipping you want a short final cook to finish the center without drying it; listen for gentle sizzling and watch for an even light brown. Rushing the flip or using too small a spatula are common mistakes that can break the pancake.
- Remove from pan—the pancakes will be very soft and tender—and serve with any desired toppings: When you transfer them, notice the warm sweet aroma and the delicate spring when you touch the center. These pancakes are best enjoyed right away, with toppings like applesauce or yogurt that add moisture and familiar flavors for small eaters. If you plan to store them, cool fully on a rack before refrigerating to prevent sogginess. A typical error is stacking them hot which traps steam and makes them soggy, so always cool briefly before containment.
Tips and Variations
These tips come from repeated toddler breakfasts and kitchen experiments. They cover storage, texture tweaks, and flavor variations so you can adapt 2 Ingredient Baby Pancakes to your pantry and preferences.
- Cool fully before storing — Let pancakes cool on a wire rack to avoid trapped steam that makes them soggy in the fridge.
- Freeze in single layers — Freeze pancakes flat on a tray first, then stack with parchment between them in a bag to prevent sticking and allow easy portioning.
- Swap in sweet potato or pumpkin — Use mashed roasted sweet potato or canned pumpkin puree in place of banana for seasonal variety and extra nutrients.
- Add a handful of greens — Blend in baby spinach for a mild green boost; it changes color but not the tender texture, which helps sneak vegetables into picky eaters meals.
- Optional baking soda for lift — A small amount of baking soda lightens the crumb if you prefer a slightly airier pancake, use sparingly to avoid fragility.
- Gentle reheating — Reheat briefly in a warm pan or microwave on low power to preserve tenderness without drying them out.
Pairing Suggestions for 2 Ingredient Baby Pancakes
These pancakes pair well with gentle, familiar flavors and small portion side items. Below are ideas for serving occasions, storage, and seasonal pairings so you can plan meals around toddlers schedules and family routines.
- Serve with applesauce — A classic pairing, applesauce adds moisture and a mild fruity sweetness that toddlers often welcome, making it a comforting breakfast or snack combo.
- Top with plain yogurt — A spoonful of plain yogurt adds creaminess and a slight tang that balances the sweet notes of the banana, and provides extra protein for a more filling bite.
- Add diced soft fruit — Tiny pieces of ripe fruit give fresh texture and encourage kids to explore different flavors while keeping bites small and safe.
- Occasion-friendly — These pancakes are ideal for everyday breakfasts, light brunches, or as part of a packed toddler snack for outings, because they are easy to portion and transport.
- Storage tips — Refrigerate up to three days in an airtight container, or freeze in a single layer with parchment between pancakes for long term storage and quick meal prep.
- Seasonal swaps — In autumn use pumpkin puree or roasted sweet potato for a seasonal twist, and in spring or summer top with seasonal berries for freshness.
- Serving size guidance — The recipe yields small pancakes perfect for little appetites; offer two to three as a starter portion and adjust as the child grows.
FAQ
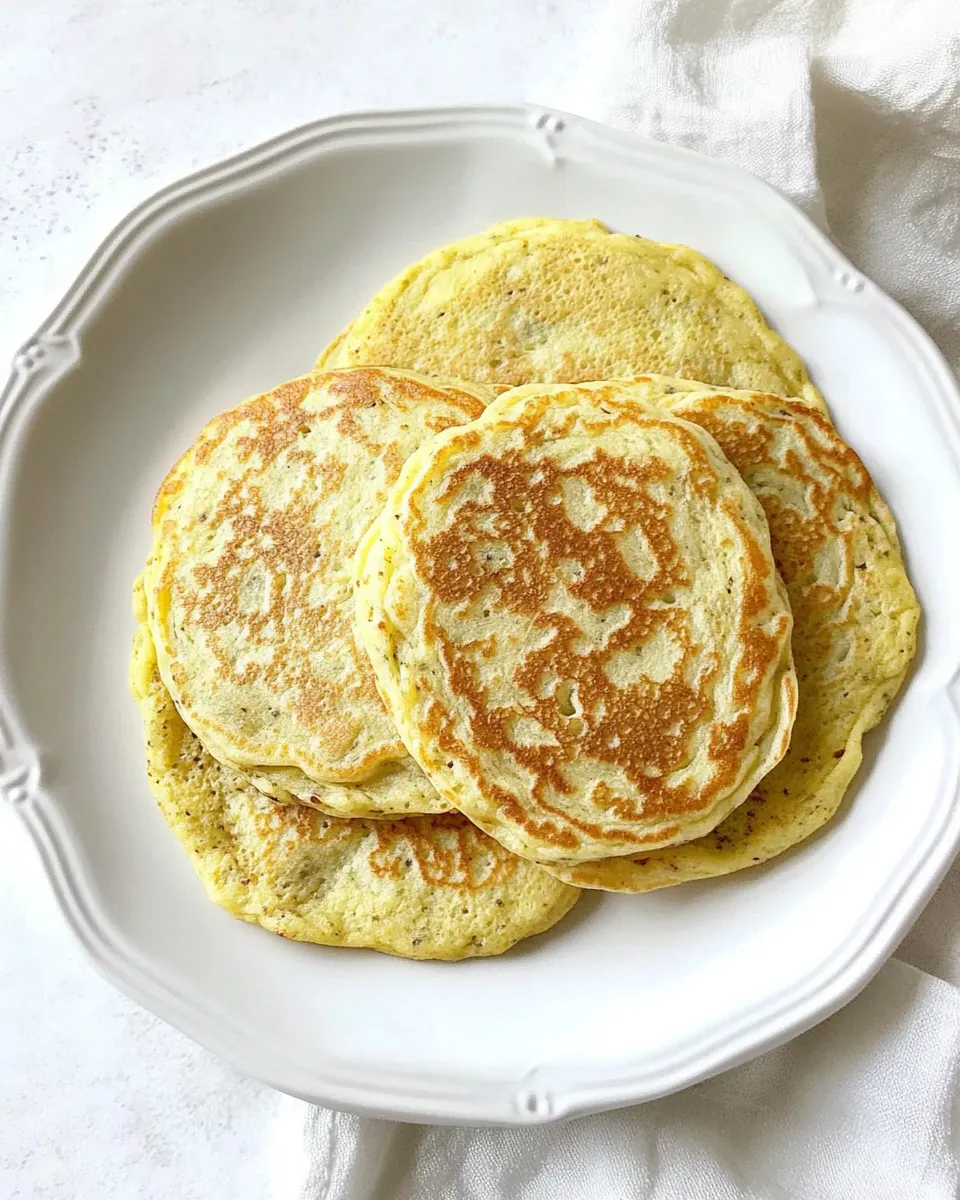
Conclusion
These 2 Ingredient Baby Pancakes shine because they turn a humble banana and egg into a tender, toddler friendly treat that is quick and adaptable. Give them a try during a busy morning or as a calm afternoon snack, and you may find they become a trusted staple in your routine. They are forgiving, easy to store, and welcome endless variations, so have fun experimenting and enjoy the small victories that come with feeding little ones.
2 Ingredient Baby Pancakes
Equipment
- Vitamix Blender
- Green Pan Non-Stick Pan
- Storage Containers
Ingredients
- 1/4 cup mashed very ripe banana (about 1 small) Mashed very ripe banana provides natural sweetness and moisture, helping bind the batter while adding gentle flavor and nutrients; its soft texture makes it easy to mash smooth for even pancake consistency. Use about a quarter cup from one small banana to keep pancakes tender without needing added sugar.
- 1 egg Whisked egg contributes structure, protein, and lift by helping the batter set and hold together during cooking; it also adds richness and helps achieve a light, fluffy interior. Beaten thoroughly before combining for an even texture throughout the pancakes.
- 1 teaspoon baking soda (optional) Leavening from baking soda (optional) produces carbon dioxide when activated, creating tiny bubbles that lighten the pancakes and improve rise; use sparingly to avoid an overly alkaline taste. Add only if additional fluffiness is desired, and ensure some acidity is present to fully activate it.
- Butter or oil, for cooking Butter or oil for cooking prevents sticking, promotes even browning, and adds a subtle richness or neutral fat depending on choice; apply a thin layer to the pan to control surface heat and texture. Replenish between batches as needed to maintain consistent cooking and color.
- Toppings including applesauce, yogurt, and/or diced fruit Toppings including applesauce, yogurt, and/or diced fruit add flavor variation, moisture, and nutritional value while making pancakes more appealing and palatable for babies; choose soft textures and mild flavors to suit developmental stage. Serve in small portions and cut fruits finely to reduce choking risk.
Instructions
- Place a nonstick or cast iron skillet or griddle over medium heat. (I prefer nonstick.) Add a small slice of butter or oil.: You will hear the faint hiss as the pan warms, and a tiny shimmer appears on the surface when it is ready, which tells you it can brown the pancakes gently. I prefer a nonstick pan because these pancakes are fragile and the nonstick surface makes flipping easier, but a well seasoned cast iron also works and gives excellent color. If the pan is too cool the batter will spread too thin without browning, while too hot will char the edges before the center sets. Avoid crowding the pan so each pancake has room and cooks evenly.
- Mash the banana with a fork in a medium bowl. Crack the eggs into the same bowl and stir together. The batter will be very runny.: The fat will sizzle softly when it hits a hot pan, releasing a comforting scent that signals the pan is ready for batter. Use just enough to coat the surface, spreading it with a spatula so there is a thin, even sheen, which helps create a golden rim on the pancakes. Too much fat results in greasy pancakes, while too little can make them stick and tear when you flip. If you notice the fat smoking, lower the heat slightly and wipe excess away.
- Spread the butter or oil with a spatula to coat the bottom of the pan. Place 1 tablespoon batter into the pan to make small pancakes. Cook until the edges start to set and the bottoms are lightly browned, about 1 minute.: As you mash the banana , its aroma will grow sweeter and the texture will turn silky; aim for very few lumps for the smoothest batter. The mashed fruit provides both flavor and moisture, so mash thoroughly until it reaches a spreadable consistency. A common misstep is leaving large chunks, which can cause uneven cooking and dense spots. If your fruit is overly soft and watery, drain briefly on a paper towel to avoid a batter that is too loose.
- Flip carefully and cook for an additional minute. (These are delicate so try to get your spatula halfway under the pancake, then carefully turn over.): When you introduce the egg to the mashed fruit, you will see the mixture become more uniform and slightly glossy, which signals cohesion. Stir until blended; the batter will be very runny, but that is expected. This viscosity helps create the custardy interior. Overmixing is not a concern here, but under mixing can leave streaks of uncooked egg. If the batter separates, whisk vigorously to recombine before cooking.
- Remove from pan—the pancakes will be very soft and tender—and serve with any desired toppings.: Running a thin layer across the surface creates a uniform contact point so each pancake browns evenly. The fat should gleam without pooling. If you see pooled fat, tilt the pan and blot the excess with a paper towel. Uneven coating can cause some pancakes to brown too quickly while others remain pale, so take a few seconds to ensure an even film.
- Place 1 tablespoon batter into the pan to make small pancakes: The spooned batter will spread slightly and settle, forming small round disks that cook quickly. Look for tiny bubbles at the edges and a change in surface from glossy to more matte, these cues tell you the bottom is setting. Using a tablespoon ensures uniform sizes that fit small hands. Pouring too much batter makes them harder to flip and more likely to break, while too little may result in pancakes that overcook before the center is cooked through.
- Cook until the edges start to set and the bottoms are lightly browned, about 1 minute: Watch the edges for a subtle firming and the bottom for a gentle golden color, these signs indicate the pancake is ready to flip. You will hear a faint quiet as steam escapes, and the surface will shift from glossy to more textured. If you wait too long you risk overly browned bottoms and a center that becomes dry, while flipping too soon leaves the pancake undercooked. Mistaking color under bright lights can happen, so gently lift an edge to peek at the bottom.
- Flip carefully and cook for an additional minute: A soft sound and a slight puff when you flip indicate the interior is set but tender. Slide your spatula about halfway under the pancake so you support it while turning, this reduces tearing. After flipping you want a short final cook to finish the center without drying it; listen for gentle sizzling and watch for an even light brown. Rushing the flip or using too small a spatula are common mistakes that can break the pancake.
- Remove from pan—the pancakes will be very soft and tender—and serve with any desired toppings: When you transfer them, notice the warm sweet aroma and the delicate spring when you touch the center. These pancakes are best enjoyed right away, with toppings like applesauce or yogurt that add moisture and familiar flavors for small eaters. If you plan to store them, cool fully on a rack before refrigerating to prevent sogginess. A typical error is stacking them hot which traps steam and makes them soggy, so always cool briefly before containment.
Notes
- Cool fully before storing — Let pancakes cool on a wire rack to avoid trapped steam that makes them soggy in the fridge.
- Freeze in single layers — Freeze pancakes flat on a tray first, then stack with parchment between them in a bag to prevent sticking and allow easy portioning.
- Swap in sweet potato or pumpkin — Use mashed roasted sweet potato or canned pumpkin puree in place of banana for seasonal variety and extra nutrients.
- Add a handful of greens — Blend in baby spinach for a mild green boost; it changes color but not the tender texture, which helps sneak vegetables into picky eaters meals.
- Optional baking soda for lift — A small amount of baking soda lightens the crumb if you prefer a slightly airier pancake, use sparingly to avoid fragility.
- Gentle reheating — Reheat briefly in a warm pan or microwave on low power to preserve tenderness without drying them out.