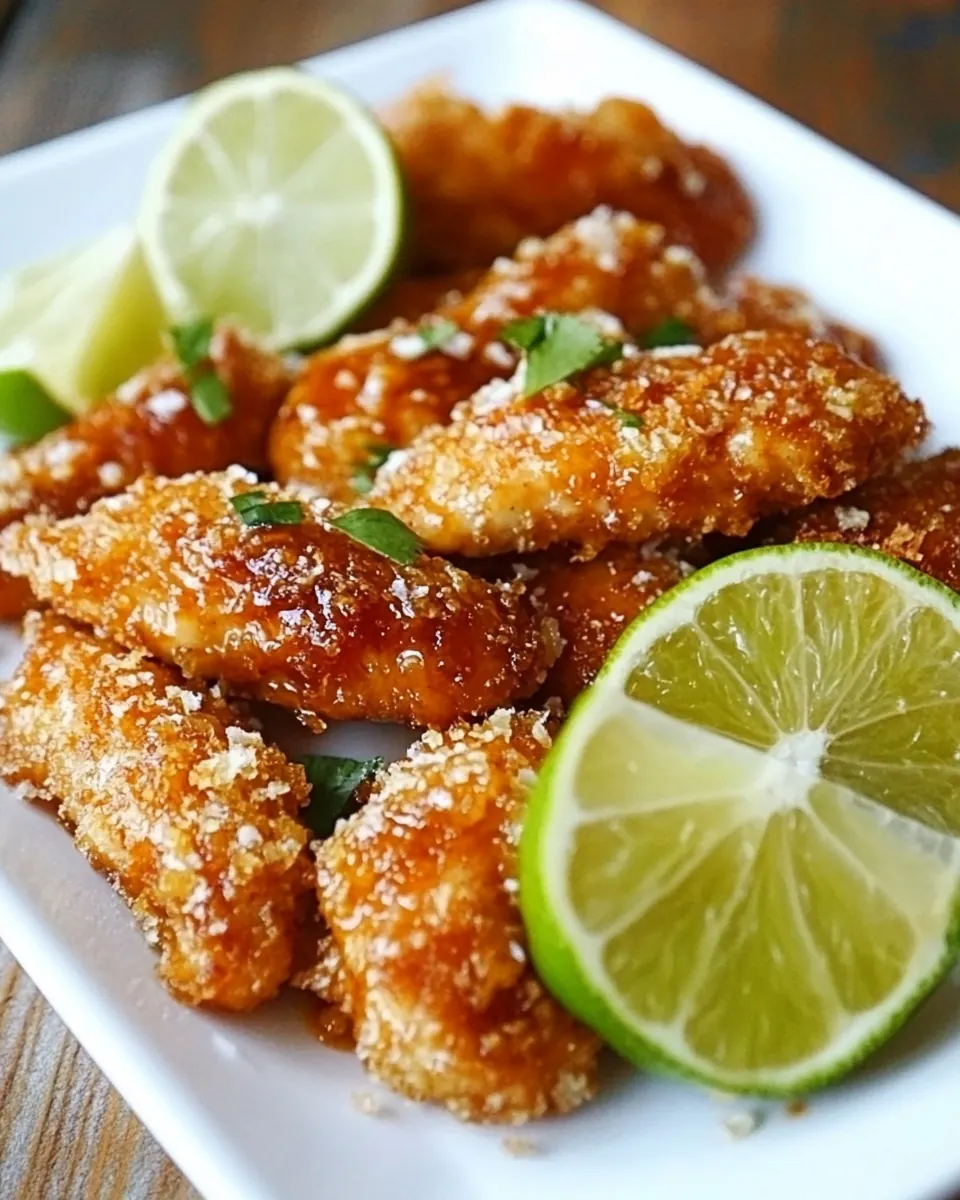
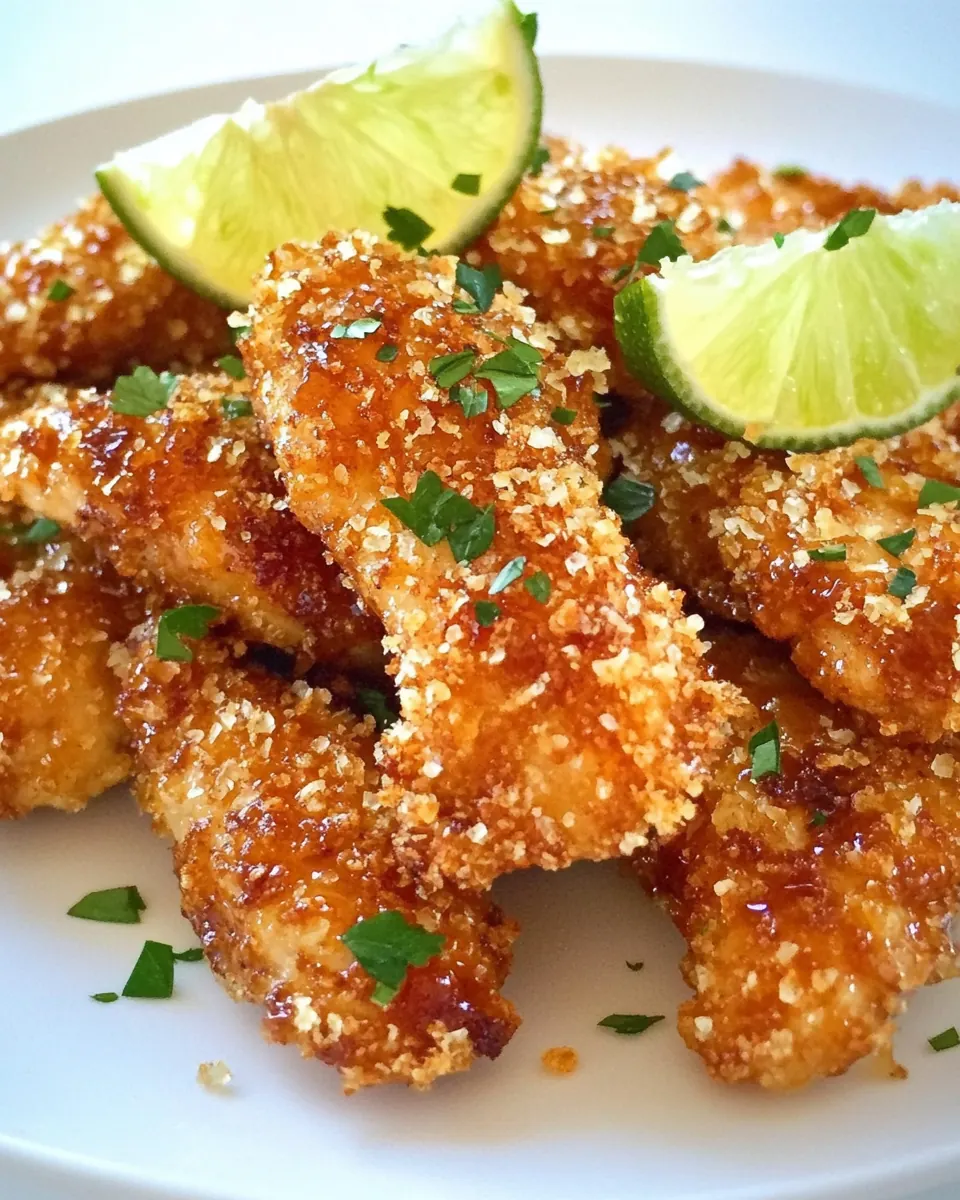
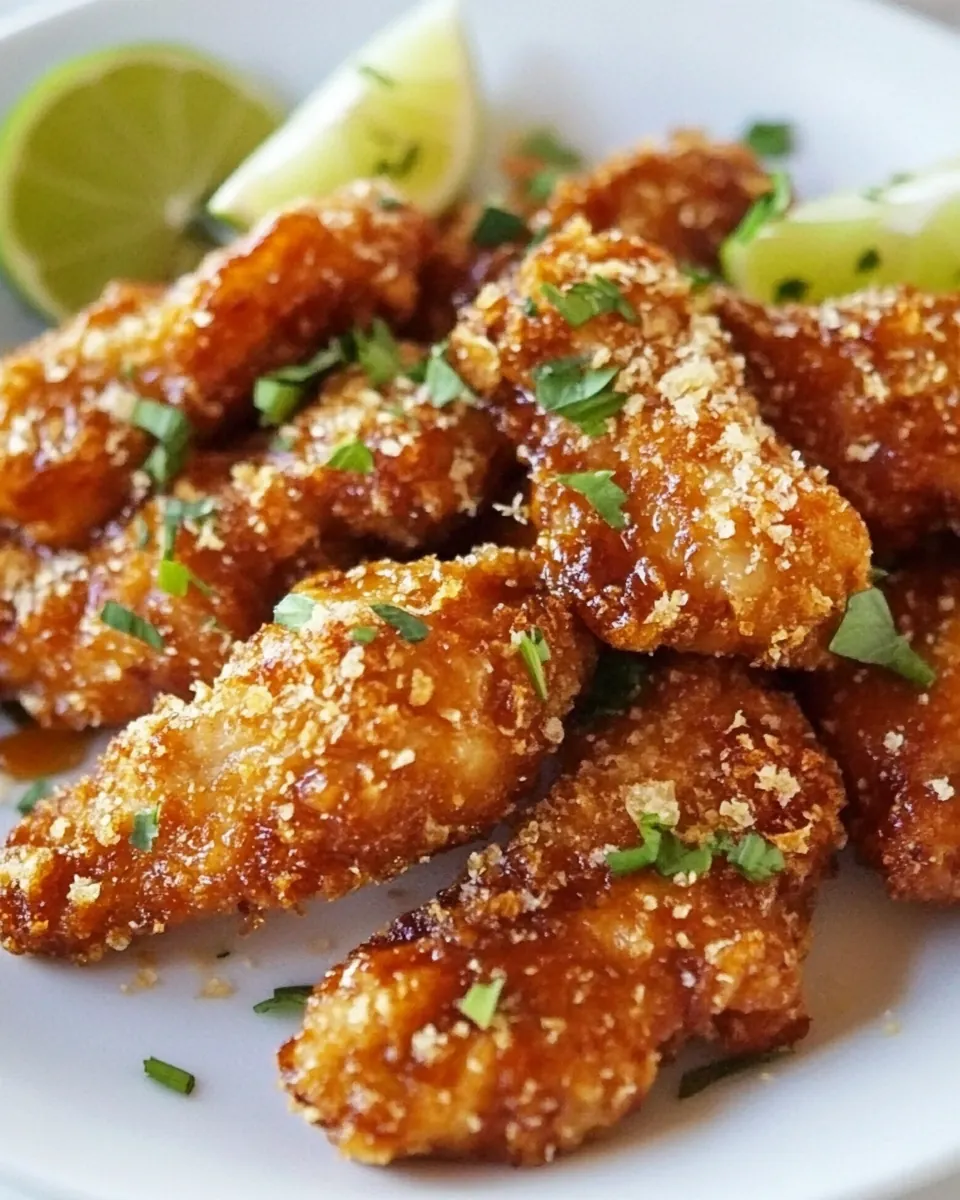
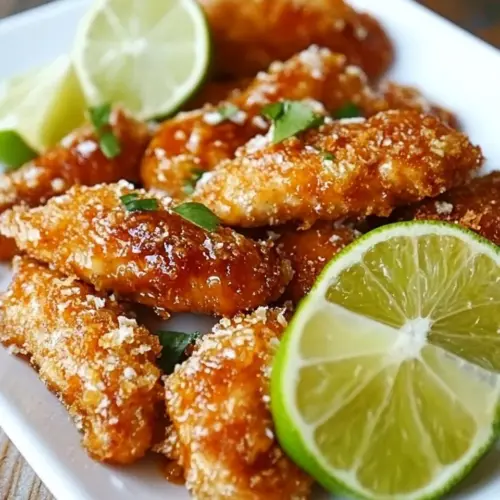
Crunchy Honey Lime Chicken
Crunchy Honey Lime Chicken is the kind of recipe I reach for when I want something bright, crunchy, and impossibly simple to pull together after a long day. I remember the first time I paired honey and lime with crispy coated chicken tenders, how the sharp citrus cut through the sweet syrup and the crumbs held their crunch even as the sauce added a glossy finish. That interplay of textures and flavors hooked me instantly, and it has become a fast favorite whenever friends drop by or I need a cheery weeknight dinner.
I like to tell the story of the recipe as a string of small discoveries. One evening I had leftover panko and a jar of honey, plus a bag of chicken tenders in the freezer. I wanted to avoid heavy sauces, so I used lime to brighten the dish, and the result felt both fresh and indulgent. Ever since that night I have swapped between stovetop and oven methods depending on how much hands on time I have, and both yield crunchy, satisfying results.
Recipe Snapshot
25 mins
15 mins
10 mins
Easy
350 kcal
American
Gluten-Free, Paleo
Dinner
Stainless steel skillet, Tongs, Wire rack, Rimmed baking sheet
Why This Crunchy Honey Lime Chicken Works
Crunchy Texture That Holds Up
I love how the panko breadcrumbs give the chicken a pronounced crunch without weighing it down. Panko keeps its structure, so even when you squeeze lime over the strips, you still get crispy bites. I pay attention to toasting the panko or using high heat briefly because that extra step deepens flavor and builds a better crust.
Bright Honey Lime Balance
The combination of honey and lime is simple, yet it achieves a perfect balance of sweet and acidic. I find that drizzling the honey at the end keeps the sweetness fresh and sheen like a glaze, while the lime wedges let everyone control the brightness. It is an easy way to dial the flavor to personal taste.
Flexible Cooking Methods
Whether I am pan frying or roasting in the oven, the technique adapts well. For busy nights I use the oven method to free up time, and for when I want to watch the browning I use the stovetop. That flexibility means this recipe fits both relaxed weekends and hectic weeknights.
Pantry Friendly Ingredients
I’m always drawn to dishes that rely on staples. The flour, panko breadcrumbs, an egg, and common seasonings come together to create something elevated without a trip to the store. It is one of my go to recipes when I want to impress with minimal fuss.
Kid Friendly, Yet Adult Enough
My family loves this because it pleases picky eaters while still offering grown up flavors. The crunchy texture appeals across ages, and offering lime wedges means people can add zest as they like. This dish is great for casual dinners and small gatherings, and it always racks up compliments.
Crunchy Honey Lime Chicken Shopping List
These ingredients are chosen for texture balance and flavor clarity. The coating trio of flour, egg, and panko breadcrumbs creates a sturdy crust, while seasonings like chili powder and cayenne pepper add warmth. The finishing duo of lime and honey lends brightness and a glossy sweet finish that ties everything together.
- 1/4 cup all purpose flour: Coat lightly to create a thin barrier that helps dredged chicken achieve an even, golden crust when fried or baked, while also aiding adhesion for egg wash and breadcrumbs.
- 1 teaspoon chili powder: Add warmth and mild heat to seasonings, enhancing overall flavor complexity and complementing the lime and honey for a balanced sweet-spicy profile.
- 3/4 teaspoon kosher salt: Season generously to bring out the natural flavors of the chicken and other ingredients, while helping to tenderize slightly and ensure a well-rounded savory base.
- 1/2 teaspoon freshly ground black pepper: Provide sharp, aromatic heat that brightens the dish and adds subtle complexity to the savory-sweet balance, enhancing the final bite without overpowering.
- 1/4 teaspoon cayenne pepper: Contribute concentrated spicy heat to build a layered kick, allowing precise control over the overall spiciness of the finished chicken.
- 1 large egg: Bind coatings by creating a sticky surface for breadcrumbs to adhere to, while adding a touch of richness that improves mouthfeel and helps crust formation.
- 2 tablespoons milk: Thin the egg wash for a smoother, more even coating that promotes breadcrumb adhesion and can slightly tenderize the surface of the chicken.
- 1 pound boneless skinless chicken tenders: Serve as the main protein, offering tender texture and a mild flavor that soaks up the honey-lime glaze and crispy breadcrumb coating effectively.
- 1 1/2 cups panko breadcrumbs, toasted if desired: Provide a crunchy, golden coating that contrasts with the tender chicken; toasting deepens flavor and adds extra crunch for a satisfying texture.
- 2 tablespoons (or more) olive oil (for stovetop cooking): Facilitate shallow frying in a skillet to help the breadcrumb crust crisp evenly and develop a rich, savory flavor through controlled browning.
- 2 large limes, cut into wedges: Add bright, acidic citrus to finish the dish, cutting through richness and balancing sweetness while providing fresh aroma and a zesty finish.
- 1/4 cup honey: Sweeten and glaze the chicken, creating a sticky, glossy coating that pairs with lime to form a balanced sweet-tart finishing sauce.
Step by Step Guide for Crunchy Honey Lime Chicken
These steps walk you through turning pantry staples into crunchy, bright Crunchy Honey Lime Chicken. I prefer to read each step fully before starting so I can set up my dipping and coating stations. Keep your tools close, and plan to work in batches so everything finishes hot and crisp.
- In a medium bowl, whisk together the flour, chili powder, salt, pepper and cayenne. Add the egg and milk and whisk until smooth. Add the chicken tenders to the flour mixture and stir to coat well.: The moment you start whisking you will notice the spices bloom in the flour , releasing a warm, fragrant aroma that hints at the final flavor. As the egg and milk emulsify with the dry mix, you will see a slightly thickened batter form, smooth and glossy. When you add the chicken tenders, press them into the mixture so the coating adheres evenly; this step matters because uneven coating leads to bare spots after cooking. A common mistake is to overcrowd the bowl, which prevents proper contact and causes clumping. If that happens, work in smaller batches so each tender is fully covered. Visually you want an even pale coat, with no big globs of batter, and the texture should feel tacky to the touch but not dripping.
- Place the panko in a medium sized bowl. Set a plate next to the panko. Using your fingers or a set of tongs, dip and thoroughly coat each piece of chicken in the panko crumbs. Set the crumb coated chicken strips on the plate.: When the panko breadcrumbs meet the tacky surface of the coated chicken , they should cling immediately, producing a textured, feathery crust. You will hear a faint rustling as you press the crumbs on, and the visual cue is a uniformly covered strip with a dry looking exterior. Press gently but firmly so the panko nests into the batter rather than sitting loosely on top. A frequent error is not shaking off excess crumbs, which can burn in the pan and create an uneven crust; tap lightly to remove loose crumbs. If your panko seems soggy, spread it on a sheet and toast it lightly to restore crispness before coating.
- STOVE TOP DIRECTIONS: Warm the oil in a large stainless steel skillet over medium high heat. When the oil is shimmering, use the tongs to carefully and quickly place half of the chicken in the skillet in a single layer. Let the chicken cook undisturbed for about 2 minutes, until it has lightly browned, then flip it over and cook the second side for 2 minutes (or until cooked through).: Warm the oil in a large stainless steel skillet over medium high heat. When the oil is shimmering, use the tongs to carefully and quickly place half of the chicken in the skillet in a single layer. Let the chicken cook undisturbed for about 2 minutes, until it has lightly browned, then flip it over and cook the second side for 2 minutes (or until cooked through). : As the olive oil warms you will see a shimmering surface and smell a faint fruity scent, which signals the pan is ready. Adding the strips should create an immediate sizzle, and that sound is your best indicator that a golden crust is forming. Letting the pieces cook undisturbed is crucial for developing even browning; nudging them too soon tears the crust and causes sticking. When you flip, the underside should be a warm golden brown with a crisp edge. A common mistake is crowding the skillet, which drops the oil temperature and leads to soggy crusts, so cook in batches. Use a meat thermometer if unsure; the chicken is safely done at 165 degrees F.
- OVEN DIRECTIONS: Preheat the oven to 425 degrees F. Set a wire rack over a rimmed baking sheet. Lightly grease the rack with oil. Place the crumb coated chicken strips on the wire rack. Spray liberally with olive oil spray. Bake for 10 minutes, or until the chicken is cooked through.: Preheat the oven to 425 degrees F. Set a wire rack over a rimmed baking sheet. Lightly grease the rack with oil. Place the crumb coated chicken strips on the wire rack. Spray liberally with olive oil spray. Bake for 10 minutes, or until the chicken is cooked through. : When you use the oven method, the high heat encourages rapid browning and an evenly crisp exterior because air circulates beneath the pieces on the wire rack. You will see the crumbs change from pale to golden as the sugars in the crumbs toast, and the sound is a gentle crackle as moisture escapes. Spraying with oil ensures the surface gets evenly crisp without soaking the panko. A typical pitfall is skipping the wire rack, which leads to steaming and a limp crust; the rack is essential for air flow. Keep an eye on color rather than time alone, and verify internal temperature to ensure juicy results.
- Set a plate out while the chicken finishes cooking. Transfer the finished chicken to the plate.: Moving cooked chicken to a waiting plate lets residual heat redistribute and prevents the crust from becoming soggy on a hot baking sheet. You will notice a subtle hiss as the hot pieces hit the plate, and the crust should remain crisp to the touch. Resting briefly helps the juices settle so the interior stays moist. A mistake here is stacking the strips too tightly which traps steam and softens the crust, so give them a bit of space. Visually, the crust should look golden and dry, not glossy from oil; that indicates proper crisping.
- Squeeze the lime wedges over the chicken and drizzle with the honey just before serving.: The finishing squeeze of lime releases a bright citrus perfume and a tart zip that cuts through the richness, while the honey adds a warm, floral sweetness and a glossy sheen. When you drizzle the honey at the end, it stays on the surface rather than sinking in, creating small sticky pockets that contrast the crisp crumb. A common error is adding both too early, which softens the crust; timing is everything. Look for a balance of shine and a light tack on the surface, and taste a piece to adjust acidity or sweetness if needed.
Expert Tips about Crunchy Honey Lime Chicken

I have gathered tips that help every cook gain consistent, crunchy results. These focus on technique, timing, and small adjustments that make a big difference in texture and flavor.
- Prep a coating station: Set bowls for the flour mixture, panko, and a plate for the coated tenders so you can work efficiently and avoid sticky hands slowing you down.
- Check oil temperature: The oil should shimmer but not smoke; if it smokes the crust will darken too quickly while the center remains undercooked.
- Use room temperature chicken: Let tenders sit briefly at room temperature so they cook evenly, reducing the chance of an overcooked exterior and cold center.
- Toast panko when possible: Gently toasting the breadcrumbs on the stove or in the oven builds a nuttier flavor and makes the crust more resilient to moisture.
- Finish with fresh lime: Squeezing lime at the end brightens the dish without breaking down the crust, so hold off until serving.
Serve This Crunchy Honey Lime Chicken With
This section covers thoughtful serving ideas that complement the crunchy, sweet and tart profile of the dish. Consider textures, temperature contrasts, and occasions when this recipe shines.
- Casual dinners: Serve the Crunchy Honey Lime Chicken with simple steamed rice to soak up any honey lime drips and keep the meal approachable for weeknight family meals.
- Lunch gatherings: Arrange the strips on a platter with extra lime wedges for informal lunches where guests can customize acidity to taste.
- Ramadan iftar or festive evenings: The bright flavors and crunchy texture make this a warming yet refreshing option to break a fast or to add variety to a special spread.
- Picnic friendly: Let the pieces cool slightly and pack them with extra lime wedges; they travel well without losing much crispness if kept on a rack or separated from sauces.
- Storage tips: Refrigerate cooled leftovers in an airtight container and reheat in a hot oven or toaster oven to restore crispness, avoid microwaving which softens the crust.
FAQ
Conclusion
What makes this recipe special is the contrast between a crisp panko crust and the bright honey lime finish that livens each bite. The balance of textures and flavors is straightforward yet refined, making it a dependable option for weeknights and small gatherings alike. Give it a try the next time you want something quick that feels special, and enjoy how the simple ingredients transform into a memorable, crunchy dish.
Crunchy Honey Lime Chicken
Equipment
- Stainless steel skillet
- Tongs
- Wire Rack
- Rimmed Baking Sheet
Ingredients
- 1/4 cup all purpose flour Coat lightly to create a thin barrier that helps dredged chicken achieve an even, golden crust when fried or baked, while also aiding adhesion for egg wash and breadcrumbs.
- 1 teaspoon chili powder Add warmth and mild heat to seasonings, enhancing overall flavor complexity and complementing the lime and honey for a balanced sweet-spicy profile.
- 3/4 teaspoon kosher salt Season generously to bring out the natural flavors of the chicken and other ingredients, while helping to tenderize slightly and ensure a well-rounded savory base.
- 1/2 teaspoon freshly ground black pepper Provide sharp, aromatic heat that brightens the dish and adds subtle complexity to the savory-sweet balance, enhancing the final bite without overpowering.
- 1/4 teaspoon cayenne pepper Contribute concentrated spicy heat to build a layered kick, allowing precise control over the overall spiciness of the finished chicken.
- 1 large egg Bind coatings by creating a sticky surface for breadcrumbs to adhere to, while adding a touch of richness that improves mouthfeel and helps crust formation.
- 2 tablespoons milk Thin the egg wash for a smoother, more even coating that promotes breadcrumb adhesion and can slightly tenderize the surface of the chicken.
- 1 pound boneless skinless chicken tenders Serve as the main protein, offering tender texture and a mild flavor that soaks up the honey-lime glaze and crispy breadcrumb coating effectively.
- 1 1/2 cups panko breadcrumbs, toasted if desired Provide a crunchy, golden coating that contrasts with the tender chicken; toasting deepens flavor and adds extra crunch for a satisfying texture.
- 2 tablespoons (or more) olive oil (for stovetop cooking) Facilitate shallow frying in a skillet to help the breadcrumb crust crisp evenly and develop a rich, savory flavor through controlled browning.
- 2 large limes, cut into wedges Add bright, acidic citrus to finish the dish, cutting through richness and balancing sweetness while providing fresh aroma and a zesty finish.
- 1/4 cup honey Sweeten and glaze the chicken, creating a sticky, glossy coating that pairs with lime to form a balanced sweet-tart finishing sauce.
Instructions
- In a medium bowl, whisk together the flour, chili powder, salt, pepper and cayenne. Add the egg and milk and whisk until smooth. Add the chicken tenders to the flour mixture and stir to coat well.: The moment you start whisking you will notice the spices bloom in the flour , releasing a warm, fragrant aroma that hints at the final flavor. As the egg and milk emulsify with the dry mix, you will see a slightly thickened batter form, smooth and glossy. When you add the chicken tenders, press them into the mixture so the coating adheres evenly; this step matters because uneven coating leads to bare spots after cooking. A common mistake is to overcrowd the bowl, which prevents proper contact and causes clumping. If that happens, work in smaller batches so each tender is fully covered. Visually you want an even pale coat, with no big globs of batter, and the texture should feel tacky to the touch but not dripping.
- Place the panko in a medium sized bowl. Set a plate next to the panko. Using your fingers or a set of tongs, dip and thoroughly coat each piece of chicken in the panko crumbs. Set the crumb coated chicken strips on the plate.: When the panko breadcrumbs meet the tacky surface of the coated chicken , they should cling immediately, producing a textured, feathery crust. You will hear a faint rustling as you press the crumbs on, and the visual cue is a uniformly covered strip with a dry looking exterior. Press gently but firmly so the panko nests into the batter rather than sitting loosely on top. A frequent error is not shaking off excess crumbs, which can burn in the pan and create an uneven crust; tap lightly to remove loose crumbs. If your panko seems soggy, spread it on a sheet and toast it lightly to restore crispness before coating.
- STOVE TOP DIRECTIONS: Warm the oil in a large stainless steel skillet over medium high heat. When the oil is shimmering, use the tongs to carefully and quickly place half of the chicken in the skillet in a single layer. Let the chicken cook undisturbed for about 2 minutes, until it has lightly browned, then flip it over and cook the second side for 2 minutes (or until cooked through).: Warm the oil in a large stainless steel skillet over medium high heat. When the oil is shimmering, use the tongs to carefully and quickly place half of the chicken in the skillet in a single layer. Let the chicken cook undisturbed for about 2 minutes, until it has lightly browned, then flip it over and cook the second side for 2 minutes (or until cooked through). : As the olive oil warms you will see a shimmering surface and smell a faint fruity scent, which signals the pan is ready. Adding the strips should create an immediate sizzle, and that sound is your best indicator that a golden crust is forming. Letting the pieces cook undisturbed is crucial for developing even browning; nudging them too soon tears the crust and causes sticking. When you flip, the underside should be a warm golden brown with a crisp edge. A common mistake is crowding the skillet, which drops the oil temperature and leads to soggy crusts, so cook in batches. Use a meat thermometer if unsure; the chicken is safely done at 165 degrees F.
- OVEN DIRECTIONS: Preheat the oven to 425 degrees F. Set a wire rack over a rimmed baking sheet. Lightly grease the rack with oil. Place the crumb coated chicken strips on the wire rack. Spray liberally with olive oil spray. Bake for 10 minutes, or until the chicken is cooked through.: Preheat the oven to 425 degrees F. Set a wire rack over a rimmed baking sheet. Lightly grease the rack with oil. Place the crumb coated chicken strips on the wire rack. Spray liberally with olive oil spray. Bake for 10 minutes, or until the chicken is cooked through. : When you use the oven method, the high heat encourages rapid browning and an evenly crisp exterior because air circulates beneath the pieces on the wire rack. You will see the crumbs change from pale to golden as the sugars in the crumbs toast, and the sound is a gentle crackle as moisture escapes. Spraying with oil ensures the surface gets evenly crisp without soaking the panko. A typical pitfall is skipping the wire rack, which leads to steaming and a limp crust; the rack is essential for air flow. Keep an eye on color rather than time alone, and verify internal temperature to ensure juicy results.
- Set a plate out while the chicken finishes cooking. Transfer the finished chicken to the plate.: Moving cooked chicken to a waiting plate lets residual heat redistribute and prevents the crust from becoming soggy on a hot baking sheet. You will notice a subtle hiss as the hot pieces hit the plate, and the crust should remain crisp to the touch. Resting briefly helps the juices settle so the interior stays moist. A mistake here is stacking the strips too tightly which traps steam and softens the crust, so give them a bit of space. Visually, the crust should look golden and dry, not glossy from oil; that indicates proper crisping.
- Squeeze the lime wedges over the chicken and drizzle with the honey just before serving.: The finishing squeeze of lime releases a bright citrus perfume and a tart zip that cuts through the richness, while the honey adds a warm, floral sweetness and a glossy sheen. When you drizzle the honey at the end, it stays on the surface rather than sinking in, creating small sticky pockets that contrast the crisp crumb. A common error is adding both too early, which softens the crust; timing is everything. Look for a balance of shine and a light tack on the surface, and taste a piece to adjust acidity or sweetness if needed.
Notes
- Prep a coating station: Set bowls for the flour mixture, panko, and a plate for the coated tenders so you can work efficiently and avoid sticky hands slowing you down.
- Check oil temperature: The oil should shimmer but not smoke; if it smokes the crust will darken too quickly while the center remains undercooked.
- Use room temperature chicken: Let tenders sit briefly at room temperature so they cook evenly, reducing the chance of an overcooked exterior and cold center.
- Toast panko when possible: Gently toasting the breadcrumbs on the stove or in the oven builds a nuttier flavor and makes the crust more resilient to moisture.
- Finish with fresh lime: Squeezing lime at the end brightens the dish without breaking down the crust, so hold off until serving.